Silhouette

Cameo 4 Foil Quill Alternative

Hi Everyone!

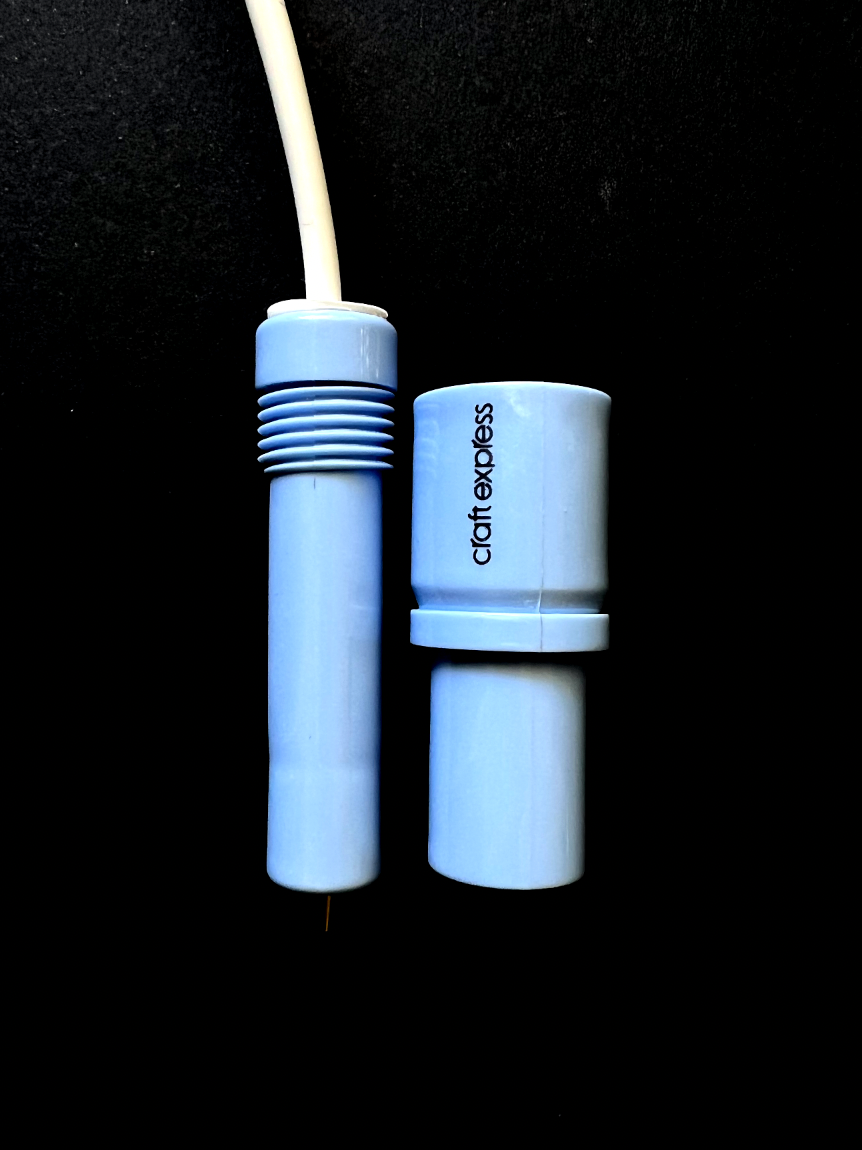
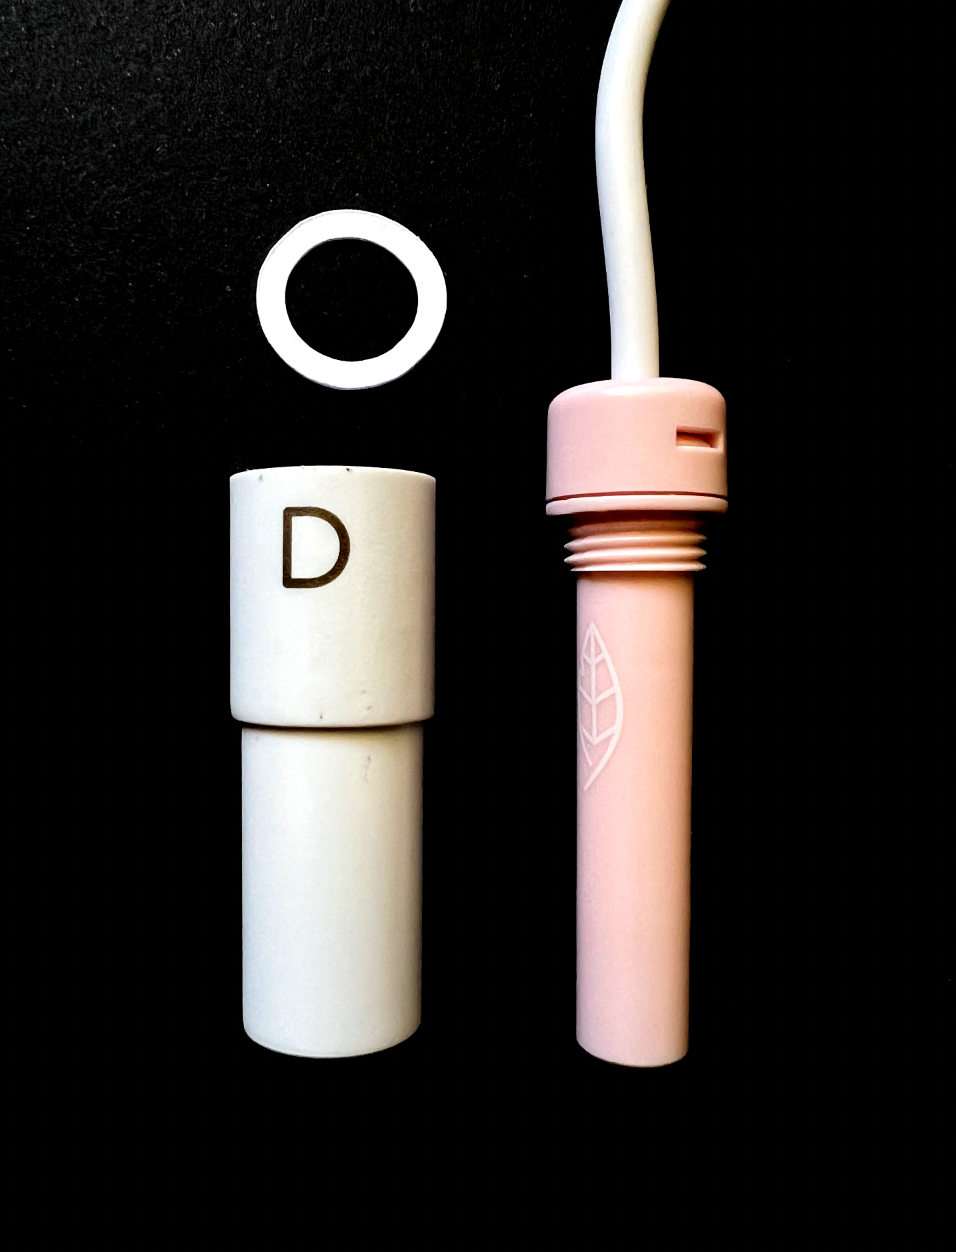
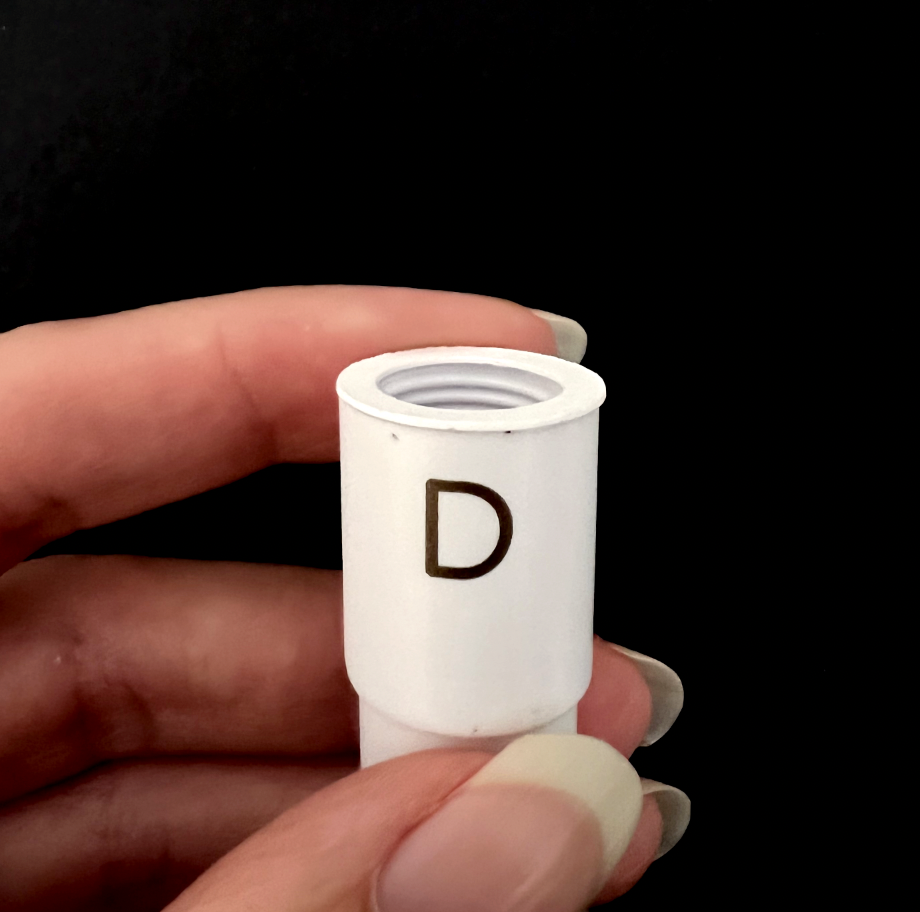
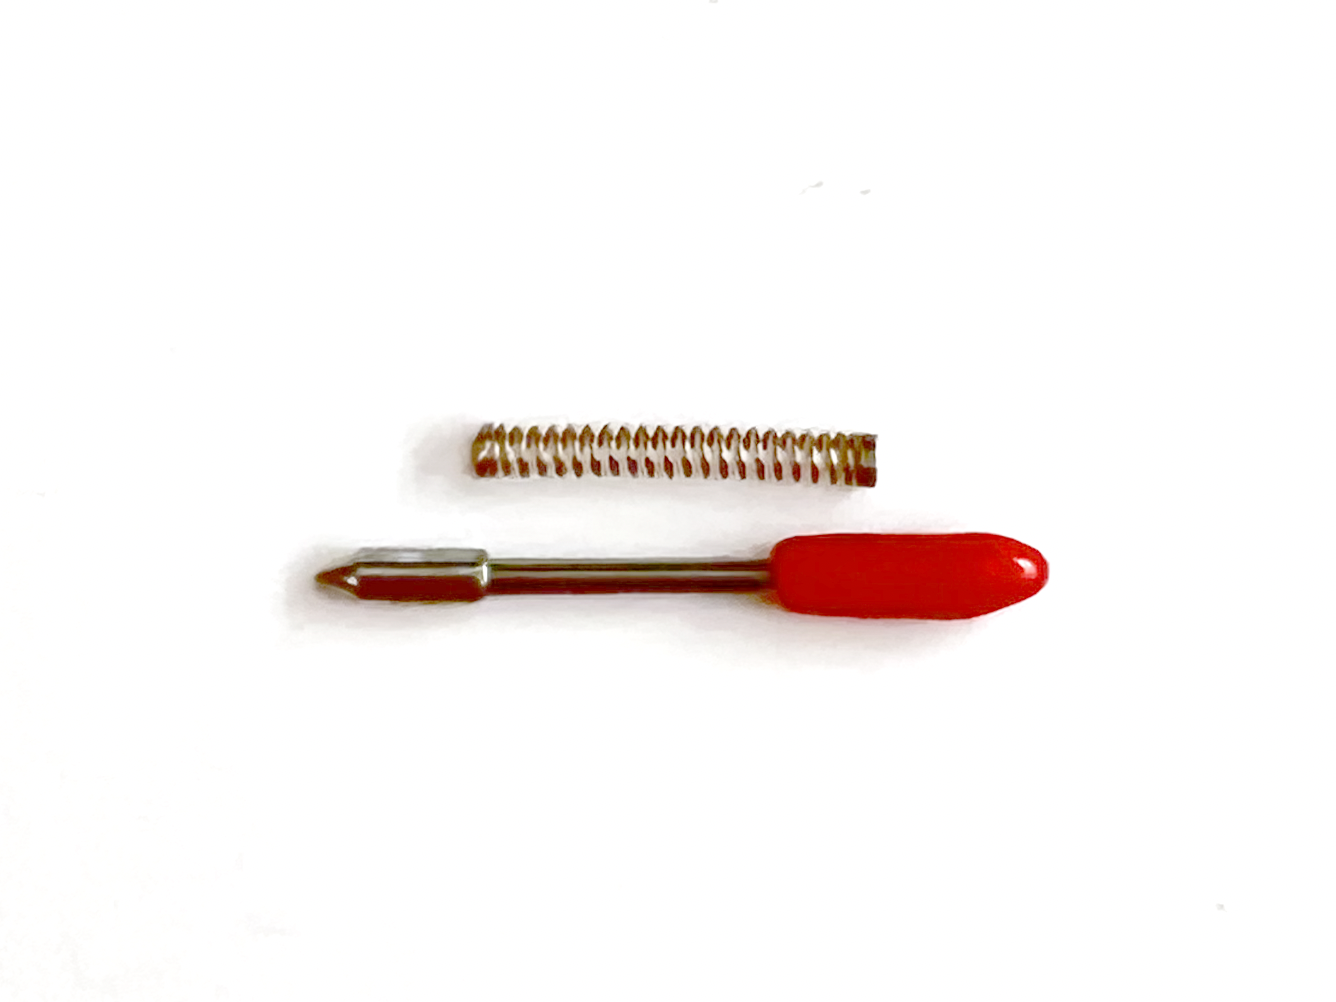
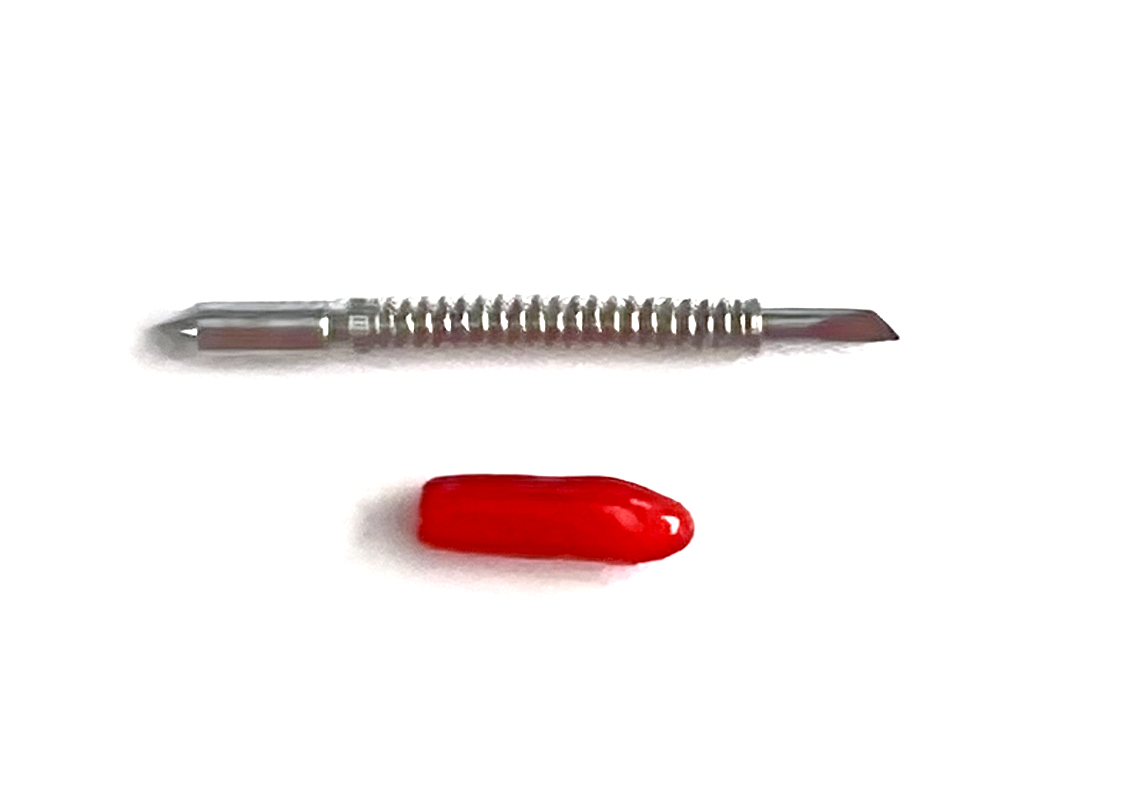
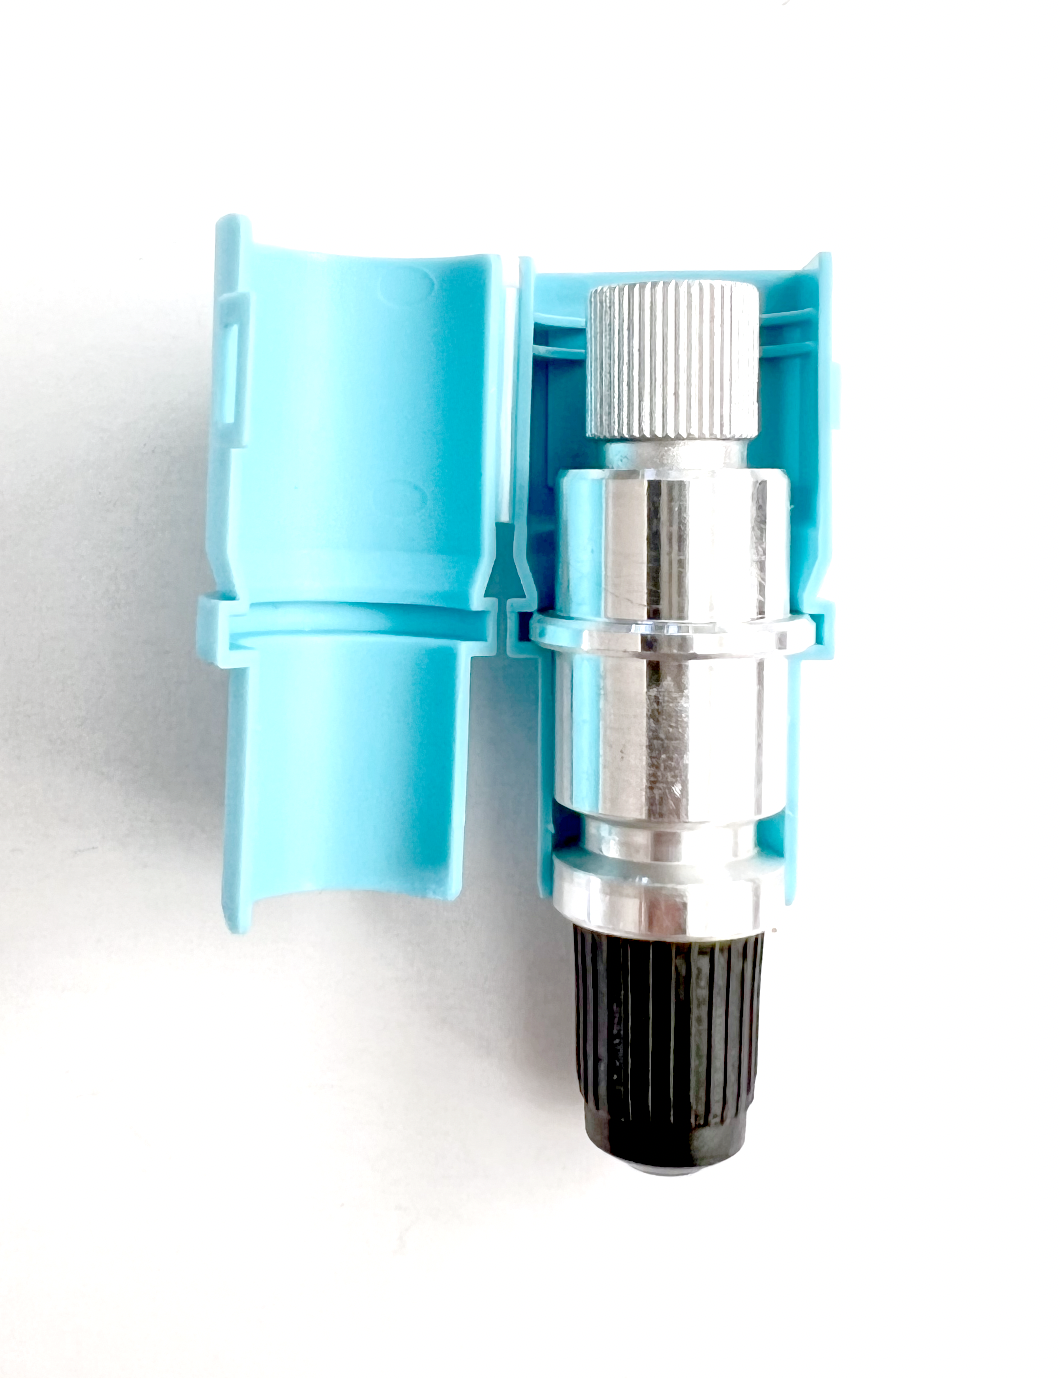
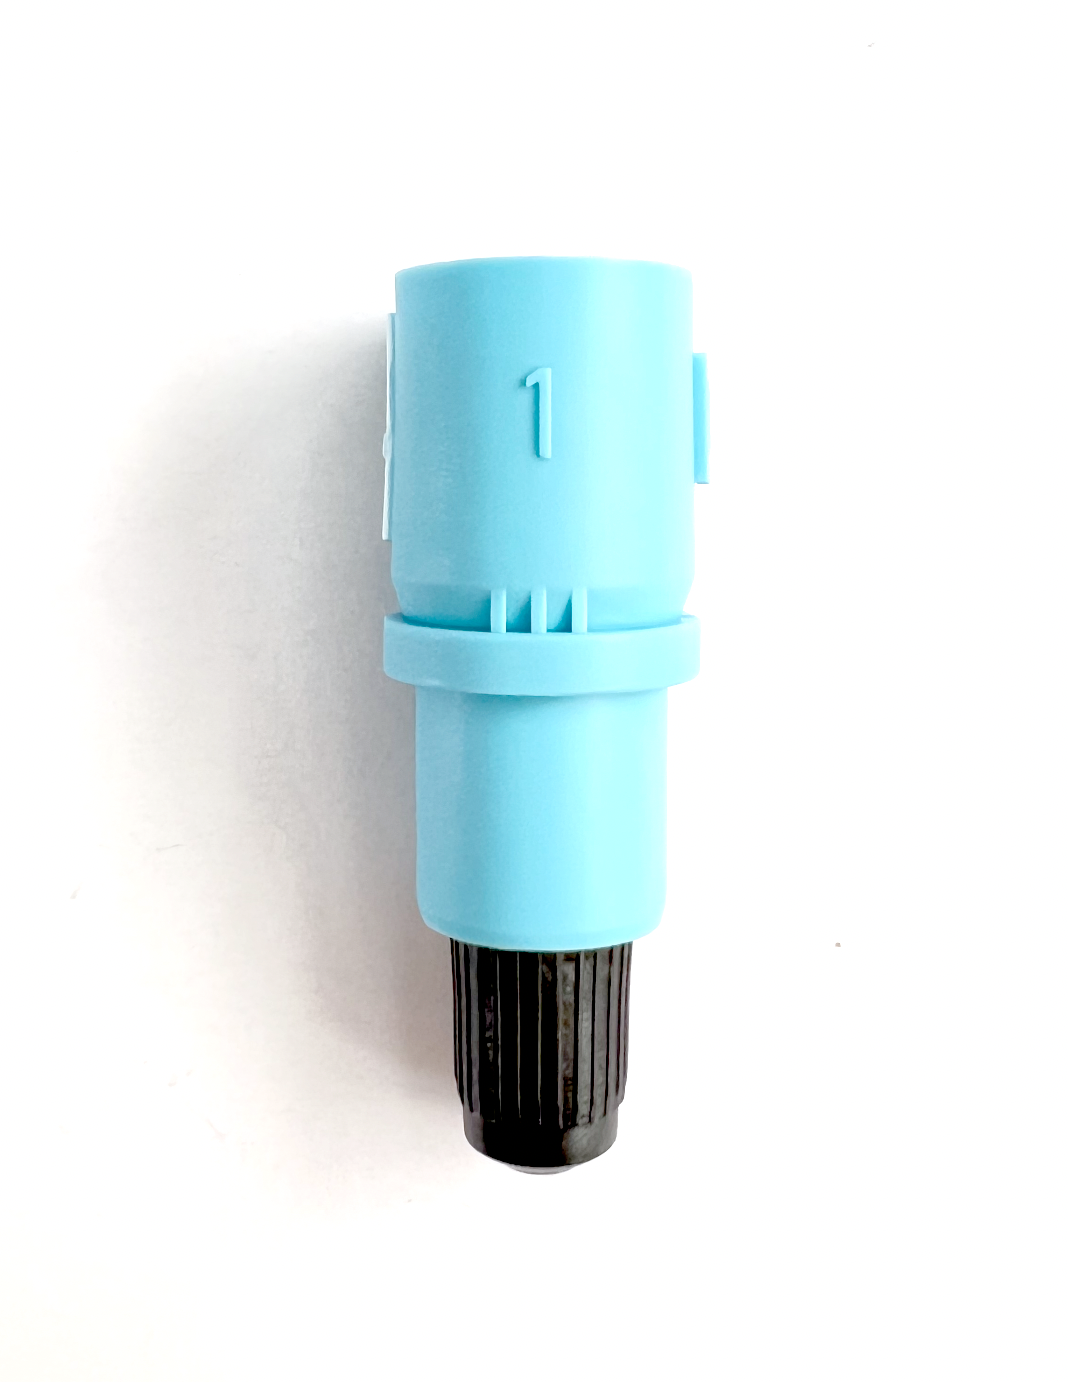
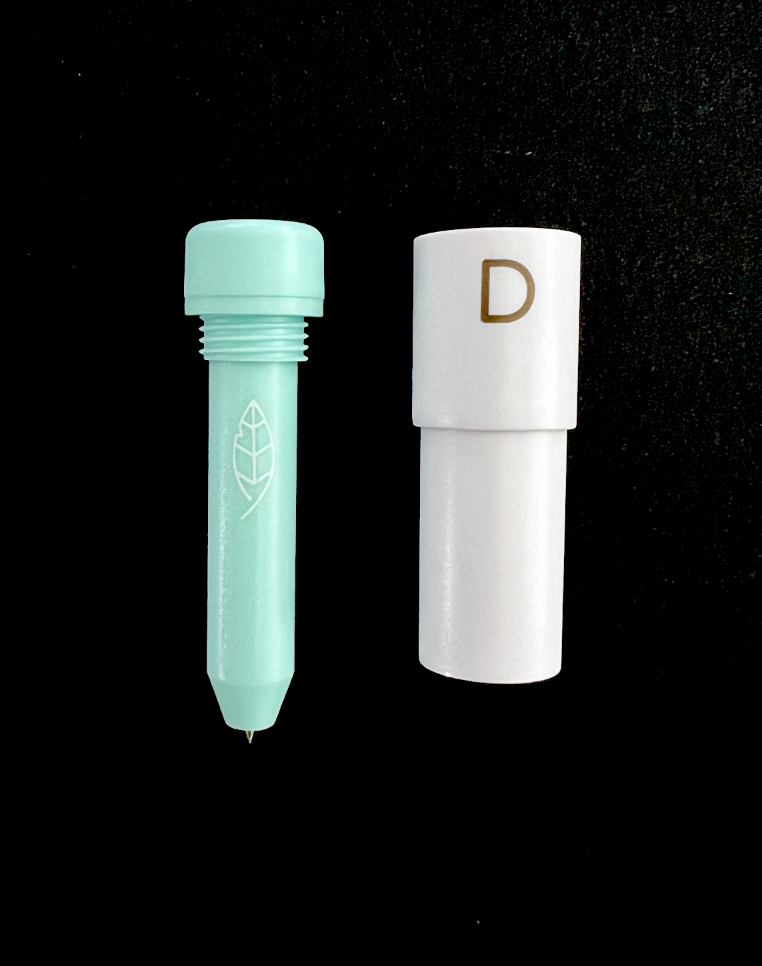
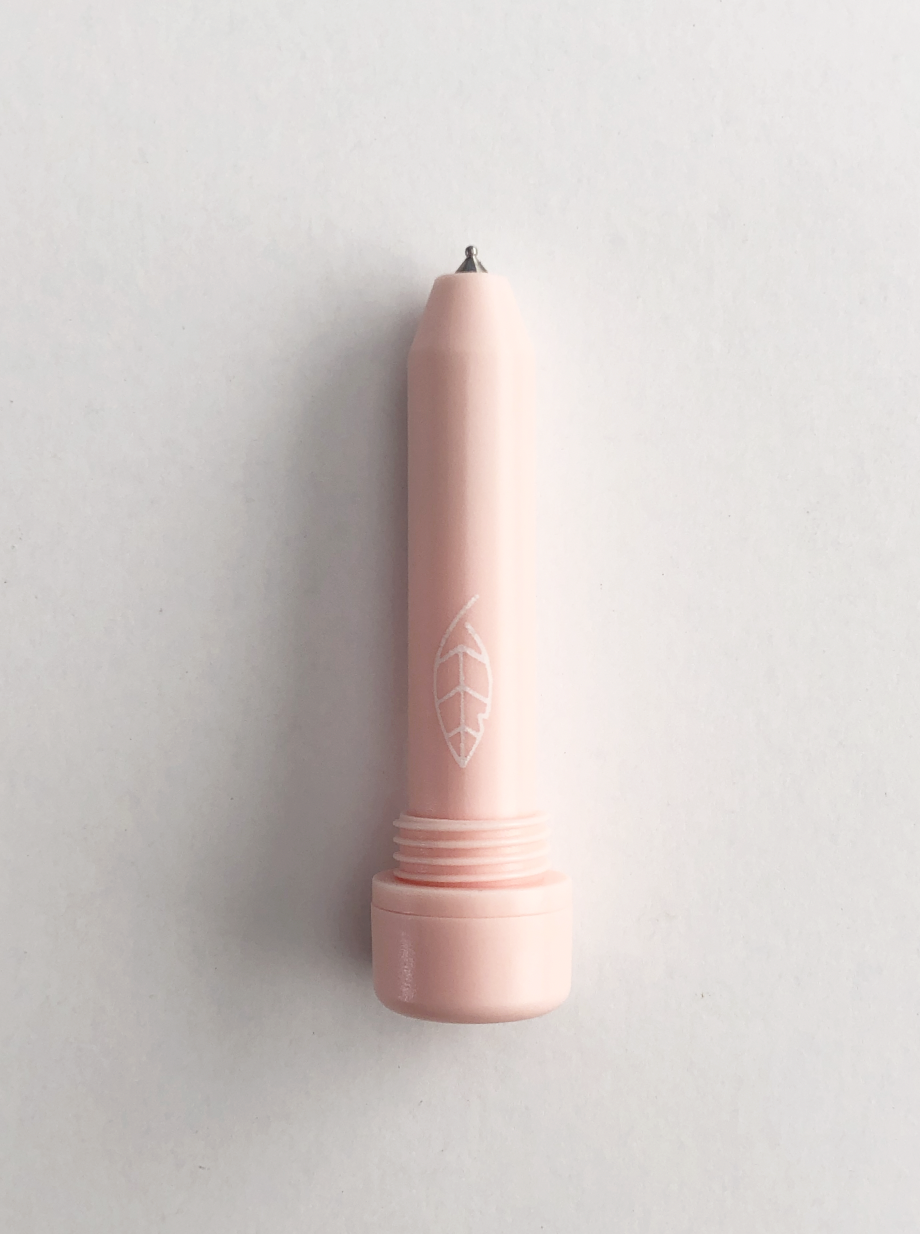
This week I wanted to share with you another brand of heated foil quill that you can use with your Cameo 4. It comes with an adapter specifically designed to fit the Cameo 4 machine. I found it on Amazon a few weeks ago and I decided to try it out.

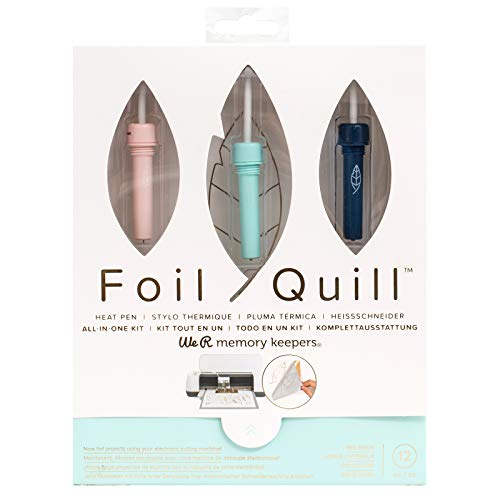
For now, it looks like it’s only available with one tip size. It seems similar to the medium tip foil quill from We R Memory Keepers.

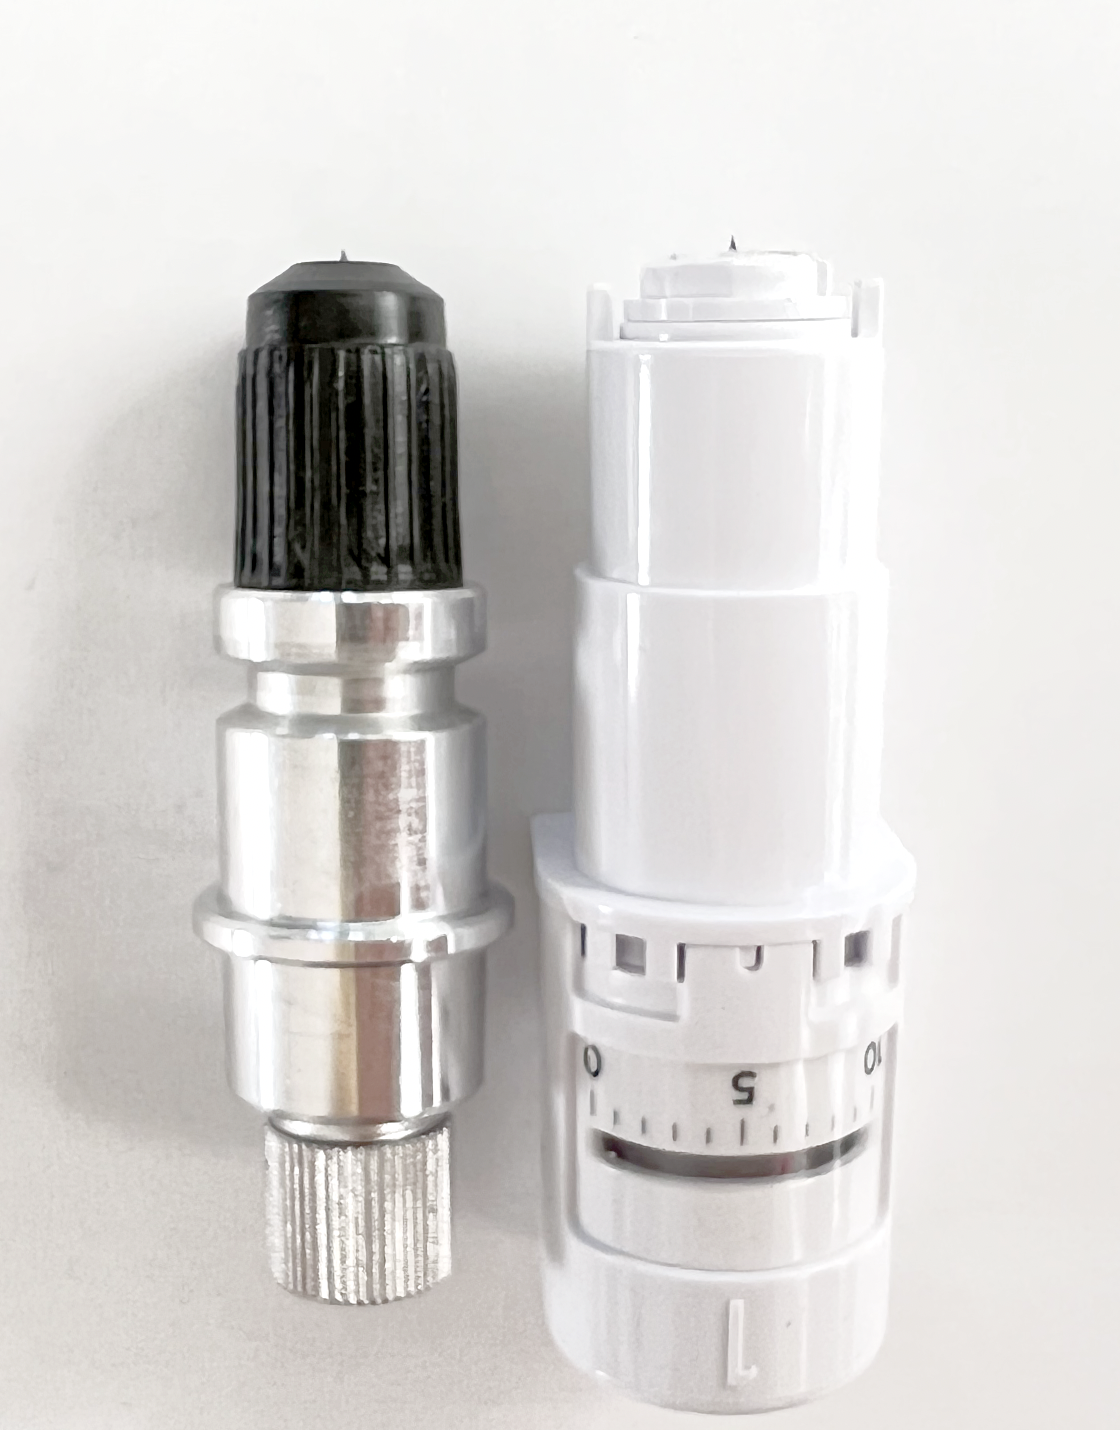
Note: The adapter that comes with this does NOT fit the We R Memory Keepers Foil Quills.

Craft Express Foil Quill

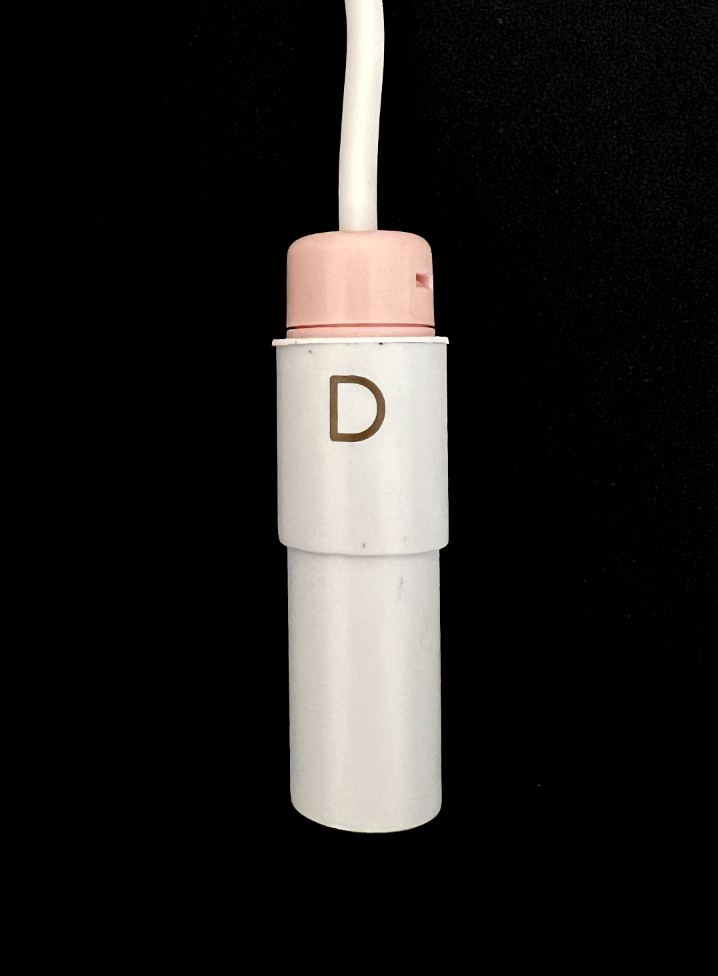
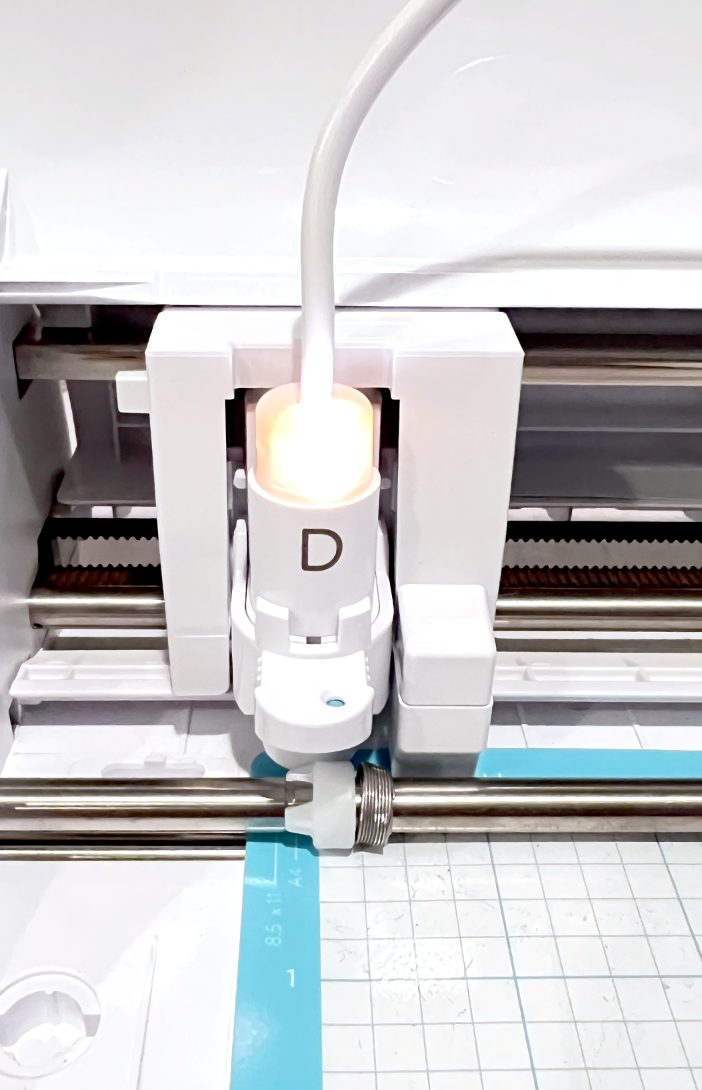
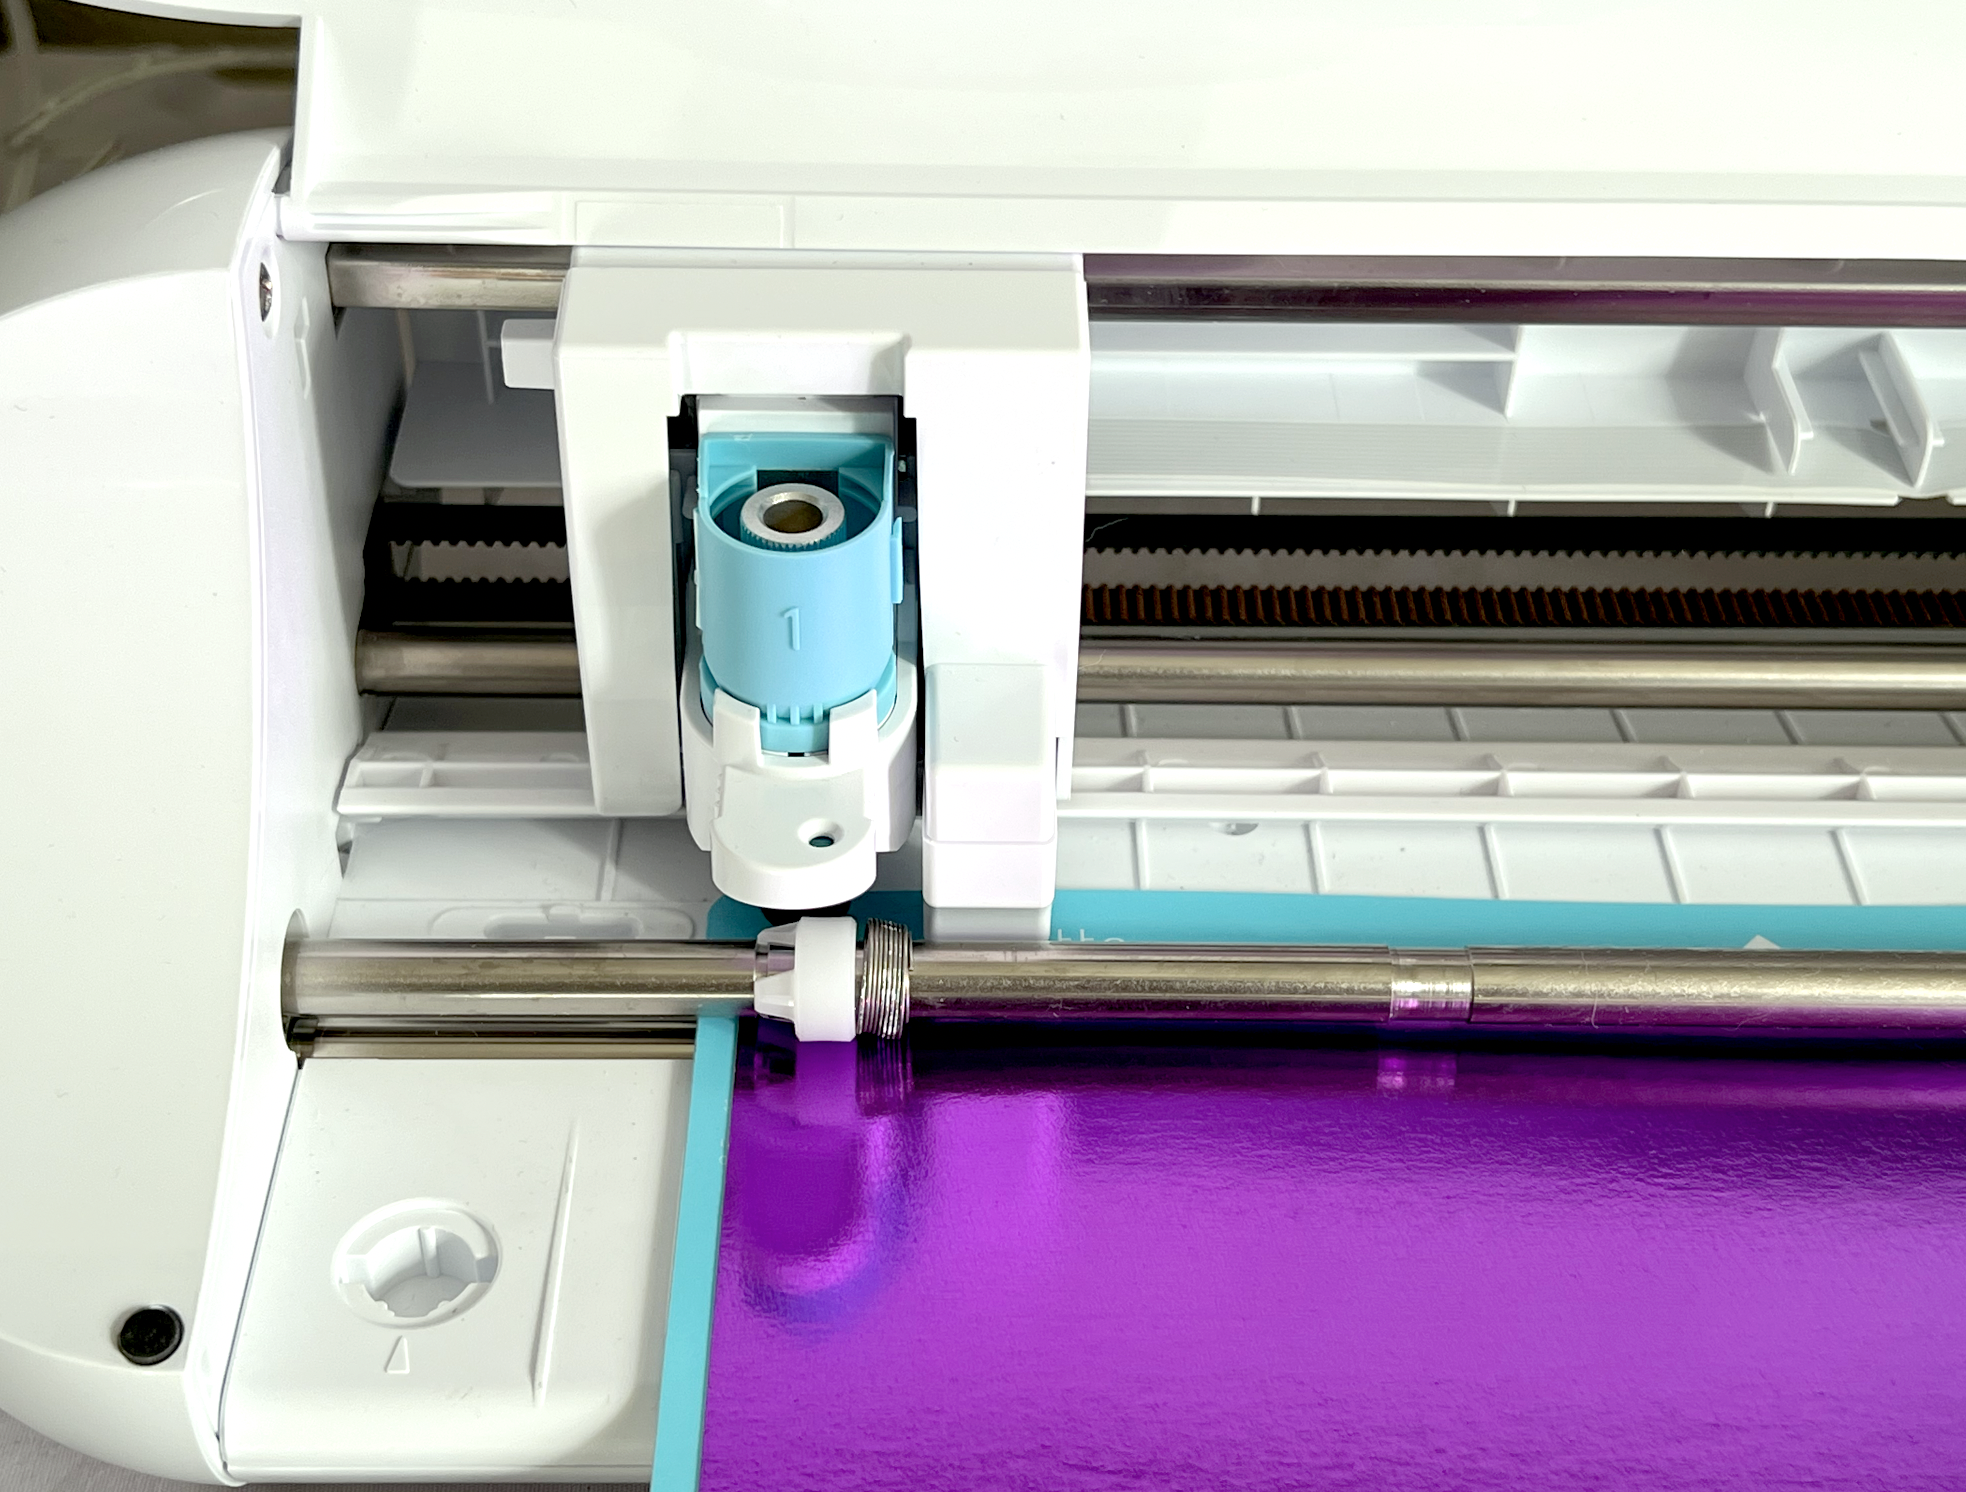
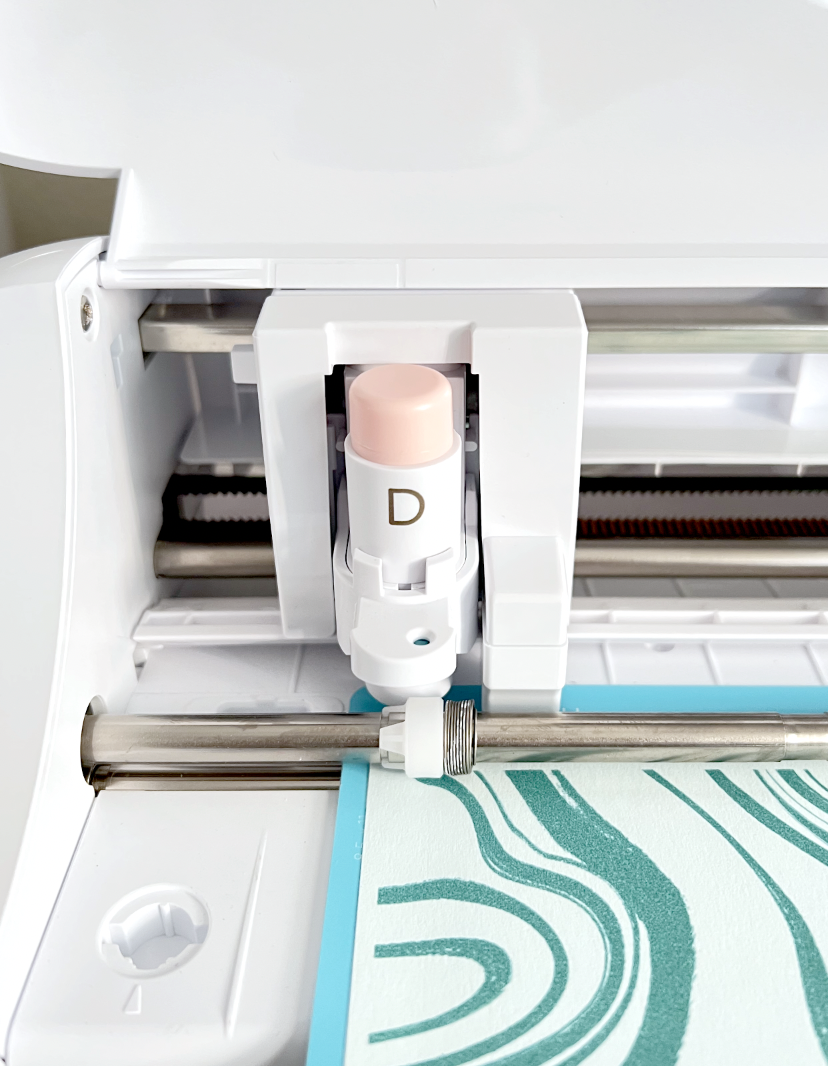
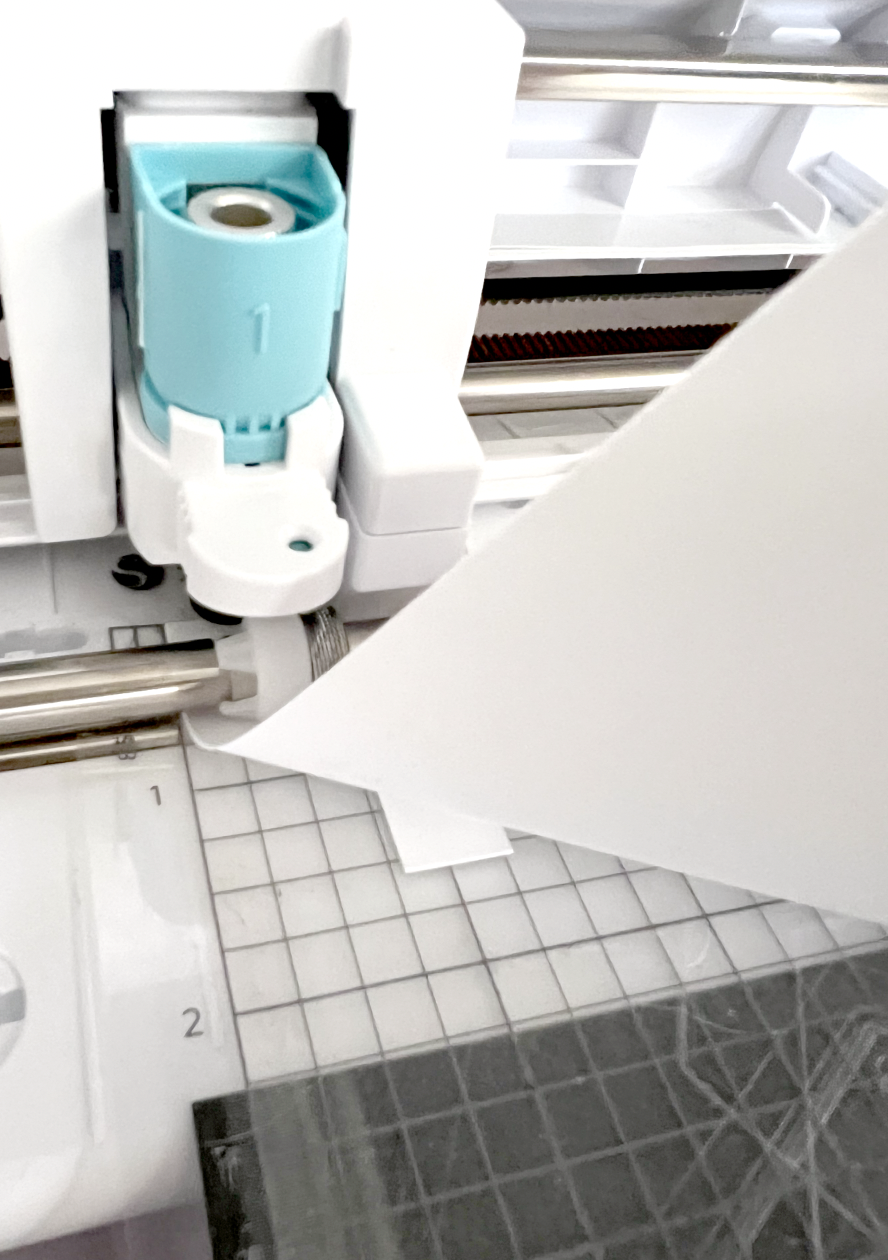
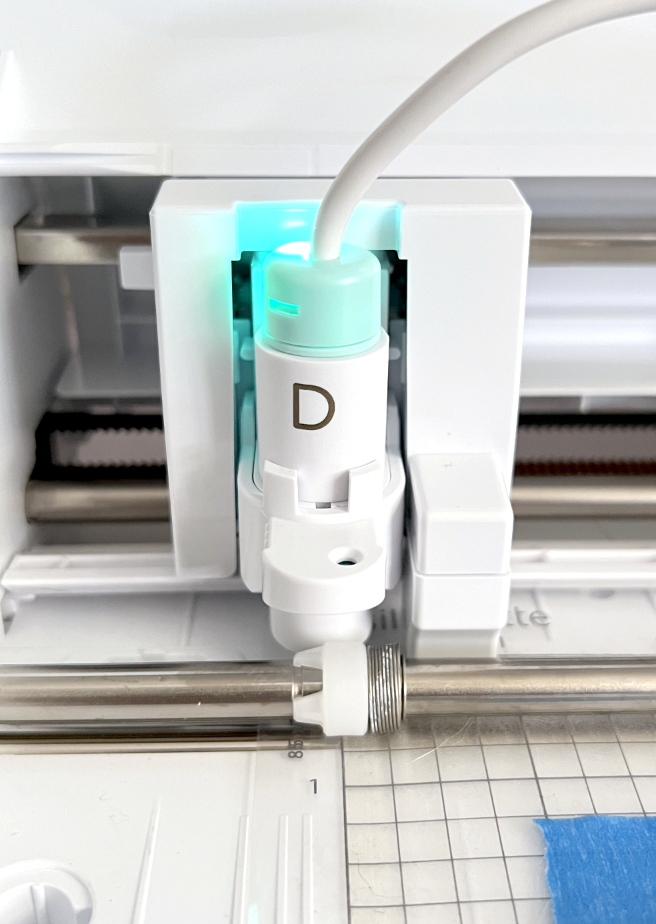
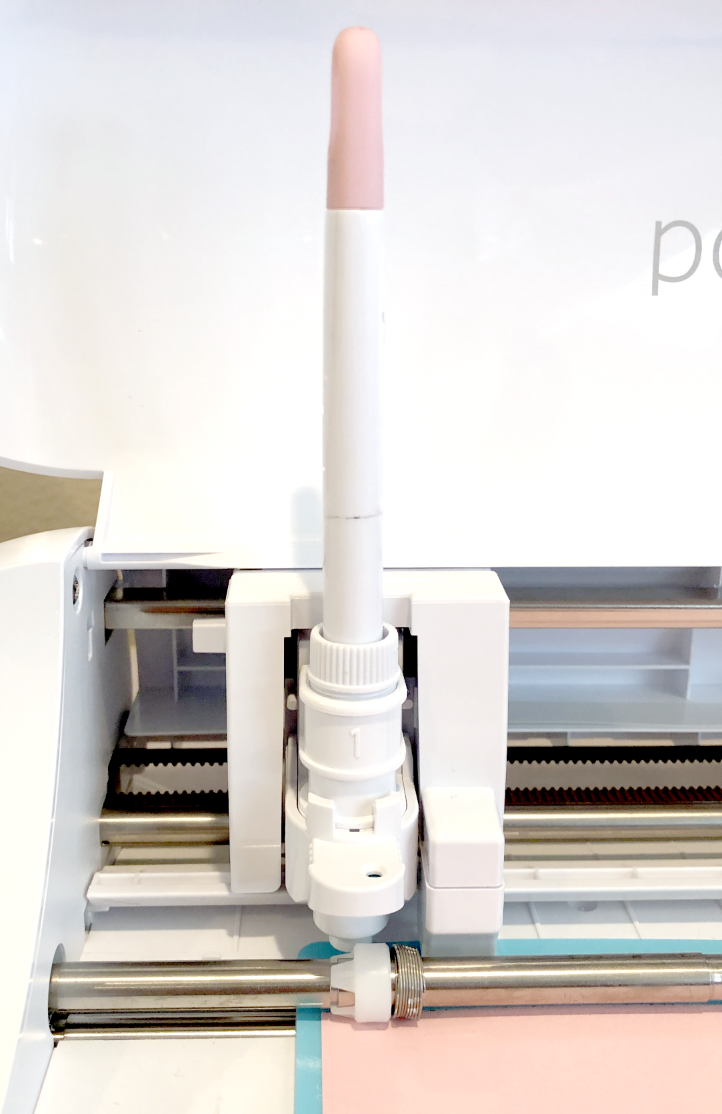
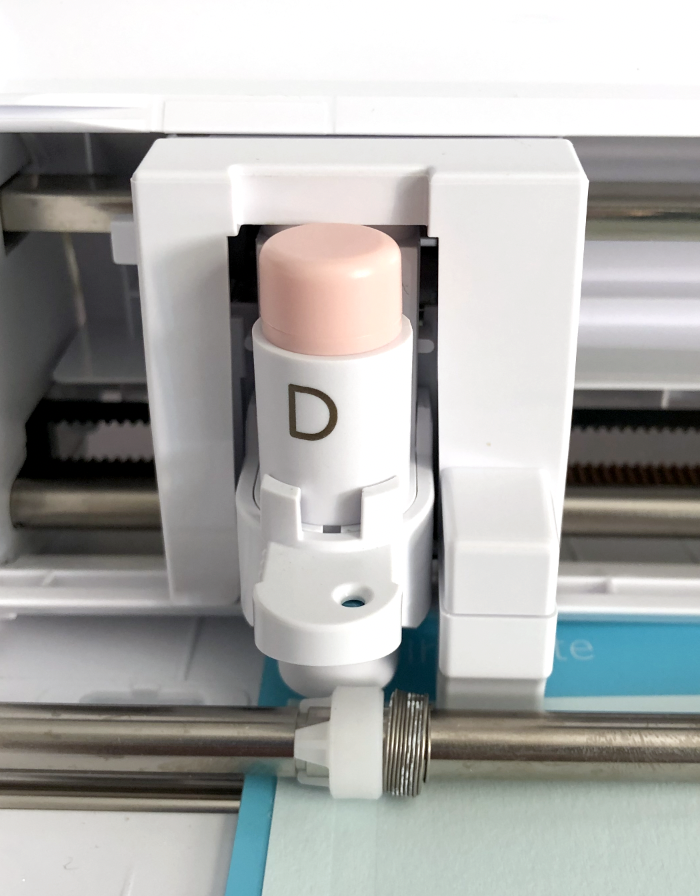
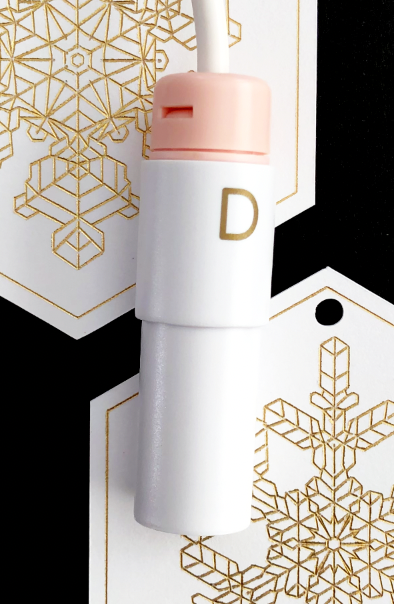
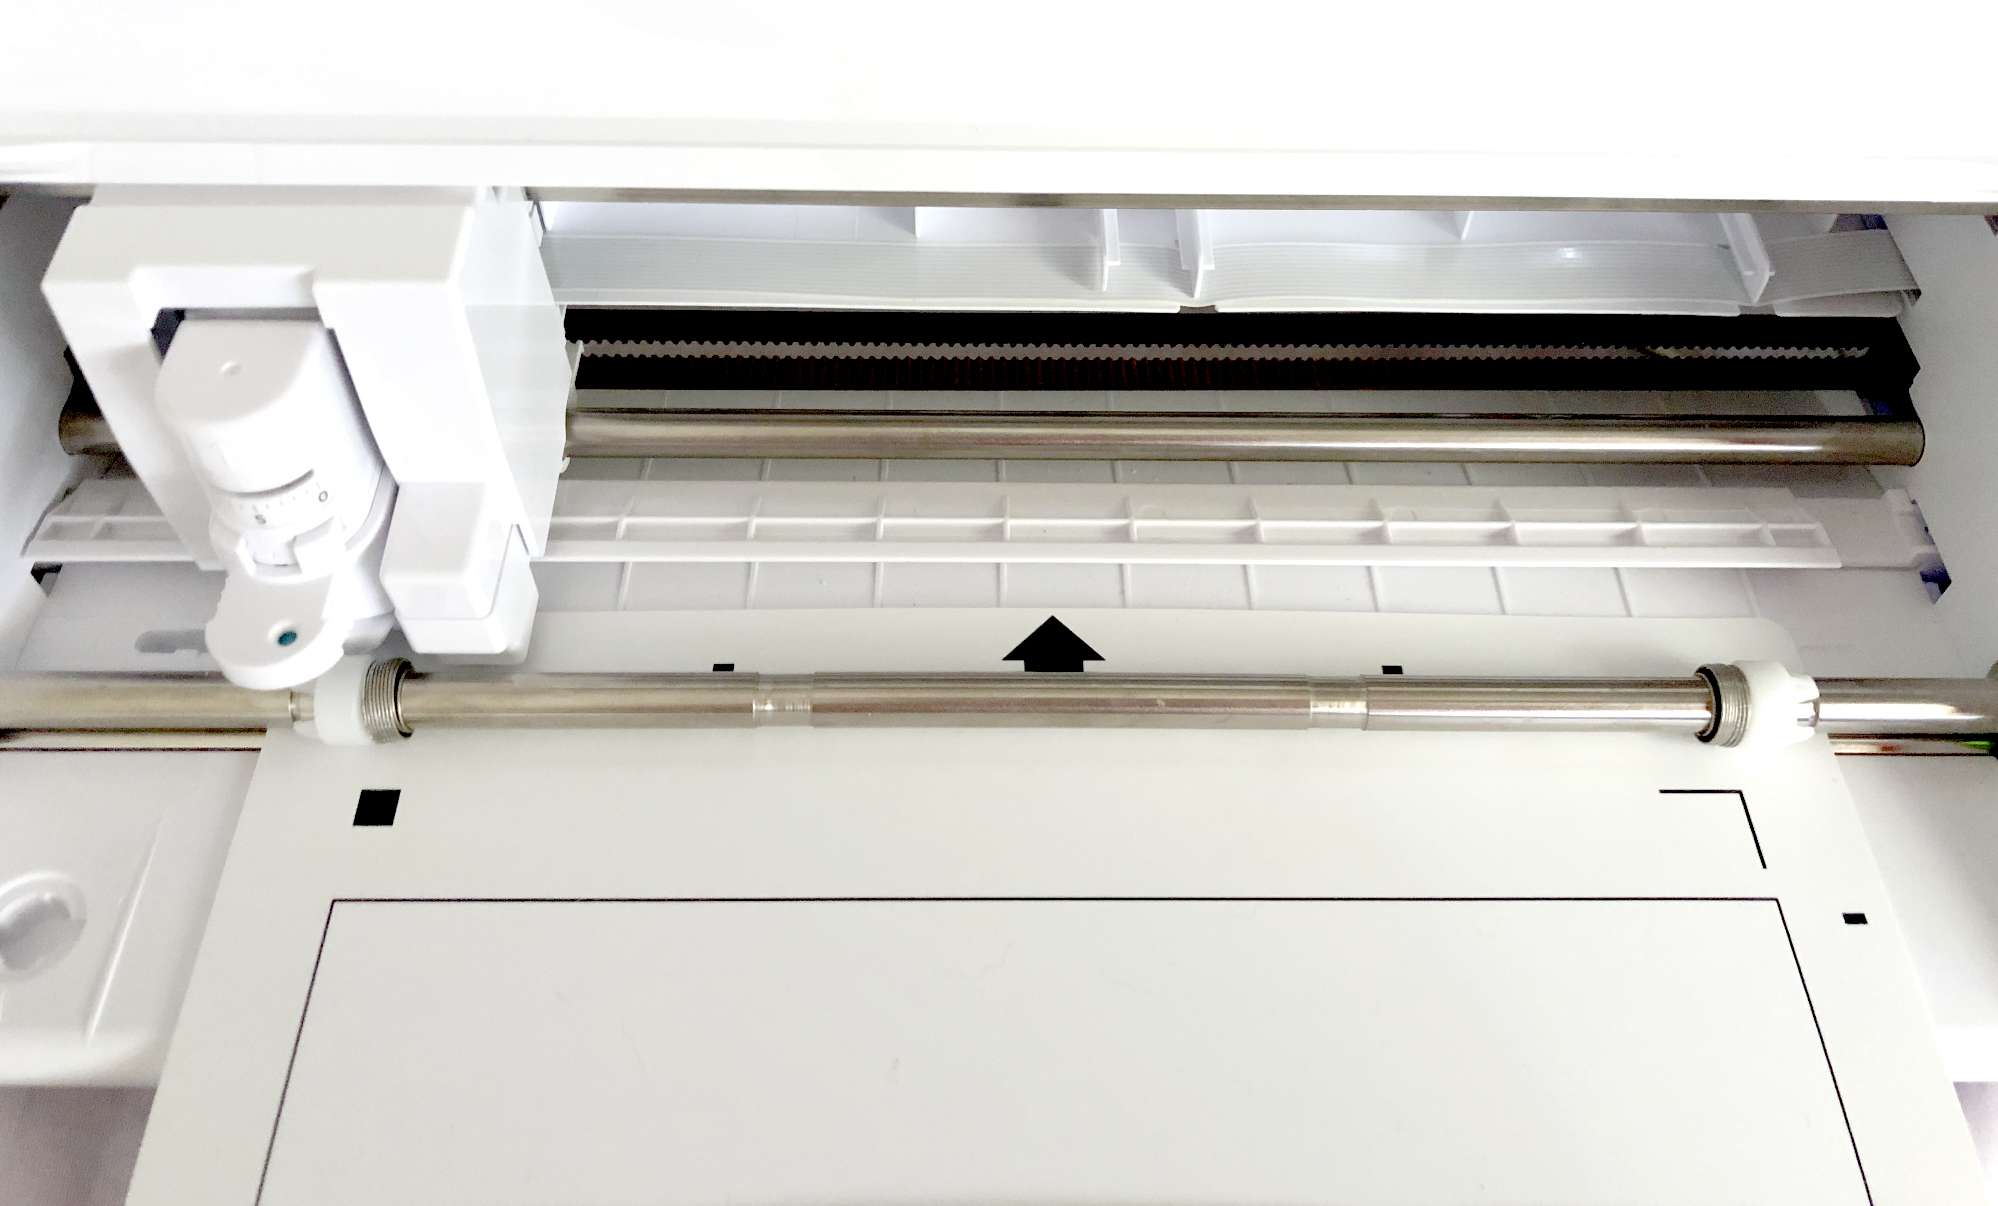
I placed the foil quill in slot 1 in my Cameo 4 carriage and plugged it in. This foil quill still needs to be plugged into a USB power source like the We R Memory Keepers Foil Quills. I used one of my small portable chargers.

Craft Express Foil Quill

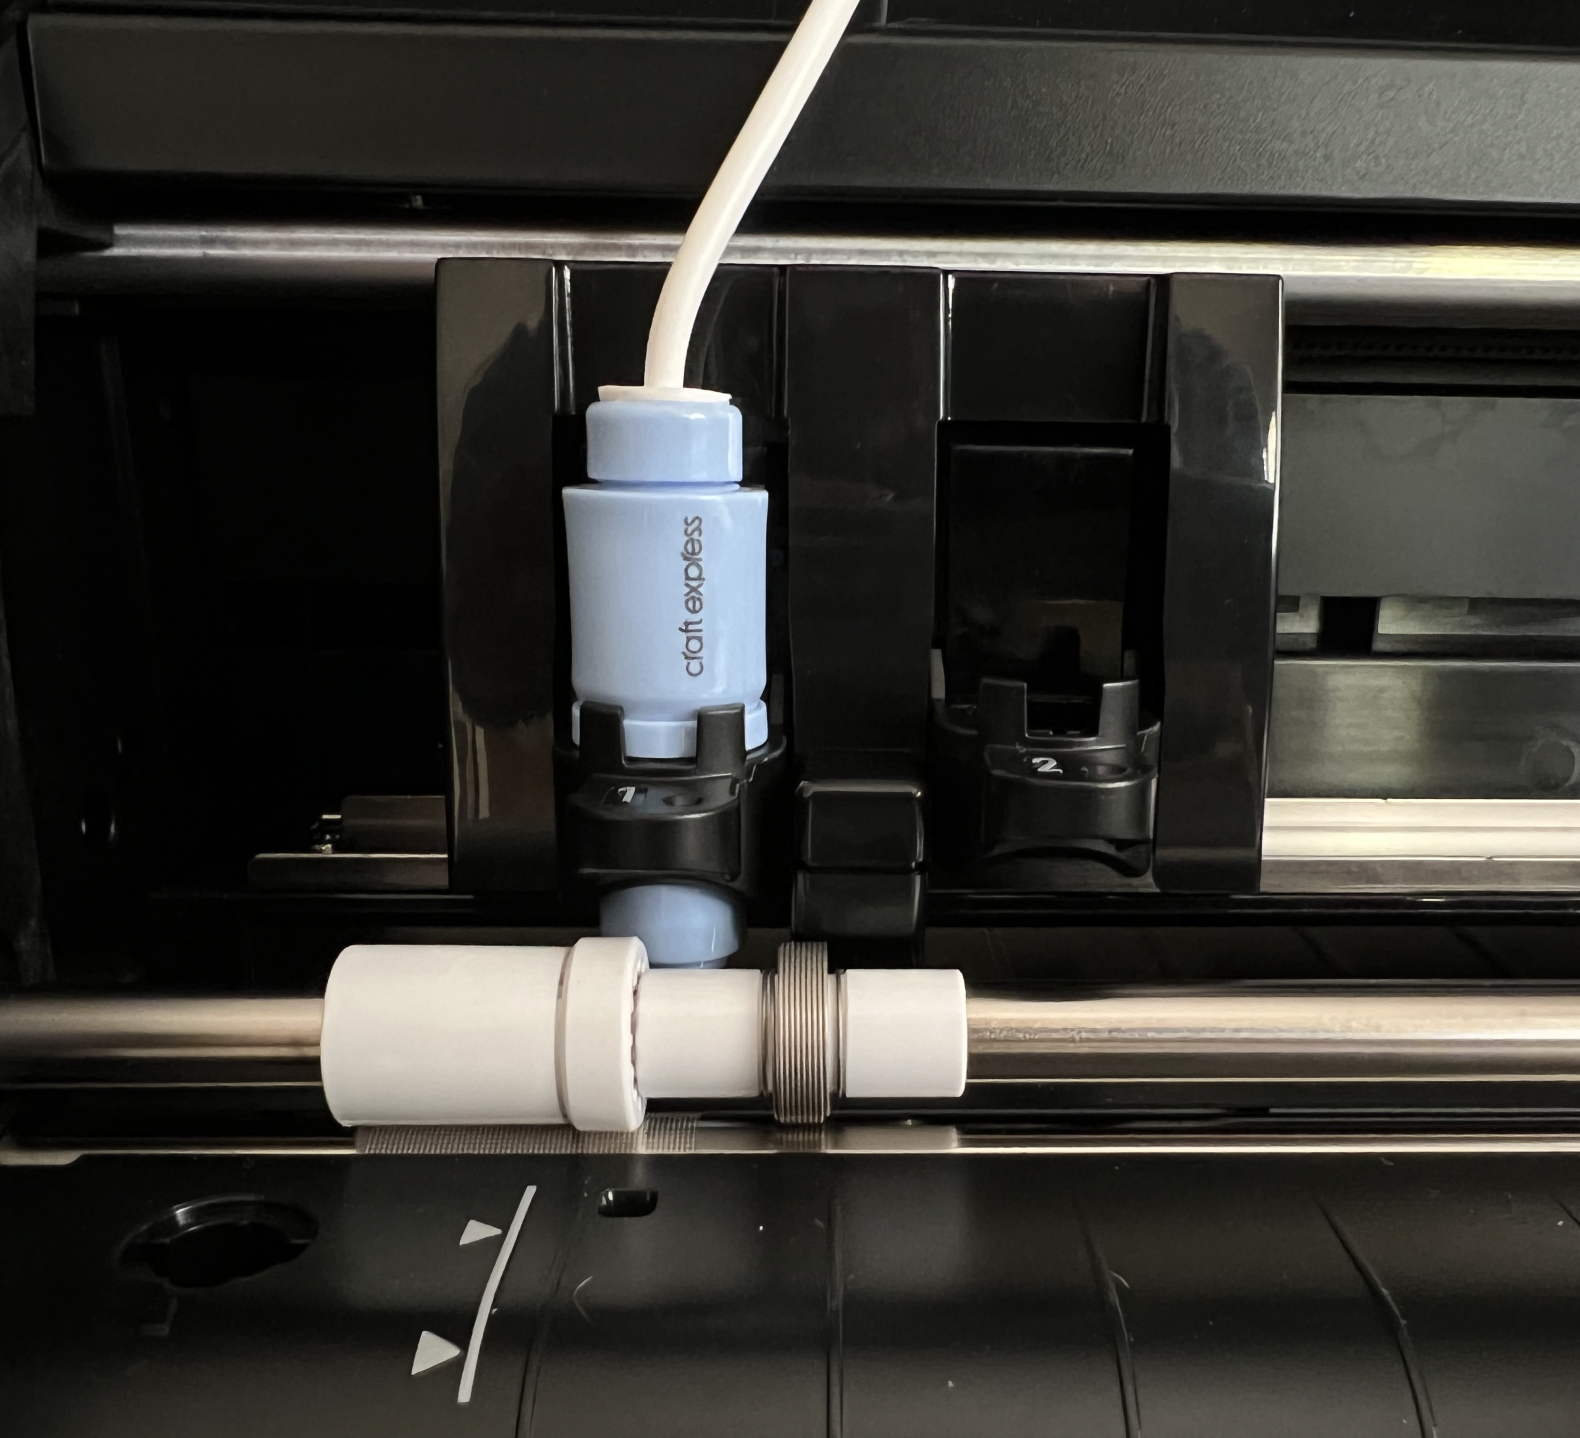
The pen temperature can supposedly be set to 2 different levels. I’m not sure how that works, when I plug it in the switch has a red light or green light. For this initial testing, I have it on the green light.

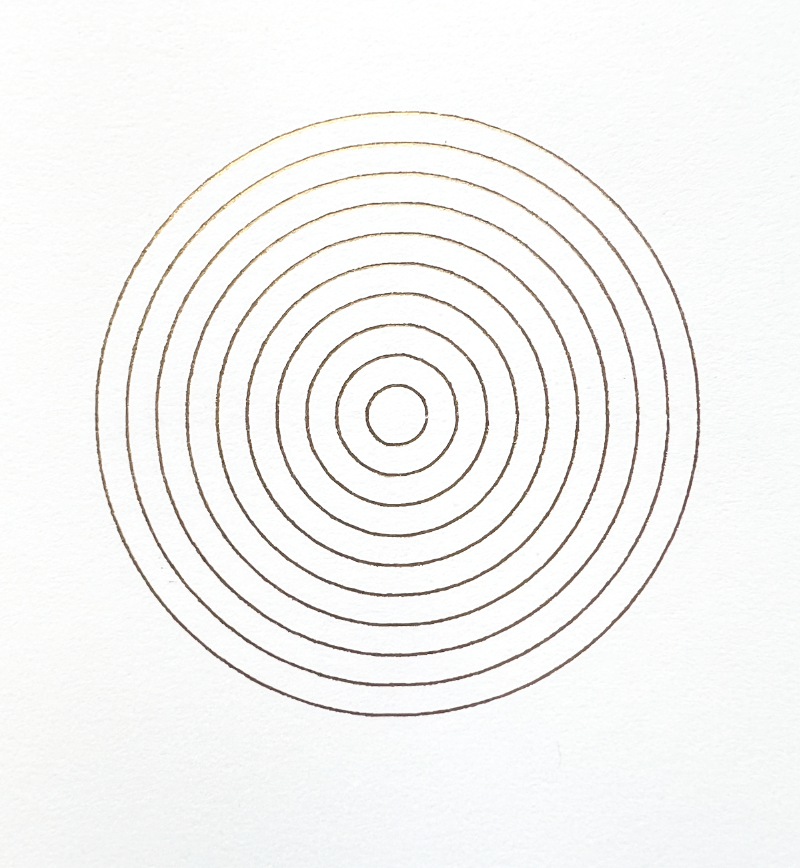
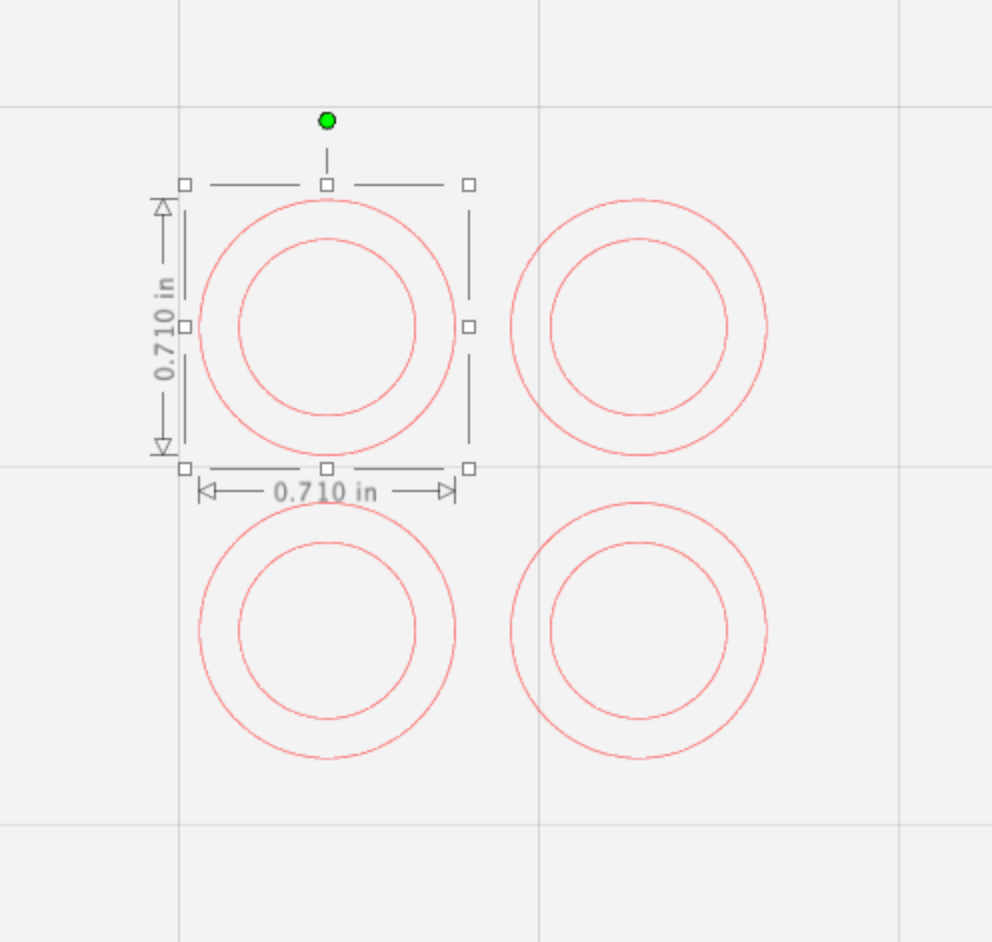
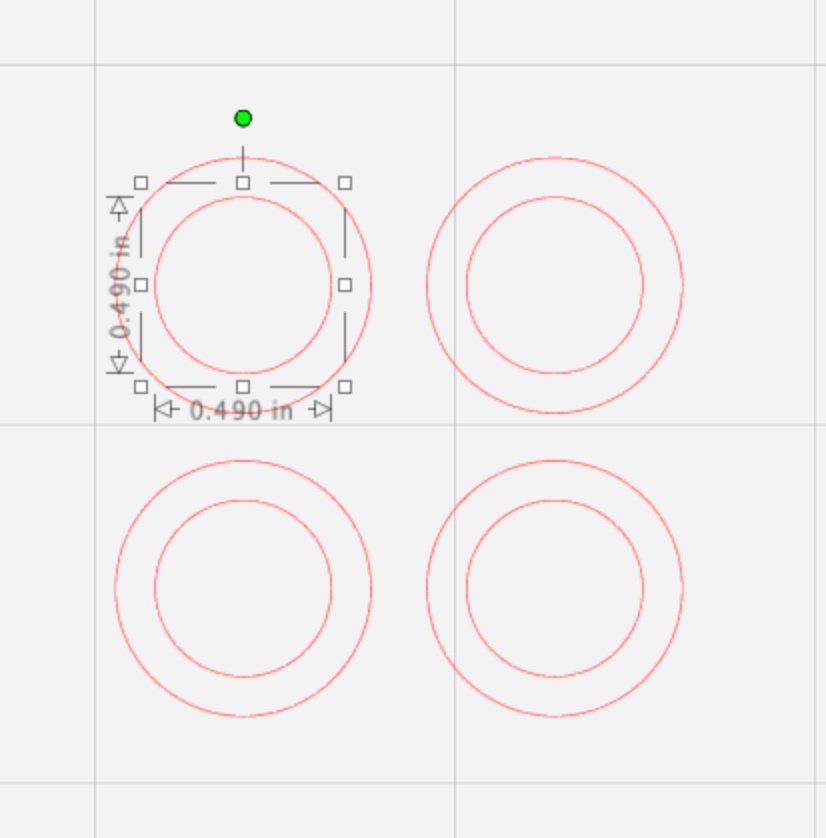
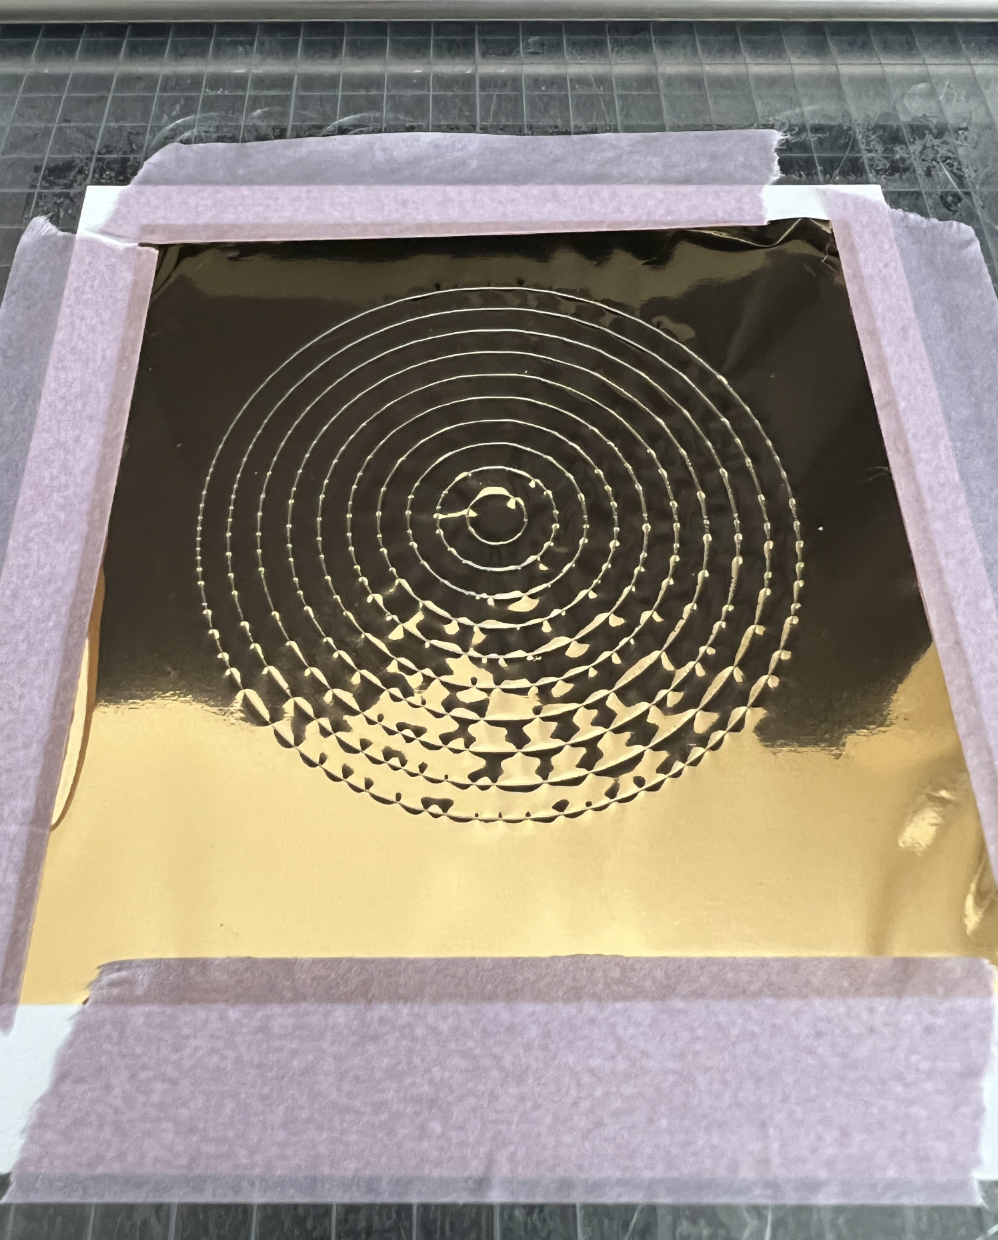
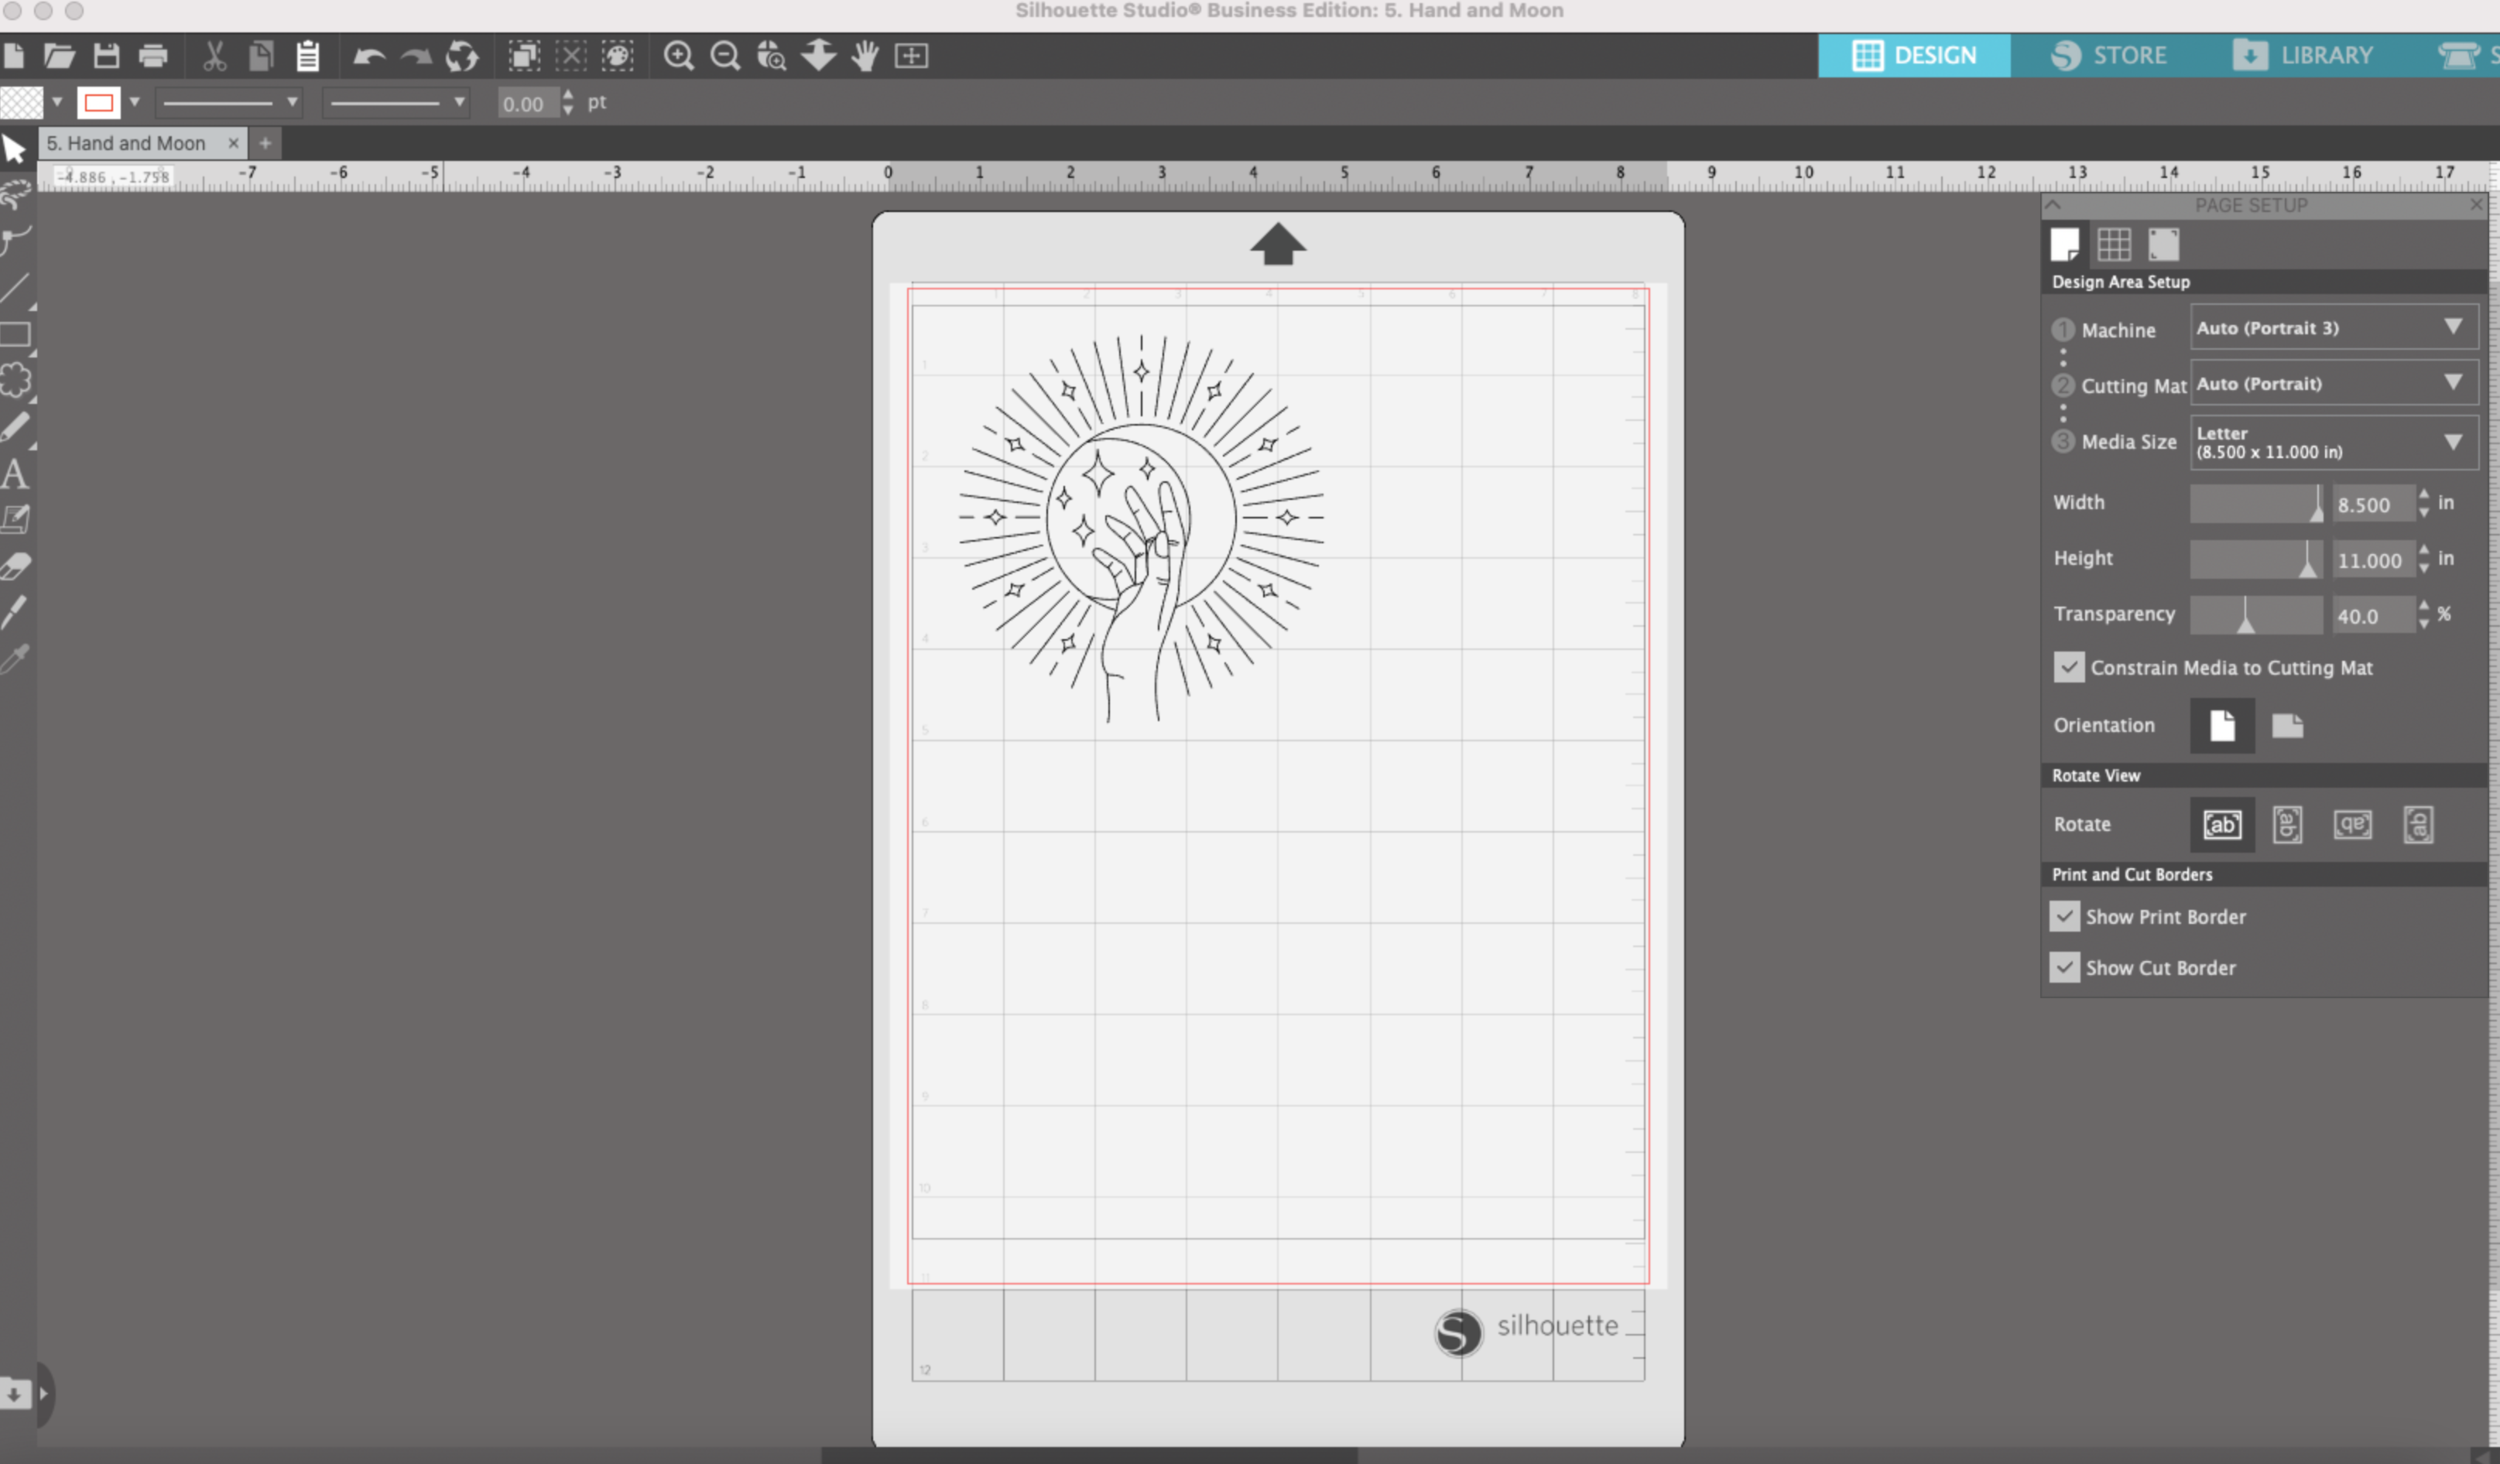
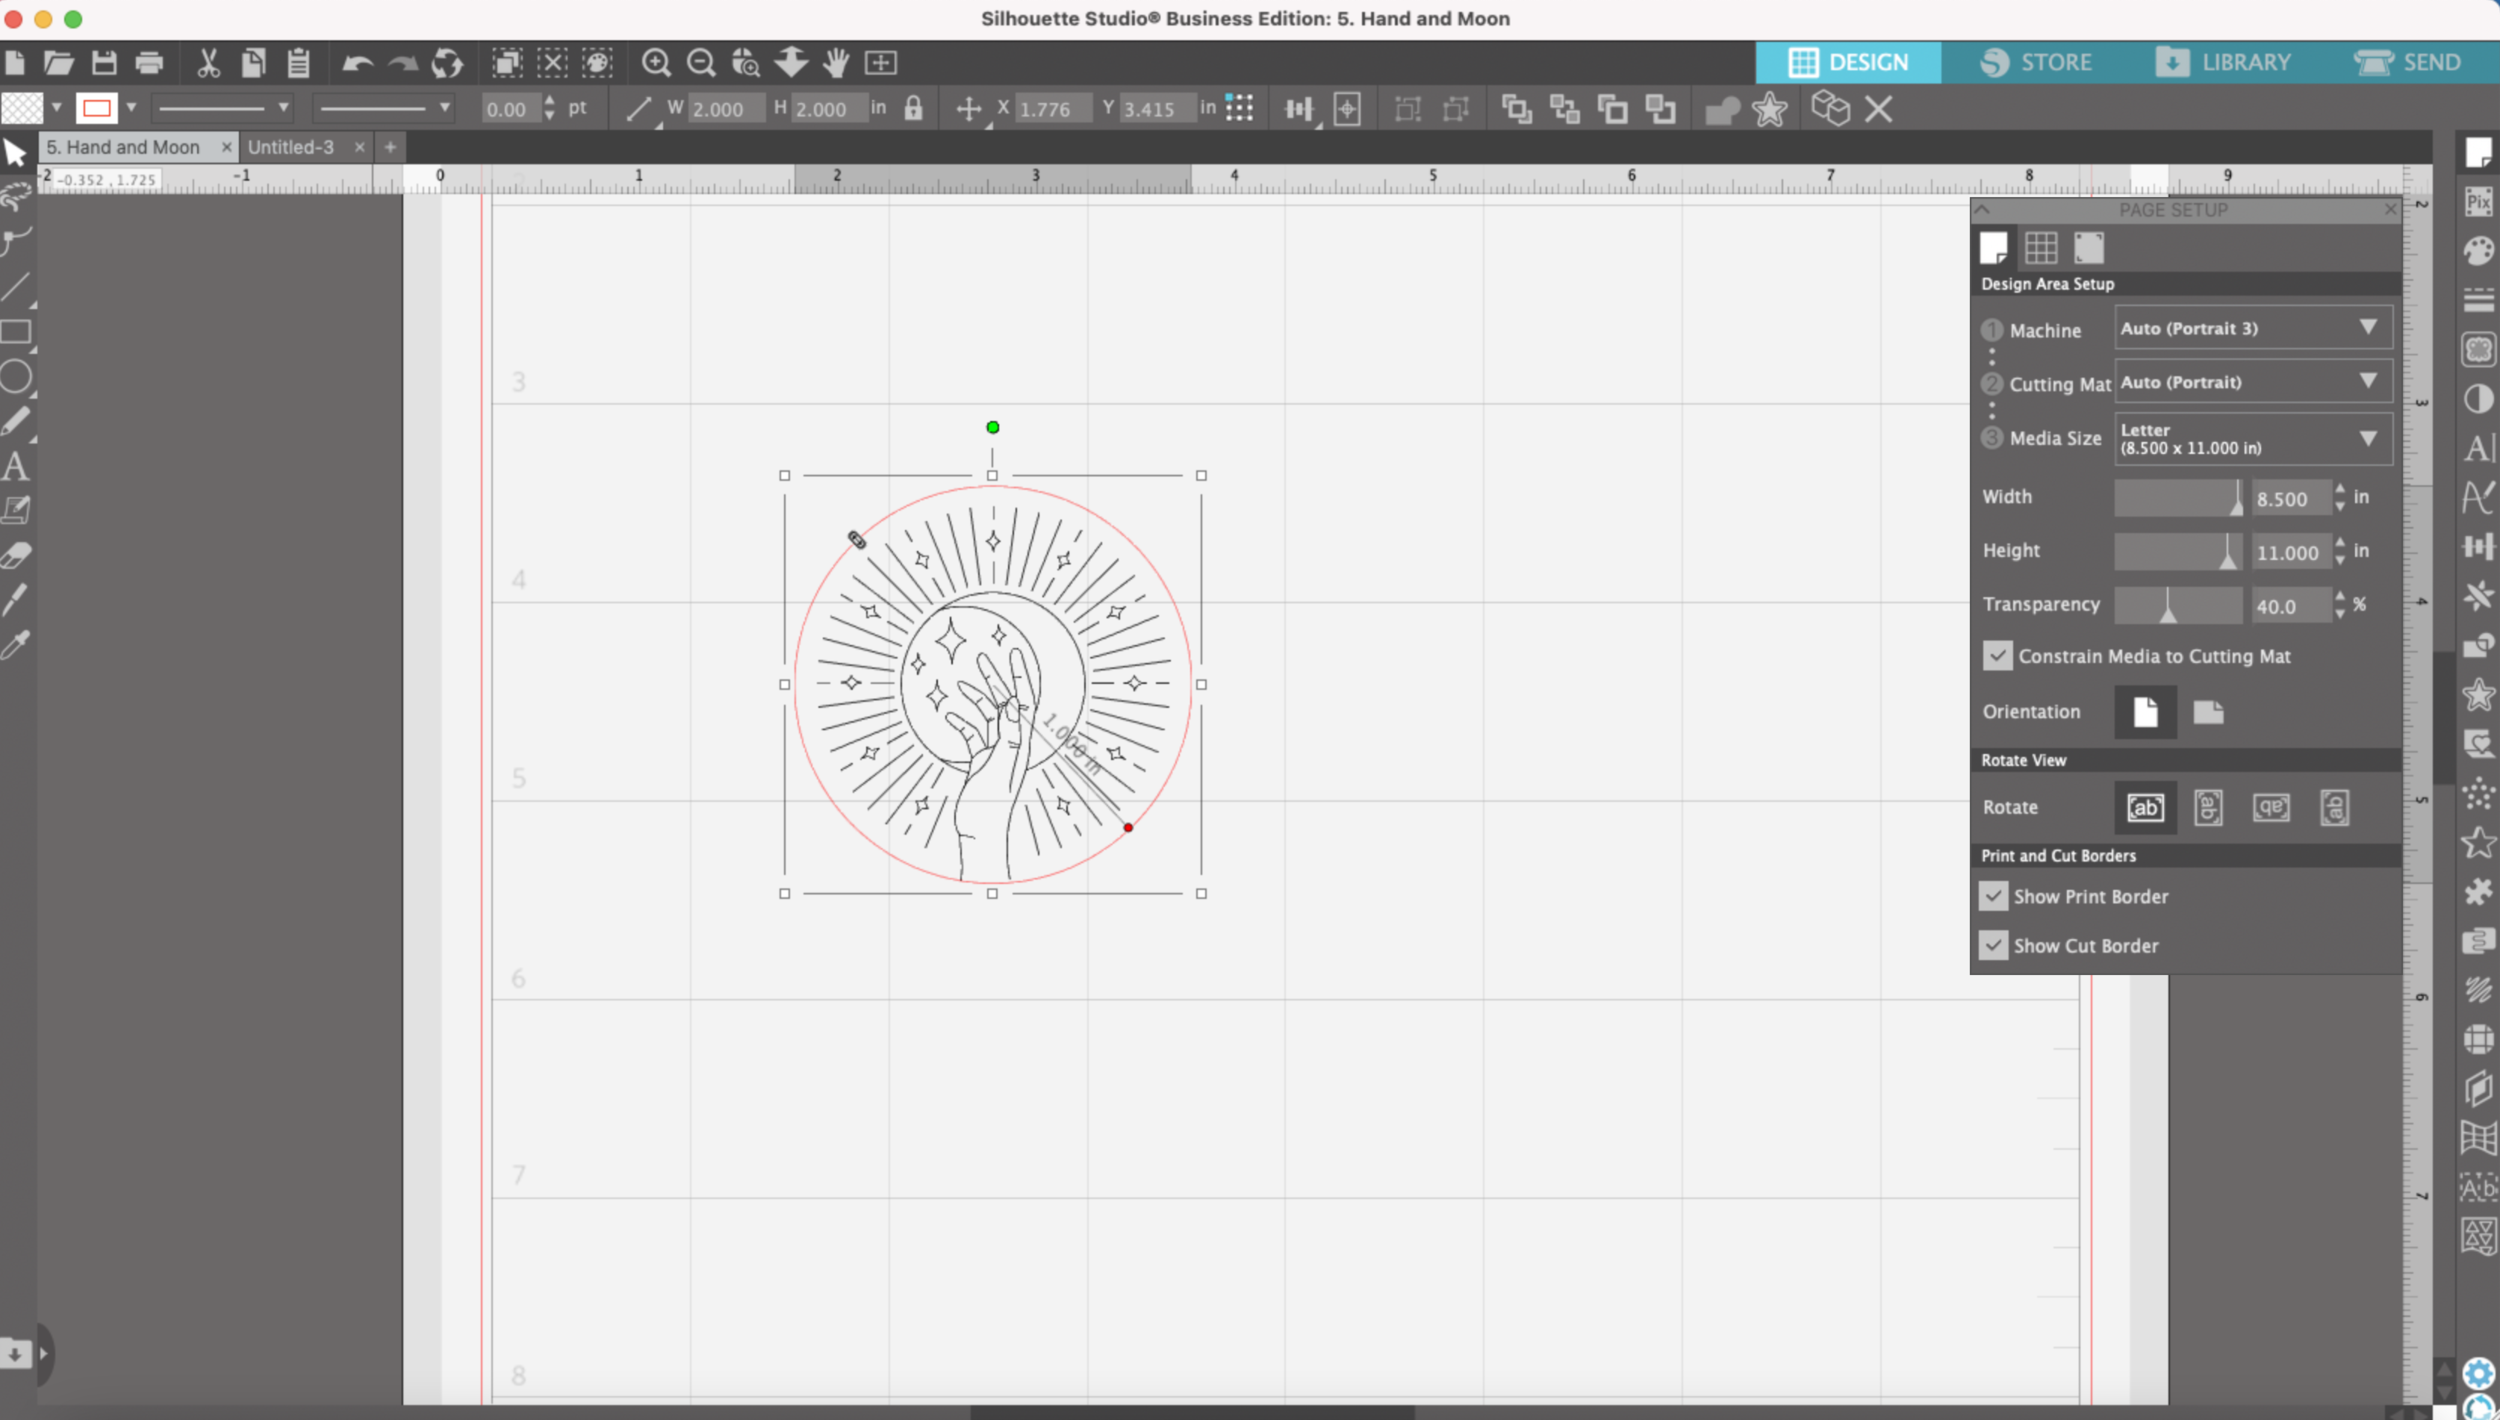
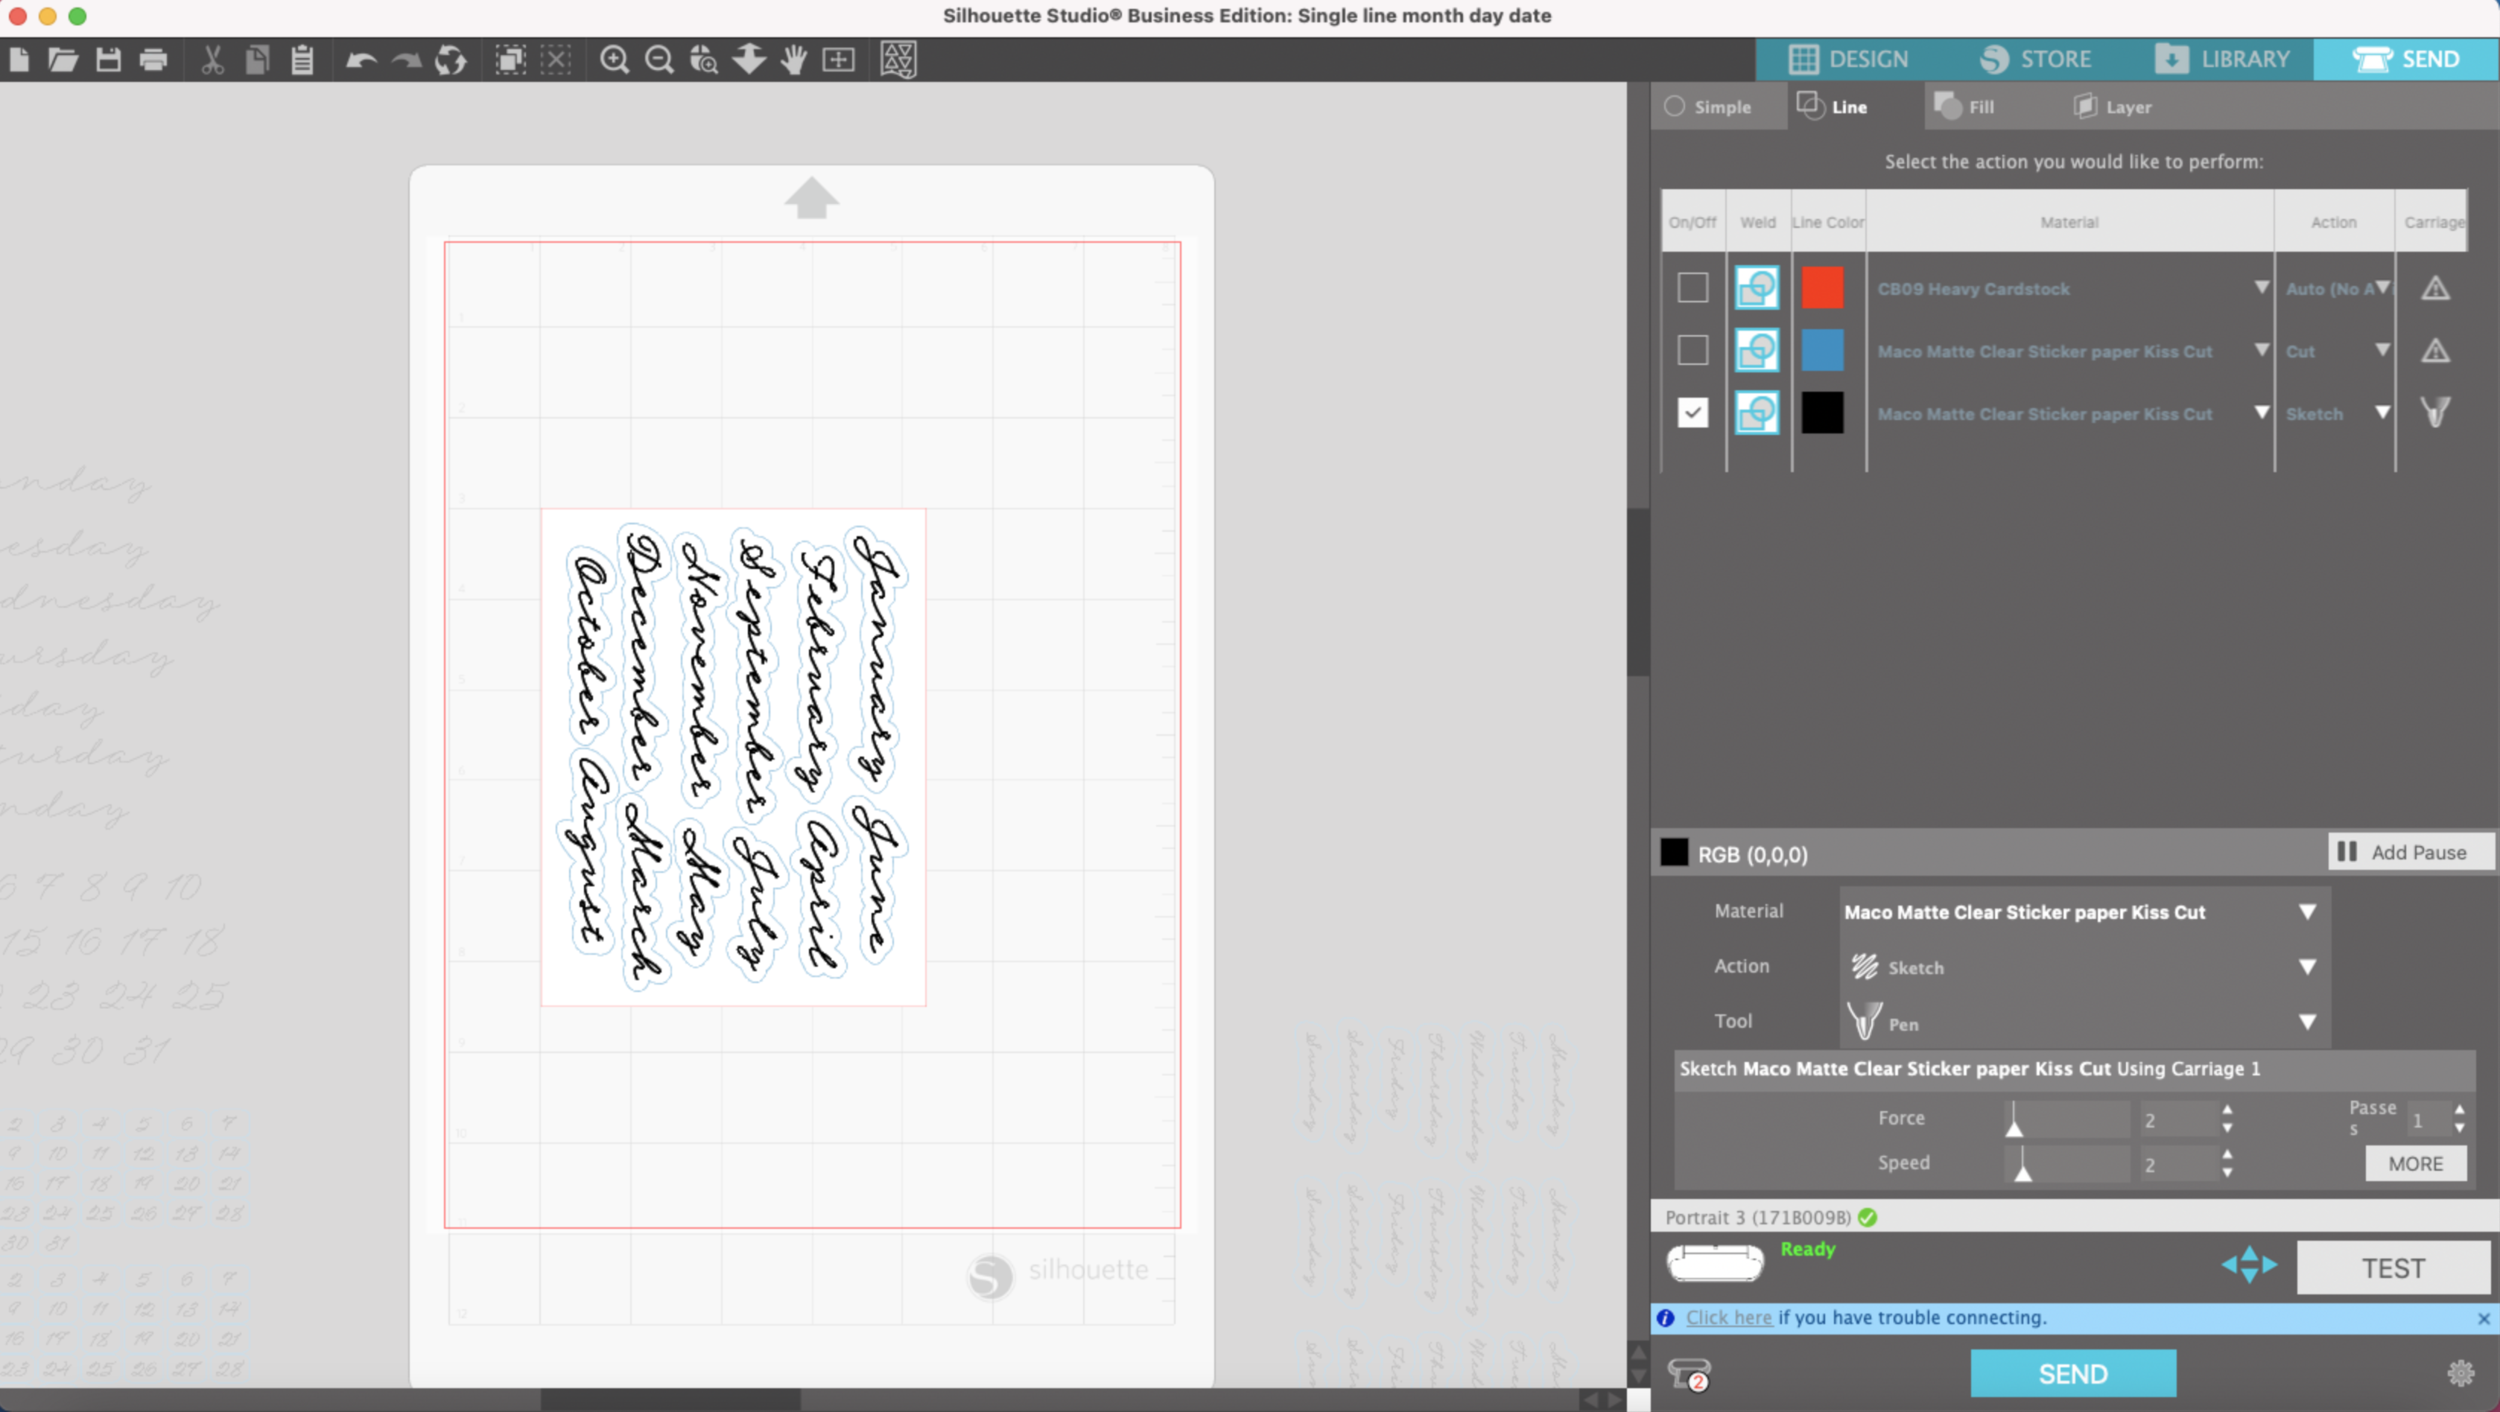
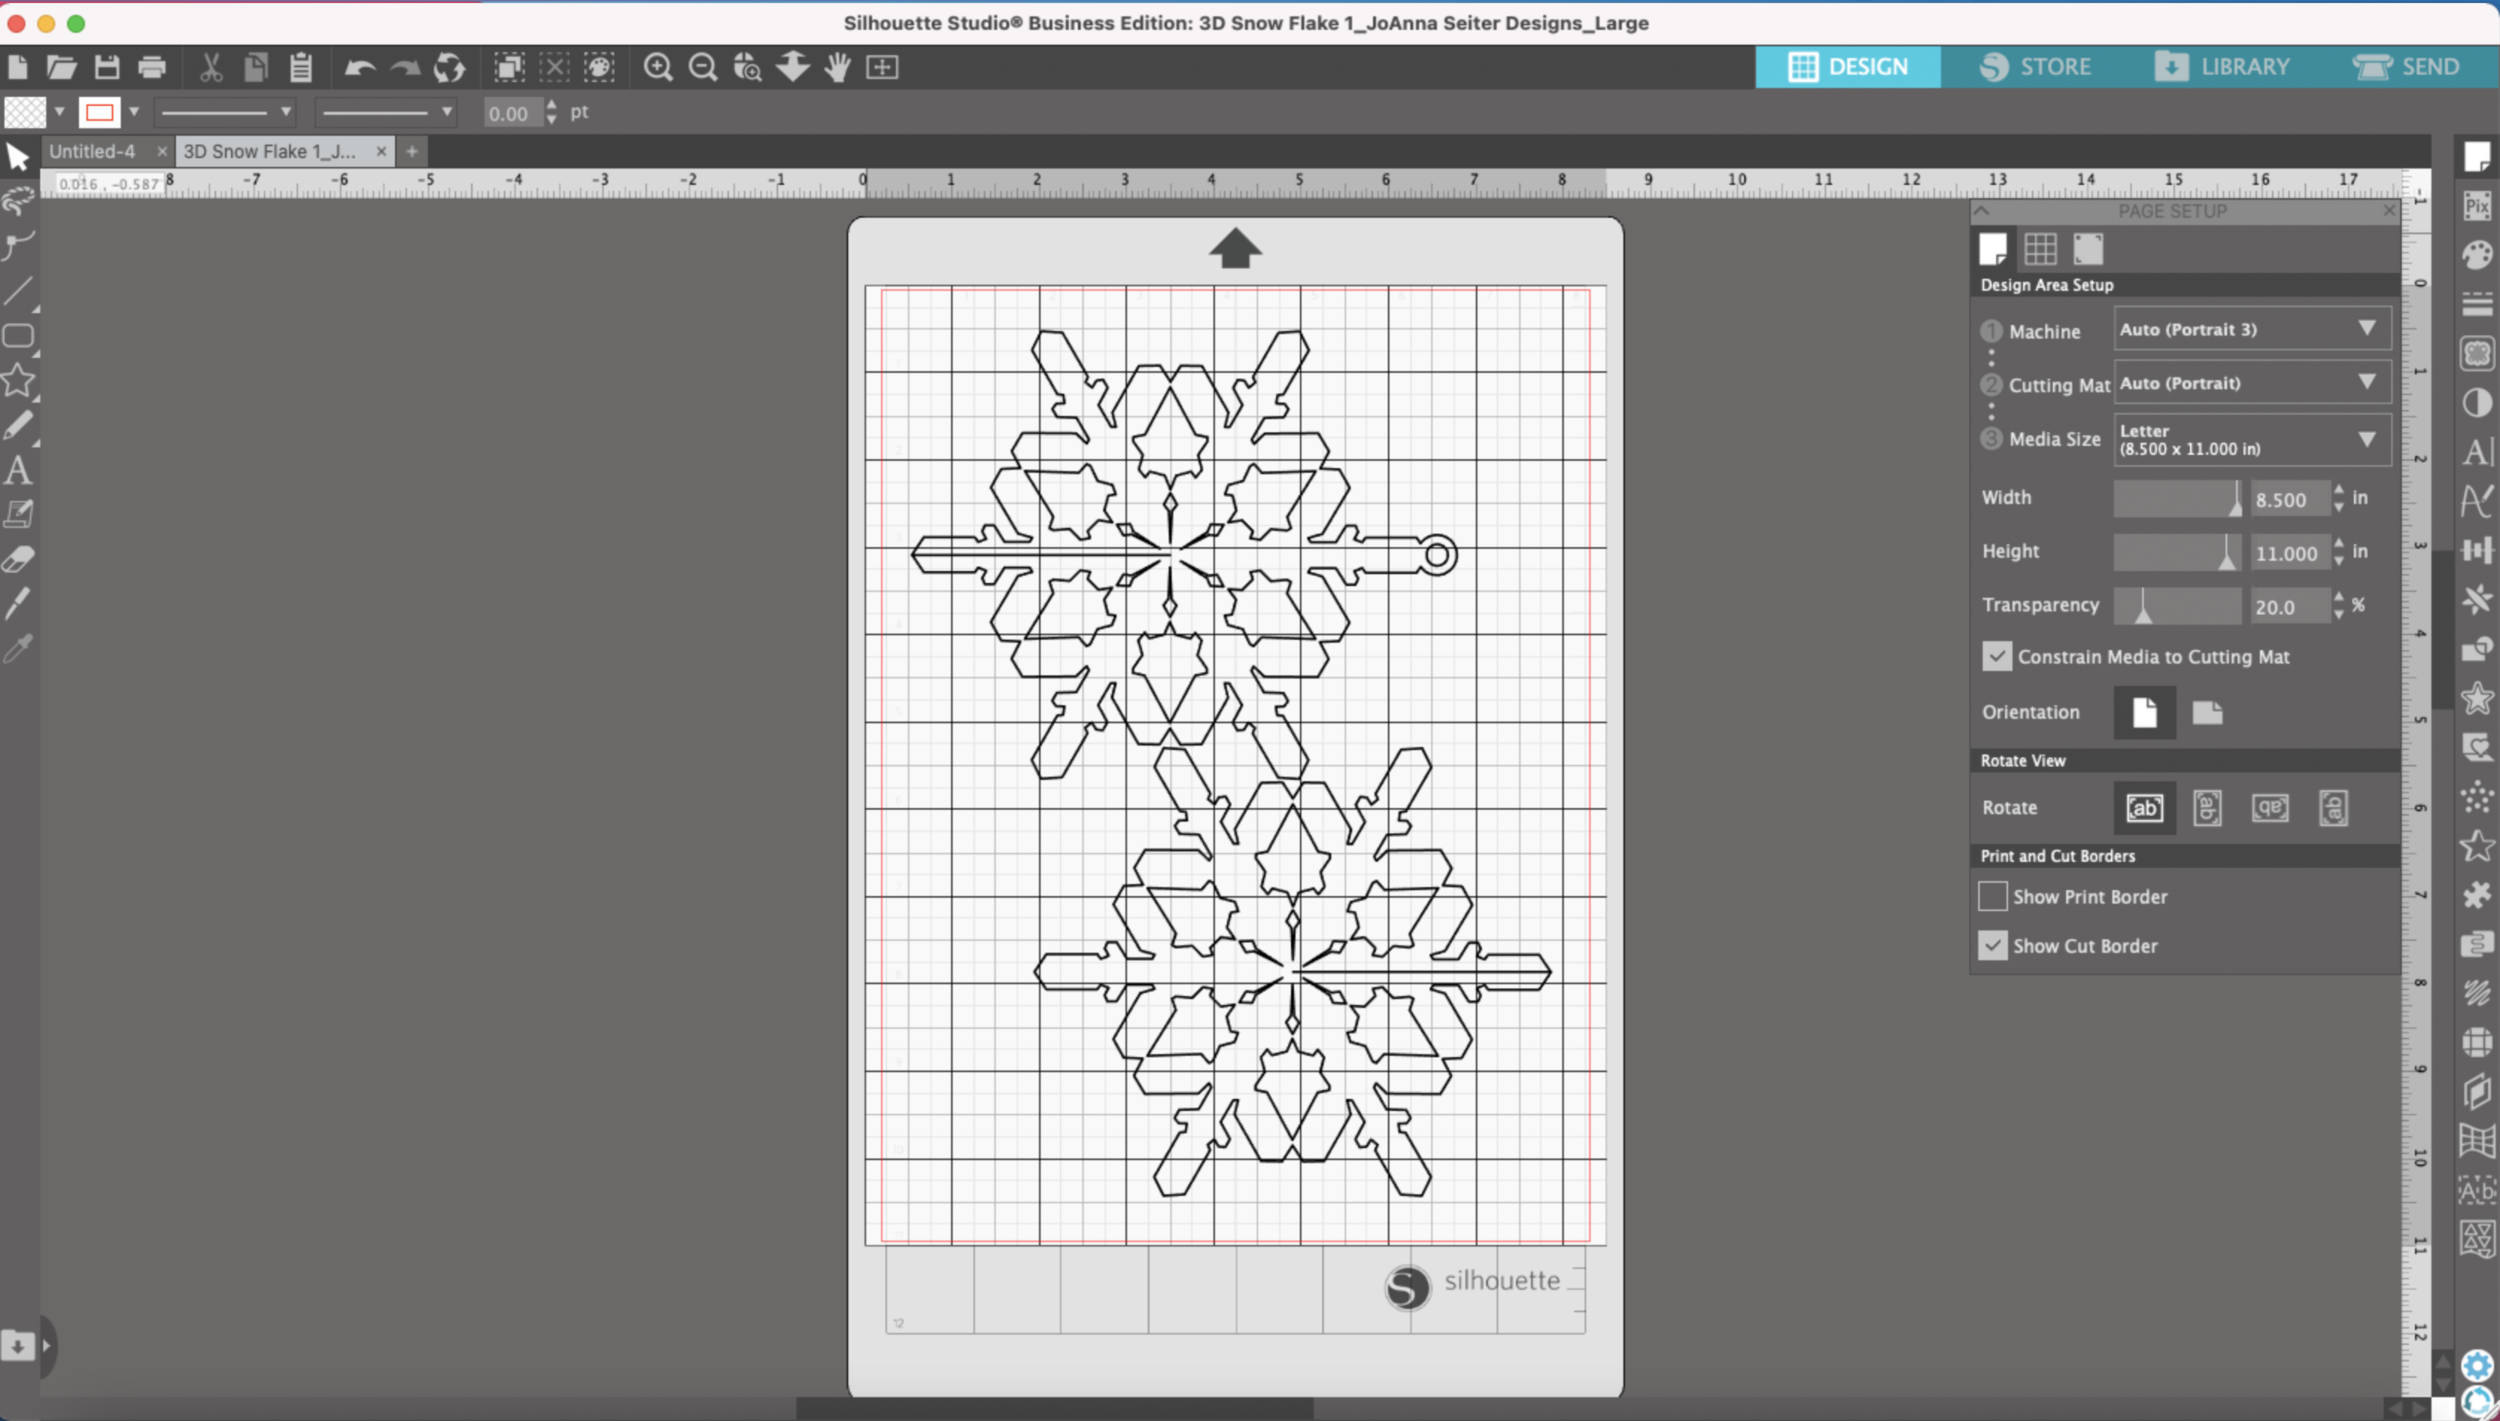
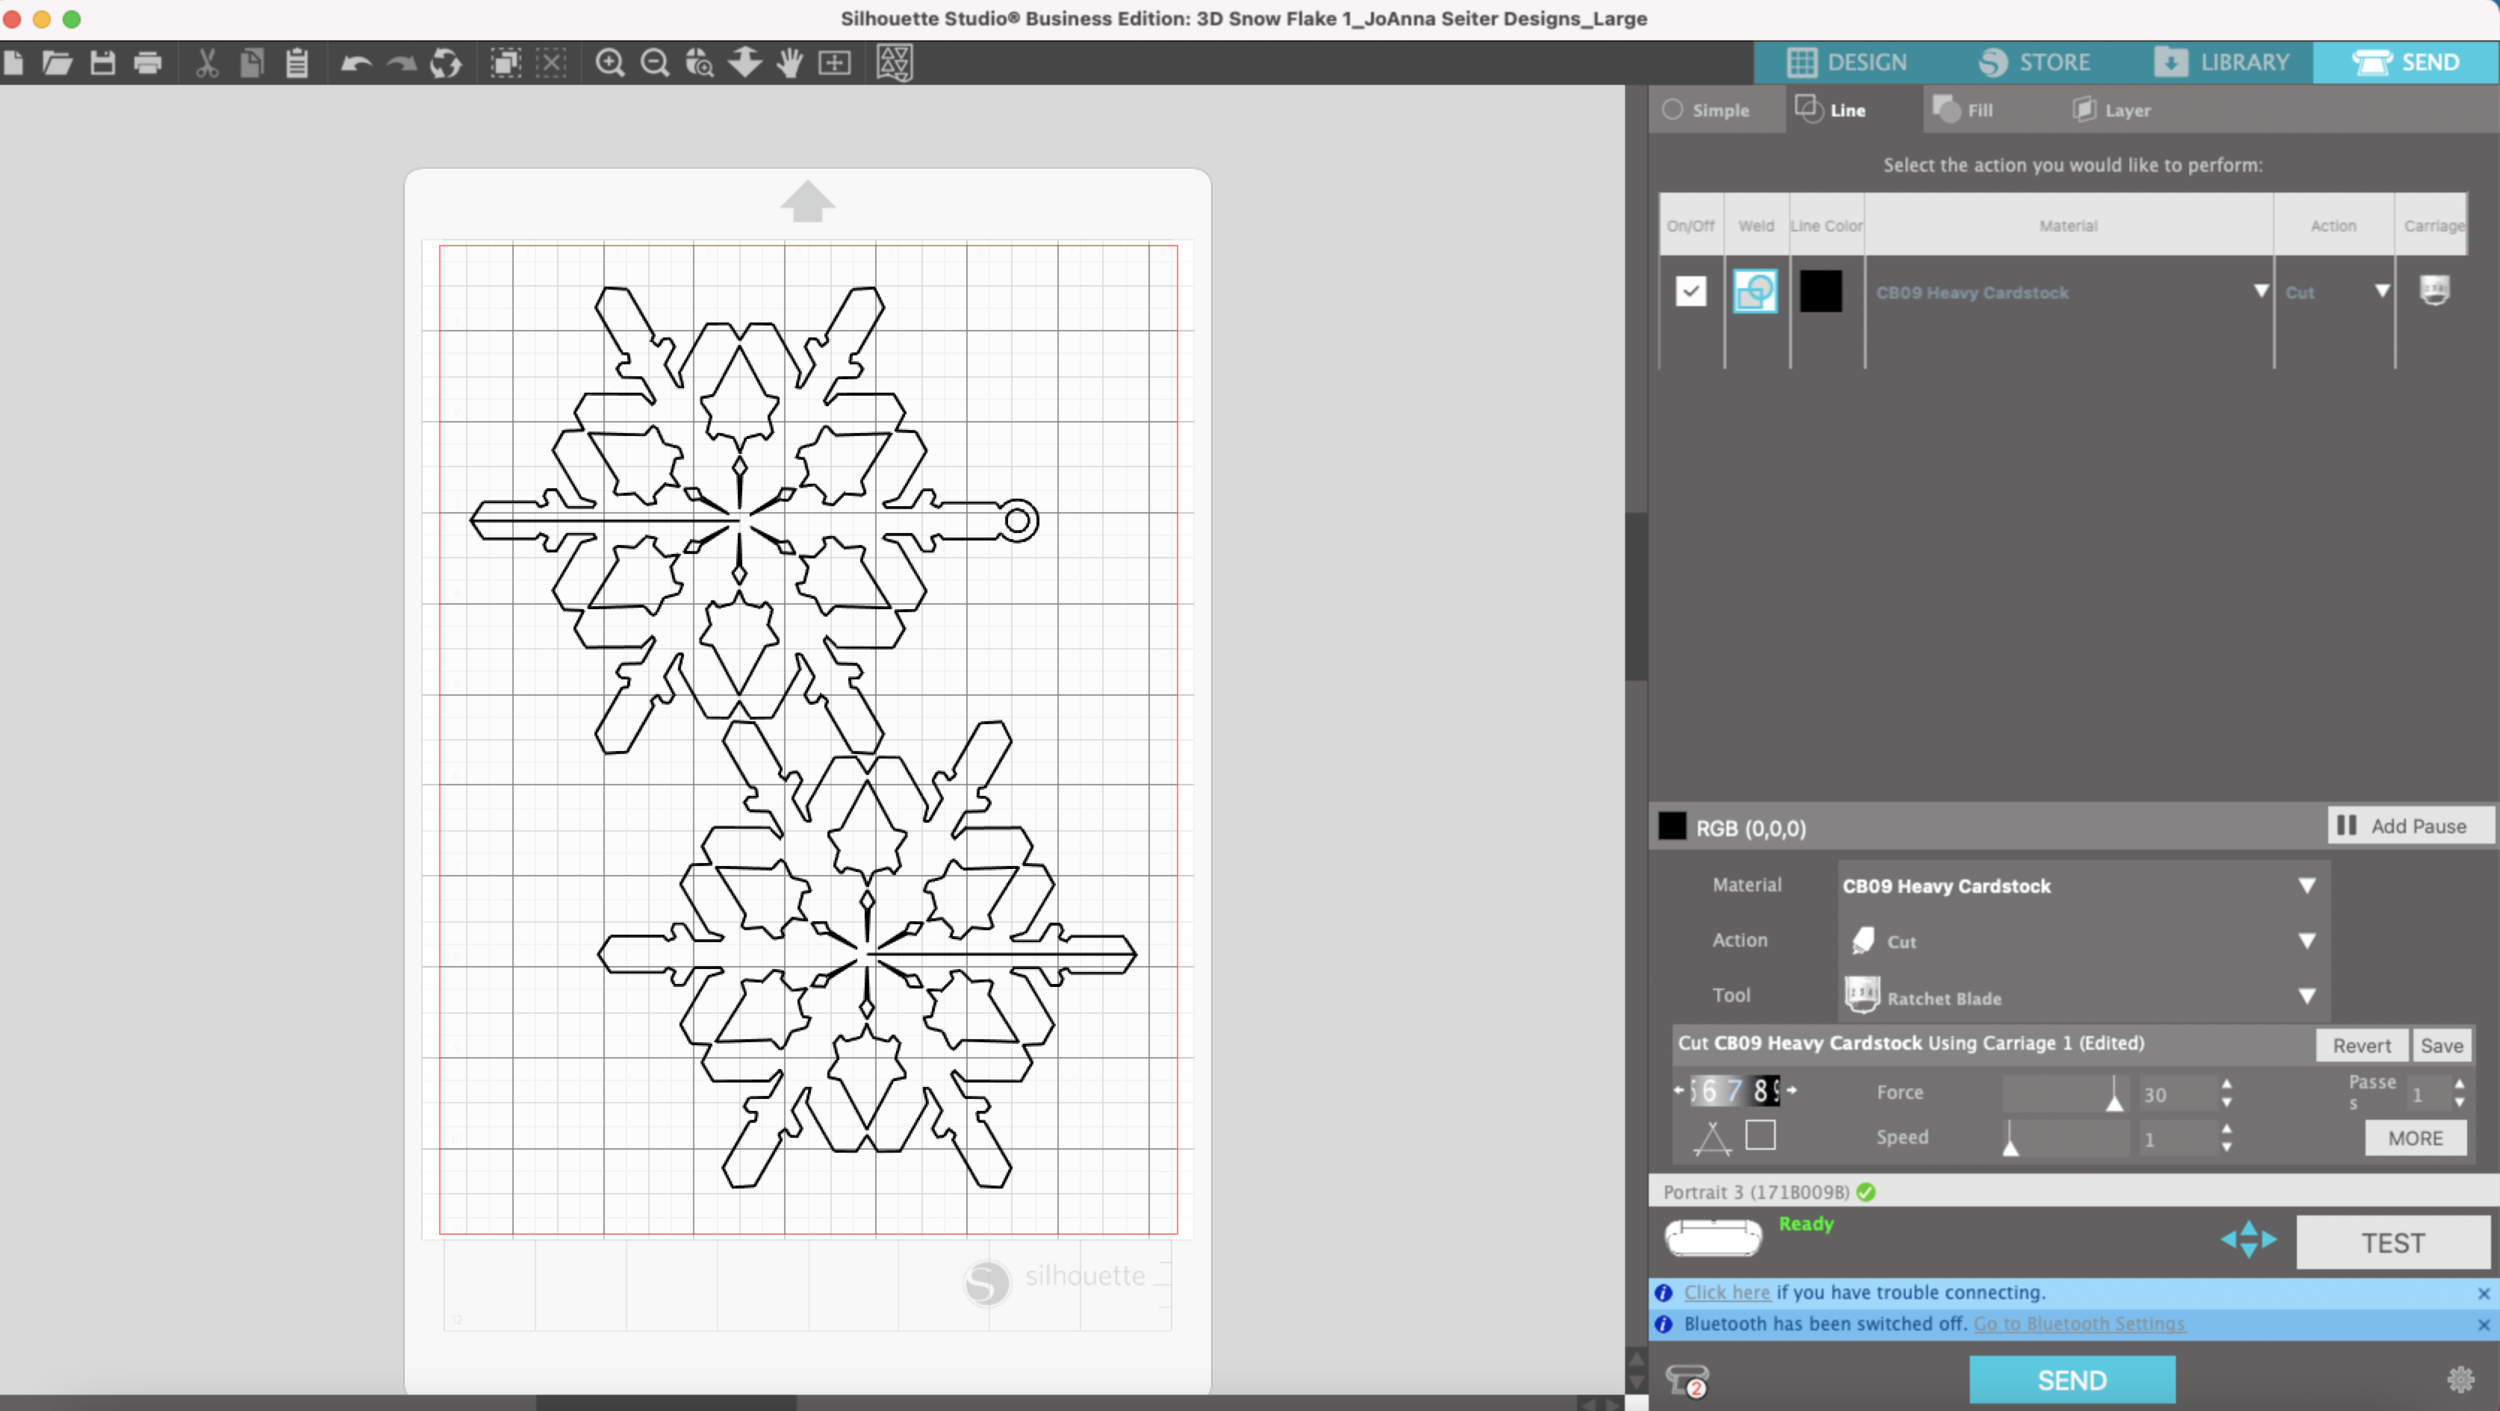
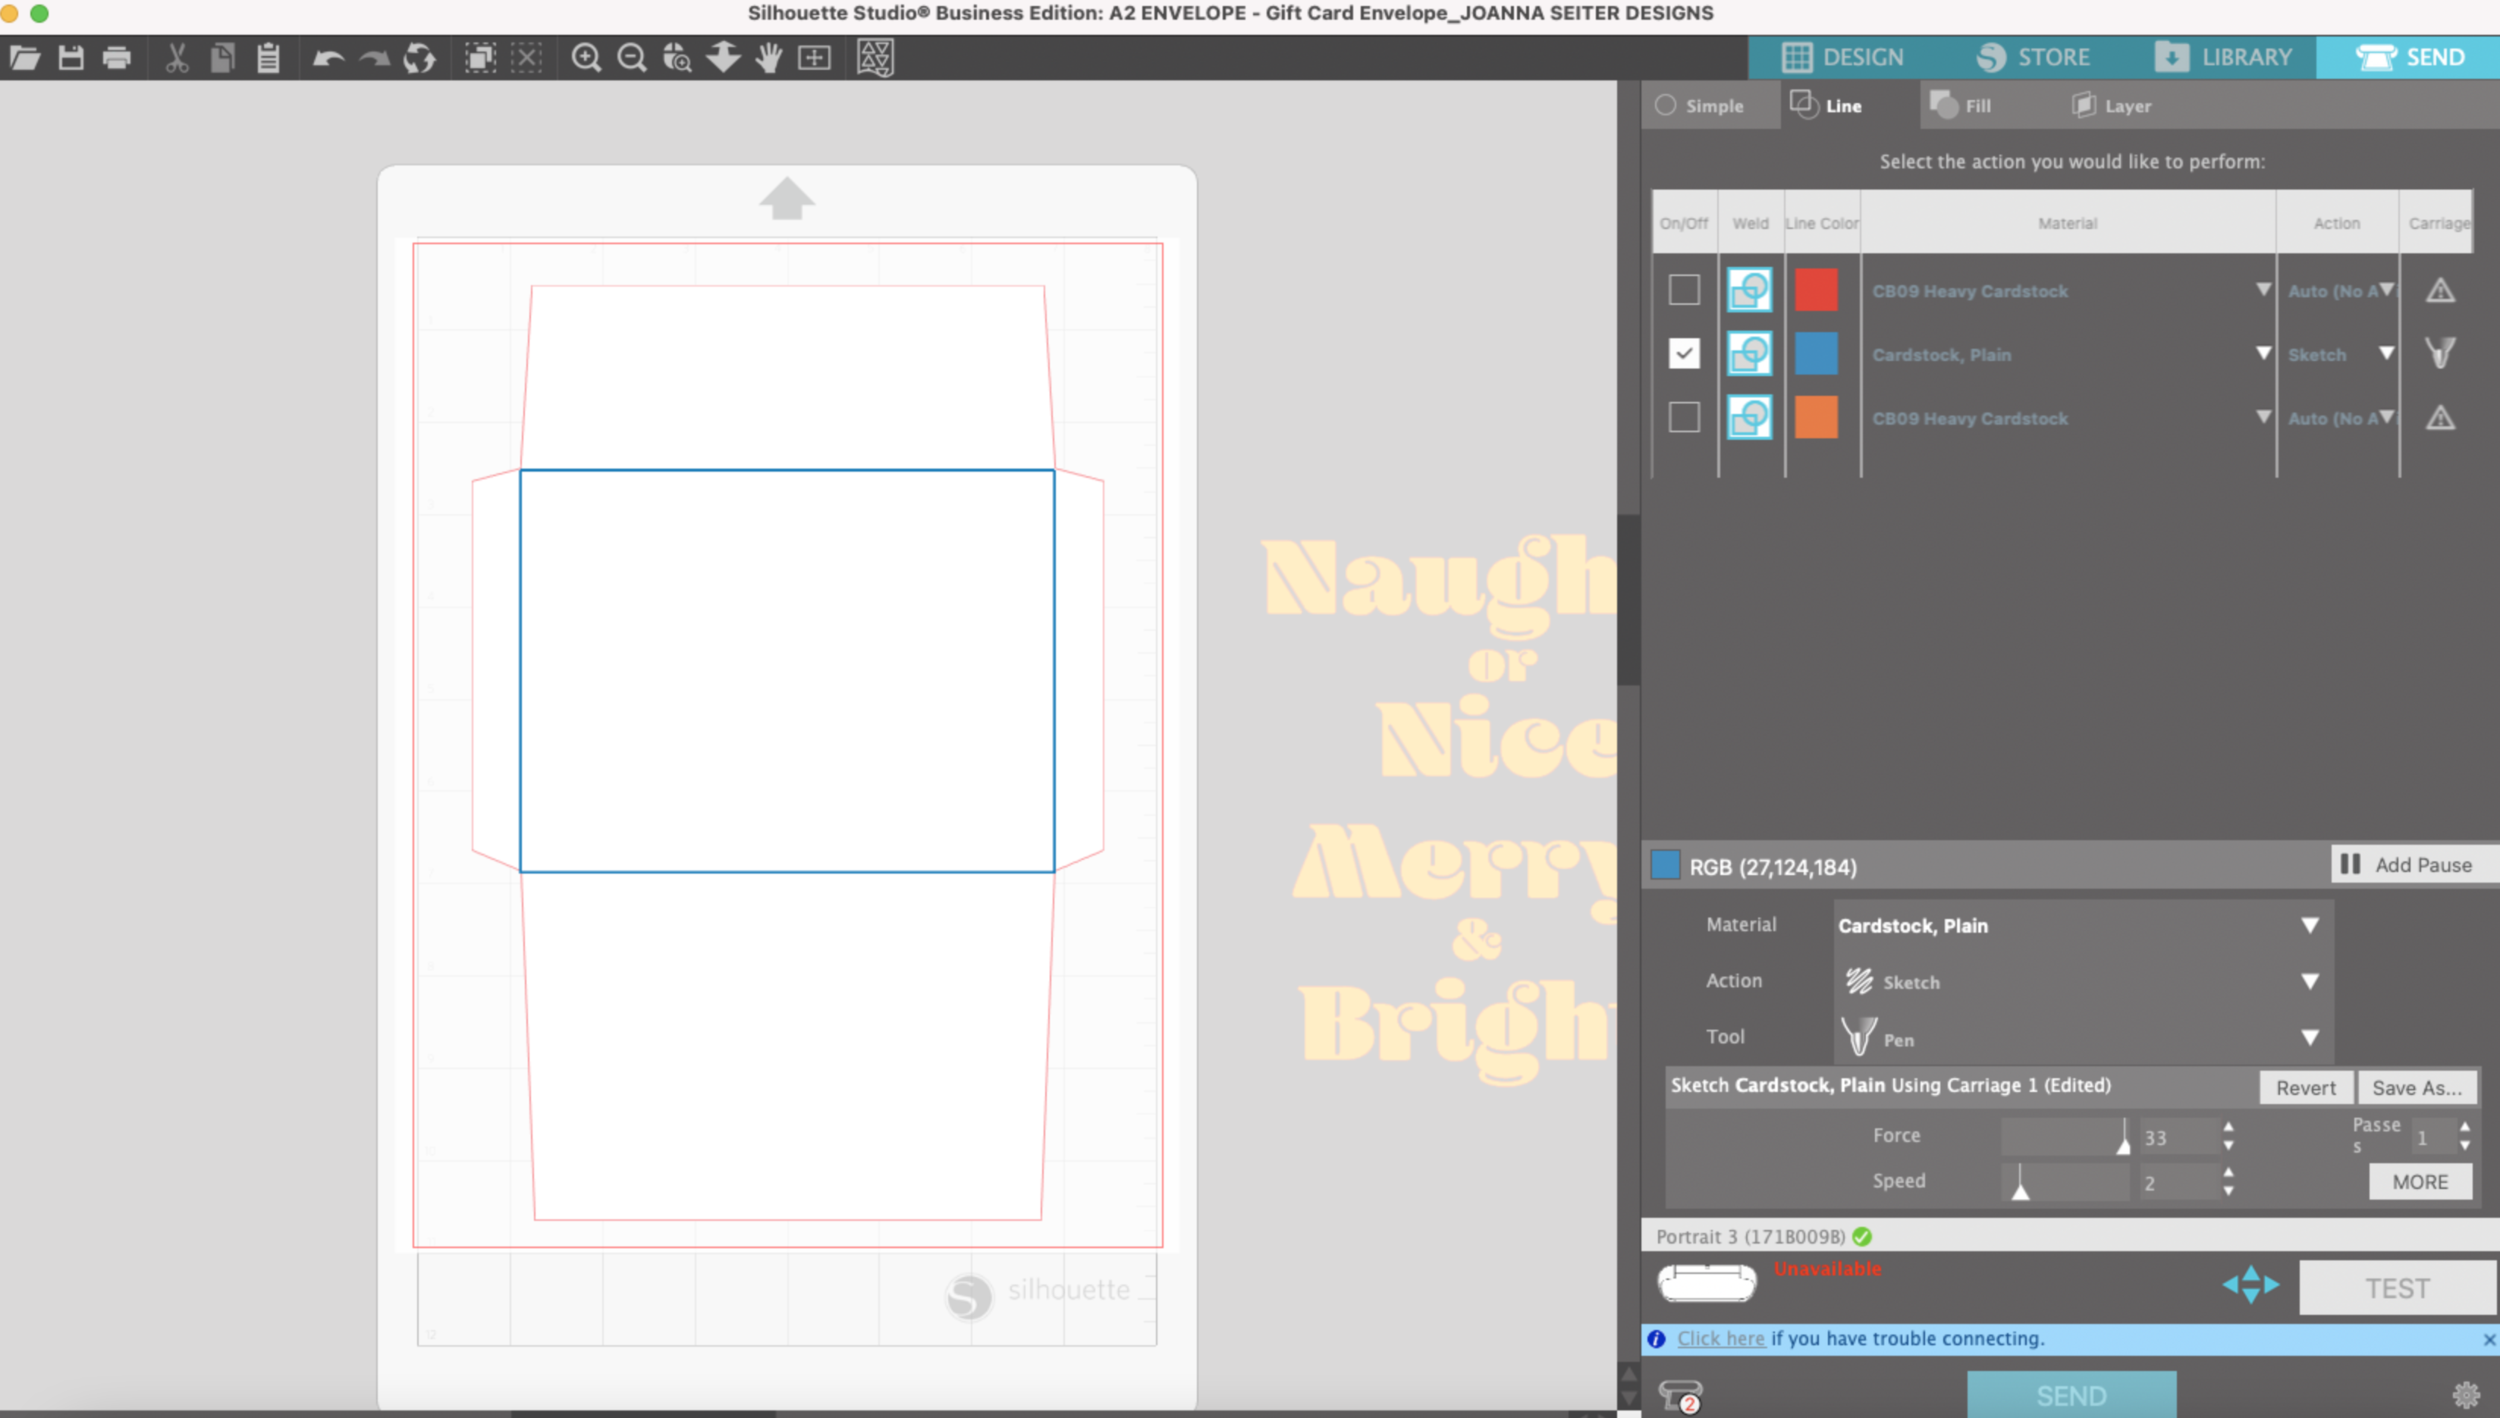
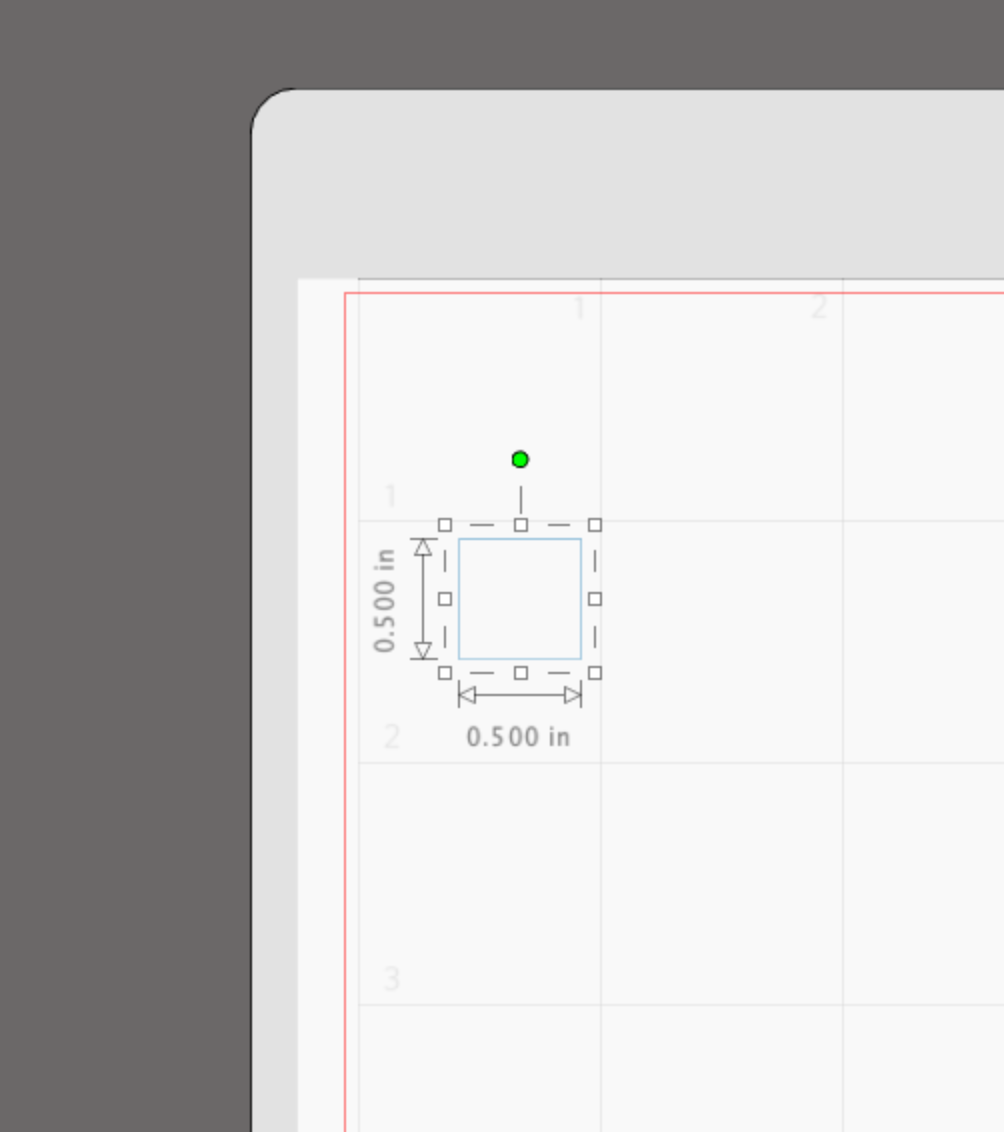
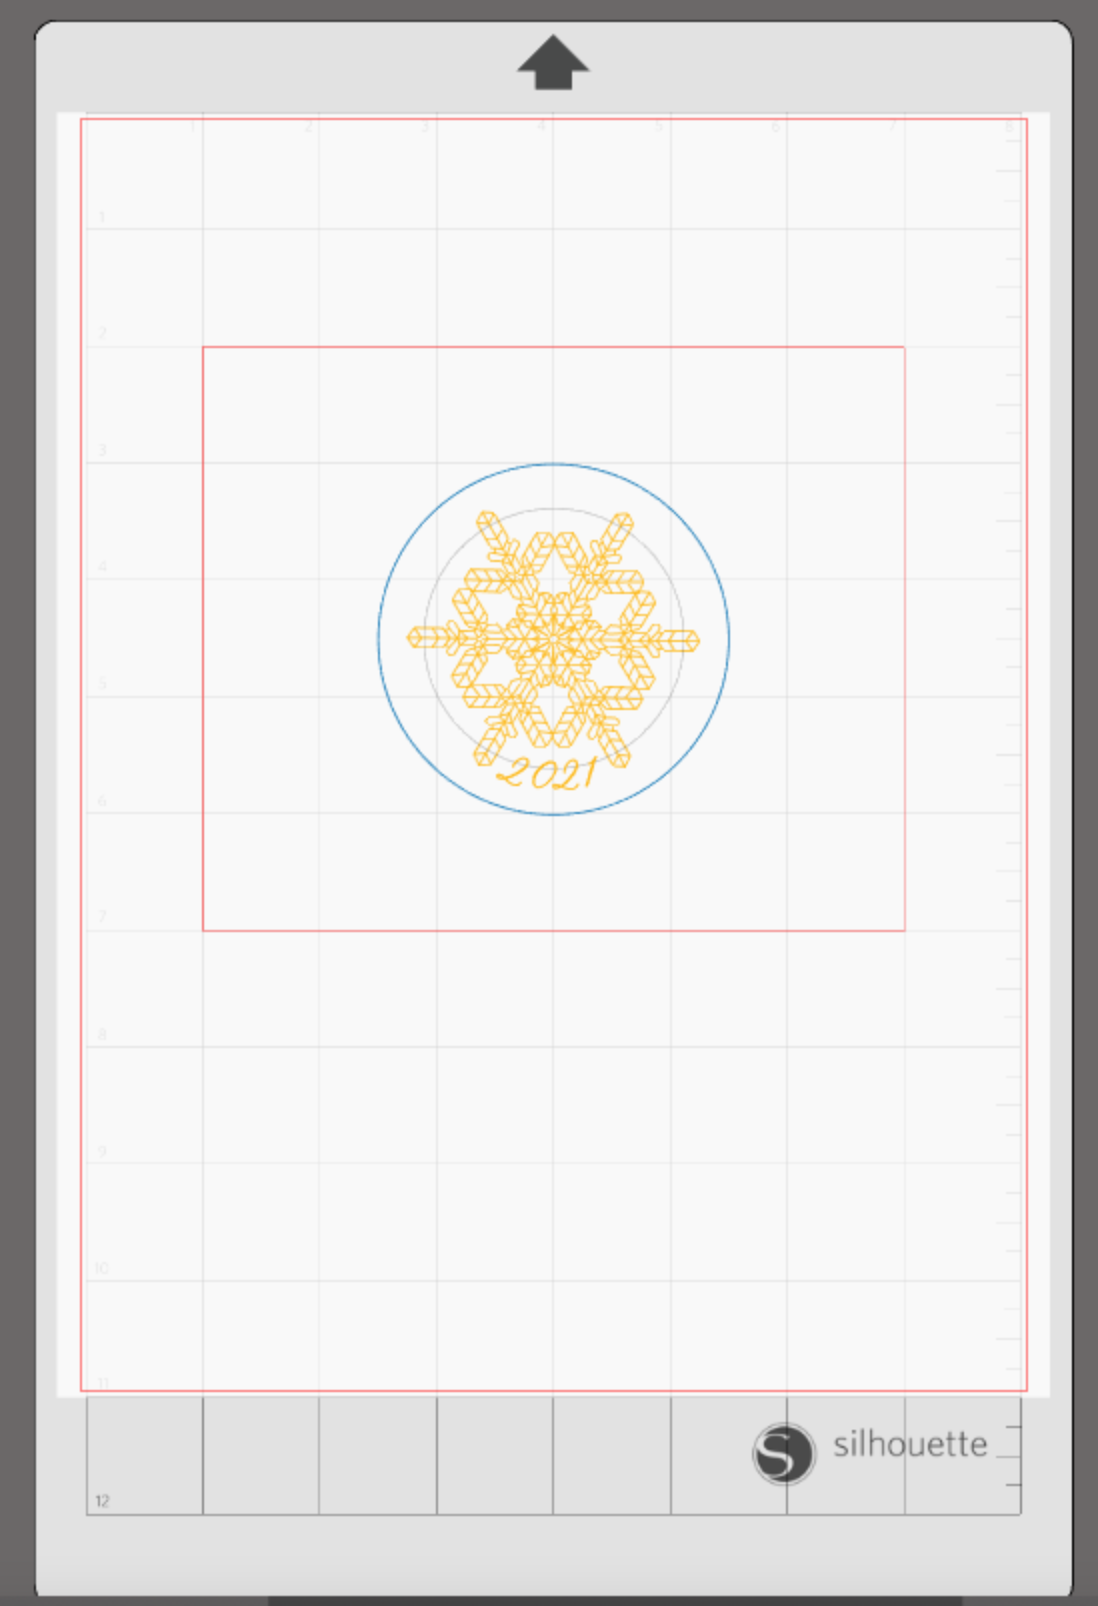
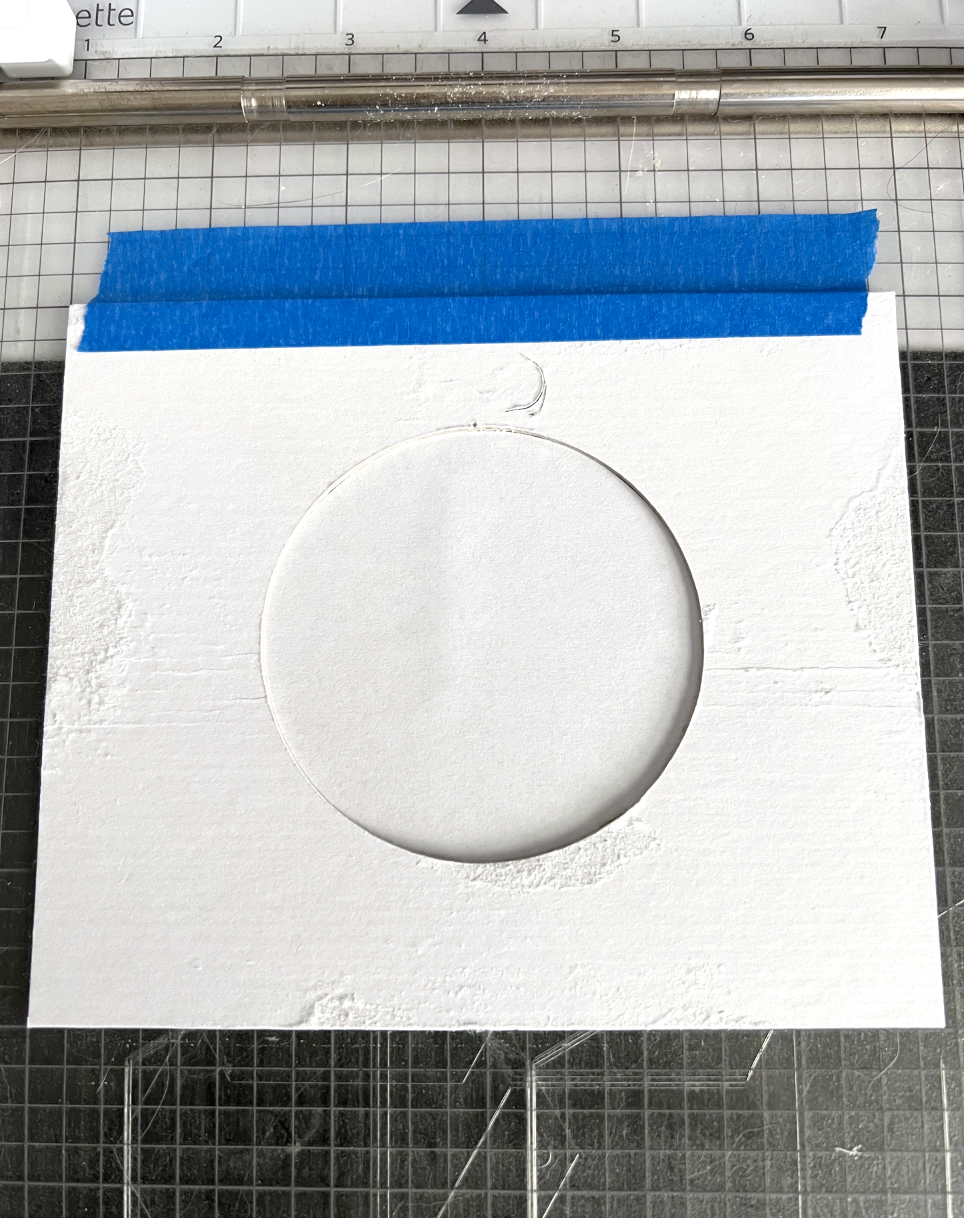
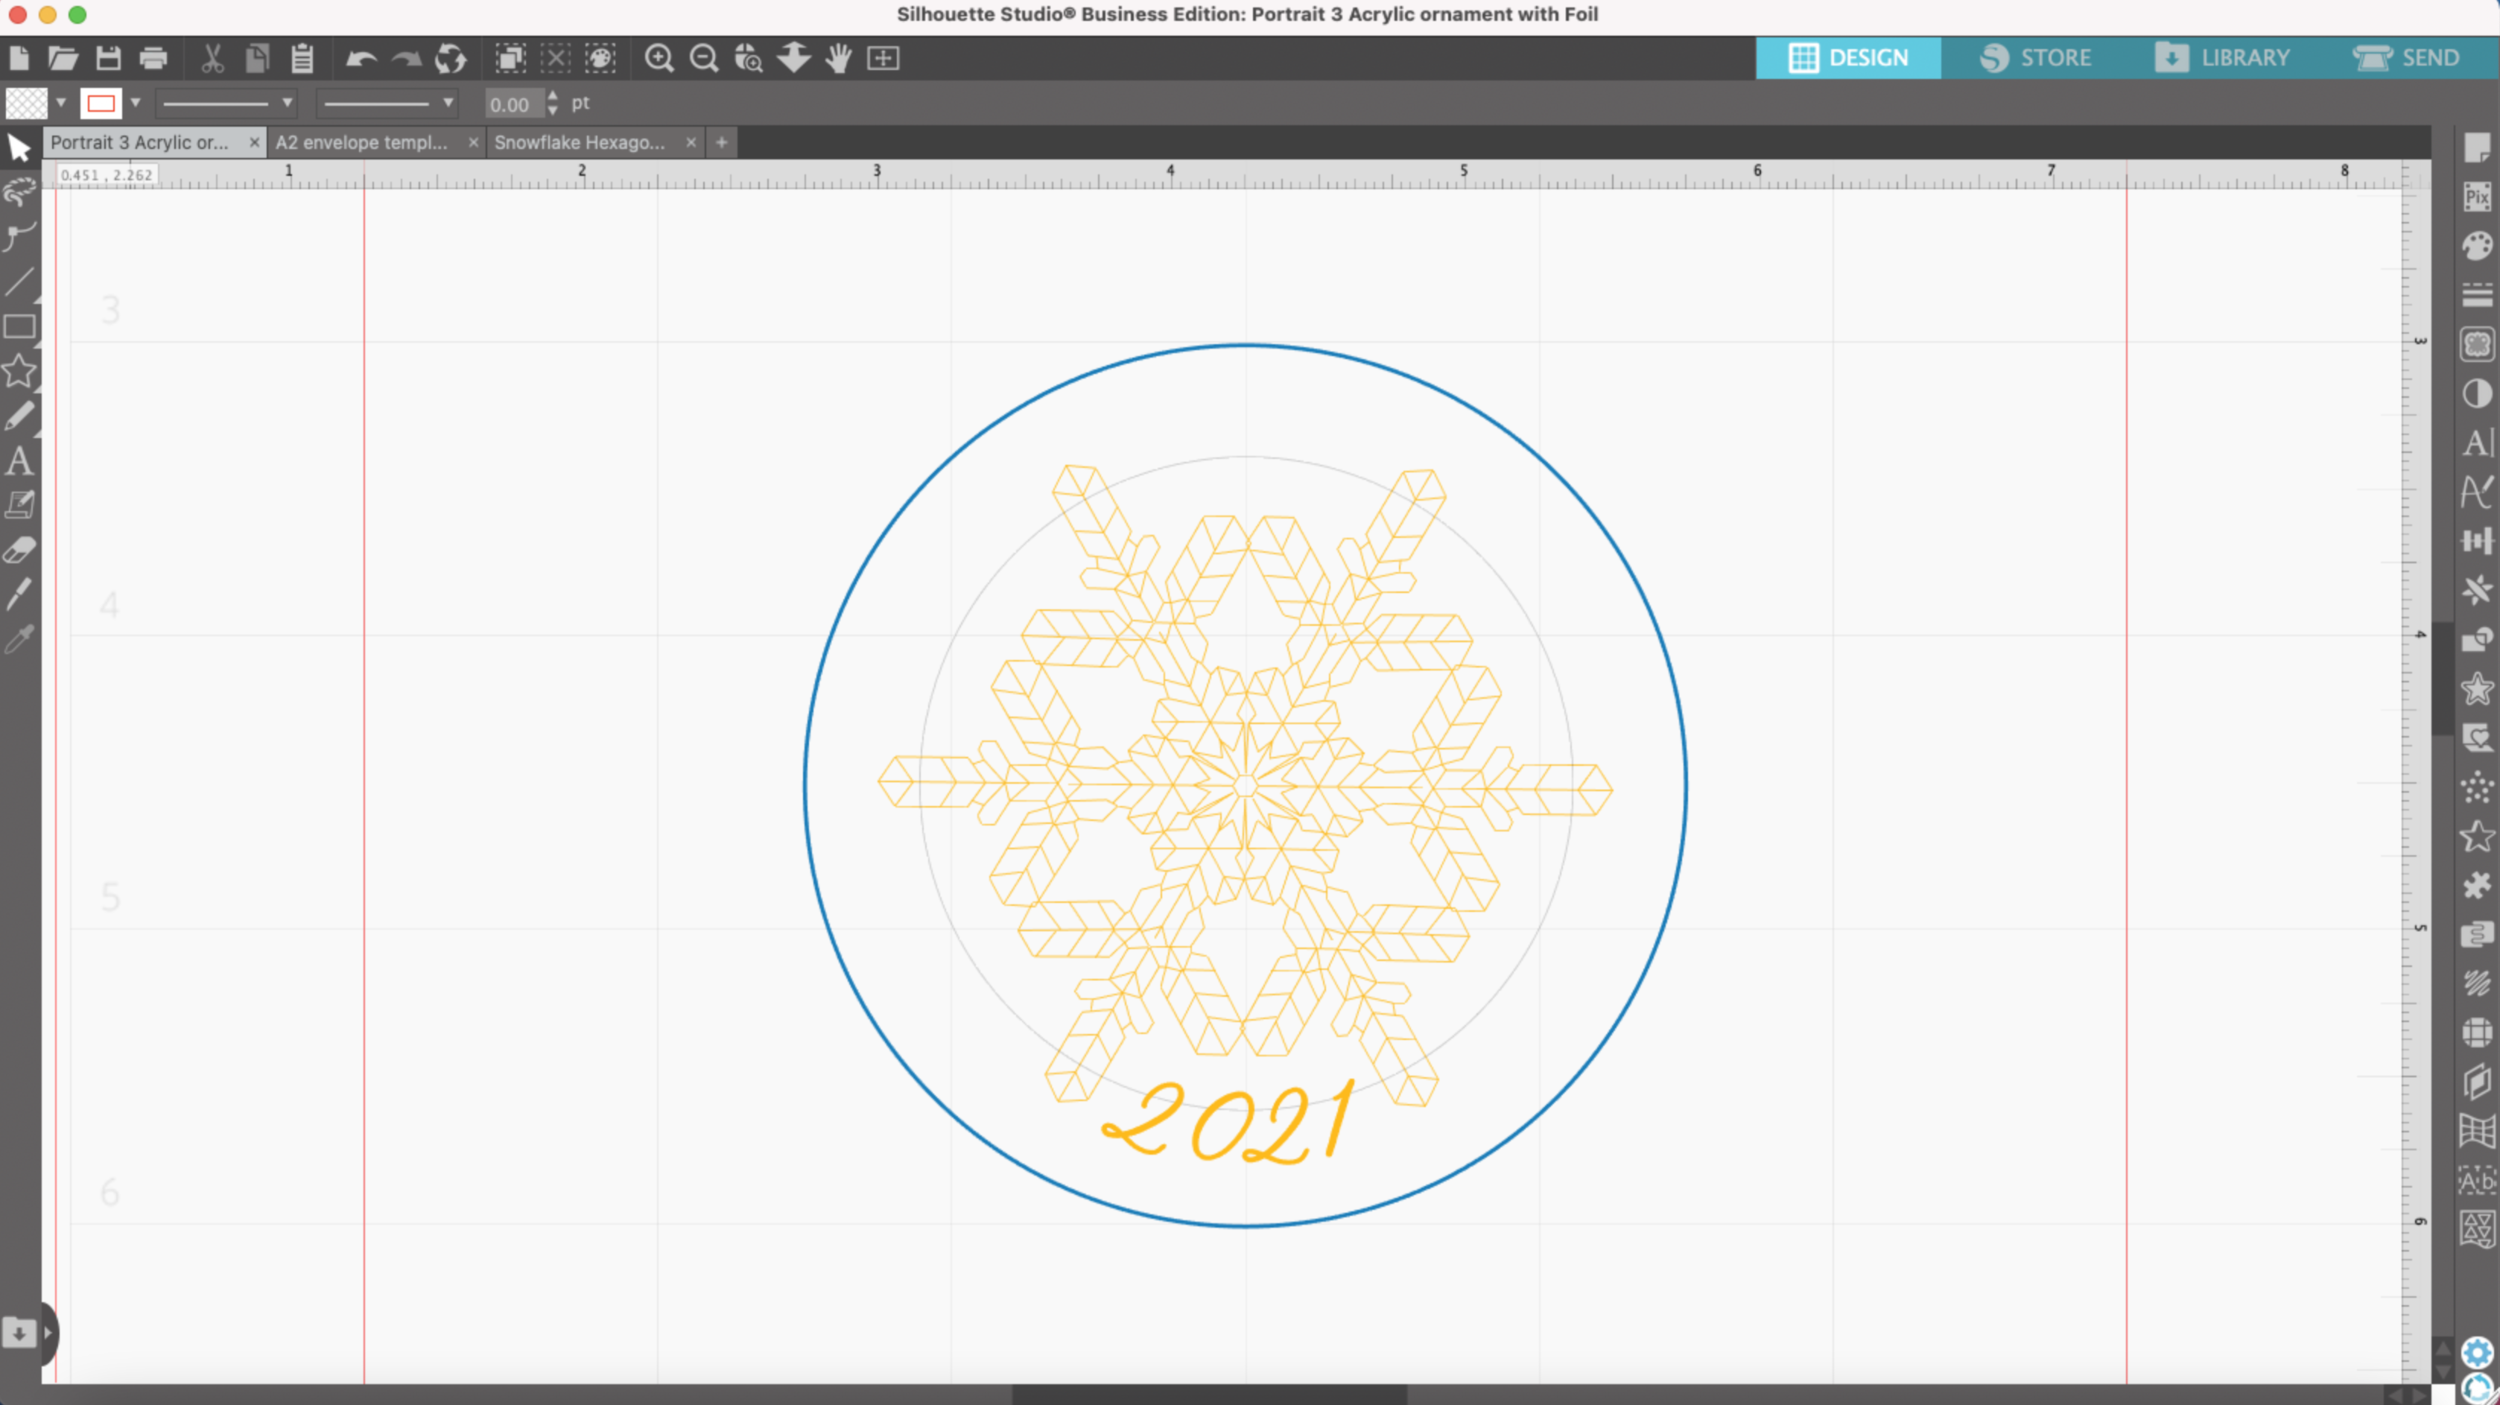
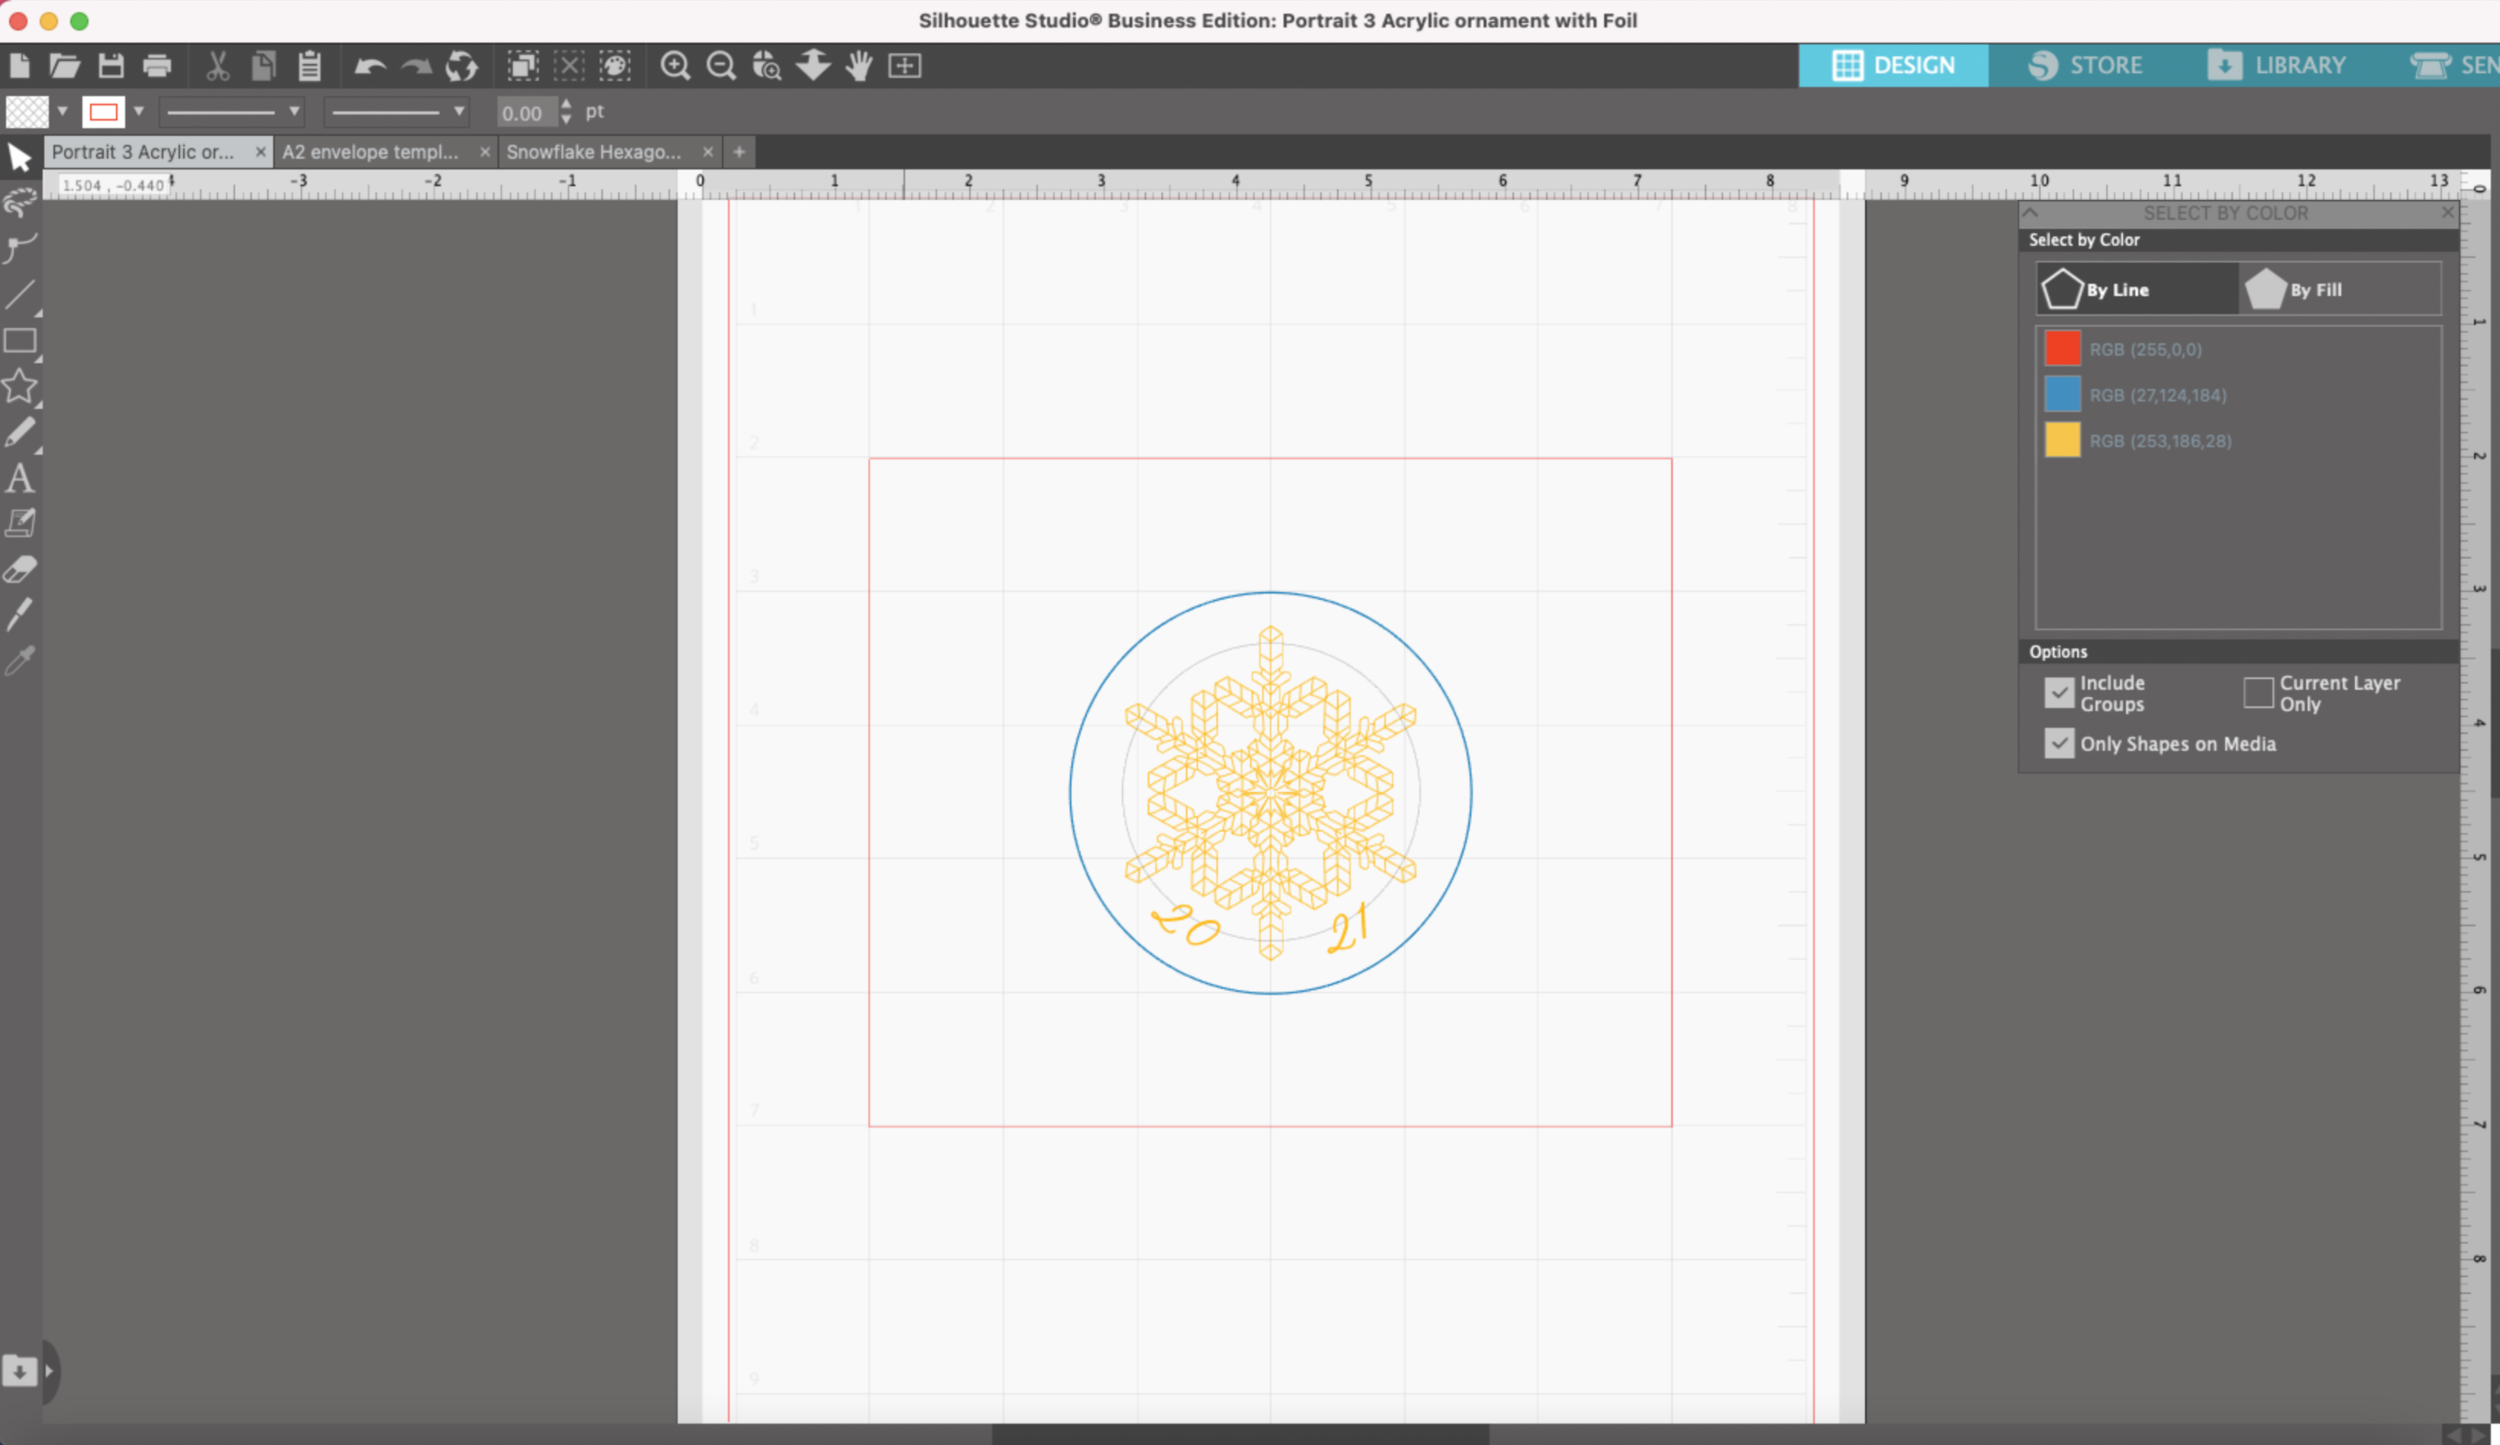
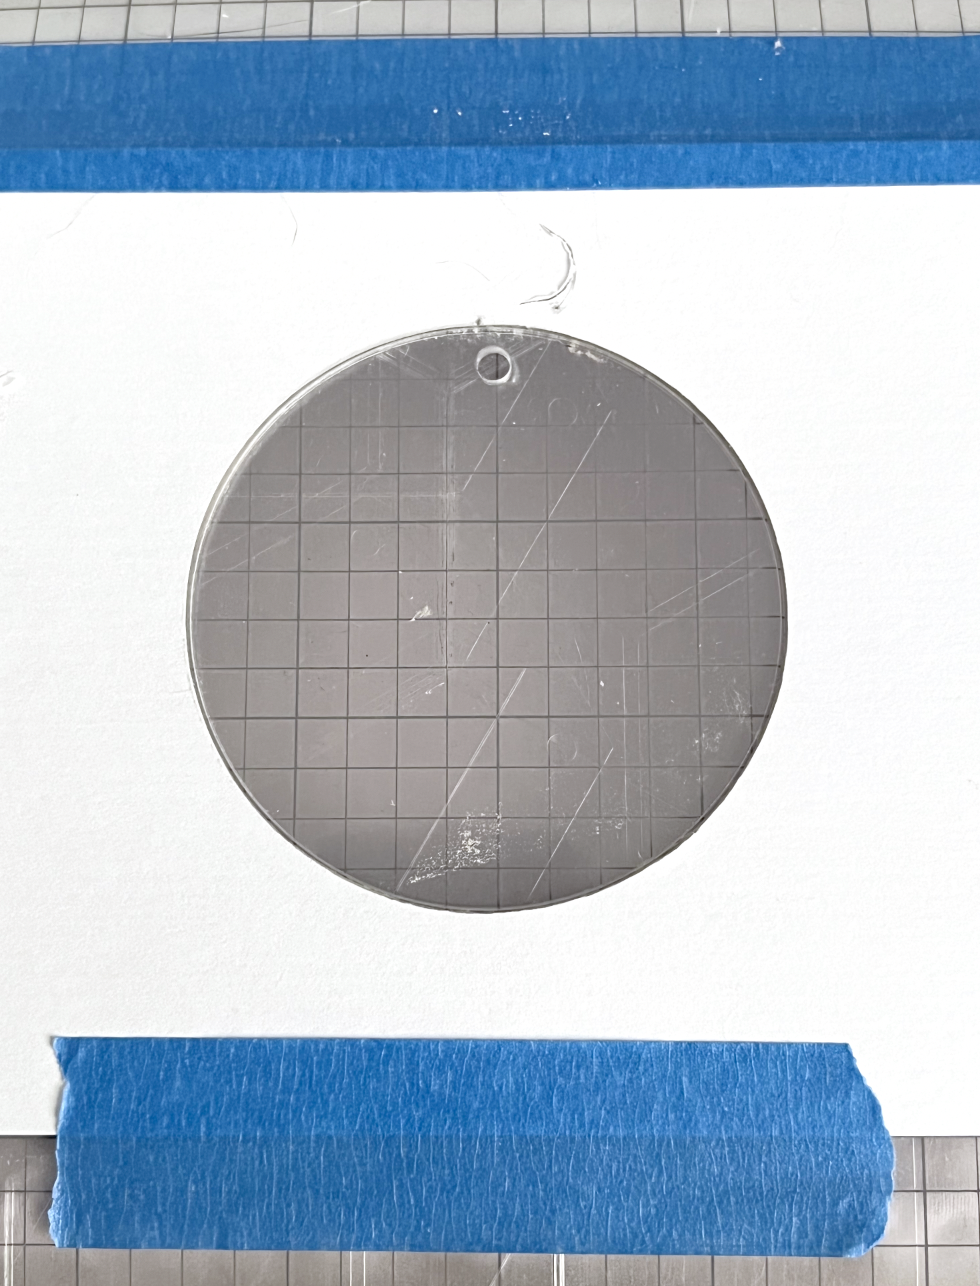
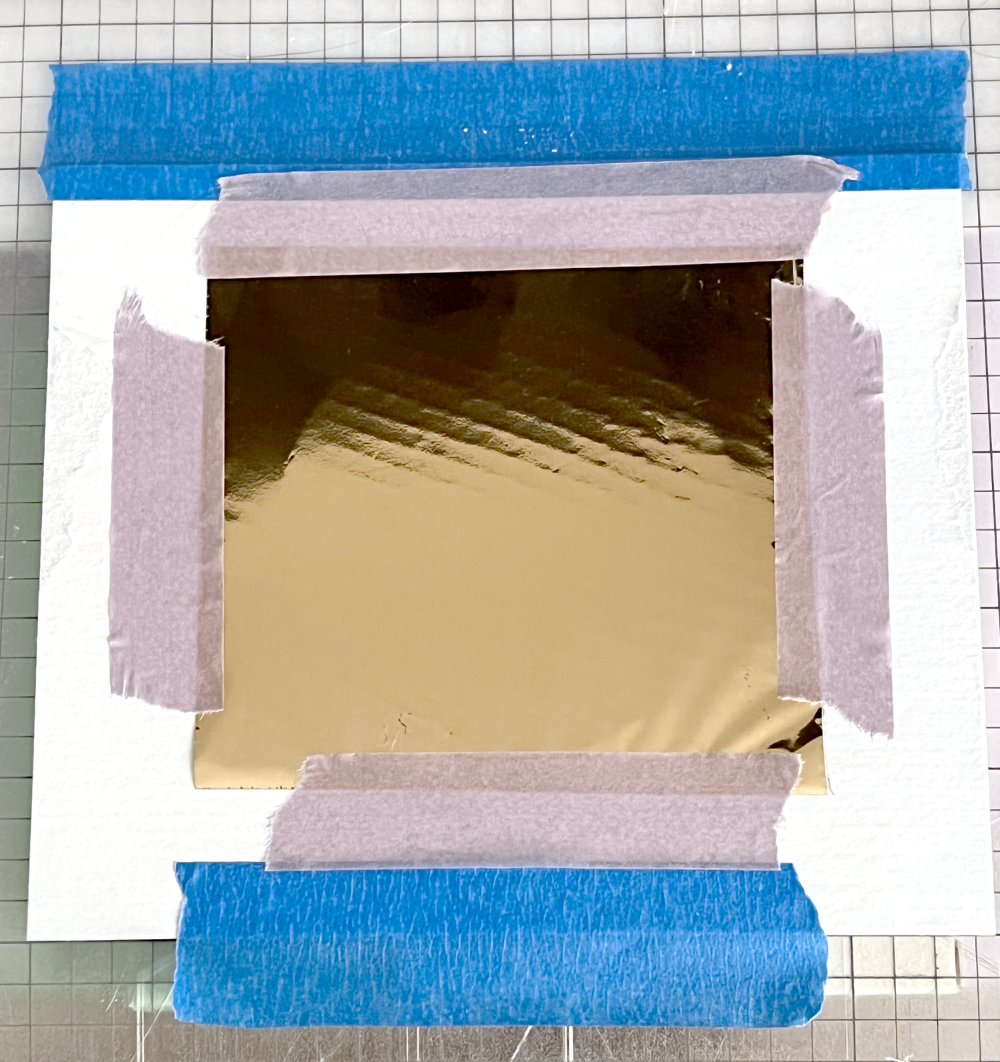
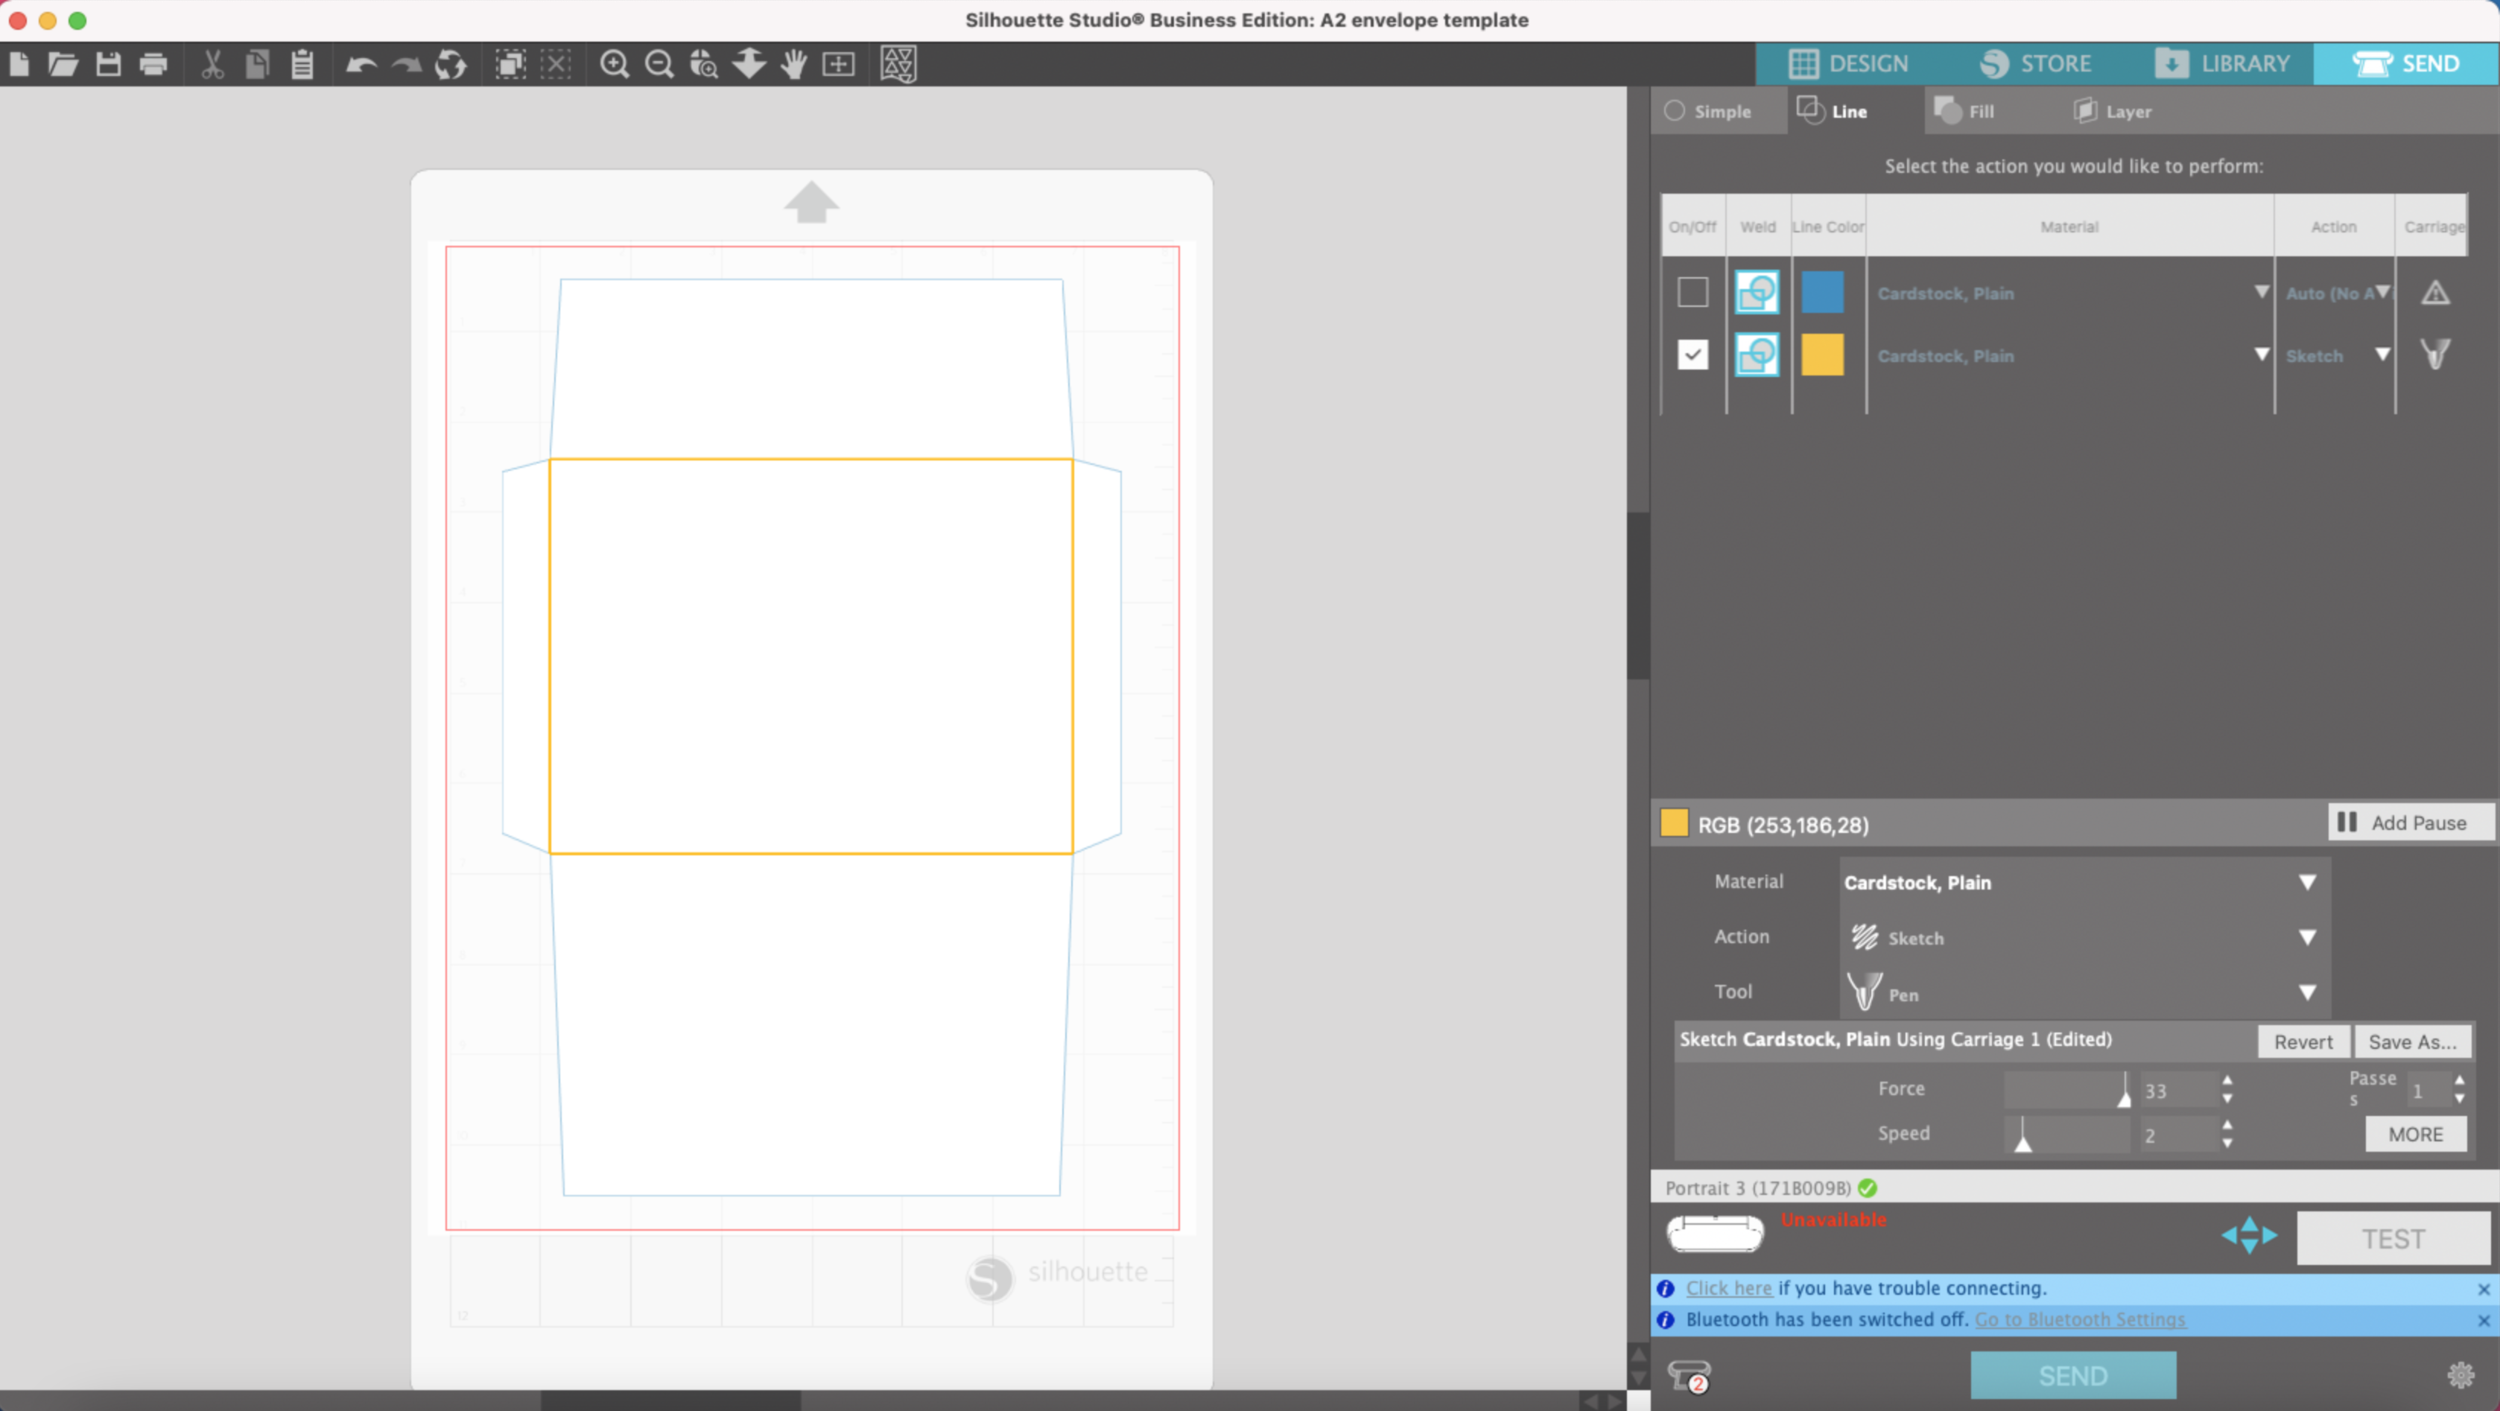
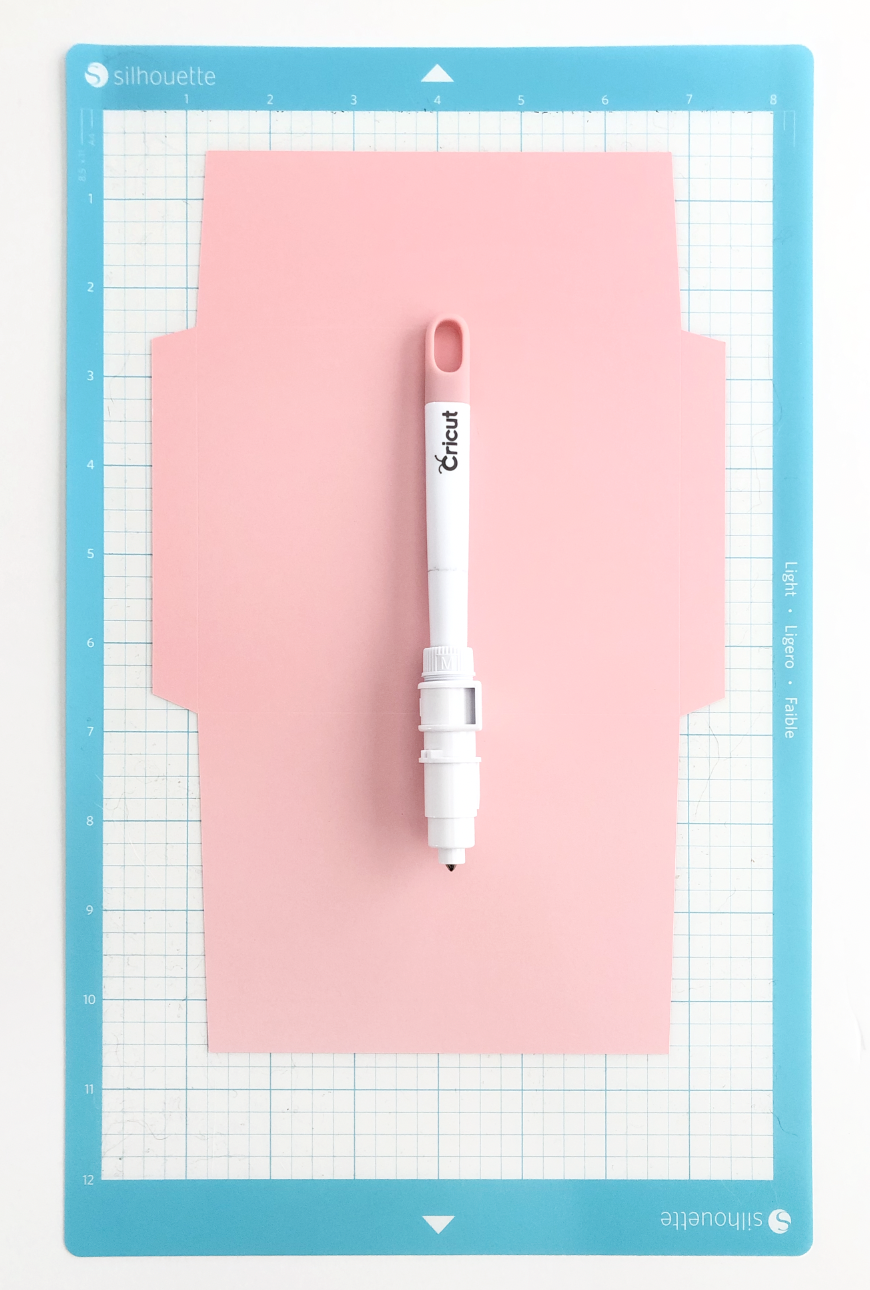
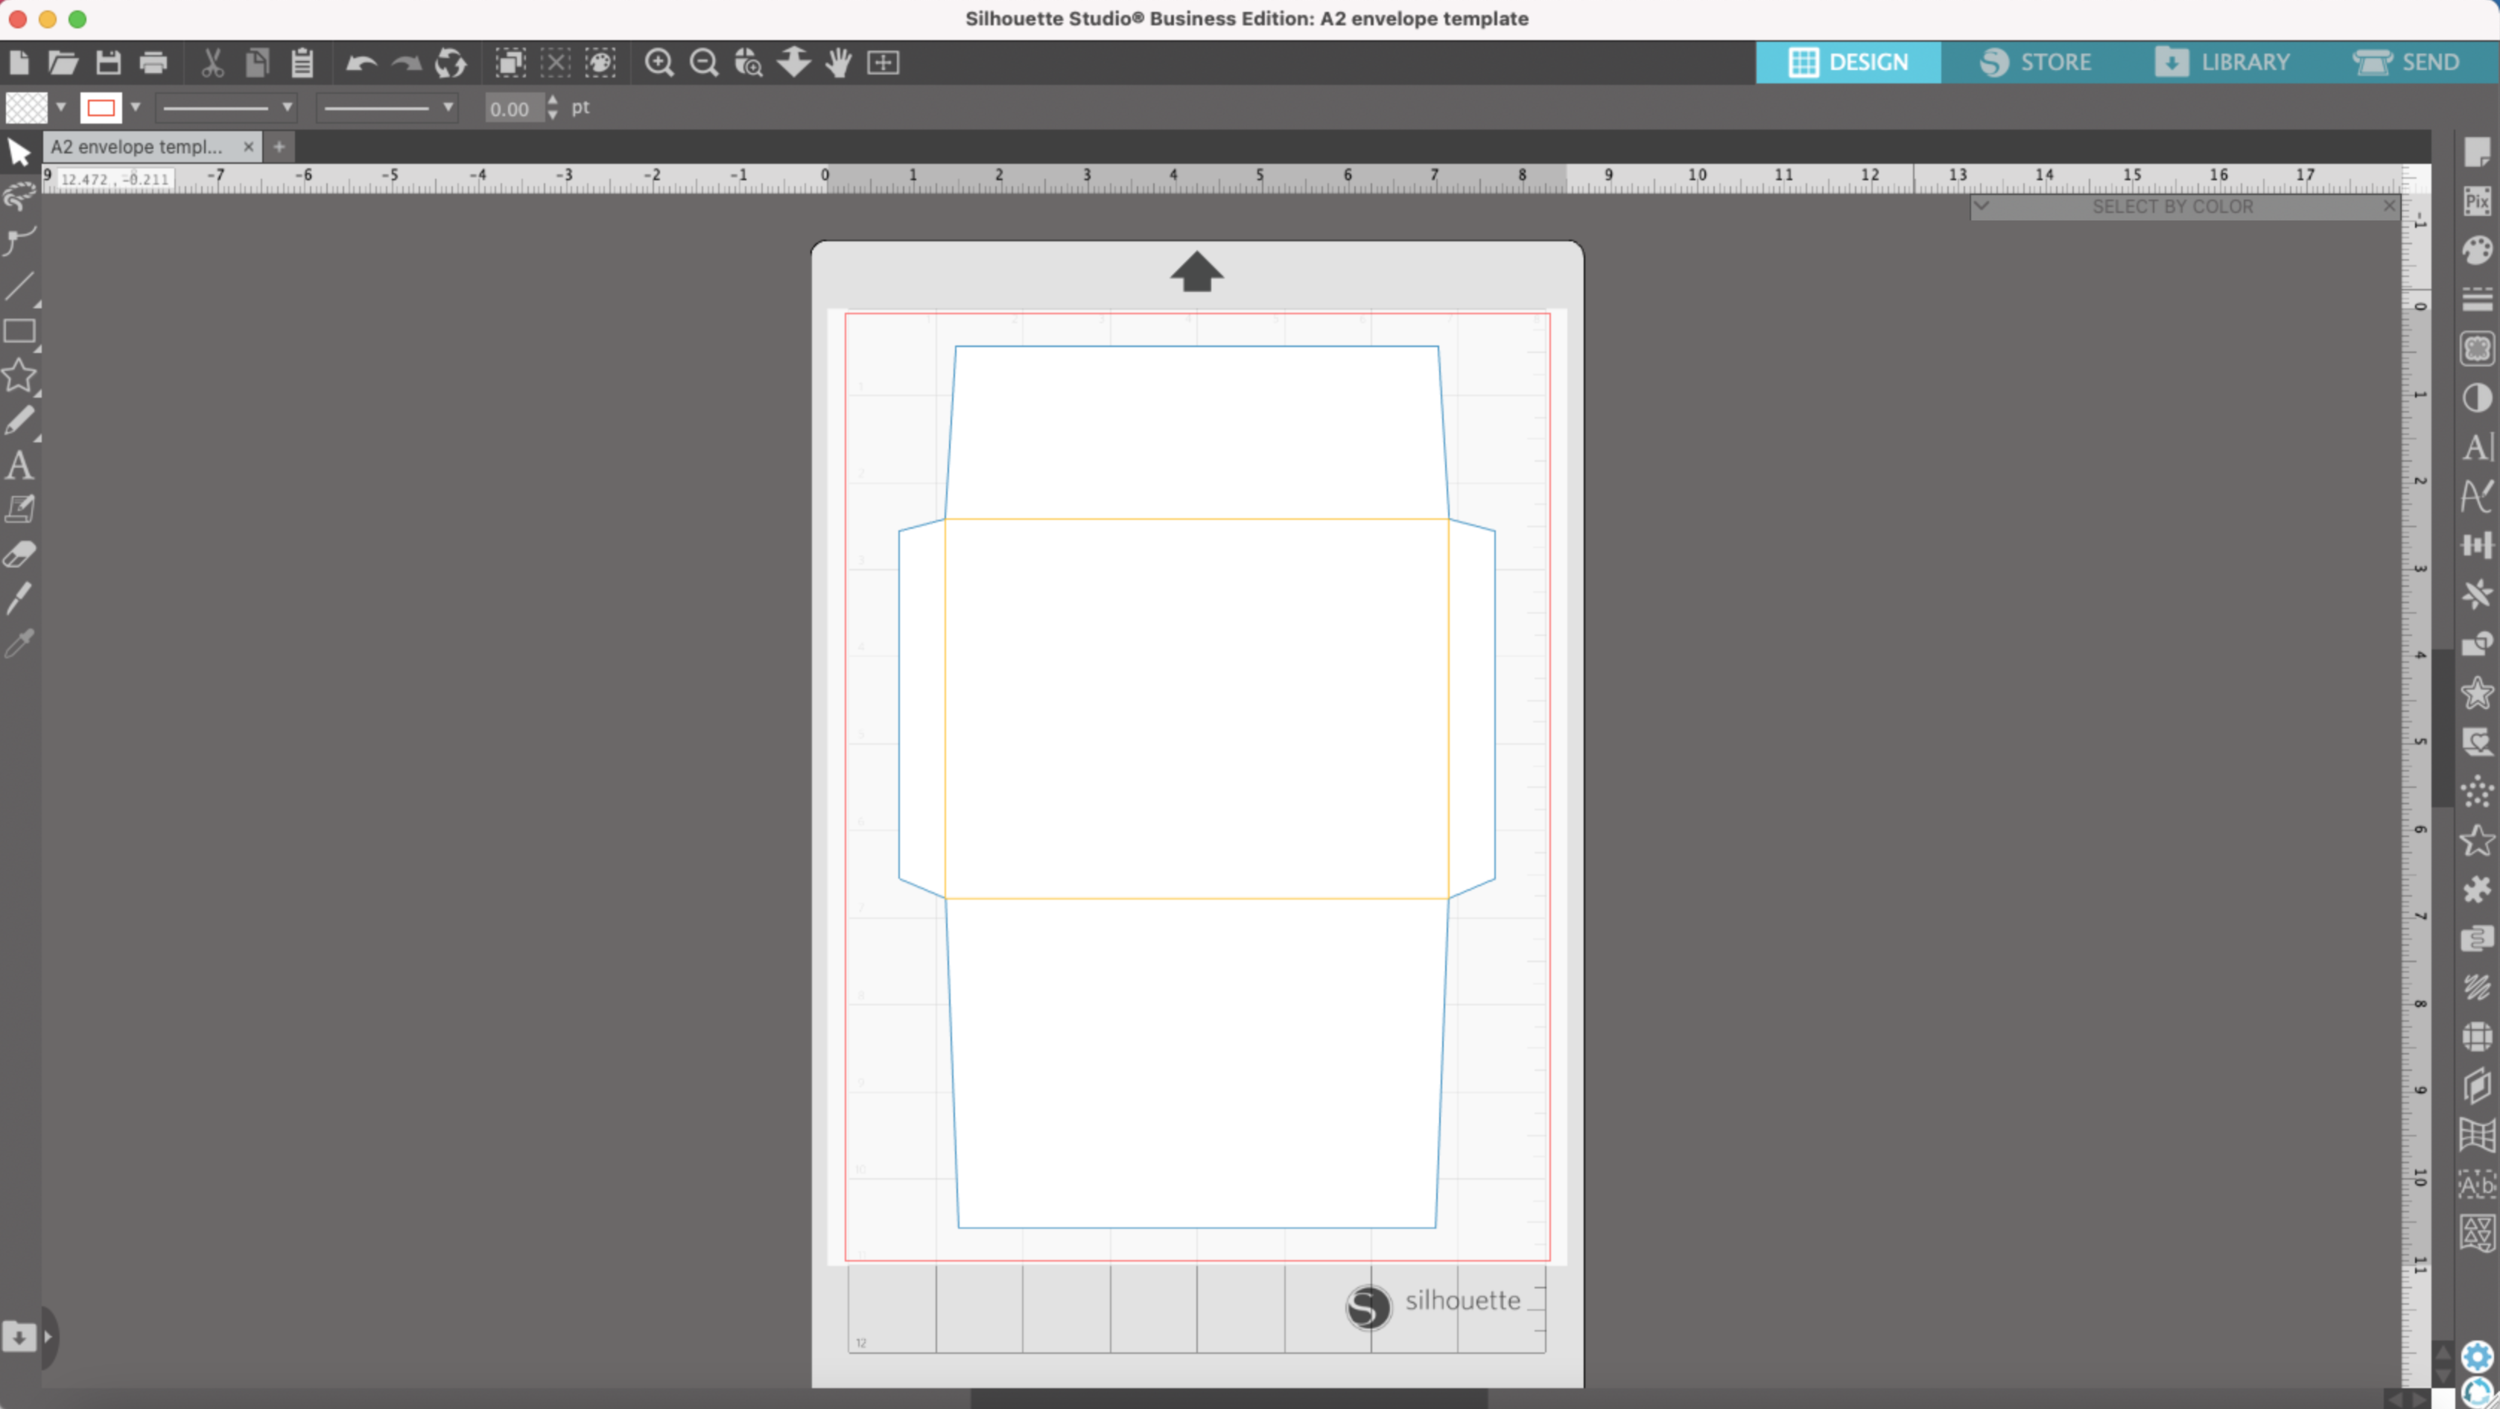
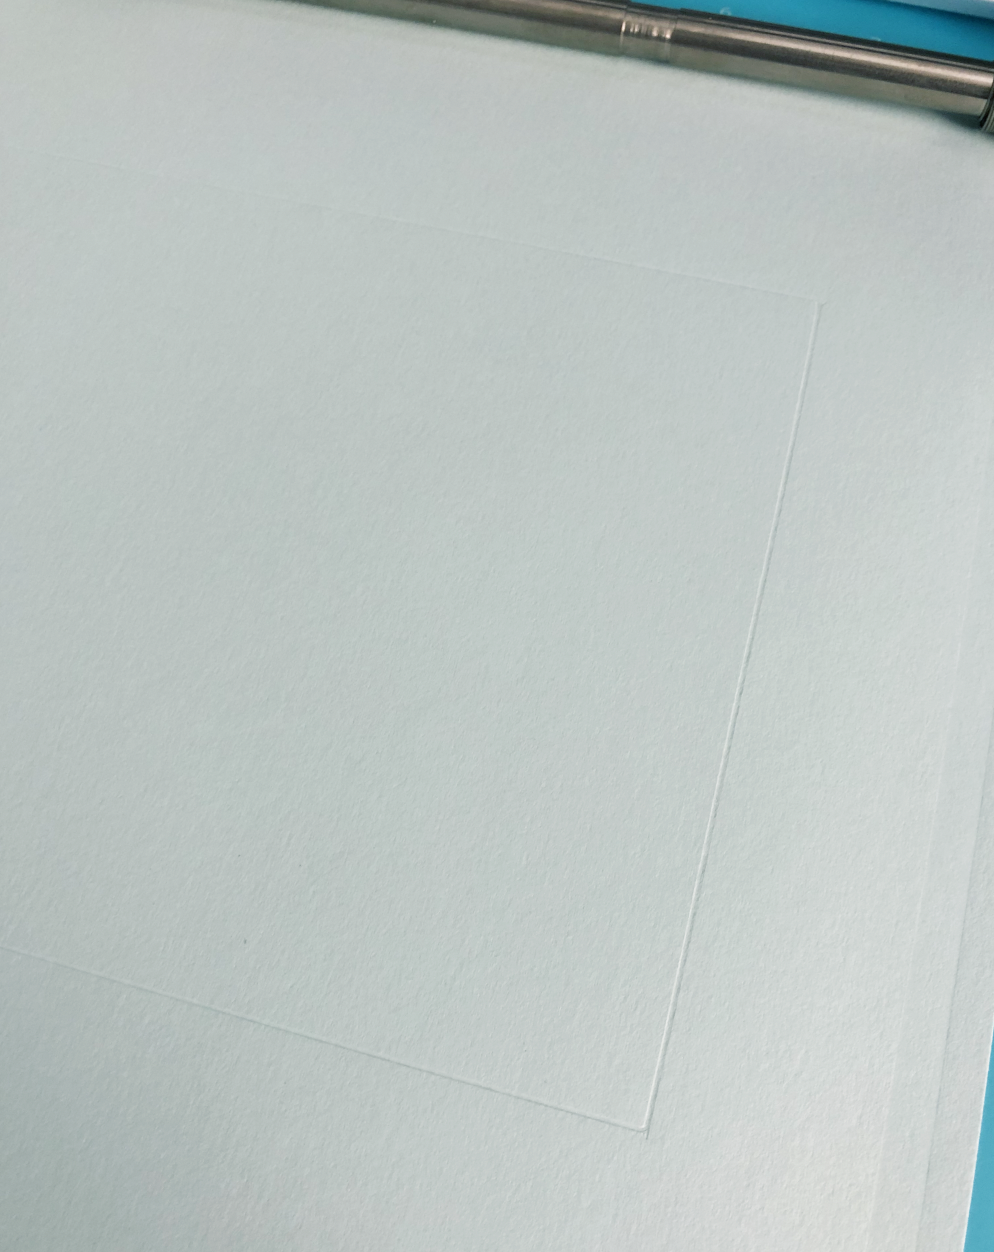
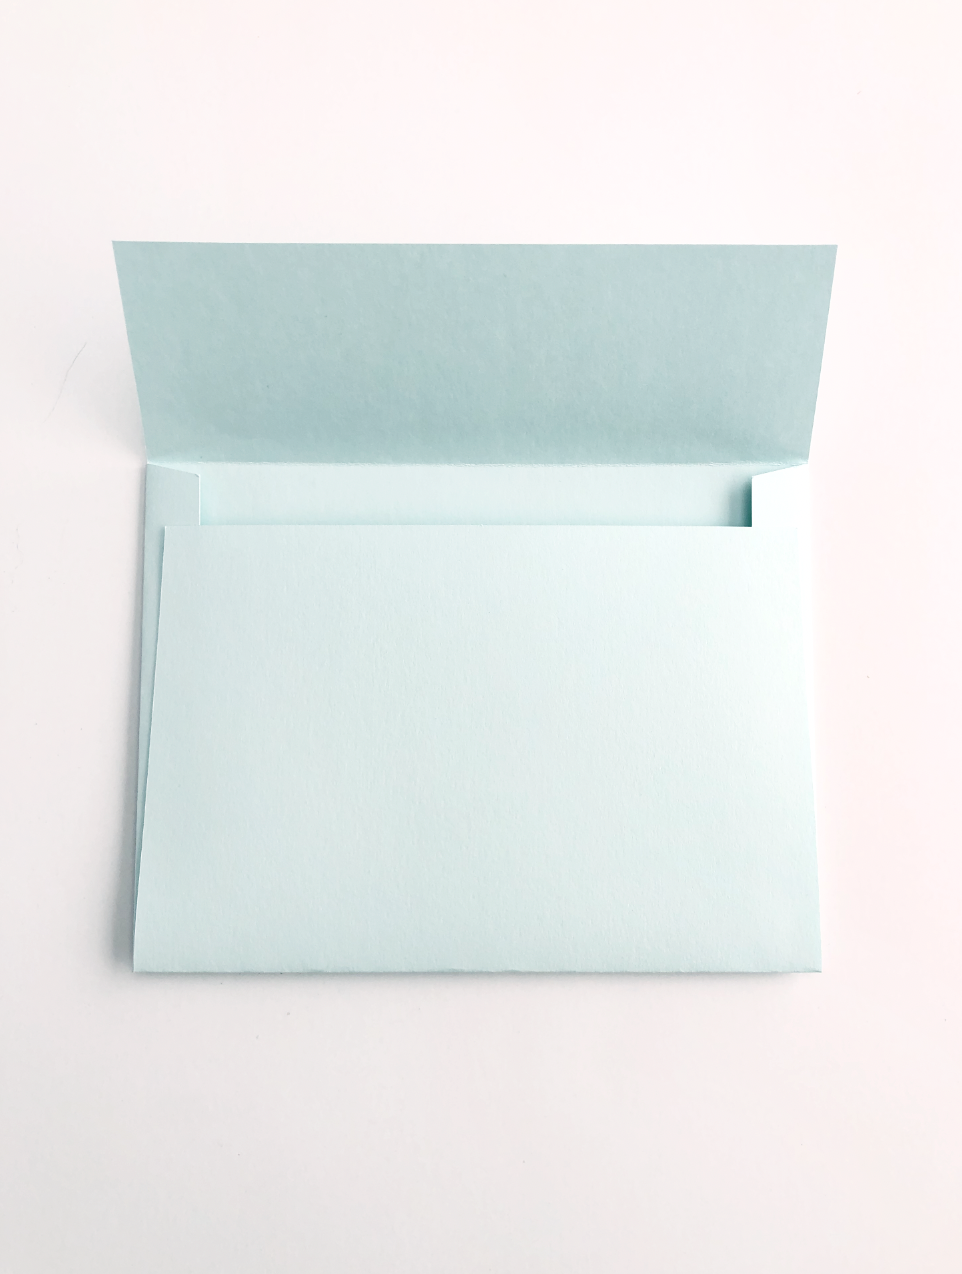
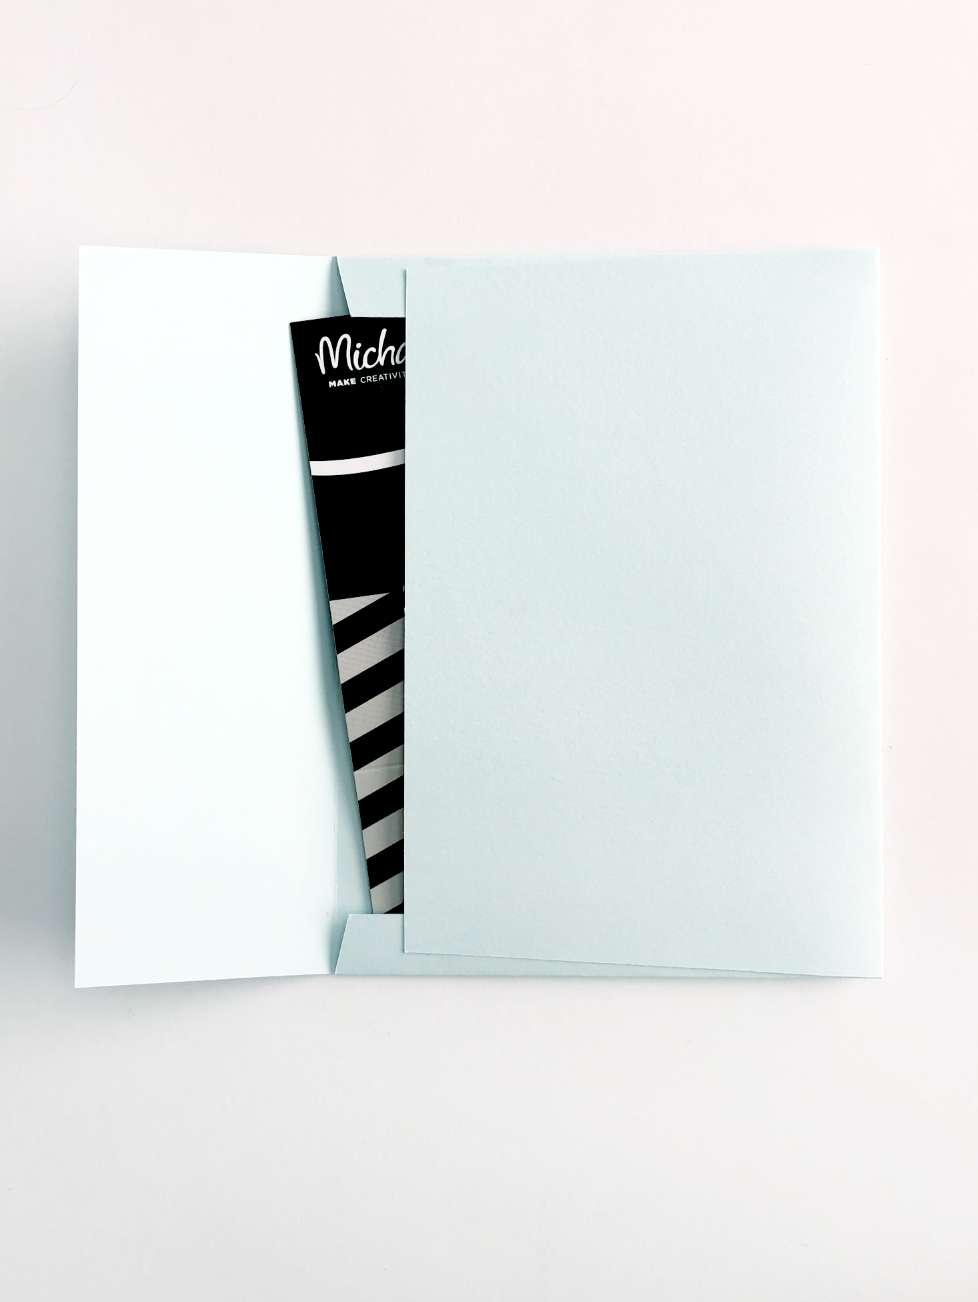
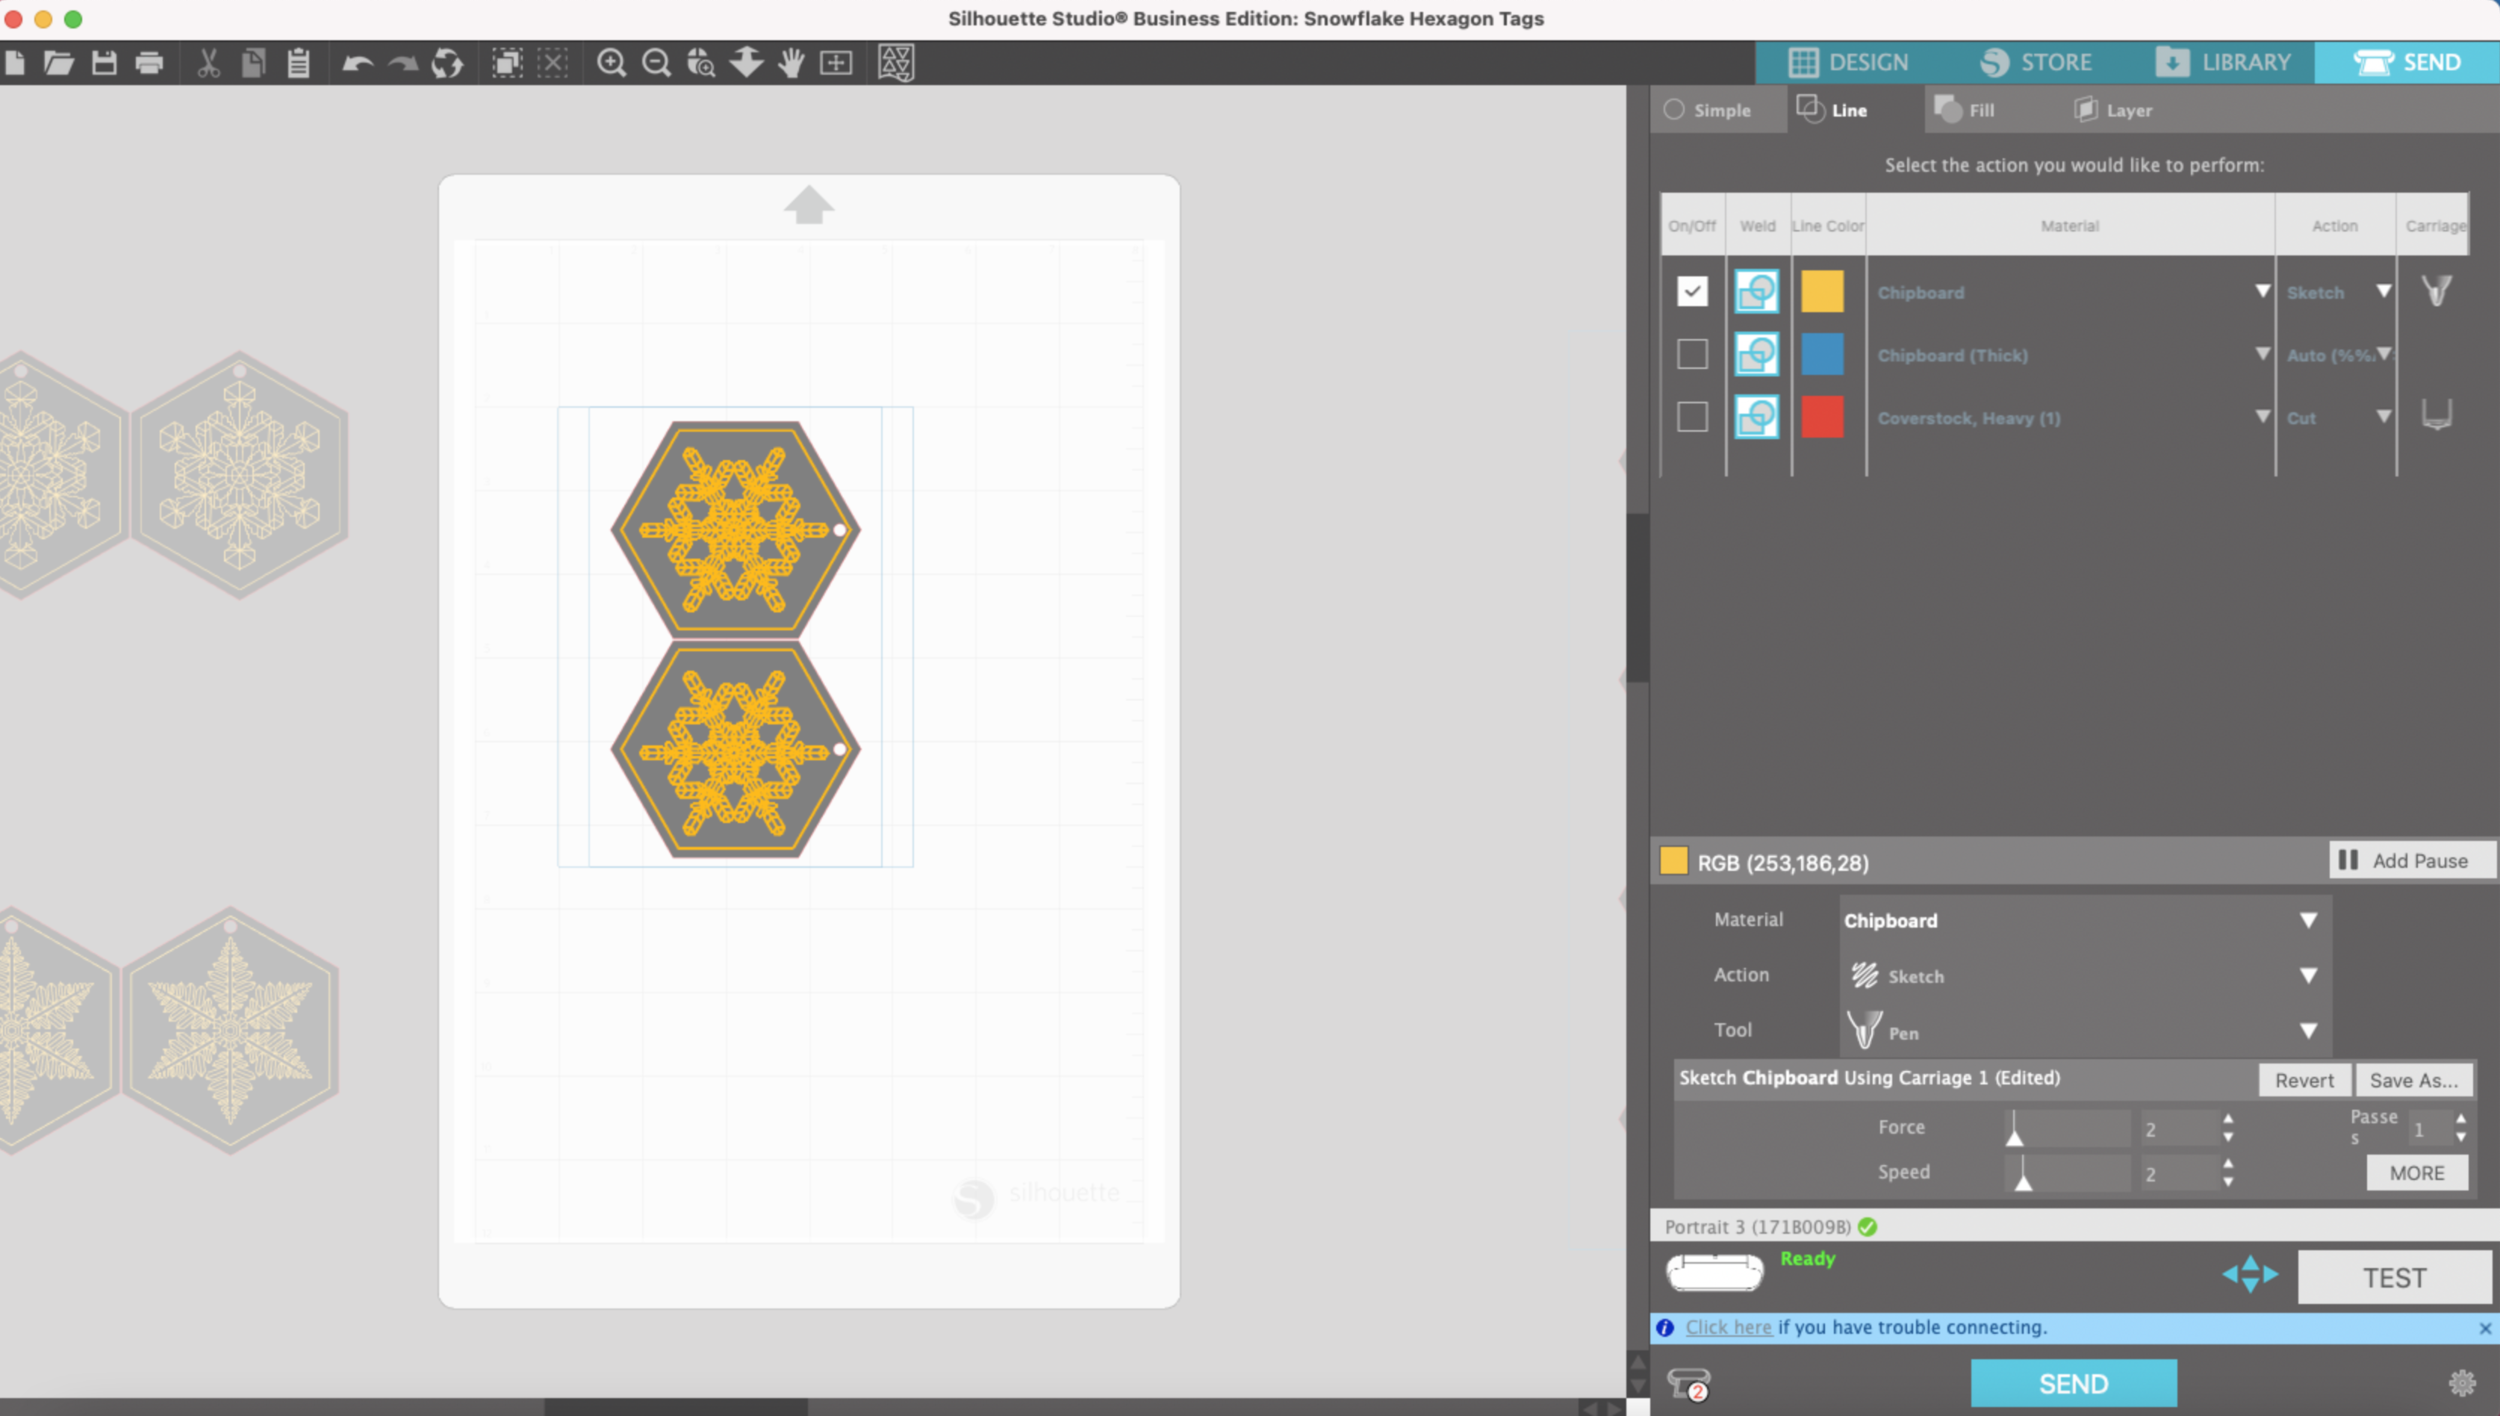
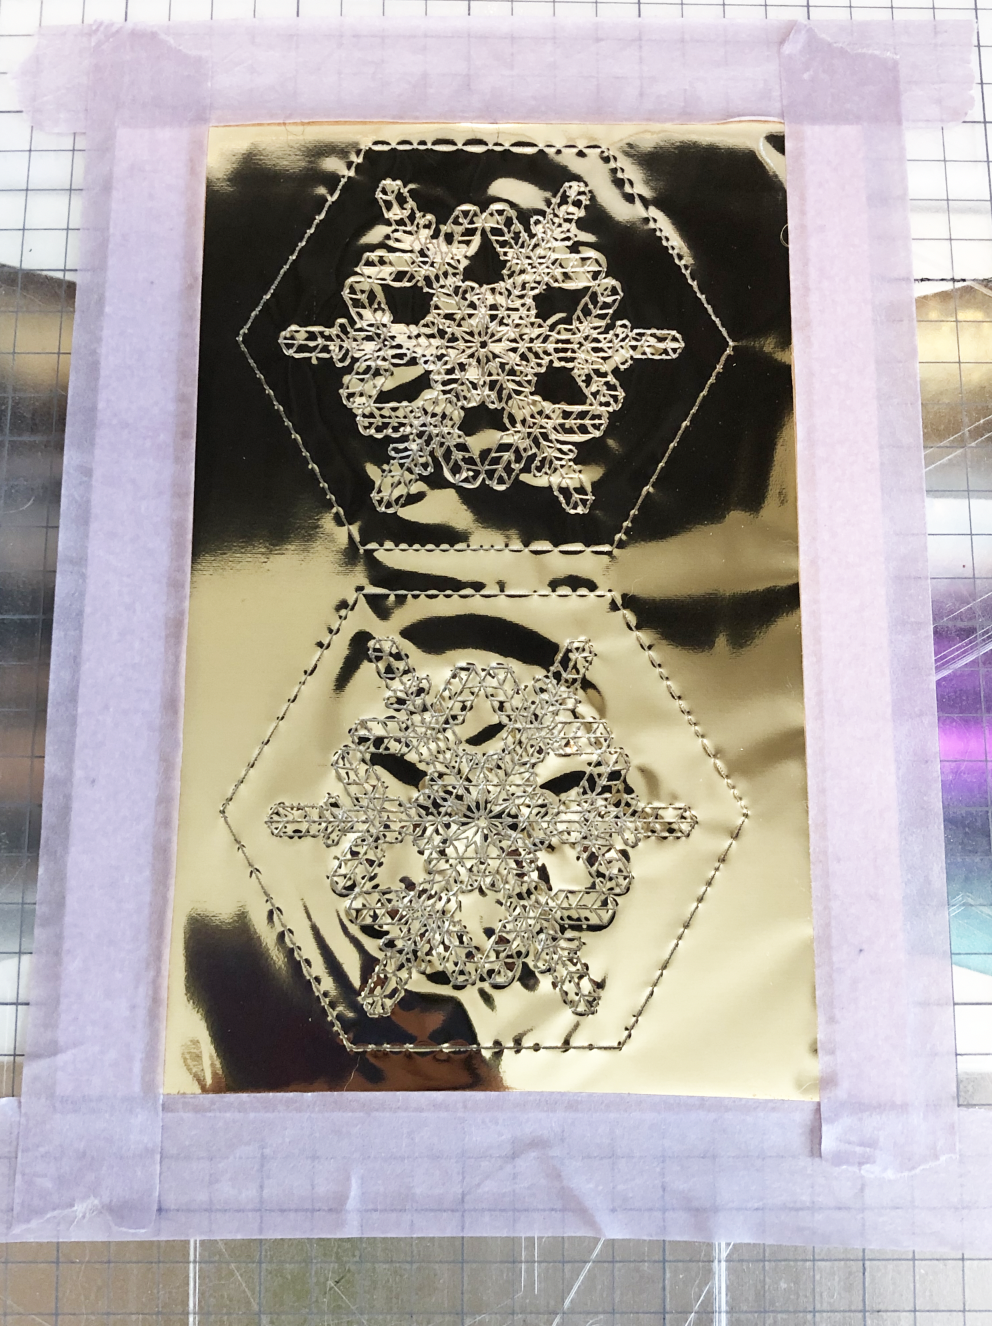
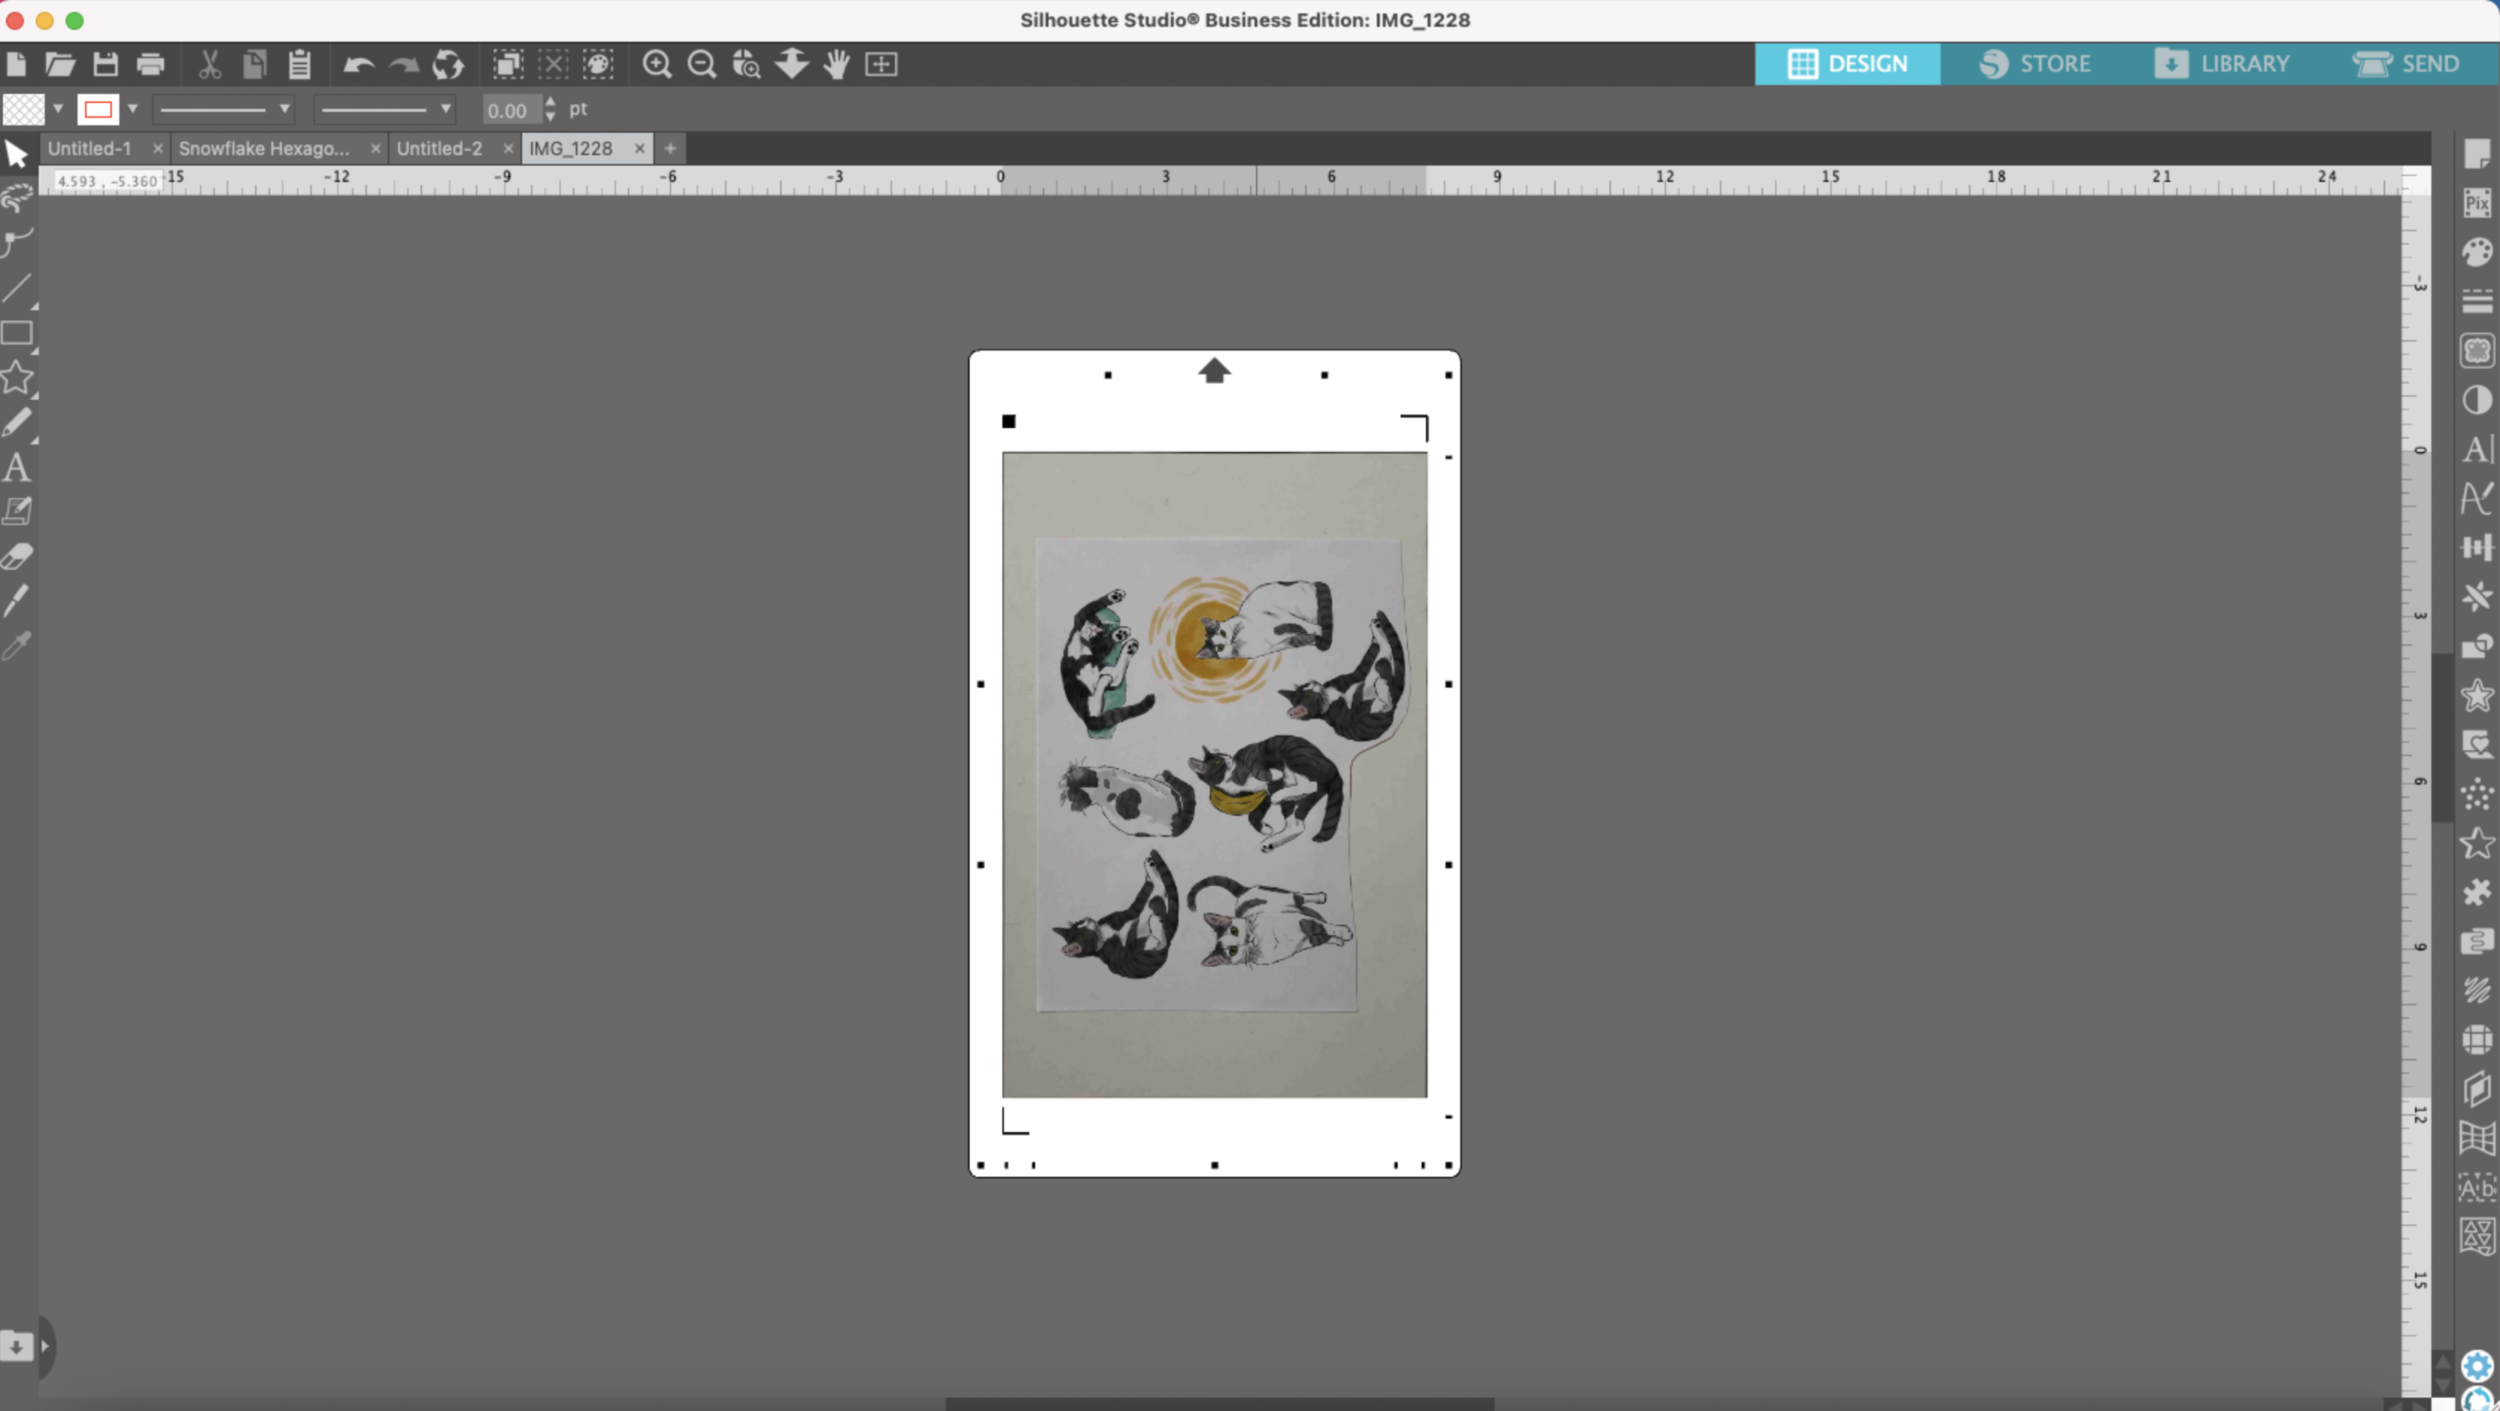
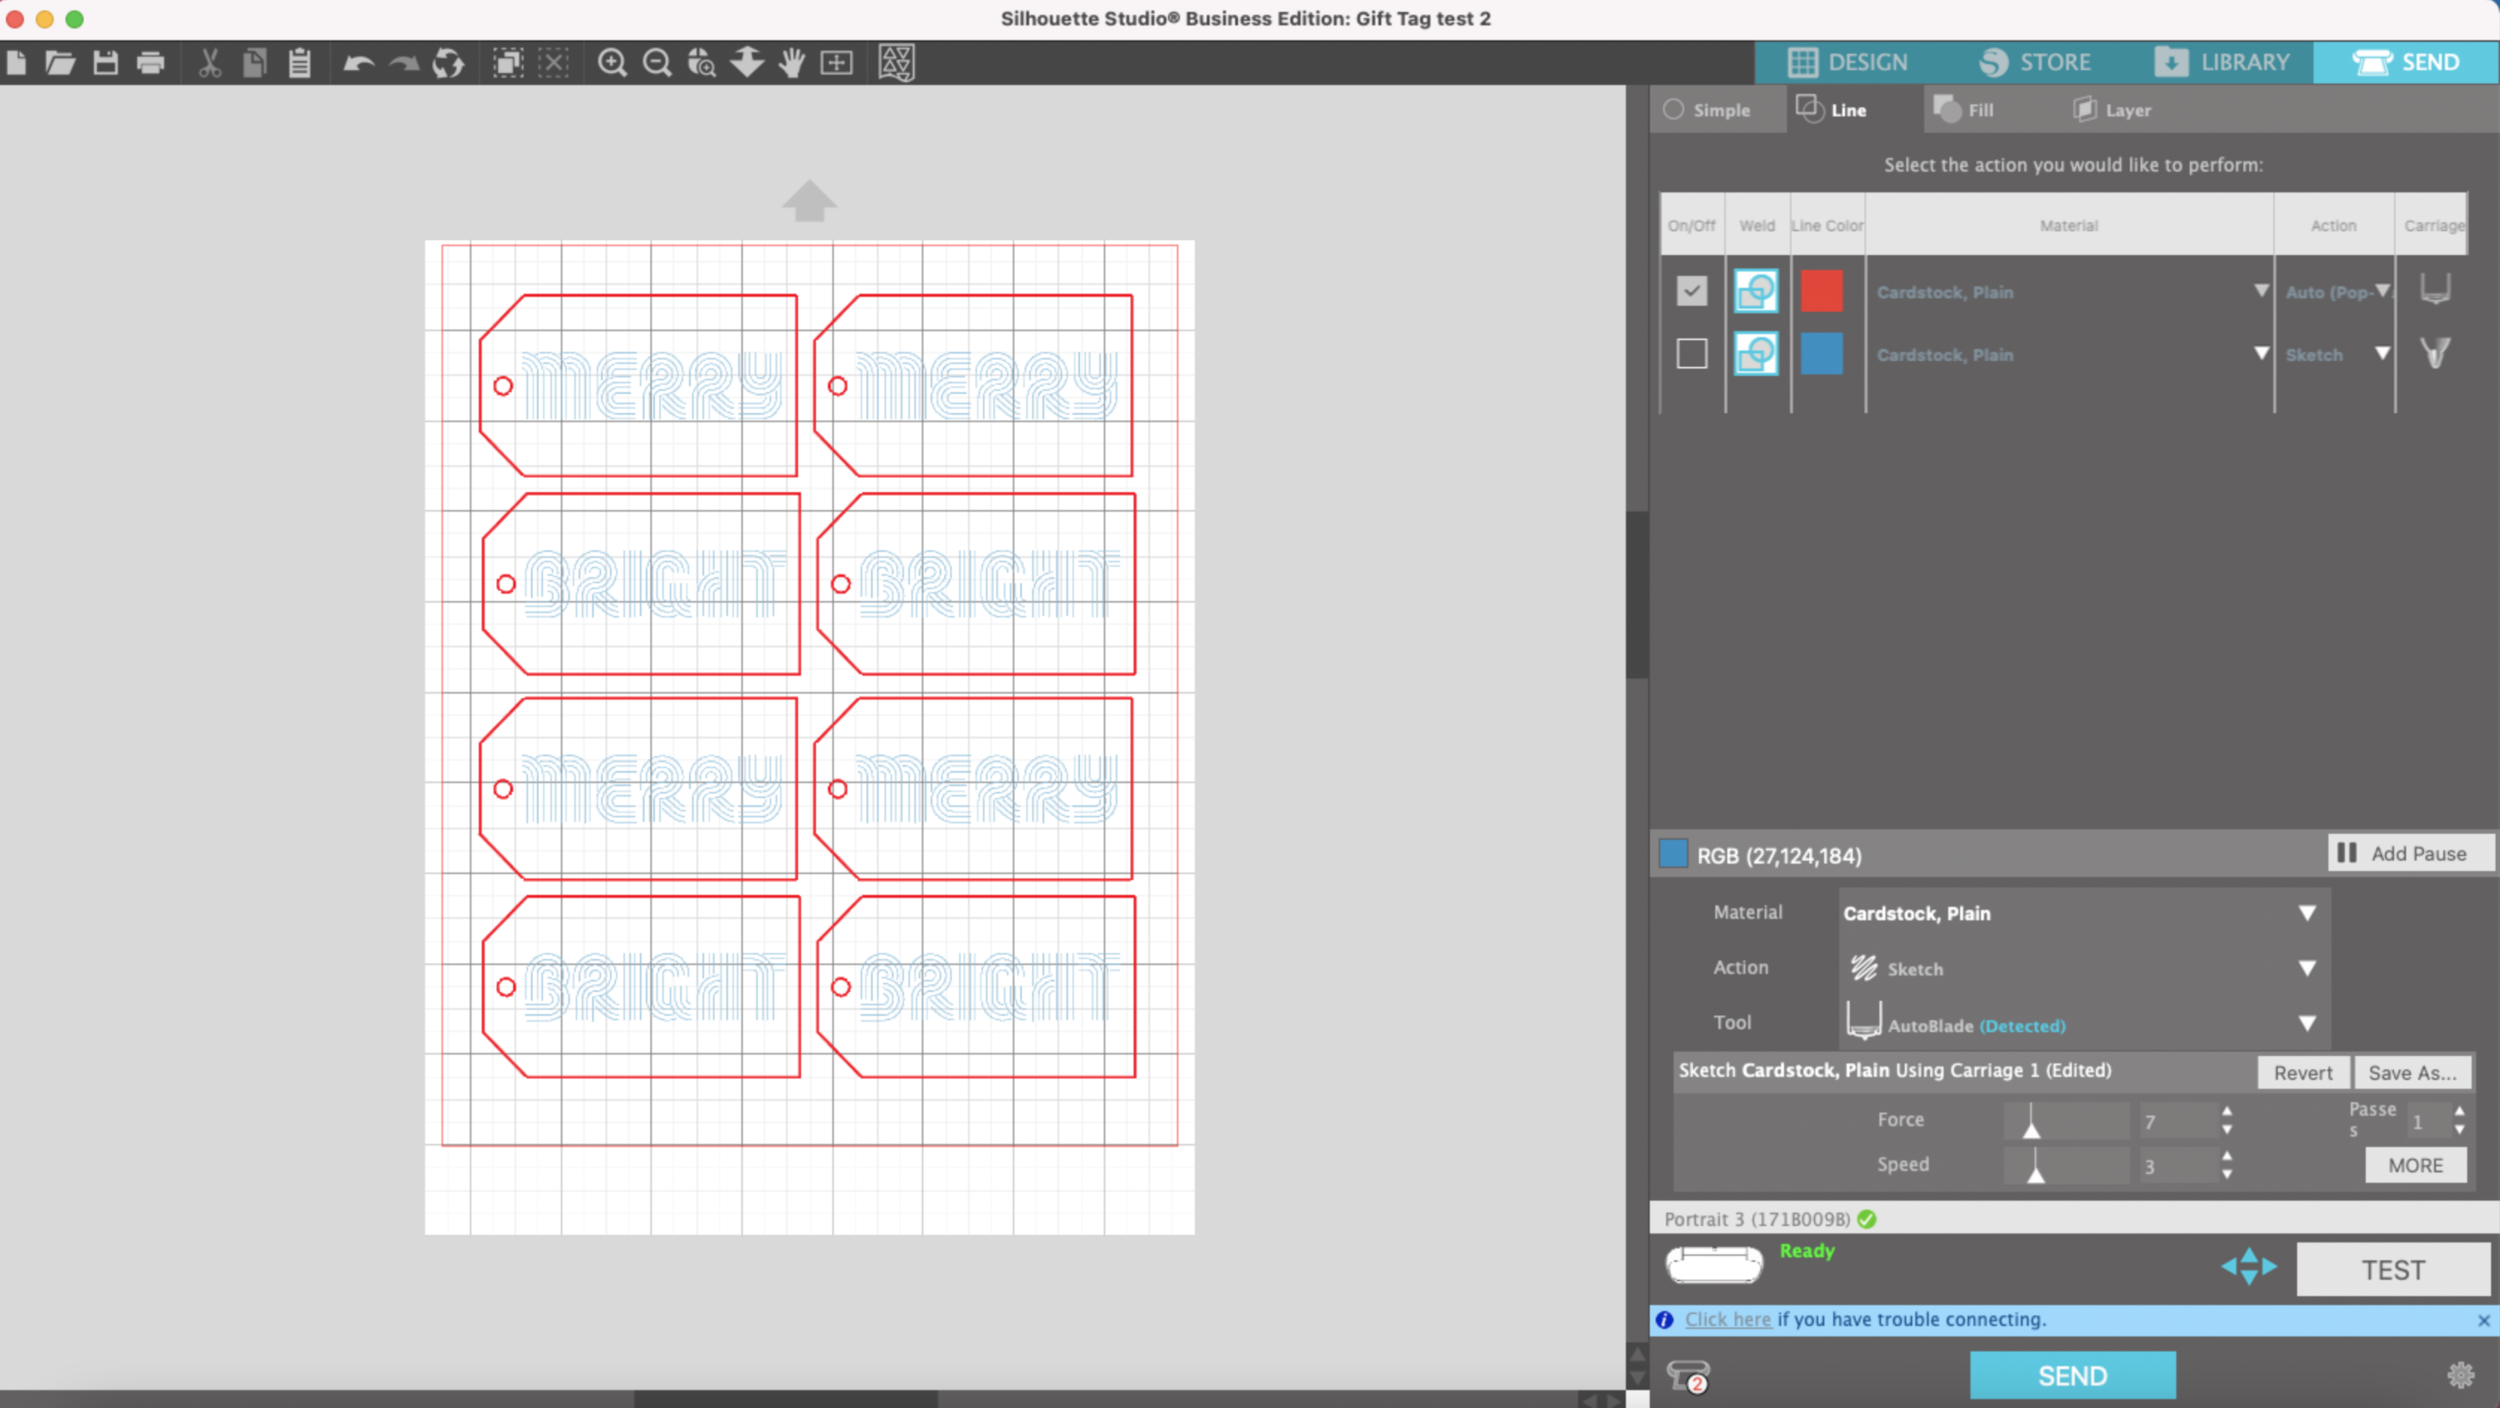
I have some simple concentric circles that I made in Silhouette Studio to test it out. I’m using some heavy cardstock and the We R Memory Keepers Gold Foil.

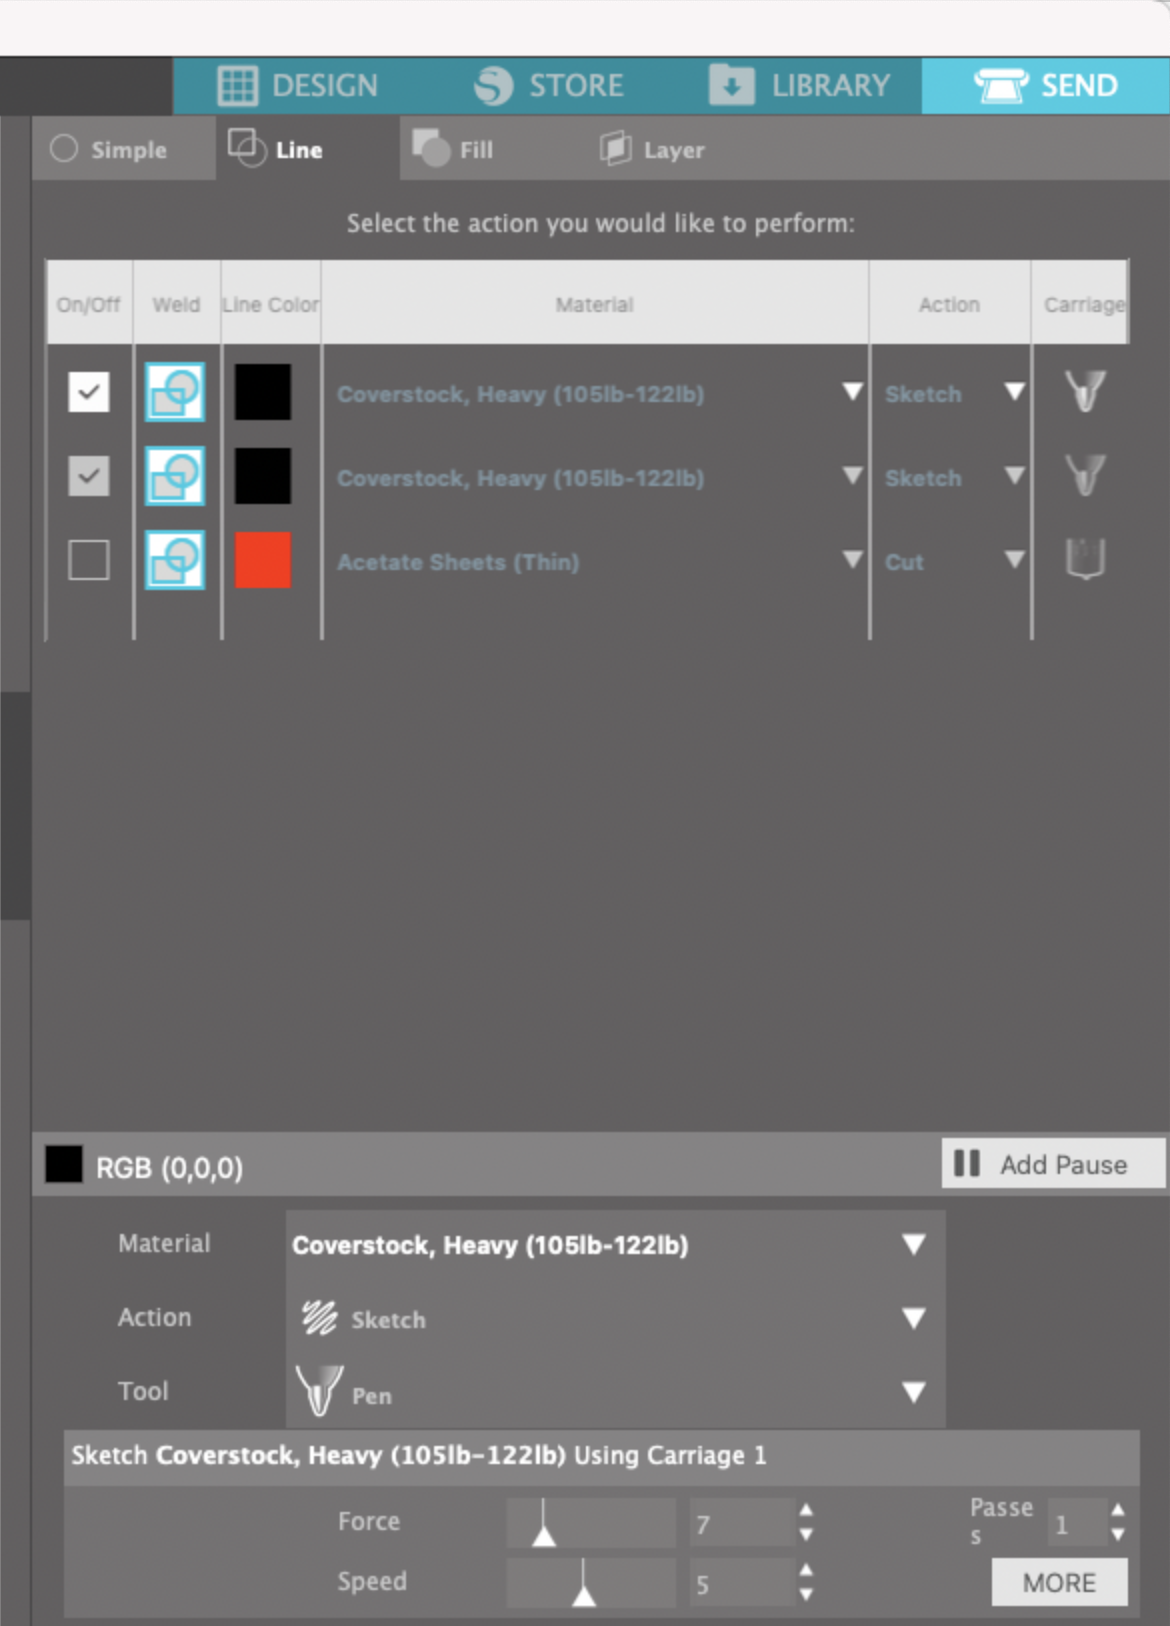
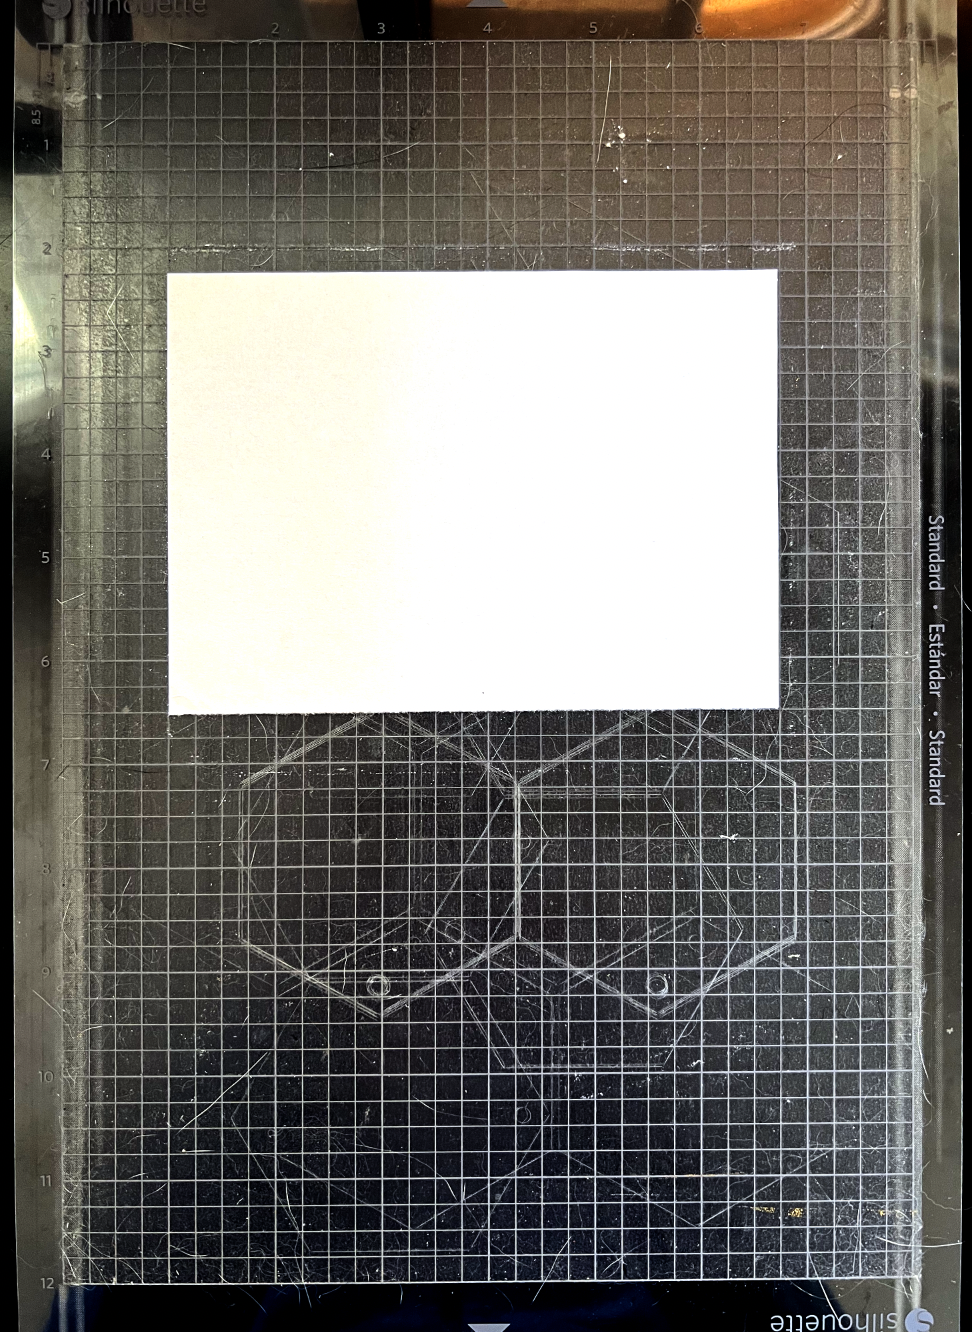
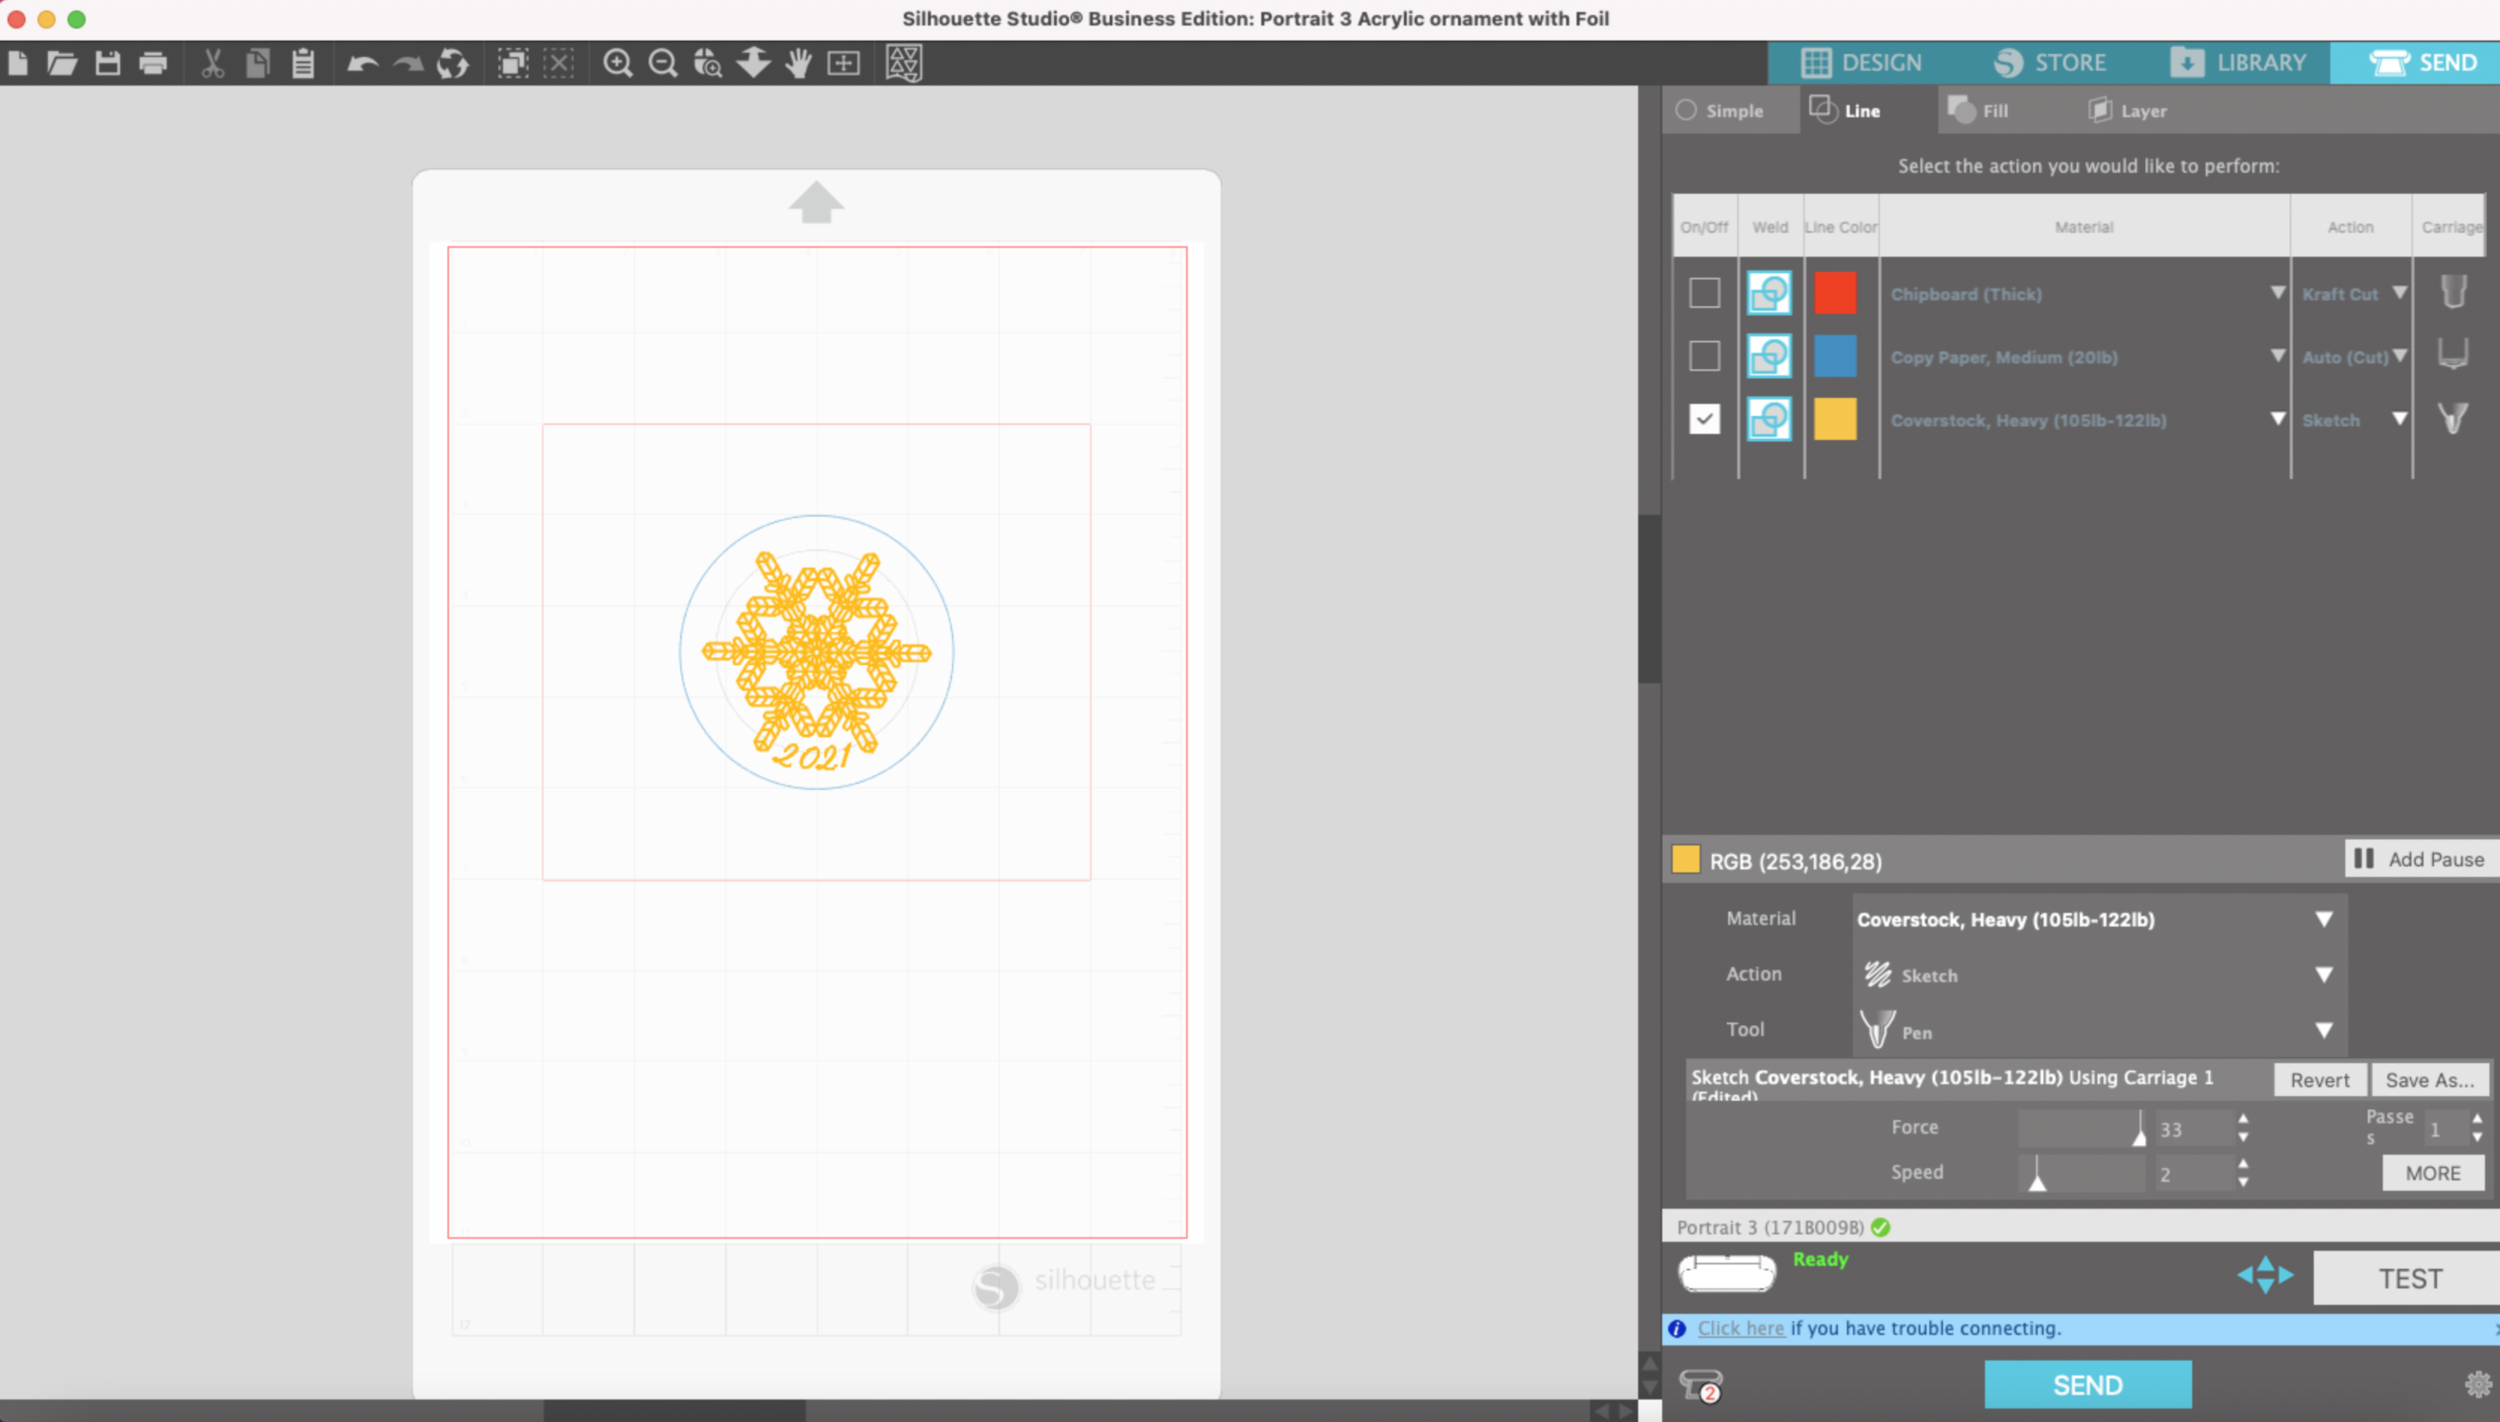
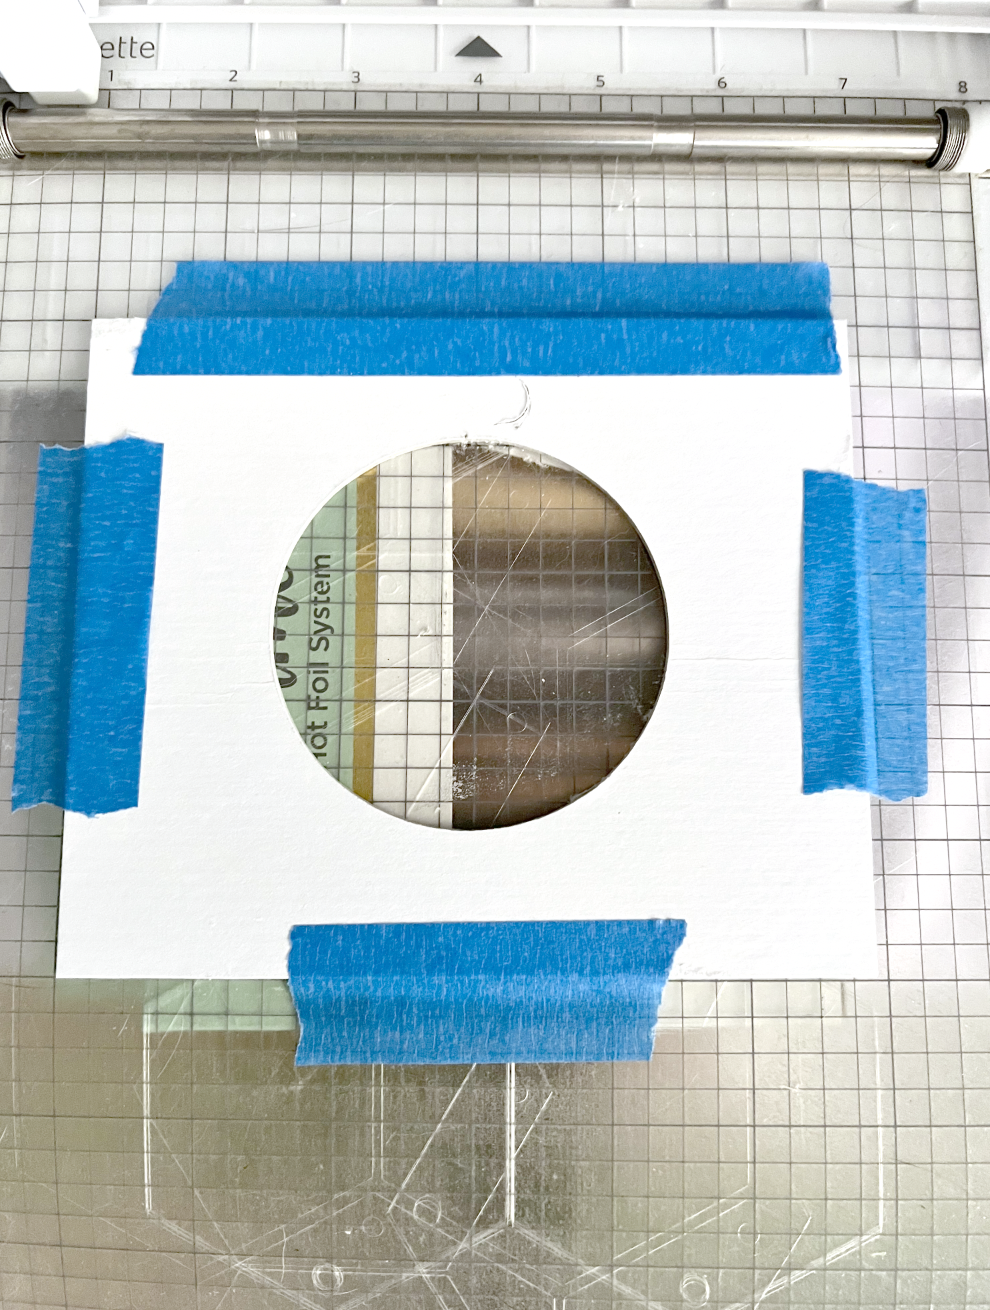
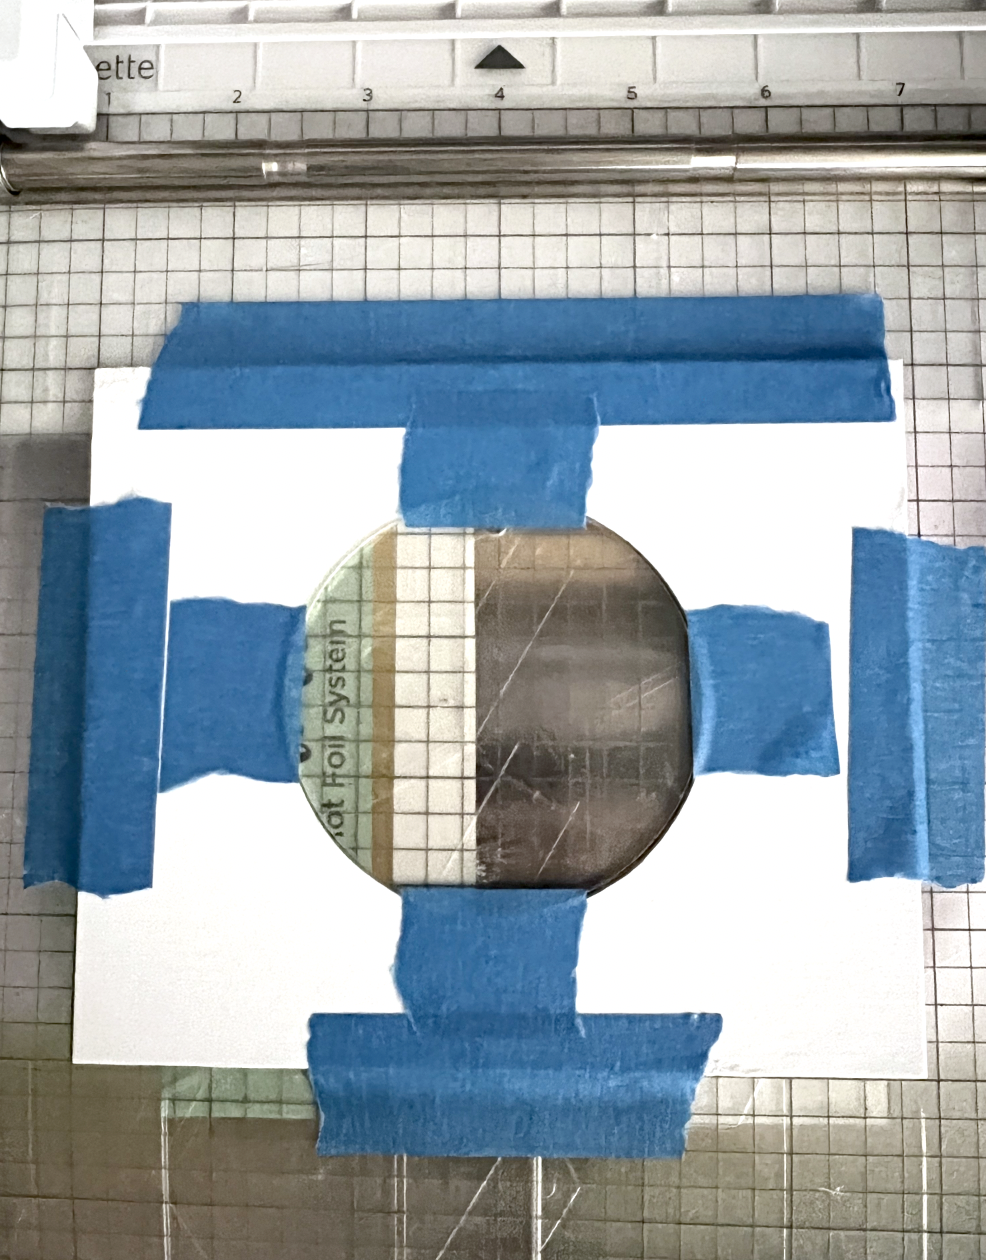
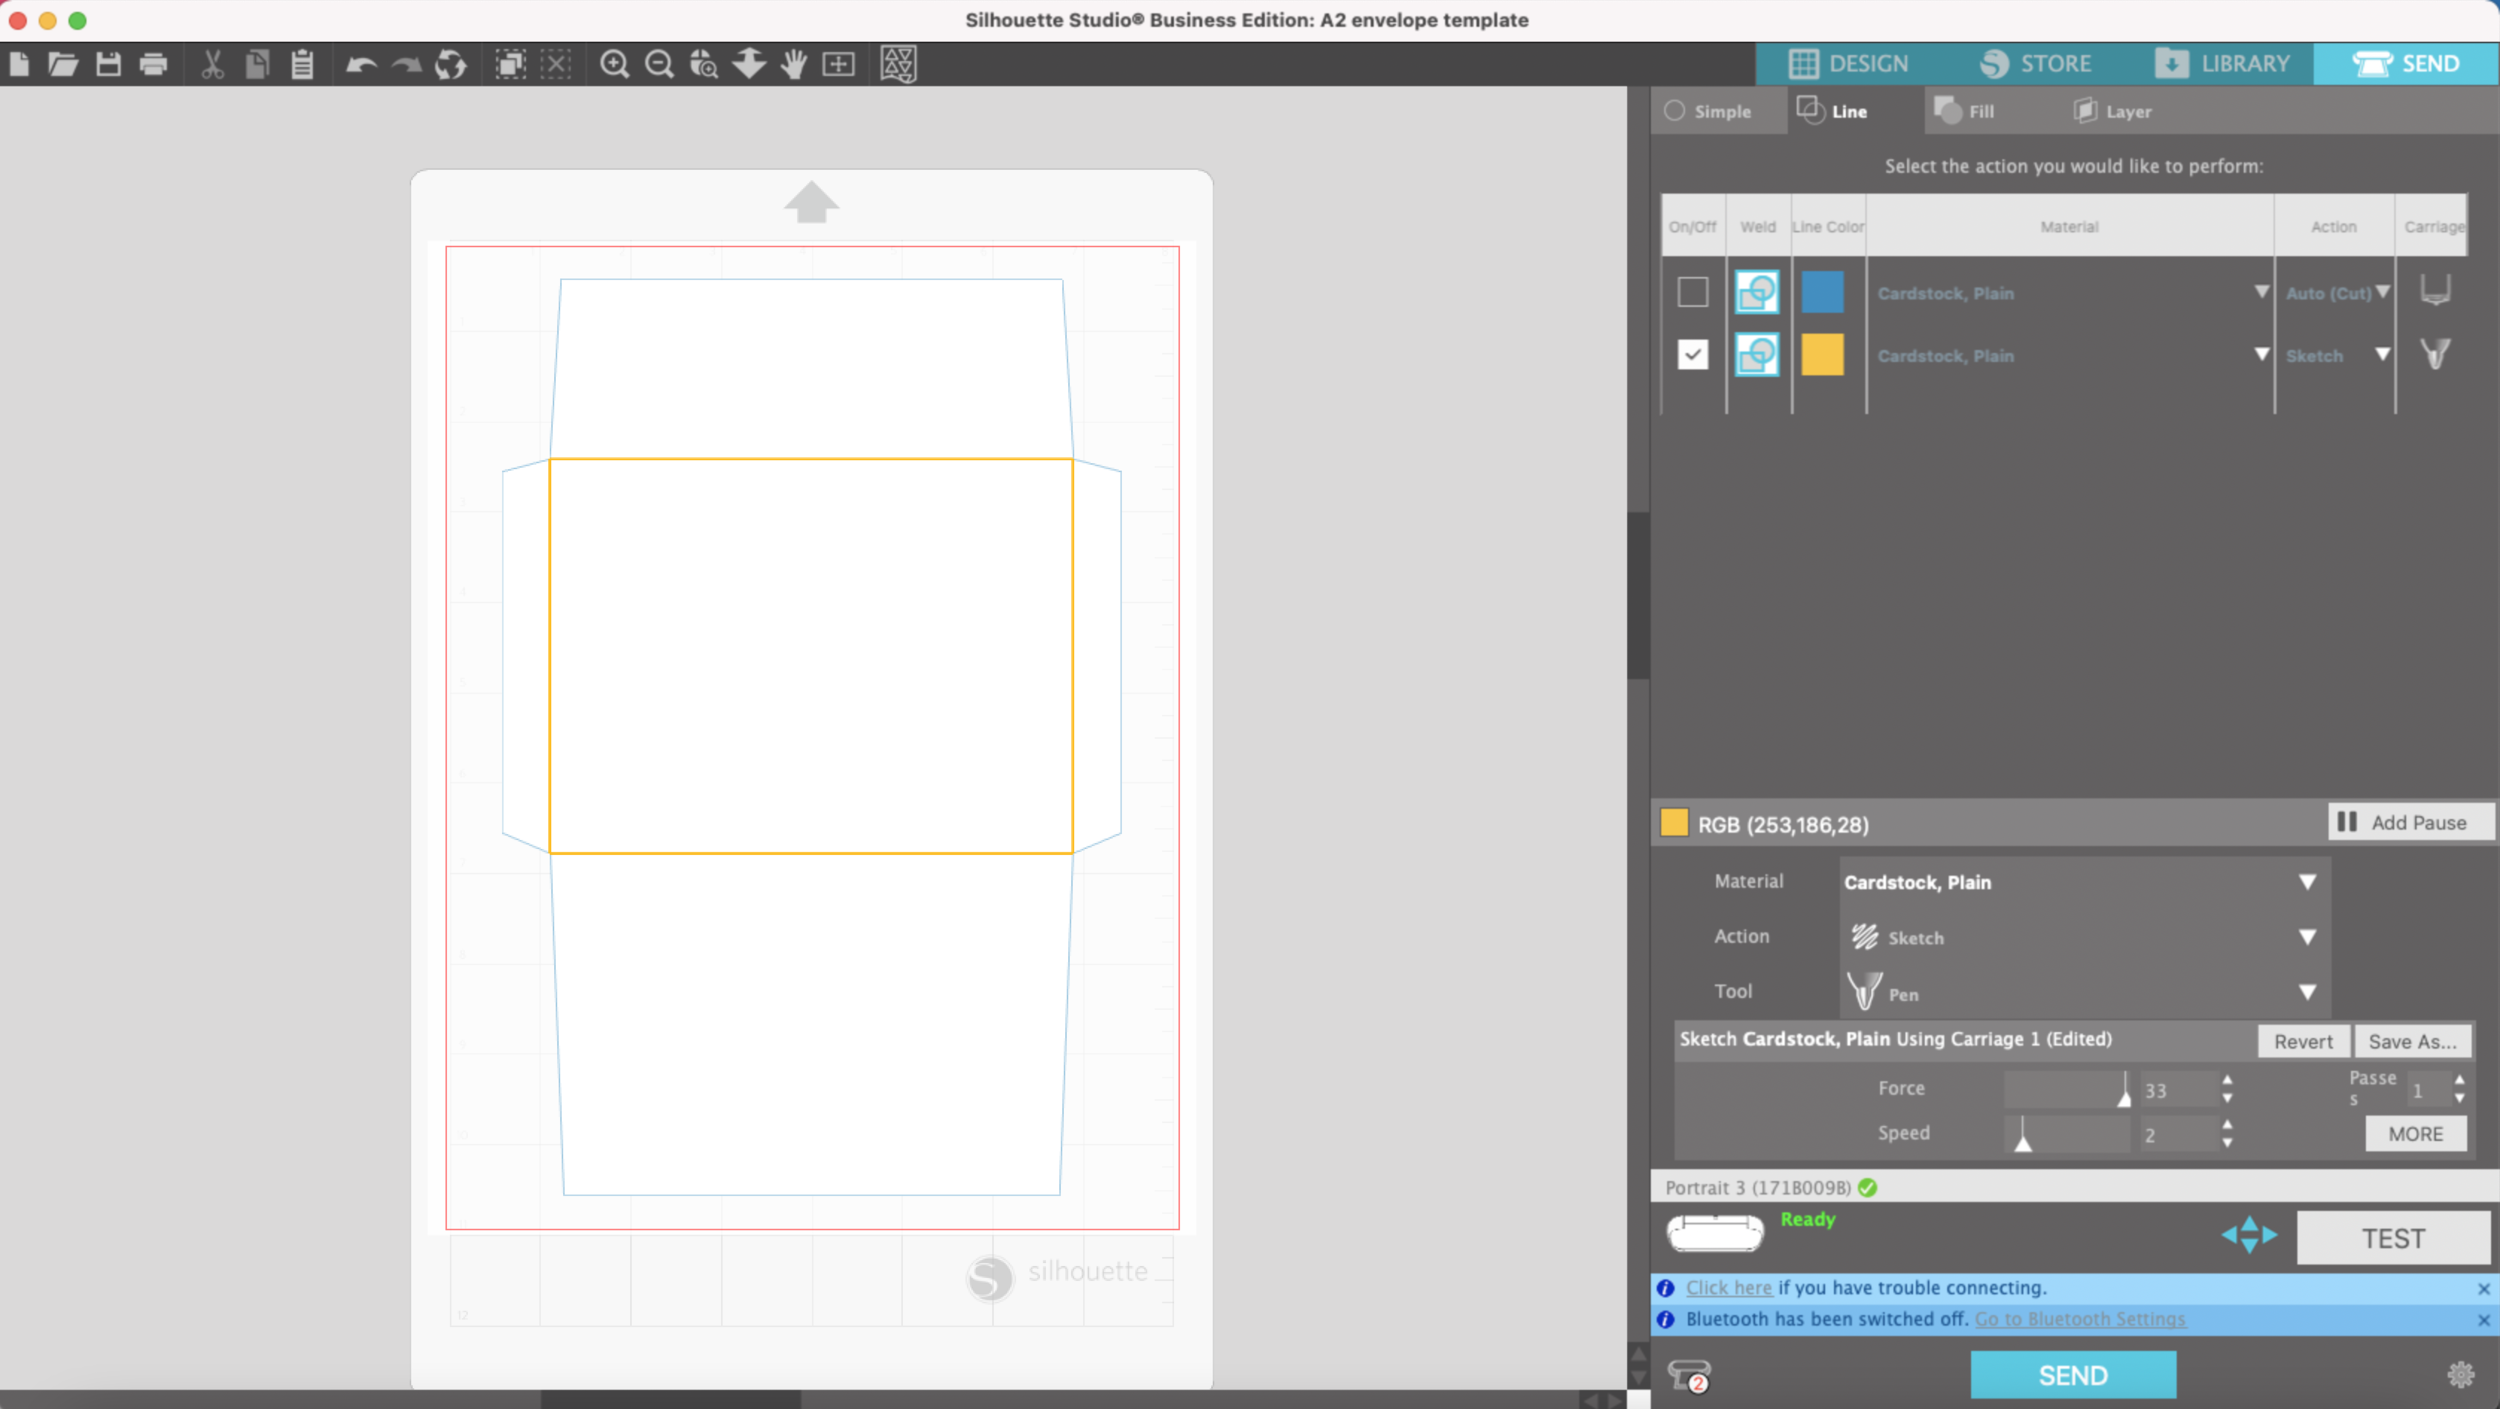
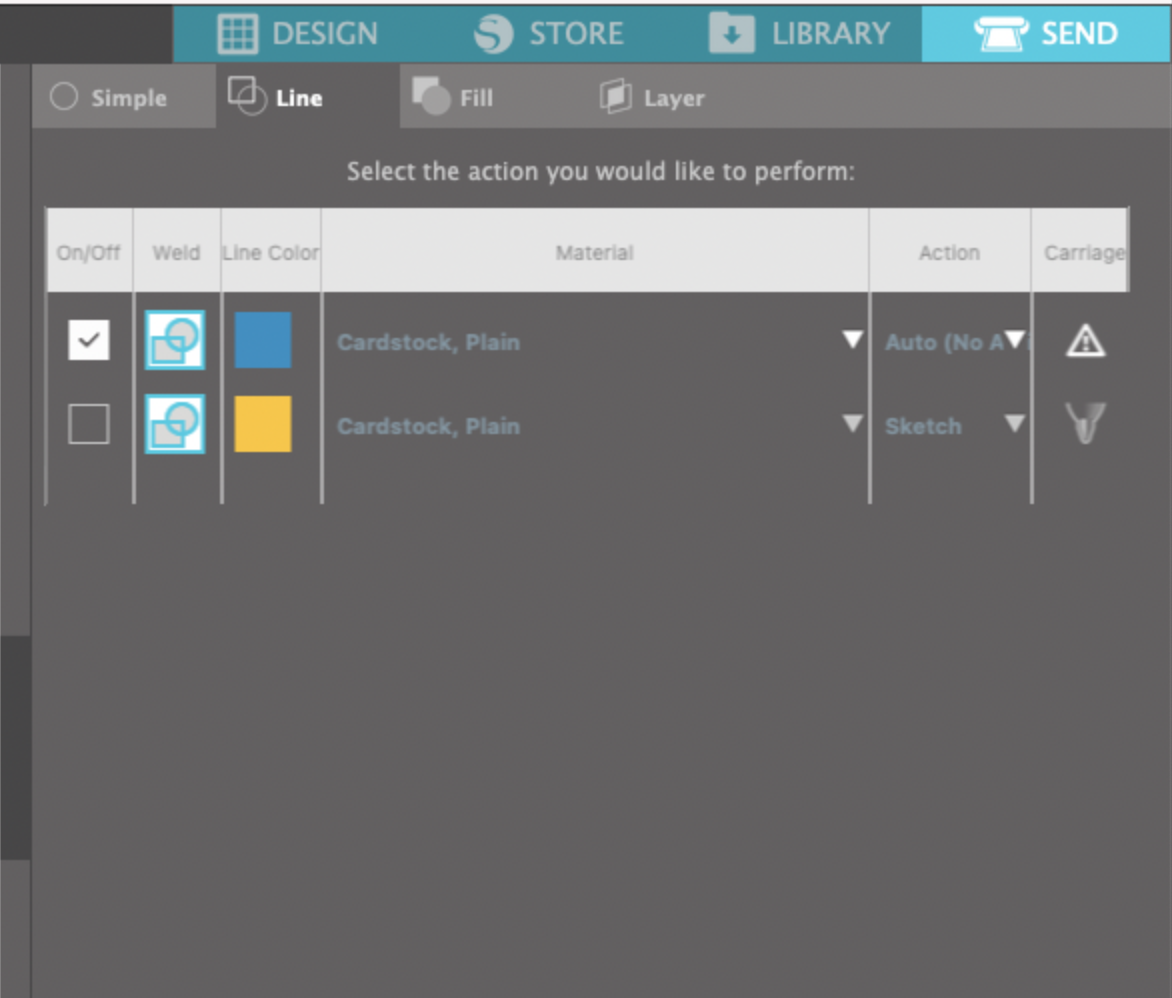
After giving it a few minutes to warm up, I loaded my mat into the machine and pressed Send.

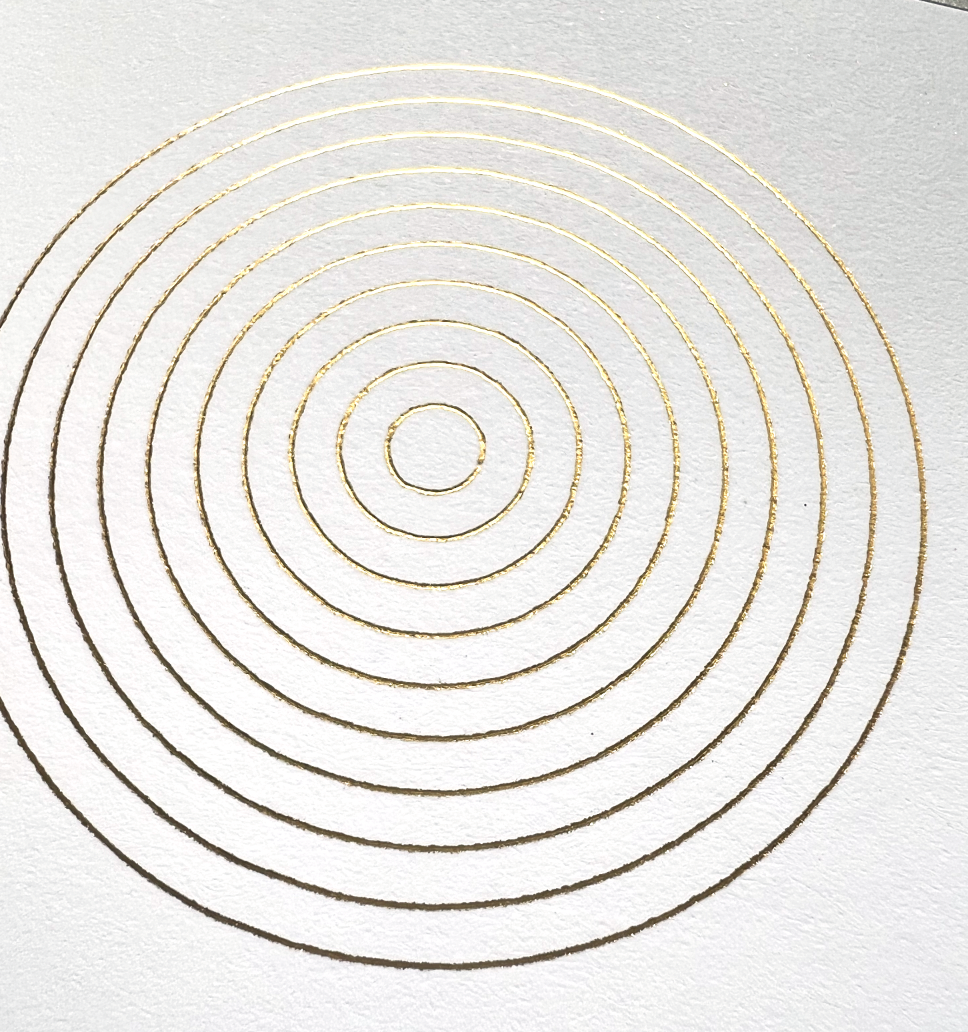
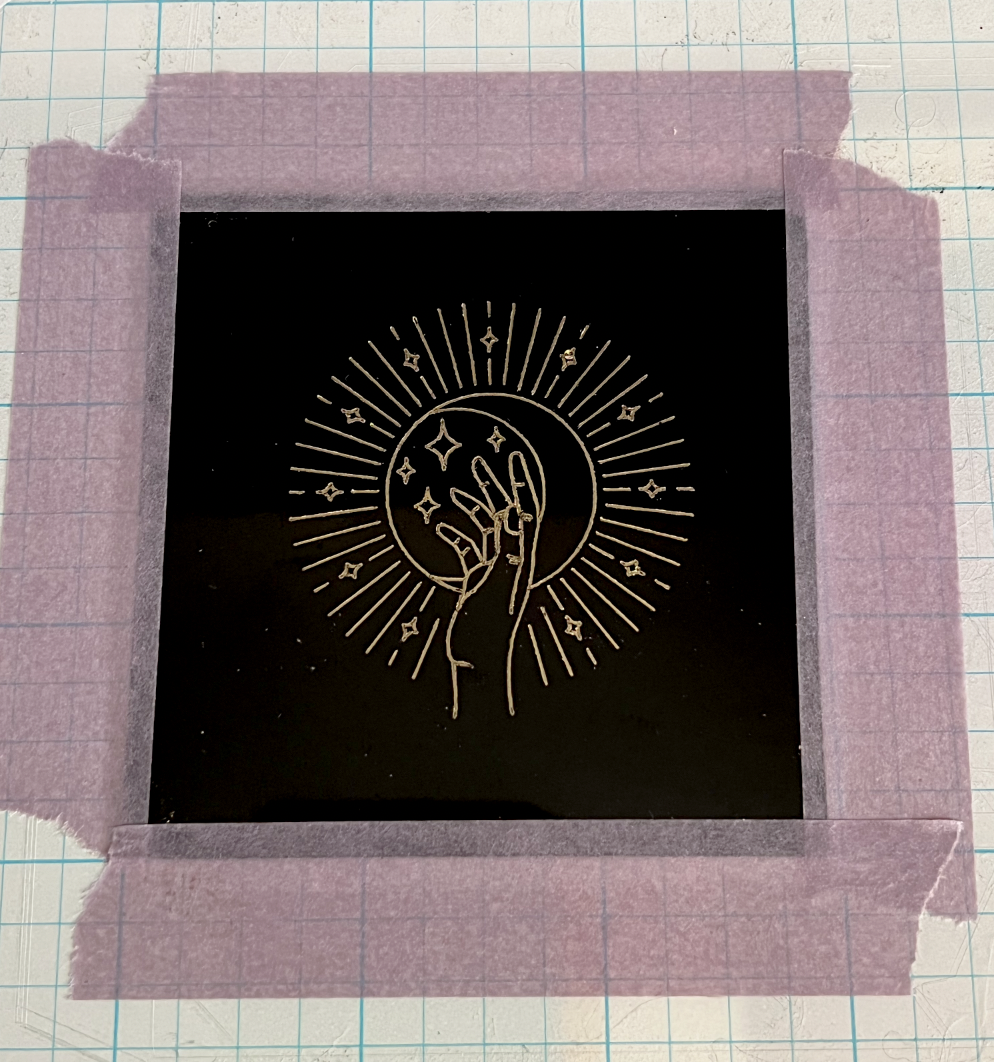
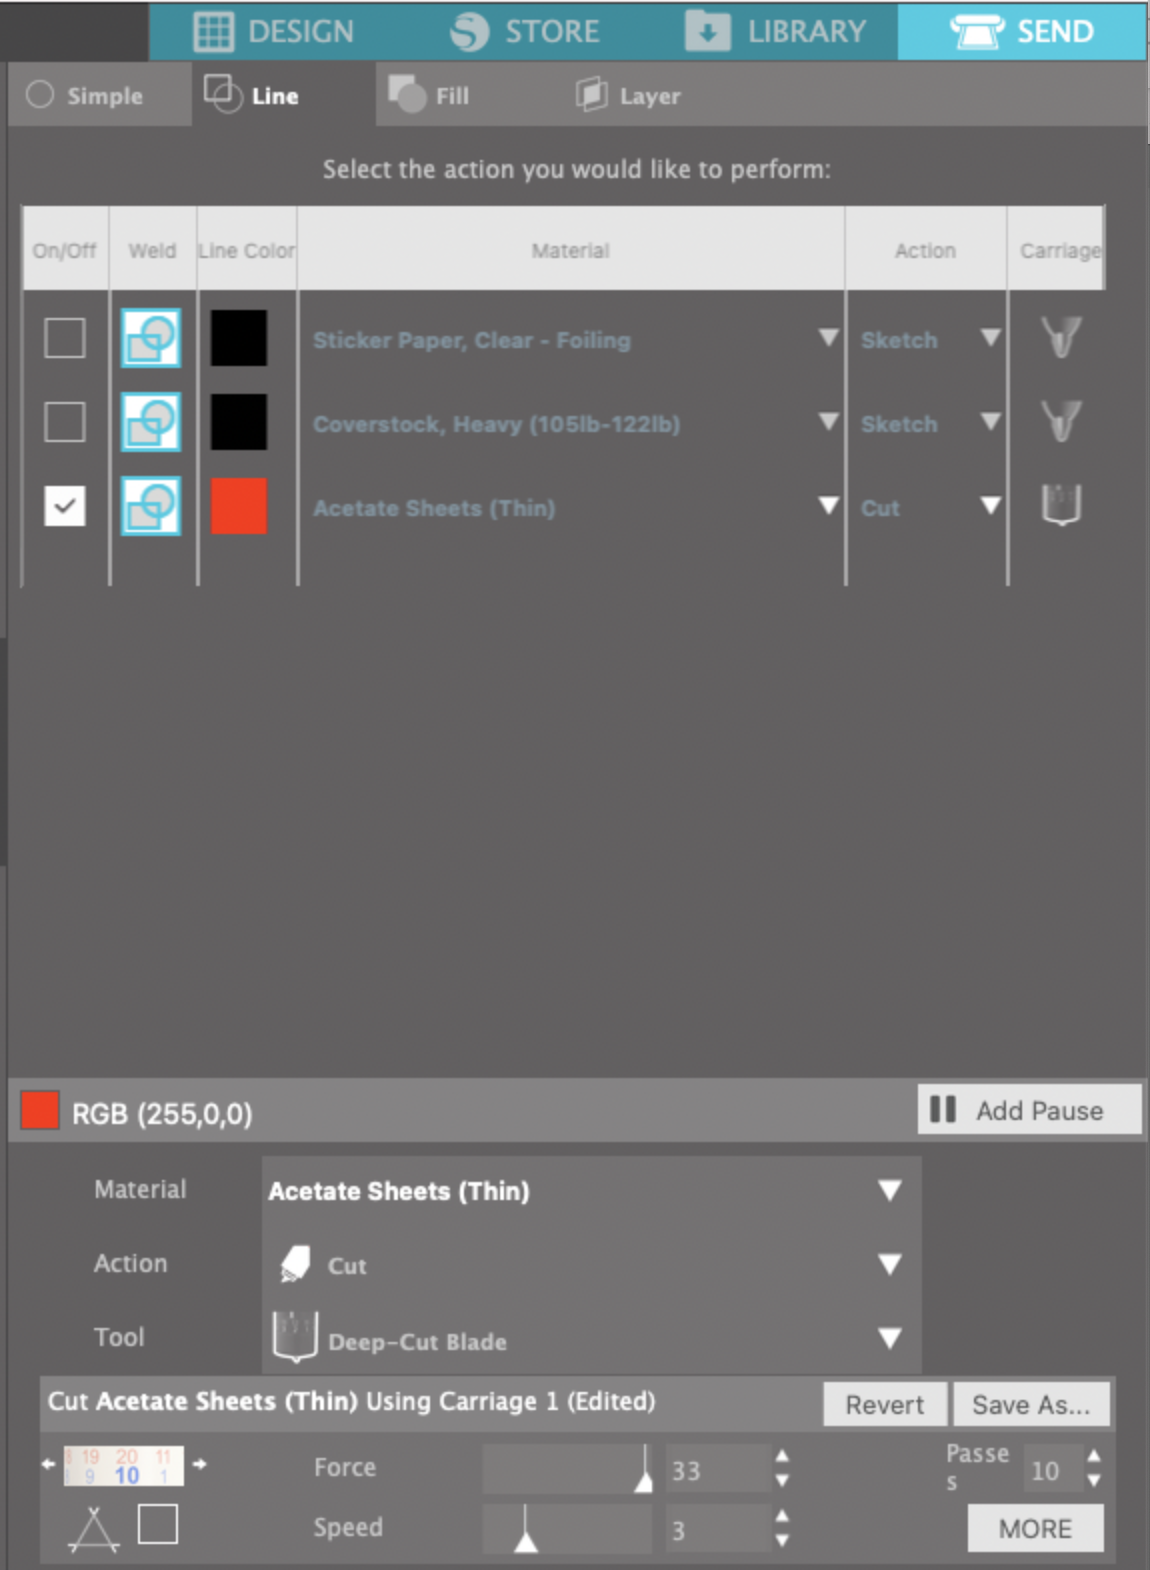
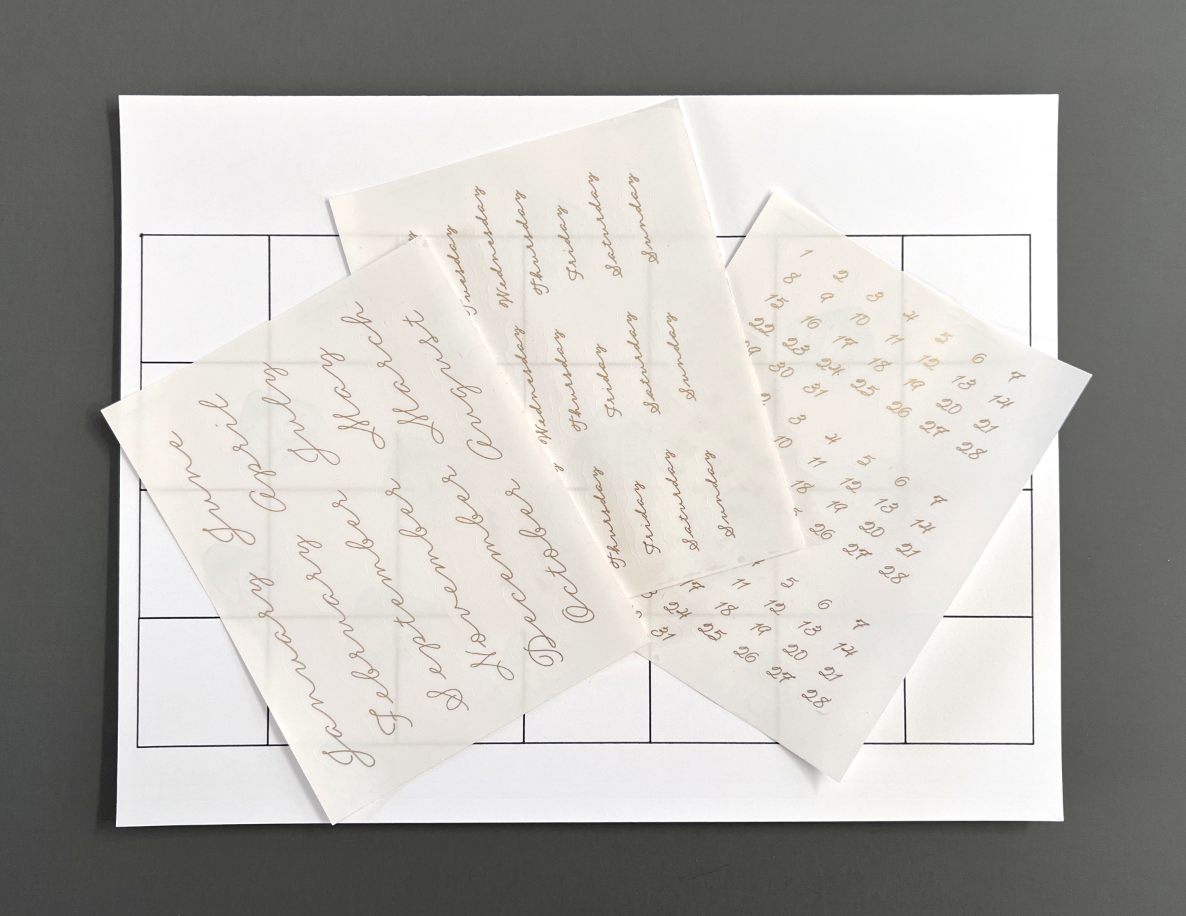
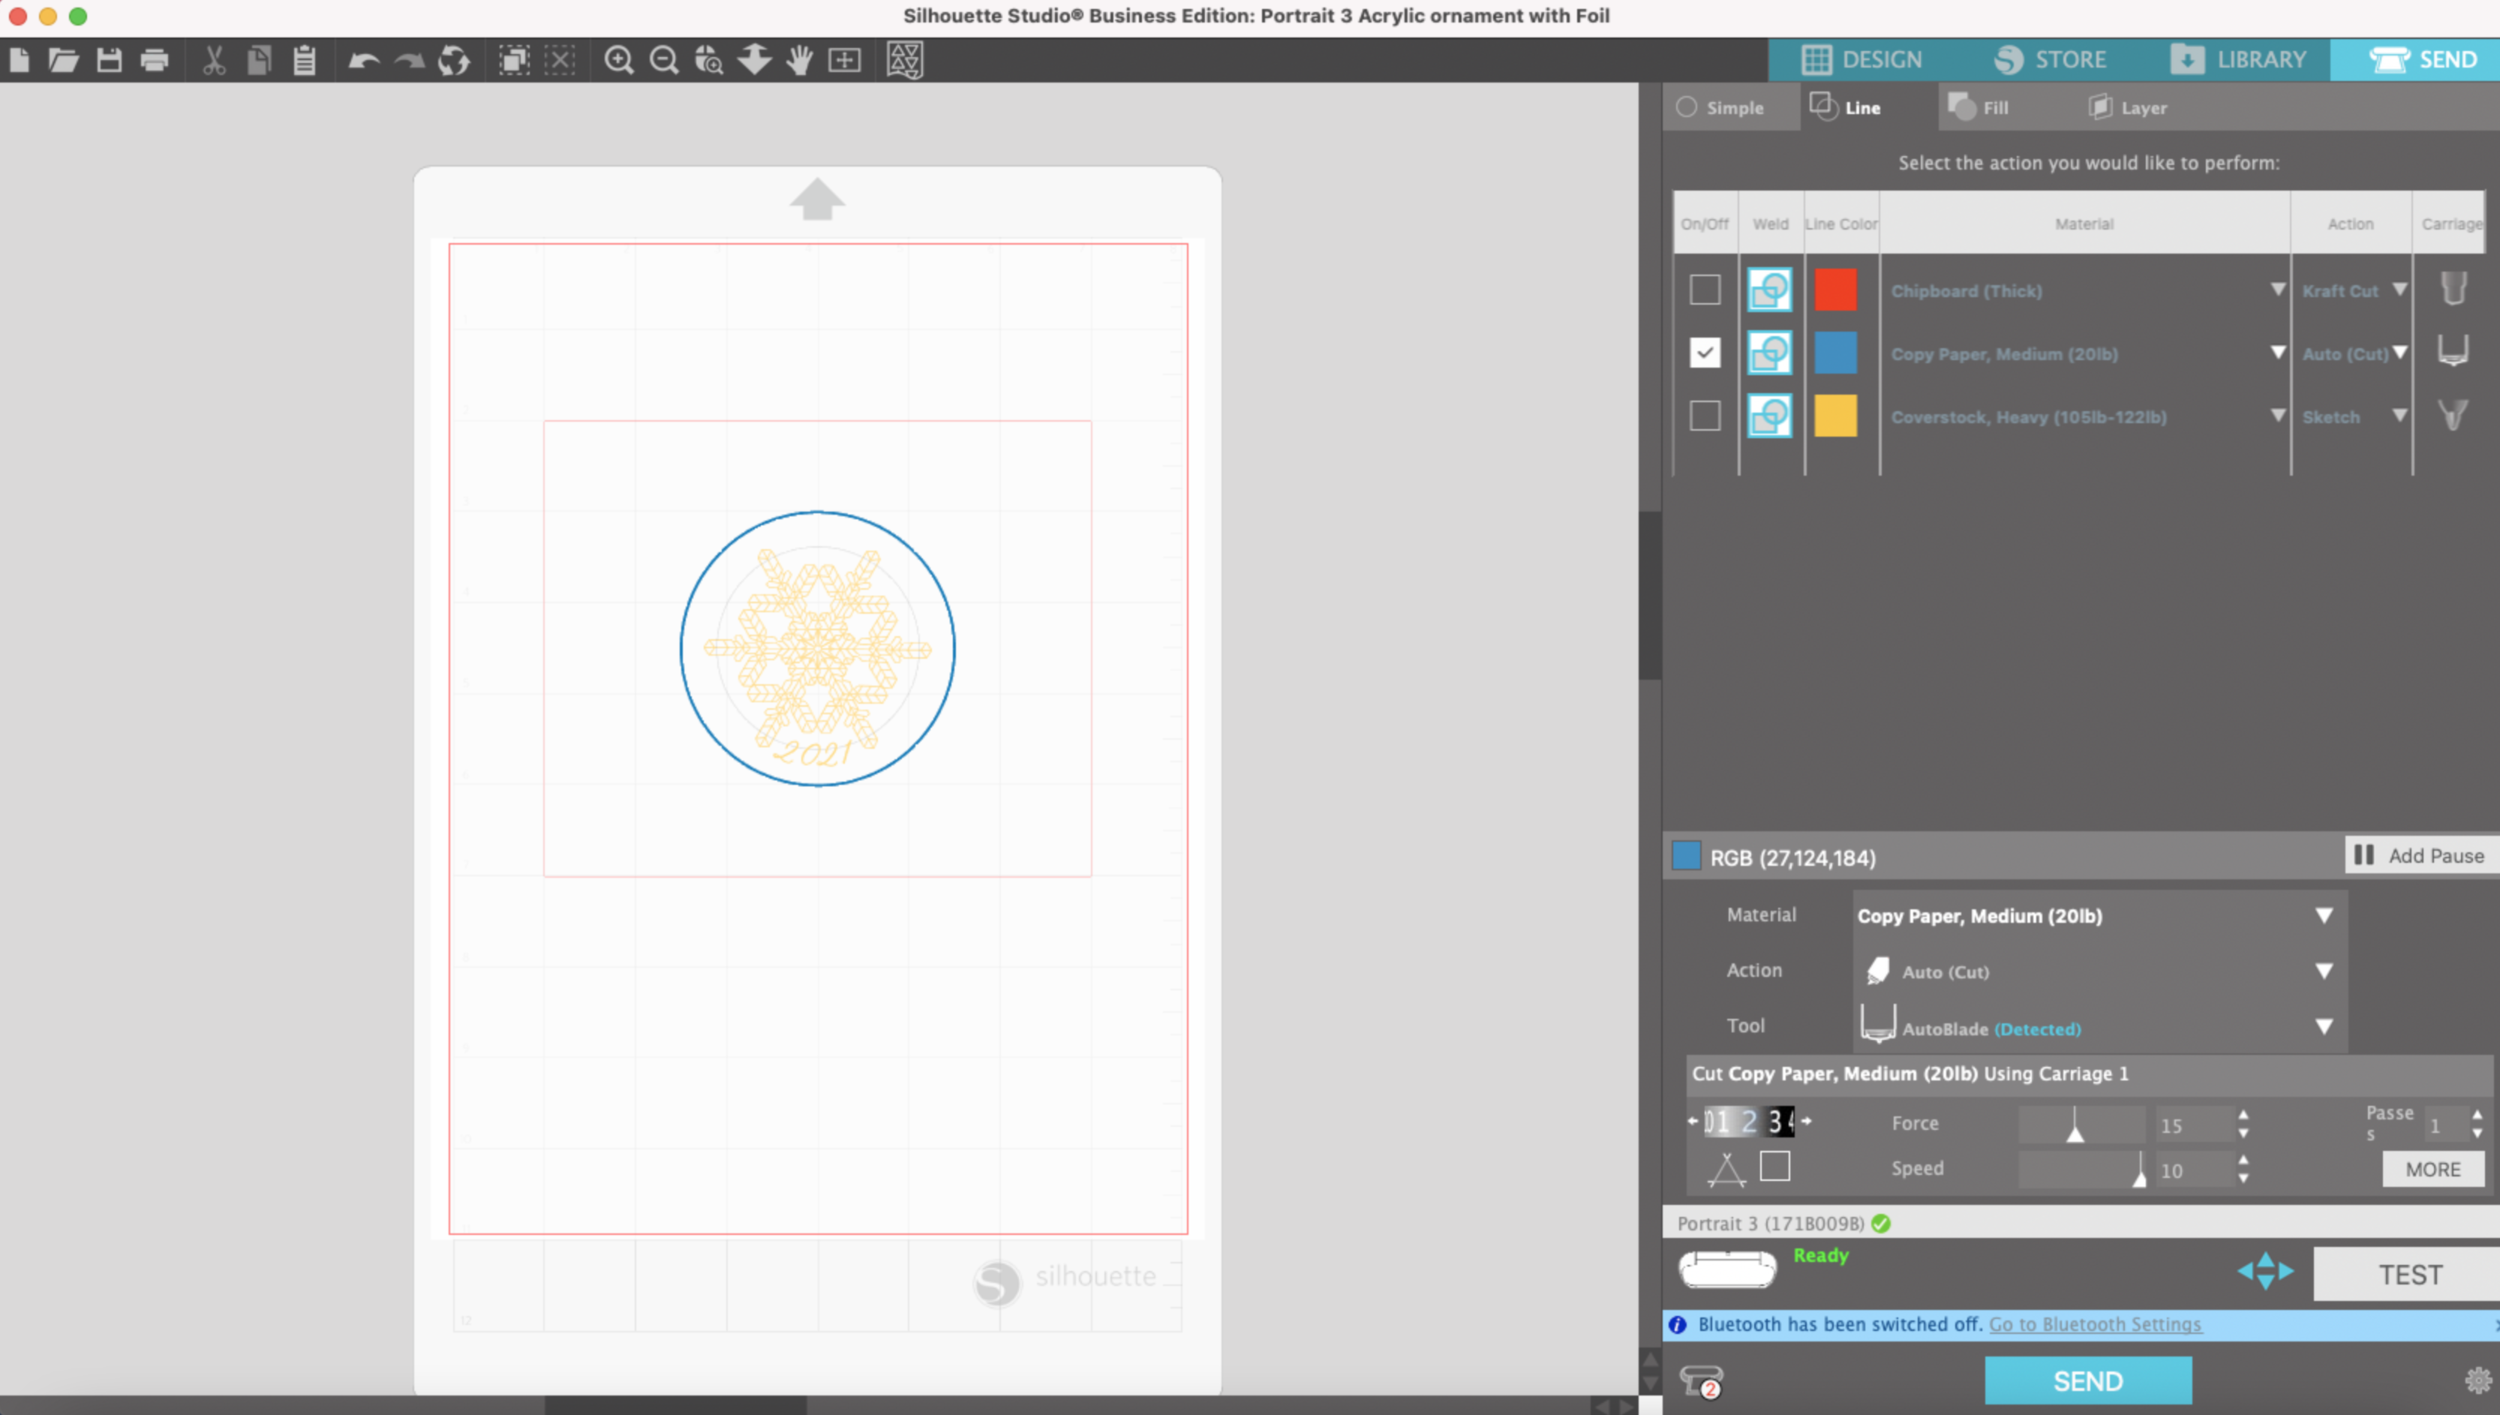
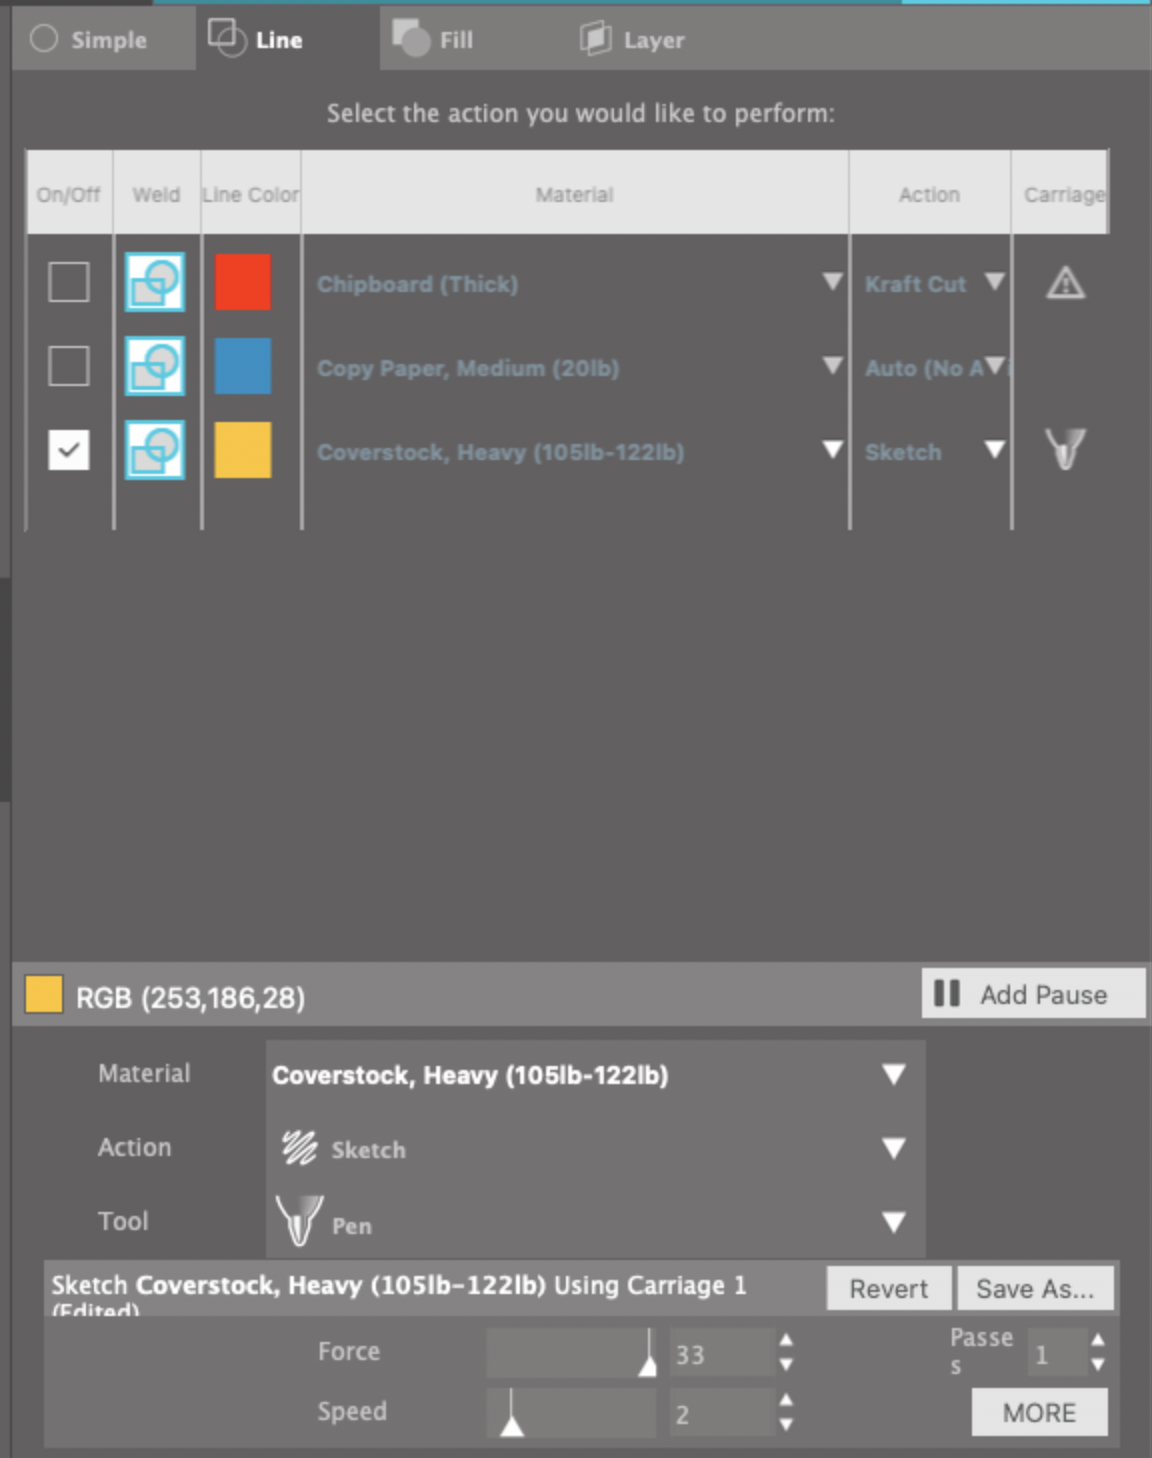
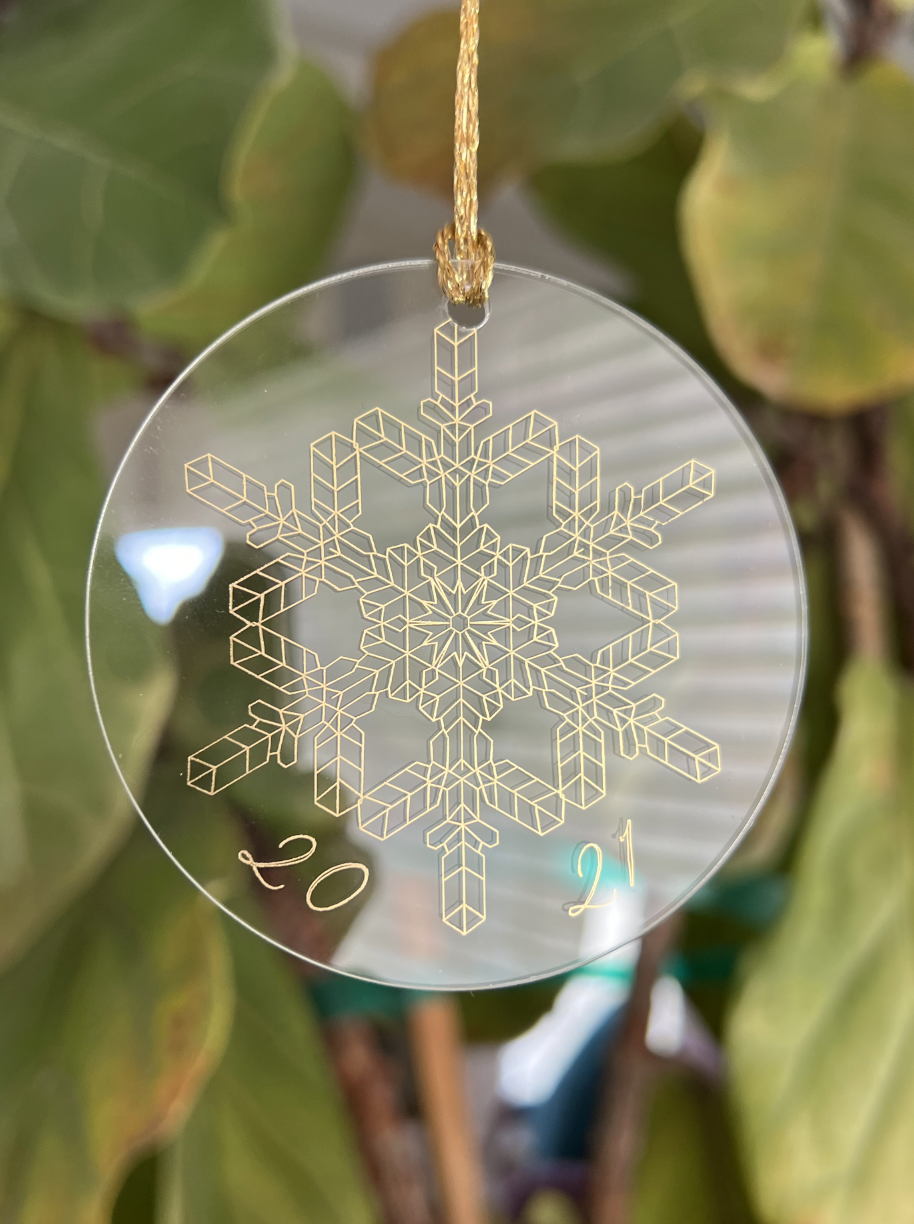
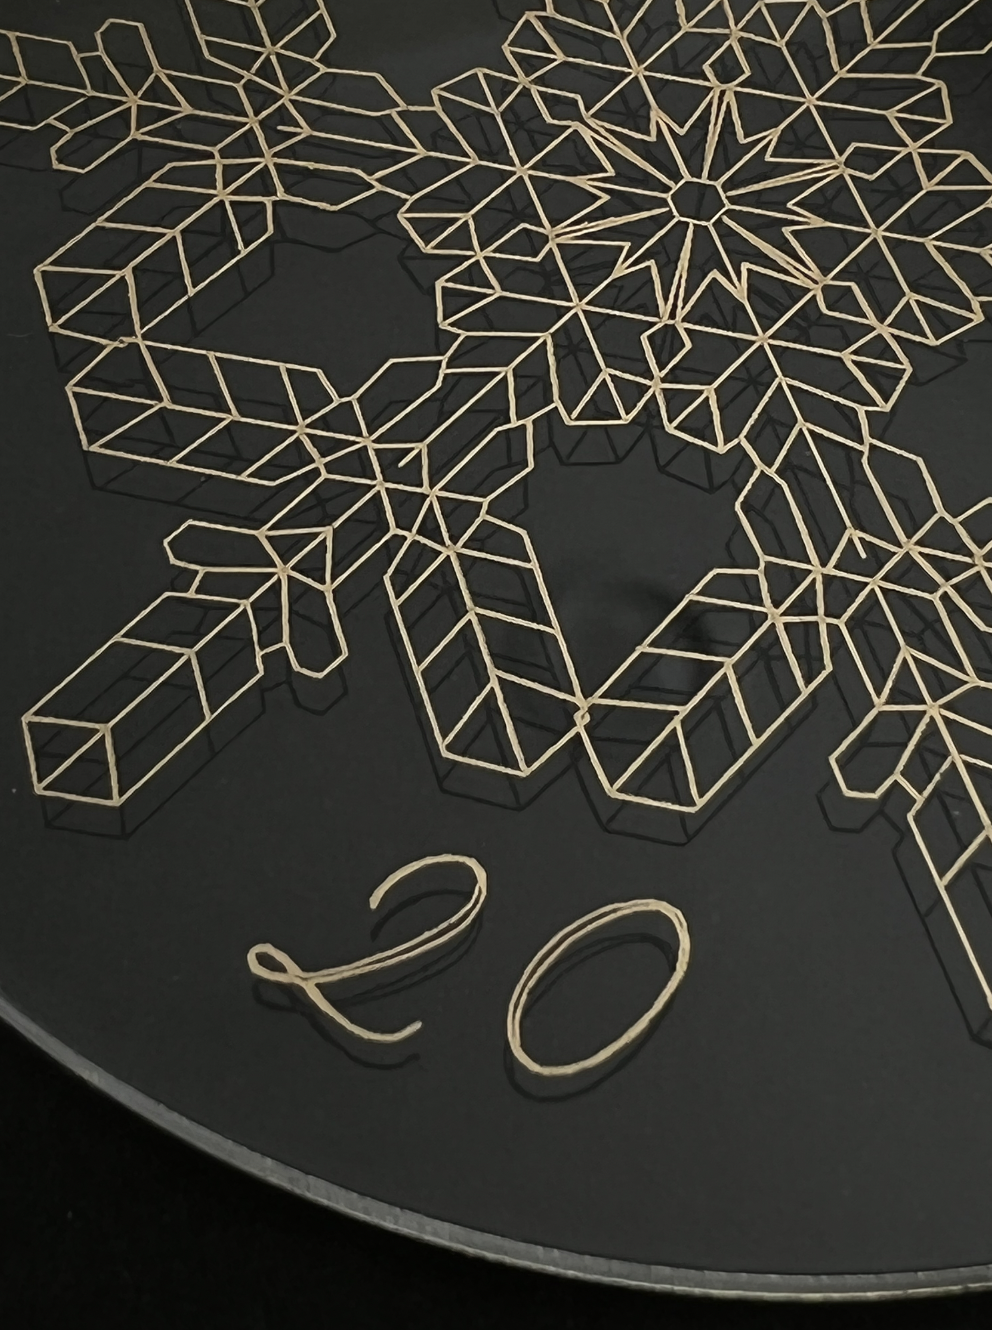
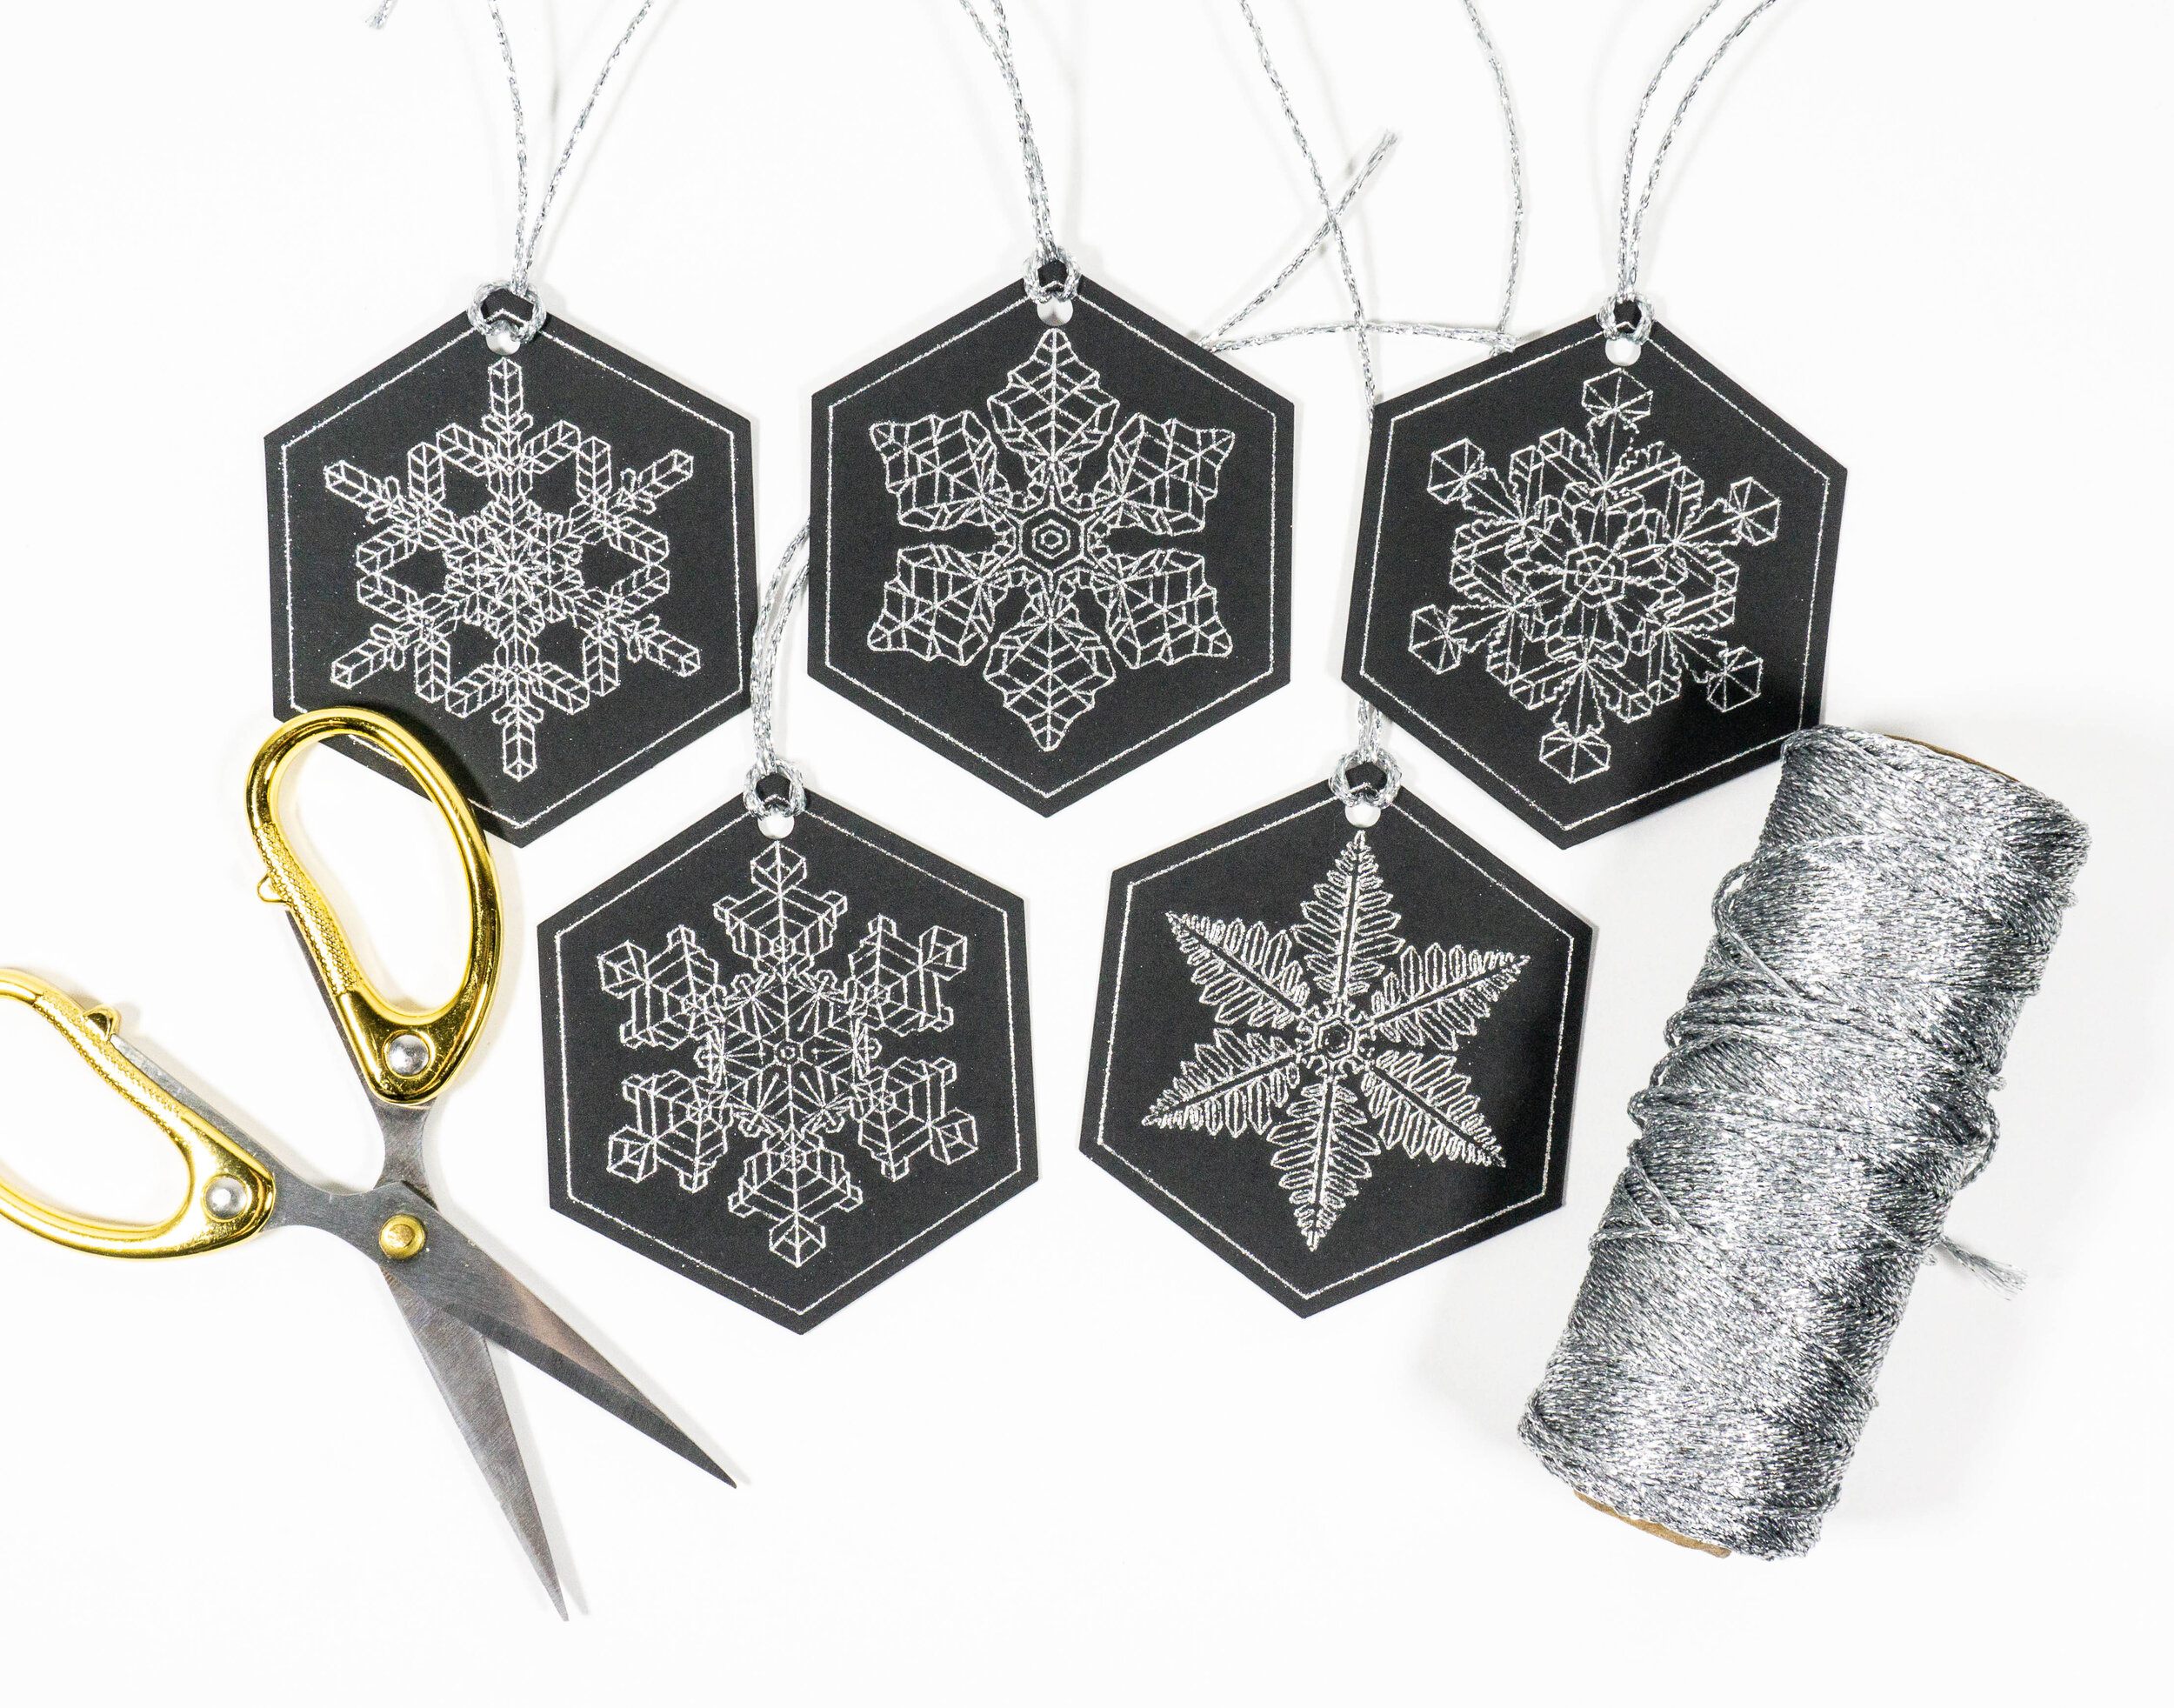
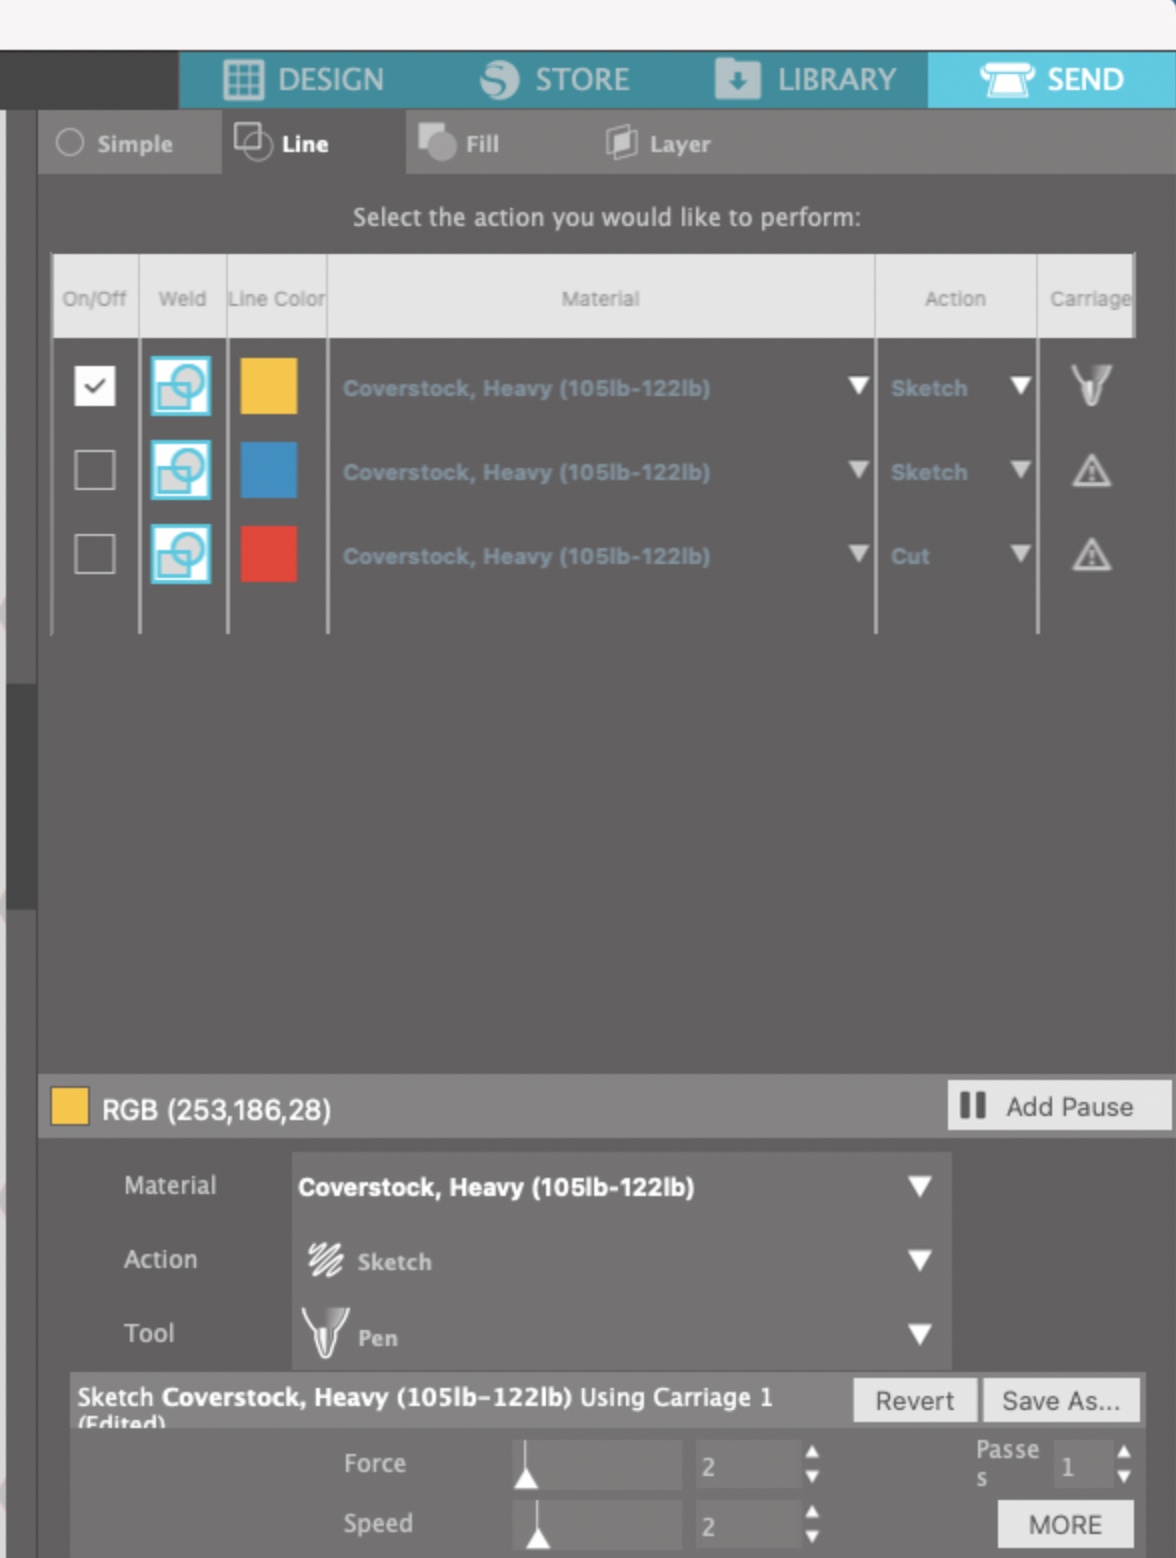
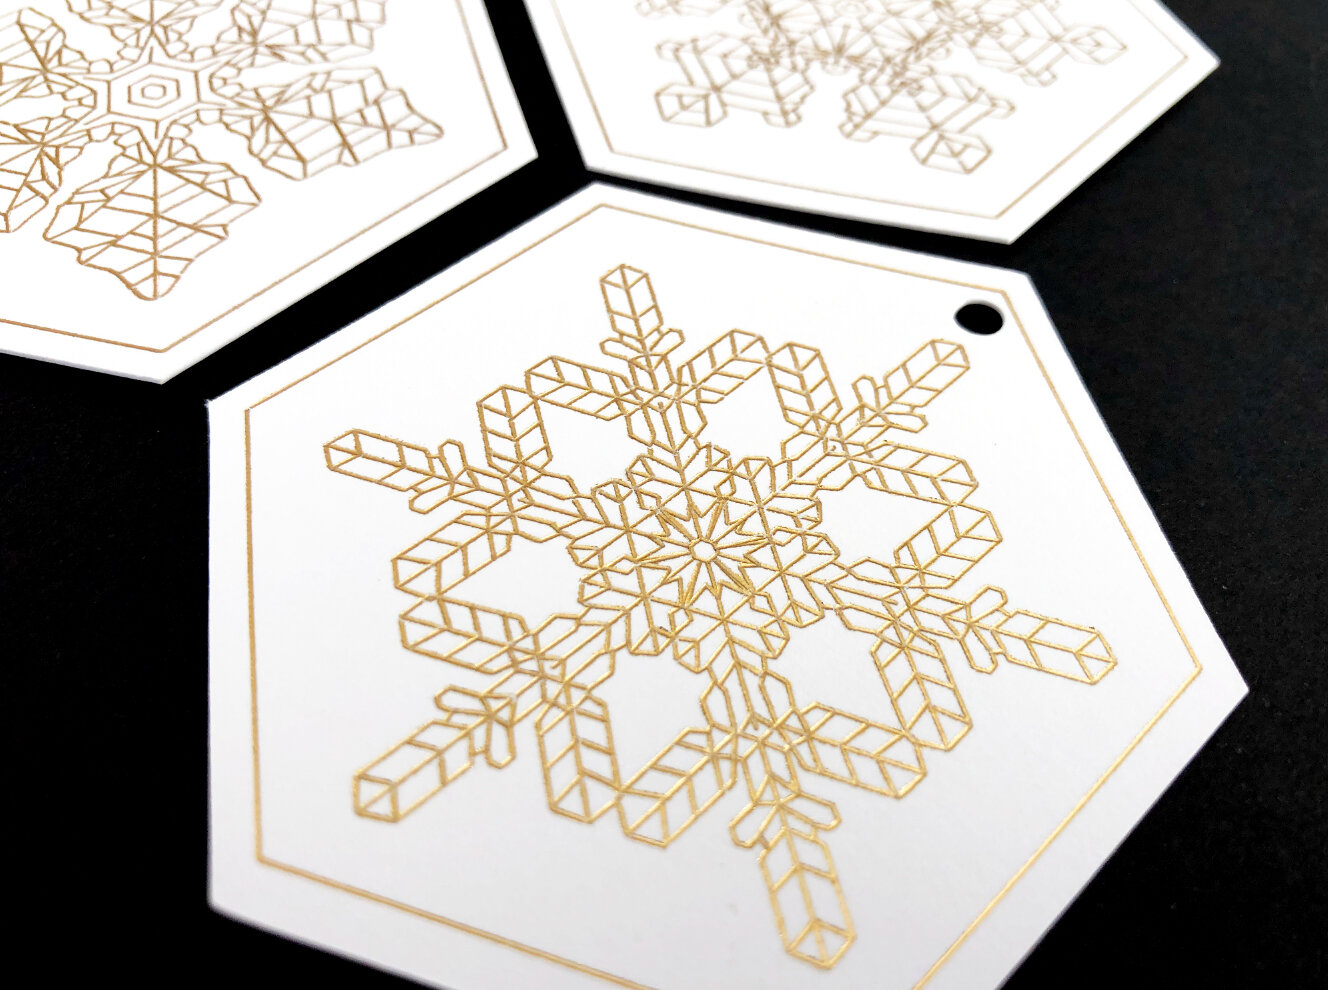
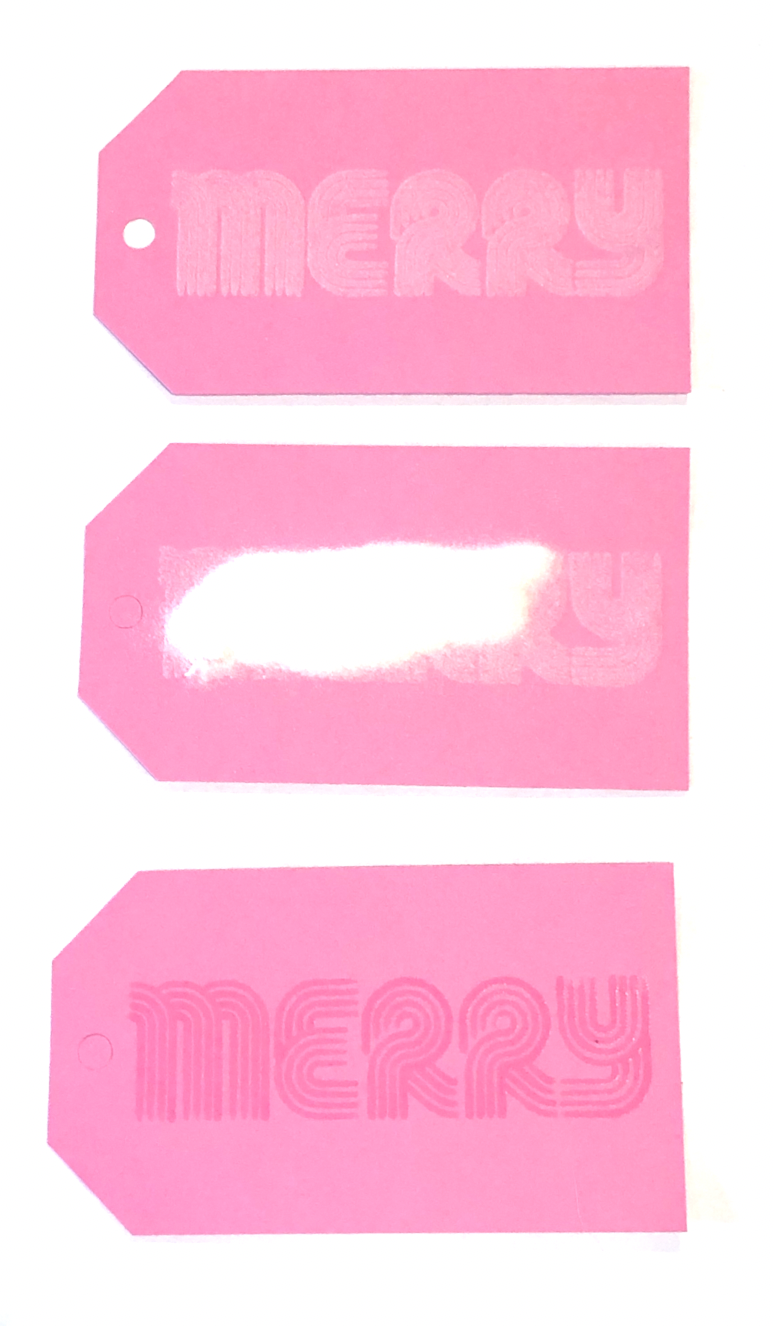
I used the Heavy Coverstock material setting, force of 5, speed 2. You might need to play around with the settings depending on your materials. It didn’t tear the foil at all and it did a really nice job of foiling!

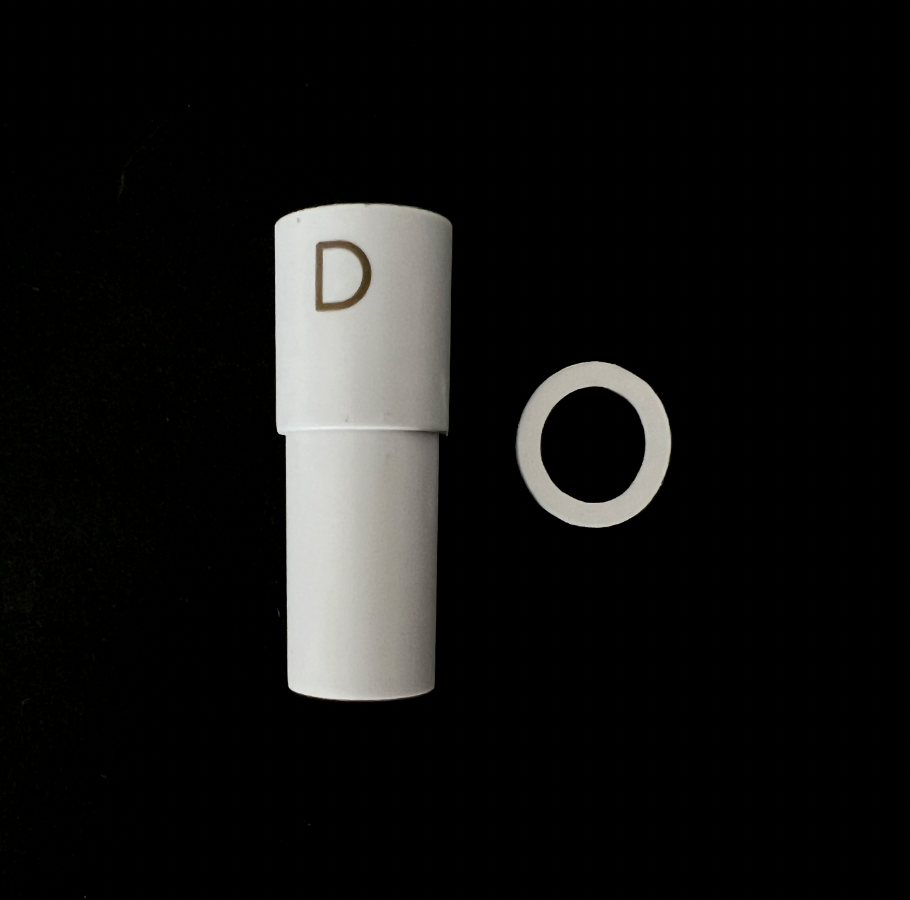
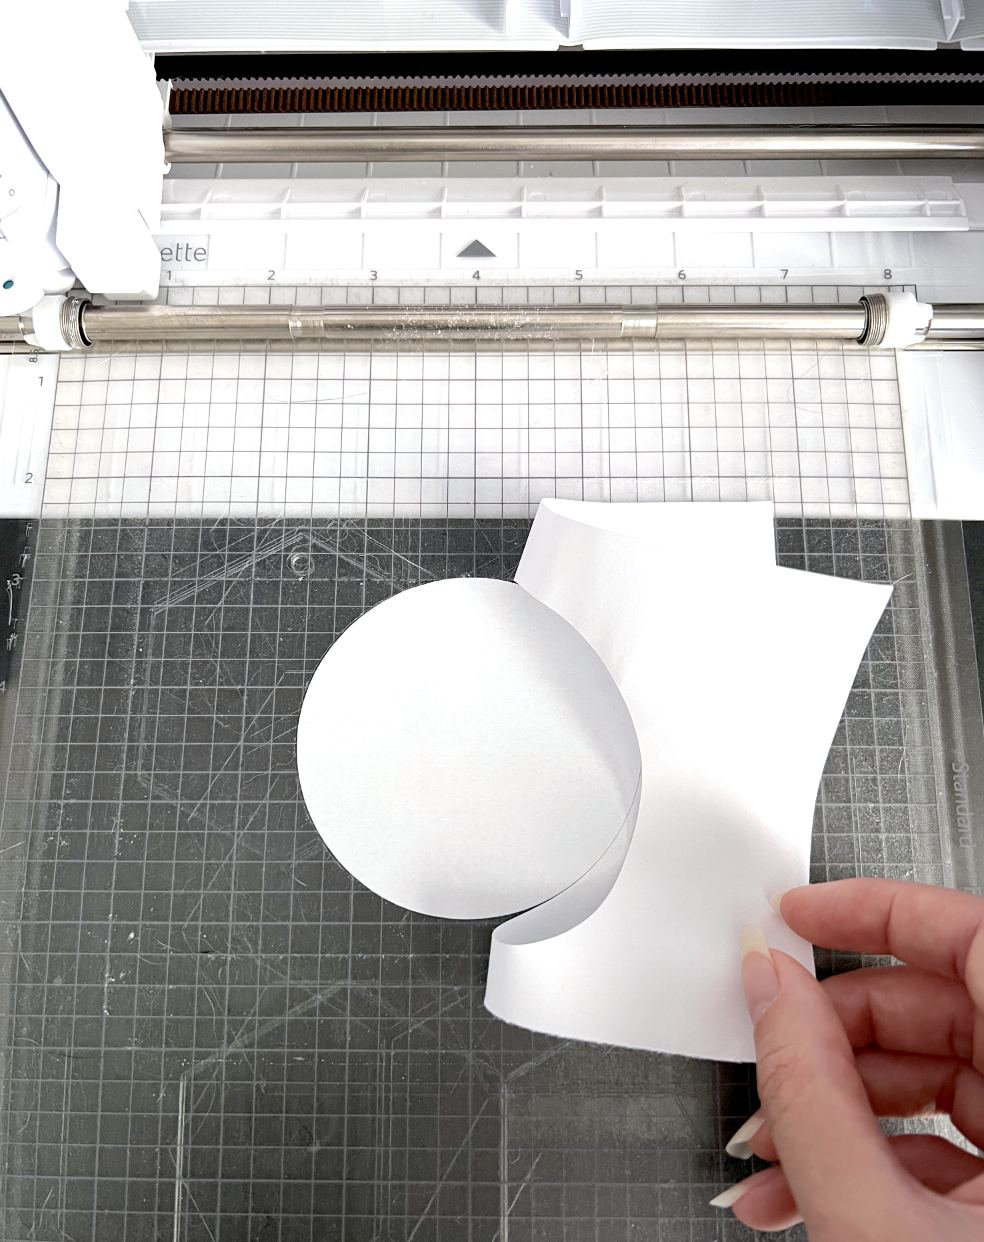
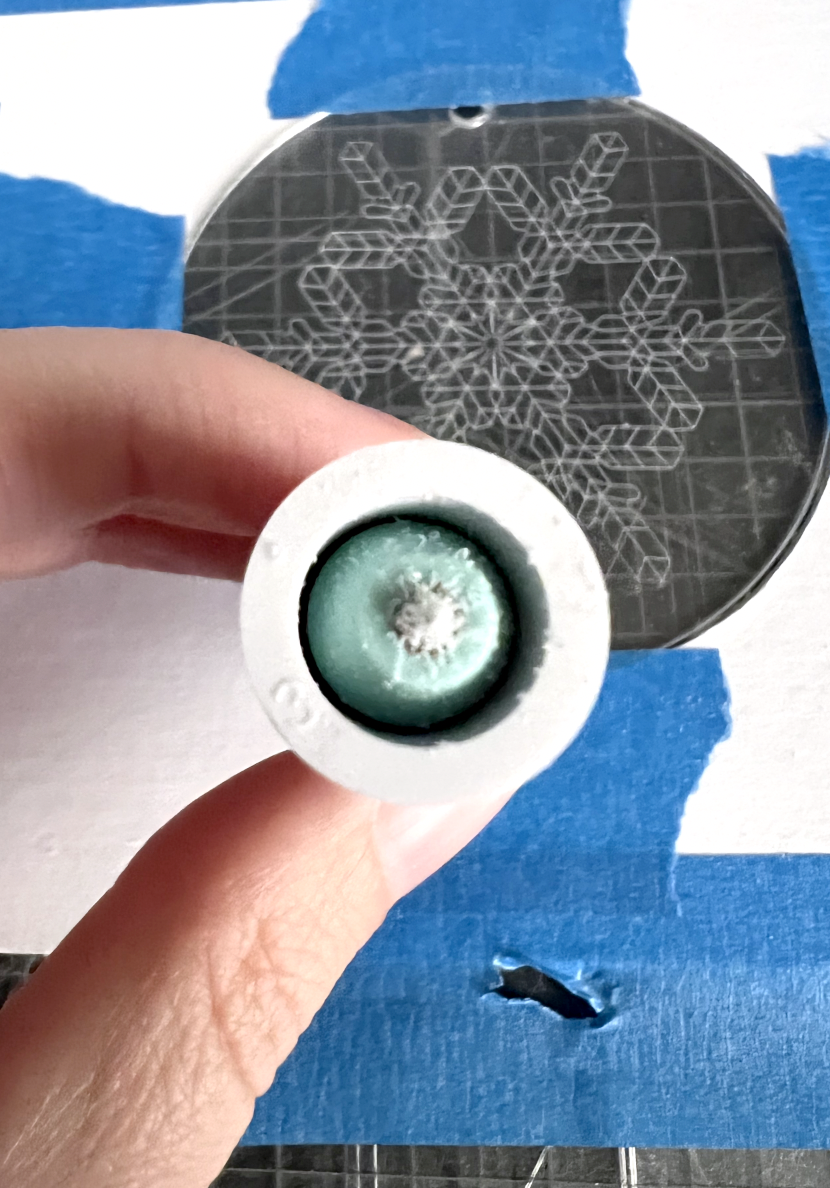
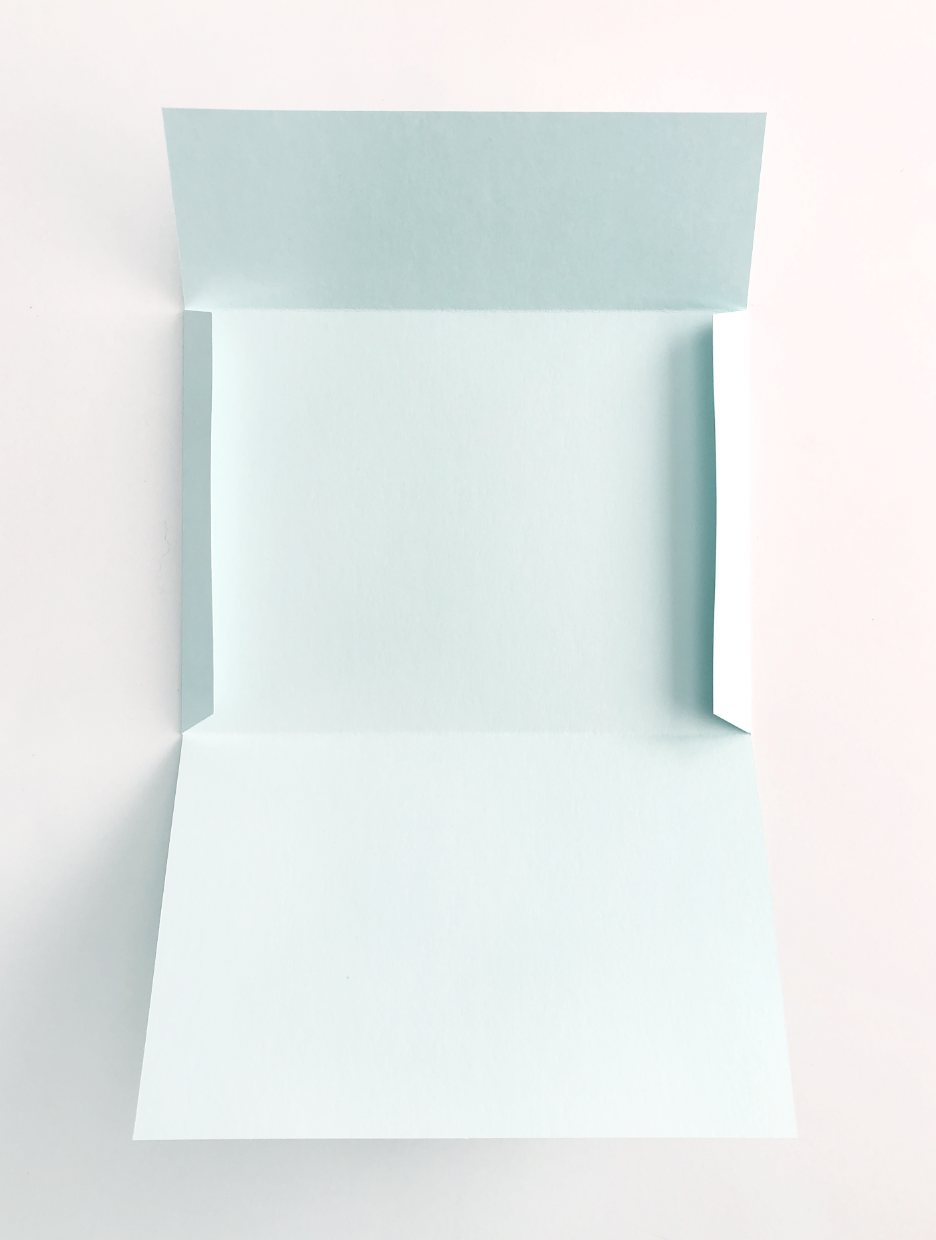
After it was done, I turned off the quill and removed it from my machine. Warning!! It gets much hotter than the We R Memory Keepers foil quill, even with the adapter around it. Be very careful when handling it, even if you just unplugged it. It even made slot 1 of my machine very warm, so I’m not sure if I would use it for a long period of time.

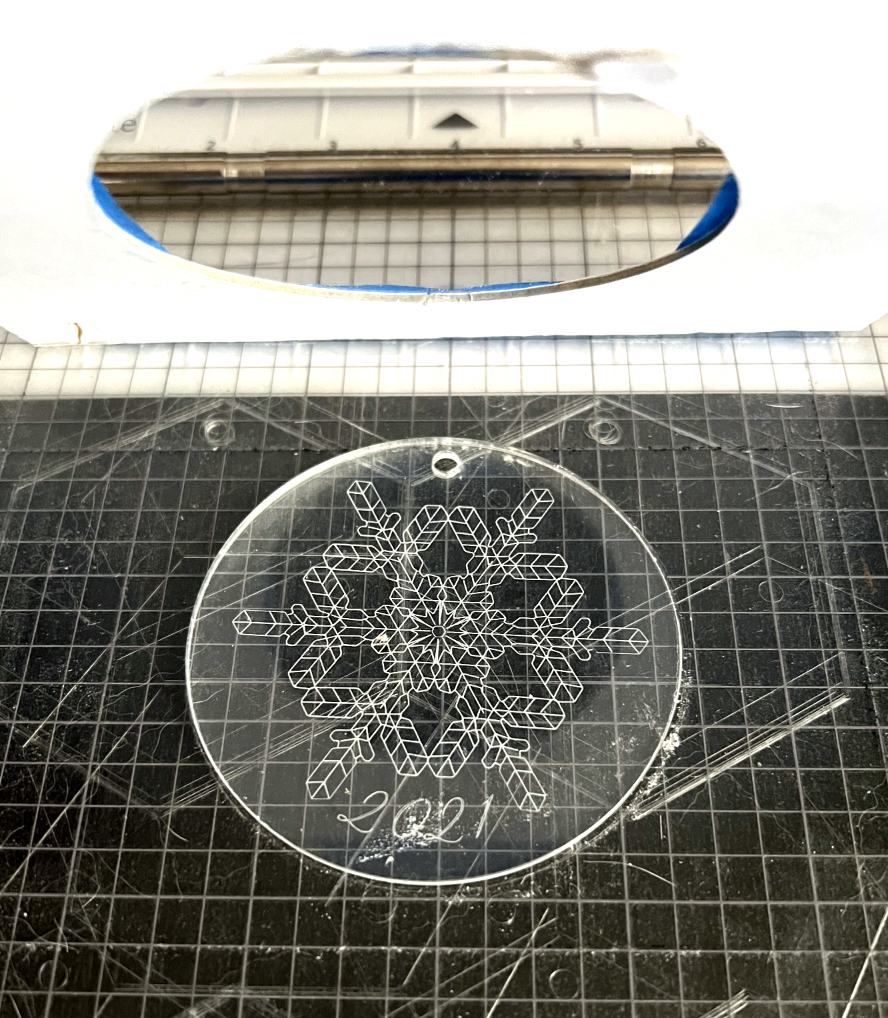
Other than that, it did a really nice job. My only wish is that they would offer additional tip sizes like a fine tip and a bold tip.

Craft Express Foil Quill

Silhouette Cameo 4 Fine Tip Foil Quill Adapter

Hi Everyone!

Links in this article may be affiliate links.

It’s been a few weeks since my last post, but during that time I got a Cameo 4 and I’ve been playing around with it a little bit.

As you probably already know, the We R Memory Keepers Foil Quill is one of my favorite tools to use with my cutting machines. I see a lot of people having trouble using the Fine Tip Foil Quill in particular with the Cameo 4 and Portrait machines. I got my fine tip to work pretty well with my Portrait 3, and I tried it out with the same settings on my Cameo 4. Those settings didn’t work with my Cameo 4 and I actually broke the tip off my foil quill. Oops!!

I ended up buying a new Fine Tip foil quill and I finally figured out a better way to keep it from ripping my foil and breaking the tip. It’s so simple and, I can’t believe I didn’t think of this sooner!

All you need is some cardstock. I’m using a 100lb cardstock, so it’s a little thicker. But you can use whatever you have on hand.

Cameo 4 Fine Tip Foil Quill Adapter

I created an 18mm (0.71in) circle in Silhouette Studio with a 12.5mm (0.49in) circle inside. So now I have basic ring. I duplicated it a few times, depending on the thickness of your cardstock, you may need more than one, you can stack them on top of each other.

Cameo 4 Foil Quill Adapter

I cut the rings with my Cameo machine using the Heavy Coverstock setting and the Autoblade.

Cameo 4 Foil Quill Adapter

I placed the ring on top of the D adapter. I know the Foil quill says the A adapter is for Silhouette machines, but that’s for the Cameo 3 and previous models. For the Portrait 3 and Cameo 4 you need the D adapter, which is really supposed to be for a Sissix machine.

Cameo 4 Foil Quill Adapter

Then I screw my Fine Tip foil quill into the adapter. The cardstock ring keeps it just slightly above the top edge of the adapter, and it also helps keep the tip from wiggling around in the adapter. I already tried not screwing the tip all the way into the adapter and it wobbles around to much when you are trying to draw with it.

If you are using a thinner cardstock, you might need to use 2 or 3 rings stacked on top of each other.

Cameo 4 Foil Quill Adapter

Next, I’m going to test it without being plugged in or with any foil. I’m checking to make sure the tip actually reaches the cardstock I’m going to be foiling. My foil quill is loaded into slot 1 on the carriage.

I have a scrap piece of cardstock on my mat and I’m going to test with the Coverstock, Heavy material setting, force of 5, speed of 2, action is sketch, tool is pen.

Cameo 4 Foil Quill Adapter

I run it though my machine without the quill plugged in and no foil. I can see that the tip leaves a slight indent in the cardstock. You want to make sure the tip isn’t digging in too deep, or it will rip your foil. This looks like a good depth, so next I’m going to test it with some foil.

Cameo 4 Foil Quill Adapter

I plug in my foil quill and cover my piece of cardstock with foil. I’m using the We R Memory Keepers brand of foil.

Cameo 4 Foil Quill Adapter

I run it through my machine with the same settings Heavy Coverstock, Force 5, speed 2.

It makes it through without tearing the foil.

Cameo 4 Foil Quill Adapter

It looks great after removing the foil!

Cameo 4 Foil Quill Adapter

Depending on the materials you use, your settings may be different from mine. If you want to try using the Fine Tip Foil Quill on thicker materials, you can try adding some more rings to help raise the tip higher up and away from the mat.

Making Pins using Black Shrink Plastic and the Foil Quill

Hi Everyone!

This week I’m going to share a fun little project you can make with your WRMK Foil quill, black shrink plastic, and a single line SVG file.

Supplies:

(Links to items below may be affiliate links)

Single line SVG file (I will be using one from my Celestial collection)

Black shrink plastic

WRMK Medium tip Foil quill (the mint one)

WRMK gold foil

Silhouette or Cricut machine that is compatible with the WRMK Foil Quill (I will be using my Portrait 3)

Light grip cutting mat

Deep cut blade (I will be using my CB09 holder with a 60 degree blade)

Heat gun or toaster oven

Pin backing

Glue


Let’s get started!

I’ve got my Single line SVG file opened in Silhouette Studio. I want to make this into a round pin that will end up being approximately 1 inch in diameter.

Shrink Plastic Pin with gold foil

I will draw a 2” circle since my shrink plastic will shrink about 50 percent.

Now I need to scale down my art to fit inside the circle.

Shrink Plastic Pin with gold foil

I’m going to draw and cut this by line color, so I will be keep my artwork in black and the circle in red.

I cut down my black shrink plastic sheet to a 2.75 x 2.75 inch square. I also cut down my foil to a smaller square.

We’re going to do the foiling first. I’m going to place my back shrink plastic a little further down on the mat so it’s easier to remove the foil once it’s done.

Shrink Plastic Pin with gold foil

Make sure everything is taped down well to your mat so nothing shifts while foiling and cutting.

I’m using the Medium foiling tip. My Material is set to Coverstock, Heavy. The action is set to Sketch, tool is set to Pen. The force is set to 7 and speed is 5.

Shrink Plastic Pin with gold foil

After it’s done foiling, do NOT remove the mat! Carefully remove the foil.

Shrink Plastic Pin with gold foil

Now it’s time to cut. I’m using my CB09 blade holder with a 60 degree blade. I selected Acetate for the material. Tool is the Deep Cut blade, depth is 10, force is 33, speed is 3. Number of Passes is set to 10 which is the most Silhouette Studio will allow.

Shrink Plastic Pin with gold foil

After the first 10 passes, do not remove the mat from the machine. Carefully dust of any little plastic particles and send it through again for another 10 passes.

Once it’s done with the 2nd set of ten passes, do NOT remove the mat. Dust off any little plastic particles again. You can carefully lift a corner of the shrink plastic off the mat to see if it’s close to be cut through. Just make sure you don’t accidentally shift the placement on the mat.

I typically have to make 30-40 total passes, even then it’s not always cut all the way through, but it’s enough I can carefully pop it out.

Here it is before shrinking so you can get an idea of the size difference.

Shrink Plastic Pin with gold foil

Now it’s time to shrink it! I’m going to be using my heat gun and little metal spatula on some teflon sheeting. But you can also follow the instructions that come with your shrink plastic and do it in a toaster oven.

Shrink Plastic Pin with gold foil

Once it’s done shrinking, while the plastic is still warm, you can use a metal spatula or other flat object to help flatten your piece.

The shrink plastic doesn't shrink perfectly even, so my circle is now a little lopsided, but it’s not too bad. I love how the gold foil keeps all the little details and still adds a little bit of shine. I haven’t noticed the gold foil scratching off, so it’s up to you if you want to apply some sort of sealer on top.

Shrink Plastic Pin with gold foil

I’m going to glue my pin onto the back ,and now it’s finished and ready to go on a jacket, a bag, a hat, or anywhere else you like to add pins!

Shrink Plastic Pin with gold foil

Creating Watercolor Style Clip Art in Procreate to Use With Your Cricut or Silhouette Machine

Hi Everyone!

This week I’m going to share a watercolor style technique that I like to use in Procreate to make clip art that I can use with my Cricut or Silhouette machine.

I will be using the Brushy McBrush Face brush from the Everything Watercolor brush set from Uproot Brushes. This is a great set of brushes and it also comes with some very nice paper textures. The paper textures make a huge difference when trying to make convincing digital watercolor artwork.

Let’s get started!

I will be using my same Capricorn line drawing from the past few weeks. In the end you will see all the different ways I’ve used this same base drawing and rendered it different ways. This is also a great way to figure out what kind of drawing/ painting style you prefer to use for your own artwork.

I’m going to be using the Smooth Paper texture canvas that comes with the Everything Watercolor brushes. I will go ahead and delete the others so I can have more layers to work with for my painting.

Watercolor style clip art in Procreate - paper texture

I copy and pasted my Capricorn line drawing and put it underneath the paper texture. I also lowered the opacity of my drawing to where I can barely see it. The paper texture always needs to stay on top, you painting and drawing layers will always be below the texture stack.

Watercolor style clip art in Procreate - sketch layer

There are already some layers labeled “Paint Here”, I’m going to go head and duplicate these while they’re still empty, but you can always add more later.

For simplicity, I’m going to use the same colors that I did last week, and I’m going to start with the tail again. I select my Brushy McBrush Face brush and start painting on one of the “Paint Here” layers. With this brush, once you lift your pencil off the screen, when you draw/ paint over the same area again it will get darker.

I really love the ends and edges of this brush, they’re a little rough so it looks like i’m painting with an actual brush.

This brush also layers very nicely, once I’ve got my base layer down I can go back in and make some darker areas like with real watercolor.

Watercolor style clip art in Procreate - brushes

I still like to keep all of my colors on separate layers, so it’s easier for me to go back and make any color adjustments if needed.

Once I’ve got my base colors down, I’m going to add some more shadows. The color I started out with was little dark, but I ended up adjusting my layer opacity to 50%.

Watercolor style clip art in Procreate - layers

Now for my finishing touch, I’m going to use the Dry Ink pen that comes with Procreate (you can find it in the Inking brushes) I want this to look like I quickly went around it with an old Micron pen. I’m going to loosely trace around my original one drawing, but I’m not going to worry about being too precise. I want this illustration to have a looser feel than my gouache style painting from last week.

Watercolor style clip art in Procreate - ink pen

Now it’s finished, and here’s a side by side with my painting from last week. I can use these painting as clip art for stickers and I also plan to make some repeating patterns once I have finished all the zodiac signs.

Watercolor style clip art in Procreate - finished design

Watercolor style with black ink details

Gouache style clip art in Procreate

Gouache style with pencil details

Creating Your Own Single Line SVG Files - Part Two

Hi Everyone!

This week is part two of how to create your own single line SVG files. I’m going to share with you how I take my sketch from Procreate and use the Adobe Illustrator app on my iPad Pro to create the SVG file.

Last week exported my file from Procreate as a JPEG. I’m going to bring that file into the Illustrator app by selecting the picture icon in the tool bar on the left and finding that file on my iPad.

Inserting Image in Illustrator App

You can adjust the size of the image, I typically keep my pretty large at this point. I’m going to add a new layer above my sketch layer, then I’m going to lock my sketch layer.

Inserting Image in Illustrator App

I typically start with a basic out line of my image and then fill in all the little details on a separate layer. You need to use either the pencil tool or the pen tool to create a single line SVG. This is so your image is made up of individual paths and not filled shapes. I’m going to use the pencil tool since it feels most natural when I’m tracing my image using my Apple Pencil.

Pencil tool Illustrator App

I’m going to start tracing the outline of the horns with my pencil. If you need to stop and lift up your pencil, you can continue that same line again by selecting the path and start drawing at one of the end points.

Pencil tool Illustrator App

Now, you can choose the draw the rest of the outline or start refining each section as you go along. I’m going to refine each section as I go along. Using the Direct selection tool, I can delete anchor points, change curved points to sharp angles and vice versa.

Direct Selection tool Illustrator App

After the outline is complete, I will create a new layer for the details.

Creating single line SVGs Illustrator app

I do the details by sections in the drawing. As you can see, I simplified the scales on the fish tale from my original drawing. Now is great time to make any adjustments to your drawing. Once I finish the details, I make each section a subgroup in my layer.

Creating single line SVGs Illustrator app

Now it’s time to export this file as SVG. Click on the box with the arrow in the upper right tool bar across the top in the app. Select “Publish and export.”

Export as SVG Illustrator app

On the left side of the screen, select “Export as.”

Export as SVG Illustrator app

In the drop down next to Format, select SVG and click the blue Export button.

Export as SVG Illustrator app

I’m going to select “Save to Files.”

Export as SVG Illustrator app

Then I select the “Illustrator” folder. Next week I will show you how to test this file using the Cricut App on my iPad.

Export as SVG Illustrator app

Creating Your Own Single Line SVG Files - Part One

Hi Everyone!

One of my goals this year is to create more SVG files to add here and my Etsy shop. There are a lot of SVG cut files available out there, but not as many single line or draw files. I thought I would share my process for how I create my single line SVG files.

I start off by trying to come up with an idea for a collection of files, this year I want to do all of the zodiac symbols. Since we’re still in January, I’m going to start off with Capricorn, which is often depicted as a sea goat.

I love using Pinterest to gather inspiration and I created a board where I’m collecting images of all the different zodiac symbols. I’ll keep adding to this board as I work my way through all the zodiac signs.

After I’ve gathered a few images I go through them and I start to pick out what parts I like from each image.

I really like how the fish tails loop around on these.

I think I want a profile view for the head.

Next, I’m going to start creating a rough sketch on my iPad Pro in one of my favorite apps, Procreate. If you don’t have an iPad, you can also do your sketch the good old fashioned way with pencil and paper.

I would like for these to fit on a round shape like a key ring or coaster, so I’m going to start out. with a circle shape and keep my design within that shape.

I like to sketch with the Peppermint Pencil, it’s one of the brushes that comes with Procreate. It’s almost like sketching with a real pencil!

Another great thing about Procreate is you can have your reference image in a separate little window inside Procreate.

Creating a sketch in Procreate

Or you can do a split screen with Procreate and Pinterest.

Procreate Split Screen

I’m going to work with my reference image in a window in Procreate. So I take some screenshots of my Pinterest images that I will be referencing.

After I work out my sketch, I can either take a screenshot, save it as a JPEG or PNG file to bring into the Illustrator app.

Exporting from Procreate

If you made your sketch on regular paper, you will need to scan you image so you can bring it into Illustrator or another vector program of your choice.

Next week I will share with you how I turn my sketch into vector line art in the Illustrator App on my iPad.

Capricorn sketch Procreate

Planner Stickers with the WRMK Foil Quill

Happy New Year!

The new year is always a great time to make a fresh start with a new planner. I bought a planner notebook last year, but I didn’t realize it only had pages for 6 months and a bunch of blank pages at the end. After I filled up the 6 months , I kind of stopped using it. So this year, I’m going to make my own calendar/ planner pages and hopefully keep myself on track for this year!

Supplies: (links below may be affiliate links)

My Single line SVG files or another file you may have

Clear Sticker Paper

WRMK Fine Tip Foil Quill (the pink one)

WRMK Gold foil or heat reactive foil of your choice

Silhouette Portrait 3

Light Grip cutting mat

Autoblade

I created some single line SVG files for the months, days and dates. I’m going to test them out with my WRMK Foil Quill and some clear matte sticker paper.

I bought this clear matte sticker paper on Amazon. Unfortunately, when I received it I realized it has a slit down the back carrier paper which is not disclosed in the product description. I should have read more of the reviews! It’s not a problem for this project since I’m trimming the paper down to foil it.

I’m trimming my sticker paper down to 5.5 inches x 4.25 inches. You don’t have to do this, but I have an easier time foiling with smaller pieces.

I have all of my months set up to fit on one 5.5 inch x 4.25 sheet in Silhouette Studio and now it’s time to foil!

Foil Quill Planner Stickers

I’m using the fine tip foil quill (the pink one) with the D adapter, since my letters and numbers get pretty small.

Foil Quill Planner Stickers

I’ve got my sticker paper on my light grip mat approximately where it is shown in Silhouette studio and my foil is taped down tightly on all four sides.

Foil Quill Planner Stickers

After some initial testing with this sticker paper I created a custom material setting:

Action: Sketch

Force: 2

Speed: 2

Passes: 1

Foil Quill Planner Stickers

After it’s done foiling, do not remove your mat from the machine! Carefully remove the foil and place the Autoblade in carriage 1.

I want my stickers to be kiss cut, so the blade will not cut through the backing paper on the stickers. I added the following settings to my custom material:

Action: Cut

Force: 25

Speed: 4

Passes: 1

Foil Quill Planner Stickers

I repeat the same process for the days of the week and the dates.

Now my stickers are ready to be added to my calendar template!

Foil Quill Planner Stickers

3D Cardstock Snowflakes

Hi Everyone! It’s almost the end of 2021, this year has flown by! I’ve been spending the past couple of weeks planning new projects and files to share on my website and Etsy shop. Christmas may be over, but it’s still winter in some parts of the world, so I thought I would share part of a project I’ve been working on. It’s a pretty simple one you can do on a snowy afternoon!

Supplies:

(links below may be affiliate links)

Cutting machine (I will be using my Portrait 3, but you can also use a Cricut or other cutting machine)

Light Grip cutting mat

Snowflake cut file (You can download the one I’m using here for free)

Lightweight cardstock (I’m using foil cardstock, 2 different colors)

Glue stick or tape runner

Ribbon, twine or fishing line to hang the snowflakes

First open the SVG file in Silhouette Studio and adjust the size of the snowflake to your liking and will fit to your materials. Since I’m using two different colors of cardstock, I’m making my snowflakes pretty large.

I have one snowflake with a hole added at the top for hanging and one snowflake without the hole at the top.

3D Snowflake SVG Cut file

I’m using my light grip cutting mat. I initially tried to do the matless, but the angles are a little too tight to get a nice pop out cut.

3D Snowflake SVG Cut file

My foil cardstock feels a little heavier than my regular 65lb cardstock and the lightweight cardstock settings didn’t cut all the way through with my test cut. I got the best cut results using the Heavy Coverstock settings. The settings you see are for my CB09 blade since my auto blade is a little too dull to cut cardstock. You can use the default auto blade settings for Heavy Coverstock if you are using your auto blade.

3D Snowflake SVG Cut file

I cut one color first, then I cut the same shapes from the 2nd color.

3D Snowflake SVG Cut file

Next, I’m going to glue my pieces together, I’m using my tape runner, but you could also use a glue stick. I’m going to glue the two pieces with the hole at the top together. Then I’m going to glue the two pieces without the hole in the top together. Make sure the slit lines match up on the two pieces without the hole in the top.

3D Snowflake SVG Cut file

Then I’m going to slide the two pieces together along the slits until they meet in the middle.

3D Snowflake SVG Cut file

Now you can add ribbon, twine, or fishing line through the hole at the top to hang your snowflake!

3D Snowflake SVG Cut file

DIY Gift Card Envelopes

Hi Everyone! This week I want to share a quick and easy way to make gift card envelopes.

DIY Gift Card Envelopes

Supplies:

(Links below may be affiliate links)

Silhouette Portrait 3 or other cutting machine

Portrait 3 Light grip mat

Bevel quill with D adapter from Foil Quill or scoring stylus with Silhouette Pen adapter

Auto Blade

My A2 Envelope template or any other envelope template you may have

Lightweight printed or plain cardstock

Gold adhesive foil or any adhesive vinyl of your choice

Vinyl transfer Tape

Glue or tape

To start, I overprinted some of my 65lb lightweight cardstock with a marble design I created in Procreate. You can use plain cardstock or any printed cardstock you already have on hand.

DIY Gift Card Envelopes

I’ve got the A2 envelope SVG already uploaded into Silhouette Studio. I have my score lines in Blue and my Cut lines in Red.

DIY Gift Card Envelopes

I will do the score lines first, so I’ve got my Bevel quill loaded with the D adapter from my Foil Quill. Settings are Sketch action, Force of 33, Speed 2. Your settings may vary depending on your materials

DIY Gift Card Envelopes

After it’s done scoring, I will use my Autoblade to cut the red lines. Settings are Plain Cardstock, Blade depth 4, Force 20, Speed 4

DIY Gift Card Envelopes

Next I created my word layout in Adobe Illustrator using the font Blenny Black. I outlined my letters and saved them as an SVG so I can import my file into Silhouette Studio. (I’m using the Business version).

You can use another font that you already have and you can also create your lettering directly in Silhouette Studio.

I’m going to cut my letters out my adhesive gold foil with my Auto Blade set to Vinyl, Metallic Material; Blade Depth 1; Force 10; Speed 5. Depending on what type of vinyl you use, your settings may vary.

DIY Gift Card Envelopes

After cutting, I weed out the excess foil and apply the transfer tape to the foil.

DIY Gift Card Envelopes

I’m going to peel off the backing of the foil letters and center my design on the front of the envelope (Just eyeballed it, but you can lightly mark on your cardstock with a pencil if you want to be more precise).

Carefully remove the transfer tape and make sure my letters are secured onto the cardstock.

DIY Gift Card Envelopes

Then I’m going to fold along the score lines and use my tape runner to seal the edges of the envelope.

DIY Gift Card Envelopes

Add your gift card, close the envelope with either glue, a tape runner, or a sticker and it’s ready for gifting!

DIY Gift Card Envelopes

Blade Replacement Alternatives for Portrait 3

Hi Everyone!

I’ve been cutting a lot of gift tags the past few weeks and I noticed my Auto Blade that came with my machine is getting dull. I searched on Amazon for a replacement and one single Autoblade is $16.99, yikes!! You have to replace the whole thing, not just the little blade inside.

So I did a little research and I found this CB09 blade that should work with the Portrait 3 and Cameo 4, you just need to put it in the Blue Tool Adapter, before inserting it into your machine.

**Links may be affiliate links and I may earn a small commission if items are purchased via the links.

I got mine a couple of days ago and I decided to try it out. It is a little bit of a process to set it up, but it seems like it’s going to be well worth it.

I’m going to test on some of my heavy cardstock, so I’m going to use one of the 45 degree blades with the red tip. I also need one of the little springs that comes with the blades.

CB09 Blade Portrait 3

Carefully remove the red rubber tip and slide the tiny spring onto the blade.

CB09 Blade Portrait 3

Then, unscrew with black plastic barrel on the blade holder. Insert the blade with the spring into the body of the holder. There’s a small hole with a magnet inside that will grab the blade when you insert it into the holder.

CB09 Blade Portrait 3

Screw the black plastic barrel back onto the holder.

CB09 Blade Portrait 3

I still have my dull auto blade and the blade depth is set to 7 which is what I use for my heavy cardstock. I’m going to twist the ridged silver metal portion of the holder so the blade is peeking out at approximately the same distance as my auto blade. It’s barely showing at the tip of the holder.

CB09 Blade Portrait 3

Now I’m going to put the entire holder into the Blue tool adapter, and snap it closed.

CB09 Blade Portrait 3

Time to load it into my Portrait 3 machine!

In Silhouette Studio I made a small 0.5 inch square to test.

CB09 Blade Test Portrait 3

In the send tab, I’m going to select Heavy Coverstock as my material and Ratchet blade as my tool. I want to try my blade depth on 7, Force of 30 and 1 pass.

CB09 Blade Portrait 3

I load my mat and send it through my machine. I lifted my cardstock off the mat to see if the cut went all the way through. It didn’t quite cut all the way, so I will try one more pass.

CB09 Blade Portrait 3

After the second pass, it cut all the way through. So now I’m going to save these material settings in Silhouette Studio.

CB09 Blade Portrait 3

So now my blade is set up to cut heavy cardstock. If I want to cut other materials, I will need to adjust the blade depth by turning the ridged silver part of the CB09 holder. There are no markings on the holder, so I will probably add a sticker and draw some lines on it so I know where I had my blade set for different materials.

This blade did a very nice cut, and with all the replacement blades it came with, it’s a fraction of the cost of the Auto Blade. I’m excited to see how long these blades last!

12 Gift Ideas for Someone Who Owns a Cricut or Silhouette Machine

Hi Everyone!

With the holidays getting closer, I wanted to share some gift ideas for people who already own a Cricut or Silhouette cutting machine. These are also great for someone who will be getting a machine for Christmas this year and you want to get them a few little extras.

Here are my top 12 gift ideas: (Note: Amazon links are affiliate links and I may receive a small commission if you purchase by clicking the link)

  1. Extra Cutting Mats

You can never have too many cutting mats! I like having a few of each color so If I’m making multiples of the same project I can set up additional mats while one is running on the machine. I haven’t bought any off brand mats yet, but a lot of people swear by the Nicapa brand on Amazon. But if you’re not willing to risk going with an off brand yet, check the Cricut website, Amazon, Michael’s, JoAnns, Hobby Lobby, or any other craft stores, someone usually has them on sale. For my Silhouette machine, I haven’t found an off brand mat that I like yet, but once again, check Amazon, craft stores, or Swing Design to see if there are any sales.

2. Extra Cutting Blades

A lot of people buy off brand replacement blades from Amazon and claim they last much longer than the Cricut or Silhouette brand blades. there are a lot of options, make sure you read the details and reviews to check that they will with with your machine. I haven’t tried any out yet, but I just ordered some blades that should work with Portrait 3 (with a CB09 holder and the Blue tool adapter). I’m very excited to try these once I get them!

There are also A LOT of off-brand replacement blades for Cricut at a fraction of the cost of a Cricut brand replacement. You use the same blade housing that came with your original Cricut blade. As always, read the descriptions and review to make sure the blades are compatible with your particular machine.

3. Paper Trimmer

I know it seems silly to buy a paper trimmer when you have a big expensive machine to cut cut paper, but a paper trimmer really comes in handy when you need to quickly cut down a piece of paper or cardstock into smaller sizes.

4. Craft Knife

Also, it seems silly to buy a craft knife or an Xacto knife when you have a fancy machine. But this little tool can be a lifesaver when you’ve already removed your mat from the machine and there are a few areas that didn’t quite cut all the through like they should. I recommend an Xacto knife or another generic brand over the Cricut True Control Knife. You can use standard #11 blades with an Xacto or generic, Cricut has it’s own special replacement blades, of course!

5. Self Healing Cutting Mat

This a great for protecting your workspace as well as having a nice little area to assemble projects. I own several of these in a few different sizes.

6. Delicate Surface Tape

This tape is awesome! I used to use blue painters tape to help hold my projects on my mat, but sometimes it would rip the cardstock. This tape rarely tears my cardstock and it does a great job holding my foil in place when I’m using my foil quill.

7. Tape Runner

These are super nice for assembling cards and envelopes and you don’t have to wait for glue to dry!

8. Pen or Marker Adapter

If you want to use any non-Cricut brand pens or marker with your machine, these are a must! And well worth it in my opinion. Check the details to make sure you are buying the correct one to fit your machine. These are also great for Silhouette machines, but not as necessary since they have a great adapter already.

9. Sakura Gelly Roll Pens

These pens are amazing on black or dark colored cardstock! The Cricut metallic gel pens DO NOT show up very well on black or dark colored cardstock, don’t waste your money on them. In order to use these with a Cricut machine you will need a pen adapter (see above). They fit in the Silhouette pen holder too!

10. Glue Pens

These are a fun little accessory you can use to foil, glitter, or heat emboss. You can buy the WRMK Glue Quill kit which comes with adapters for each machine. Or you can buy just some glue pens, but you will need pen adapter for your machine.

11. Light Pad

A lot people use these to help see the cut lines while they’re weeding vinyl or cardstock. It’s also great for tracing designs! This one is a fraction of the cost of the Cricut brand.

12. Foil Quill Set

I recommend this to everyone I know that has a machine, I love it! Don’t waste your money on the Cricut Foil Transfer Kit. The Foil Quill is so much more consistent and it works on way more materials. Just be aware, it will void the warranty on your machine, which is usually about a year. My Cricut machine is way out of warranty and I’ve also been using it in my Portrait 3 that I got this year without any issues. You can also check JoAnn’s, they often have deals on the Foil Quill.

That’s all for now! I hope I gave you a few ideas for gifts you could ask for or for someone you know that has a machine.

How to Set Up Your Template on Your Cutting Mat for Silhouette Users

Hi Everyone!

The past 2 weeks I have shared 2 projects that I am using a chipboard template with a 3 inch circle cut out to help keep my acrylic discs in place while I’m foiling or engraving. This week I’m going to share my method for how I align my template when starting a new project or coming back to my project after I’ve unloaded my mat from my machine.

In Silhouette Studio I’ve got my project already designed and set up to cut/ sketch by line. I’ve placed my design toward the middle of my mat so it’s easier to place the template while the mat is in the machine and so my template will NOT go under the rollers on the edges of my machine.

Portrait 3 Template set up in Silhouette Studio

On my actual mat I’m going to place a regular piece of printer paper approximately where my design should be.

Portrait 3 Template Alignment

I’m going to cut just the circle part of my design, so I select just the blue line, load my mat and send it to machine.

Portrait 3 Template Alignment

After the machine is done cutting, DO NOT UNLOAD the mat!! Carefully remove the excess paper from around the circle.

Portrait 3 Template Alignment

Now I’m going to take my template and place it over the circle so all of my edges are aligned.

Portrait 3 Template Alignment

I tape down the top edge of the template to my mat and carefully lift the template, hinging at the tape along the top edge.

Portrait 3 template set up

I remove the paper circle from my mat and place the template down again. I place some more tape around the edges of the template to help keep it in place. Now my template is ready to load an acrylic disc!

Portrait 3 template set up

Back in Silhouette Studio in the send screen, I uncheck the box for the blue circle. I select my yellow lines to sketch, foil, or etch and it’s ready for me to press send to my machine.

Portrait 3 template set up

As long as I don’t unload my mat, I can place another acrylic disc in the template once my first one is done.

If you accidentally unload your mat, you can repeat the same process above to realign your template again.

Etching on Acrylic with the Silhouette Portrait 3

Hi Everyone!

This week I’m going to share another technique you can use to decorate some acrylic blanks for holiday ornaments. I’m going to use my WRMK Etch Quill to engrave my design into the acrylic. If you see settings for etching, embossing, debossing, etc in Silhouette Studio, those are meant for the Curio machine. The Portrait 3 really isn’t designed to etch, that’s why I’m using the 3rd party etching tool.

WRMK Etch Quill

Let’s get started!

Supplies:

(Links below may be affiliate links)

Silhouette Portrait 3

Standard Grip Mat

Chipboard with 3” circle cutout (optional)

3 inch round 2mm thick acrylic ornament blanks

WRMK Etch Quill (with D adapter from Foil Quill)

9-12 inch length of ribbon or twine

Project:

I’m using the same 3” round snowflake design that I used last week. However, I did need to make some minor tweaks to the layout of this design. I rotated the snowflake 45 degrees so it’s not so close to the hole in the top of the acrylic. During my first attempt, the tip of the etch quill got stuck in the hole and it couldn’t move around to make the design properly. So lesson learned!

I already have the updated design saved in Silhouette Studio.

Snowflake artwork to etch on Portrait 3

I’ve got my chipboard template already set up on my mat (I will create another post showing you how to line up your template on your mat so you can use it over and over again even after you have removed it from your mat).

Template for acrylic blank

Peel off the layer of plastic on the side of the acrylic that you will be etching on. Leave the plastic on the back side of the acrylic to protect the acrylic from the stickiness of the cutting mat. You will peel the plastic from the back once the design is completed.

Acrylic blank for etching

I place my acrylic disc in the hole cut out on my template with the small hole at the very top. I also put some small pieces of tape on the edges of the acrylic to make sure it doesn’t shift around while it’s being etched. Make sure the tape doesn’t overlap any part of your design.

Silhouette Portrait 3 etching on acrylic

I select the yellow lines in the send tab. I have my material set for Heavy Coverstock, Action is Sketch, Force 33, Speed 2.

Settings for etching on acrylic

I click send and my little machine does it’s magic! I ended up doing 3 passes for this design. Depending on your design, you may need to do more or less passes to get the etching deep enough that it’s visible.

Silhouette Portrait 3 etching on acrylic

I use some tape to lift off the little acrylic dust bits before I remove the disc from my mat.

If you are doing a lot of etching, make sure you remove the tip every now and then to clean off the acrylic bits that have built up.

Silhouette Portrait 3 etching on acrylic

If you leave your mat in the machine, you can do this design again on another blank disc. To remove my ornament I just lift up the template, keeping it still attached to my mat the the top edge. I lay the template back down on my mat and now I can place another disc inside the template.

Silhouette Portrait 3 etching on acrylic

I remove the plastic from the back of the ornament and then tie my ribbon through the little hole in the top.

It’s definitely more subtle that the foil on the acrylic, but it’s another nice way to create custom holiday ornaments or gift tags.

Finished etched acrylic ornament
Detail of finished etched acrylic ornament

Foil Quill on Acrylic with the Portrait 3

Hi Everyone!

It’s hard to believe it’s already November! This month I’m going to be focusing on projects for the holidays. Today’s project will be acrylic ornaments decorated by using the WRMK foil quill. Let’s get started!

Supplies:

(Links below may be affiliate links)

Silhouette Portrait 3

Standard Grip Mat

Chipboard with 3” circle cutout (optional)

3 inch round 2mm thick acrylic ornament blanks

Medium Tip Foil Quill

Gold Foil heat reactive foil or any foil color of your choice

9-12 inch length of ribbon or twine


Project:

I created a 3 inch circle in Silhouette Studio and I centered one of the snowflakes from my Snowflake Single Line SVGs

I added 2021 at the bottom using the font La Bohemienne.

Artwork set up in Silhouette Studio

I am going to send this to my machine by line color. Everything in Yellow will foiled.

My acrylic blanks are already cut into 3 inch circles, so I won’t need to actually cut them.

I already had a piece of chip board with a 3 inch circle cut out so I will be using that to help align my acrylic pieces on the cutting mat. I have it placed pretty far down on my mat so I can easily remove the foil and the ornament without removing the mat from the machine. (I will create a post later showing you how to make a chip board pattern and how to realign it to use it if over and over again.)

Mat prep for foil quill on acrylic

Plug in your Medium Foil Quill tip so it has time to heat up. I’m using the D adapter that came with the foil quill.

Medium tip foil quill using D adapter

Remove only one side of the clear plastic coating from the acrylic blank - this is the side you will have face up to foil on.

Remove plastic coating from acrylic blank

Place the acrylic blank inside the circle in the chipboard with the side that still has the plastic coating is face down against the mat.

Acrylic blank inside chipboard template

Tape down your foil over the acrylic round, make sure it’s nice and tight. My foil piece is about 4 inches x 4 inches

Tape foil over acrylic blank

In Silhouette Studio, I have just the Yellow line selected. For my material I chose Craft Foam since that’s a thicker material. My Action is Sketch, Tool is Pen, Force of 5, speed 2.

machine settings for foil on acrylic

I load my mat and press send.

After the machine is done, if you plan to make multiples, DO NOT unload the mat.

Carefully remove the foil and ornament from the mat, without taking the mat out of the machine.

I put a piece of metallic twine through the top hole and now you have pretty ornament to give as a gift or use it to jazz up your gift wrapping!

Finished ornament with gold foil on acrylic

The metallic foil sticks really well to the acrylic, the heat from the foil quill kind of melts it into the ornament. It’s so pretty, I can’t wait to try this out with different artwork on different foil colors!

Detail of gold foil on acrylic
Finished ornament gold foil on clear acrylic

Scoring with the Portrait 3 Using the Cricut Scoring Stylus

Hi Everyone!

This year I bought a Silhouette Portrait 3 machine because I wanted something smaller than my Cricut Maker that I could easily set up for quick little projects. I was also going to have to buy new mats, blades, etc anyway if I had purchased a Joy. So I decided on the Portrait 3 because it’s capable of doing so much more than the Cricut Joy.

So far, the only thing I haven’t really liked about my Portrait 3 is the scoring capability. As I mentioned in last week’s post, I don’t really like the dashed score lines or the shallow cut it uses for a solid score line.

This week I’m trying out my Cricut scoring stylus with my Portrait 3.

One of the things I really like about Silhouette is all of the adapters you can use with with their machines so you can use a variety of different brands of tools.

I’m using the Silhouette pen adapter that goes with my machine (it’s the same one that’s for the Cameo 4) and the M ring that screws into it.

Cricut Scoring Stylus and Portrait 3 pen adapter

I tried out my same A2 envelope pattern with some light 65lb cardstock, the Force set at 33, Speed 2.

project set up in Silhouette Studio

It definitely scores the cardstock! Not quite as deep of a score line as my bevel quill. But if you’re like me and have both a Cricut and Silhouette machine, this is another viable option for scoring with your Silhouette machine.

Cricut scoring stylus in Portrait 3 pen adapter
using Cricut scoring stylus with Portrait 3
score lines with portrait 3

Silhouette Portrait 3 Scoring with the Bevel Quill

Hi Everyone!

I like to make special little envelopes for birthdays or Christmas and I sometimes decorate them with my Silhouette Portrait 3 machine using pens or the foil quill. In order to make the envelopes I need to create score lines as well as cut lines. Unfortunately, I don’t really like the little dashed lines that are the default score lines for Silhouette. I’m also not really of fan of the solid score line using the auto blade or ratchet blade because it does cut into your paper or cardstock slightly and if you’re using a printed or colored paper it can leave a very visible line.

I’ve been experimenting with some of the different little tools I have for my machine and so far I’ve liked the scoring results best when I use my WRMK Bevel Quill.

Silhouette Portrait 3 Scoring with Bevel Quill

This little tool has never quite reached the popularity of the foil quill, so it might be slightly difficult to find if you don’t already have it. I managed to get one on clearance from my local JoAnn’s and it looks like they’re still available on Amazon.

I’m going to be useing my A2 envelope template. A gift card from the kiosks that you see at the grocery stores fits perfectly into this envelope!

I have my template open in Silhouette studio, I’m going to change the line color of the inner rectangle to yellow (you can pick any color) since those are the lines that I will need to score.

Silhouette Portrait 3 Scoring with Bevel Quill

I go to the send tab in Studio and I’m going to work by line color. I made my score lines yellow, my cut lines are blue. The little box next to the the yellow is checked as I will be scoring first, then cutting. Instead of SCORE, I actually have SKETCH selected as my action, Force 33, Speed 2.

Silhouette Portrait 3 Scoring with Bevel Quill

I’m using a lightweight 65lb cardstock to make my envelope and I will also be using my Light tack mat since it’s a little thicker than the standard mat.

I have my Bevel Quill loaded into my machine. Note: I am using the D adapter that came with the Foil Quill. The D adapter that came with the bevel quill doesn’t fit as tightly into my machine and the quill pops up and out of place once it’s pressed down onto the cardstock.

Silhouette Portrait 3 Scoring with Bevel Quill

I load my mat and press send. The little Bevel Quill did it’s magic.

Silhouette Portrait 3 Scoring with Bevel Quill

I’m going to swap it out for my auto blade to do the cut around the outer edge. I uncheck the box for the yellow line & I check the box for the blue line in Silhouette Studio.

Silhouette Portrait 3 Scoring with Bevel Quill

Once it’s done cutting, I fold along the score lines, add some glue tape along the sides. Now I have a perfect little envelope!

Silhouette Portrait 3 Scoring with Bevel Quill


Tips for Using the WRMK Fine Tip Foil Quill with the Silhouette Portrait 3

(Links in article below may be affiliate link)

Hi Everyone!

This week I was fulfilling an Etsy order for my snowflake gift tags, I typically make these on my Cricut Maker, but I wanted to try making them on my Silhouette Portrait 3 to see how they turn out.

I make these gift tags using my snowflake single line SVGs, heavy 100lb cardstock, the fine tip WRMK Foil Quill, and WRMK foil in gold for the white cardstock and silver for the black cardstock.

For the Portrait 3 and Cameo 4, the adapter A for the Silhouette machines doesn’t work. So I use the adapter D that came with my foil quill set.

Fine Tip Foil Quill Silhouette Portrait 3

In the Send screen set my Portrait 3 to sketch, Coverstock, Heavy (105-122lb), Force 2, Speed 2.

Fine Tip Foil Quill Silhouette Portrait 3

Initially I started out using an off brand mat with my Portrait 3, they’re a little thicker and stiffer than the Standard Portrait 3 mat.

I load my mat and press Send from the Silhouette software.

Almost immediately my foil starts ripping!!!!

Fine Tip Foil Quill Silhouette Portrait 3

I switch to my Silhouette brand Standard grip mat, it’s thinner and floppier that my off brand mat. I also switch my material to Chipboard, Force 2, Speed 2.

Fine Tip Foil Quill Silhouette Portrait 3

Reload my mat and press Send. This time the foil didn’t rip and the results are beautiful!

Fine Tip Foil Quill Silhouette Portrait 3

So here are my top 6 tips for using the WRMK Fine Tip Foil Quill:

  1. Use the D adapter that comes with the Foil Quill set

  2. Use the Silhouette brand Standard grip mat

  3. Place something like a book or a small box in front of your machine to help keep the mat level while it’s foiling. You want something that is roughly the same thickness as the front of the machine.

  4. Select a material that is thicker than the material you are foiling. For example, I was using heavy cardstock (overstock) so I selected chipboard.

  5. Select a lower force and speed. The default settings for Chipboard were Force 7, Speed 5. I got the best results with Force 2, Speed 2. Your settings will differ depending on the materials you’re using.

  6. Don’t try to foil everything at once. I can typically get 8 gift tags out of one piece of cardstock, but I cut the cardstock down into smaller pieces and foil the smaller pieces instead of one giant piece at once. That way, if something happens while foiling, I’m not wasting an entire piece of cardstock and a big piece of foil.

Using the Trace Tool in Silhouette Studio

Hi Everyone!

Last week I showed you how to use the Pix Scan mat with the Portrait 3. This week I’m going to go a little more in depth with how to use the trace feature in Silhouette studio to make a sticker offset. Here we go!

I’ve already taken a photo of the designs I’m going to use on my Pix Scan mat and imported it into Silhouette Studio.

Trace Tool Pix Scan Mat

Then I’m going to zoom in the the first little kitty that I’m going to trace and I select the Trace tool from the little toolbar on the right hand side of my screen. It kind of looks like a little butterfly.

Trace Tool Pix Scan Mat

Next, I click on “Select Trace Area” from the Trace tool dialog box. I draw a rectangle around the kitty I want to outline. I have “Solid Fill” selected in the Trace tool dialog box so the area I’m trying trace is easier to see.

Trace Tool Pix Scan Mat

I use the Threshold slider to try to get him little more filled in with the yellow, I’m really trying to get my outer edges completely yellow, there are some small gaps but we’ll fix those later.

Trace Tool Pix Scan Mat

Once I get the yellow area to my satisfaction, I select “Trace Outer Edge.” Then it shows me red cut lines around the area that I just traced.

Trace Tool Pix Scan Mat

Now I need to do a little clean up since my outer edges didn’t quite get the whole outline of the kitty and there are some areas from another sticker that got selected.

Using the Arrow from the left hand side tool bar, I select the red lines. I’m going to release the Compound Path.

Trace Tool Pix Scan Mat

Then I’m going to select the red line that goes around the outer edge of the kitty and change the line color to blue (you can use any color, I’m just using blue because it’s easy to see).

Trace Tool Pix Scan Mat

Now I’m going to make the offset. Select the little star from the tool bar on the right hand side. I’m going to make an outer offset at 0.125”. Then click Apply.

Trace Tool Pix Scan Mat

I’m going to delete the inner blue line. Then I’m going to smooth out the offset a little bit using the smooth tool.

Trace Tool Pix Scan Mat

Next, I’m going to get rid of the red outlines that are part of the other sticker. I could click each individual piece to get rid of it, but instead I’m going to use the “Select by Color” feature.

In the tools bar that goes across the top edge, I select the little paint palette with the dotted line around it. In the dialog box I have “By Line color” selected. Then I click on the red and it selects everything with a red outline.

Trace Tool Pix Scan Mat

I click delete and now all of the red lines are gone!

Trace Tool Pix Scan Mat

I repeat the same process for the other images on my mat. One thing I love about Silhouette Studio is I can can save my cut lines and use them for the next sheet of stickers too!

Using the Silhouette Portrait 3 Pixscan Mat to Cut Stickers

Hi Everyone!

This week I want to share another favorite accessory for my Silhouette Portrait 3, the Pixscan mat! It’s super helpful for cutting stickers or things you may have already printed and now you want to cut them.

First, if you haven’t done so already, you will need to calibrate whatever camera you care going to use. I’m going to be using my iPhone X.

Open Silhouette studio. I currently have not mat selected. I’m going to the little PIX icon on the toolbar to the right of Silhouette Studio.

Click on “Show Calibration Test Card.” A page full of little black dots will pop up.

Pix Scan Mat Calibration

Now we need to print this sheet with all the little black dots. I click on the little printer icon in the toolbar across the top.

My print screen pops up and I’m going to click Print.

Pix Scan Mat Calibration

Then I’m going to select the printer that I will be using to print my stickers which is my Epson P600 and I print out the sheet full of dots on an 8.5” x 11” plain sheet of paper.

Next I need to take a photo of the dotted sheet with my phone or whatever camera you are using. I placed the dotted sheet on the floor (you need to use a flat surface), and tried my best to get all the dots without and background or edges of the paper showing. DO NOT use zoom.

Pix Scan Mat Calibration

Then I airdrop the photo from my phone to my laptop. If you can’t airdrop, you can email it to yourself as well. You need to somehow save the photo onto your computer so you can upload it to Silhouette Studio.

Back in Silhouette Studio in the Pix Scan dialogs box make sure the camera icon is selected. Below that, there is a Plus (+). Click on the (+), and find the photo that you just saved to your computer. Mine is saved to my Downloads folder.

Silhouette Studio automatically reads all the information attached to photo and it adds my iPhone X to the list of cameras.

Pix Scan Mat Calibration

Now it’s time to get our mat ready! Unfortunately the Pix Scan mat for the Portrait 3 is a little too small to fit a full sheet of 8.5” x 11” sticker paper, the max area is 7.6” x 11.7”. Make sure to plan your project accordingly! I already had my print outs, so I just cut them into two parts to fit on the mat.

Silhouette Portrait 3 Pix Scan Mat

Place whatever you are cutting on the mat, make sure you are NOT covering any of the little black boxes around the edge of the mat. The software will need to read those when you’re importing your picture.

Then you need to photograph the ENTIRE mat with the same camera that you calibrated. Make sure the mat is on a flat surface and there is even lighting. Don’t use zoom!

Silhouette Portrait 3 Pix Scan Mat

After you get your photo, you need to upload the photo to your computer. I use airdrop, but you could email it to yourself as well.

In the Pix Scan dialog box in Silhouette Studio, select “Import Pix Scan Image From File.” Locate your file wherever you have it saved on your computer, mine is in my Downloads folder again.

Silhouette studio is then going to place the photo that you just took and place it on the Pix Scan mat in the software.

Silhouette Portrait 3 Pix Scan Mat

Now we need to create our cut lines and there are a few ways to do that. I already have cut lines I created in Illustrator, I could import them as an SVG since I have the Business version of Silhouette Studio.

If you do not have the business version of Silhouette Studio, you can also draw the cut lines freehand in Silhouette Studio or you can use the Trace function.

I’m going to use the Trace function for these stickers since they’re irregular shapes. I will make a separate post later on how to use the trace tool.

Silhouette Portrait 3 Pix Scan Mat

I’m finished making my cut lines, and now it’s time to send to my machine! But first, I’m going to save my file so I can use these cut lines again on the second piece of sticker paper.

I go to the SEND tab in Silhouette Studio and since we’re just cutting, I’ll keep it on the Simple screen.

Silhouette Portrait 3 Pix Scan Mat

I load my mat into my machine, make sure the side with the arrow get’s fed through the machine first.

Silhouette Portrait 3 Pix Scan Mat

Press send, and now I have some cute little kitty stickers!

Silhouette Portrait 3 Pix Scan Mat

The accuracy of the Pix Scan Mat is so much better than the Cricut Snap Mat feature. I also really like that I can create and save my cut lines directly in Silhouette Studio. When I go to cut the the 2nd piece of this sticker sheet I can use the same cutline for the same kitties.

Embossing with Glue Pens and Silhouette Portrait 3

Hi Everyone!

This week I want to share another technique I like to use to embellish gift tags and cards. I will be using the WRMK glue quill with embossing powder. If you buy the glue quill set, it comes with 2 small jars of embossing powder. Or if you already have some embossing powder on hand, you can use that too.

I’m going to do this technique with a clear embossing powder that I already have and the gold powder that came with the glue quill set. I will also need my heat gun.

I already set up my file in Silhouette Studio, my blue lines will be drawn with the glue pen & the red lines will be cut. I’m using 65lb Recollections cardstock, and I will be drawing and cutting all of this matless, yay!!

Portrait 3 embossing with glue pen

First, I will draw all the lettering with the glue quill and the Silhouette pen adapter. When I open the send tab I select “Line" and check the box next to the blue square.

Portrait 3 embossing with glue pen

After it’s done drawing, I uncheck the blue box & select the red box to cut. I choose auto-pop out since I’m doing a matless cut.

Portrait 3 embossing with glue pen

I did need to send my cut through twice, it wasn’t quite deep enough to pop out the tags nicely after the first cut.

I remove my tags from the cardstock & now i’m going to apply the embossing powder. The glue from these pens stays tacky for a little while, so don’t worry if the glue looks dry, the powder will still stick.

I’m using an old jar of Recollections clear embossing powder, I’ve had it for a few years and it still works! I apply the powder pretty thick and move it around so all of the glue gets covered. I dump the excess powder back in the jar once I’m done applying it to all the tags.

(Top) Clear Powder applied, (Middle) Clear Powder being applied, (Bottom) No powder applied, only glue

(Top) Clear Powder applied, (Middle) Clear Powder being applied, (Bottom) No powder applied, only glue

I apply some heat to it with my heat gun. The powder melts and I’m left with almost like a clear gel-like finish. It’s raised and also very shiny.

Portrait 3 embossing with glue pen

Next I tried the gold powder that came with the Glue Quill set. I applied it the same way as the clear powder. This one is kind of disappointing. I was expecting a pretty metallic gold, but this one is very drab and not metallic at all. I will be on the look out for a better gold embossing powder.

Portrait 3 embossing with glue pen

But this is another way to add some texture and dimension to gift tags or cards using your Silhouette machine!

Portrait 3 embossing with glue pen