
Hi Everyone,
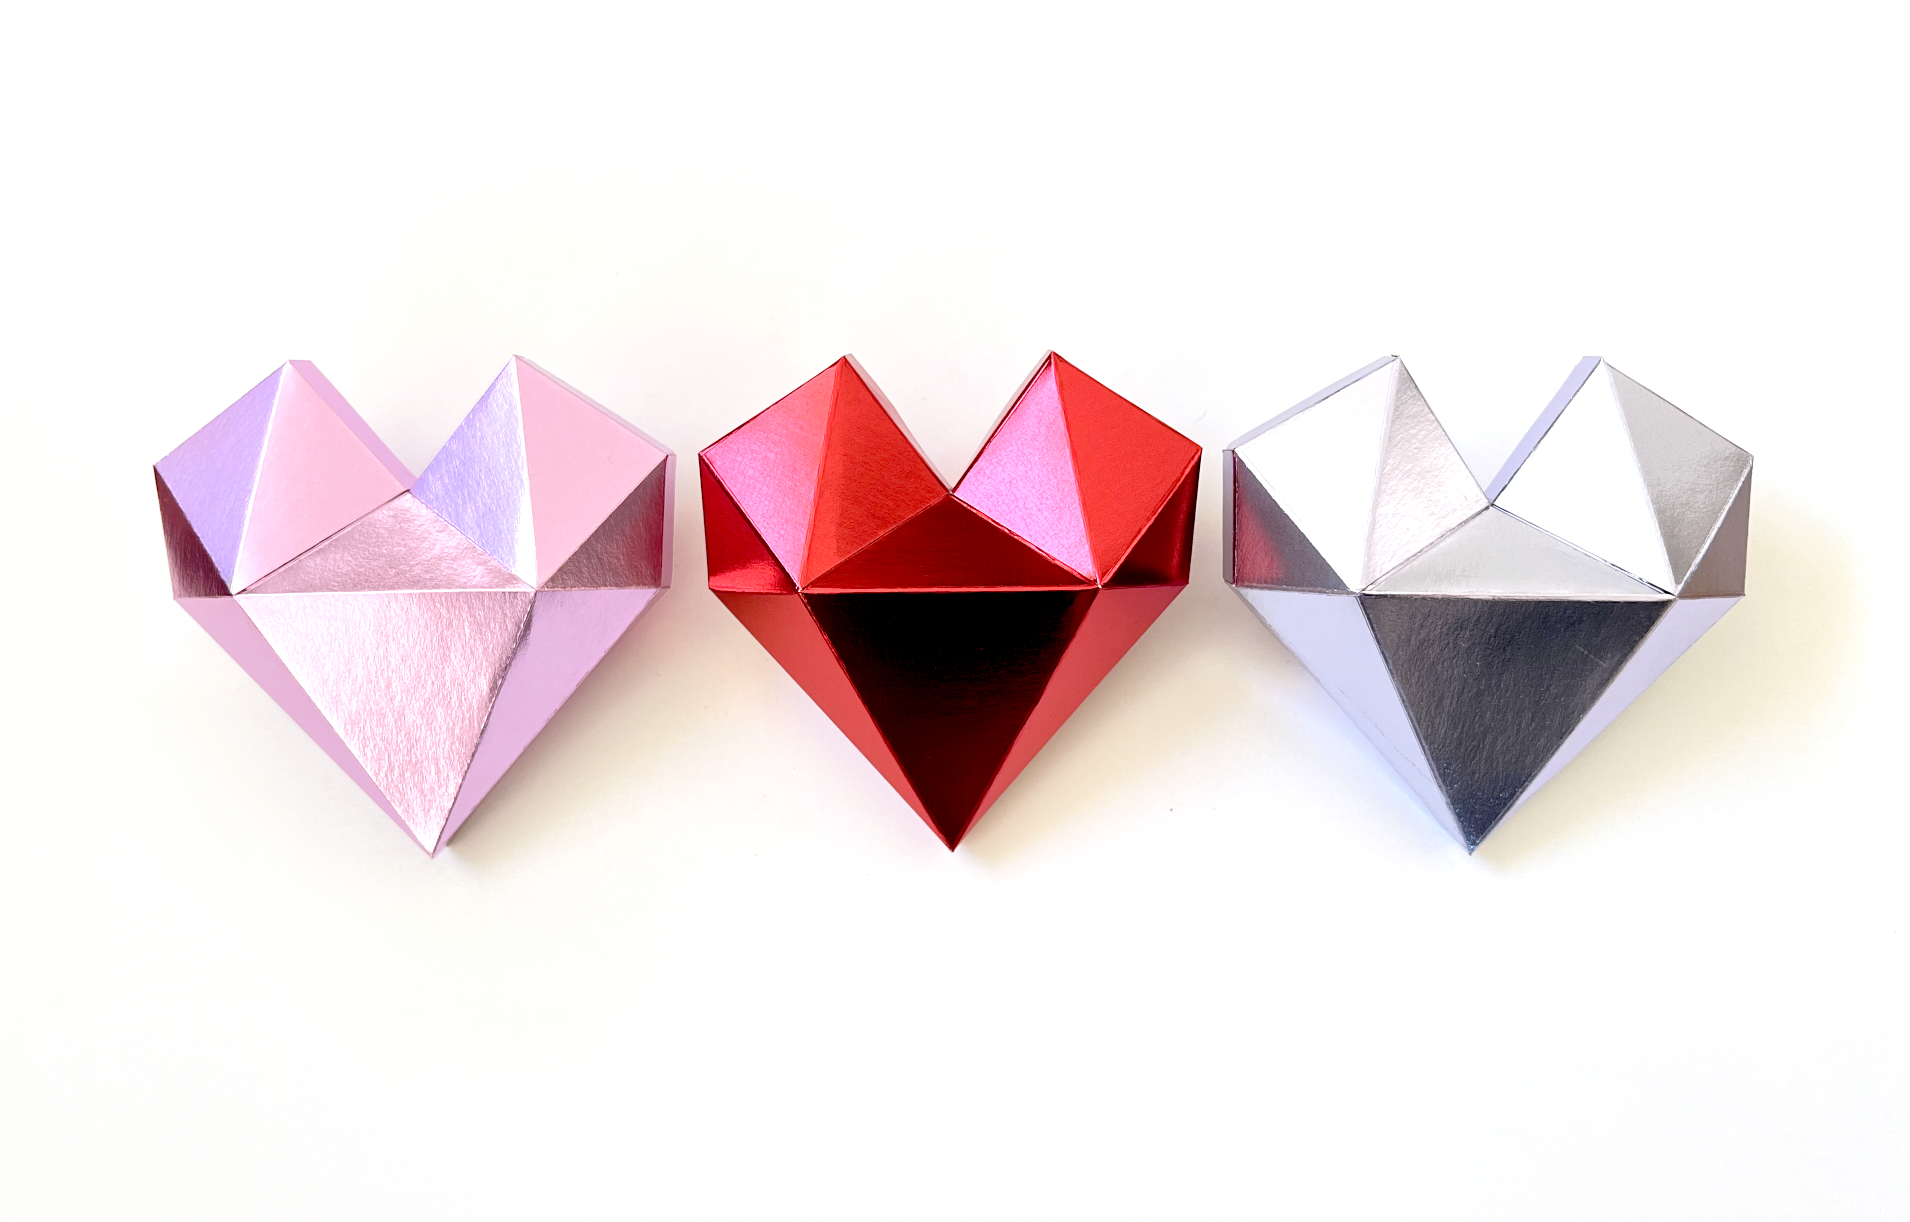
This week I’m working on some Valentine’s Day designs. I’ve been testing a pattern for a heart box on my Silhouette and Cricut machines so I can post here and in my Etsy shop. Here are the project details for making this on a Cricut Maker if you want to try it out for yourself!
Supplies:
(some links below may be affiliate links)
Cricut Machine (I will be using my Maker)
8.5” x 11” Foil Cardstock (or whatever cardstock you prefer)
Scoring Wheel or Scoring Stylus
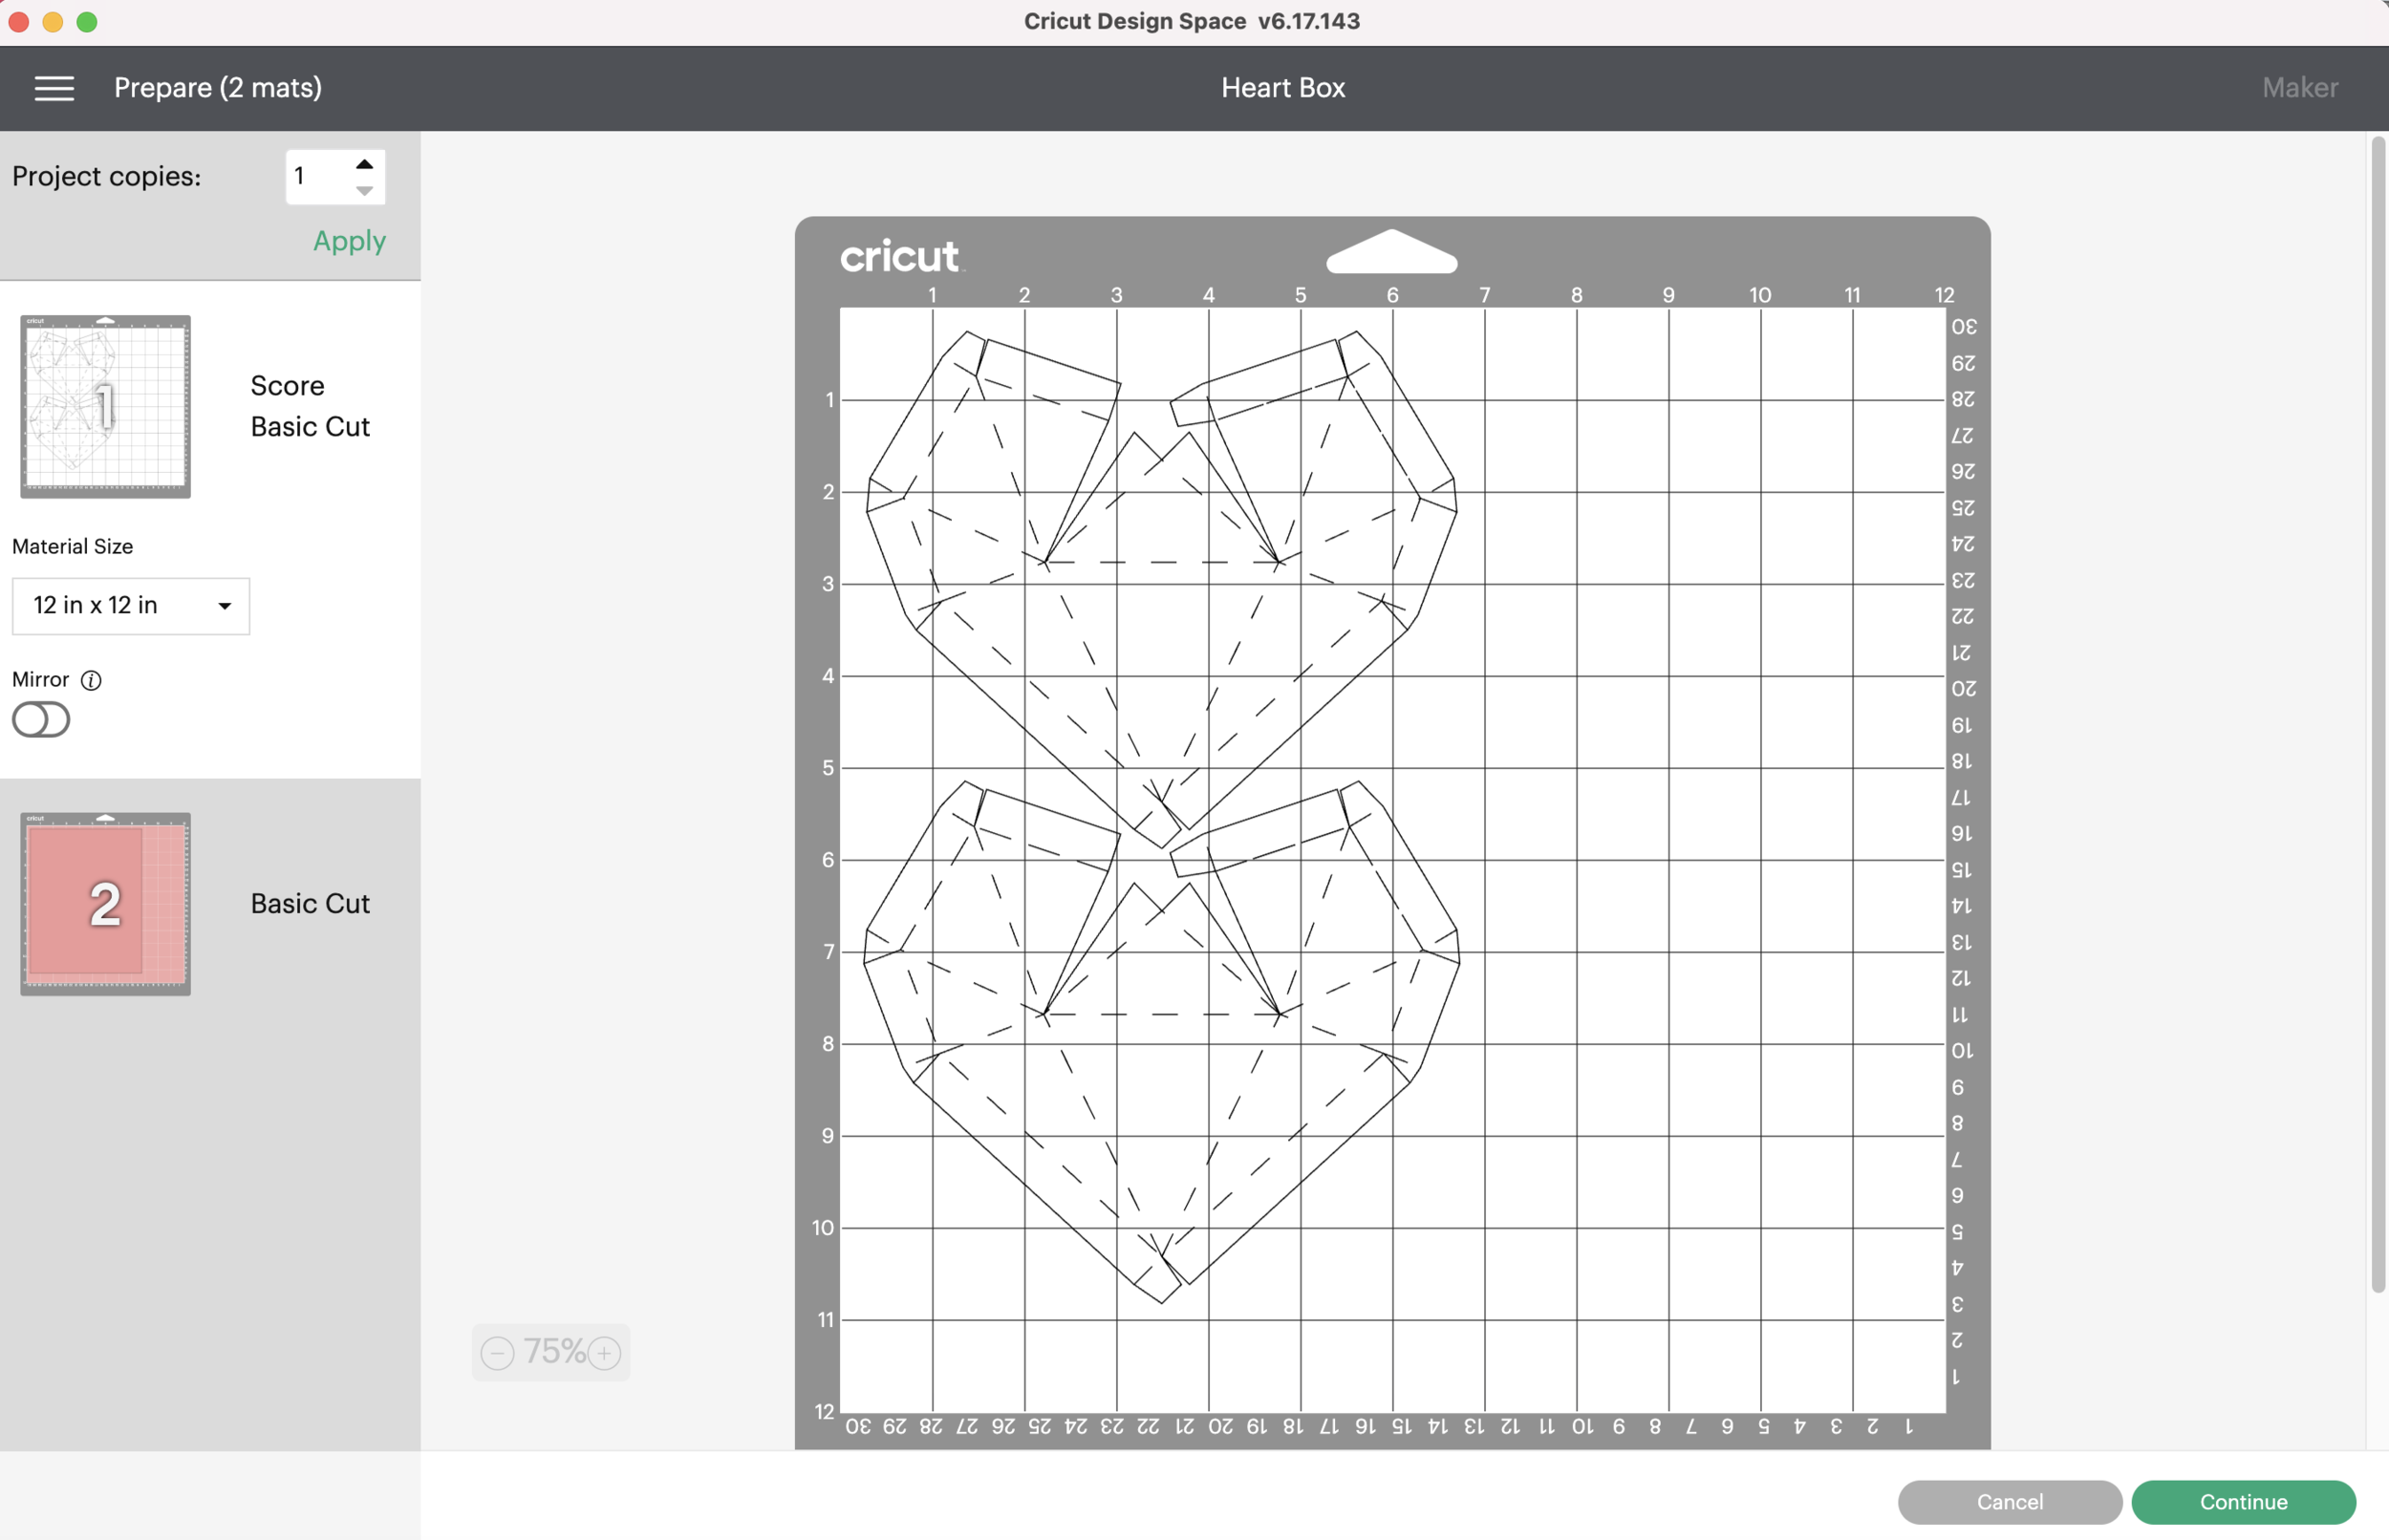
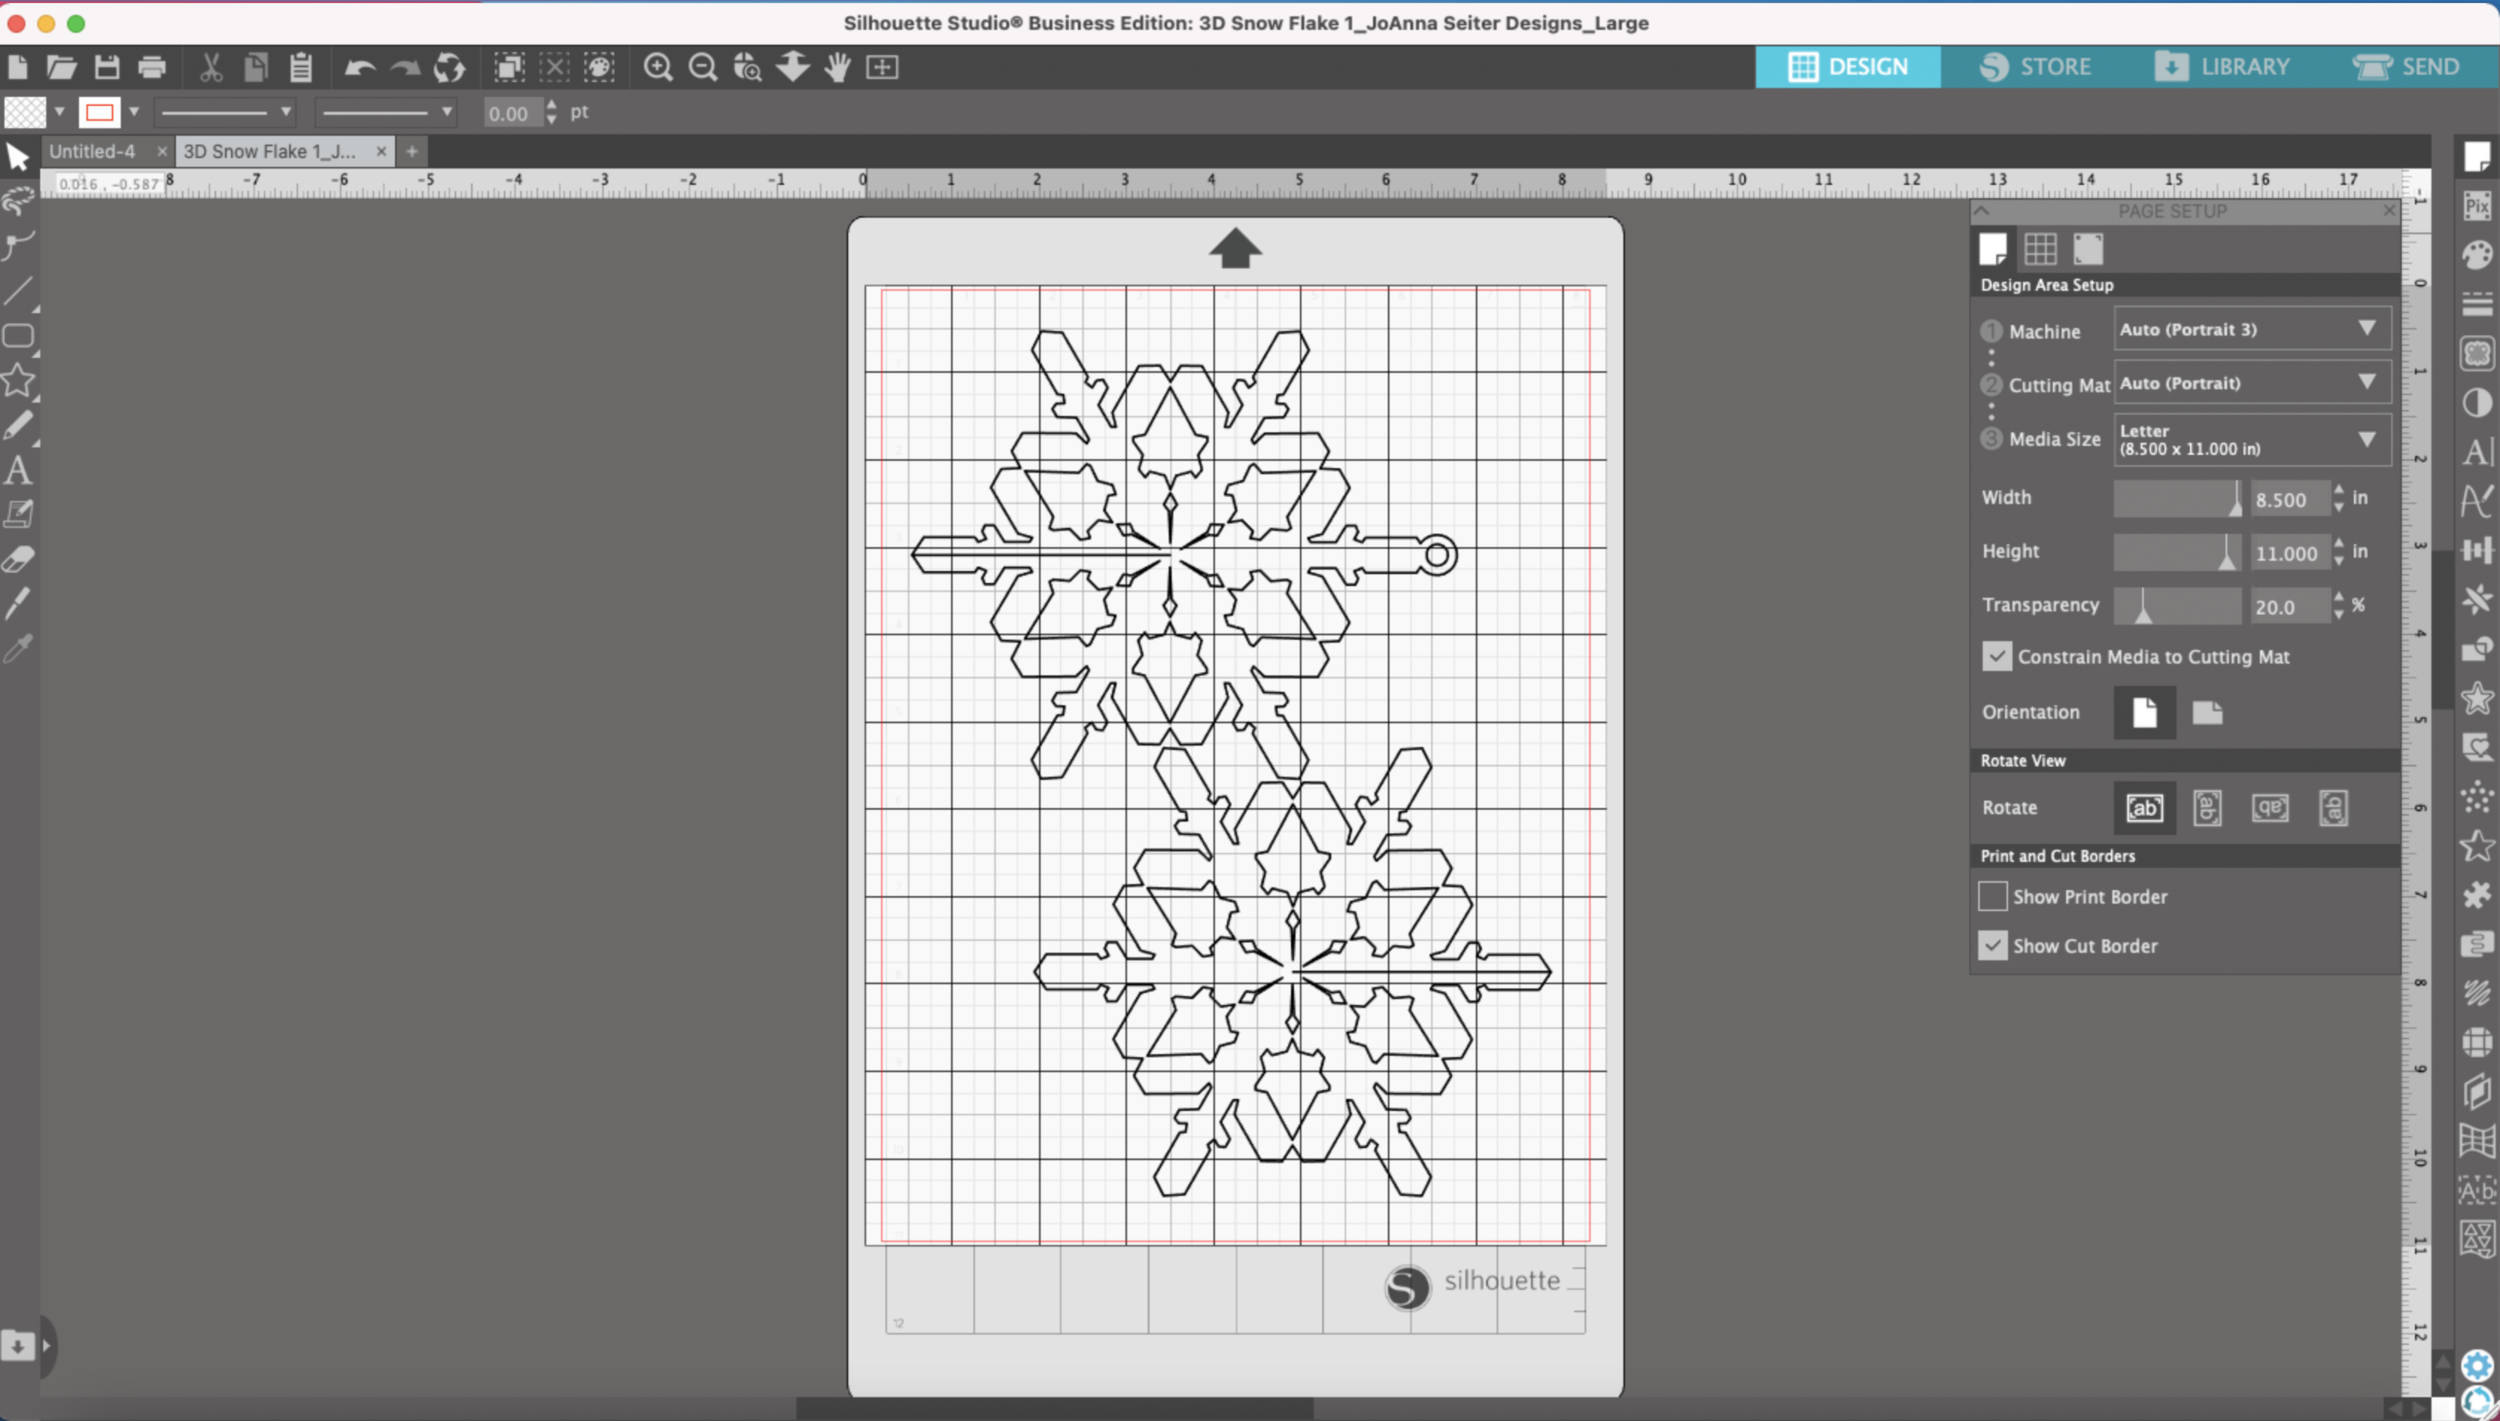
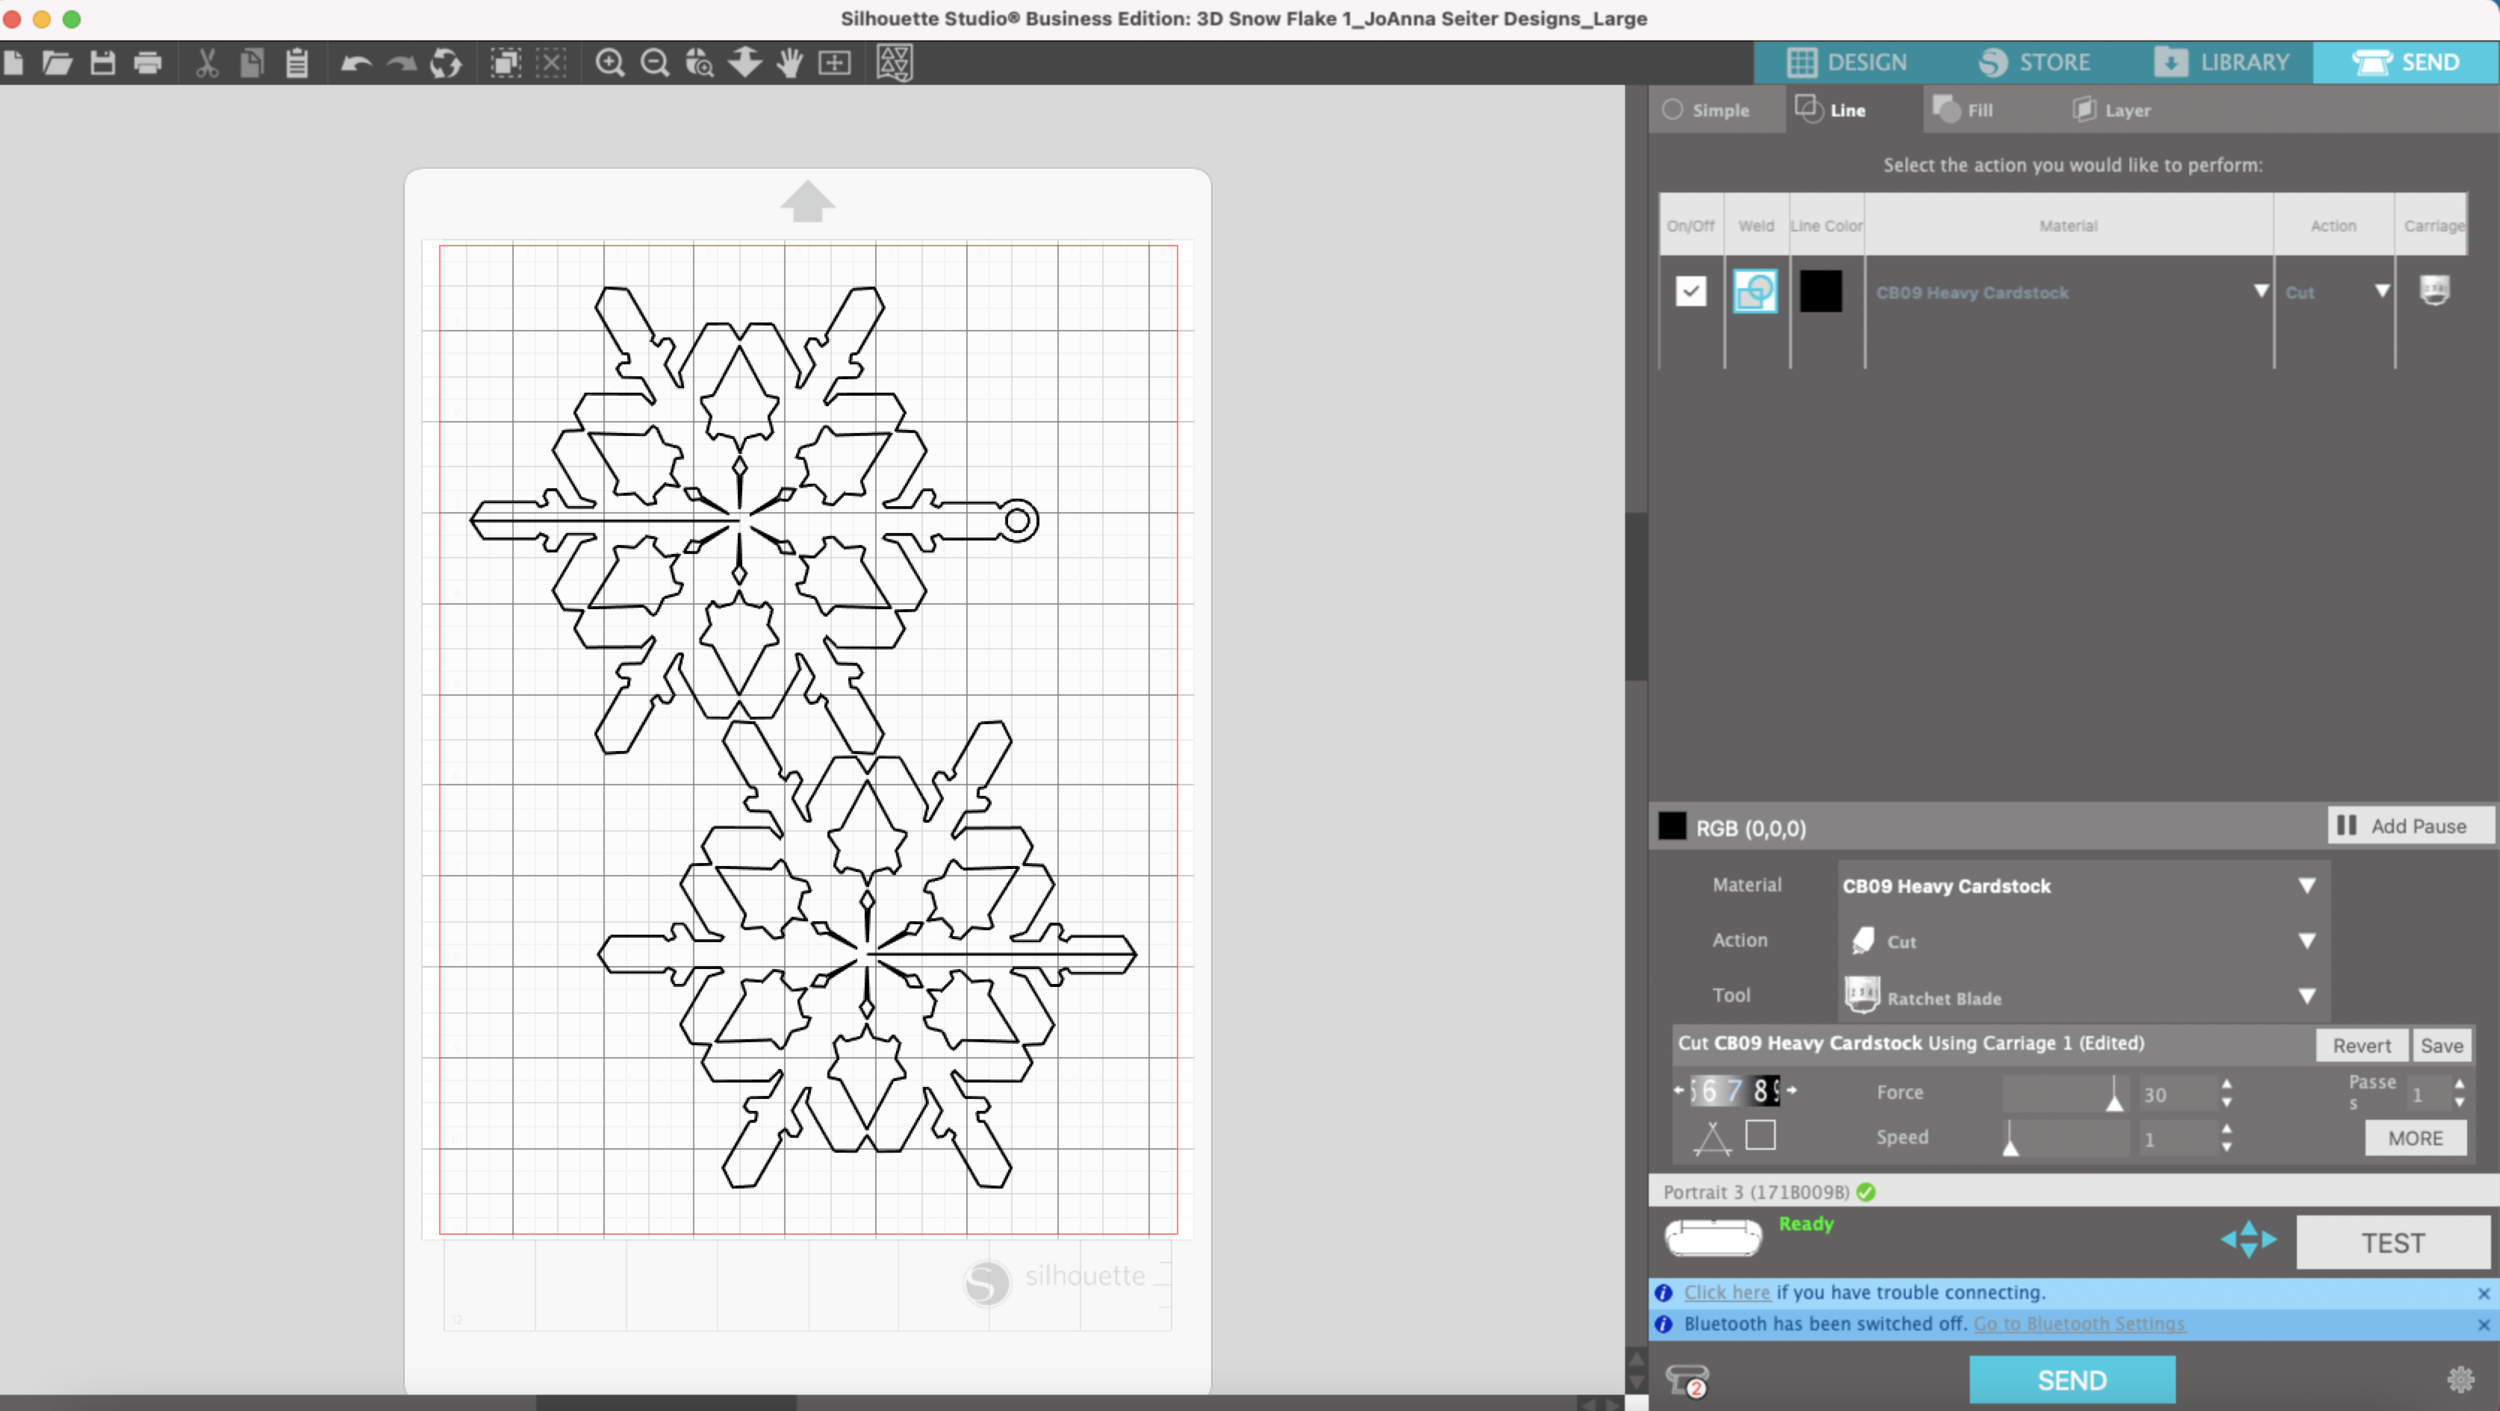
Upload to SVG into Cricut Design Space and insert it onto a blank canvas.
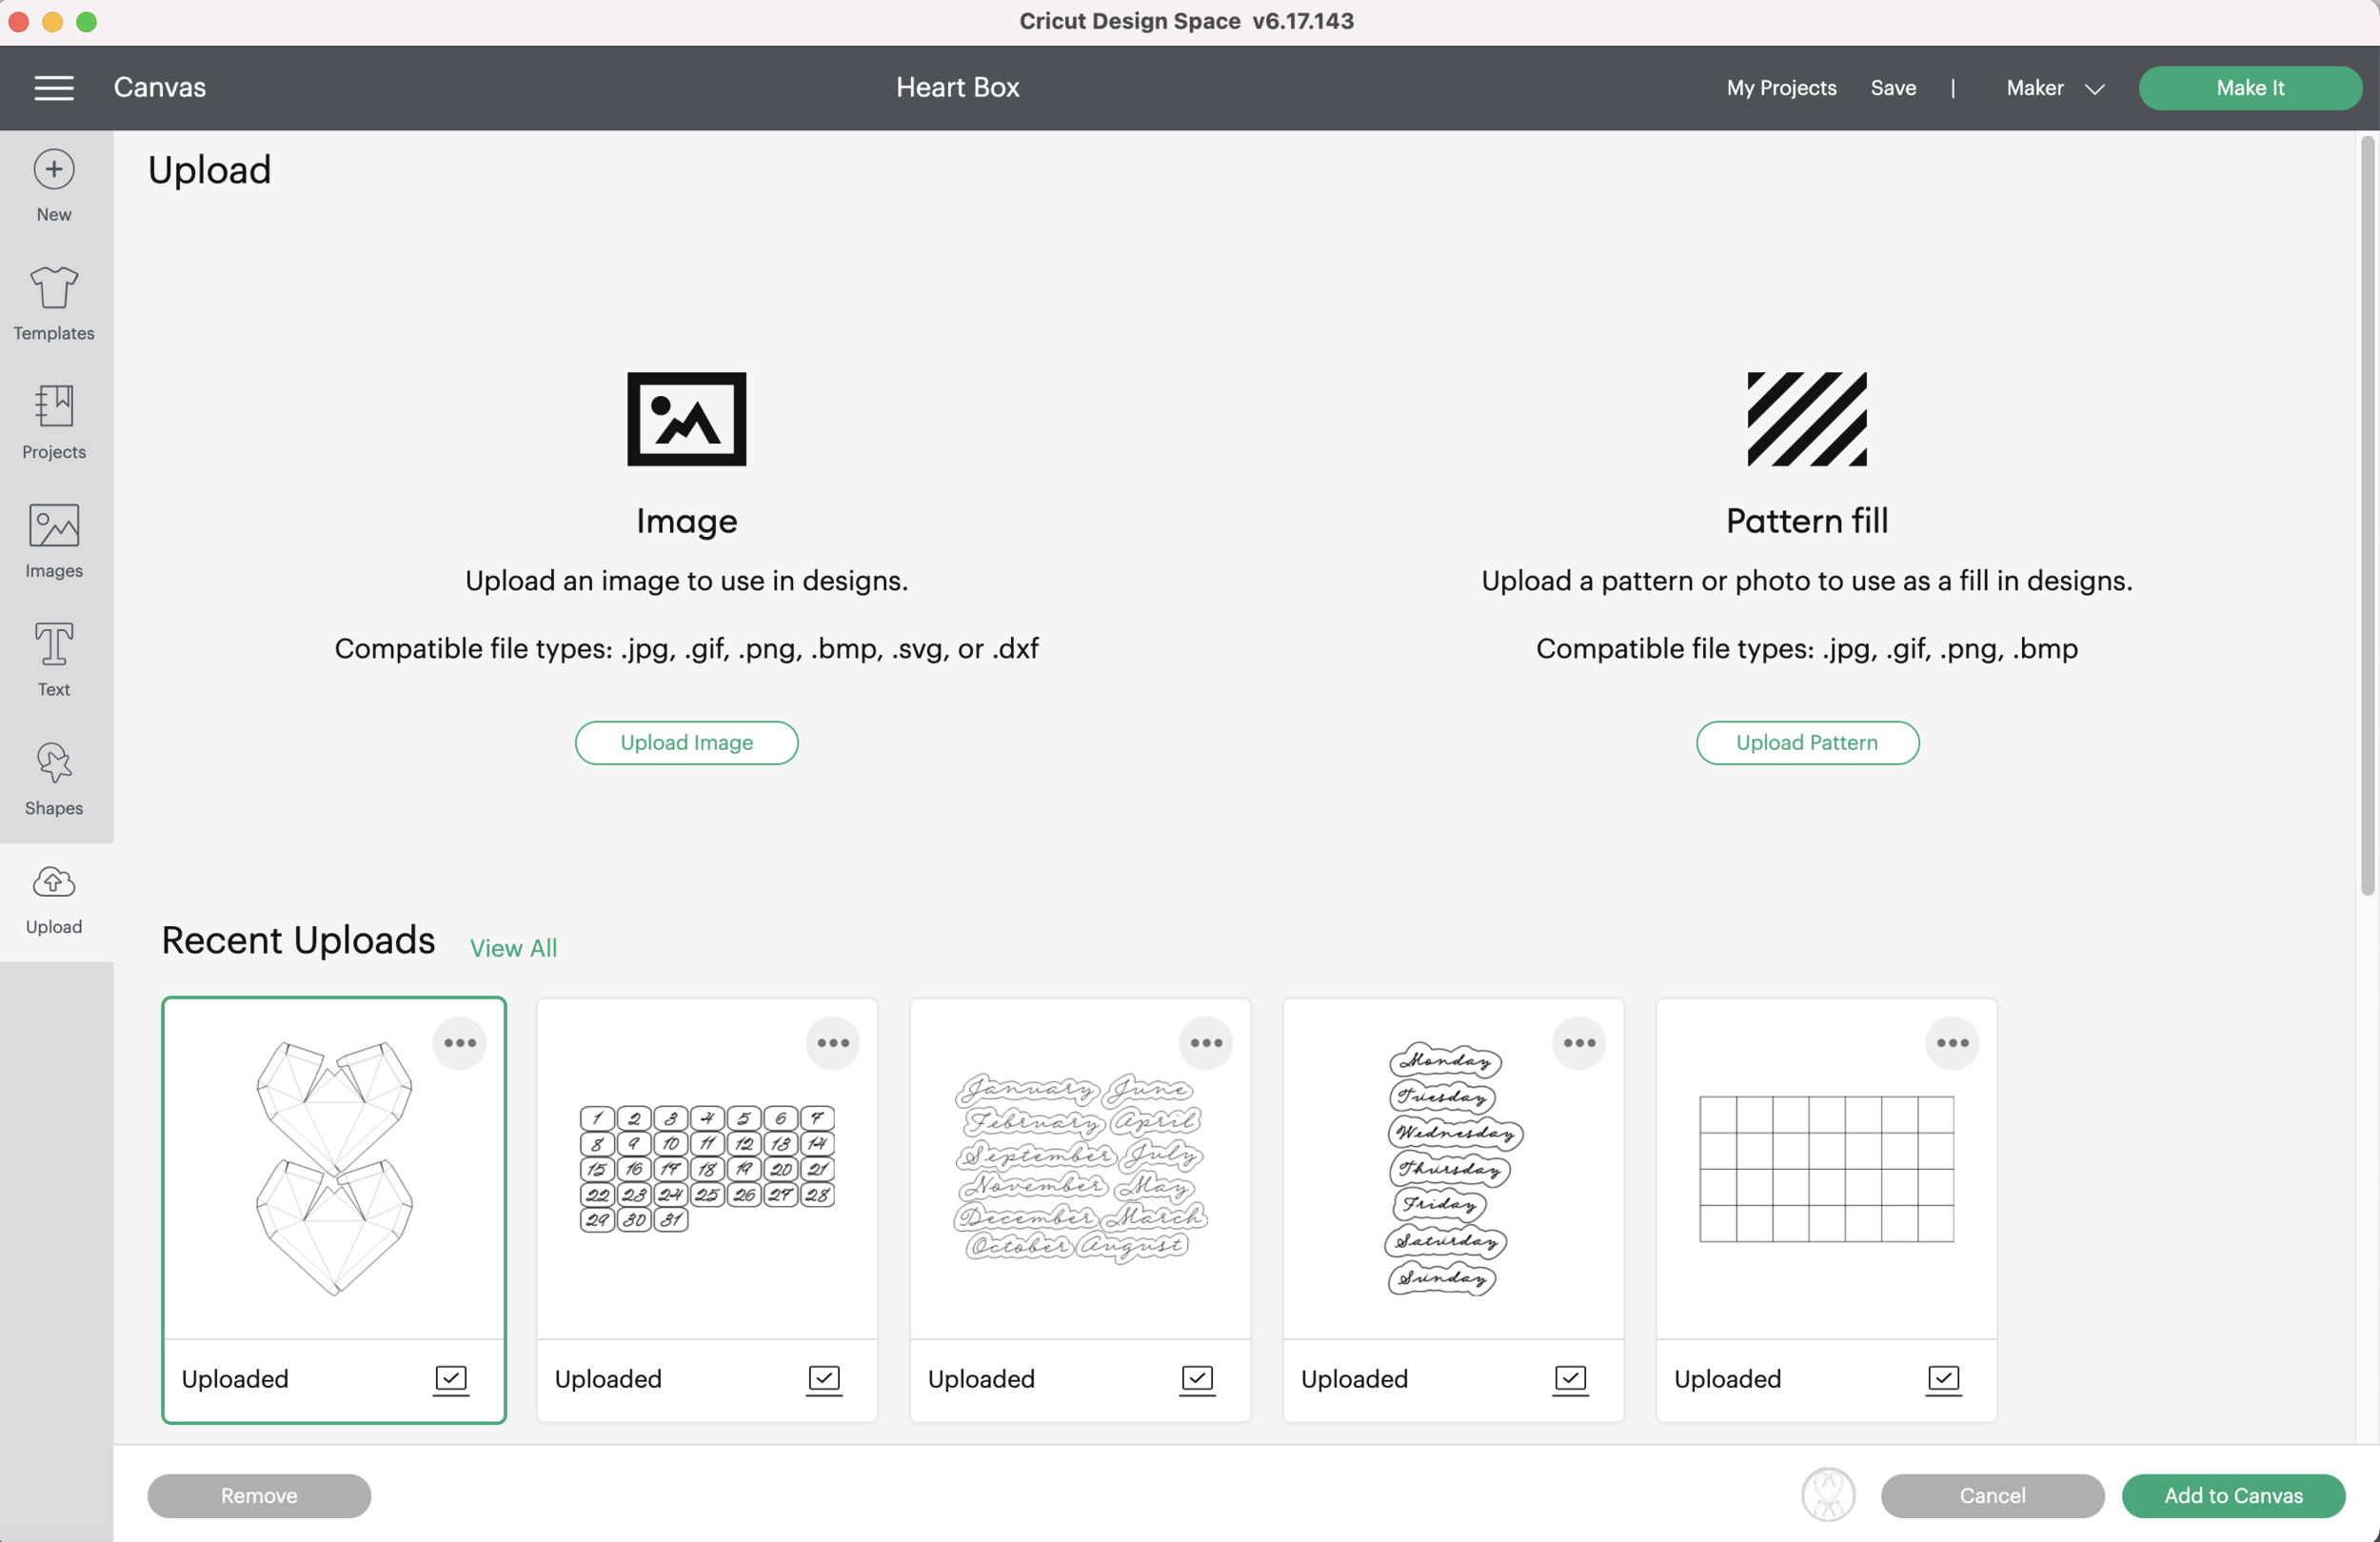
The top heart is the back of the box, to bottom heart is the front of the box. The back of the box is slightly smaller than the front.
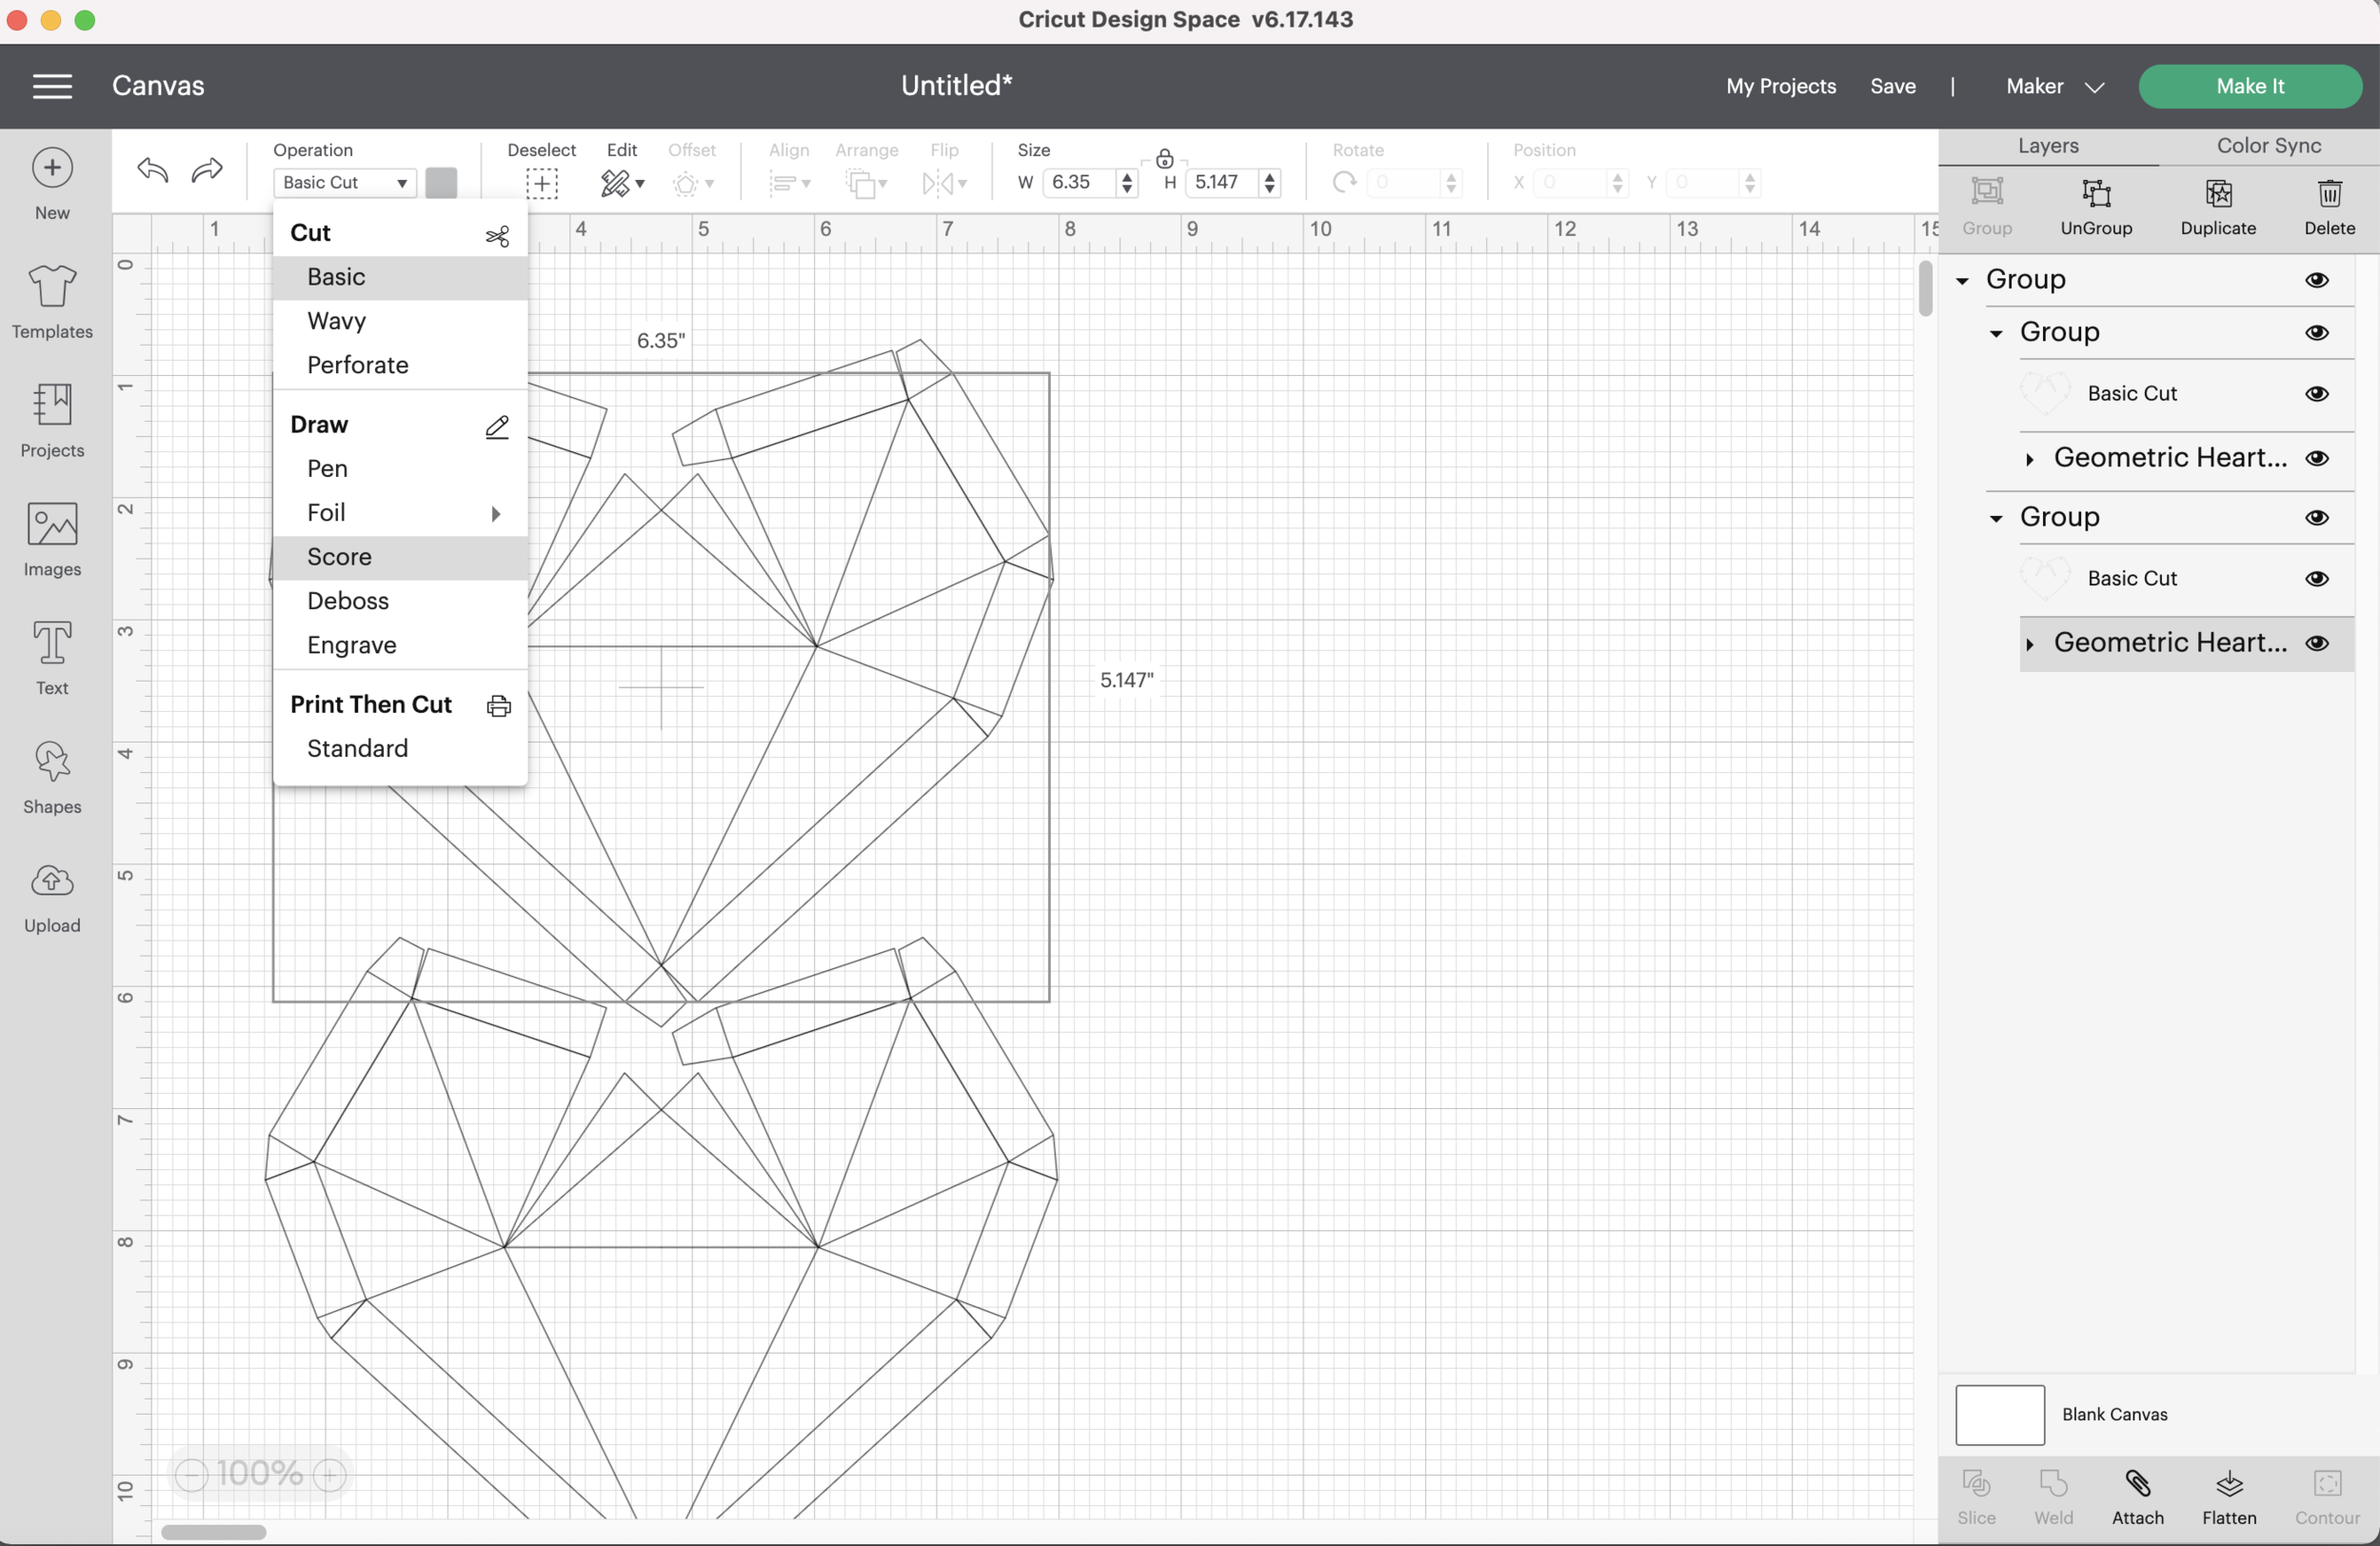
Select the groups that contains the score lines and change them from Basic Cut to Score Lines. Now your score lines should look like dashed lines.
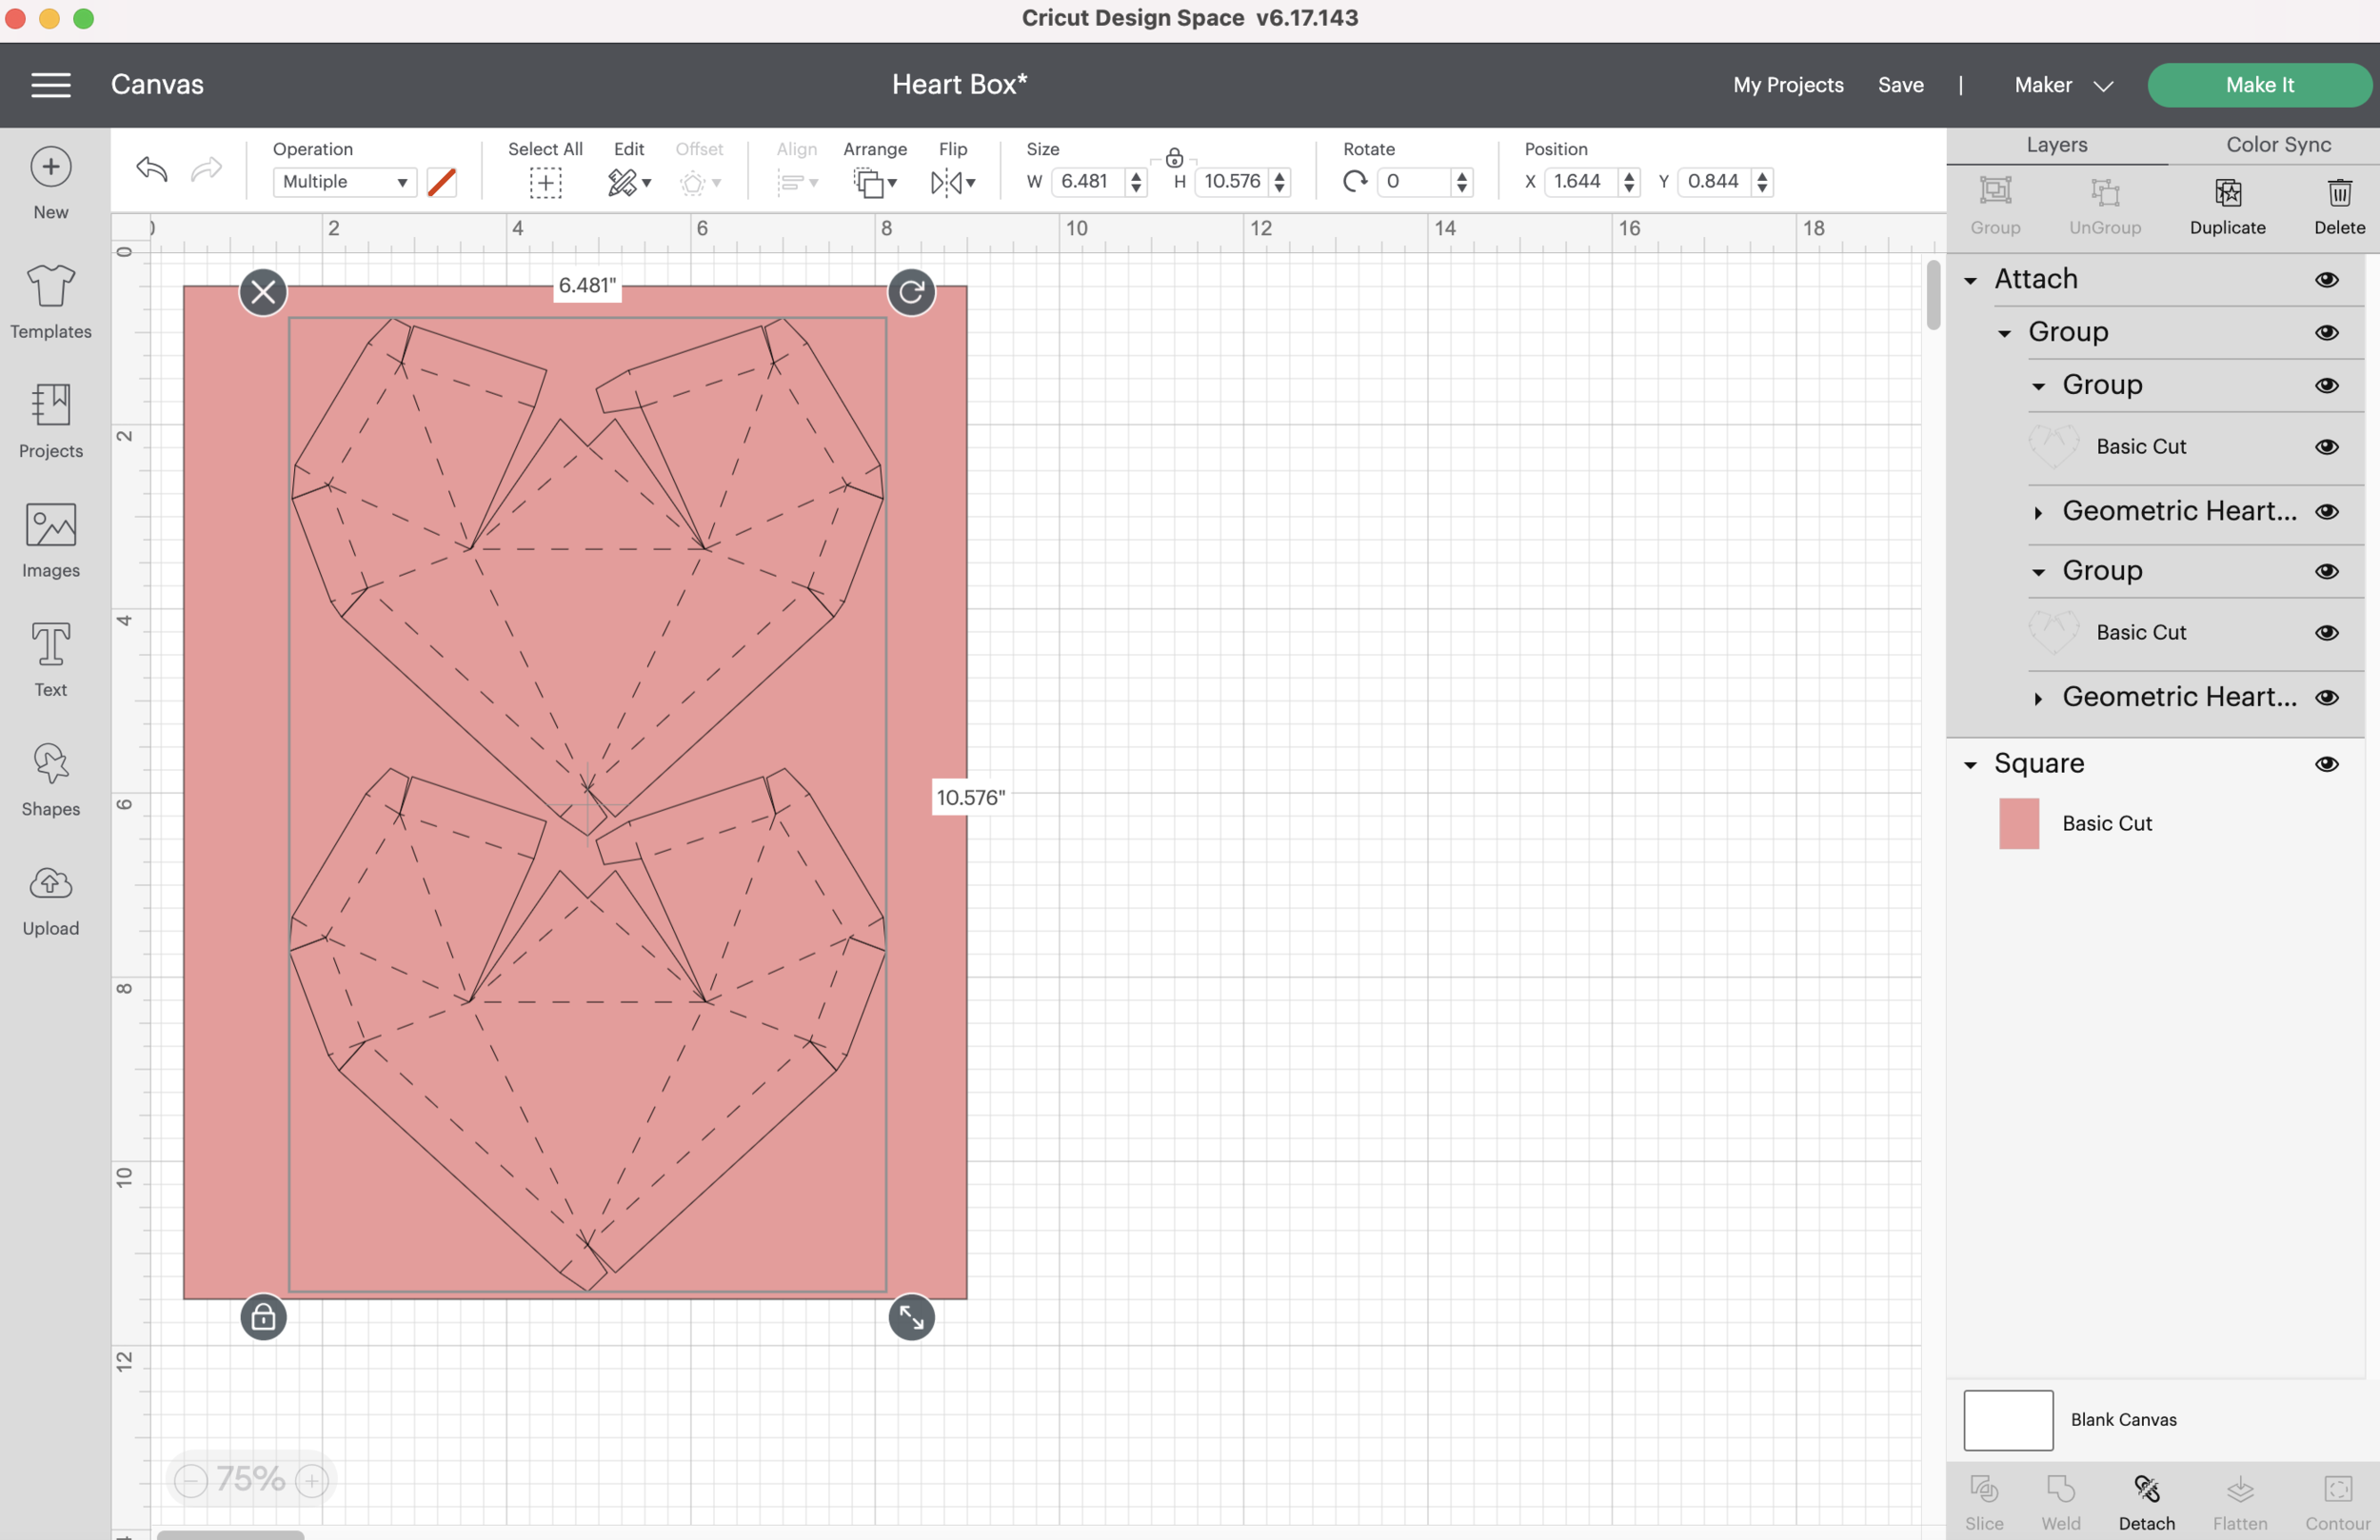
This part is optional, but since I’m using 8.5x11 cardstock I want to make sure my hearts are placed so they cut in the correct area.
Make an 8.5 x 11 rectangle and put it behind the hearts. Make sure the hearts fit within the rectangle. Attach just the hearts together, leave the rectangle on it’s own.
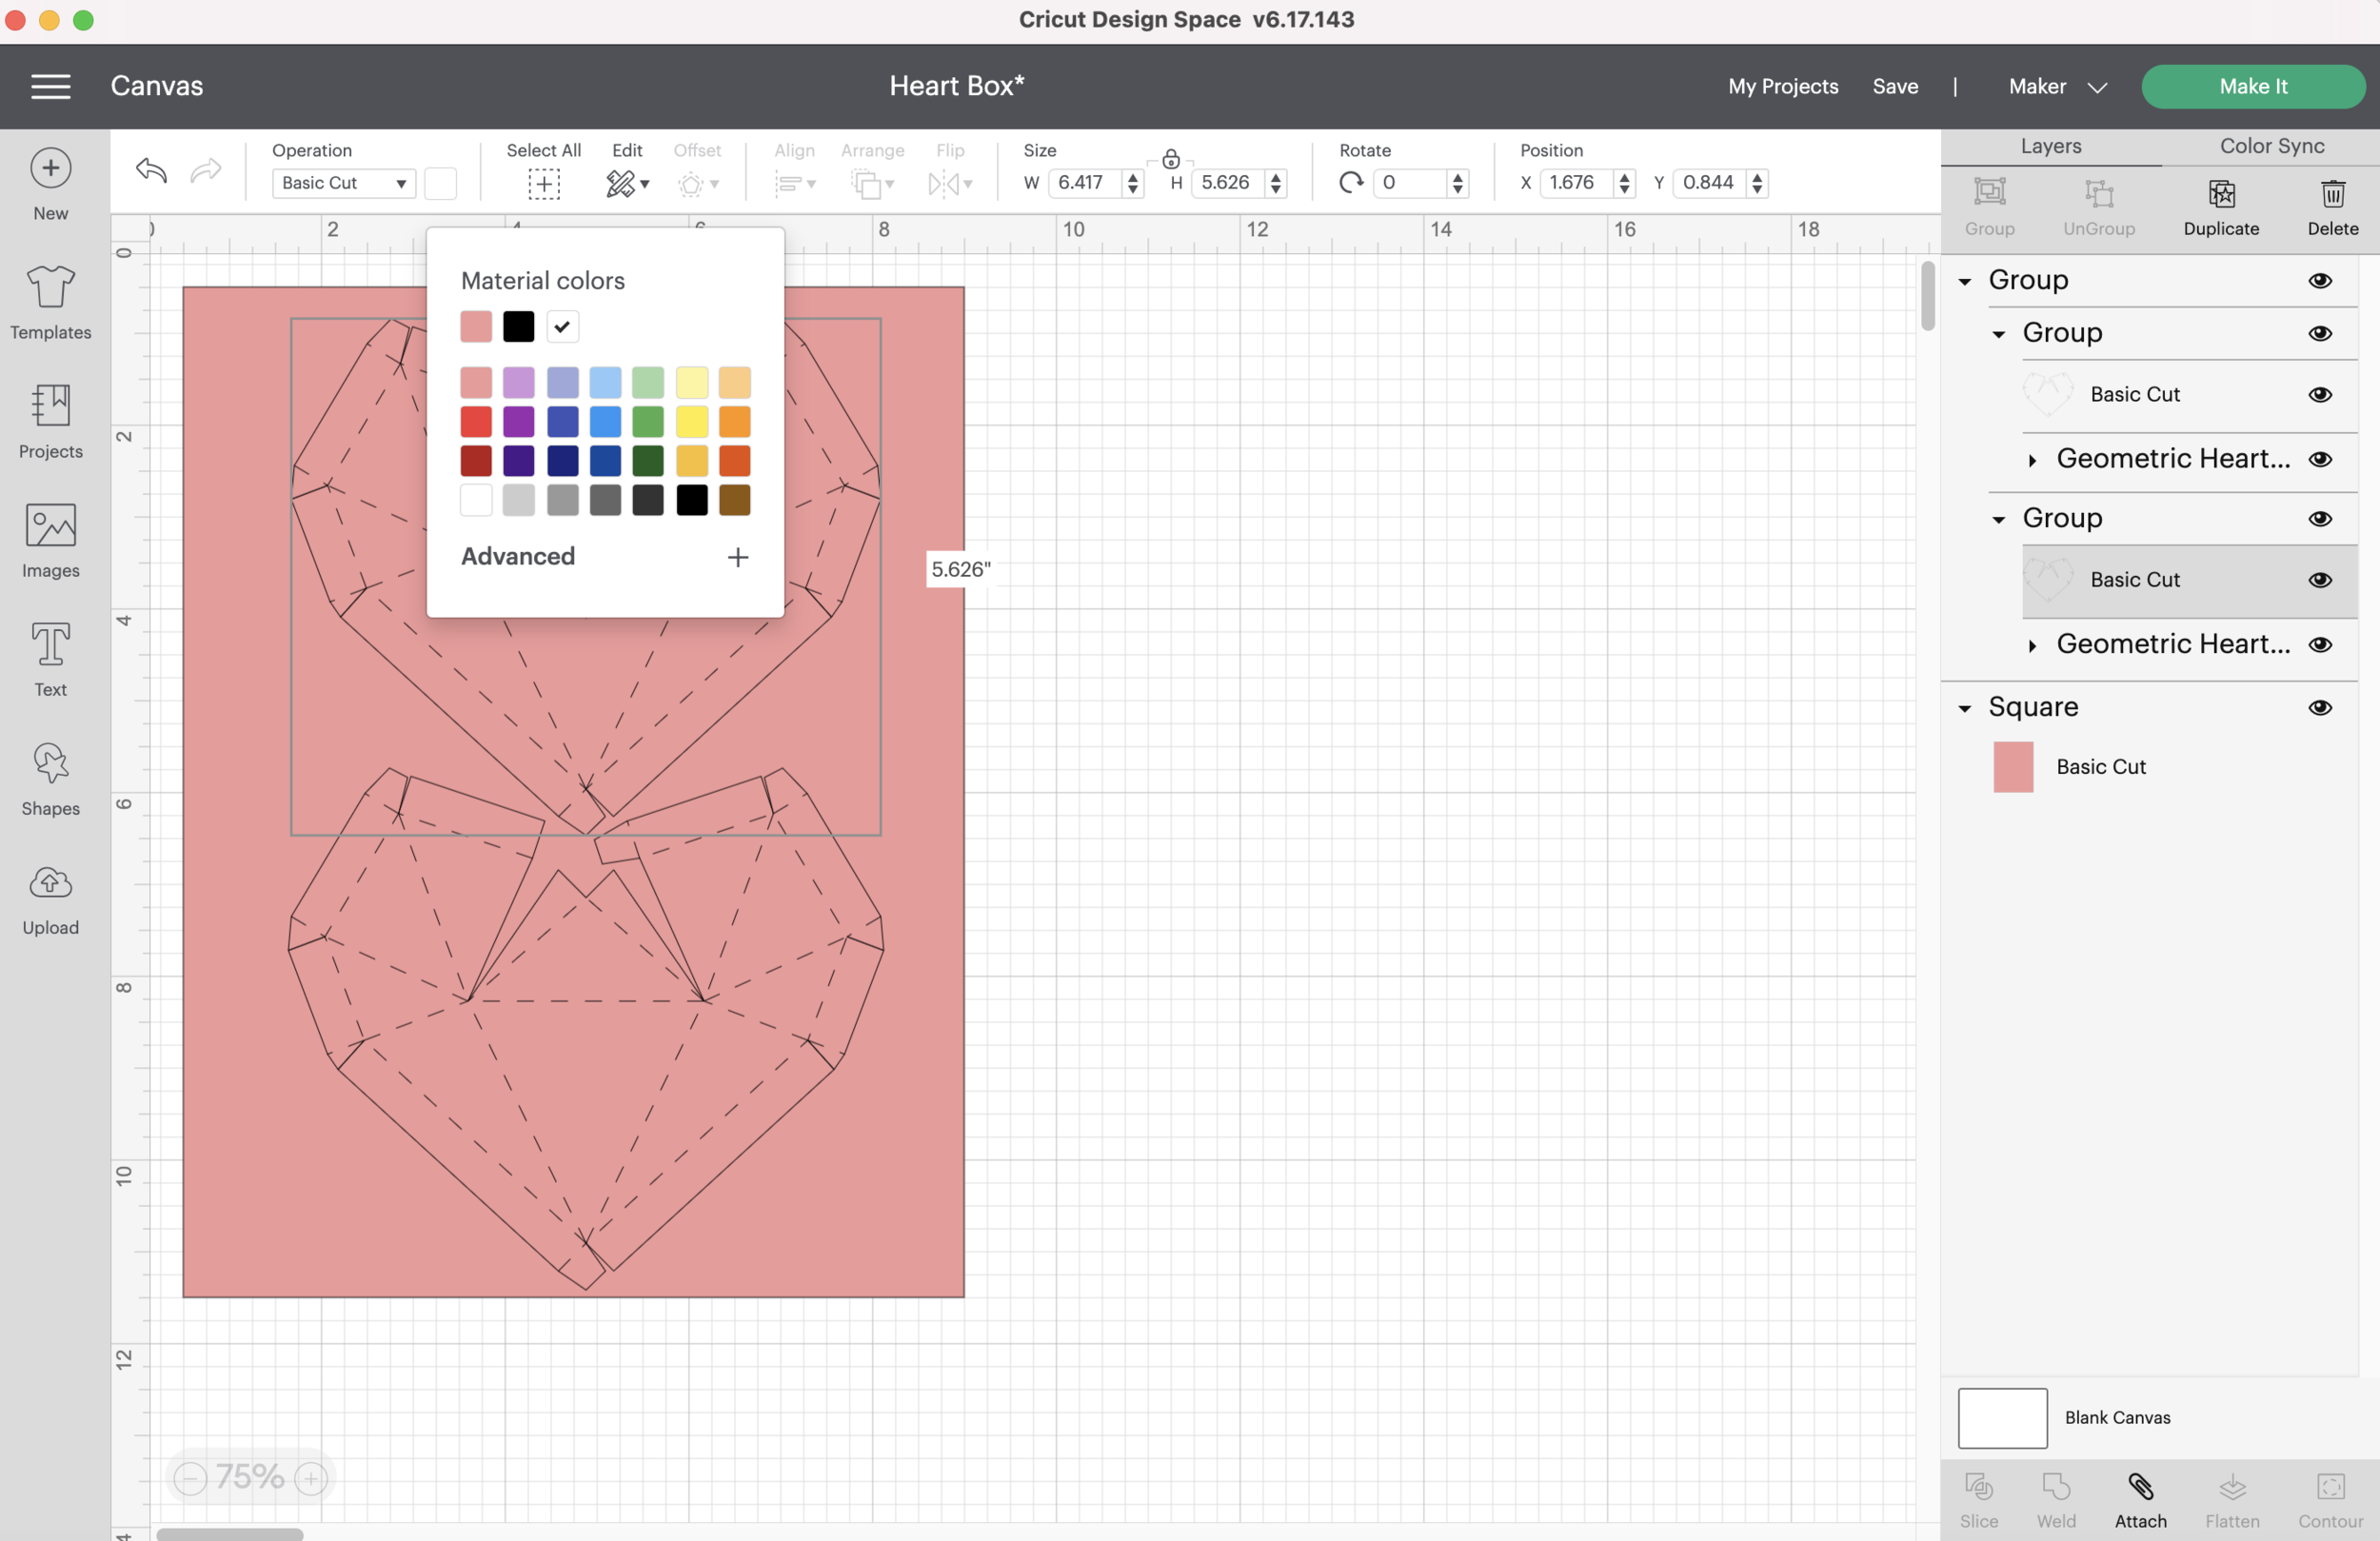
Make the material color for the hearts White so we can see them in the next step.
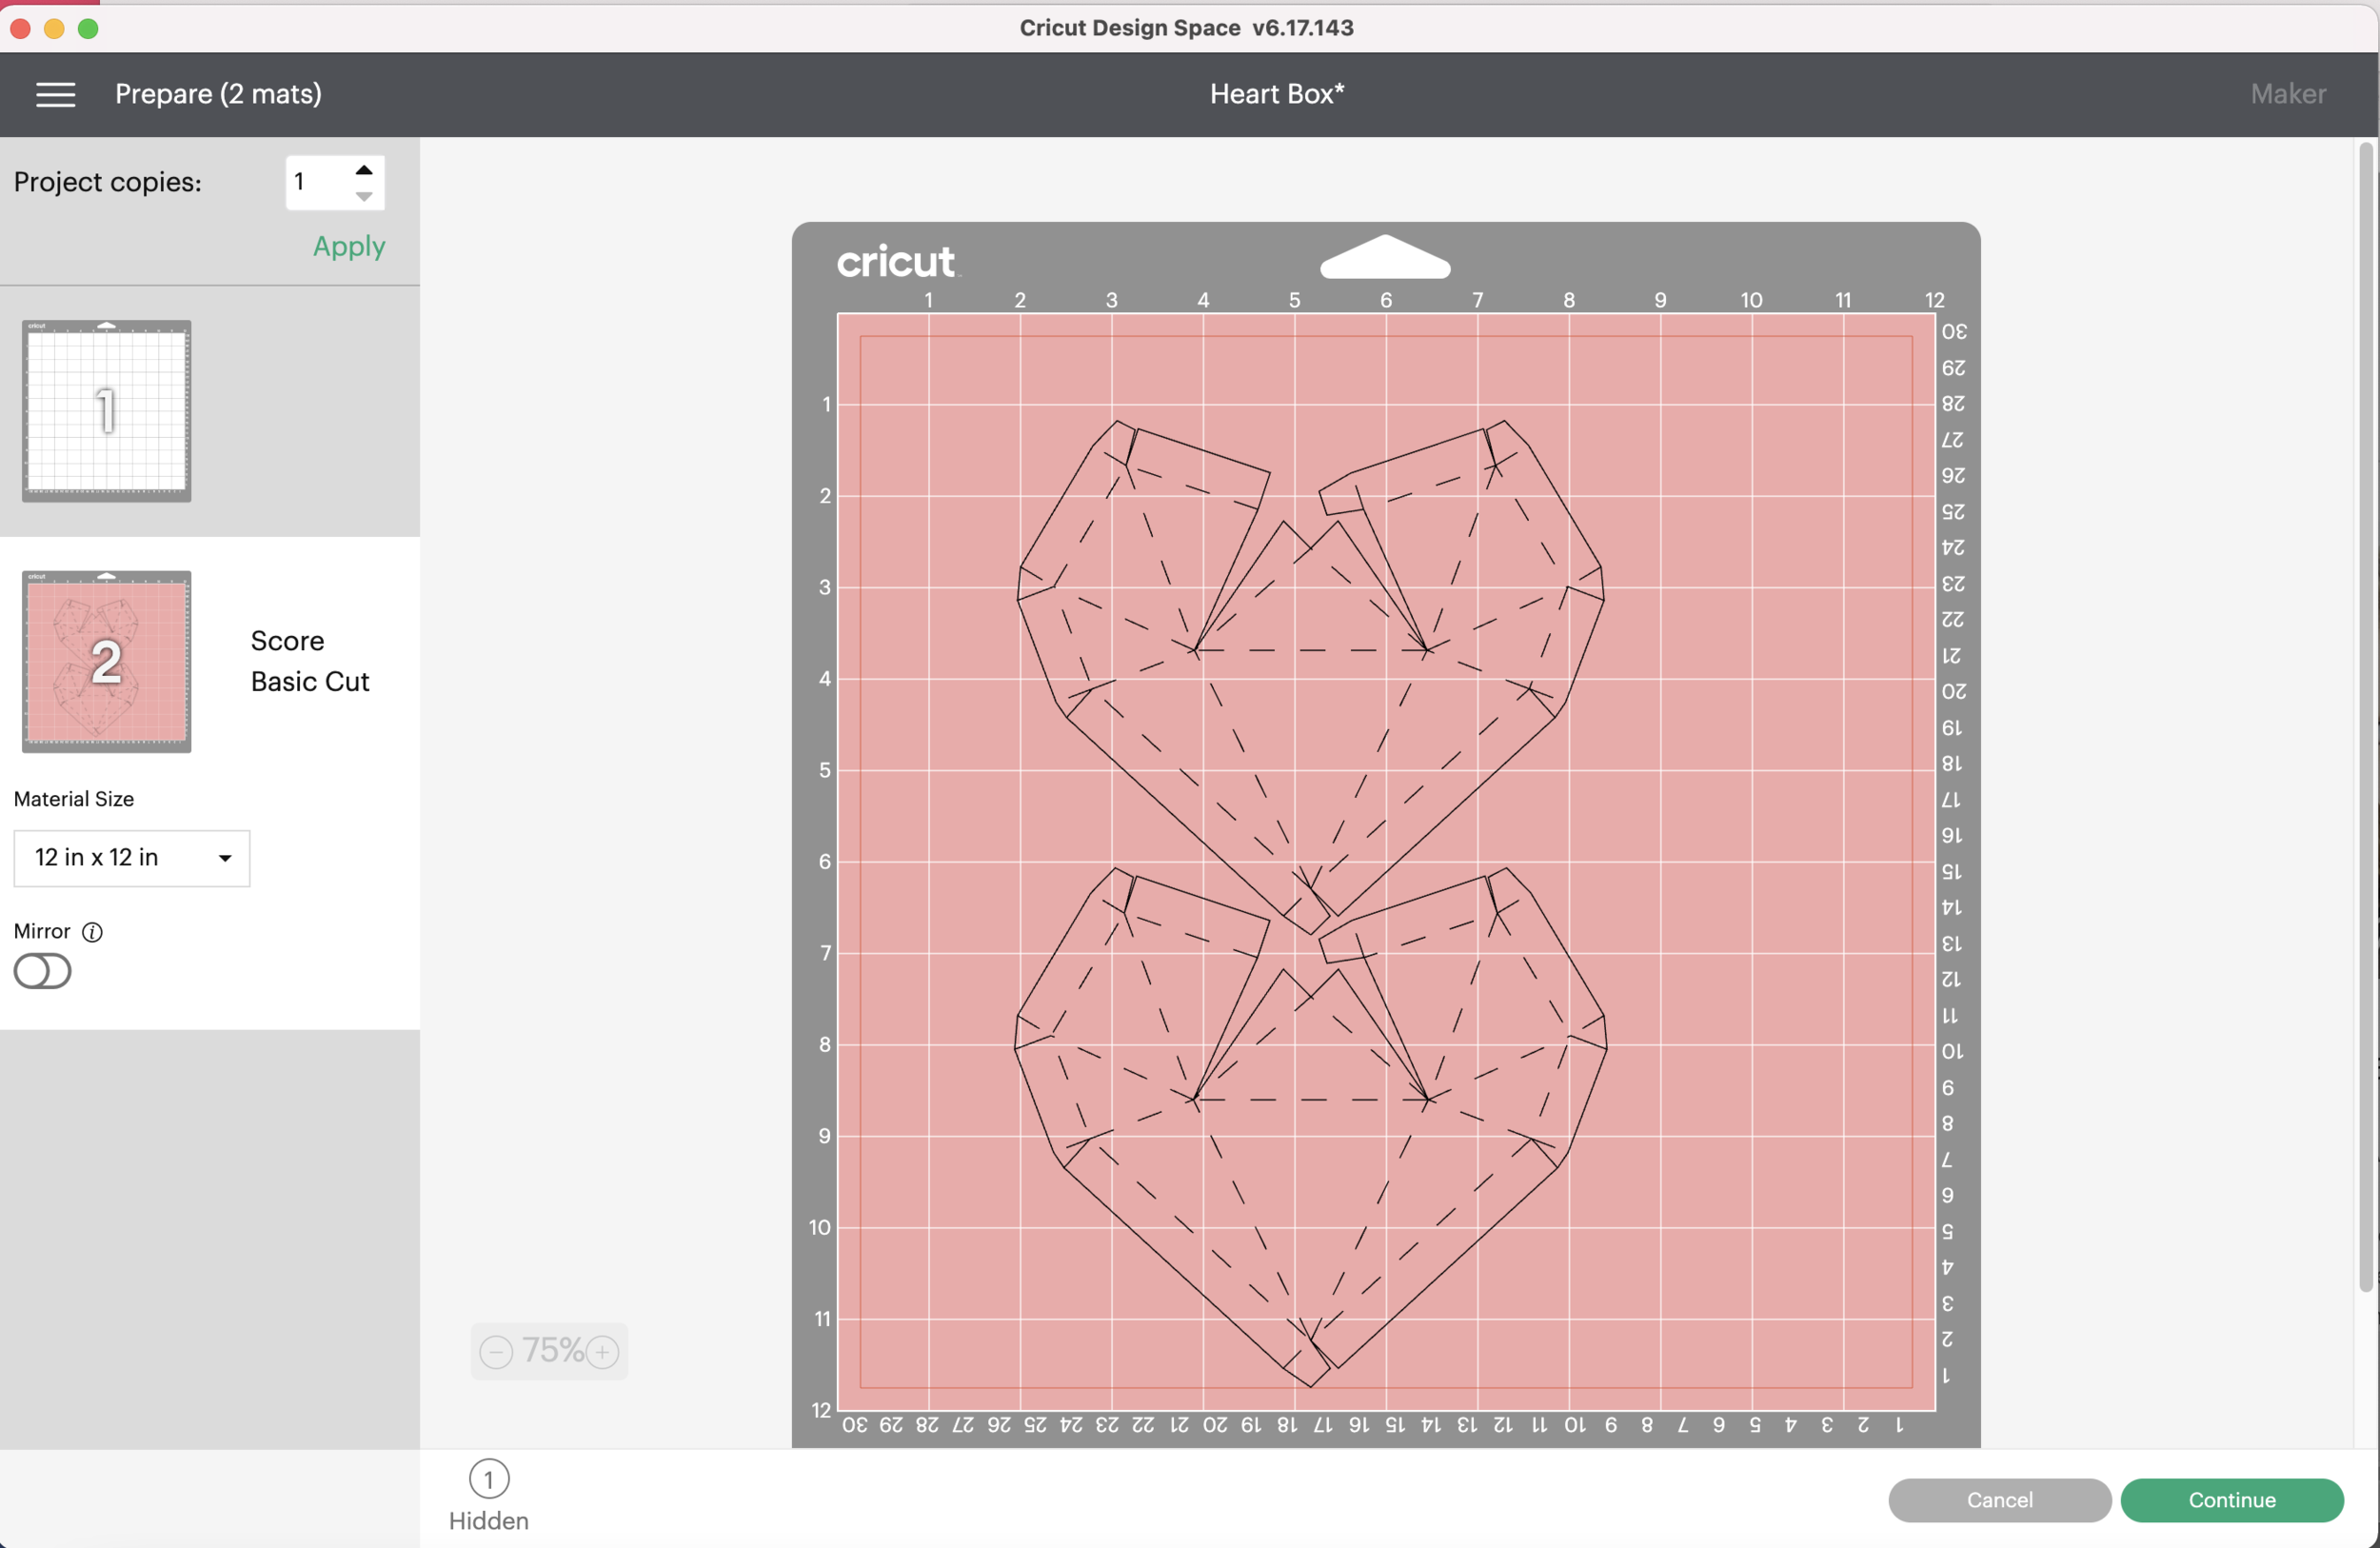
Press the Make It button, now we should have 2 mats - one with the hearts and one with the rectangle.
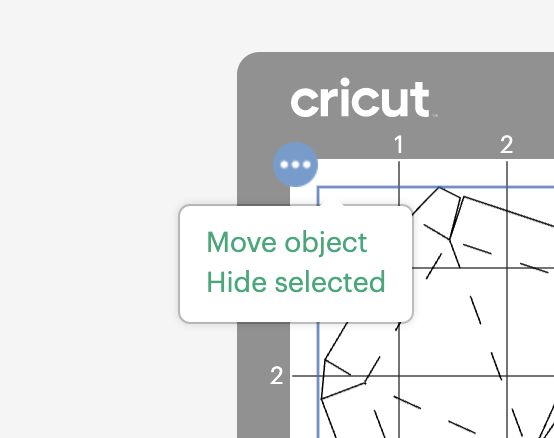
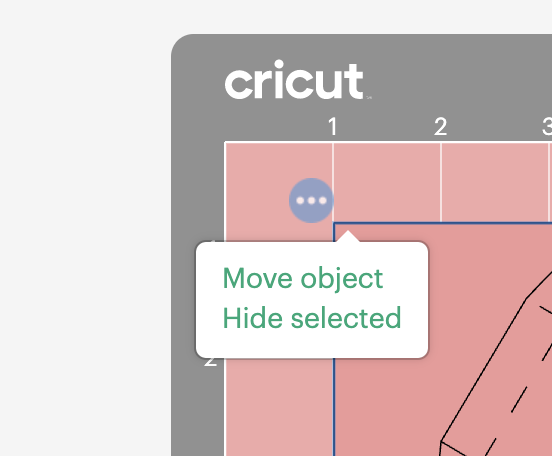
Select the mat with the hearts and click the 3 small dots. Select Move Object in the pop up box.
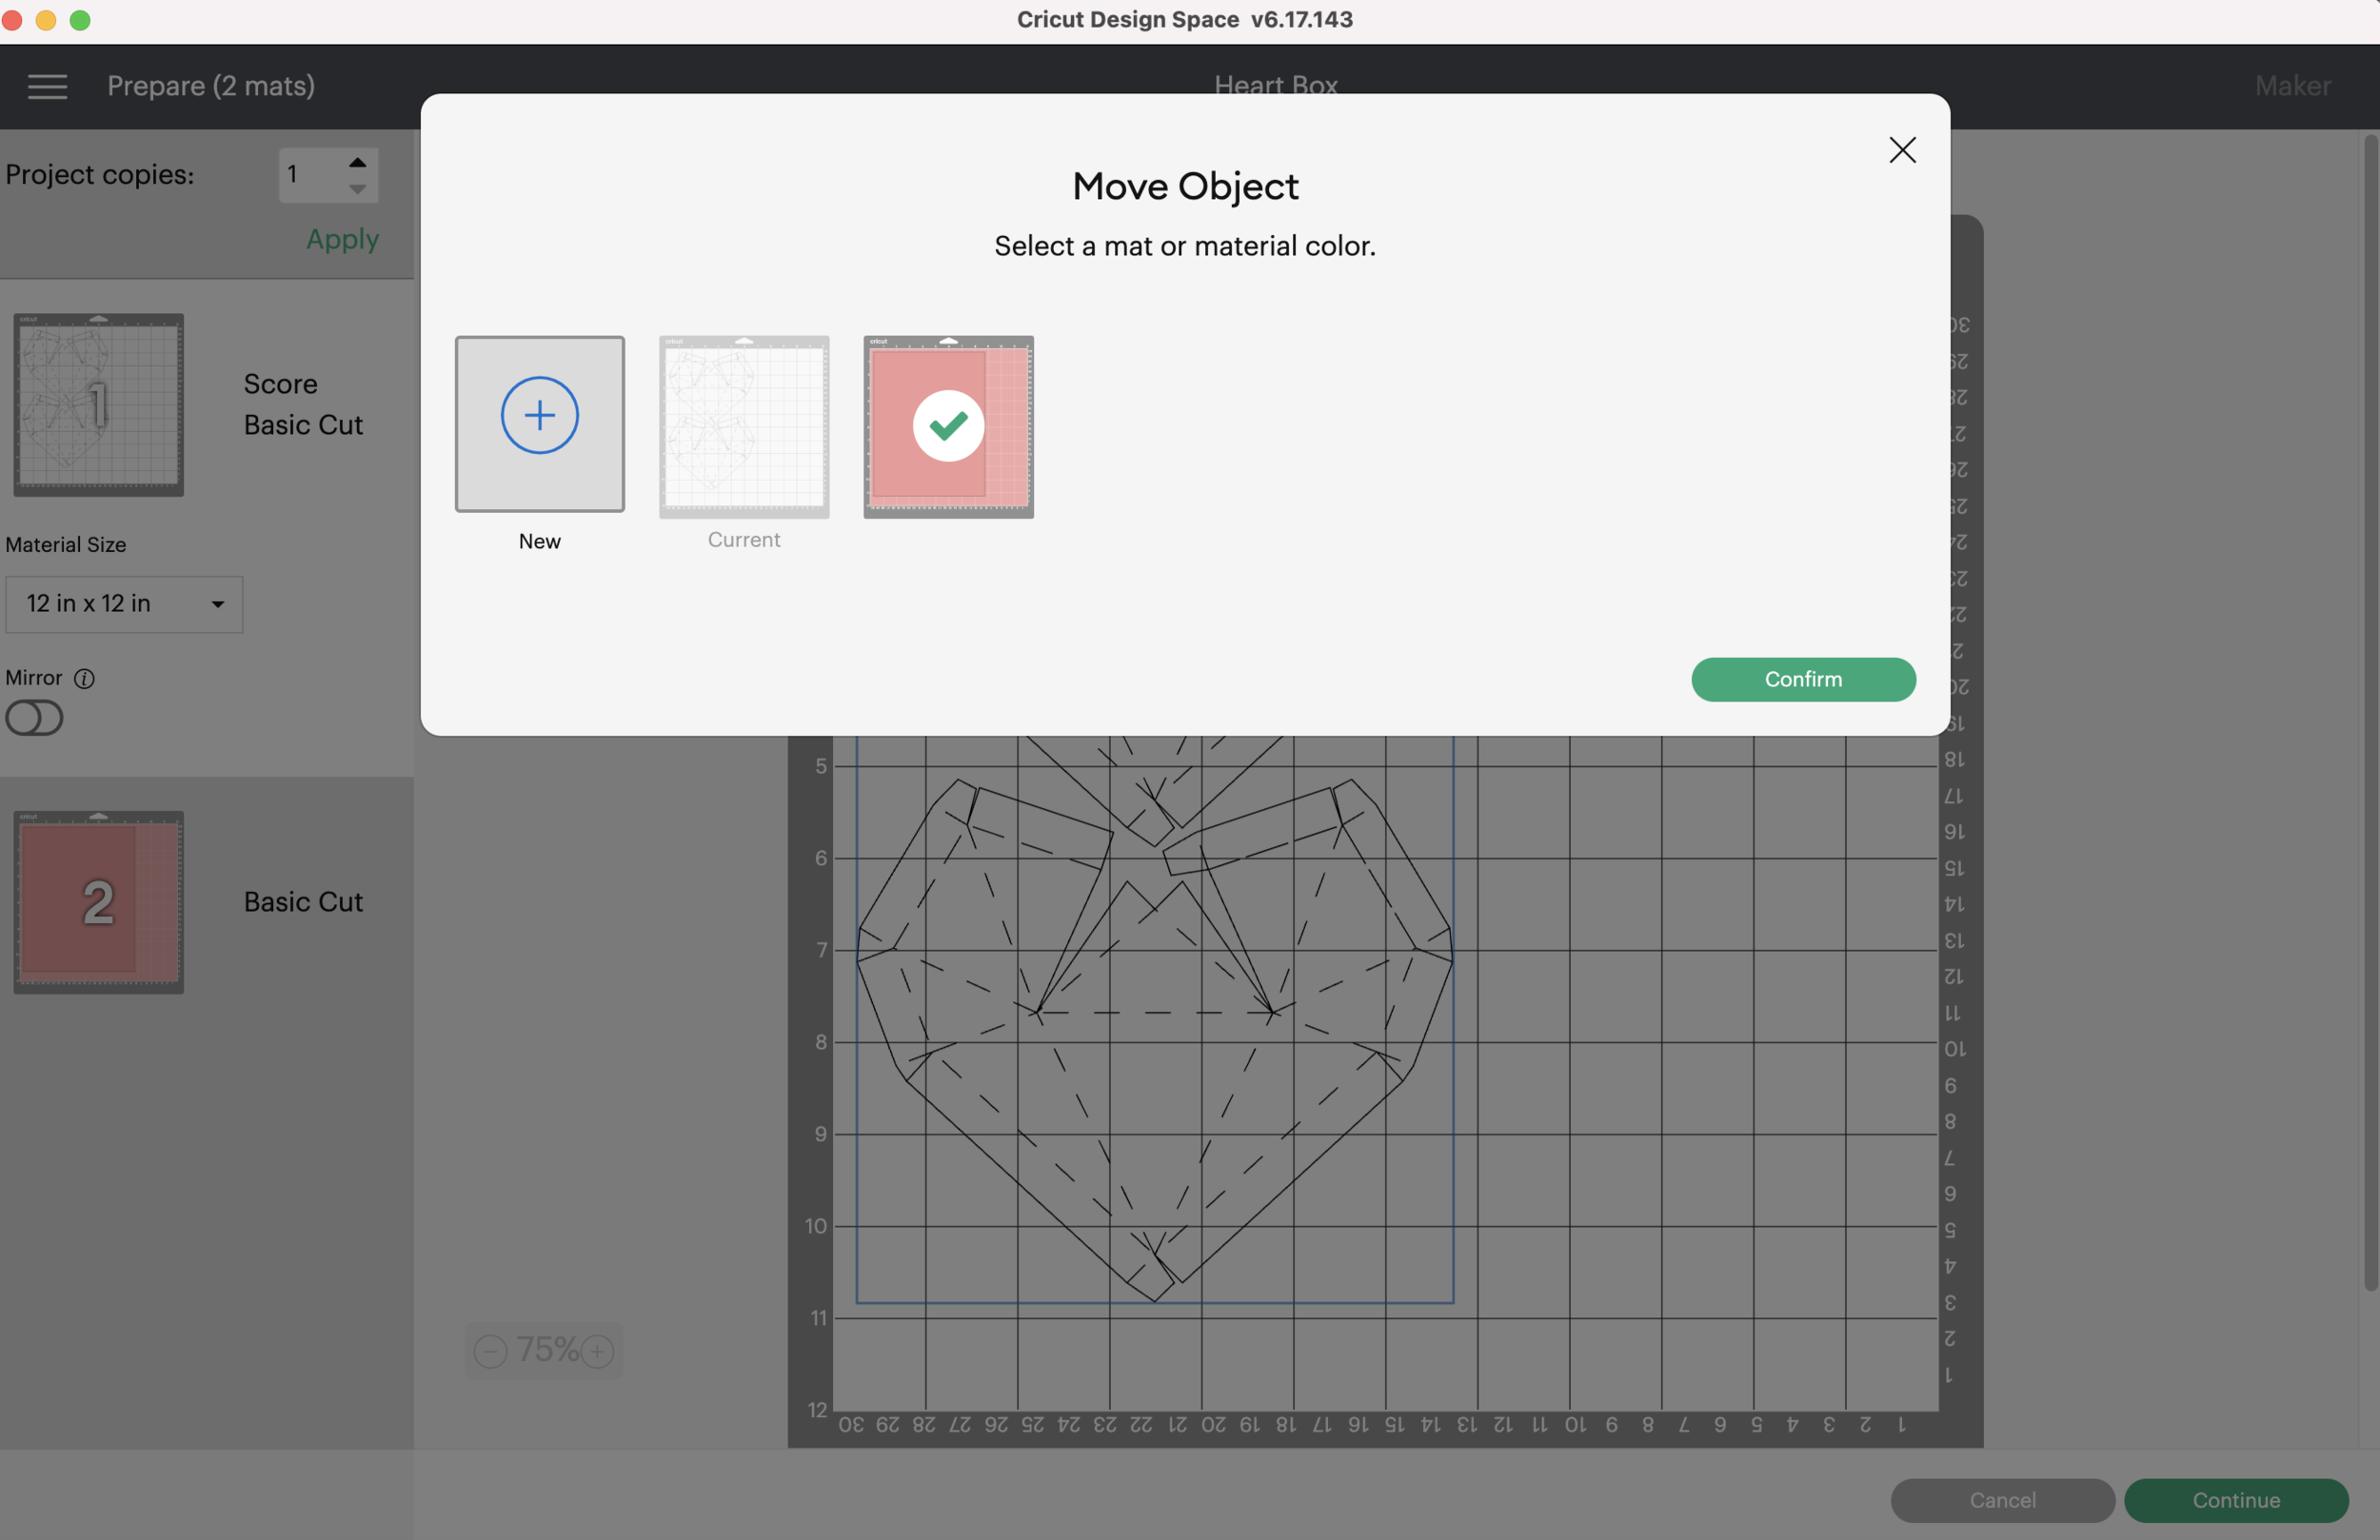
Select the mat with the rectangle in the pop up box and click Confirm. Now your hearts and rectangle will be on the same mat, but you can move them around separately.
Select the rectangle and move it as close to the 1x1 position on the mat. The red border at the bottom will keep you from moving it all the way to the 1x1 position.
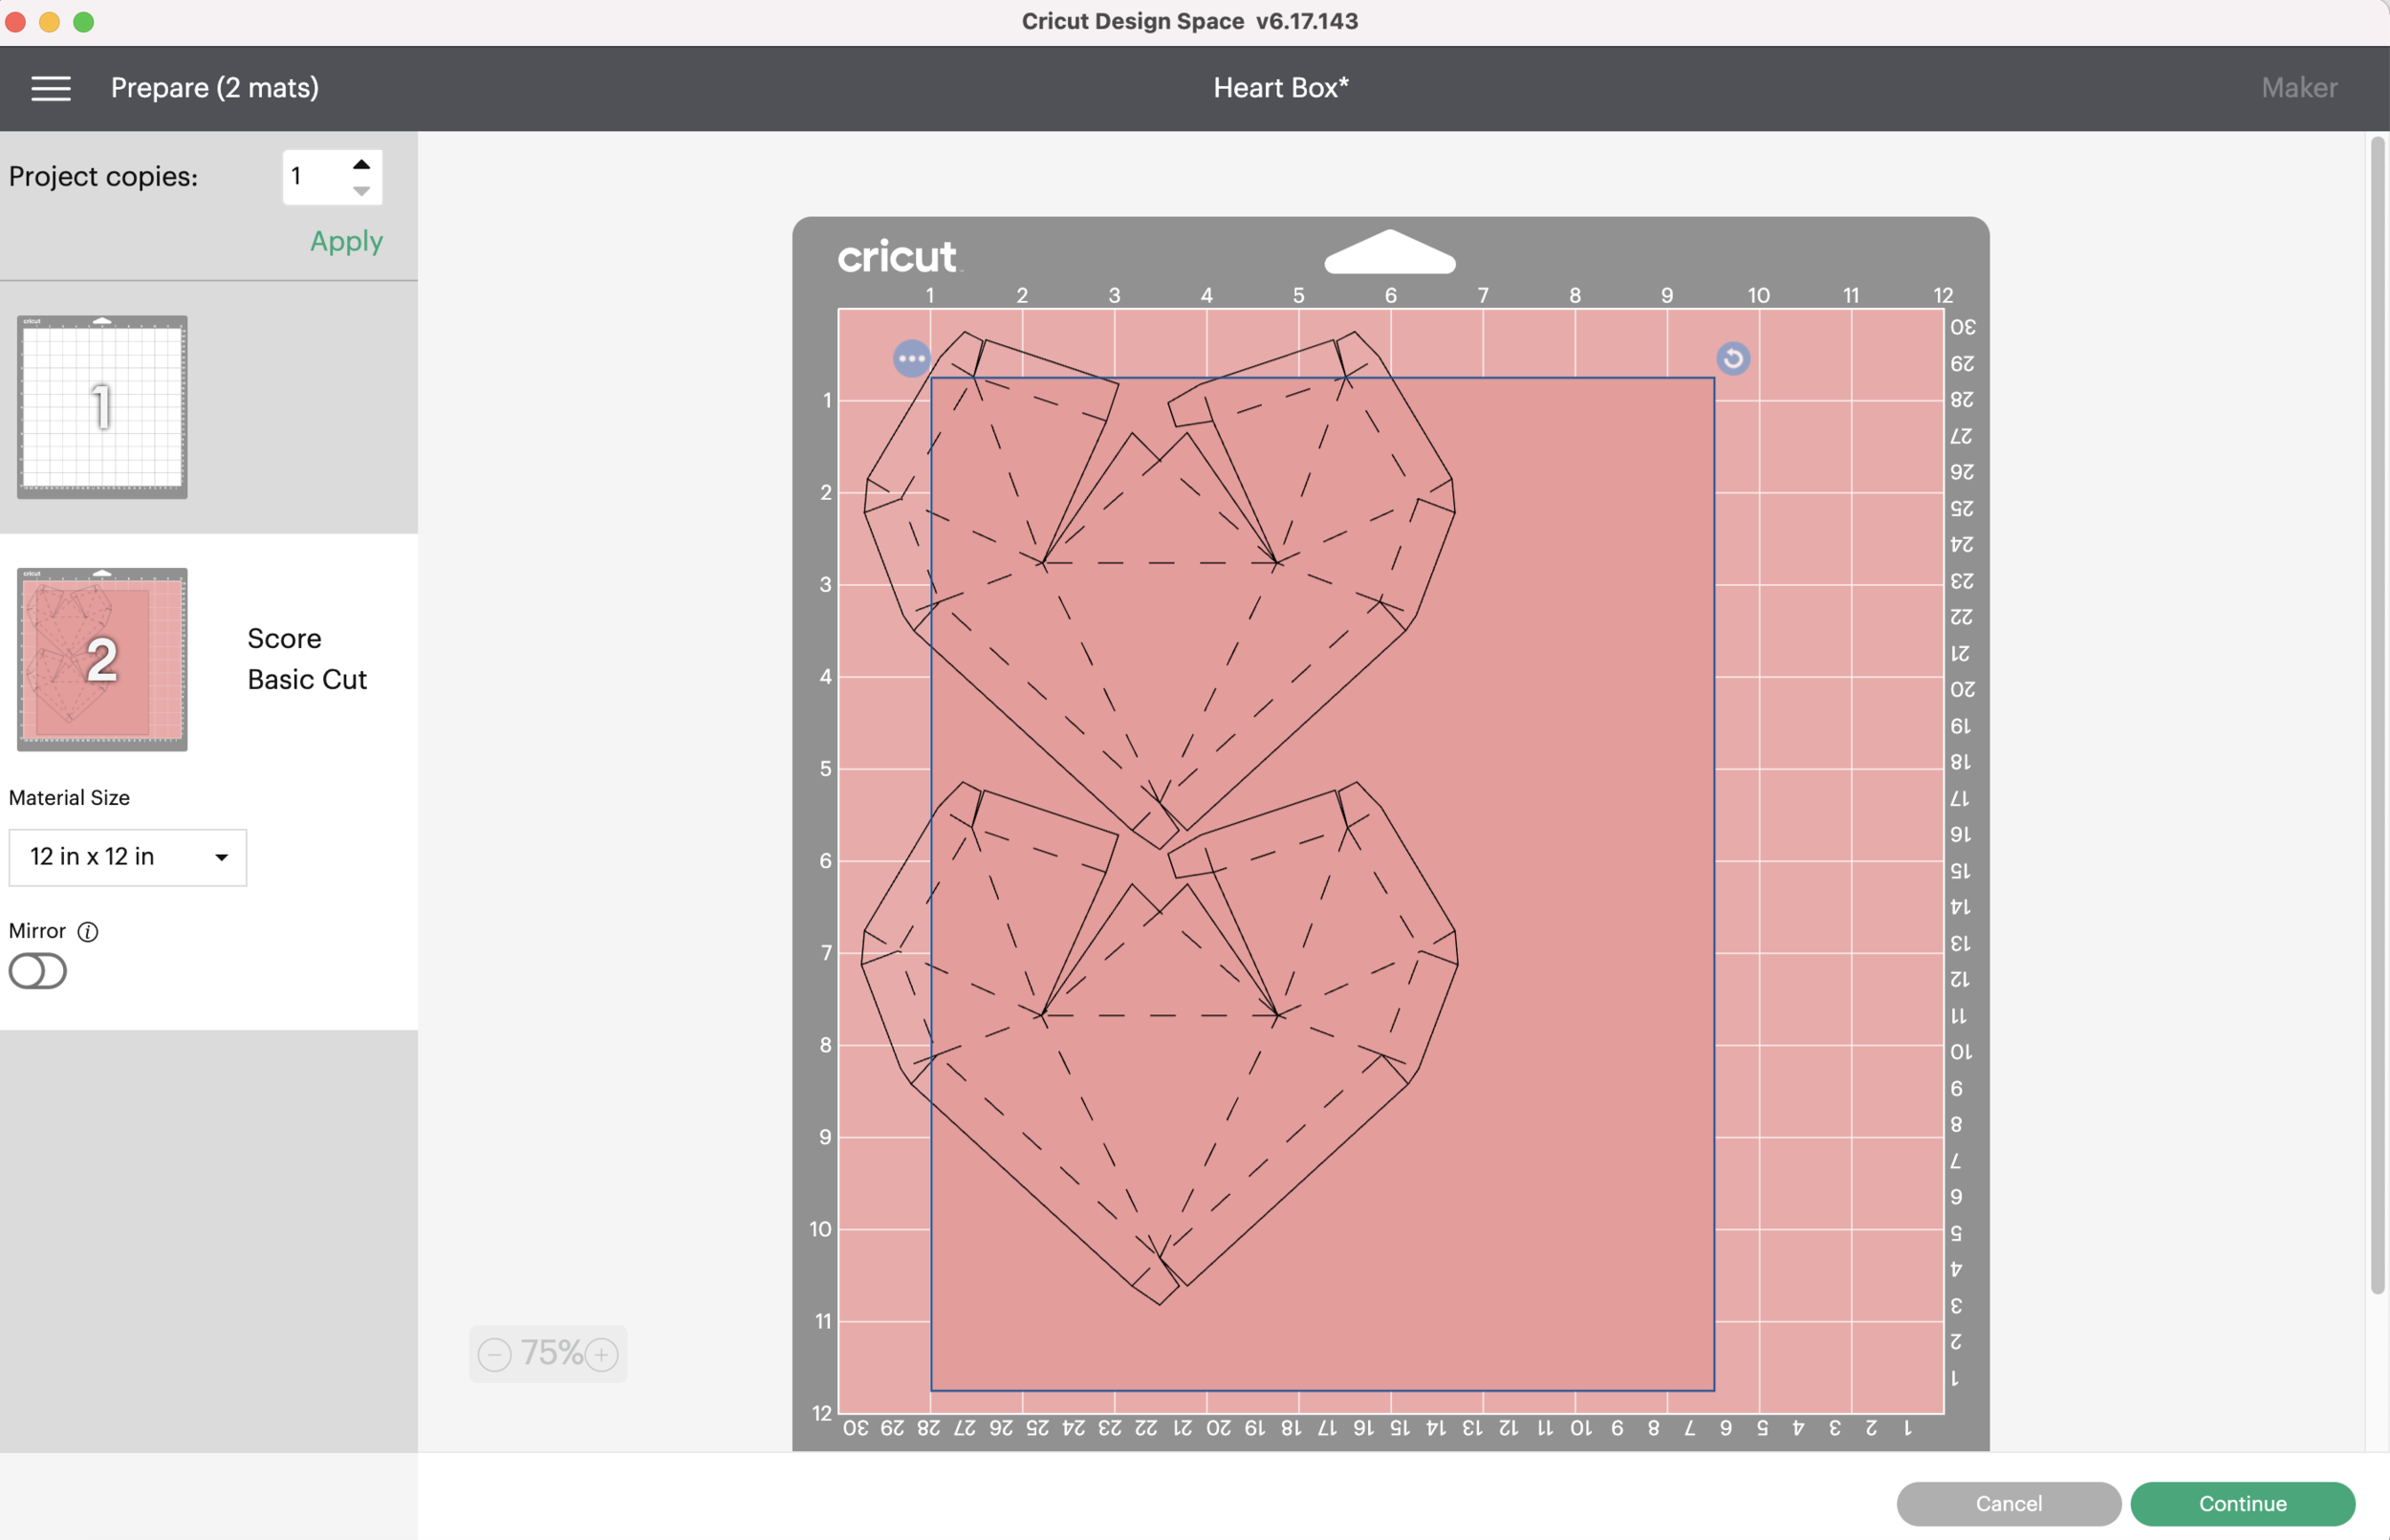
Now select the hearts and move them so they are centered left to right on the rectangle and the bottom point of the heart is touching the bottom red border line and the bottom of the rectangle.

Select the rectangle again, click the 3 dots in the corner and select Hide Object from the pop up.
Now we are left with just the hearts on the cutting mat and the rectangle is hidden.
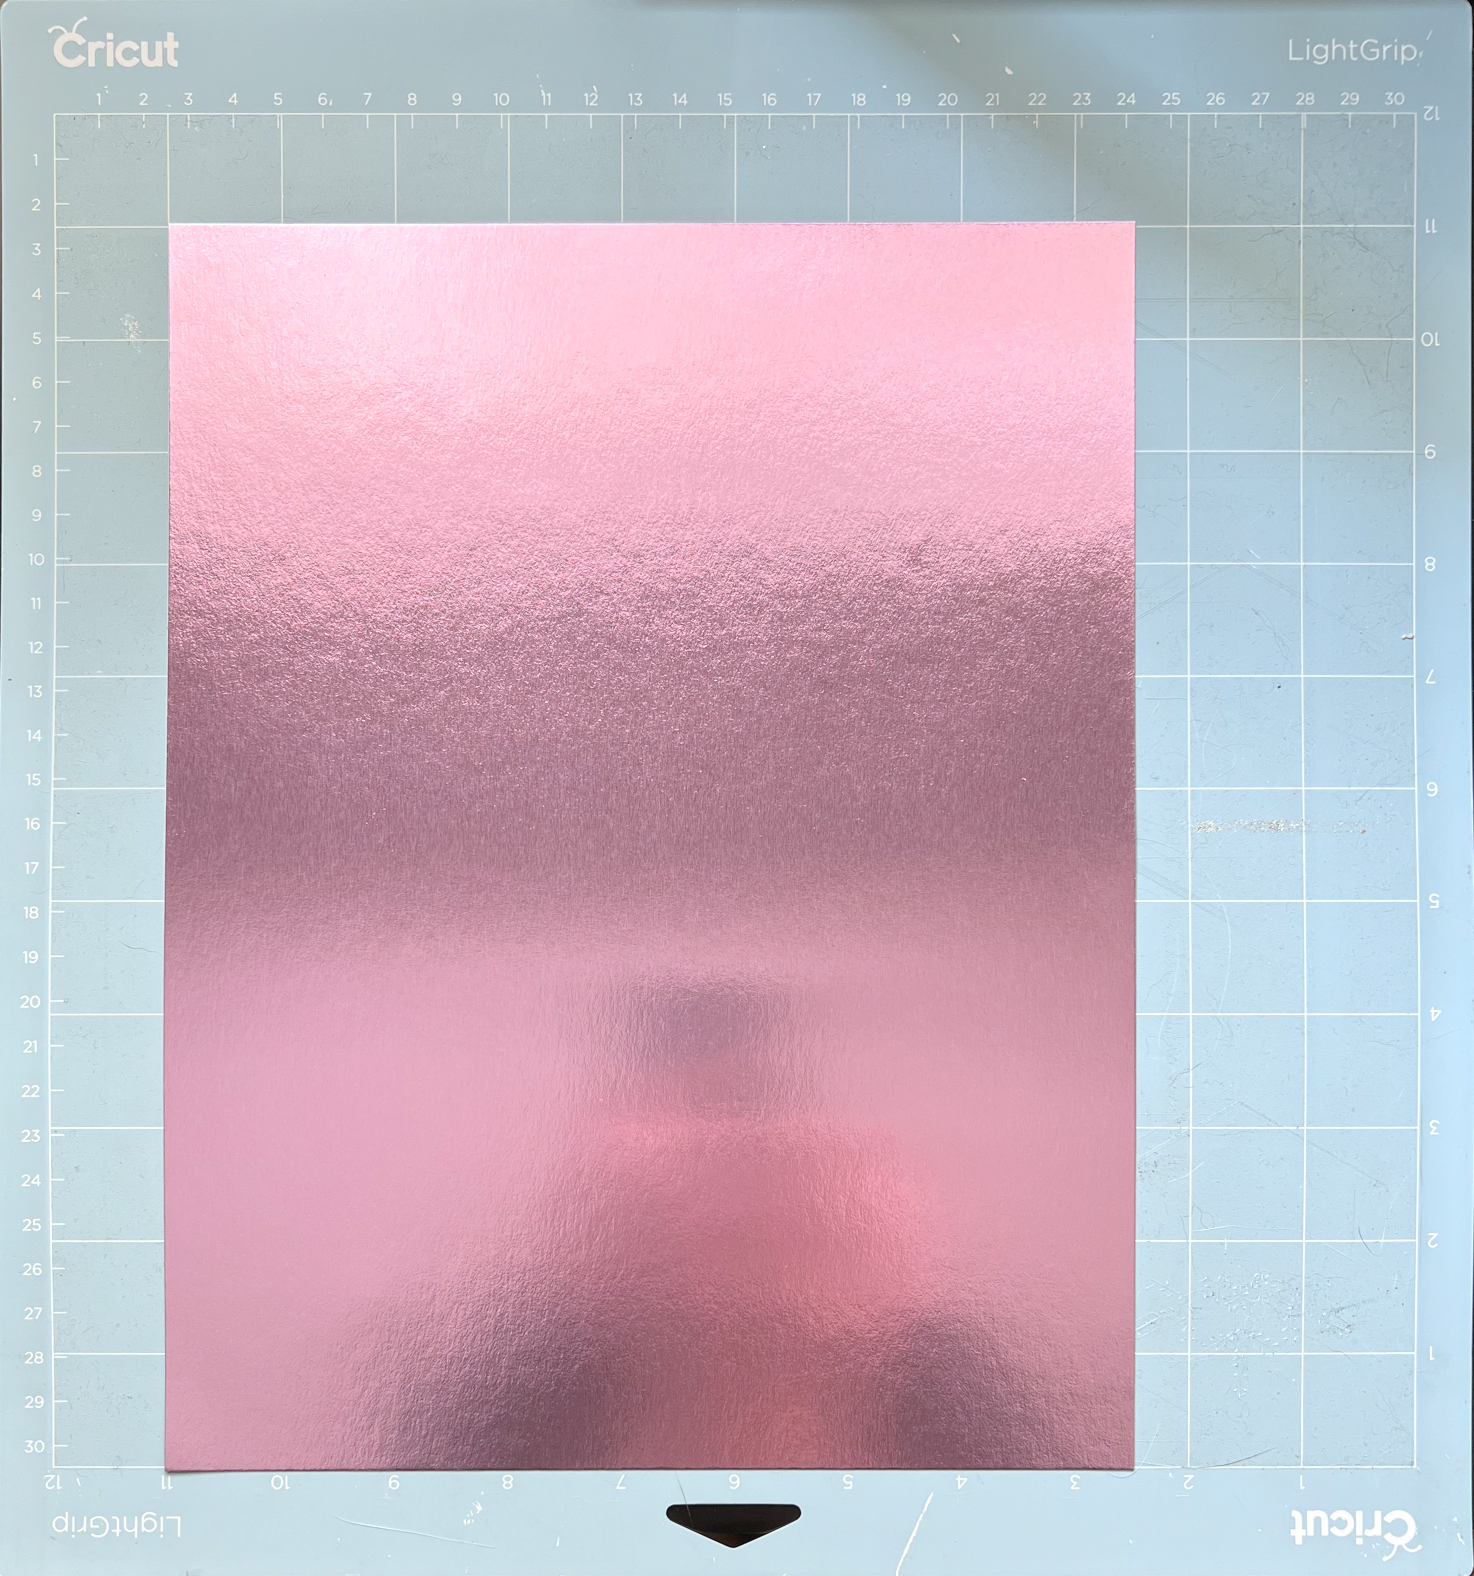
Place your cardstock on your Light Grip mat, the Top left corner of the cardstock should be at the 1 x1 position.
Since I’m using foil cardstock, I decided to use the Foil Posterboard material setting on my machine for this project.
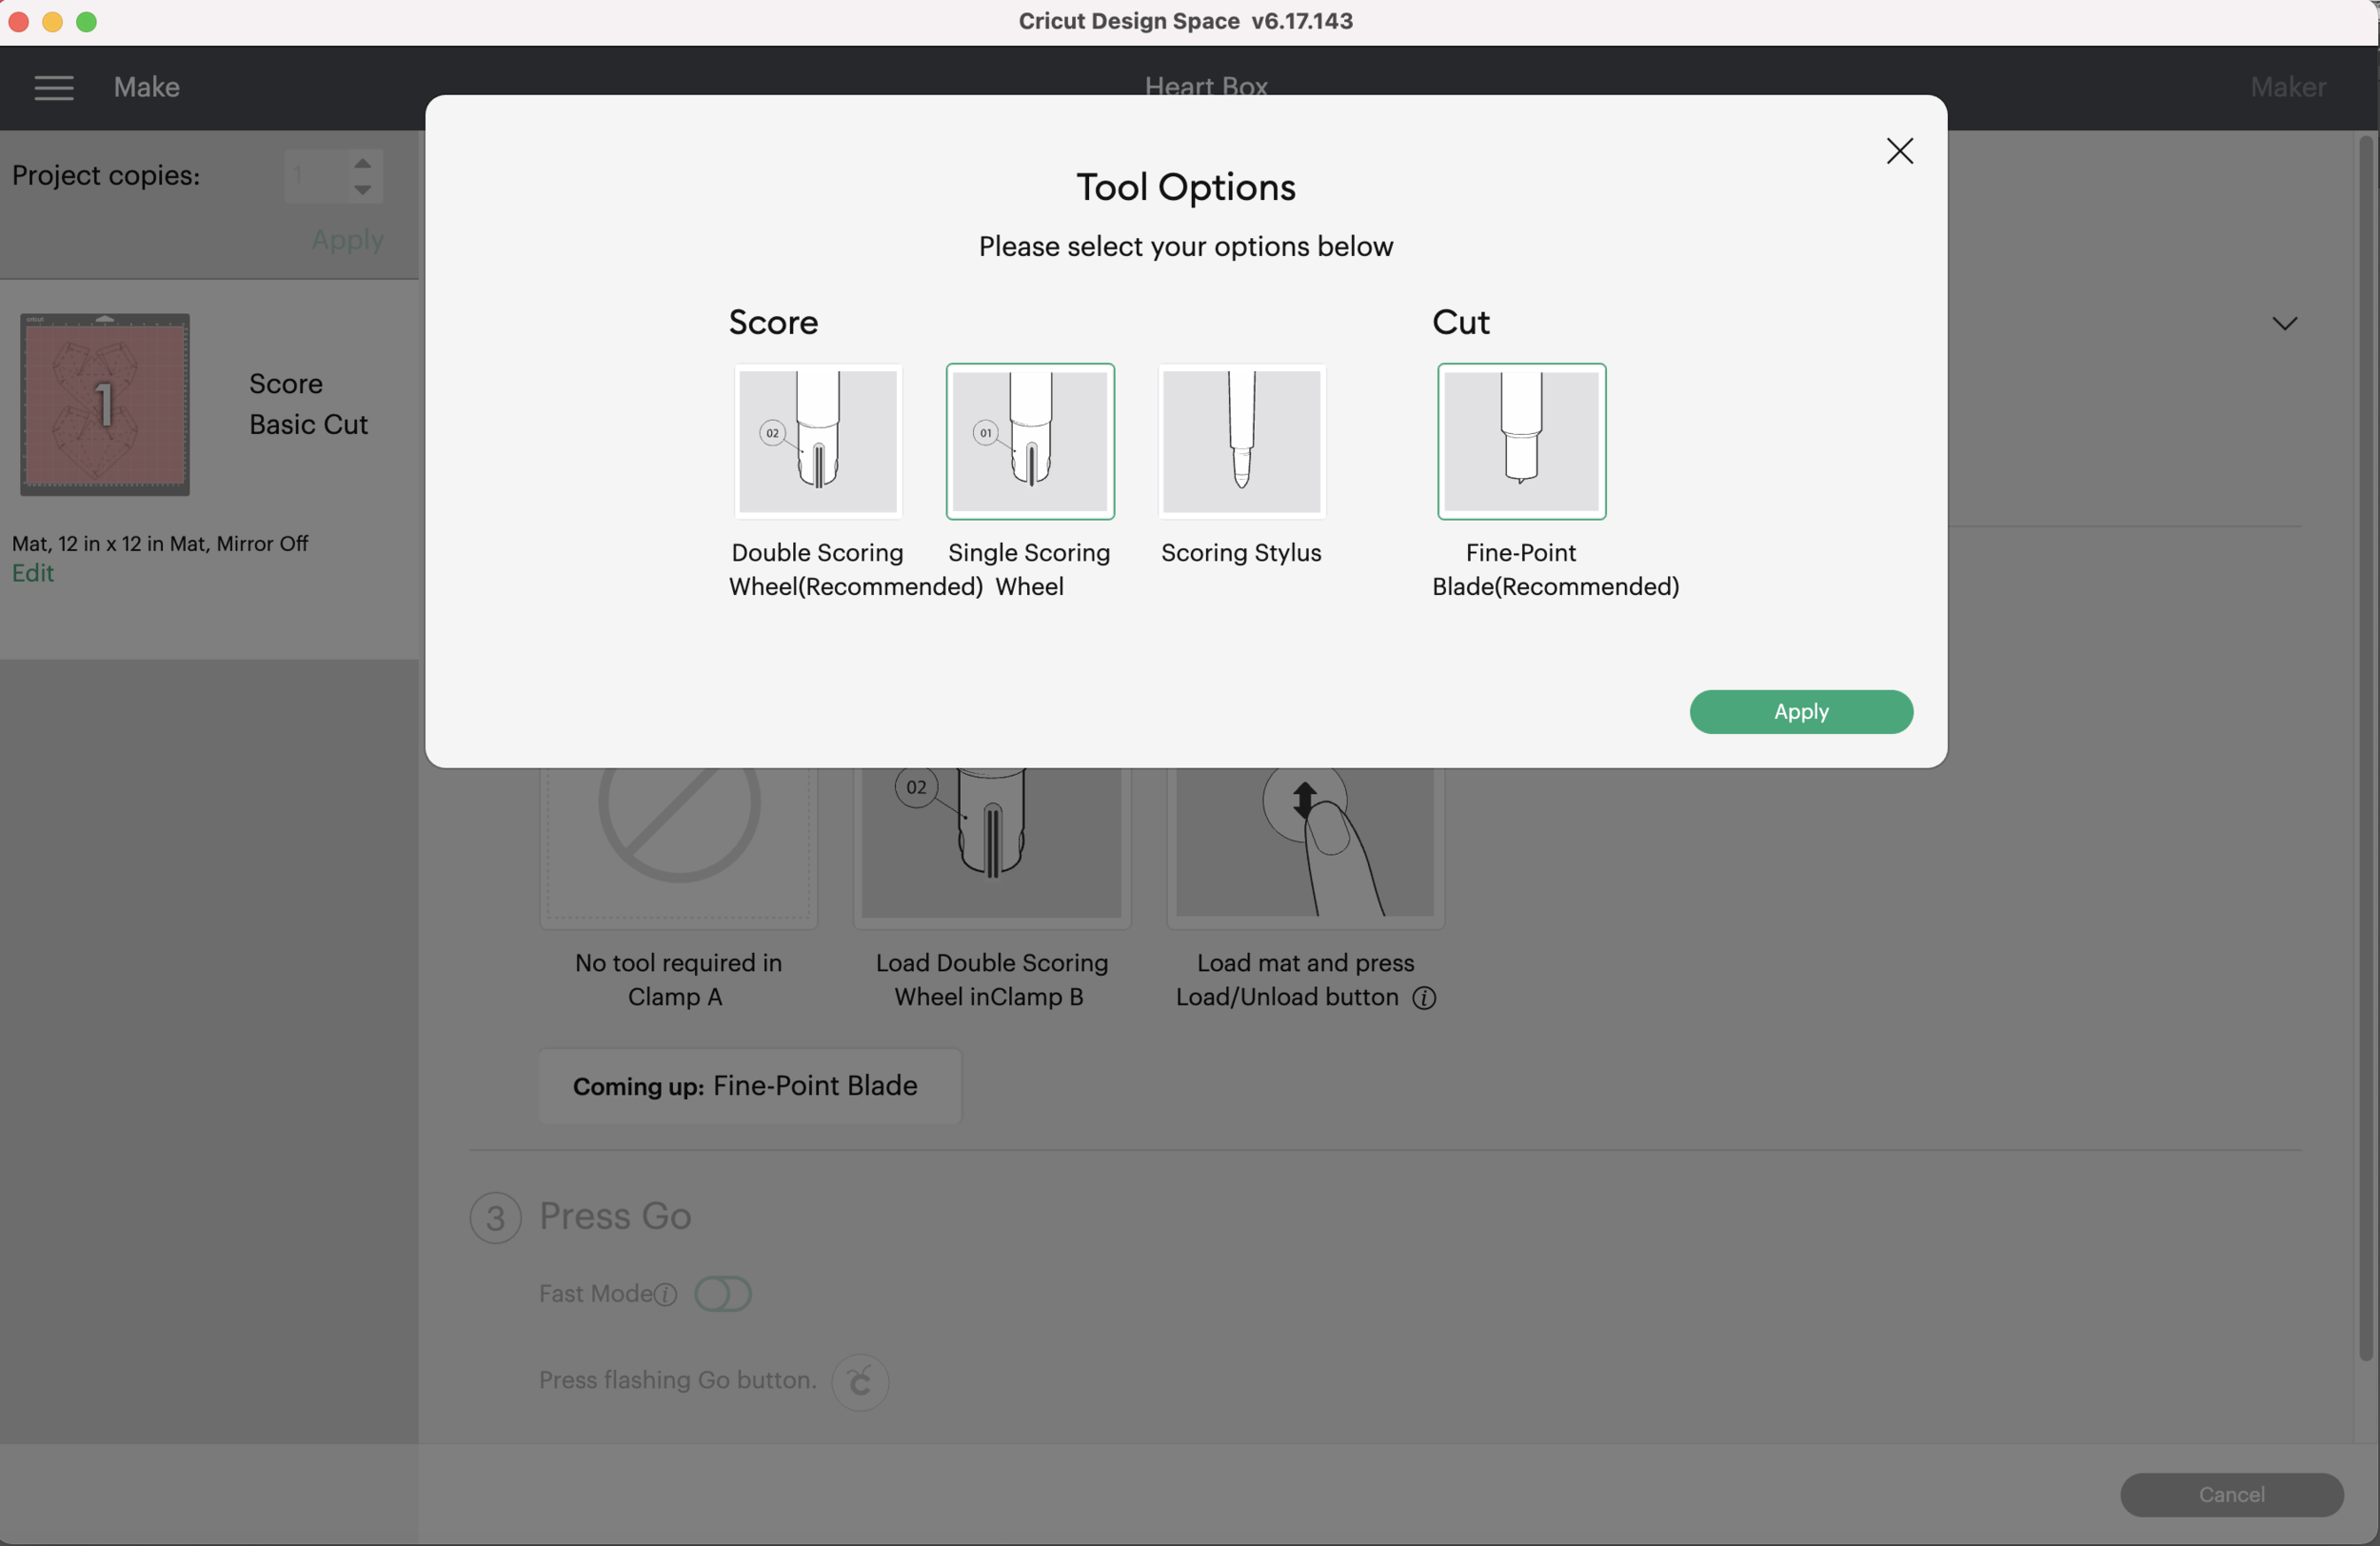
After I select my material it shows me the tools I will need. It calls for the double scoring wheel, but if you prefer to use the single scoring wheel or scoring stylus, click where it says Edit Tools in green.
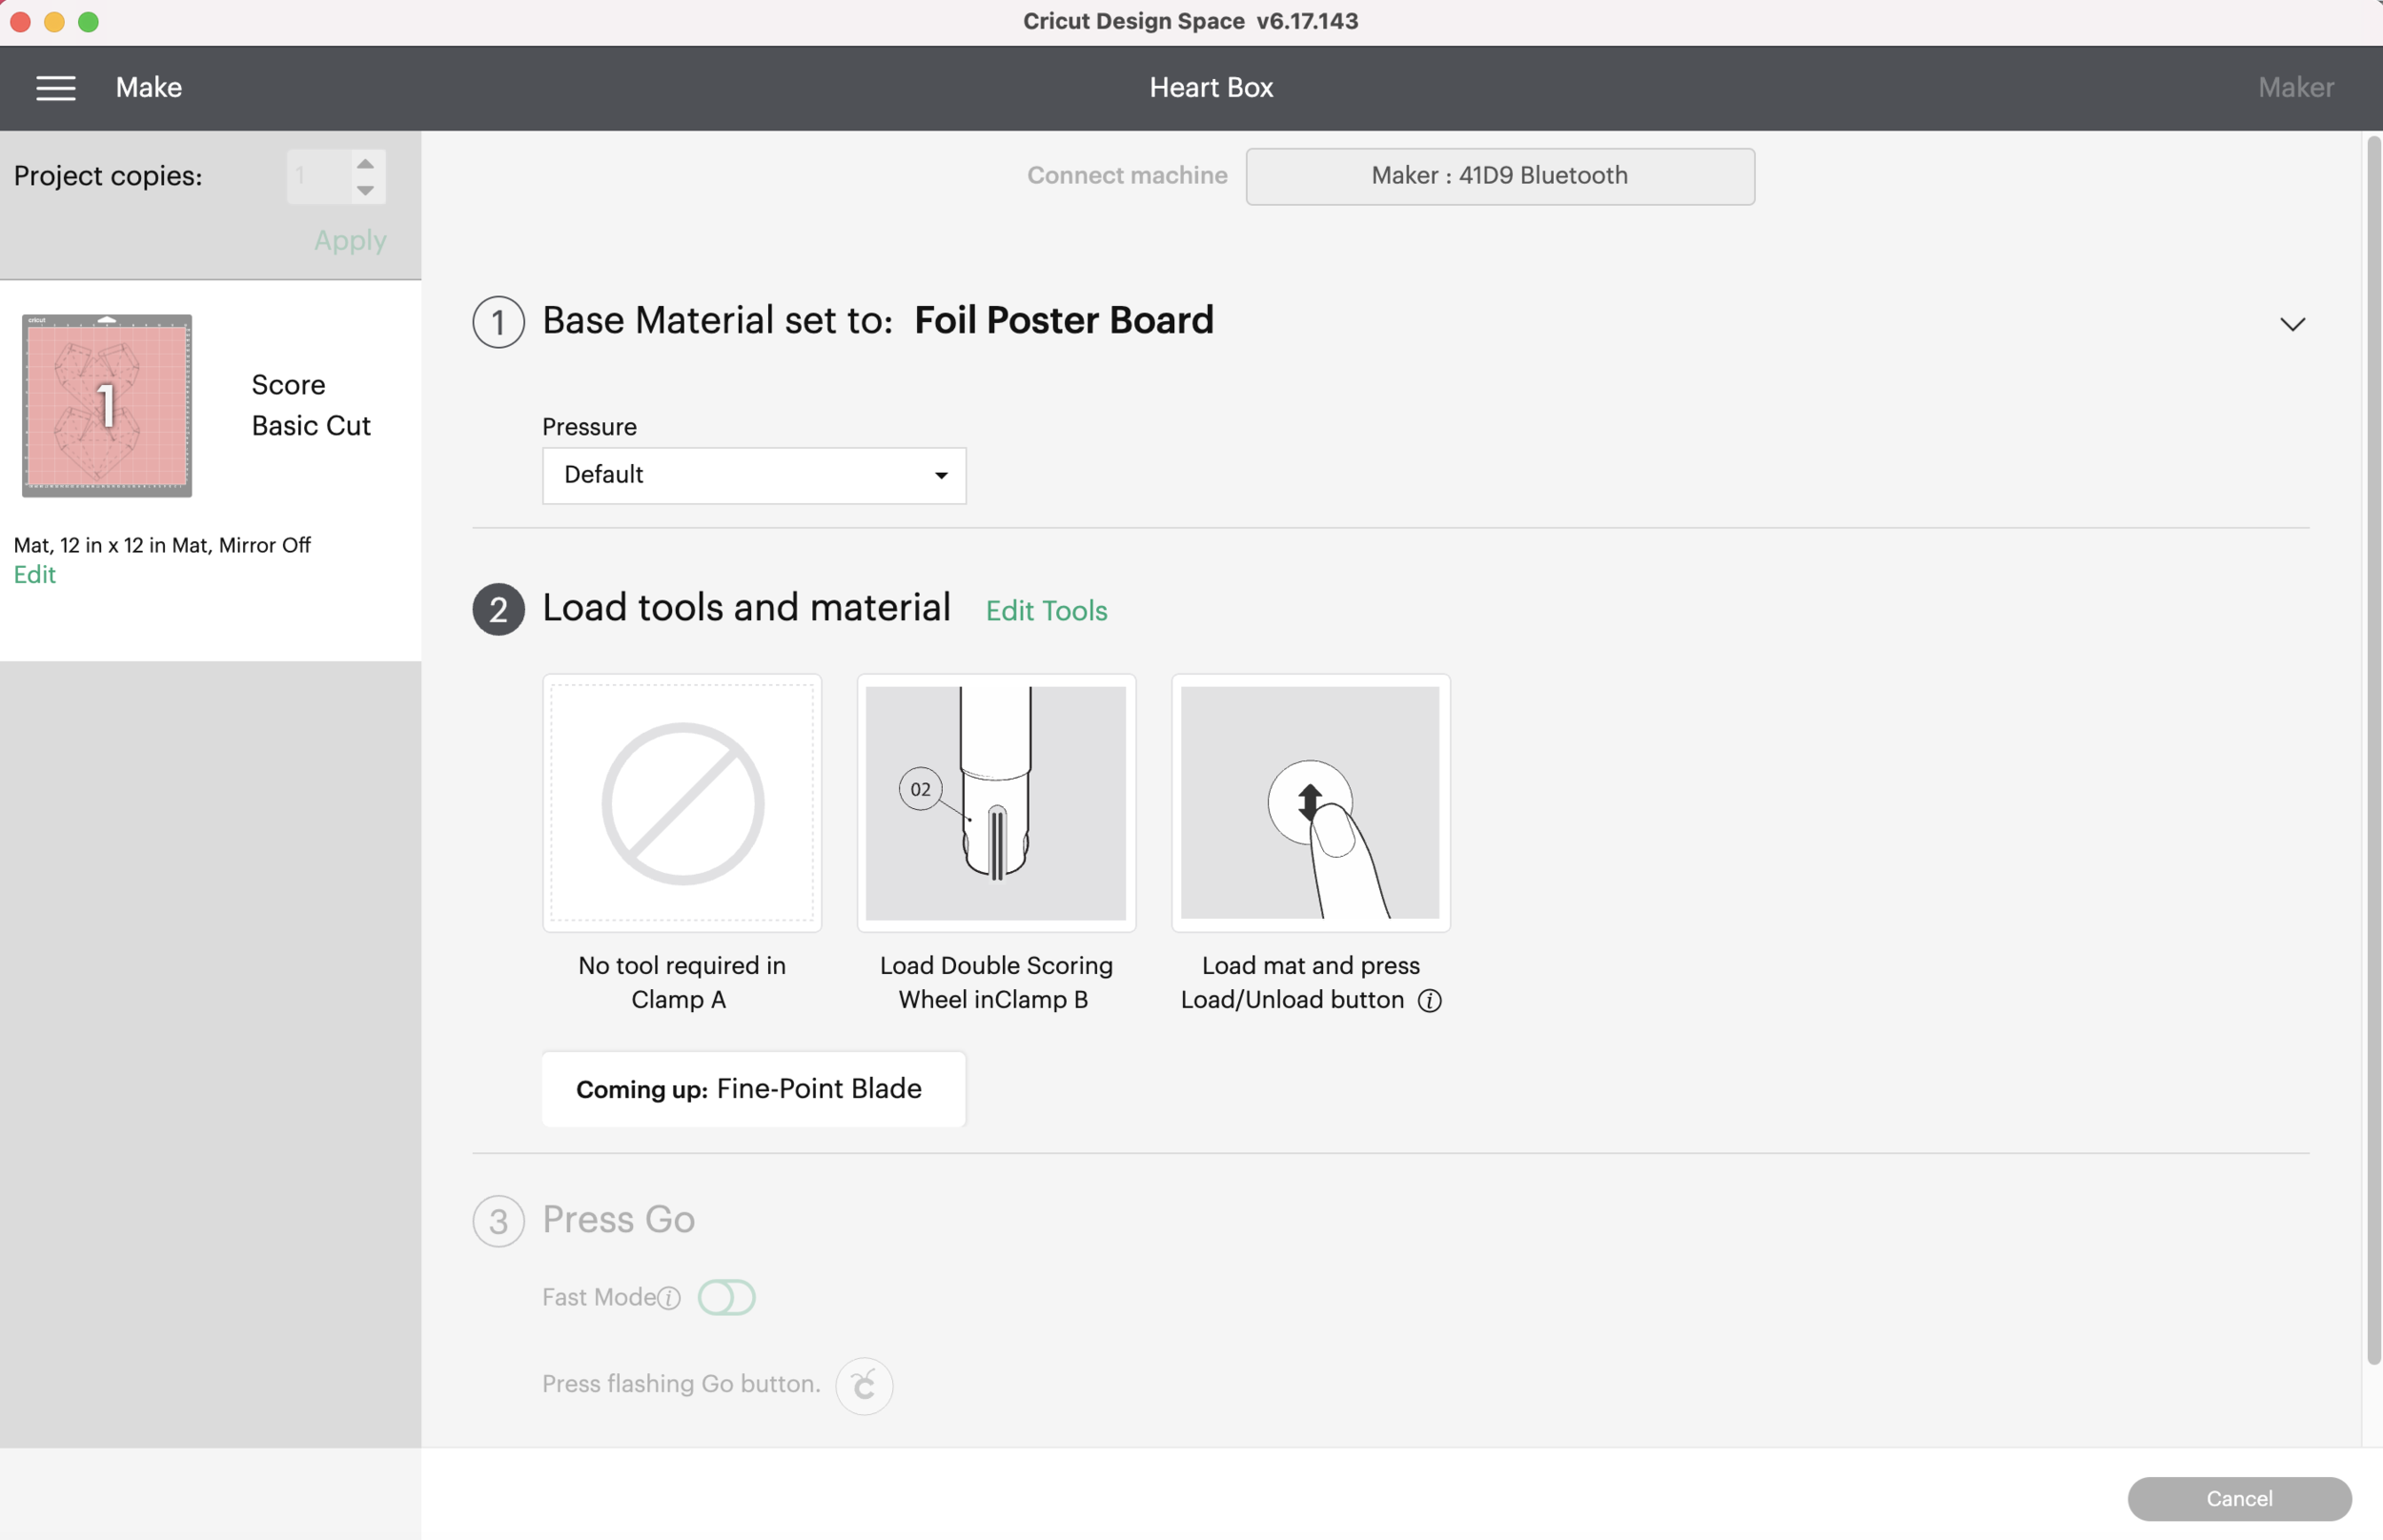
I’m going to use the single scoring wheel, so I select it and click apply. Now it’s time to load my mat and press go!
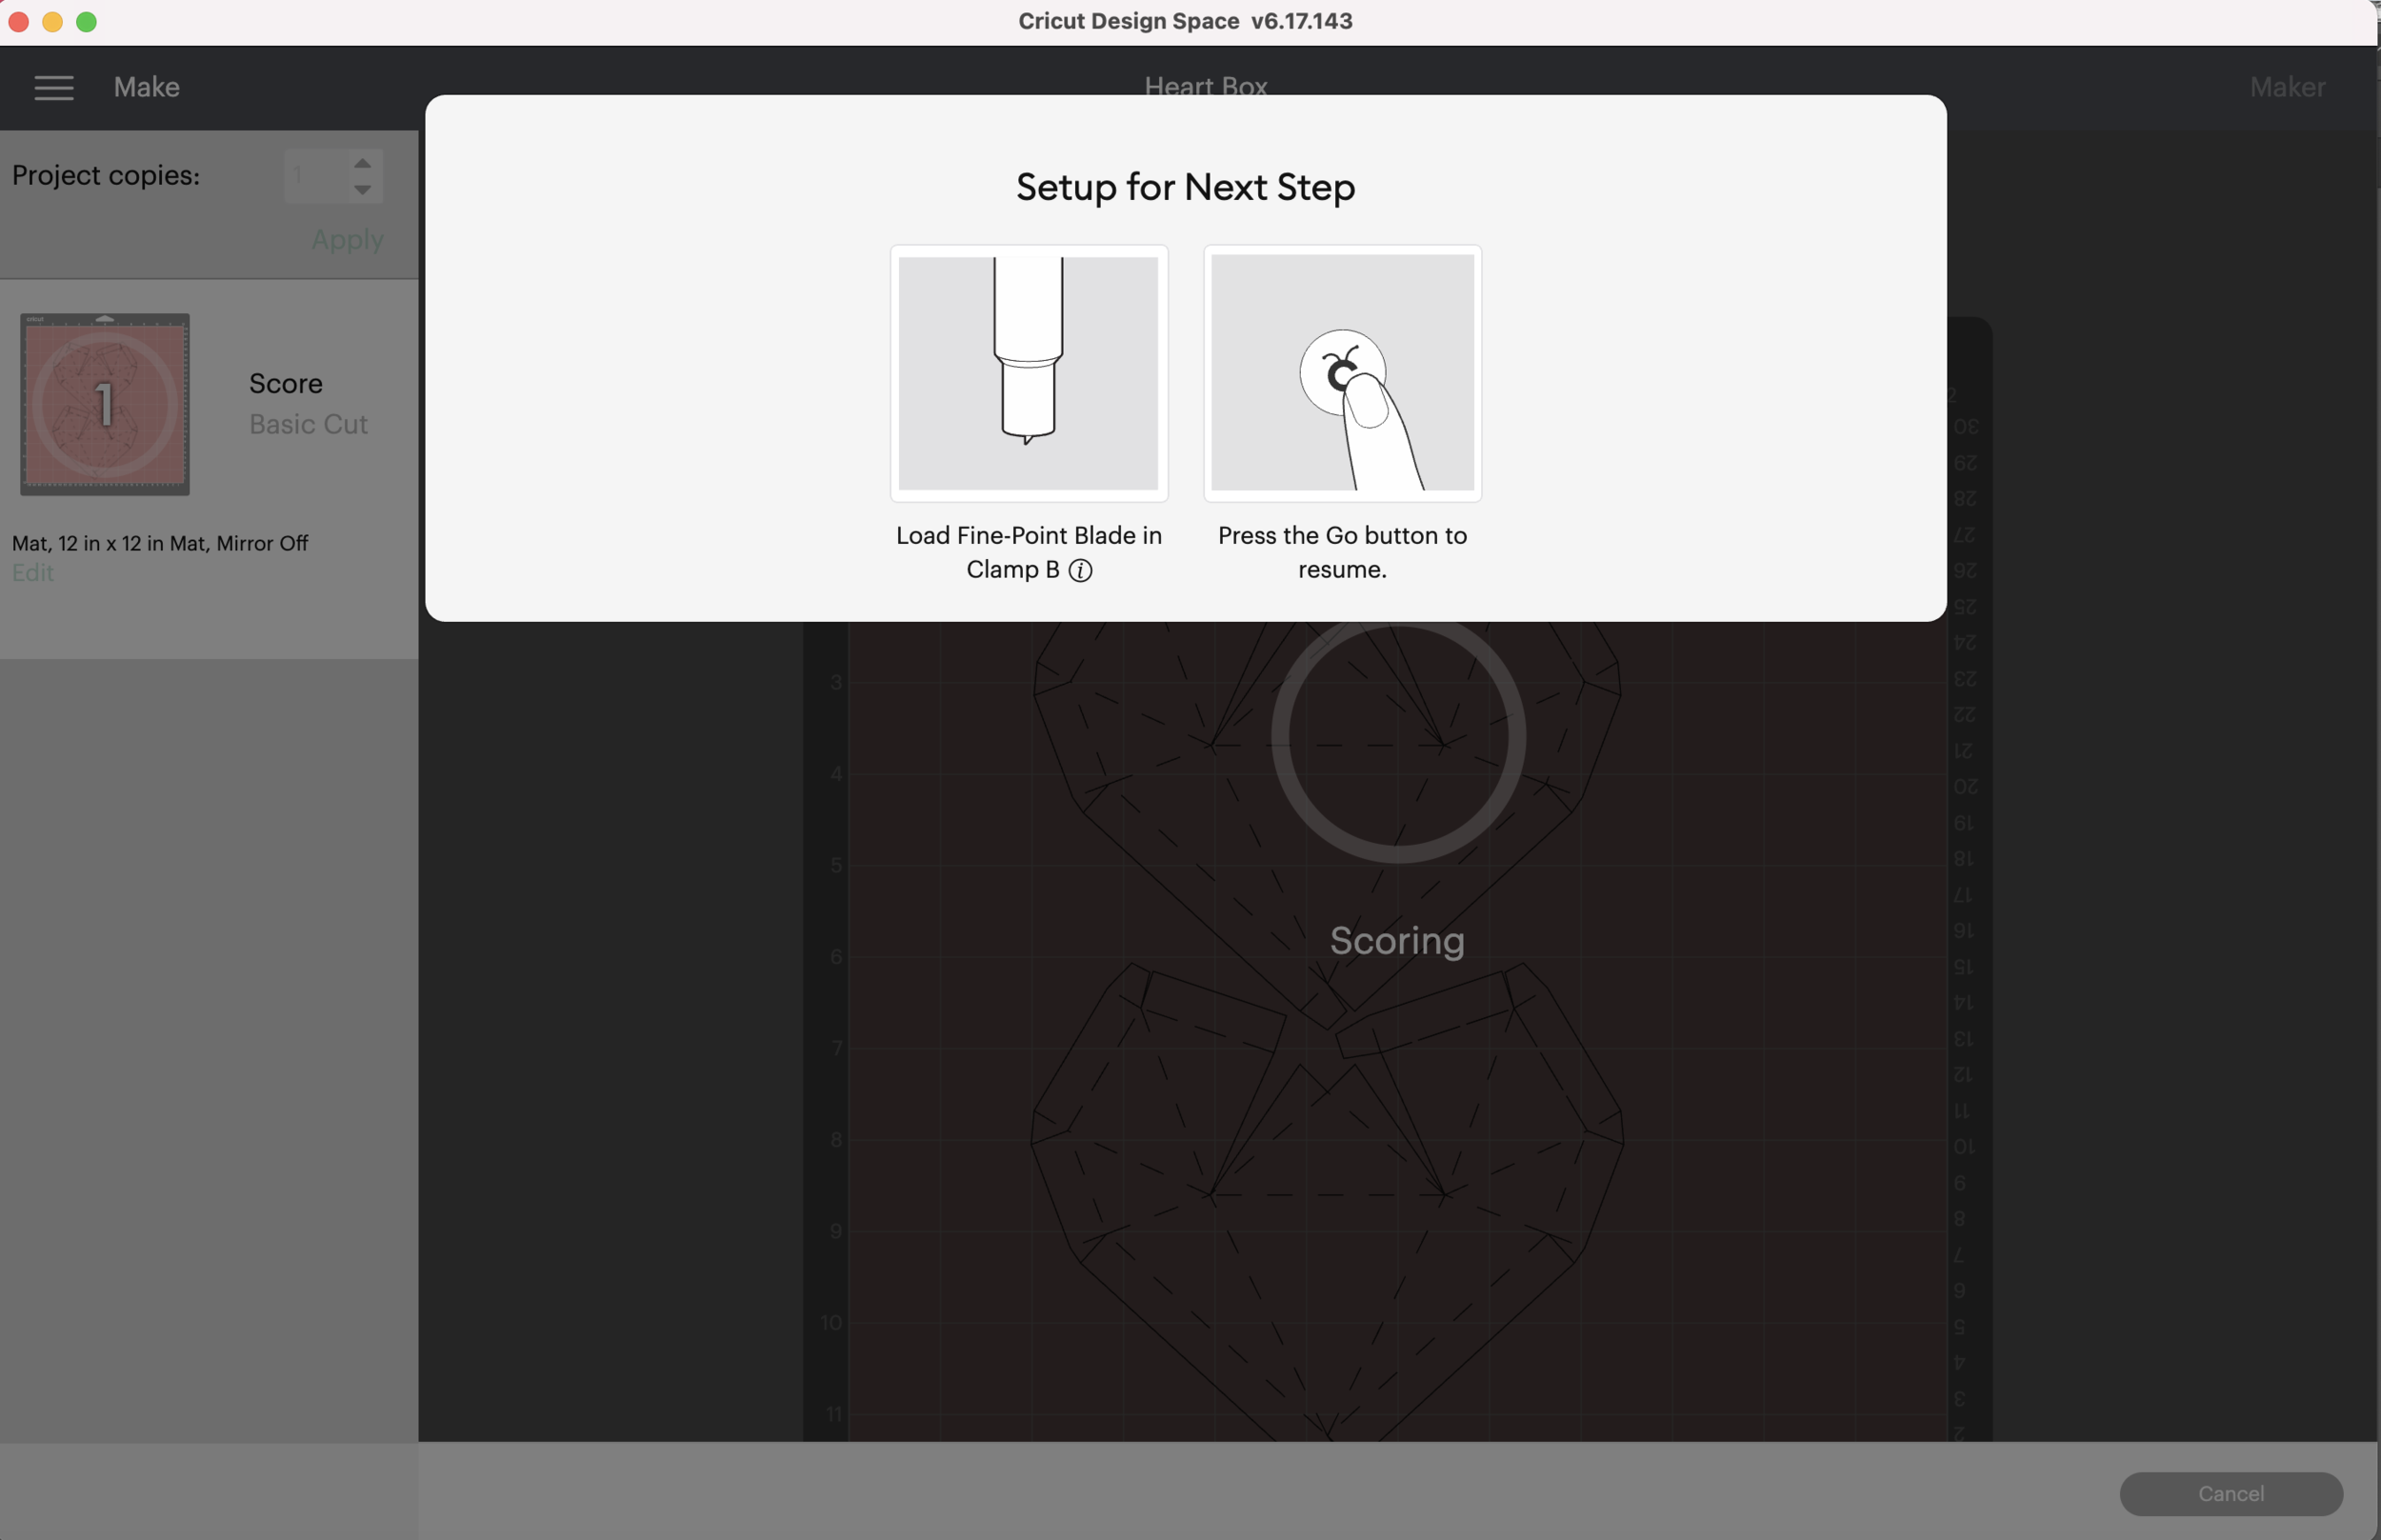
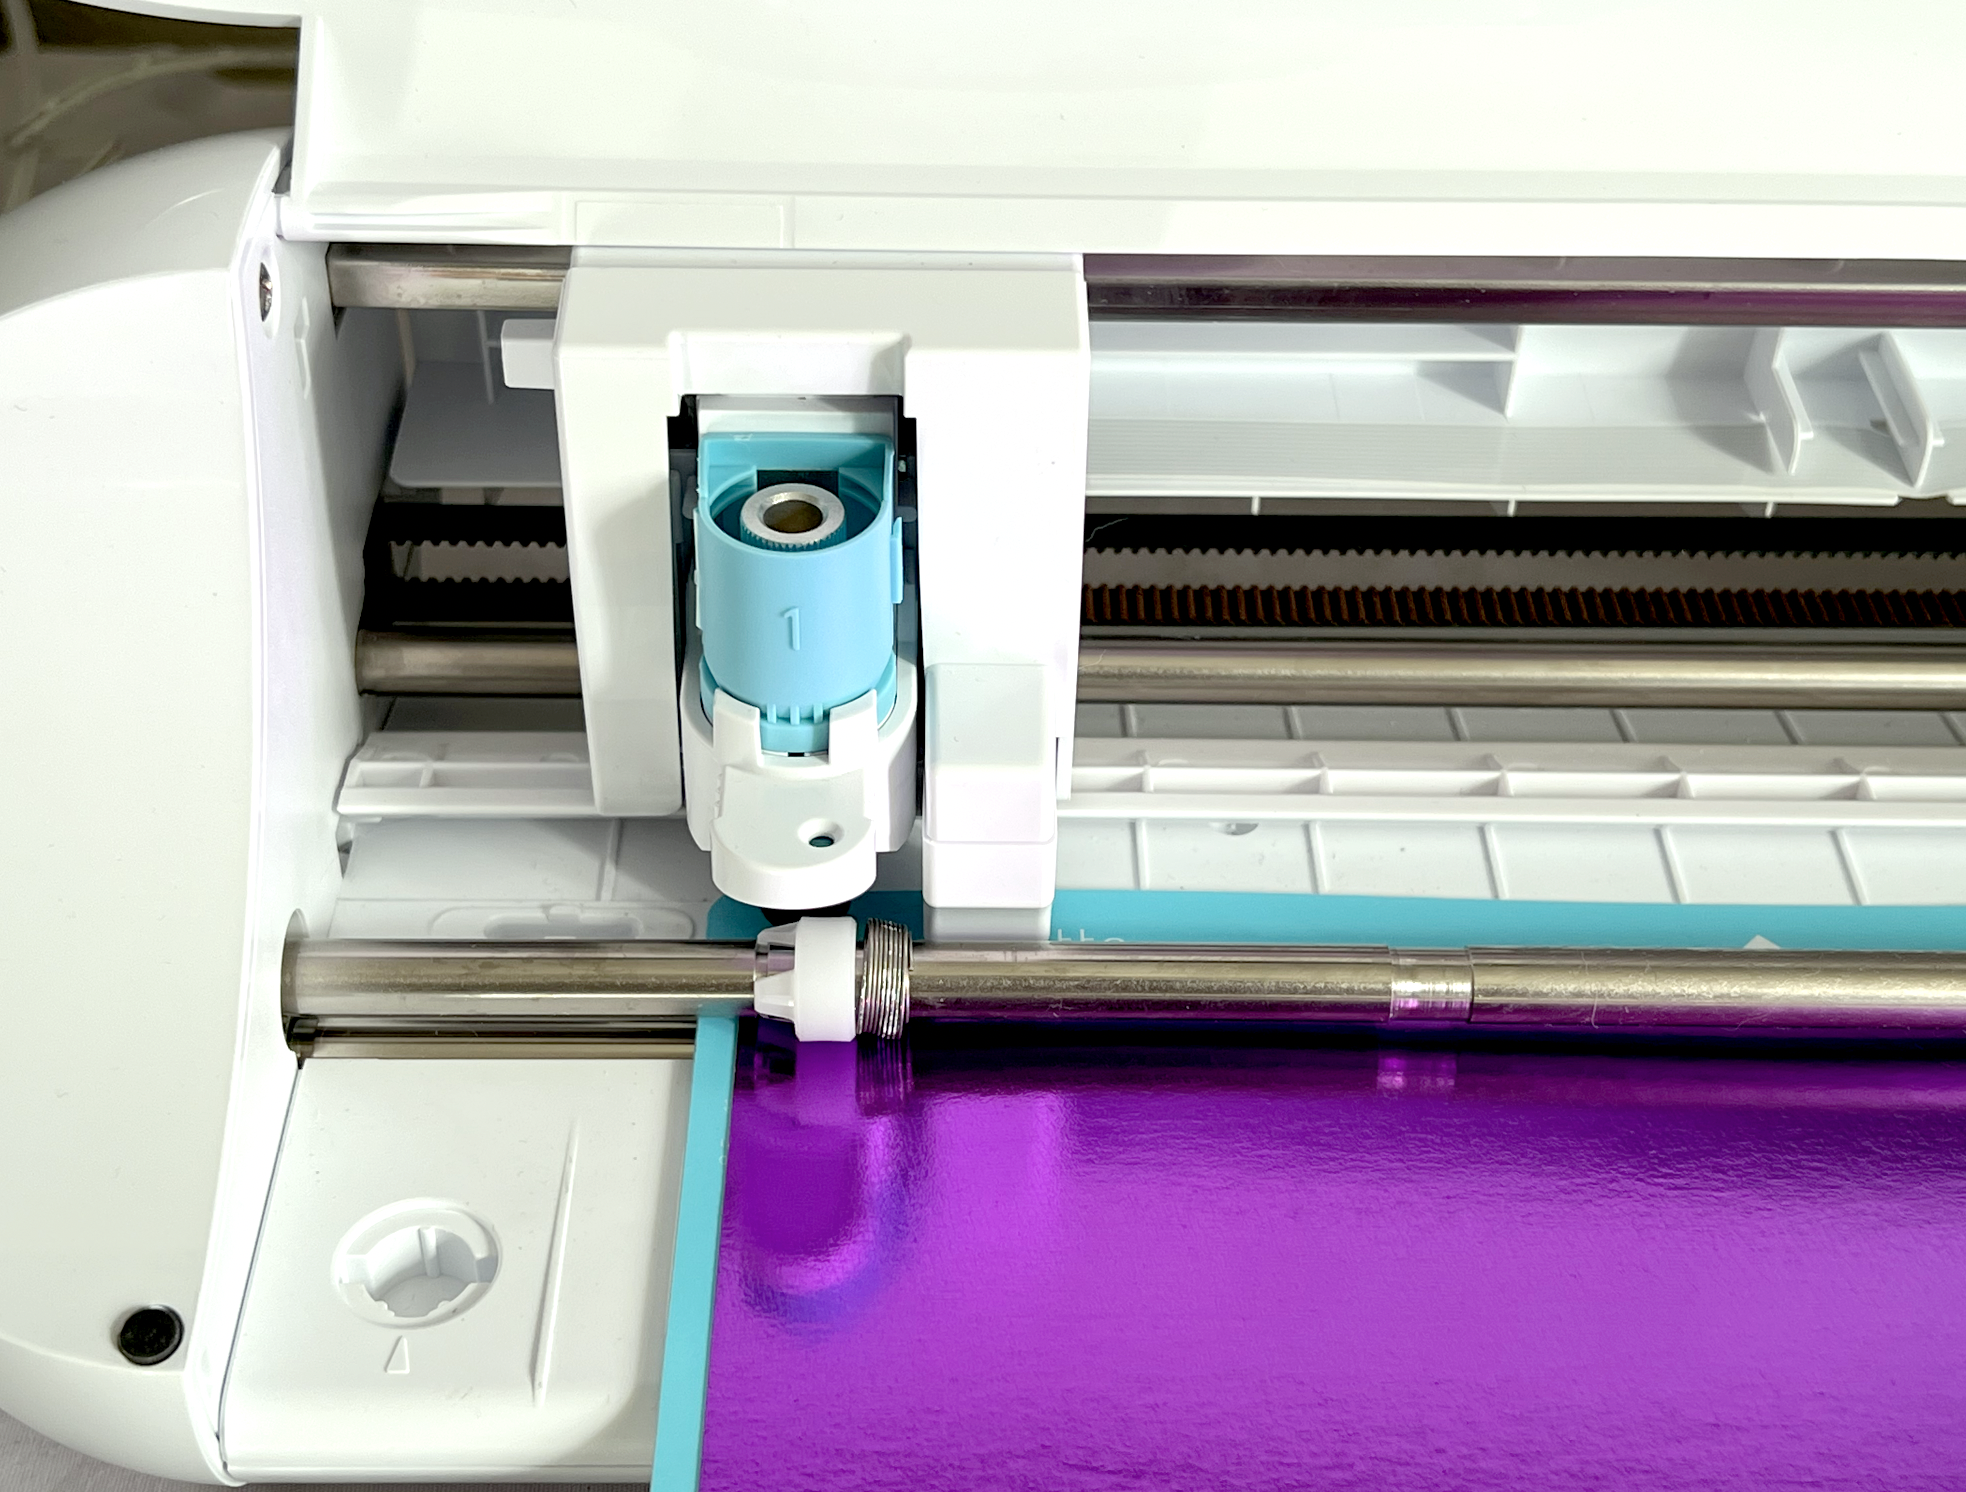
After it’s done scoring I need to switch to the fine point blade.
Once the machine is done cutting, before removing the mat, check to see that the blade cut all the way though your material. Mine did, so I can unload the mat. If it didn’t, press the Cricut button again on machine and it will do another round of cutting.
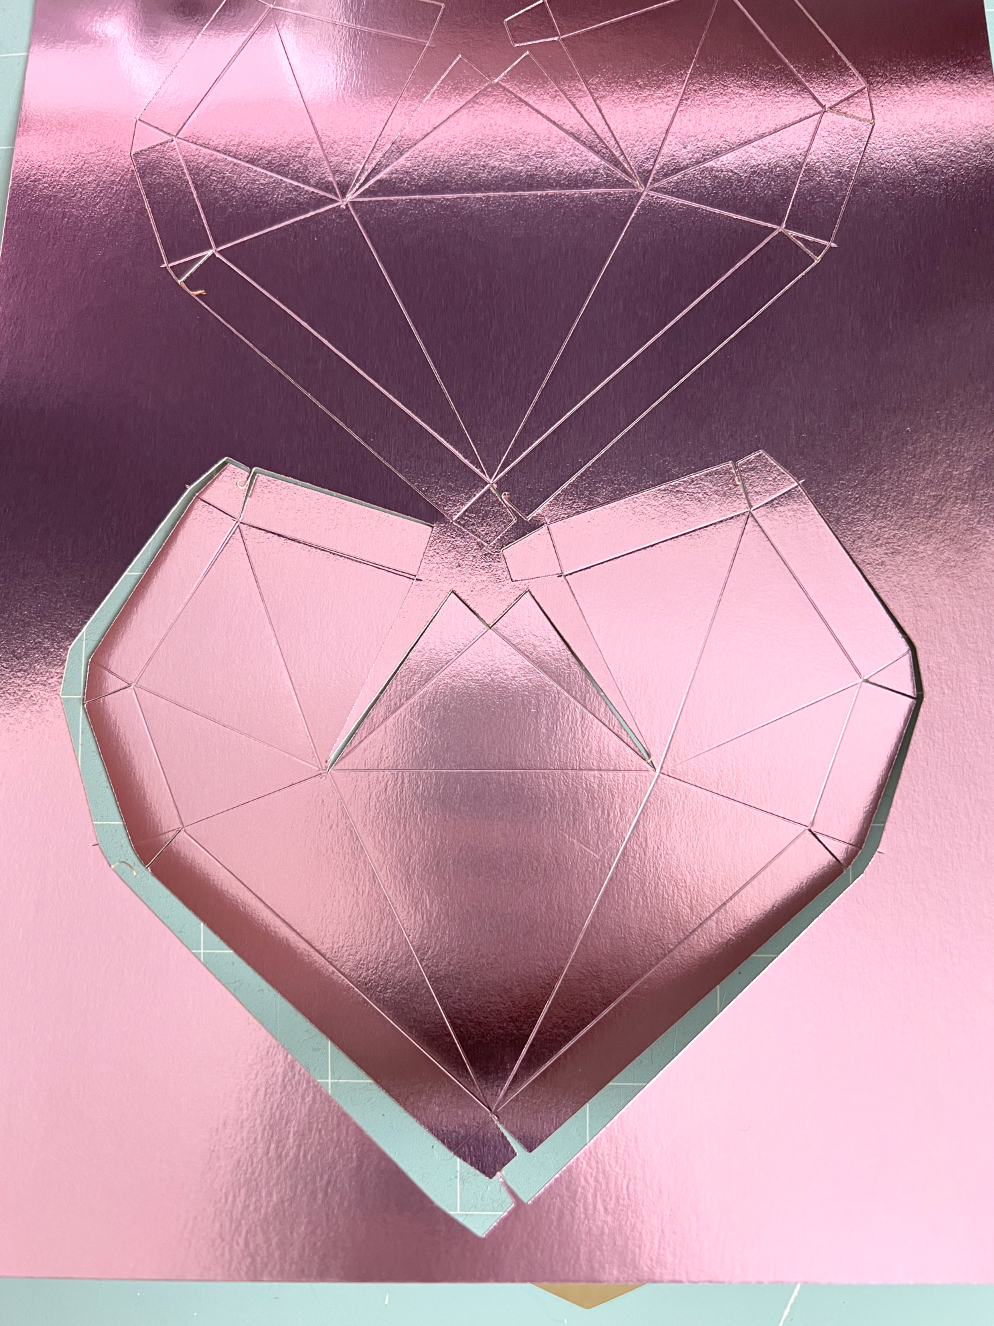
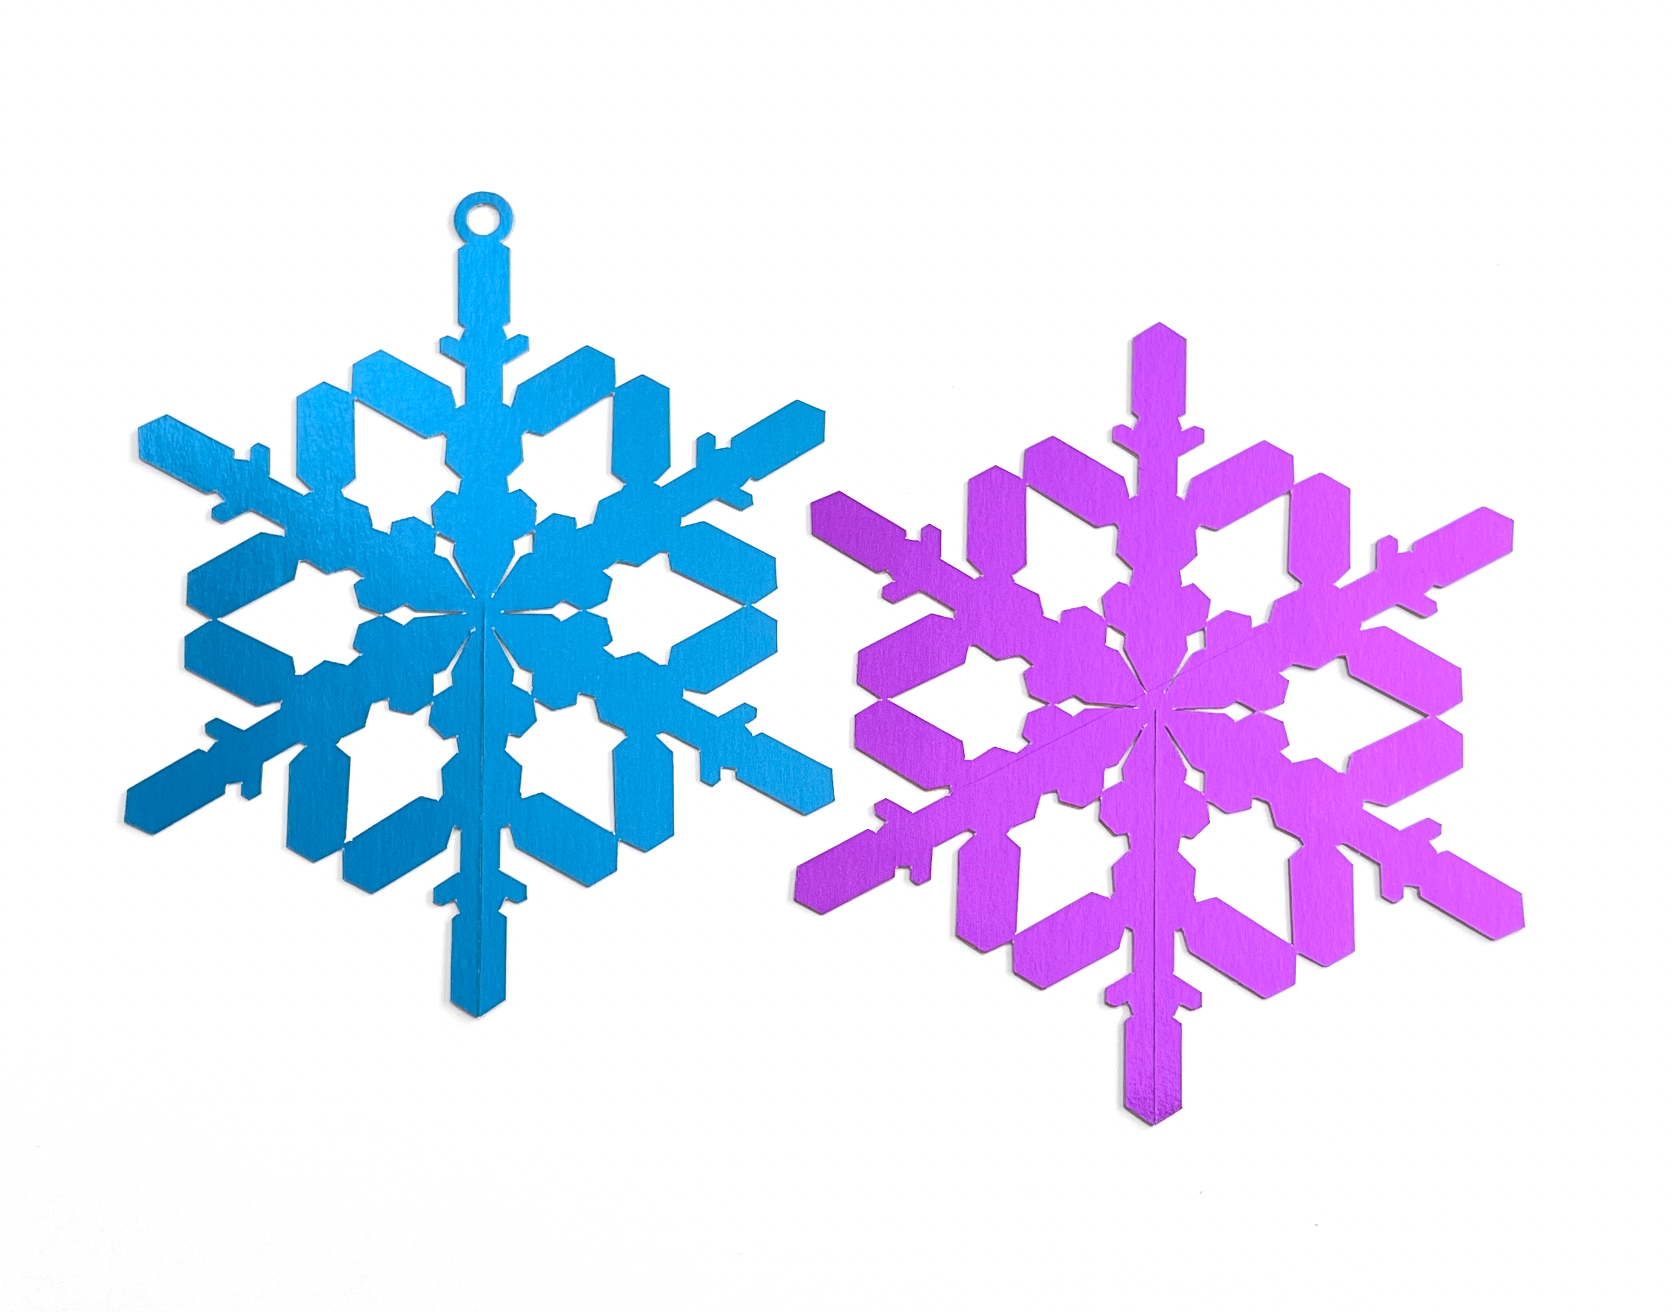
Now it’s time to assemble! It doesn’t matter if you start with the front or back heart. If you forget which piece is which, lay them on top of each other, the back heart piece is slightly smaller than the front heart heart piece.
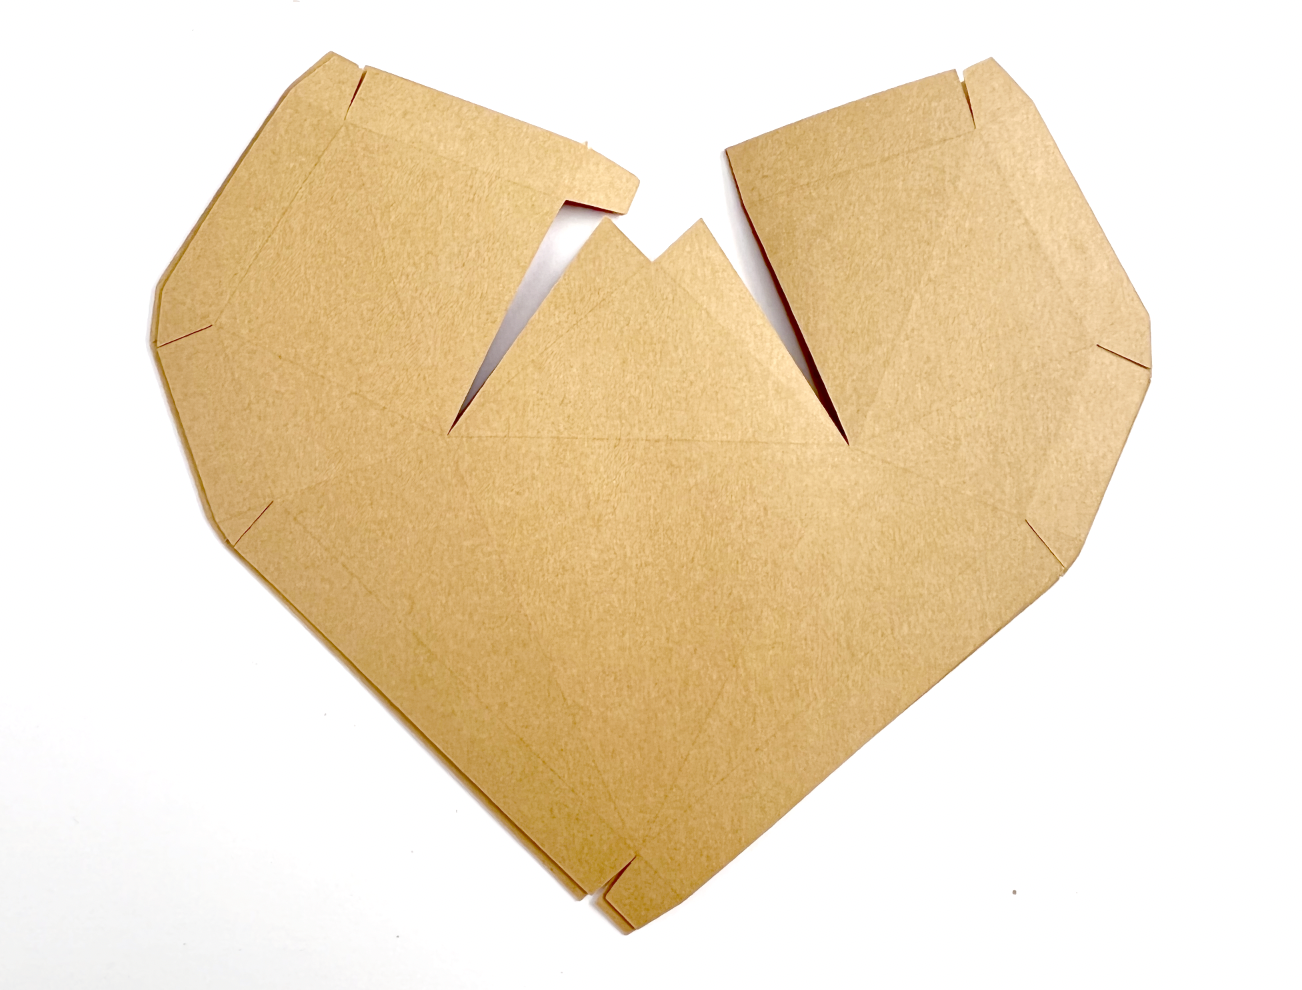
The areas in red will need tape or glue applied when assembling.
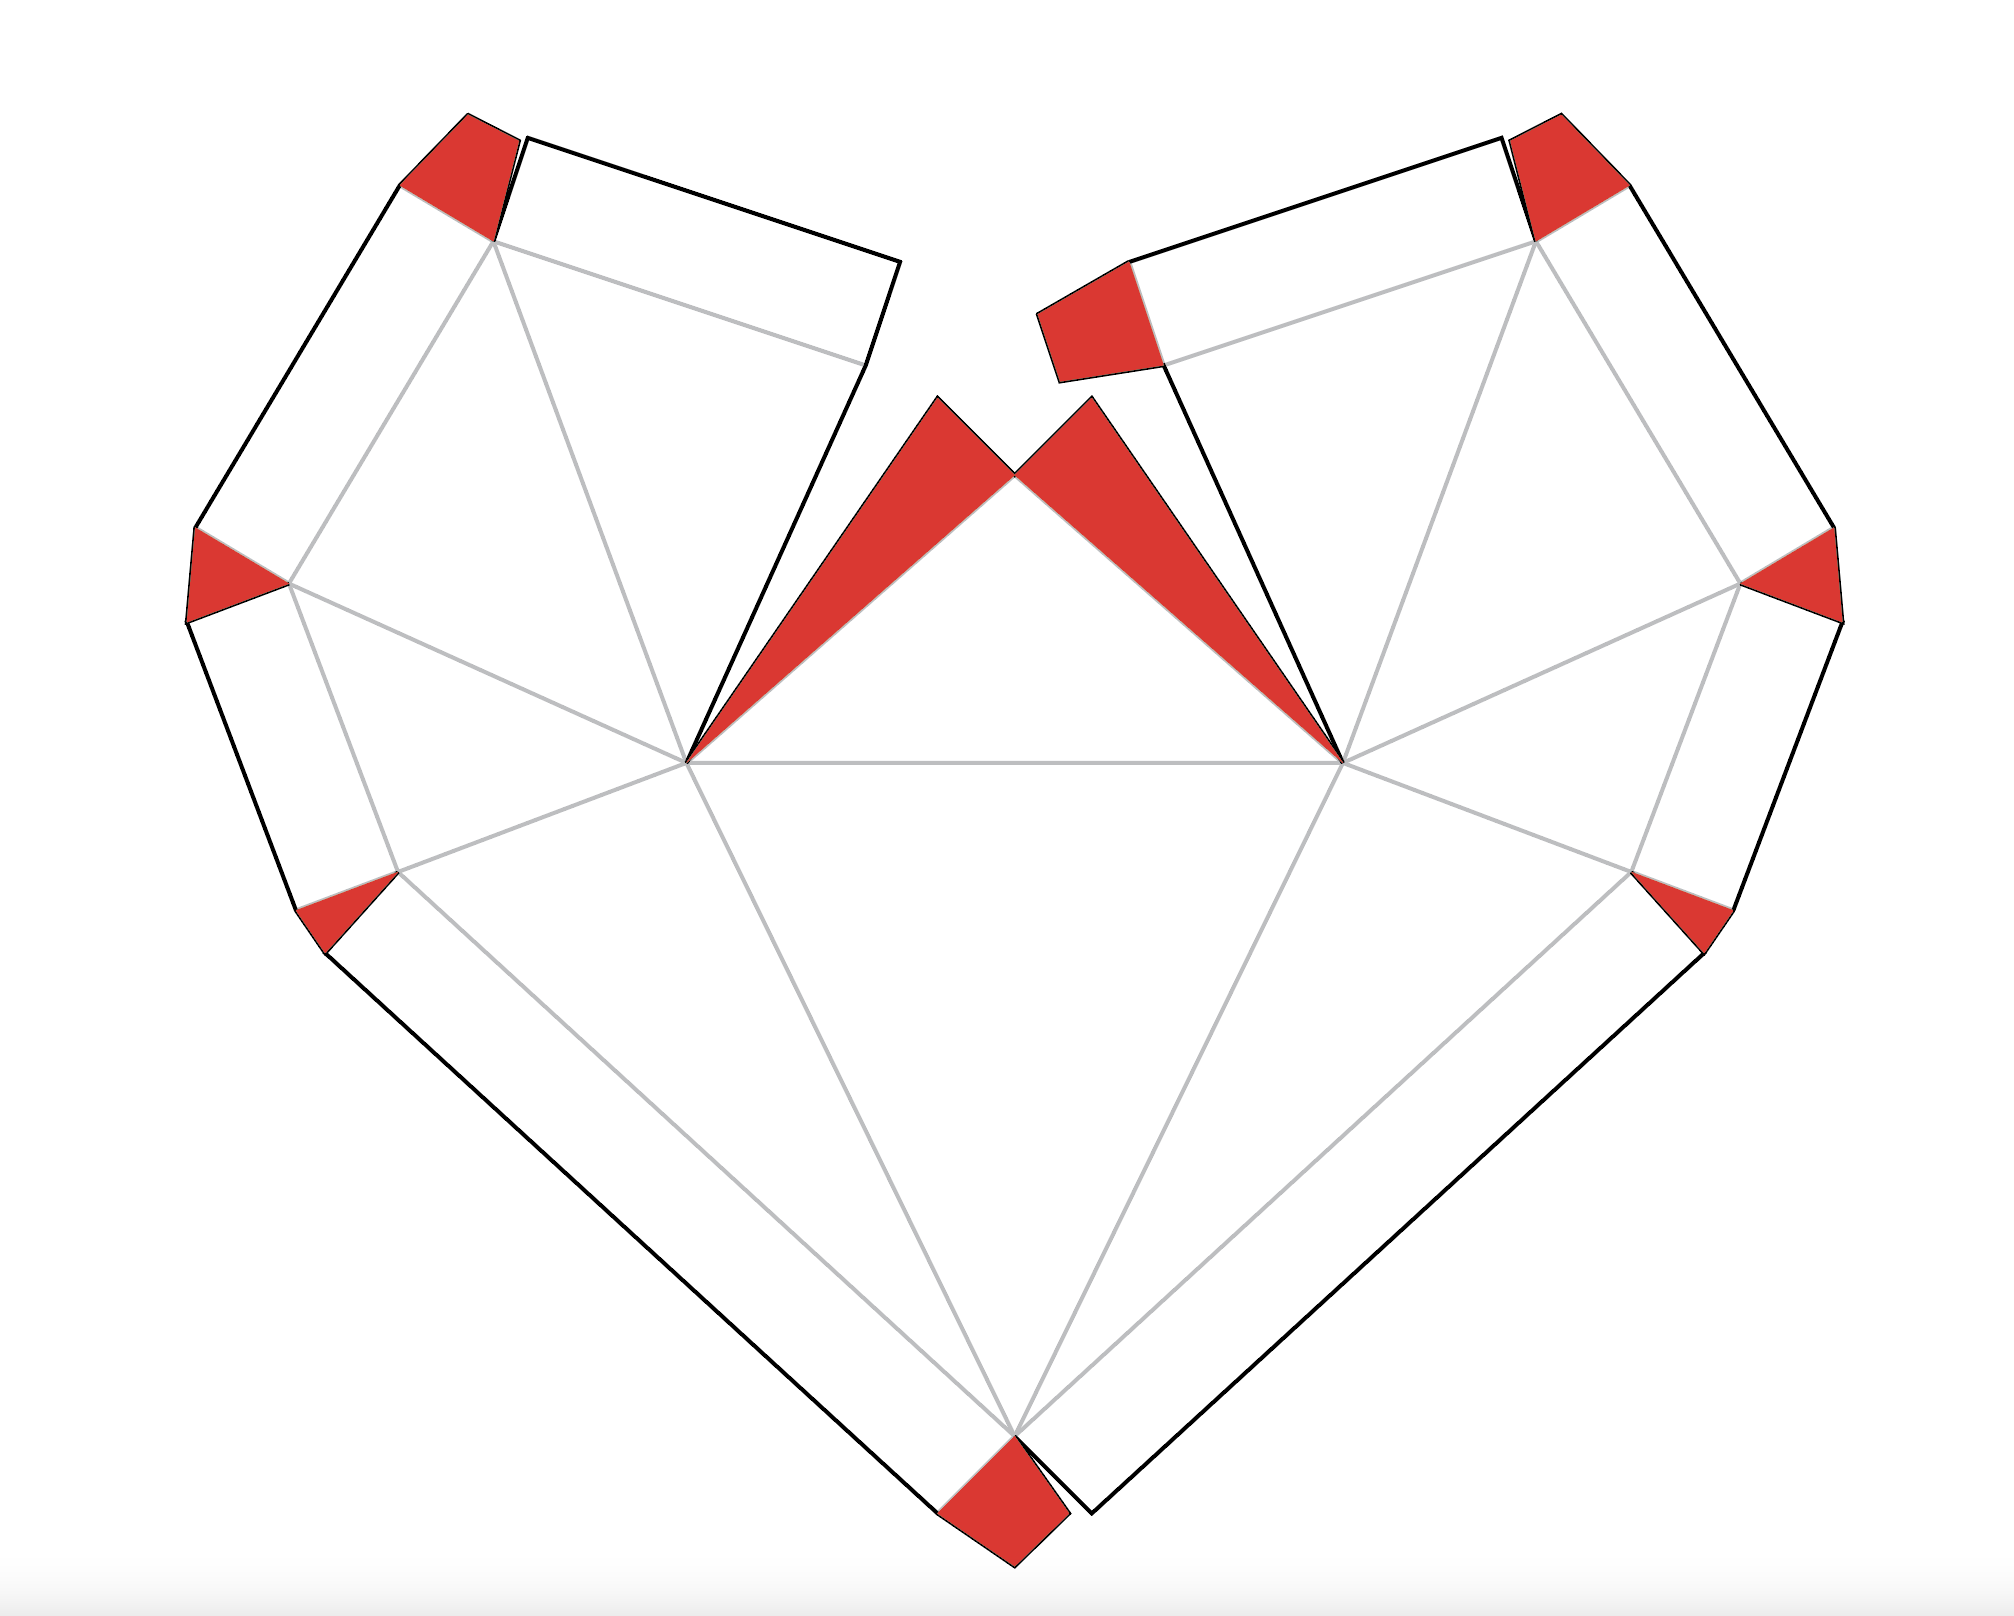
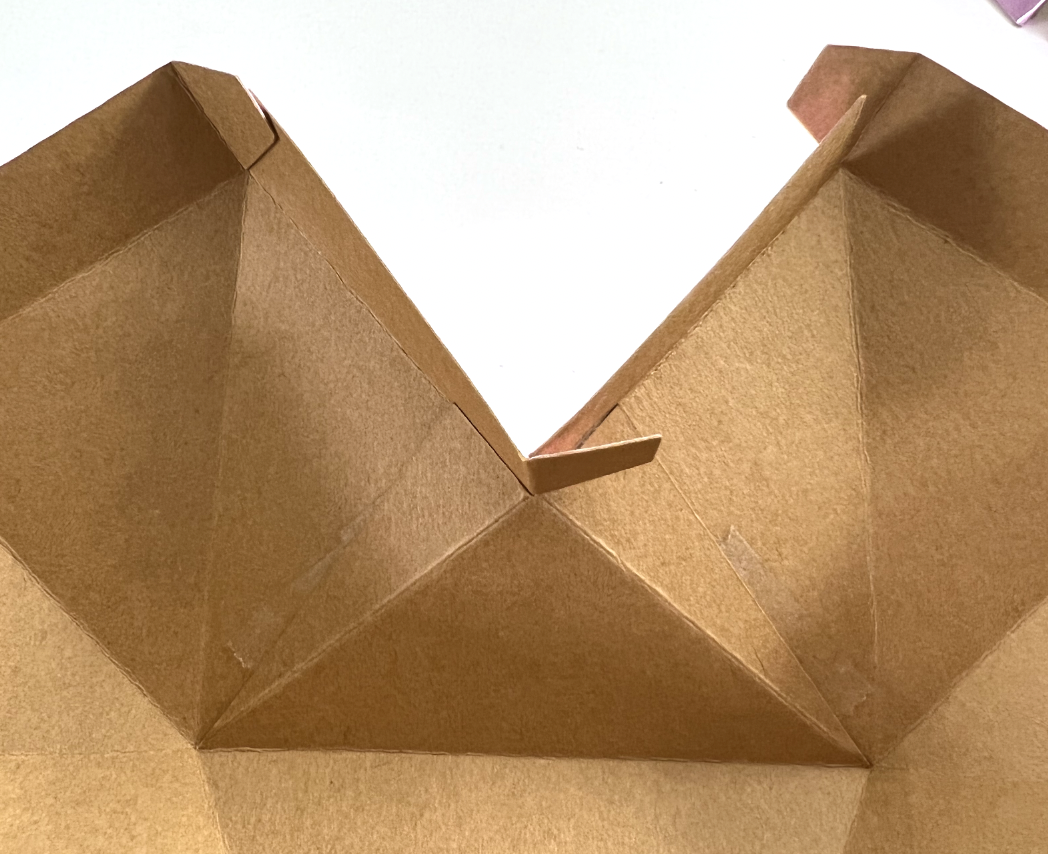
I like to fold all of my score lines before I start taping/ glueing. I’m going to start at the center of the heart, these 2 pieces in the center need to be folded in the opposite direction of all the other lines.
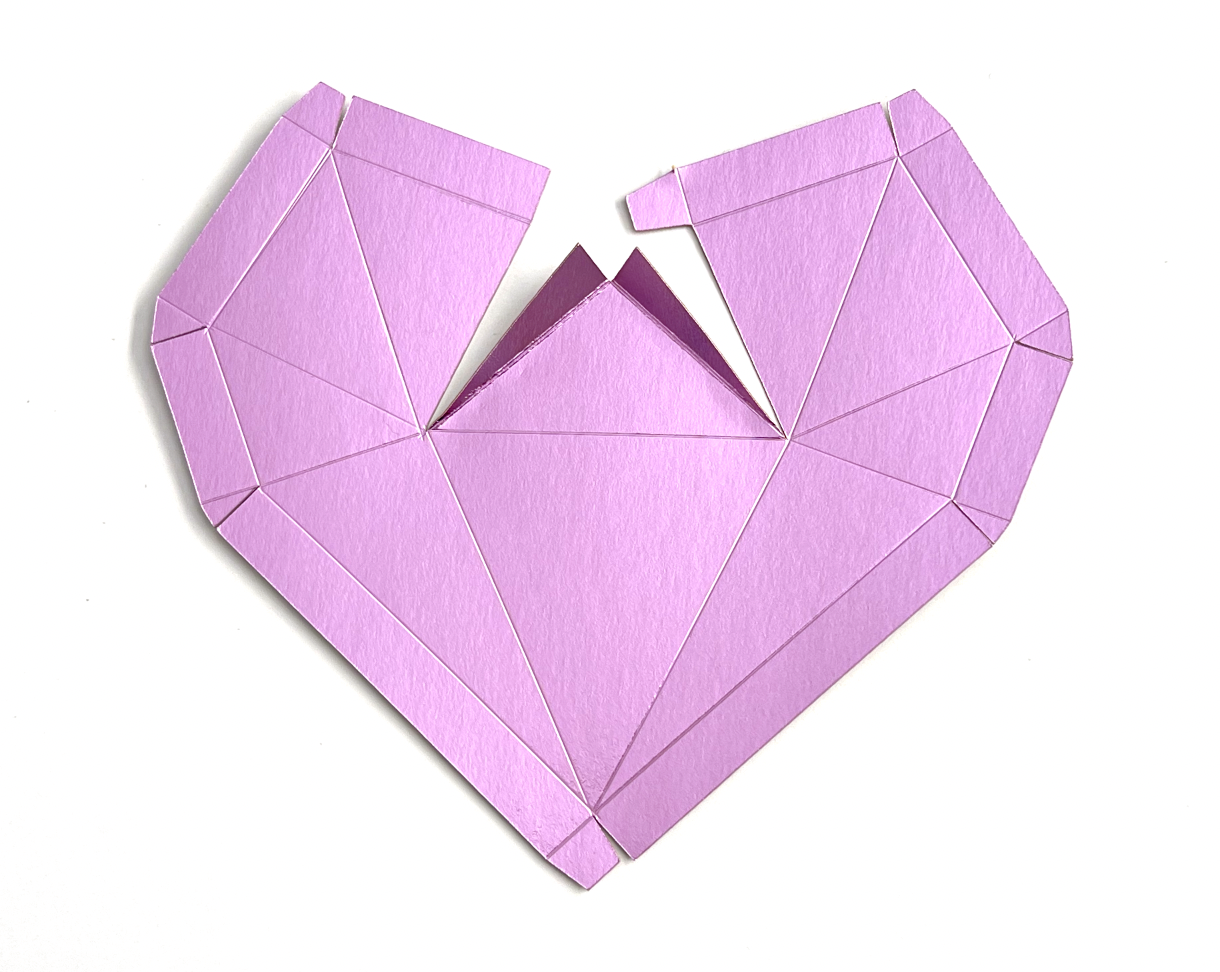
Then I fold all my other lines.
I’m going to use double sided tape to assemble this, but you can also use glue. Again, I’m going to start at the center of the heart. I apply my tape to the flap and line up the edge with my score line.
I do the same thing for the other side. Then the little tab needs to be on the inside of the heart, and taped.
Then I move to the top of the heart, apply tape or glue to the little tab. Line up the score line to the cut edge and secure it.
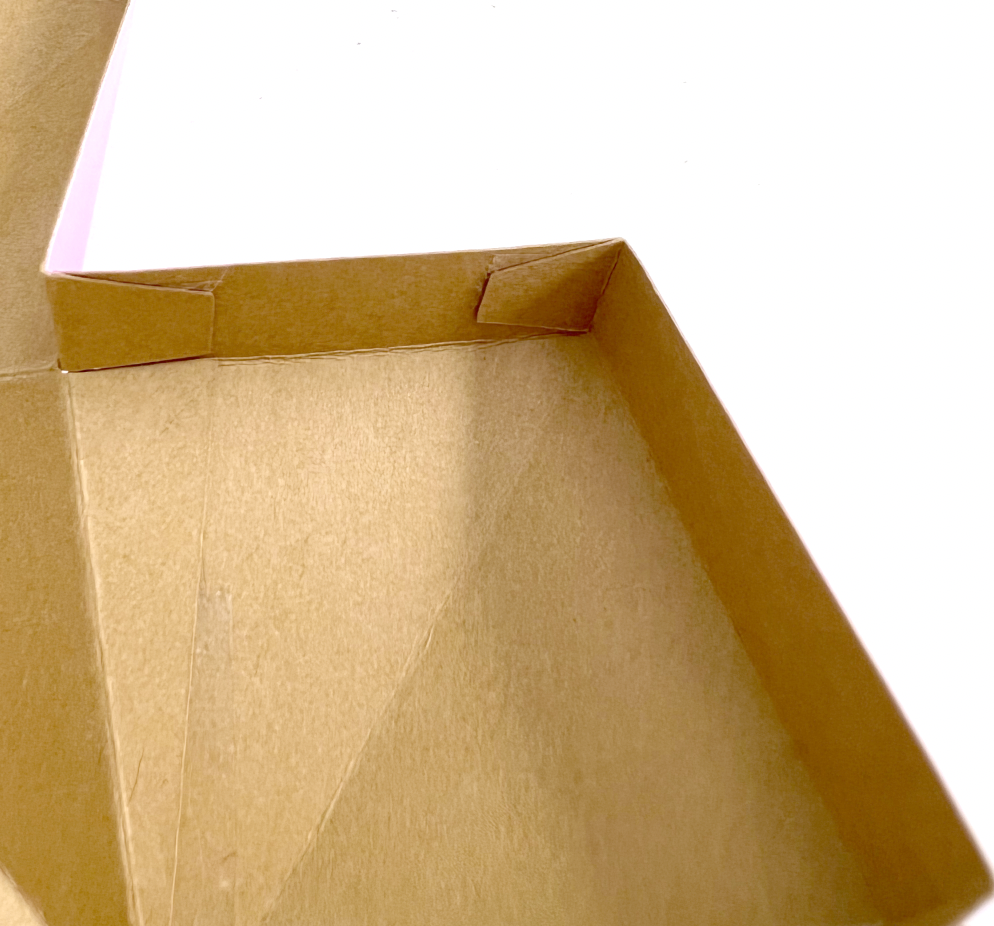
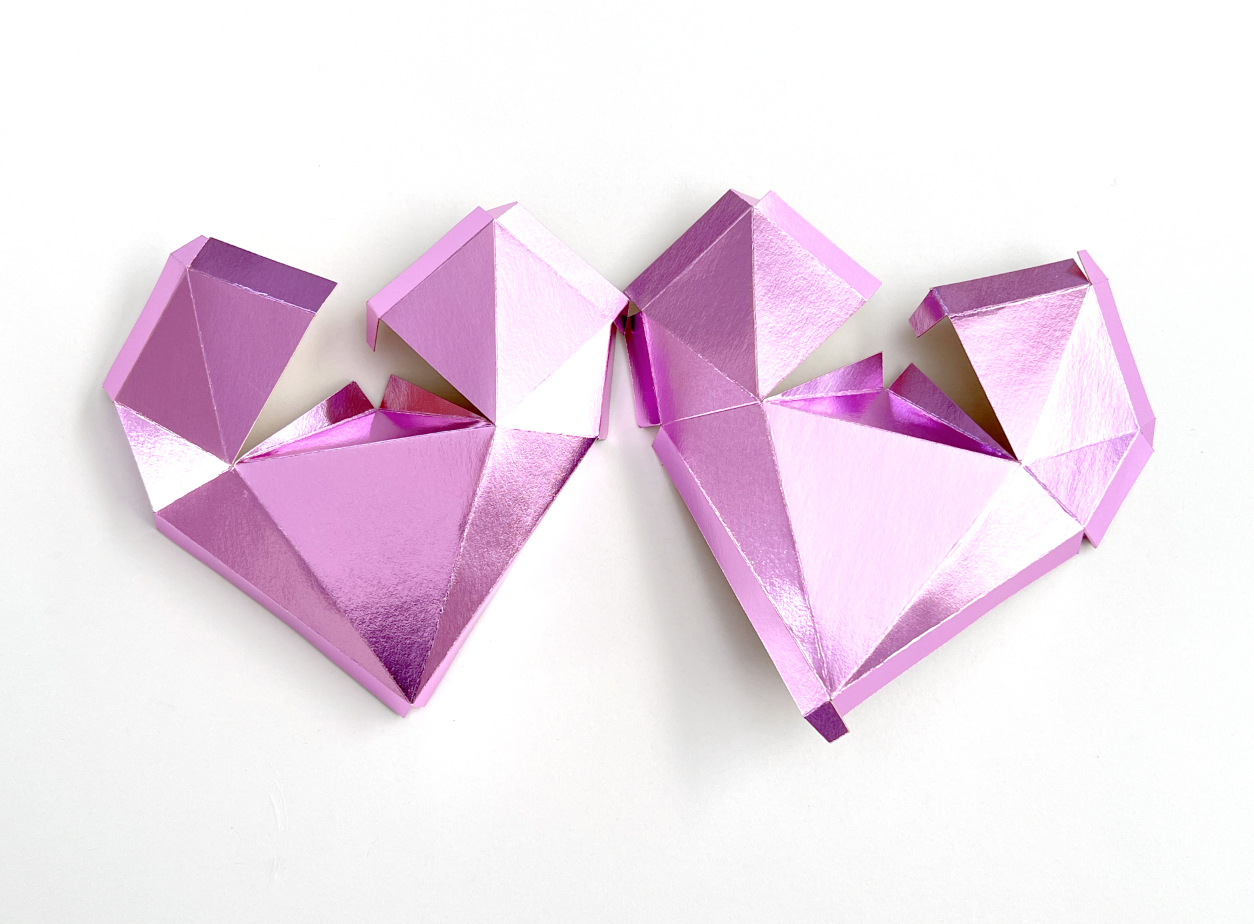
I work my way all around so all the little tabs are taped/ glued.
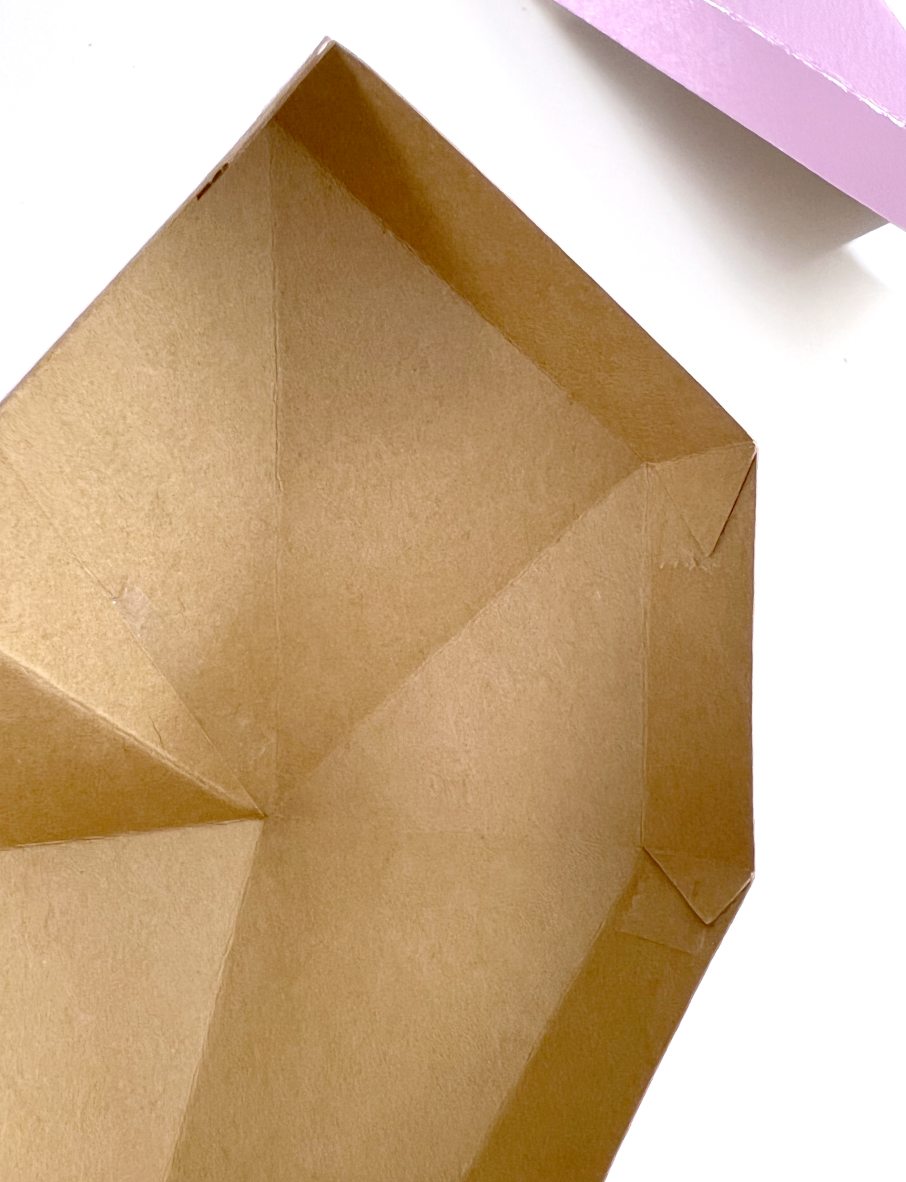
Now one side is finished and I repeat the same process for the other heart piece.
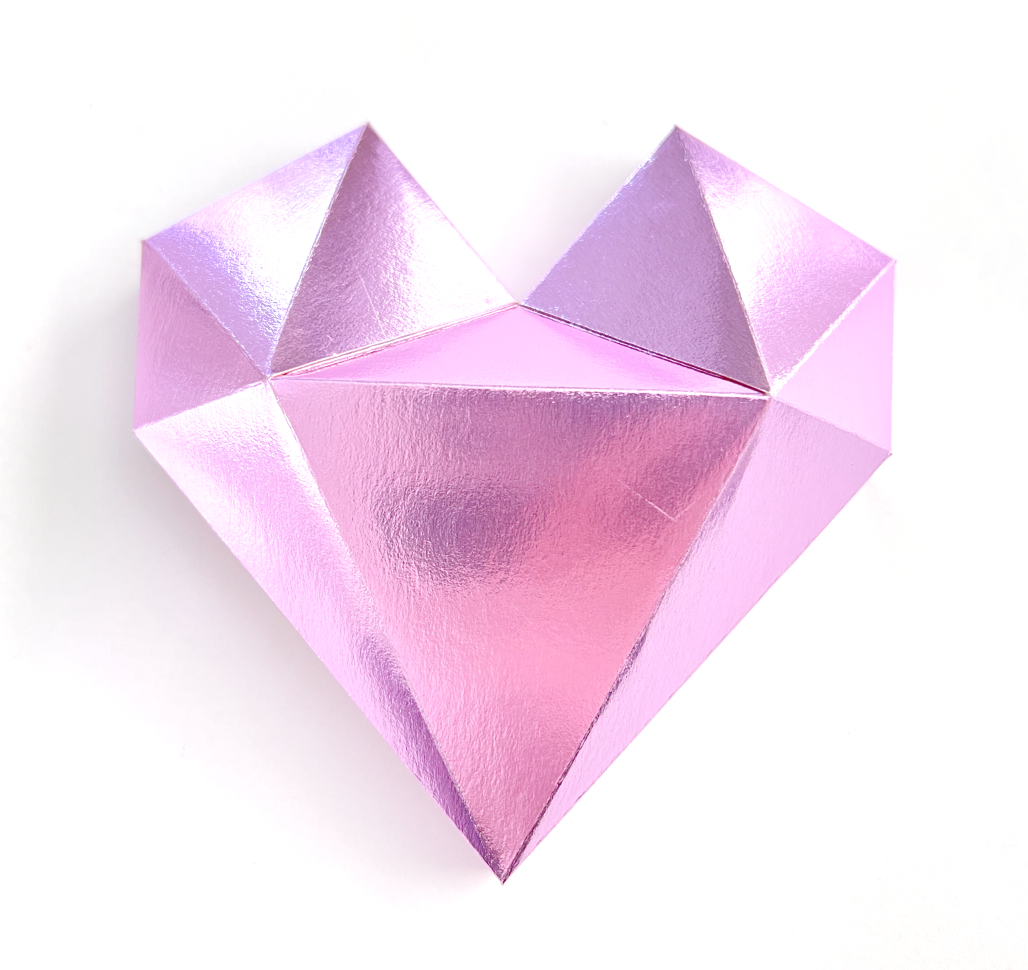
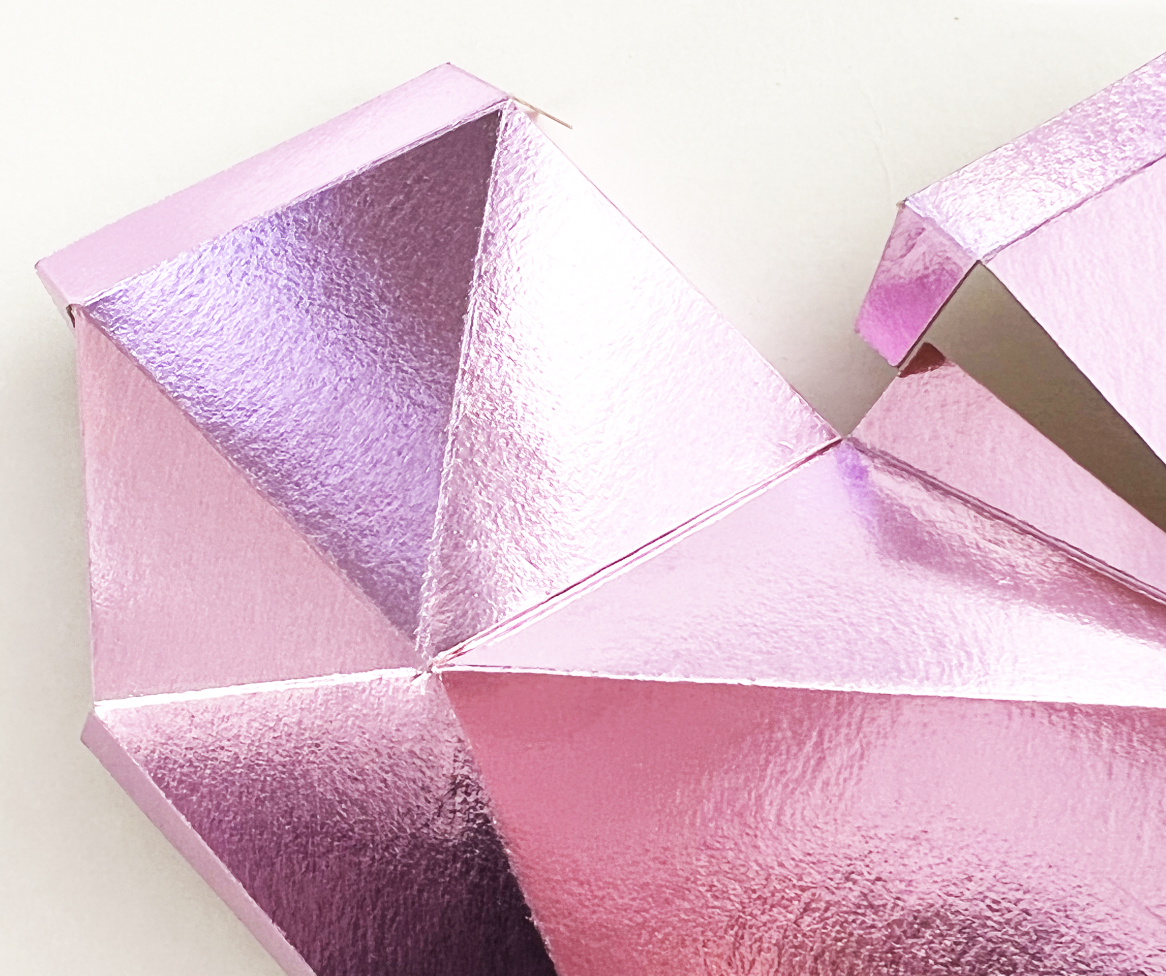
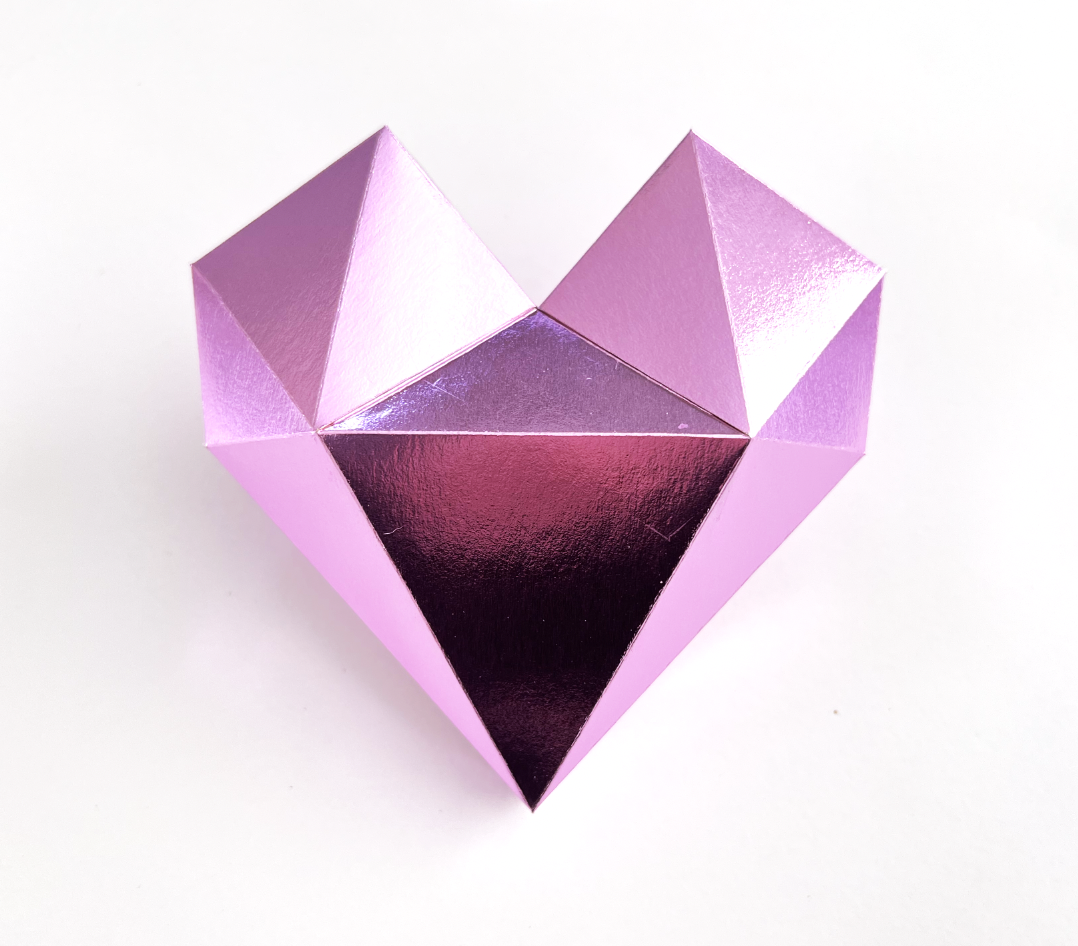
Now I put them together, the back nests inside the front. This is a view of the back.
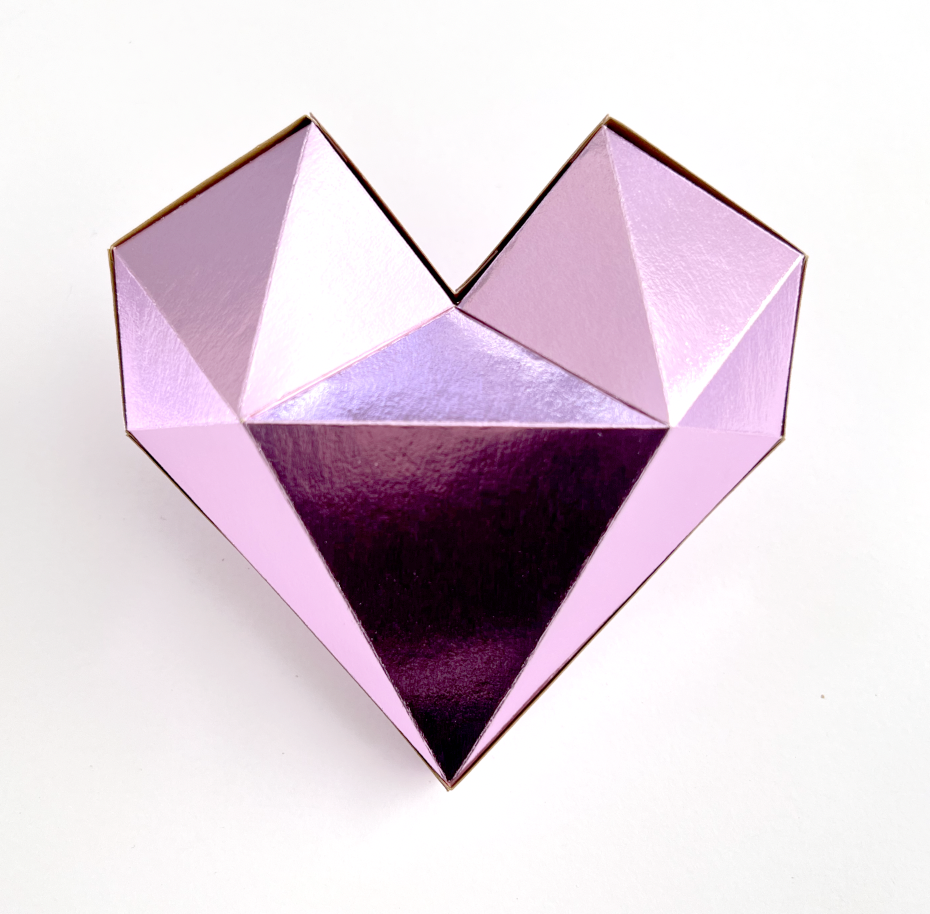
Now you have a cute little heart box! You can even cut some vinyl to add names or cute little messages to the front heart.