
Hi Everyone!
Links in this article may be affiliate links.
It’s been a few weeks since my last post, but during that time I got a Cameo 4 and I’ve been playing around with it a little bit.
As you probably already know, the We R Memory Keepers Foil Quill is one of my favorite tools to use with my cutting machines. I see a lot of people having trouble using the Fine Tip Foil Quill in particular with the Cameo 4 and Portrait machines. I got my fine tip to work pretty well with my Portrait 3, and I tried it out with the same settings on my Cameo 4. Those settings didn’t work with my Cameo 4 and I actually broke the tip off my foil quill. Oops!!
I ended up buying a new Fine Tip foil quill and I finally figured out a better way to keep it from ripping my foil and breaking the tip. It’s so simple and, I can’t believe I didn’t think of this sooner!
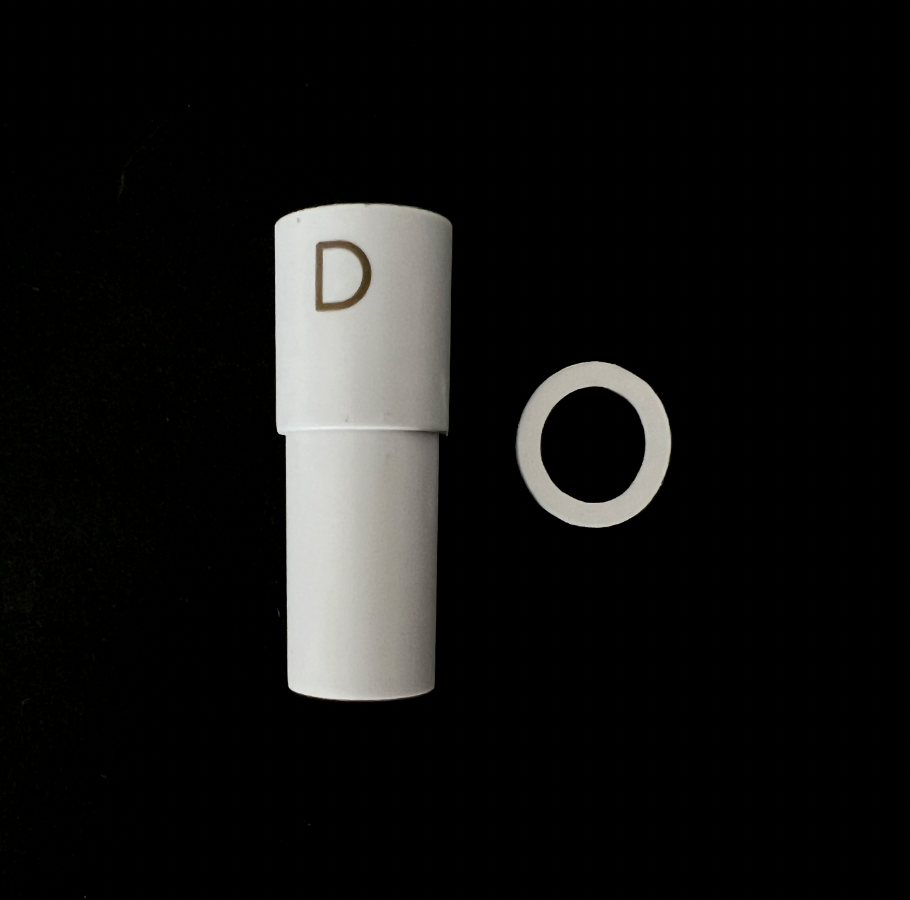
All you need is some cardstock. I’m using a 100lb cardstock, so it’s a little thicker. But you can use whatever you have on hand.
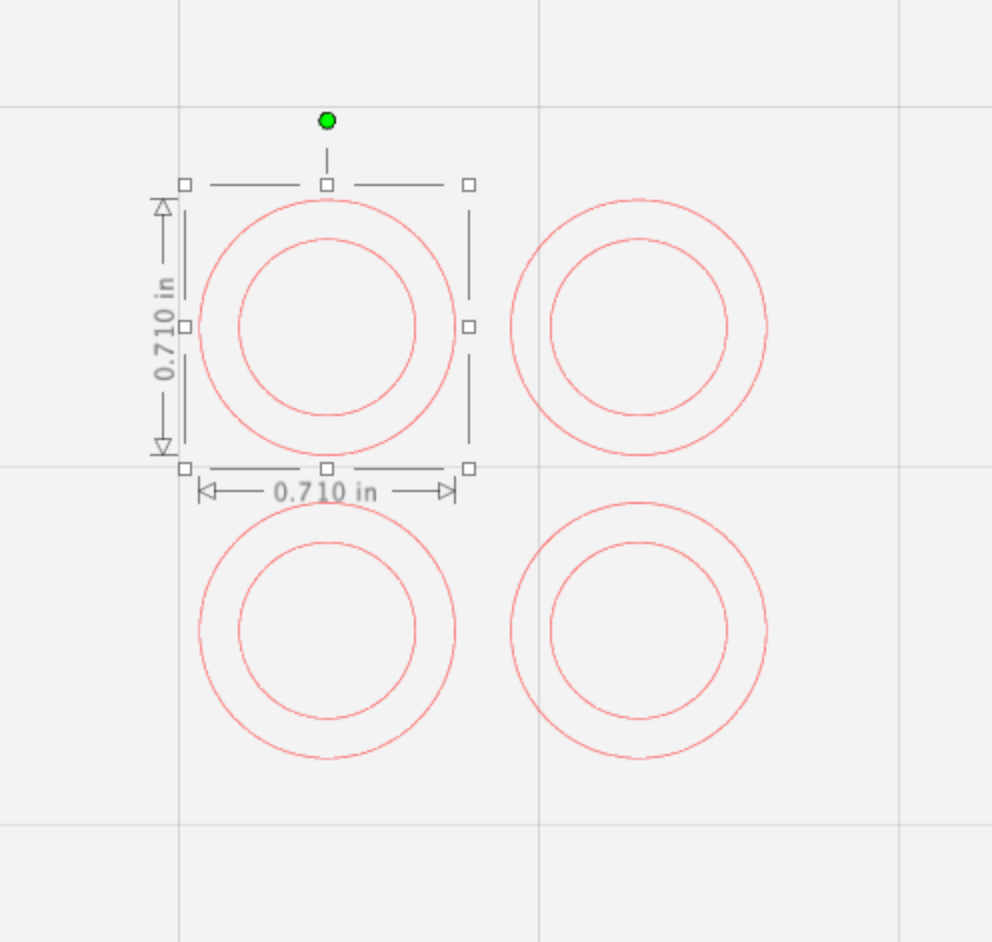
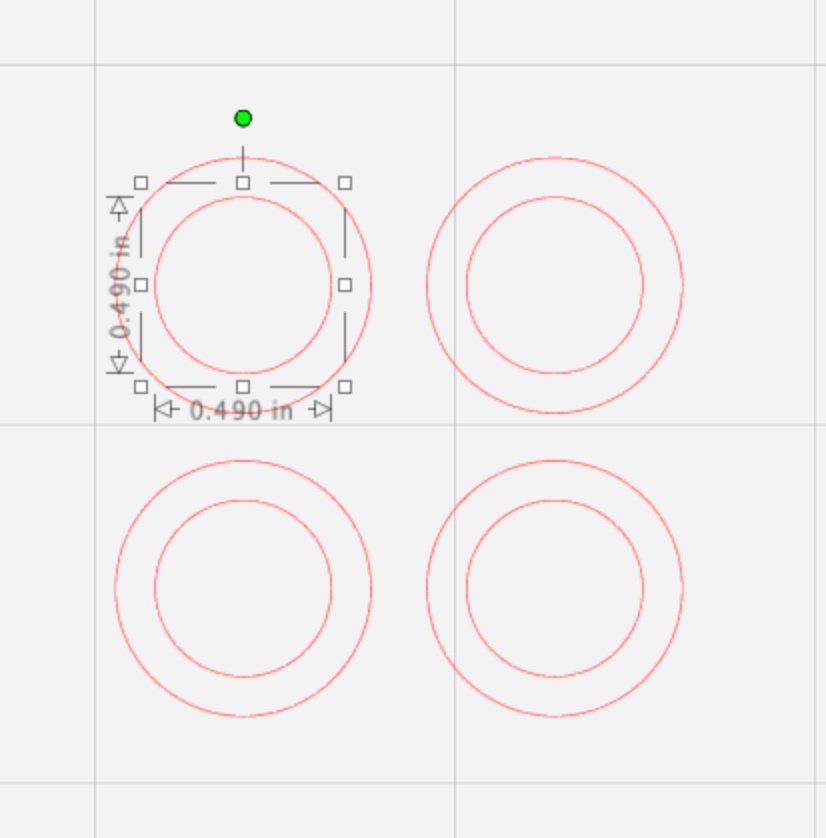
I created an 18mm (0.71in) circle in Silhouette Studio with a 12.5mm (0.49in) circle inside. So now I have basic ring. I duplicated it a few times, depending on the thickness of your cardstock, you may need more than one, you can stack them on top of each other.
I cut the rings with my Cameo machine using the Heavy Coverstock setting and the Autoblade.
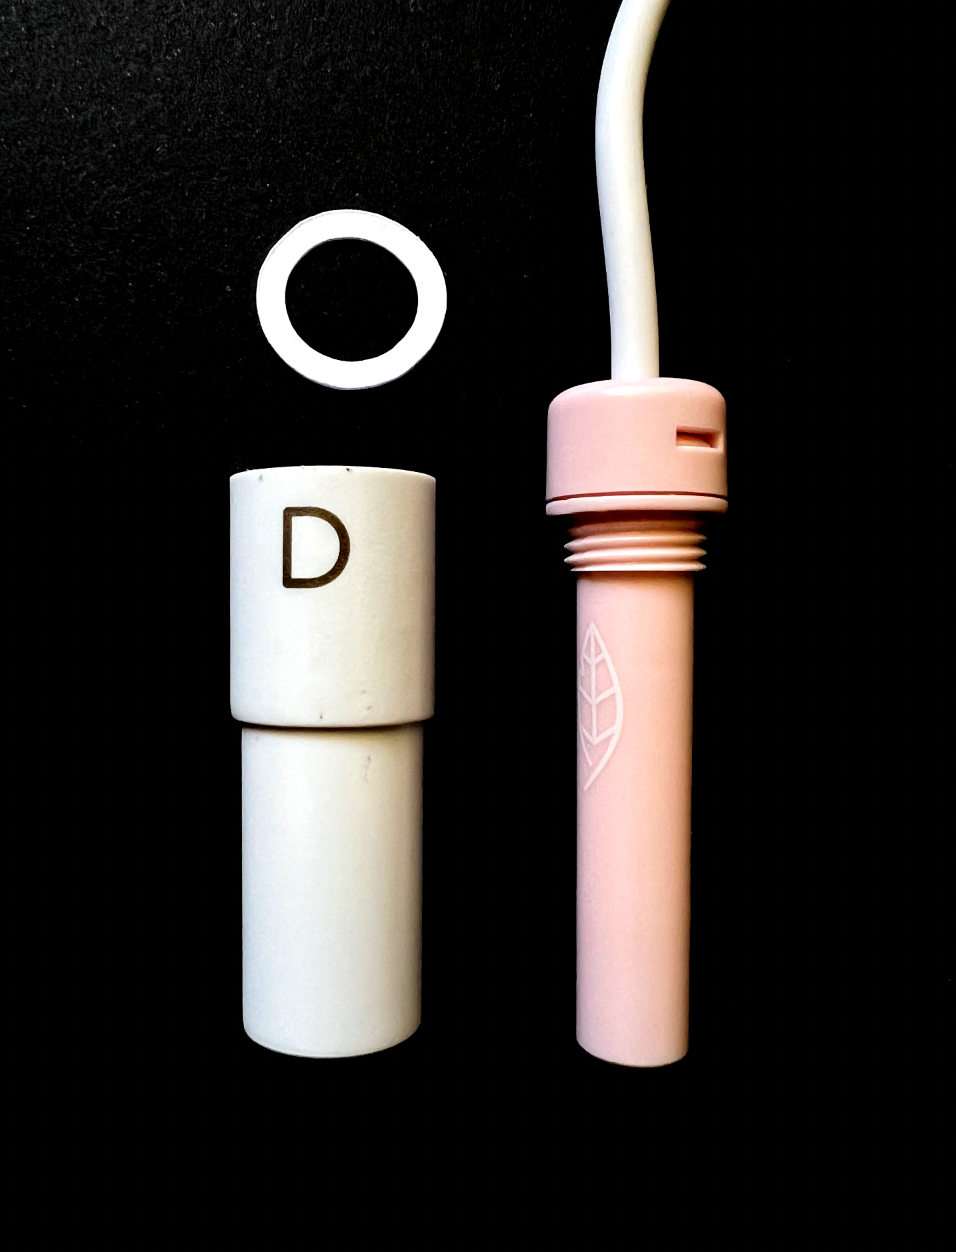
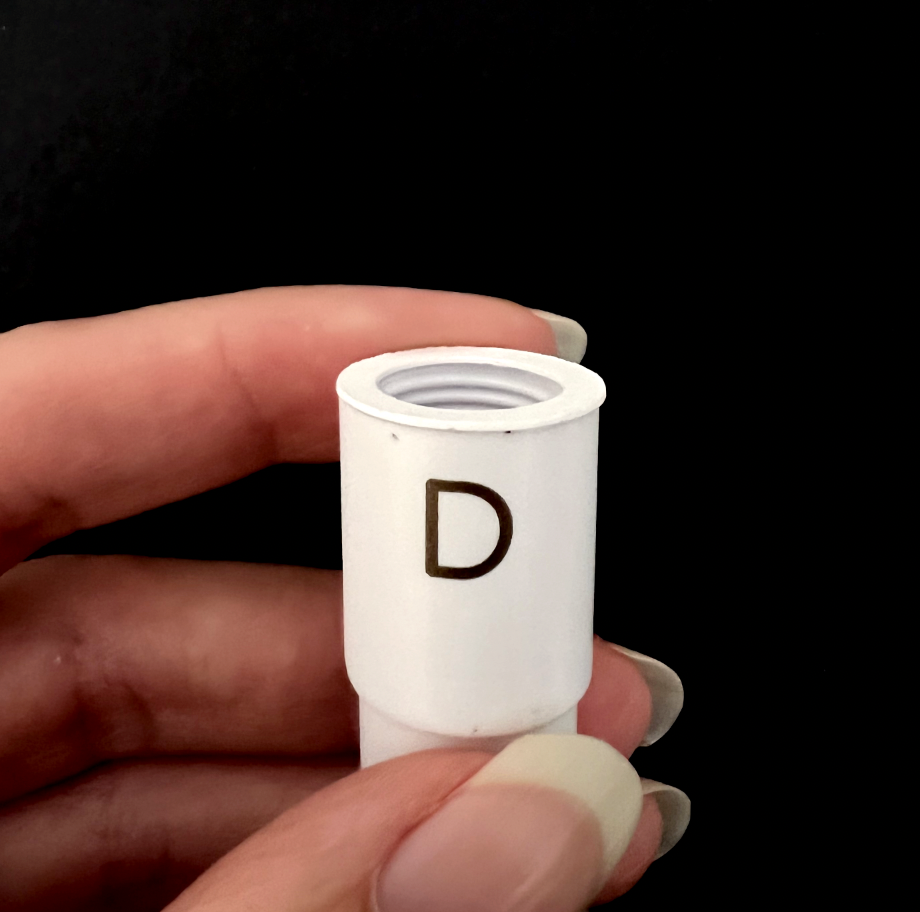
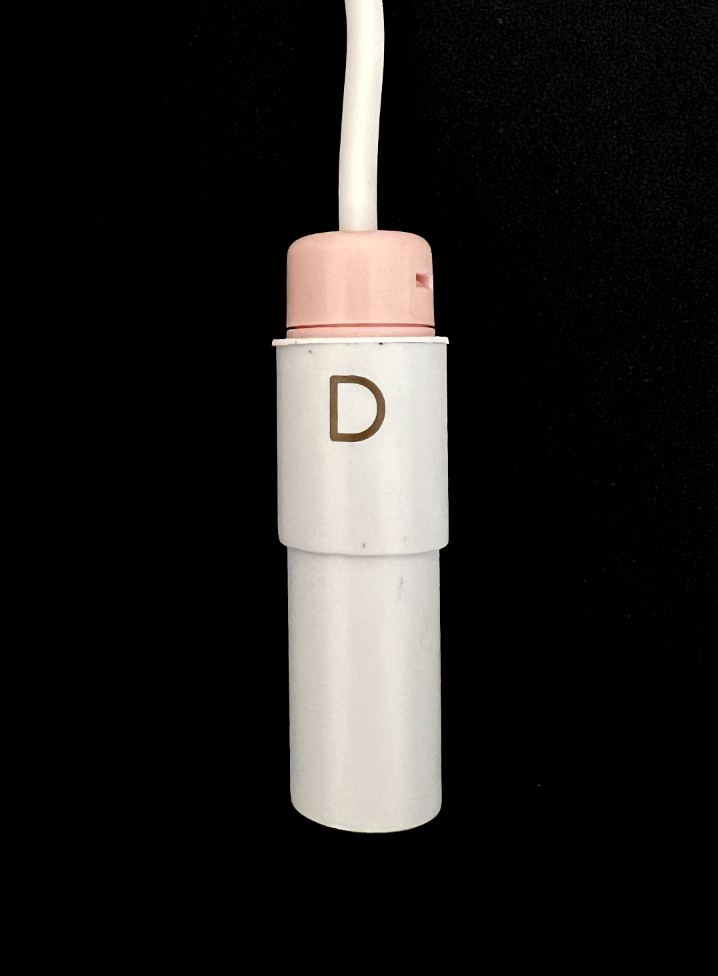
I placed the ring on top of the D adapter. I know the Foil quill says the A adapter is for Silhouette machines, but that’s for the Cameo 3 and previous models. For the Portrait 3 and Cameo 4 you need the D adapter, which is really supposed to be for a Sissix machine.
Then I screw my Fine Tip foil quill into the adapter. The cardstock ring keeps it just slightly above the top edge of the adapter, and it also helps keep the tip from wiggling around in the adapter. I already tried not screwing the tip all the way into the adapter and it wobbles around to much when you are trying to draw with it.
If you are using a thinner cardstock, you might need to use 2 or 3 rings stacked on top of each other.
Next, I’m going to test it without being plugged in or with any foil. I’m checking to make sure the tip actually reaches the cardstock I’m going to be foiling. My foil quill is loaded into slot 1 on the carriage.
I have a scrap piece of cardstock on my mat and I’m going to test with the Coverstock, Heavy material setting, force of 5, speed of 2, action is sketch, tool is pen.

I run it though my machine without the quill plugged in and no foil. I can see that the tip leaves a slight indent in the cardstock. You want to make sure the tip isn’t digging in too deep, or it will rip your foil. This looks like a good depth, so next I’m going to test it with some foil.

I plug in my foil quill and cover my piece of cardstock with foil. I’m using the We R Memory Keepers brand of foil.

I run it through my machine with the same settings Heavy Coverstock, Force 5, speed 2.
It makes it through without tearing the foil.
It looks great after removing the foil!

Depending on the materials you use, your settings may be different from mine. If you want to try using the Fine Tip Foil Quill on thicker materials, you can try adding some more rings to help raise the tip higher up and away from the mat.