portrait 3

Portrait 3 Print and Cut Gift Labels

Hi Everyone! Only a few more days until Christmas and I’ve still got quite a bit of gift wrapping to do! I always seem to run out of the little sticker gift tags very quickly. So this week I’m going to share a quick way to make your own using my Portrait 3 and the Print and Cut feature.

To do this project you will need the following: (links below may be affiliate links)

Some clip art (you can download my snowflake here for free)

Printable Sticker Paper (I’m using this one from Online labels)

Inkjet or laser printer

Silhouette Portrait 3

Autoblade

I’m going to open Silhouette Studio and create a new file. I’m using the business version, yours may look slightly different if you do not have the business version.

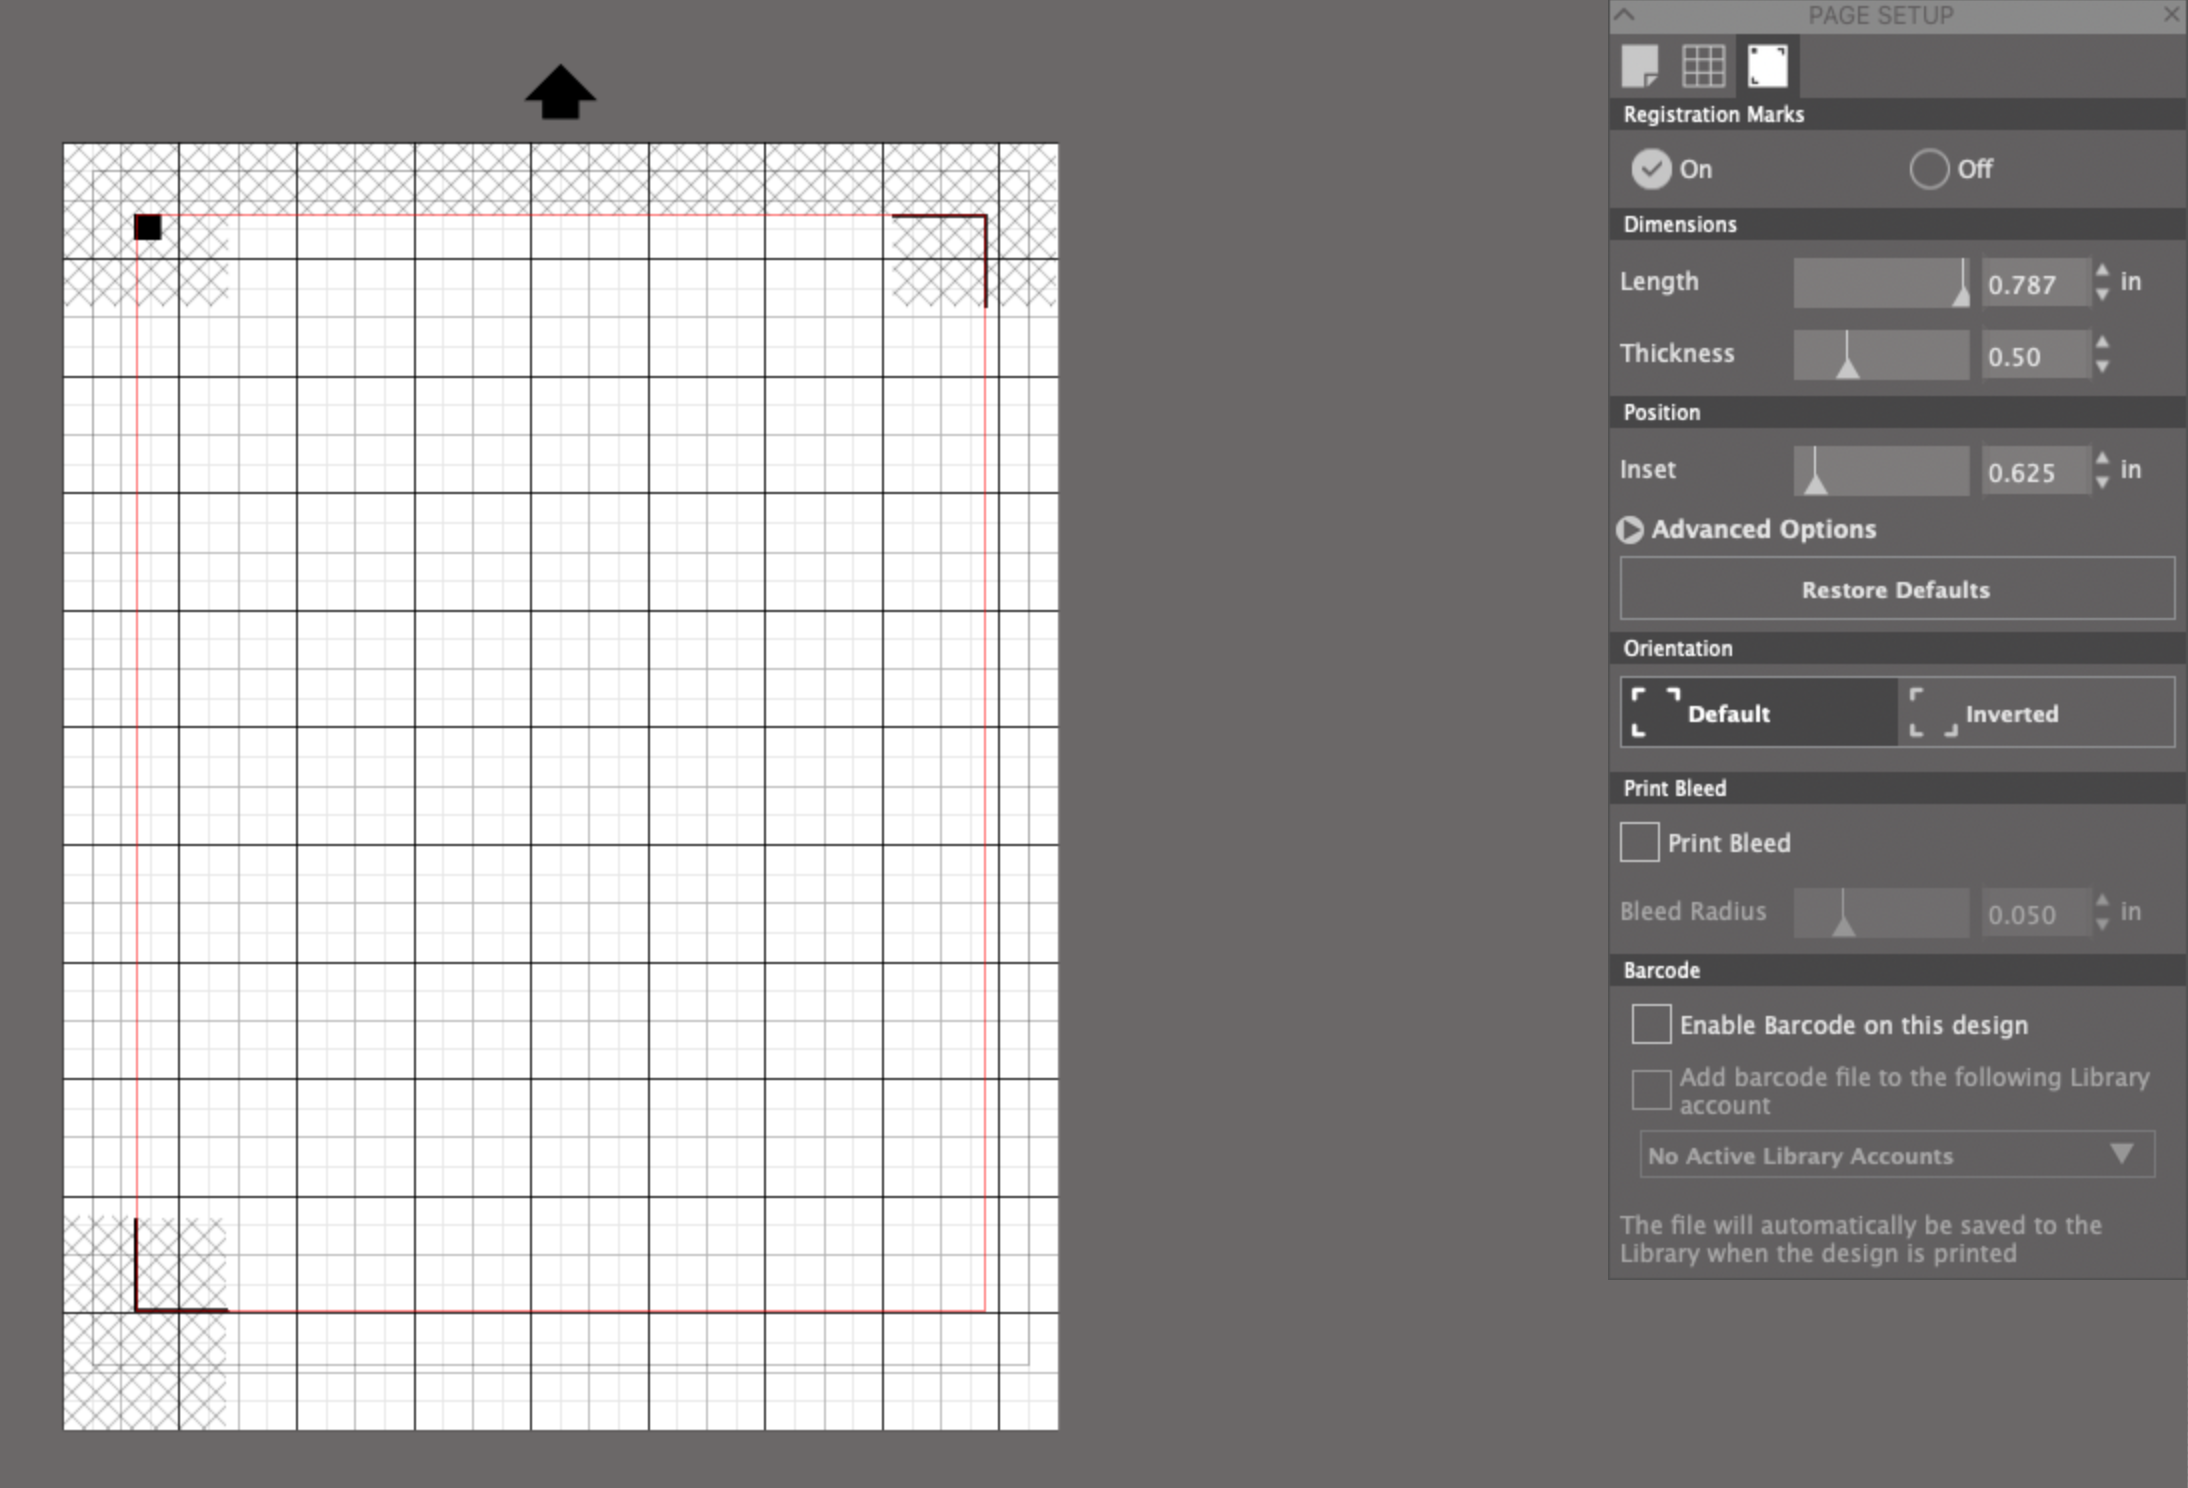
I turn on the registration marks so I know where to place my artwork and these will also be printed to the machine knows where to cut.

Print and Cut stickers portrait 3

I’m going to do these matless (I love being able to cut stickers matless!) So under the Design area menu my Cutting Mat will be set to None. My Media size is Letter 8.5 x 11.

Print and Cut stickers portrait 3

I load my snowflake PNG file (it’s pretty big when I first bring it in) and I scale it down to about 2 inches. You can scale it to whatever size you wish. I’m also going to change the red lines around the snowflake to transparent so they don’t print later.

Print and Cut stickers portrait 3

Then I’m going to create an offset around the outside of the snowflake, this will be my cut line. I make my offset 0.125 inches from the edge of the snowflake.

Print and Cut stickers portrait 3

Next, I’m going to make a rounded rectangle so I can add a To and From area onto my label. I make my rectangle approximately 2 inches wide by 0.75 inches tall.

Print and Cut stickers portrait 3

The I’m going to Weld my rectangle and the offset cutline together so I have one continuous shape to cut.

Print and Cut stickers portrait 3

I add the To and From text in the rectangle area. I’m using the Lucida Grande font at 10pt. You can use whatever font you prefer.

Print and Cut stickers portrait 3

I’m going to group everything together and now my label is ready to be duplicated. I can fit 9 of these labels within the print and cut area. Make sure your artwork is NOT falling into the grey mesh areas too much, it can mess with the machine when it’s trying to scan the registration lines.

Print and Cut stickers portrait 3

Now it’s time to print my labels! First, I tried printing directly from Silhouette Studio and I got some glitchy lines in the To and From letters. So instead of printing directly from Silhouette Studio, I’m going to save my design as a PDF and print from Photoshop.

Print and Cut stickers portrait 3 glitch

To save your file as a PDF from Silhouette Studio, click on the printer icon. Then in the bottom left corner, click on the dropdown menu and select Save as PDF. Name your file and save it to where ever you want on your computer.

Print and Cut stickers portrait 3 save as PDF

Open the PDF that you just saved in Photoshop, or other application the can print PDFs if your don’t have Photoshop. Make sure you DO NOT scale the file when you print it. Now everything looks like it’s supposed to!

Print and Cut stickers portrait 3

Back in Silhouette Studio, I’m going to the Send tab and I always like to cut my files by Line color. My cut lines are red, so I make sure the box is checked next to the red square. I want my stickers to be kiss cut so my setting are as follows - Material is Sticker Paper, White; Blade depth: 2; Force: 14; Speed: 3.

Print and Cut stickers portrait 3

I load my printed sticker paper with out the mat and press Send in Silhouette Studio.

Matless kiss cut stickers Silhouette Portrait 3

My machine scans the registration marks and starts cutting. Once it’s finished I have a set of little snowflake gift labels to help me finish my gift wrapping!

Kiss cut stickers Silhouette Portrait 3

DIY Gift Card Envelopes

Hi Everyone! This week I want to share a quick and easy way to make gift card envelopes.

DIY Gift Card Envelopes

Supplies:

(Links below may be affiliate links)

Silhouette Portrait 3 or other cutting machine

Portrait 3 Light grip mat

Bevel quill with D adapter from Foil Quill or scoring stylus with Silhouette Pen adapter

Auto Blade

My A2 Envelope template or any other envelope template you may have

Lightweight printed or plain cardstock

Gold adhesive foil or any adhesive vinyl of your choice

Vinyl transfer Tape

Glue or tape

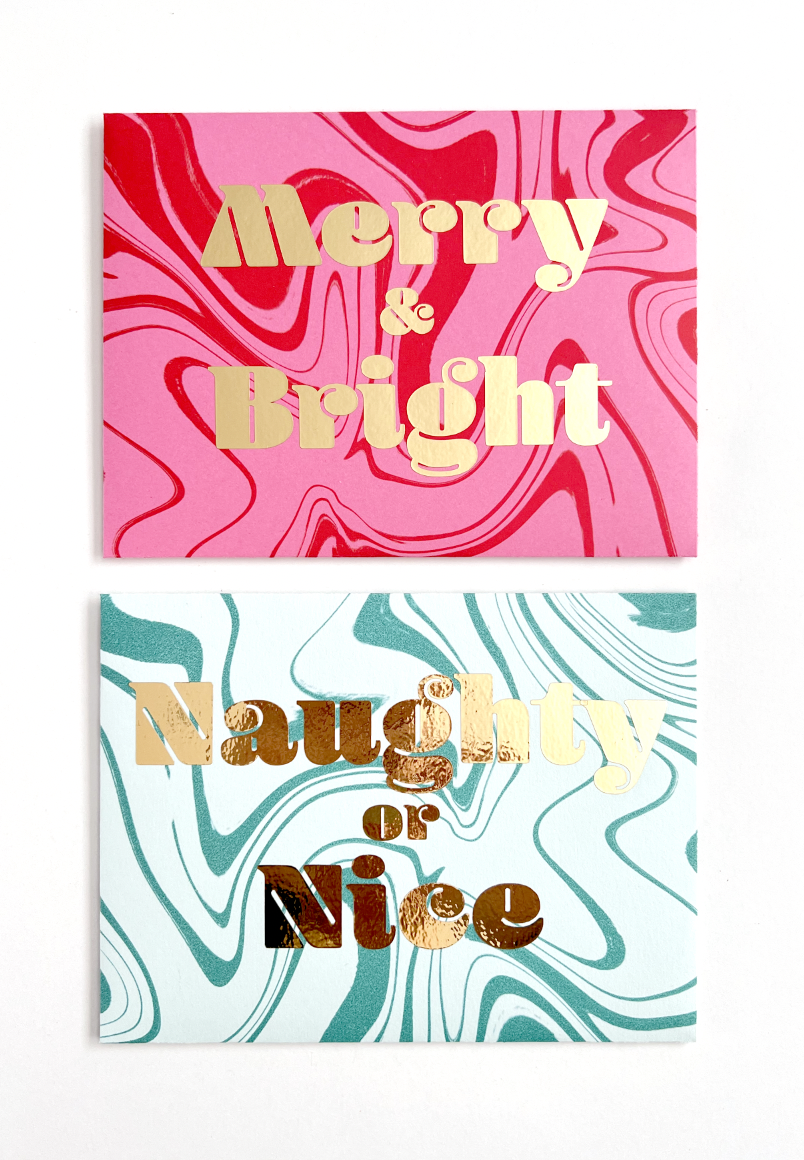
To start, I overprinted some of my 65lb lightweight cardstock with a marble design I created in Procreate. You can use plain cardstock or any printed cardstock you already have on hand.

DIY Gift Card Envelopes

I’ve got the A2 envelope SVG already uploaded into Silhouette Studio. I have my score lines in Blue and my Cut lines in Red.

DIY Gift Card Envelopes

I will do the score lines first, so I’ve got my Bevel quill loaded with the D adapter from my Foil Quill. Settings are Sketch action, Force of 33, Speed 2. Your settings may vary depending on your materials

DIY Gift Card Envelopes

After it’s done scoring, I will use my Autoblade to cut the red lines. Settings are Plain Cardstock, Blade depth 4, Force 20, Speed 4

DIY Gift Card Envelopes

Next I created my word layout in Adobe Illustrator using the font Blenny Black. I outlined my letters and saved them as an SVG so I can import my file into Silhouette Studio. (I’m using the Business version).

You can use another font that you already have and you can also create your lettering directly in Silhouette Studio.

I’m going to cut my letters out my adhesive gold foil with my Auto Blade set to Vinyl, Metallic Material; Blade Depth 1; Force 10; Speed 5. Depending on what type of vinyl you use, your settings may vary.

DIY Gift Card Envelopes

After cutting, I weed out the excess foil and apply the transfer tape to the foil.

DIY Gift Card Envelopes

I’m going to peel off the backing of the foil letters and center my design on the front of the envelope (Just eyeballed it, but you can lightly mark on your cardstock with a pencil if you want to be more precise).

Carefully remove the transfer tape and make sure my letters are secured onto the cardstock.

DIY Gift Card Envelopes

Then I’m going to fold along the score lines and use my tape runner to seal the edges of the envelope.

DIY Gift Card Envelopes

Add your gift card, close the envelope with either glue, a tape runner, or a sticker and it’s ready for gifting!

DIY Gift Card Envelopes

How to Set Up Your Template on Your Cutting Mat for Silhouette Users

Hi Everyone!

The past 2 weeks I have shared 2 projects that I am using a chipboard template with a 3 inch circle cut out to help keep my acrylic discs in place while I’m foiling or engraving. This week I’m going to share my method for how I align my template when starting a new project or coming back to my project after I’ve unloaded my mat from my machine.

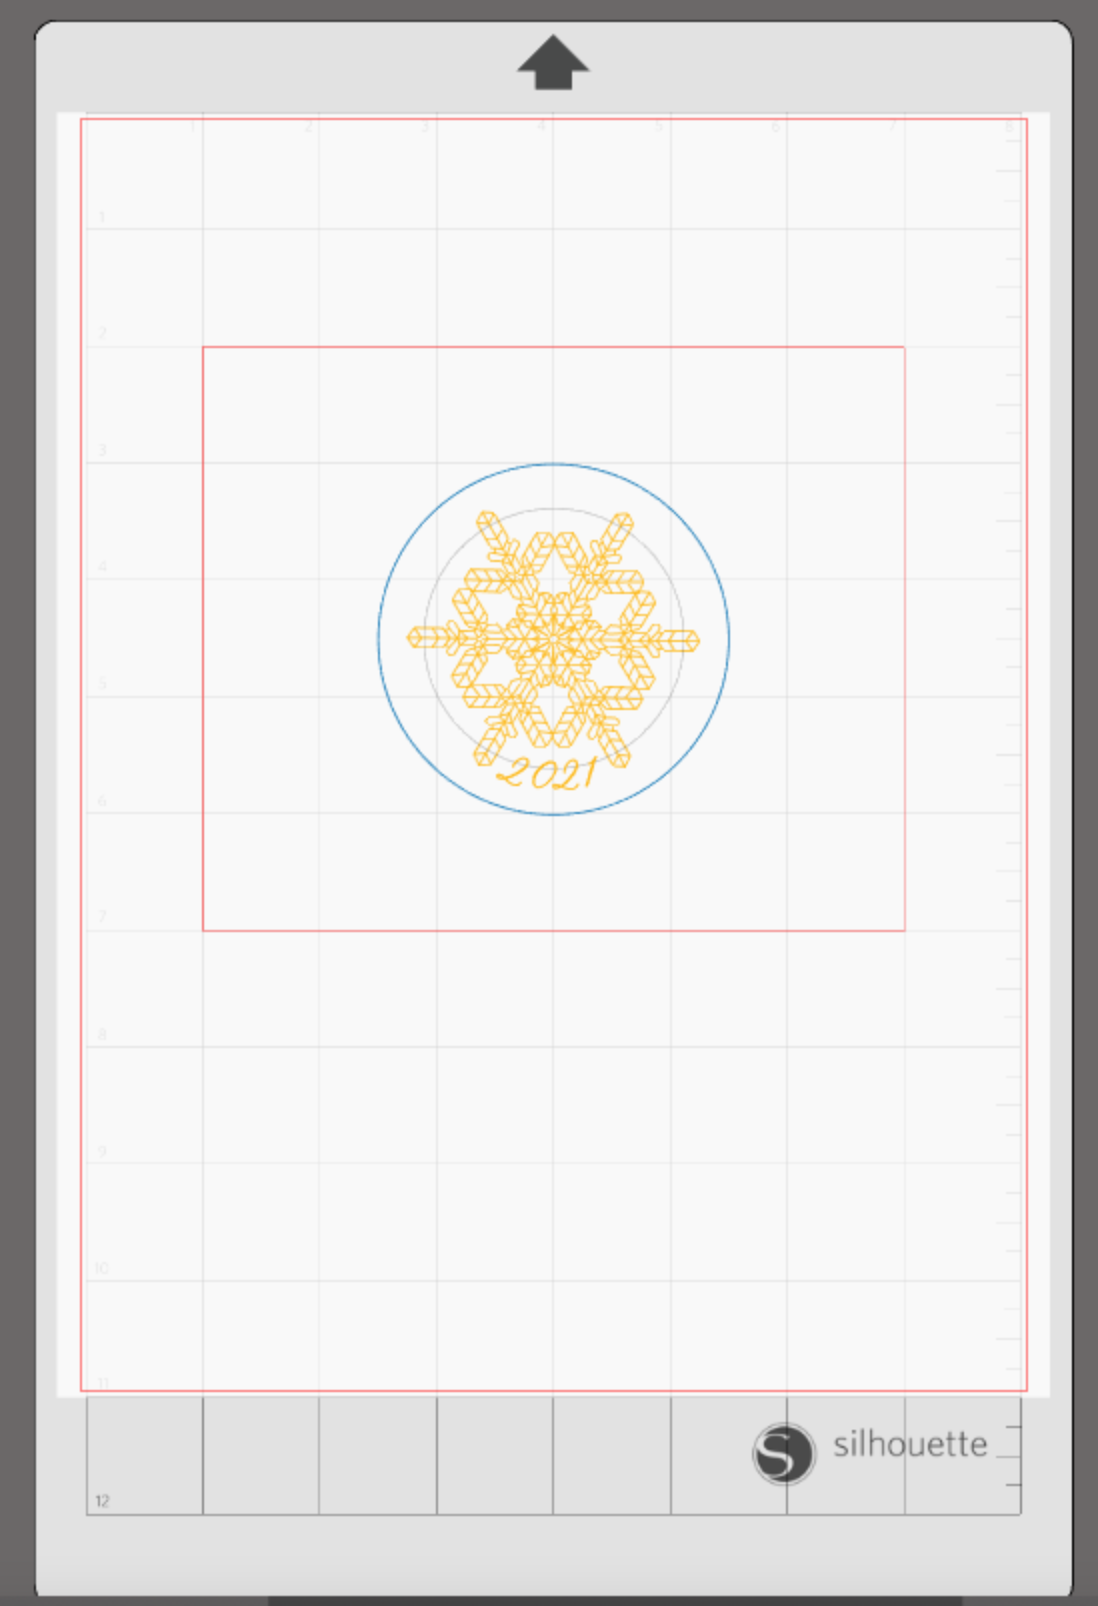
In Silhouette Studio I’ve got my project already designed and set up to cut/ sketch by line. I’ve placed my design toward the middle of my mat so it’s easier to place the template while the mat is in the machine and so my template will NOT go under the rollers on the edges of my machine.

Portrait 3 Template set up in Silhouette Studio

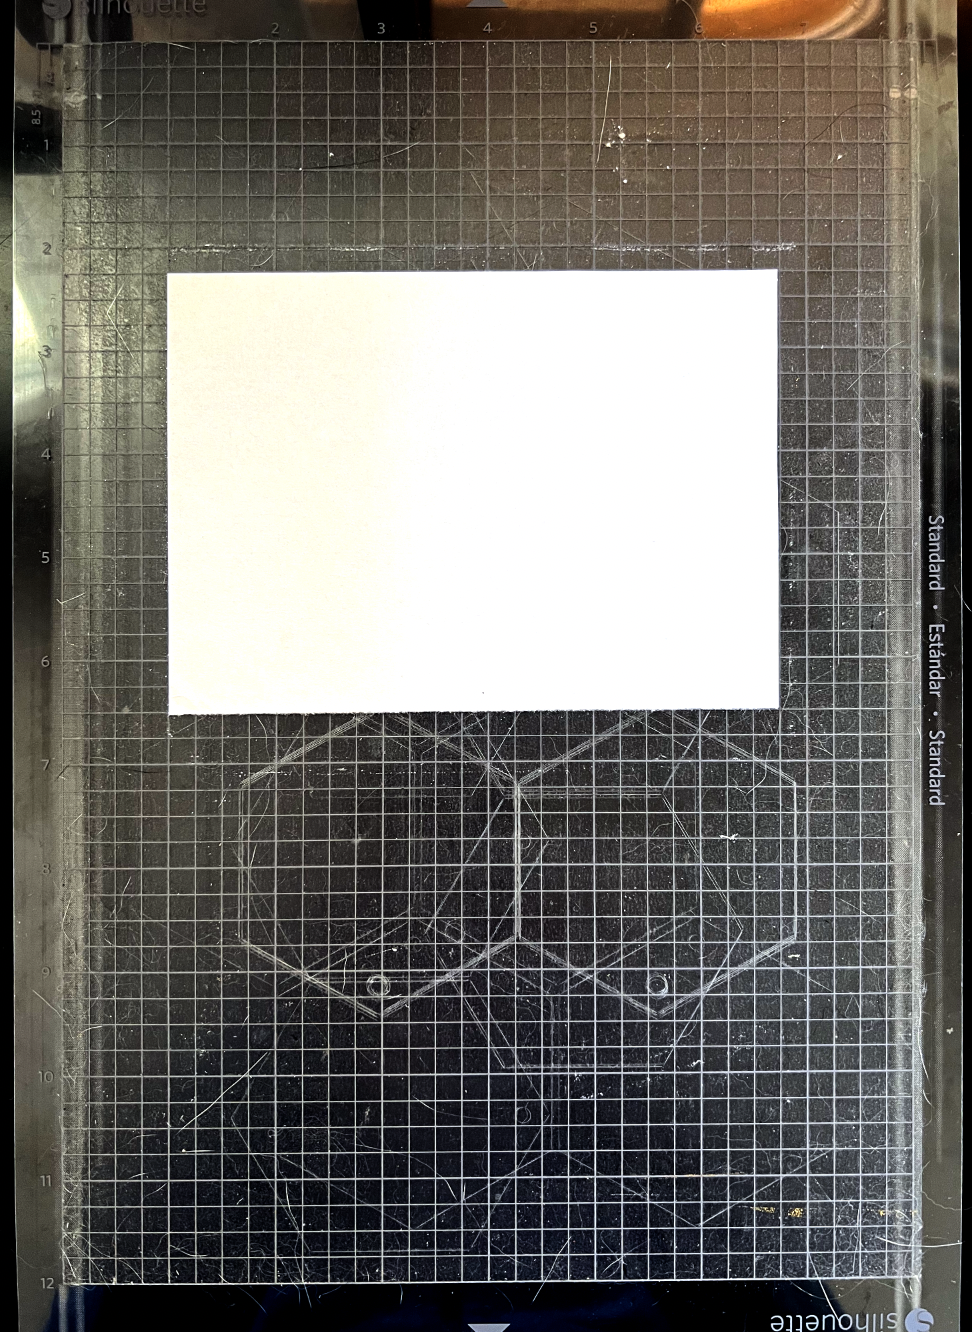
On my actual mat I’m going to place a regular piece of printer paper approximately where my design should be.

Portrait 3 Template Alignment

I’m going to cut just the circle part of my design, so I select just the blue line, load my mat and send it to machine.

Portrait 3 Template Alignment

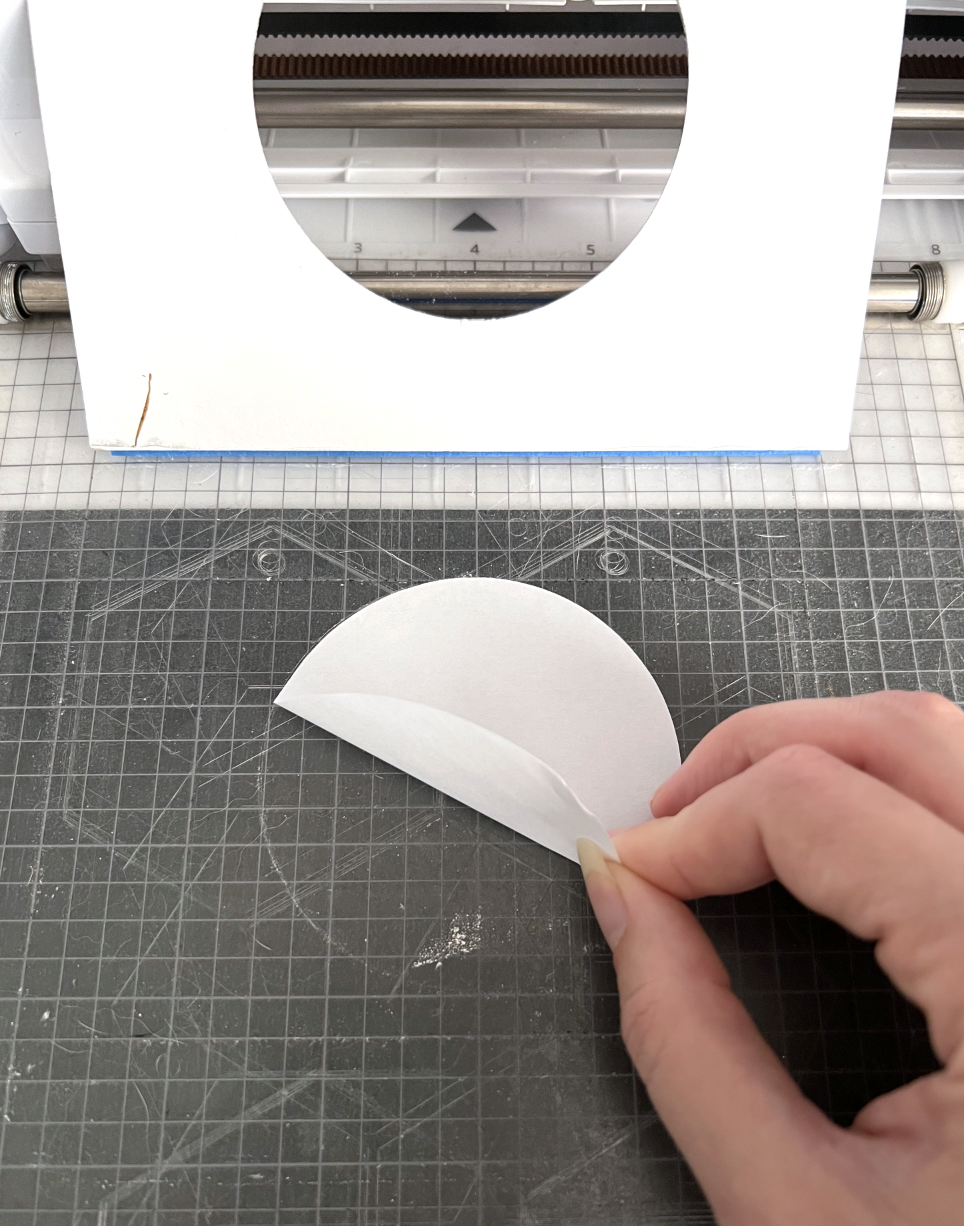
After the machine is done cutting, DO NOT UNLOAD the mat!! Carefully remove the excess paper from around the circle.

Portrait 3 Template Alignment

Now I’m going to take my template and place it over the circle so all of my edges are aligned.

Portrait 3 Template Alignment

I tape down the top edge of the template to my mat and carefully lift the template, hinging at the tape along the top edge.

Portrait 3 template set up

I remove the paper circle from my mat and place the template down again. I place some more tape around the edges of the template to help keep it in place. Now my template is ready to load an acrylic disc!

Portrait 3 template set up

Back in Silhouette Studio in the send screen, I uncheck the box for the blue circle. I select my yellow lines to sketch, foil, or etch and it’s ready for me to press send to my machine.

Portrait 3 template set up

As long as I don’t unload my mat, I can place another acrylic disc in the template once my first one is done.

If you accidentally unload your mat, you can repeat the same process above to realign your template again.

Using the Silhouette Portrait 3 Pixscan Mat to Cut Stickers

Hi Everyone!

This week I want to share another favorite accessory for my Silhouette Portrait 3, the Pixscan mat! It’s super helpful for cutting stickers or things you may have already printed and now you want to cut them.

First, if you haven’t done so already, you will need to calibrate whatever camera you care going to use. I’m going to be using my iPhone X.

Open Silhouette studio. I currently have not mat selected. I’m going to the little PIX icon on the toolbar to the right of Silhouette Studio.

Click on “Show Calibration Test Card.” A page full of little black dots will pop up.

Pix Scan Mat Calibration

Now we need to print this sheet with all the little black dots. I click on the little printer icon in the toolbar across the top.

My print screen pops up and I’m going to click Print.

Pix Scan Mat Calibration

Then I’m going to select the printer that I will be using to print my stickers which is my Epson P600 and I print out the sheet full of dots on an 8.5” x 11” plain sheet of paper.

Next I need to take a photo of the dotted sheet with my phone or whatever camera you are using. I placed the dotted sheet on the floor (you need to use a flat surface), and tried my best to get all the dots without and background or edges of the paper showing. DO NOT use zoom.

Pix Scan Mat Calibration

Then I airdrop the photo from my phone to my laptop. If you can’t airdrop, you can email it to yourself as well. You need to somehow save the photo onto your computer so you can upload it to Silhouette Studio.

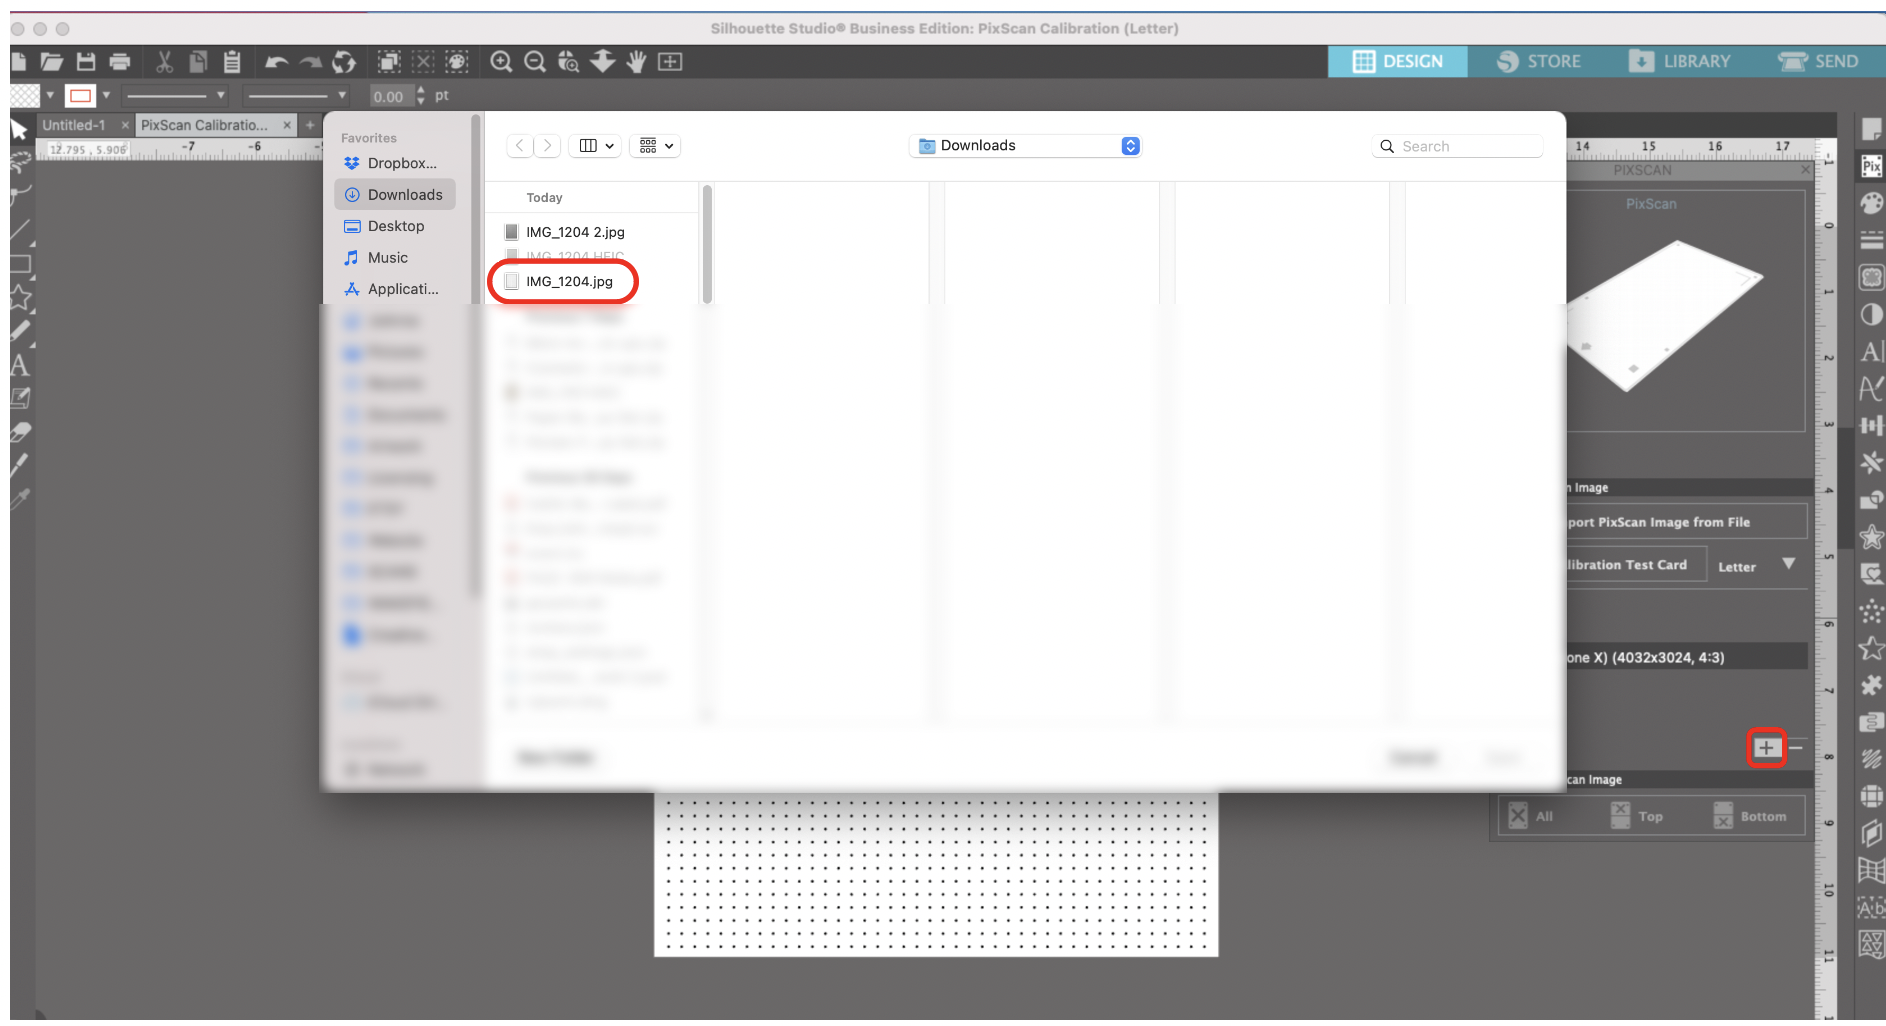
Back in Silhouette Studio in the Pix Scan dialogs box make sure the camera icon is selected. Below that, there is a Plus (+). Click on the (+), and find the photo that you just saved to your computer. Mine is saved to my Downloads folder.

Silhouette Studio automatically reads all the information attached to photo and it adds my iPhone X to the list of cameras.

Pix Scan Mat Calibration

Now it’s time to get our mat ready! Unfortunately the Pix Scan mat for the Portrait 3 is a little too small to fit a full sheet of 8.5” x 11” sticker paper, the max area is 7.6” x 11.7”. Make sure to plan your project accordingly! I already had my print outs, so I just cut them into two parts to fit on the mat.

Silhouette Portrait 3 Pix Scan Mat

Place whatever you are cutting on the mat, make sure you are NOT covering any of the little black boxes around the edge of the mat. The software will need to read those when you’re importing your picture.

Then you need to photograph the ENTIRE mat with the same camera that you calibrated. Make sure the mat is on a flat surface and there is even lighting. Don’t use zoom!

Silhouette Portrait 3 Pix Scan Mat

After you get your photo, you need to upload the photo to your computer. I use airdrop, but you could email it to yourself as well.

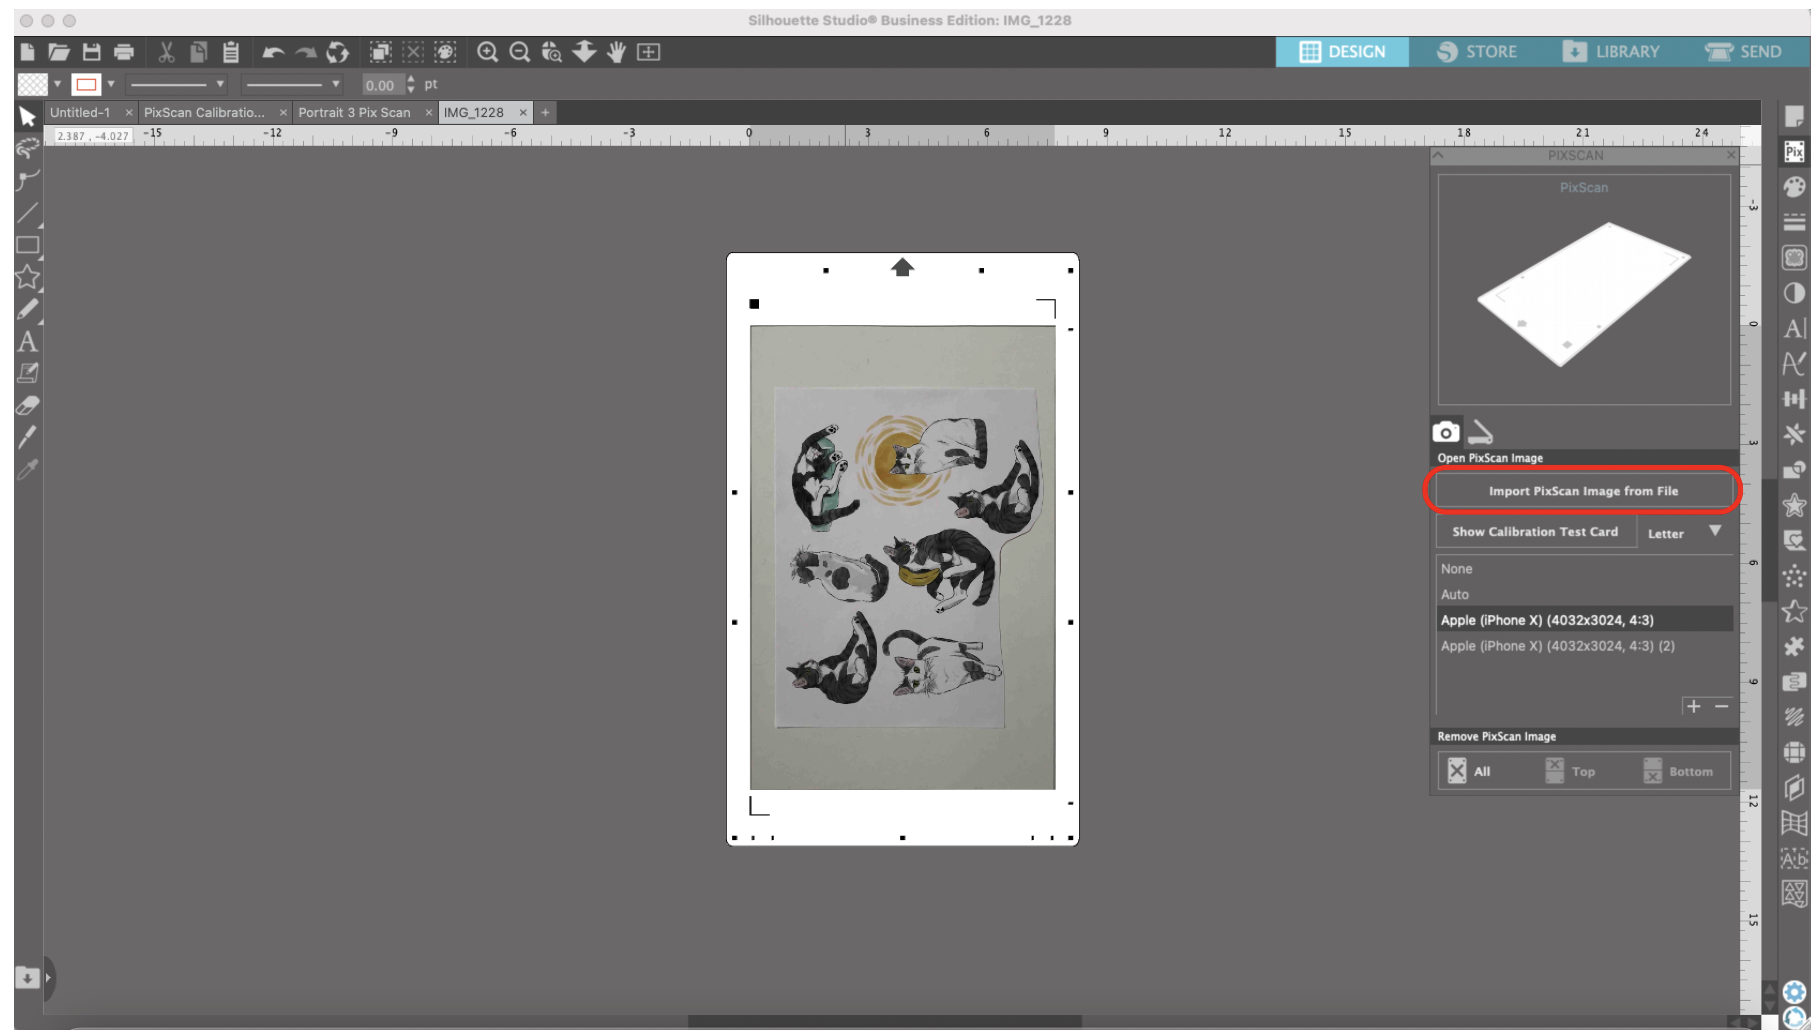
In the Pix Scan dialog box in Silhouette Studio, select “Import Pix Scan Image From File.” Locate your file wherever you have it saved on your computer, mine is in my Downloads folder again.

Silhouette studio is then going to place the photo that you just took and place it on the Pix Scan mat in the software.

Silhouette Portrait 3 Pix Scan Mat

Now we need to create our cut lines and there are a few ways to do that. I already have cut lines I created in Illustrator, I could import them as an SVG since I have the Business version of Silhouette Studio.

If you do not have the business version of Silhouette Studio, you can also draw the cut lines freehand in Silhouette Studio or you can use the Trace function.

I’m going to use the Trace function for these stickers since they’re irregular shapes. I will make a separate post later on how to use the trace tool.

Silhouette Portrait 3 Pix Scan Mat

I’m finished making my cut lines, and now it’s time to send to my machine! But first, I’m going to save my file so I can use these cut lines again on the second piece of sticker paper.

I go to the SEND tab in Silhouette Studio and since we’re just cutting, I’ll keep it on the Simple screen.

Silhouette Portrait 3 Pix Scan Mat

I load my mat into my machine, make sure the side with the arrow get’s fed through the machine first.

Silhouette Portrait 3 Pix Scan Mat

Press send, and now I have some cute little kitty stickers!

Silhouette Portrait 3 Pix Scan Mat

The accuracy of the Pix Scan Mat is so much better than the Cricut Snap Mat feature. I also really like that I can create and save my cut lines directly in Silhouette Studio. When I go to cut the the 2nd piece of this sticker sheet I can use the same cutline for the same kitties.

Silhouette Portrait 3 Drawing by Line Color

Hi Everyone! This week I’m going to share another favorite feature of my Silhouette Portrait 3, being able to draw by line color. Yes, I can do this with my Cricut Maker, but with my Portrait 3 I can essentially choose the order of the colors that I want my machine to draw. It’s not as simple to do with my Maker.

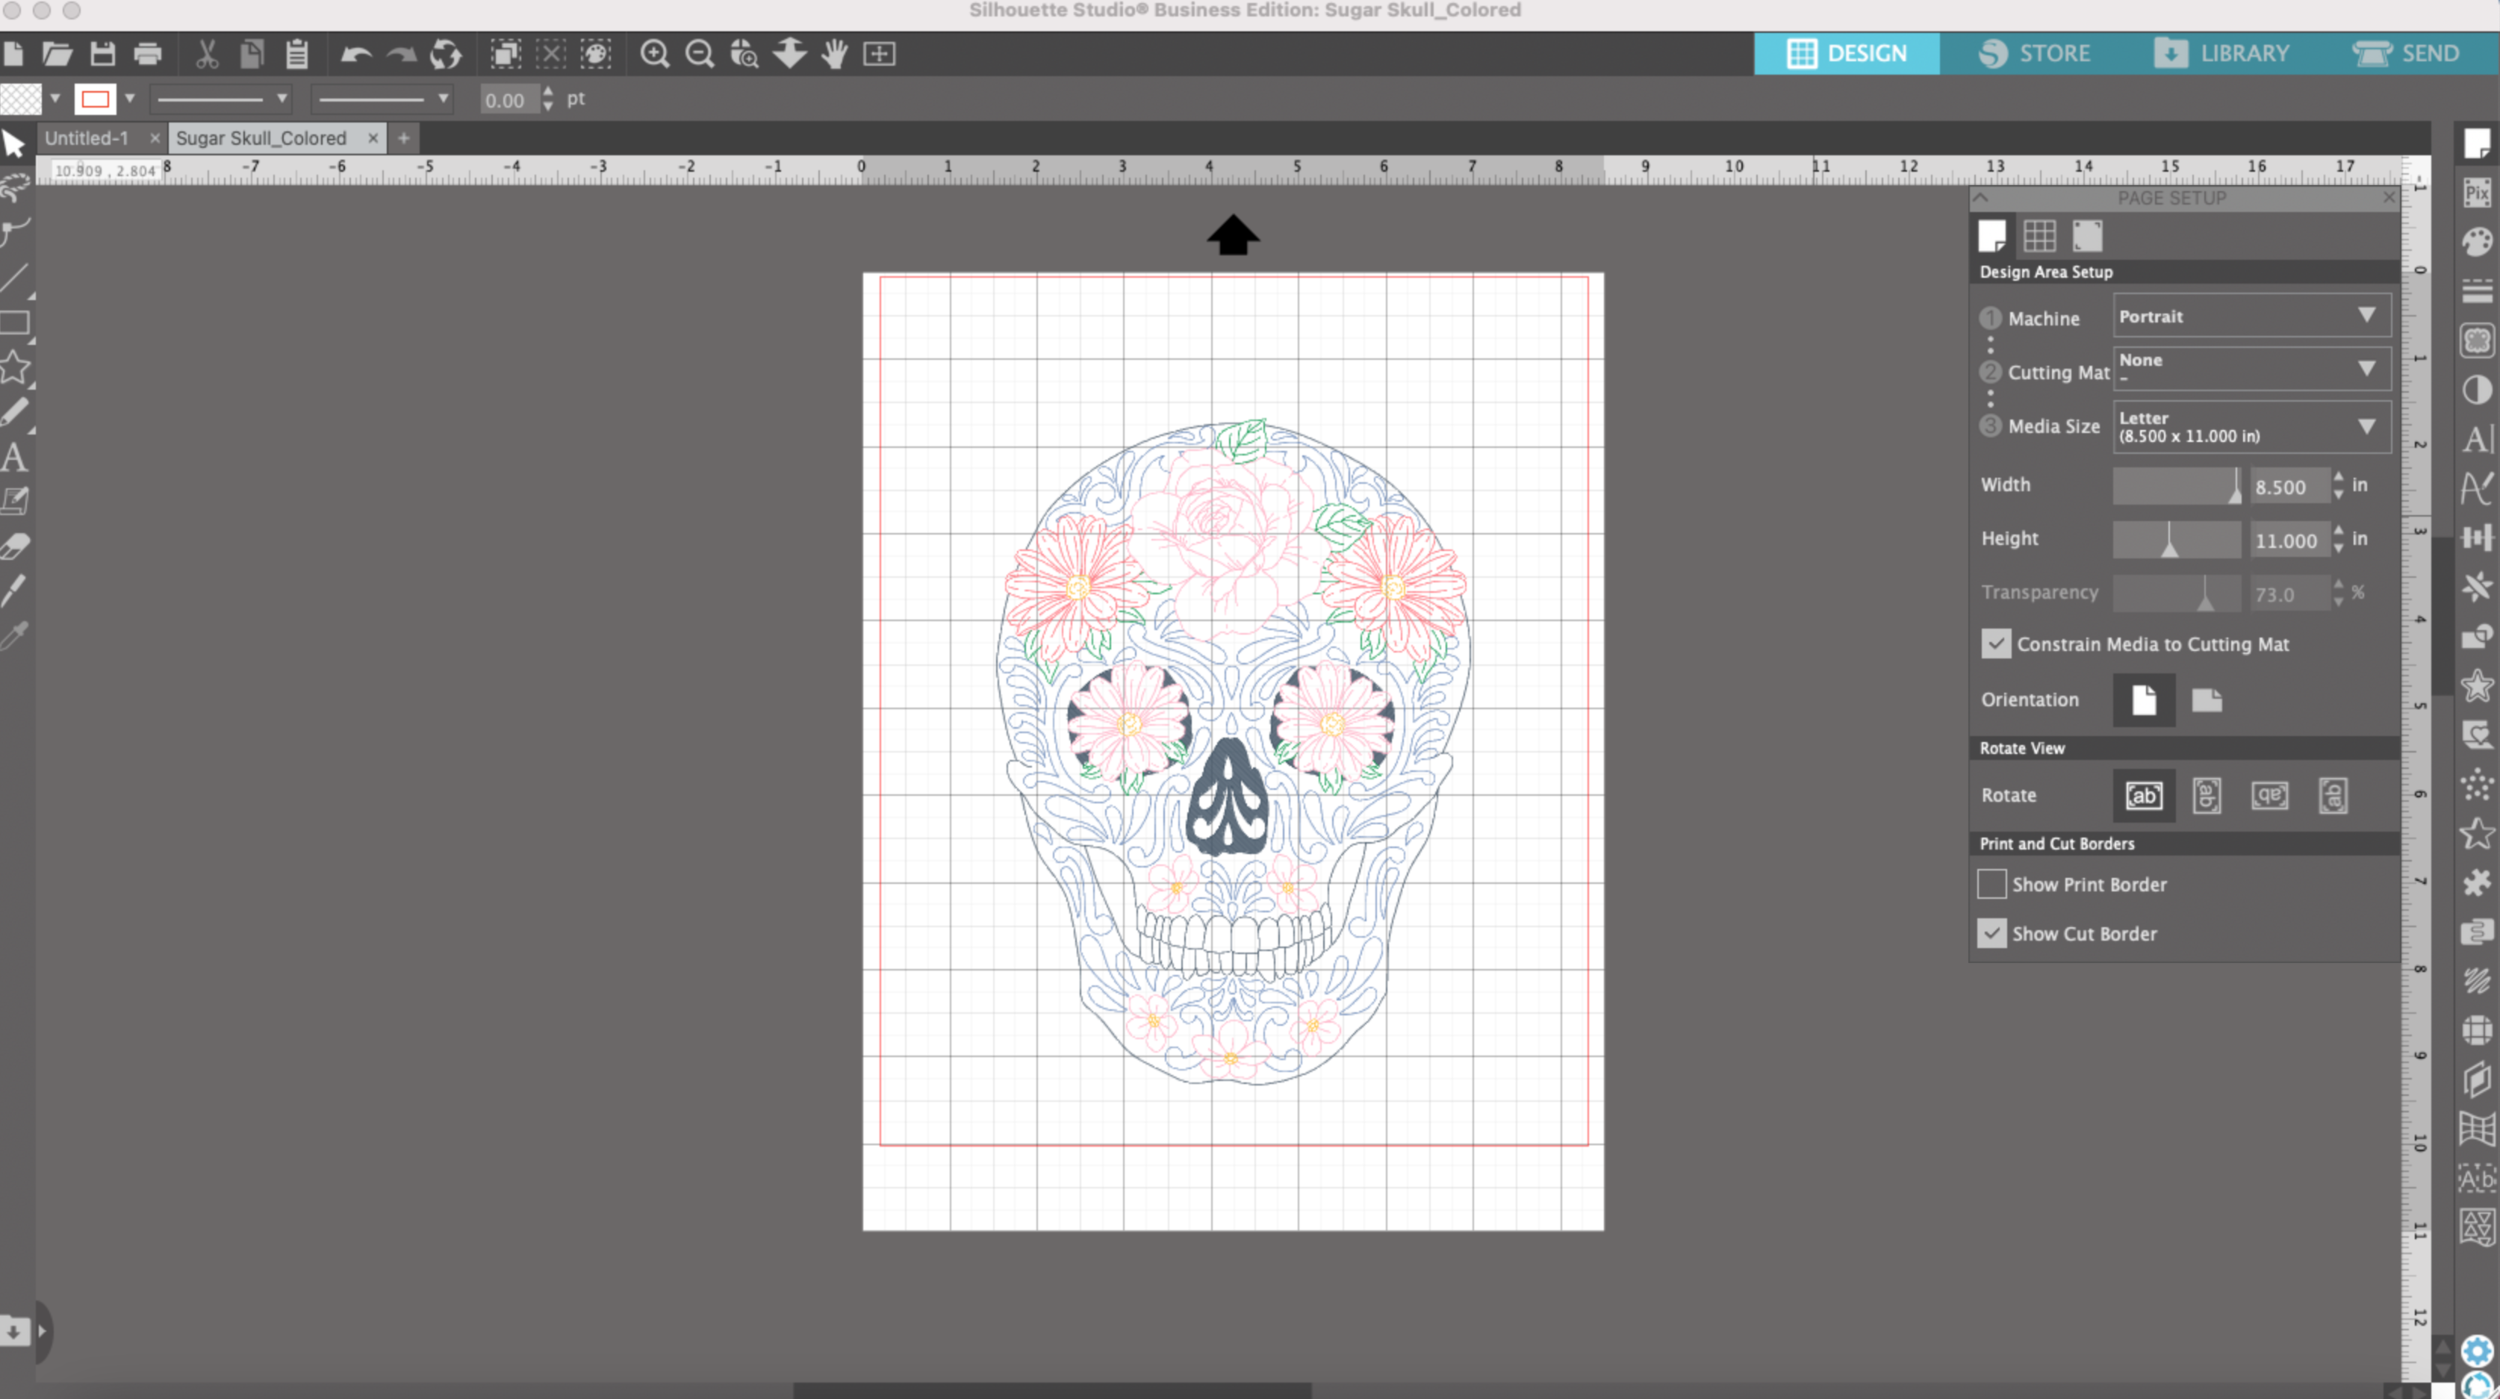
I’m going to test another skull SVG that I created in Illustrator. In Illustrator, I already applied different colors to the lines I’m going to draw and saved my file as an SVG. Note: I am using the Business Edition of Silhouette Studio so I can import and export SVG files.

I’m going to use the matless feature again and draw this floral skull on some black cardstock using my metallic Sakura Gelly Roll pens.

Silhouette Portrait 3 Draw by Line Color

I select SEND in Silhouette Studio. Instead of simple, I’m going to choose LINE. As you an see all of the colors are selected. I’m going to pick Heavy Coverstock for my material and Sketch for my Action.

Silhouette Portrait 3 Draw by Line Color

Then, I’m going to uncheck all of the colors except for the color I will be drawing with first.

Silhouette Portrait 3 Draw by Line Color

Next I will load my pen adapter with the first color I will be drawing with and load my cardstock into my machine.

Silhouette Portrait 3 Draw by Line Color

My first layer is done, next I want to draw the blue scroll work. All I have to do is uncheck the line color I just drew, and check the box for the blue lines for the scroll work. I load my blue pen and press SEND.

Silhouette Portrait 3 Draw by Line Color

Hint: Don’t forget to uncheck the colors you have completed, otherwise it will draw over that same area with the next color you have loaded!

After the blue lines are done I want to draw the little green leaves. So I uncheck the blue lines & select the green for leaves. Load my green pen and press SEND.

Silhouette Portrait 3 Draw by Line Color

I go through the same process until I have completed all the colors. I love that I don’t have to go in the order of colors dictated by the machine!

Silhouette Portrait 3 Draw by Line Color

The most tedious part of the process is swapping out the pen every time I switch a color, but I really enjoy the end result and being able to select the order of the colors that my machine will use to draw.

Silhouette Portrait 3 Matless Drawing

Hi Everyone! For little side income I sell my SVG files in my Etsy shop. But before I list my files for sale, I test them on on my Silhouette Portrait 3 machine and my Cricut Maker. I typically start my testing with my Portrait 3 because I can actually edit and save my file as an SVG from Silhouette Studio (I have the Business Edition).

This week I’m working on some single line skull designs that can be used to draw, foil, engrave, or anything else that needs a single line file. I originally drew my artwork in Adobe Illustrator, then I uploaded it as an SVG into Silhouette Studio.

To test my file, I’m going to use what is quickly becoming one of my favorite features, matless drawing. Yes, not only can you cut matless with the silhouette machines, you can also draw matless. This wasn't even a selling feature for me and my Portrait 3 machine, but I’m loving it!

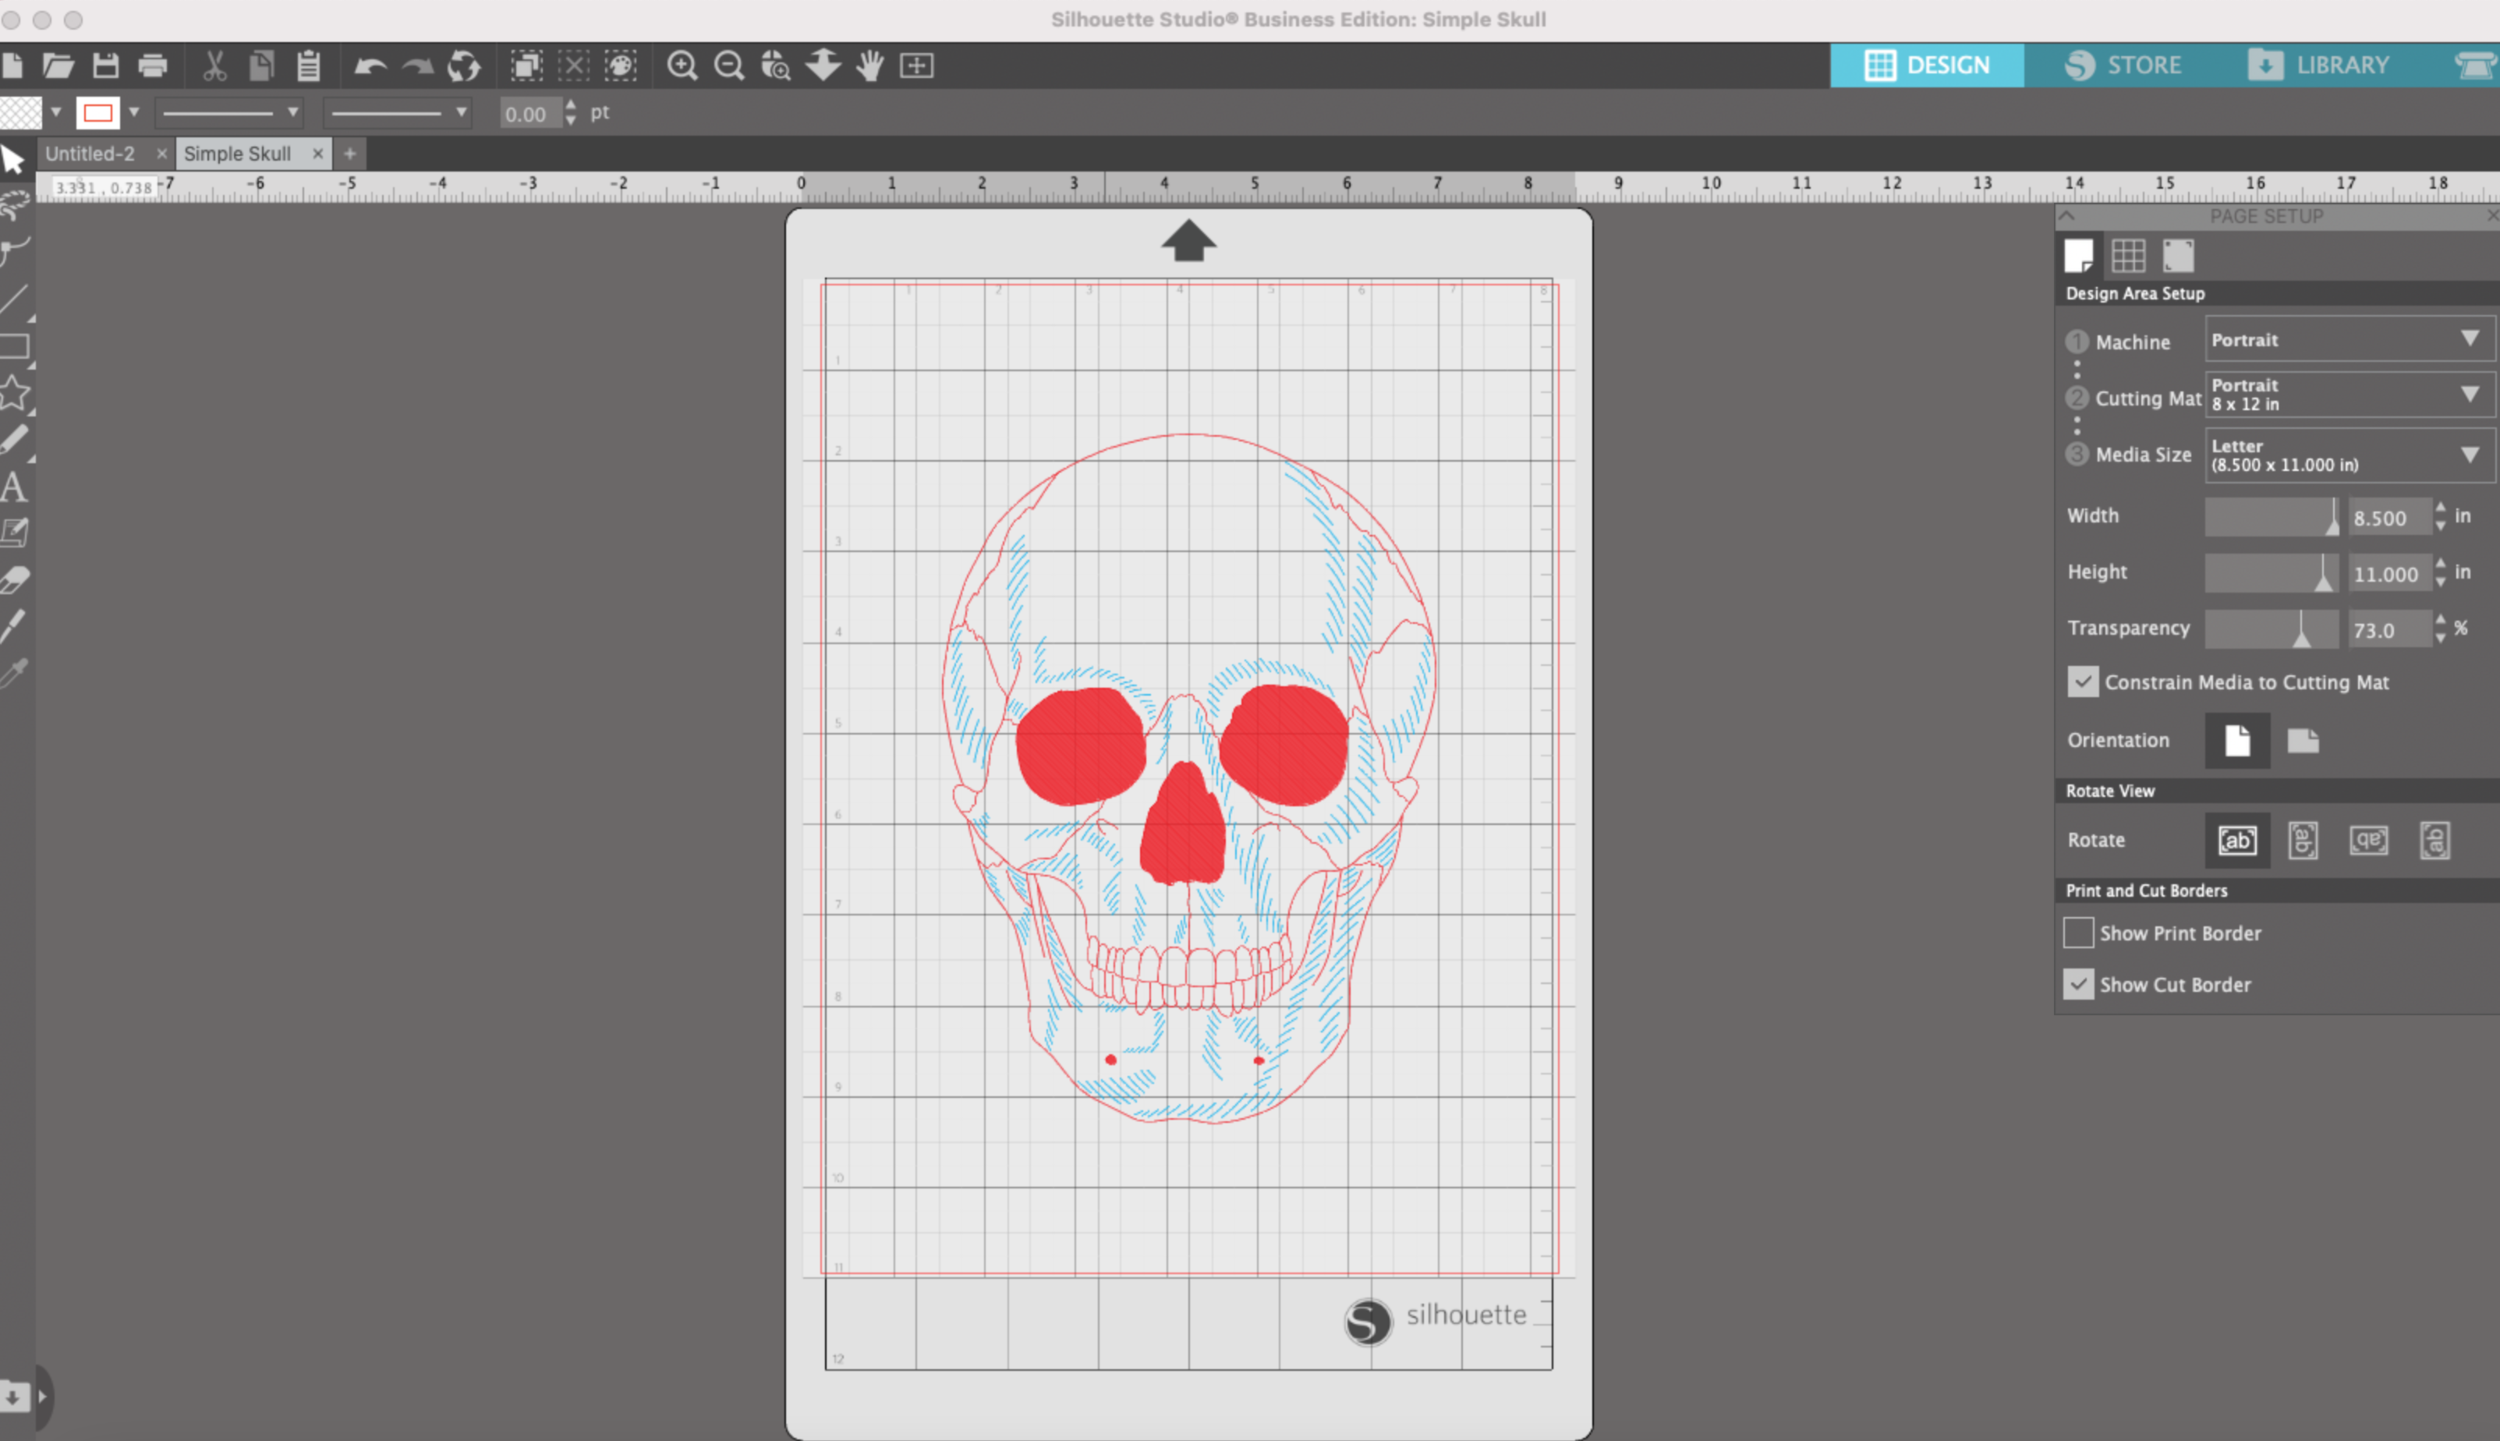
When I first open my illustration in Silhouette Studio, it shows up placed on the cutting mat.

Silhouette Portrait 3 Matless Drawing

To change to matless, click on the white sheet of paper at the top to the tool bar on the right. Under cutting mat, select “None”. My cardstock size is 8.5 x11 inches, so I will leave that as is. Keep in mind that the usable area of the cardstock becomes a little smaller with the matless feature. I need to keep all of my artwork within the red bounding box.

Silhouette Portrait 3 Matless Drawing

Disregard the two different colors in my drawing. For now, I’m going to test it with only a black pen.

In the upper right corner, I click “Send”. There’s no need to attach all of my elements and my drawing stays centered on the canvas (no shifting to the upper left corner like my Cricut machine).

In the send screen I’m going to stay with “Simple” since I’m only doing a single color drawing. Notice, now all of my lines are red. The cardstock I’m using is 100lb, so for my material I select “Coverstock, Heavy.” For my action I select “Sketch.” For my tool I select “Pen.”

Silhouette Portrait 3 Matless Drawing

I load my piece cardstock into my machine without a mat, yay!! Then I load the Silhouette pen adapter with a Sharpie Pen.

Silhouette Portrait 3 Matless Drawing

I press send and my machine starts drawing away!

Screen Shot 2021-07-23 at 10.42.37 AM.png

After a few minutes it’s done, and there’s no stickiness left on the back of my cardstock from the mat!

Silhouette Portrait 3 Matless Drawing

Foiling with the Silhouette Portrait 3 and WRMK Bevel Quill

Links in the article below may be affiliate links.

Hi Everyone!

Last week I did some foiling with my Portrait 3 and the WRMK foil quill. This week I wanted to share another technique you can use to foil with your Silhouette Portrait 3 or Cameo.

I found the WRMK Bevel Quill a few weeks ago in the clearance section at my local JoAnn’s, and I’m a sucker for all the little attachments for Cricut and Silhouette machines. Another bonus, I can use this tip in either my Cricut Maker or my Portrait 3.

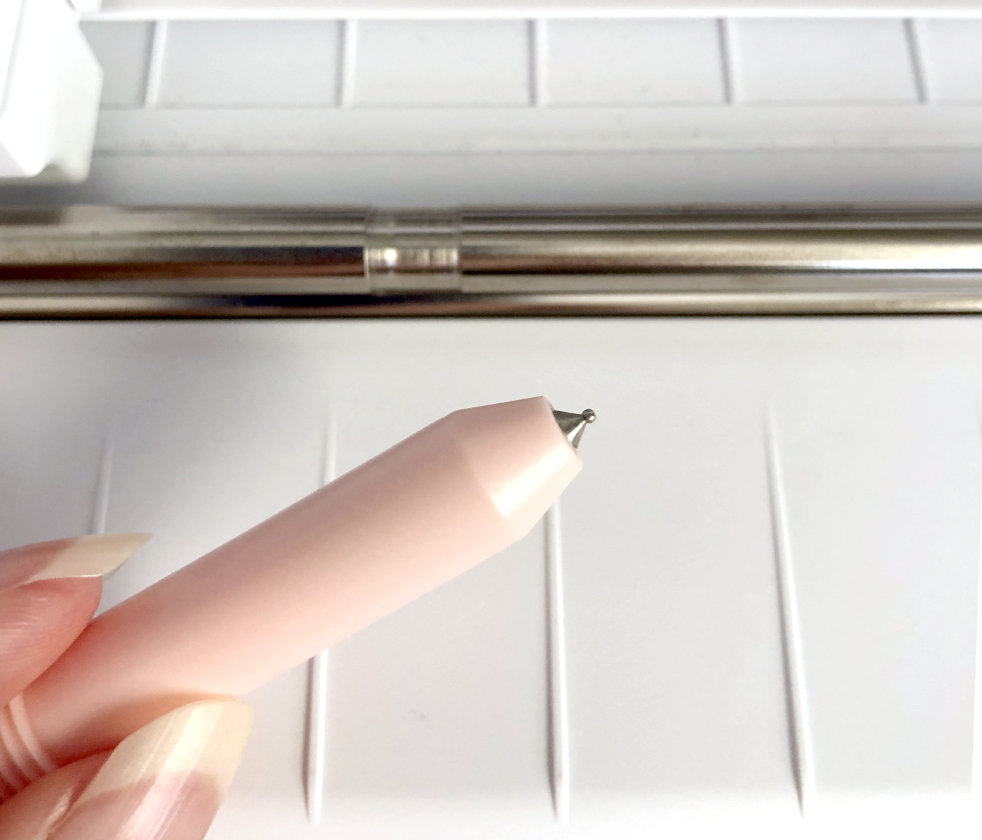
The bevel tip has a small ball point and is intended to deboss on the “bevel board" materials that are included with the tip , but I wanted to try it with the Spellbinders Glimmer Foil since the foil is also pressure sensitive.

WRMK Bevel Quill

WRMK Bevel Quill

The A adapter included in the kit is intended for the Silhouette machines, but it doesn’t fit the Portrait 3 or Cameo 4.

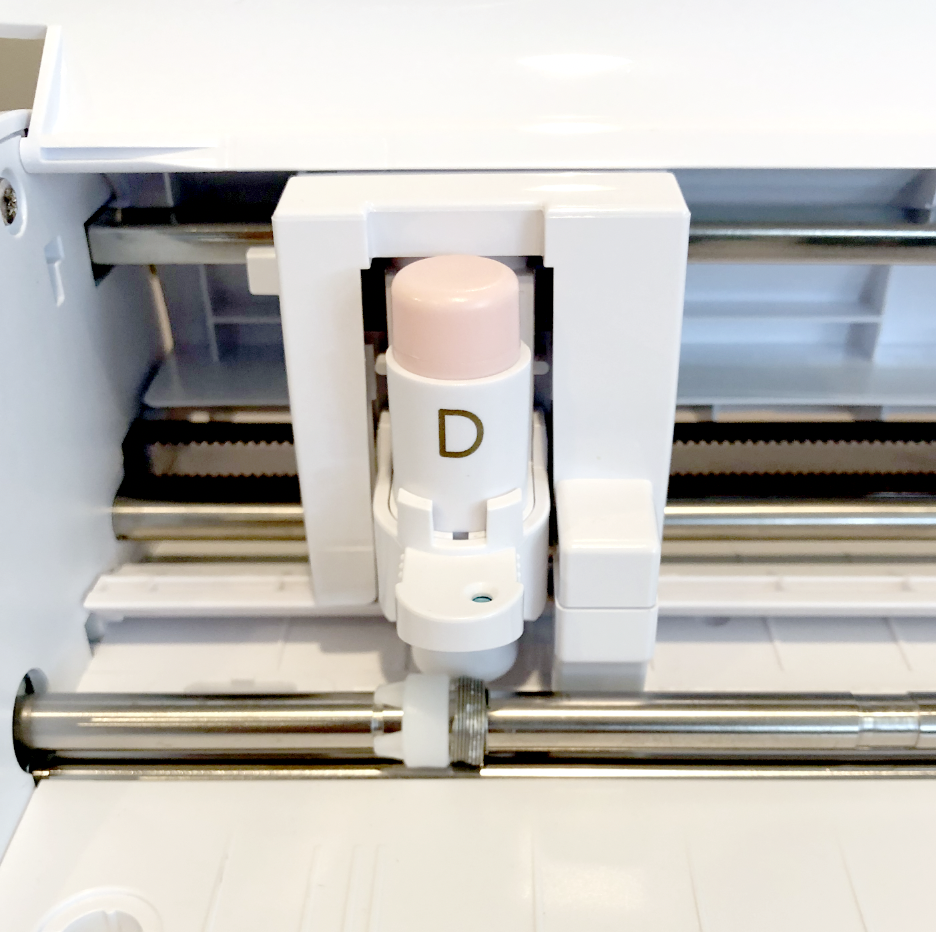
First, I tried it with the D adapter that also came in the kit, but it doesn’t fit very snugly in the Portrait 3 and pops up out of the tool holder every so slightly when the machine presses down on the tip and there’s no longer any pressure for the tip to apply the foil.

So I grabbed the D adapter from my foil quill set, it’s just a hair wider than the other D adapter. It makes such a big difference, and it stays nice and snug in the tool holder.

D adapter from Foil Quill set

D adapter from Foil Quill set

Once again, I used my favorite black cardstock and the Standard grip mat with the regular copper and gold Spellbinder foils. I tried out a few different settings. I ended up getting pretty decent results with my Force between 20-25, Speed 2, and 2 passes.

Copper foil and gold foil on black cardstock

Copper foil and gold foil on black cardstock

The results are pretty close to what I get with my Cricut Foil Transfer tool and my Maker. The foil doesn’t always stick in some places and it can be a little dusty when you remove the foil sheet after transferring. The WRMK Foil Quill is still my favorite tool for foiling, but this is definitely a good option if you don’t want to be bothered heating up the WRMK Foil Quill.

Foiling with WRMK Bevel Quill

Silhouette Portrait 3 and the WRMK Foil Quill

Links in the article below may be affiliate links.

Hi Everyone! A few months ago I finally crossed over and got a Silhouette Portrait 3, and I love it!! It works like I always thought my Cricut should work.

Last week I tried the Spellbinders Glimmer Foil with the WRMK Foil Quill in my Cricut Maker. The results weren’t great on cardstock, but it looked really nice on my clear sticker paper. So this week, I decided to try it on my Portrait 3 because I can adjust the speed and pressure with the Foil Quill, unlike the Cricut.

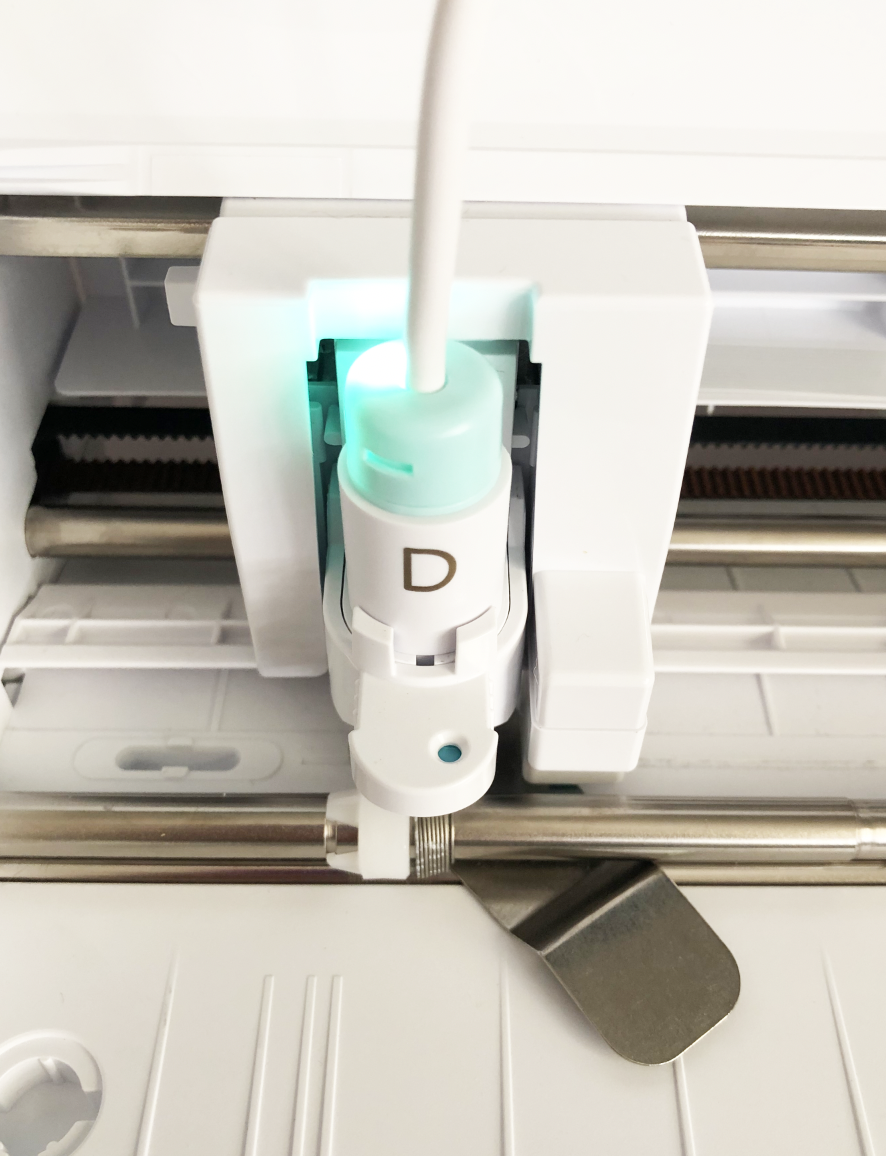
I have to use the D adapter for the Foil Quill with the Portrait 3, the usual A adapter for Silhouette doesn’t fit the newer machines.

Use Adapter D for the Silhouette Portrait 3.

Use Adapter D for the Silhouette Portrait 3.

First I tried the regular copper metallic foil on my favorite black cardstock. I’m using the Standard Grip mat with a Force of 22 and Speed 2. It looks fantastic!

Copper Foil, Medium Foil Quill Tip

Copper Foil, Medium Foil Quill Tip

Then I tried the regular gold foil, also on black cardstock. It looks pretty nice, there are a few spots where the foil didn’t stick great, but I might not have had my foil taped down tight enough (very important when foiling).

Gold Foil, Medium Foil Quill Tip

Gold Foil, Medium Foil Quill Tip

Next I tried the Silver iridescent foil with the same Force of 22, Speed 2. It looks sooooooo much better than it did on my Cricut Maker! There are a couple fo spots where the foil didn’t stick so I’m going to try a few more settings.

Iridescent Silver, Medium Foil Quill Tip

Iridescent Silver, Medium Foil Quill Tip

I tried a bunch of different pressures and speeds, but none of them are as good as the Force 22, speed 2.

Iridescent Silver, Medium Tip, different pressures and speeds

Iridescent Silver, Medium Tip, different pressures and speeds

I also tried the gold holographic foil, it did much better on the the Portrait 3 than with my Cricut Maker, but there are still a few spots where it didn’t stick to the cardstock.

Gold Holographic Foil, Medium Foil Quill Tip

Gold Holographic Foil, Medium Foil Quill Tip

Then I wanted to try it on some black vinyl for stickers. It came out pretty good, but there are some gaps in the solid hearts.

Gold Holographic Foil, Medium Tip on Black Adhesive Vinyl

Gold Holographic Foil, Medium Tip on Black Adhesive Vinyl

I changed the fill for the solid hearts from just diagonal lines to a crosshatch fill. Which is SUPER EASY to do in Silhouette Studio, and the results are much better!

Silver Iridescent Foil, Medium Tip on Black Adhesive Vinyl

Silver Iridescent Foil, Medium Tip on Black Adhesive Vinyl

I wanted to try using the Light Grip mat since the backing of the vinyl sticks a lot to the Standard Grip mat. The Light Grip mat is slightly thicker than the Standard Grip and it’s just enough difference that no matter what force I use, it’s too much and it even melted my vinyl.

Silver Iridescent Foil, Medium Tip on Black Adhesive Vinyl using Light Grip Mat

Silver Iridescent Foil, Medium Tip on Black Adhesive Vinyl using Light Grip Mat

So I switched back to the Standard Mat and it works much better! There are still some little gaps where the foil didn’t cover, so I decided to do a test with the Bold Tip Quill to see if it gets better coverage with the filled shapes.

Gold Holographic Foil, Medium Tip using crosshatch fill

Gold Holographic Foil, Medium Tip using crosshatch fill

Yes! The Bold Tip does an even better job with the filled shapes!

Gold Holographic Foil, Bold Tip using crosshatch fill

Gold Holographic Foil, Bold Tip using crosshatch fill

Silver Iridescent Foil, Bold Tip using crosshatch fill

Silver Iridescent Foil, Bold Tip using crosshatch fill

One final test with the Bold Tip on cardstock. I ended up having to switch my mat to the Light grip mat, I wasn't getting enough pressure with the Standard mat. The Bold Tip gives a really nice flat fill, but I think I like the Medium tip better for lettering.

Gold Holographic Foil, Medium Tip using crosshatch fill, Light Grip Mat

Gold Holographic Foil, Medium Tip using crosshatch fill, Light Grip Mat

An important lesson learned this week is that the cutting mat can have a really big impact on the outcome of the project!

Silver Iridescent Foil, Bold Tip using crosshatch fill. Top is using the Light Grip Mat. Bottom is using the Standard Grip Mat.

Silver Iridescent Foil, Bold Tip using crosshatch fill. Top is using the Light Grip Mat. Bottom is using the Standard Grip Mat.