Happy New Year!
The new year is always a great time to make a fresh start with a new planner. I bought a planner notebook last year, but I didn’t realize it only had pages for 6 months and a bunch of blank pages at the end. After I filled up the 6 months , I kind of stopped using it. So this year, I’m going to make my own calendar/ planner pages and hopefully keep myself on track for this year!
Supplies: (links below may be affiliate links)
My Single line SVG files or another file you may have
WRMK Fine Tip Foil Quill (the pink one)
WRMK Gold foil or heat reactive foil of your choice
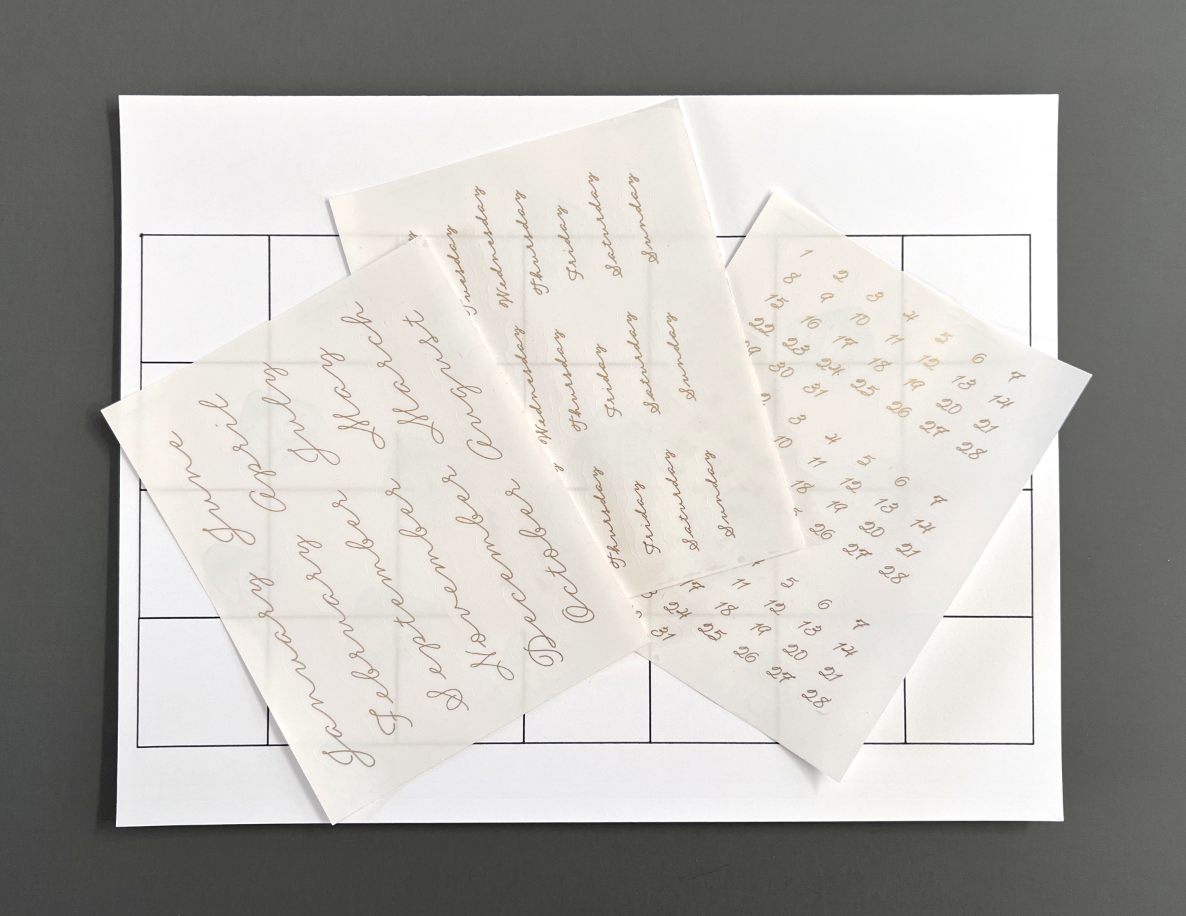
I created some single line SVG files for the months, days and dates. I’m going to test them out with my WRMK Foil Quill and some clear matte sticker paper.
I bought this clear matte sticker paper on Amazon. Unfortunately, when I received it I realized it has a slit down the back carrier paper which is not disclosed in the product description. I should have read more of the reviews! It’s not a problem for this project since I’m trimming the paper down to foil it.
I’m trimming my sticker paper down to 5.5 inches x 4.25 inches. You don’t have to do this, but I have an easier time foiling with smaller pieces.
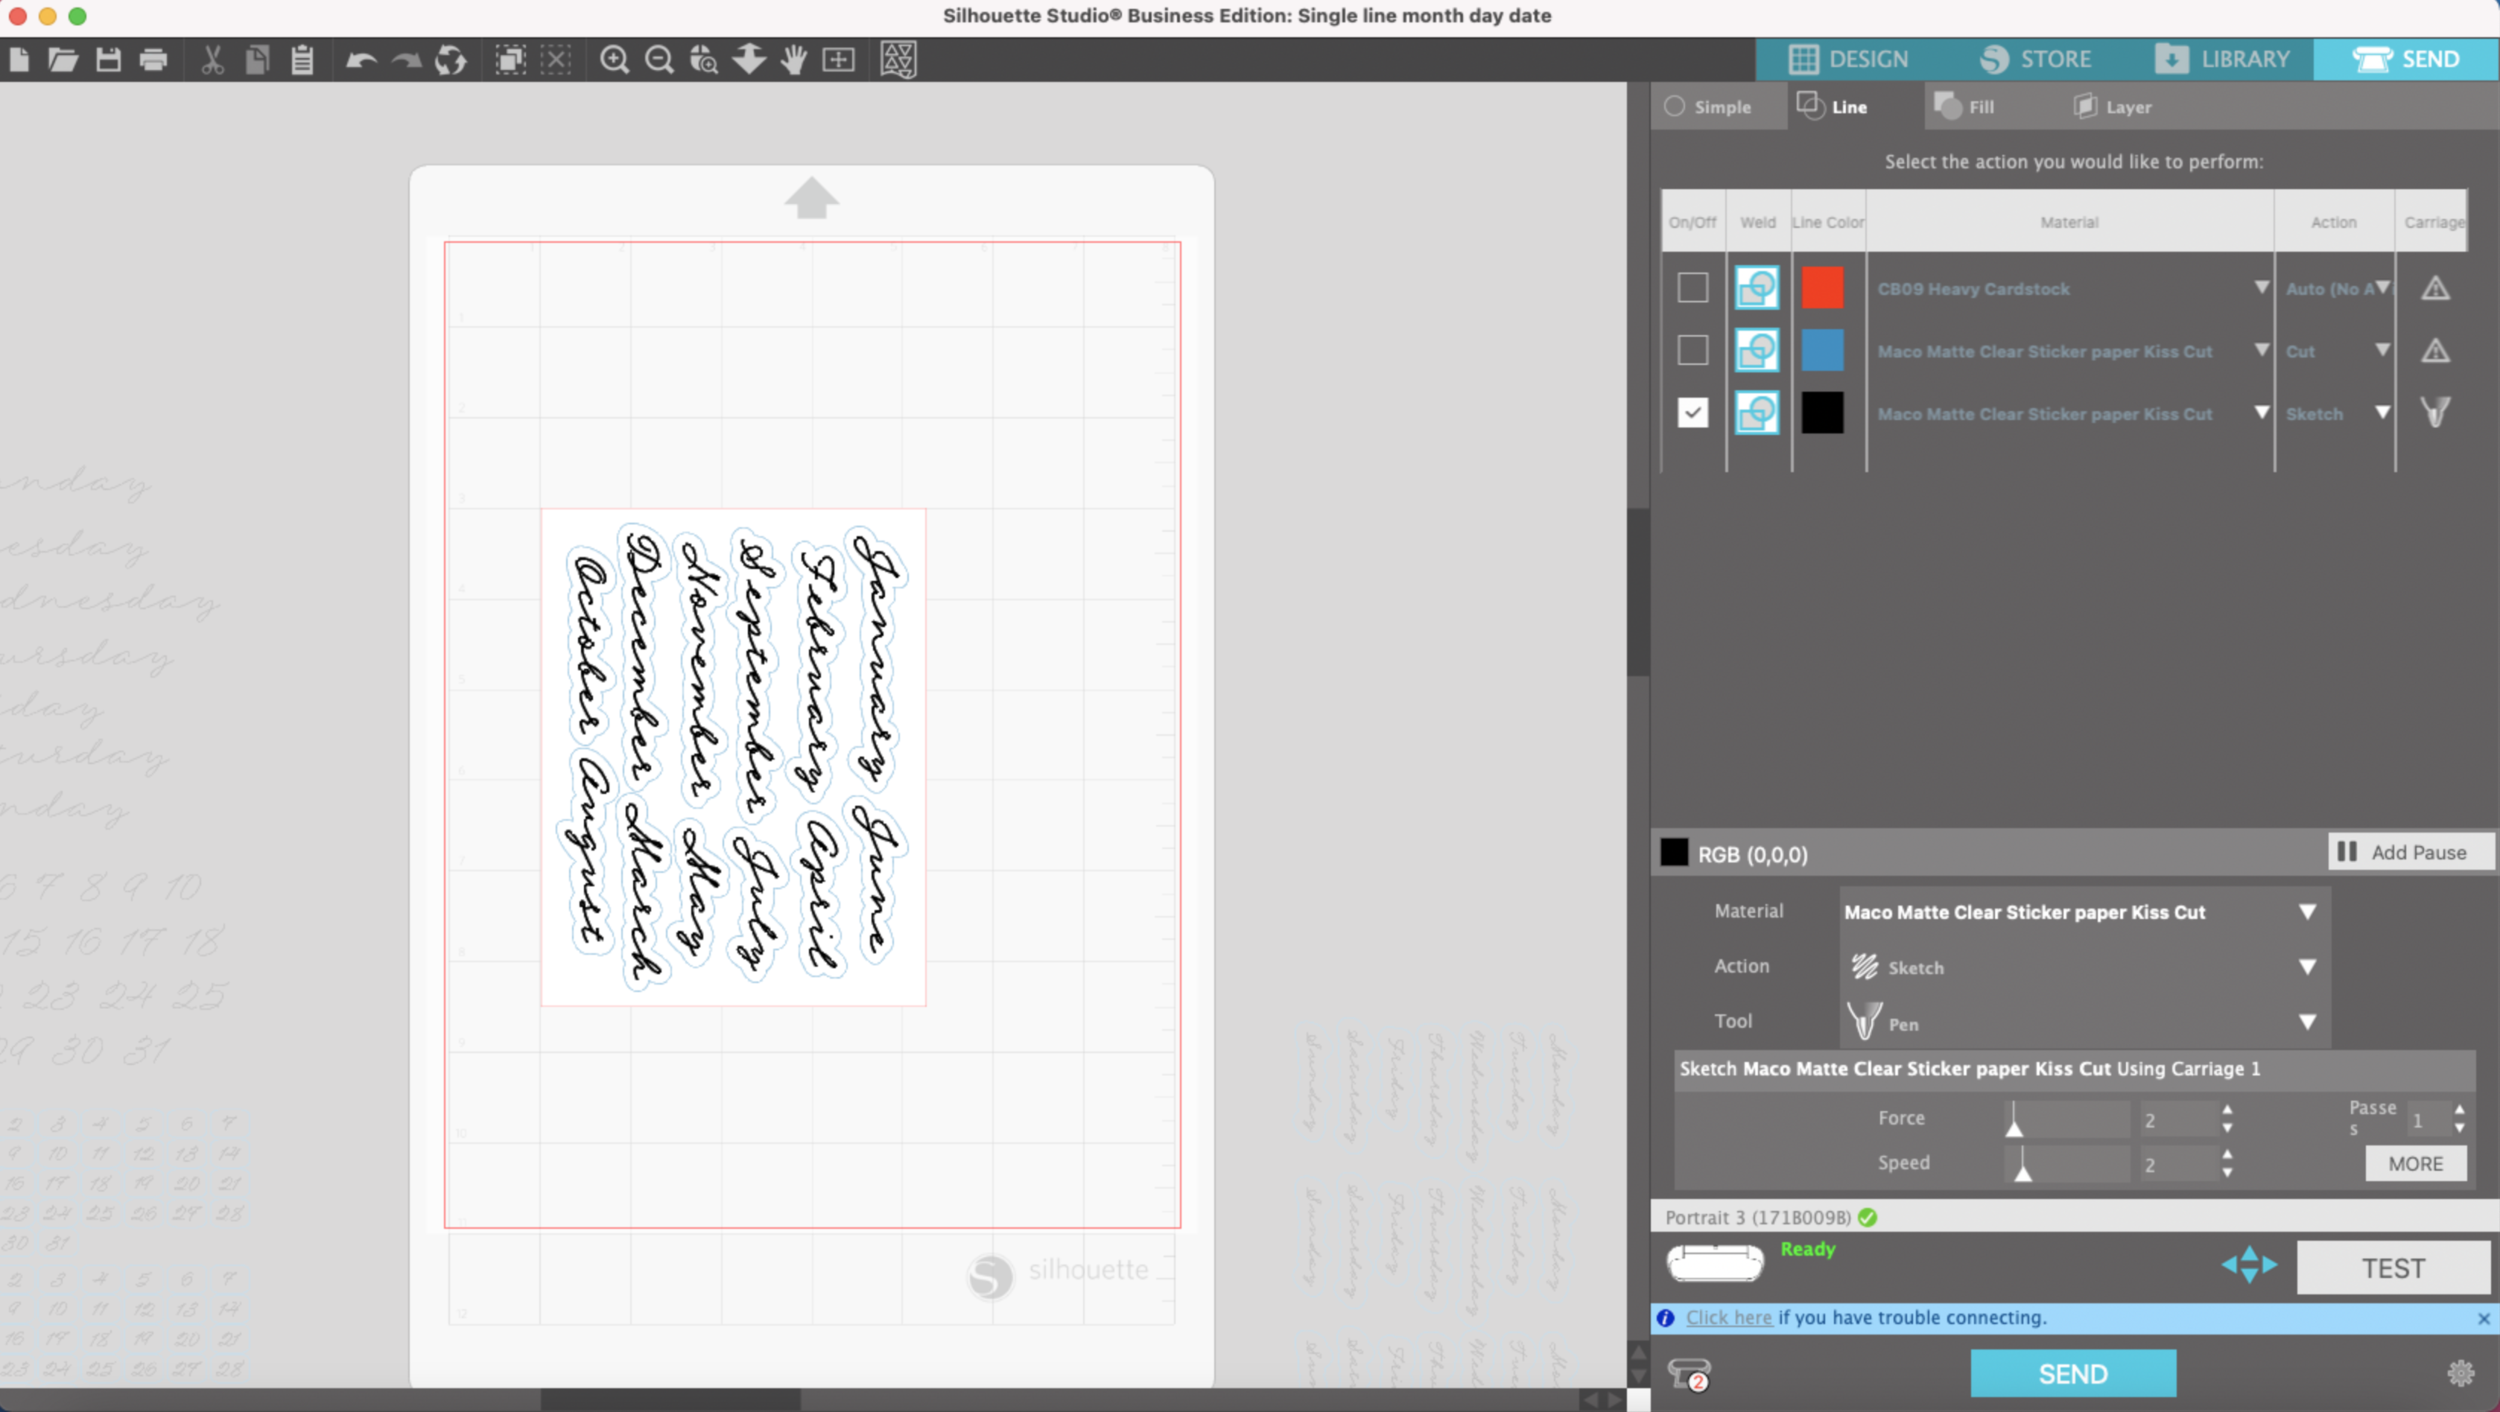
I have all of my months set up to fit on one 5.5 inch x 4.25 sheet in Silhouette Studio and now it’s time to foil!

I’m using the fine tip foil quill (the pink one) with the D adapter, since my letters and numbers get pretty small.
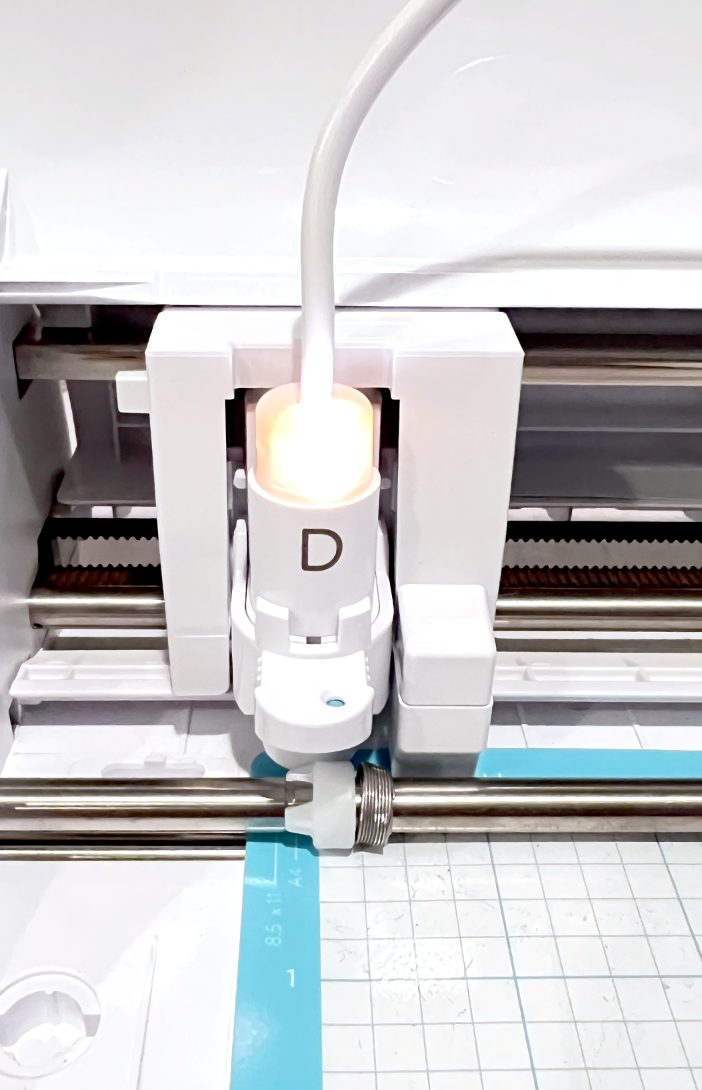
I’ve got my sticker paper on my light grip mat approximately where it is shown in Silhouette studio and my foil is taped down tightly on all four sides.

After some initial testing with this sticker paper I created a custom material setting:
Action: Sketch
Force: 2
Speed: 2
Passes: 1
After it’s done foiling, do not remove your mat from the machine! Carefully remove the foil and place the Autoblade in carriage 1.
I want my stickers to be kiss cut, so the blade will not cut through the backing paper on the stickers. I added the following settings to my custom material:
Action: Cut
Force: 25
Speed: 4
Passes: 1

I repeat the same process for the days of the week and the dates.
Now my stickers are ready to be added to my calendar template!