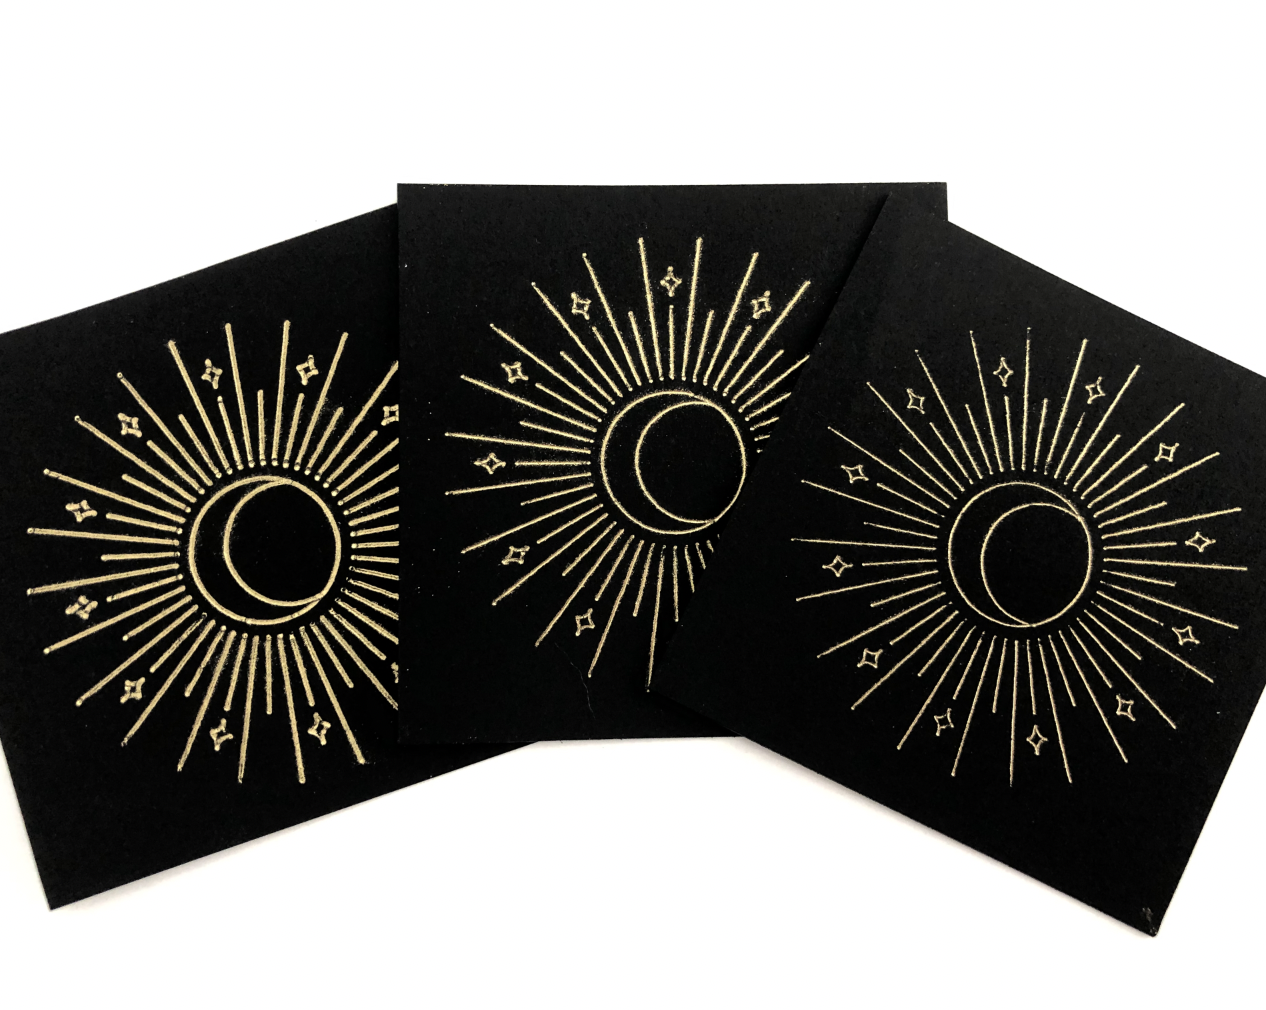
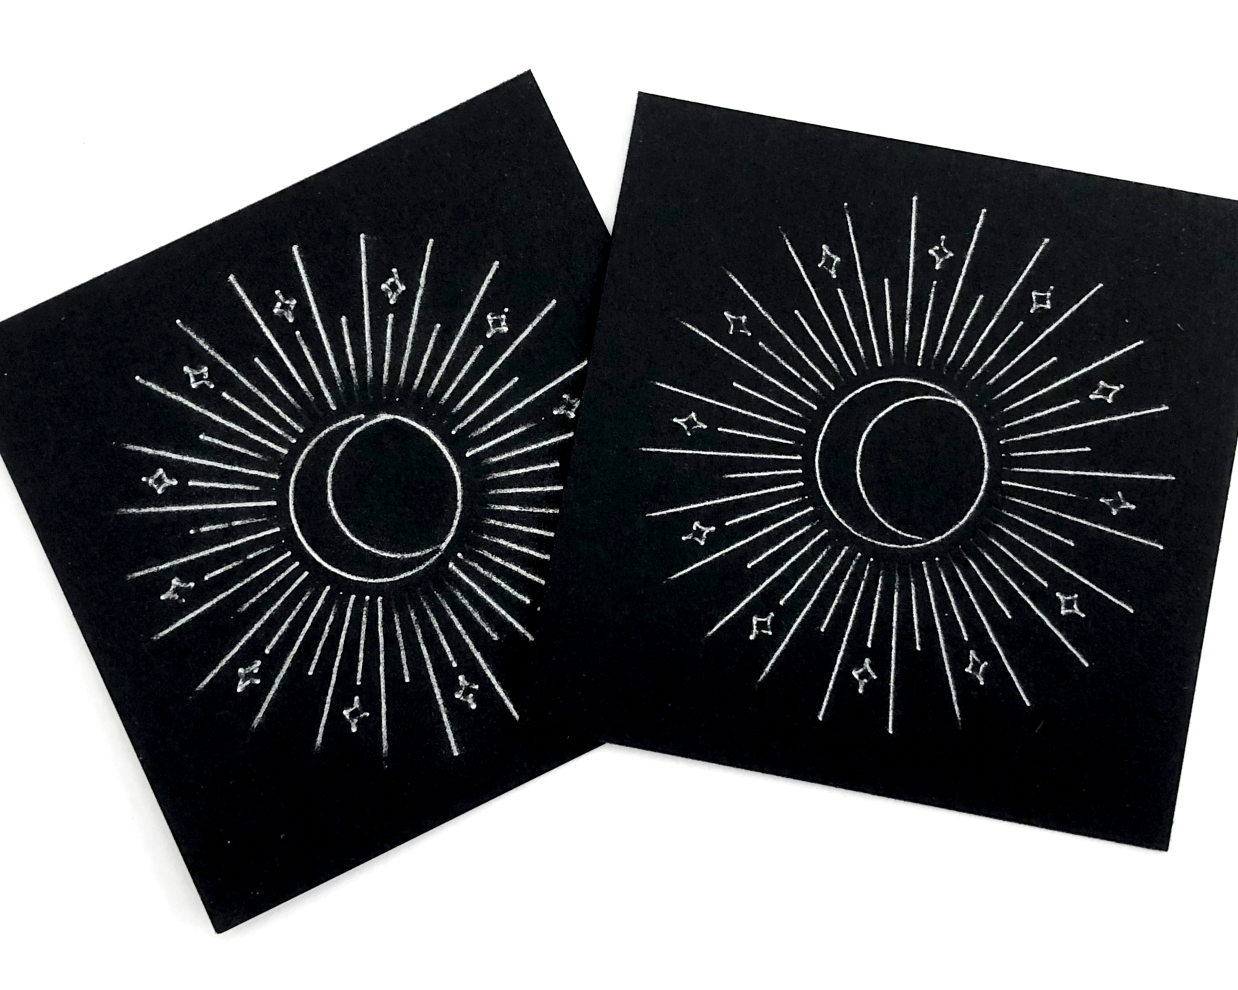
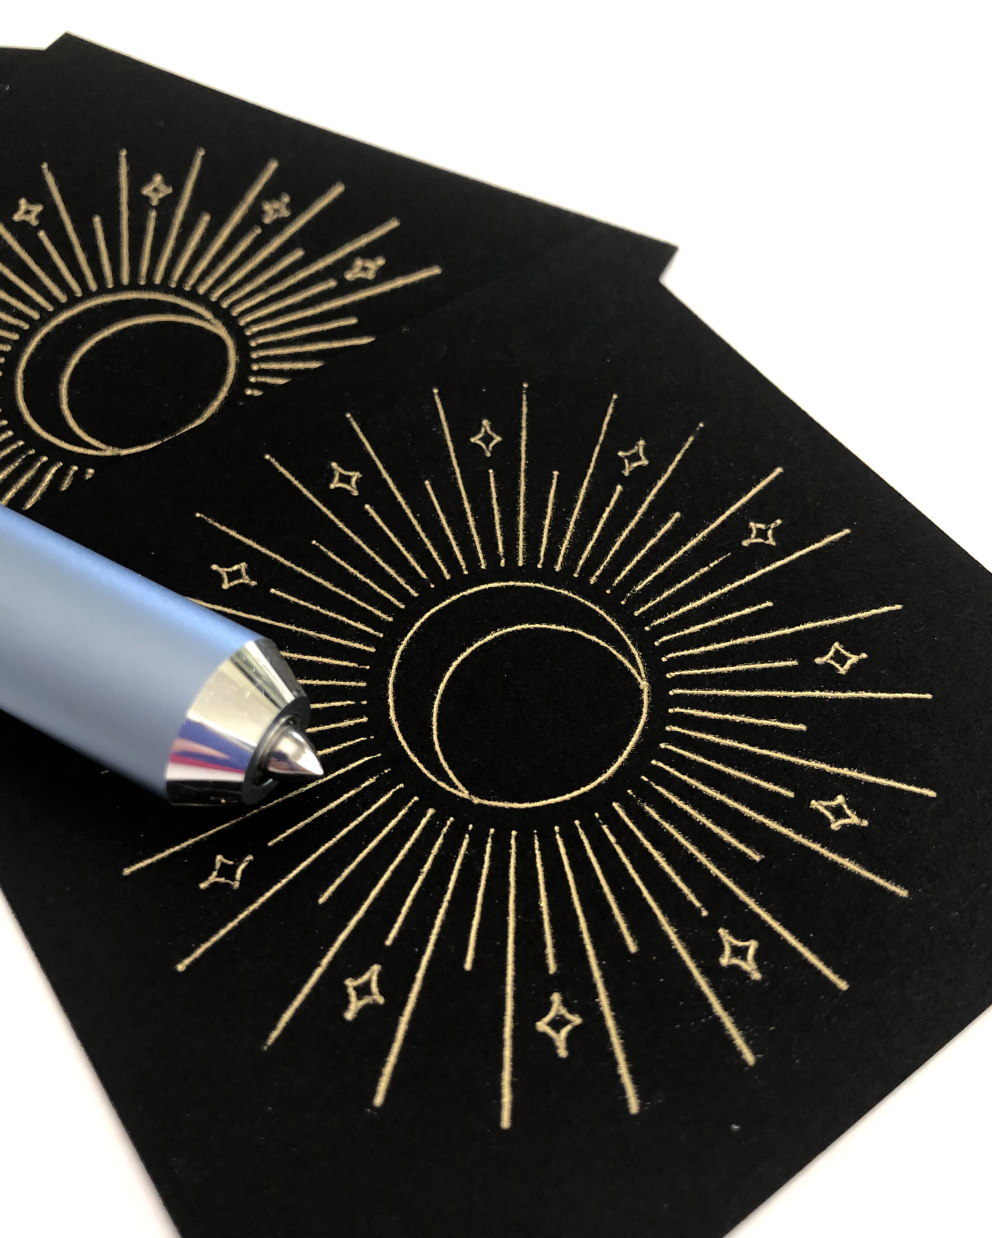
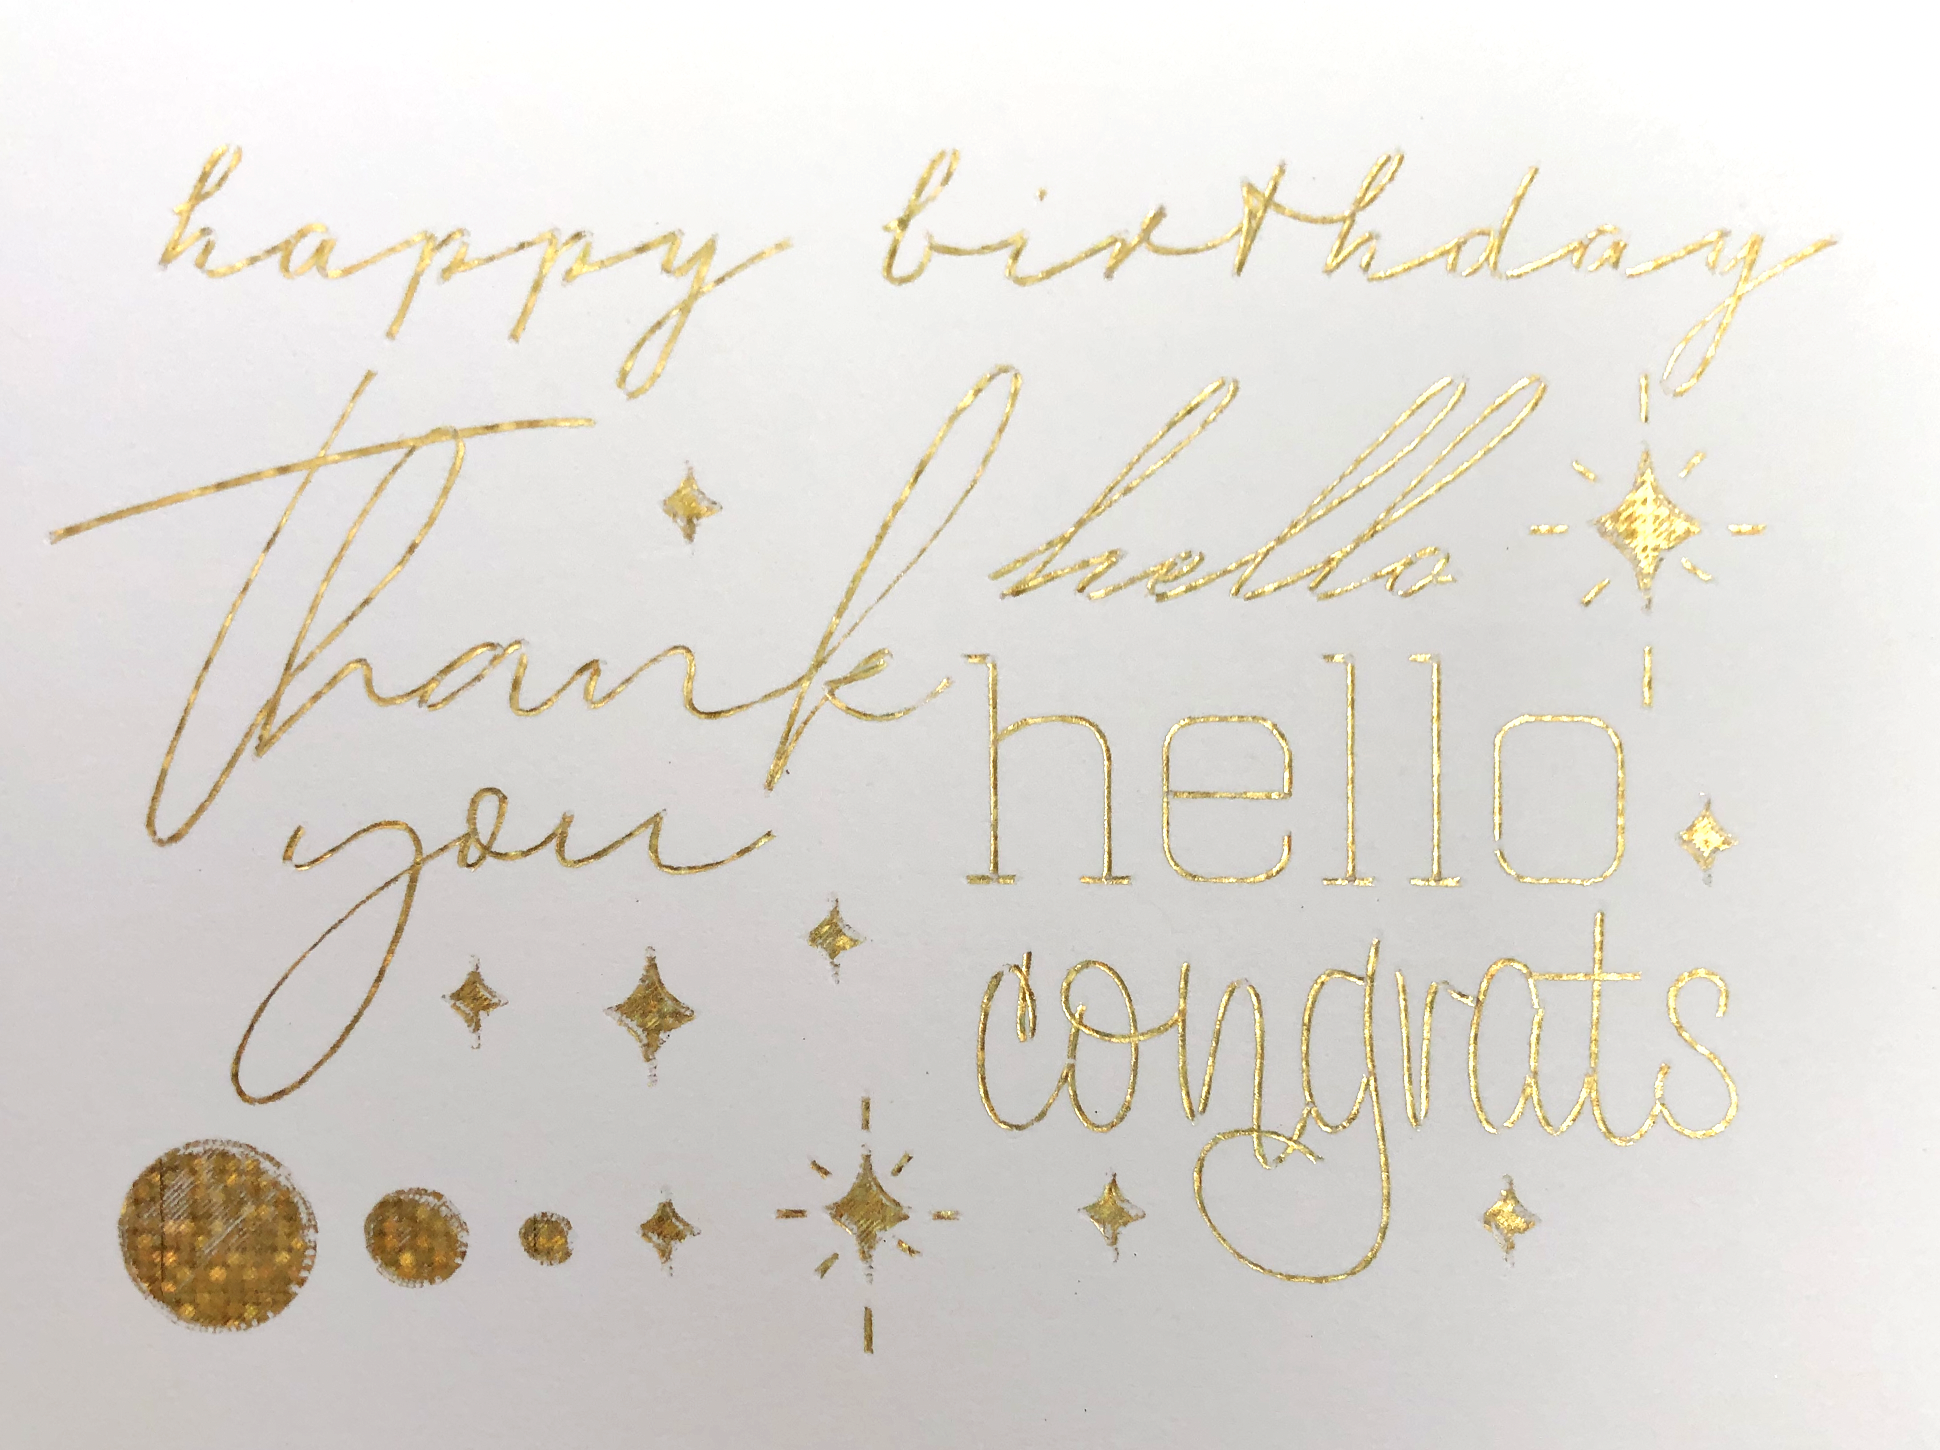
Cricut

Shrink Plastic Pins with the Cricut Maker

Hi Everyone!

St. Patrick’s day is this week, I wanted to try making a little four leaf clover pin using shrink plastic and gold foil for good luck!

Since my Portrait 3 doesn’t quite cut all the way through my shrink plastic sheets, I thought I would give my Cricut Maker a try. It’s got more cutting force than my Portrait 3, but I was also quickly reminded how much I HATE Cricut Design Space. I really wish instead of releasing ridiculously priced heat presses they would invest in better software. I really love Silhouette Studio (it works how I’ve always dreamed Design Space should work) and I think I see a Silhouette Cameo 4 replacing my Cricut Maker in the near future!

Ok, rant over. Here’s how I did it on my Cricut (Note: this DOES NOT work with the Cricut Foil Transfer tool):

Supplies:

Four leaf clover single line SVG from my Good Luck Charm bundle

Cricut Maker

Deep Cut Blade (the black one)

Light Grip mat (the blue one)

WRMK Foil Quill Medium Tip with C adapter

Gold heat reactive foil

Shrink plastic sheets

Green Sharpie

Glue

Pin back

Heat Gun on Toaster Oven

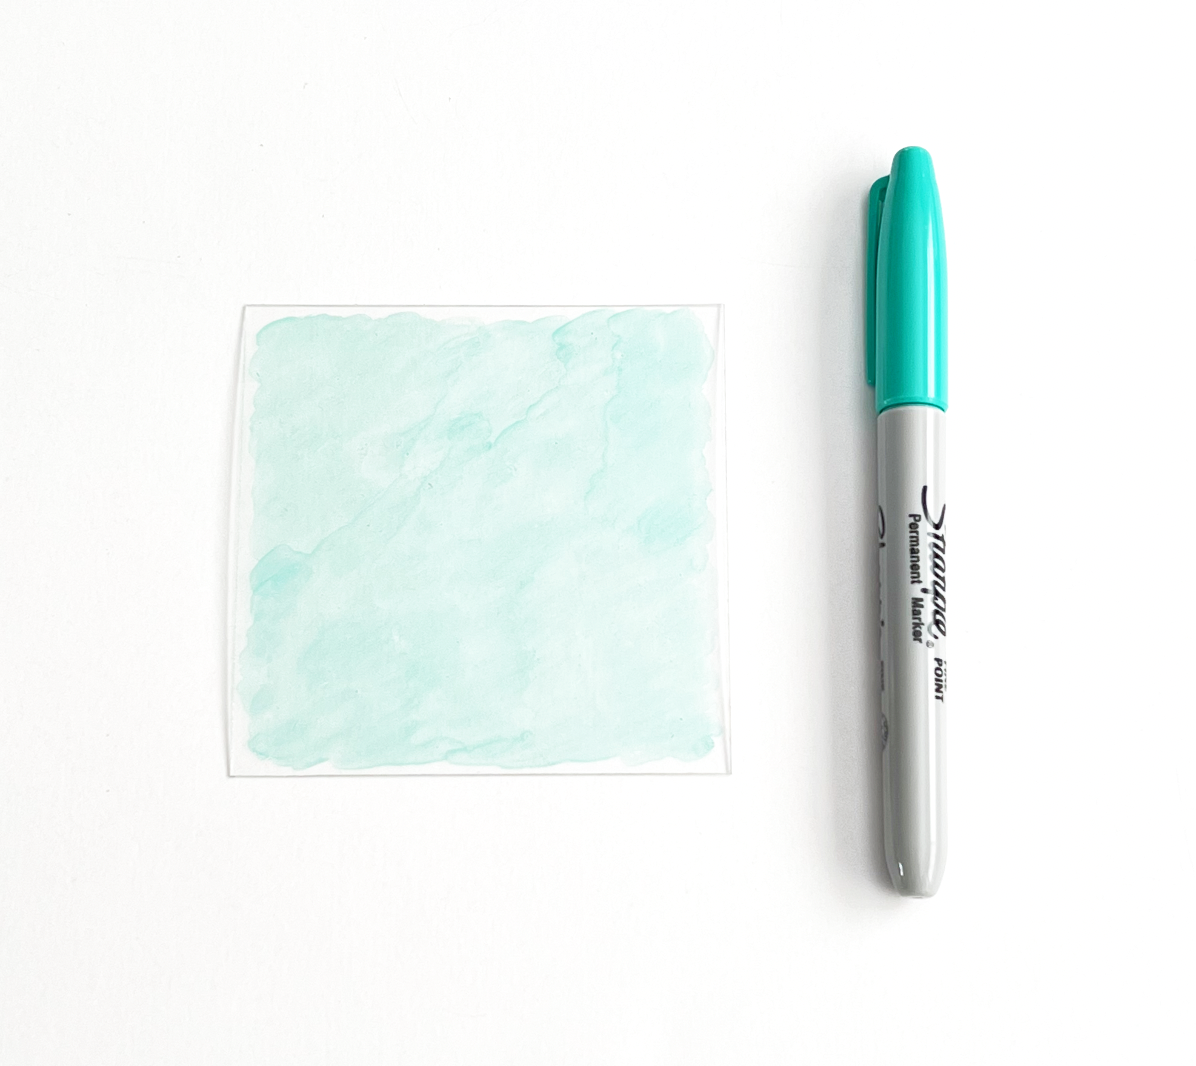
First I cut down my shrink plastic sheet into smaller squares, mine are about 3.5 x 3.5 inches. Then I colored the squares with the green Sharpie.

Tip: The Sharpie blended better when I used small circular strokes.

Cutting Shrink Plastic with Cricut Maker

I set my green squares aside to dry for a little bit. Now I’m going to set up my project in Cricut Design Space.

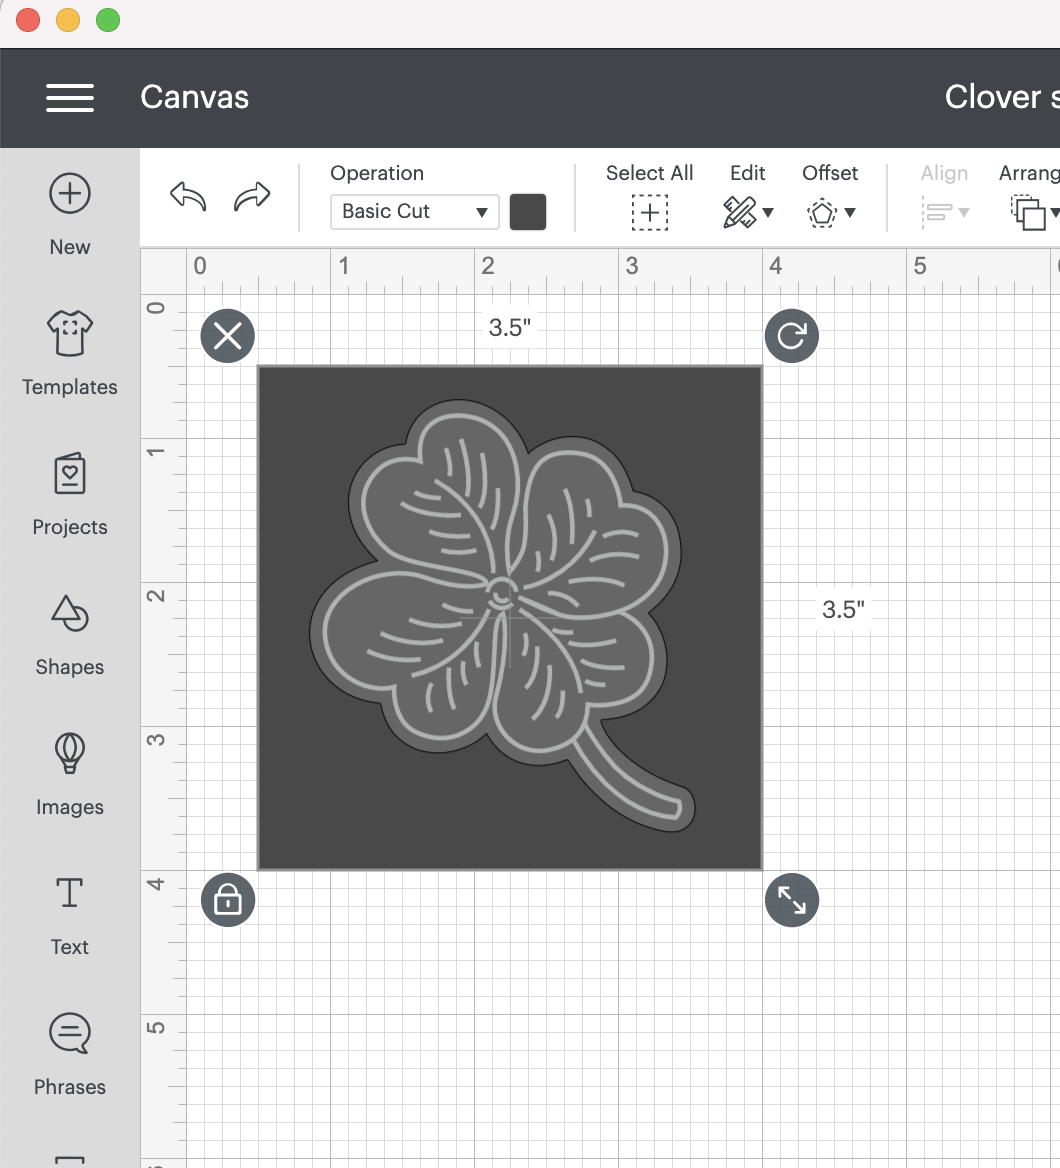
I’ve got my four leaf clover single line SVG uploaded into design space. I made a 3.5 x 3.5 inch square (the same size as my shrink plastic squares) and I scaled my four leaf clover to fit inside the square. I left a little border around the edges since I will be taping my shrink plastic to my mat.

Setting up foil quill file in Cricut Design Space

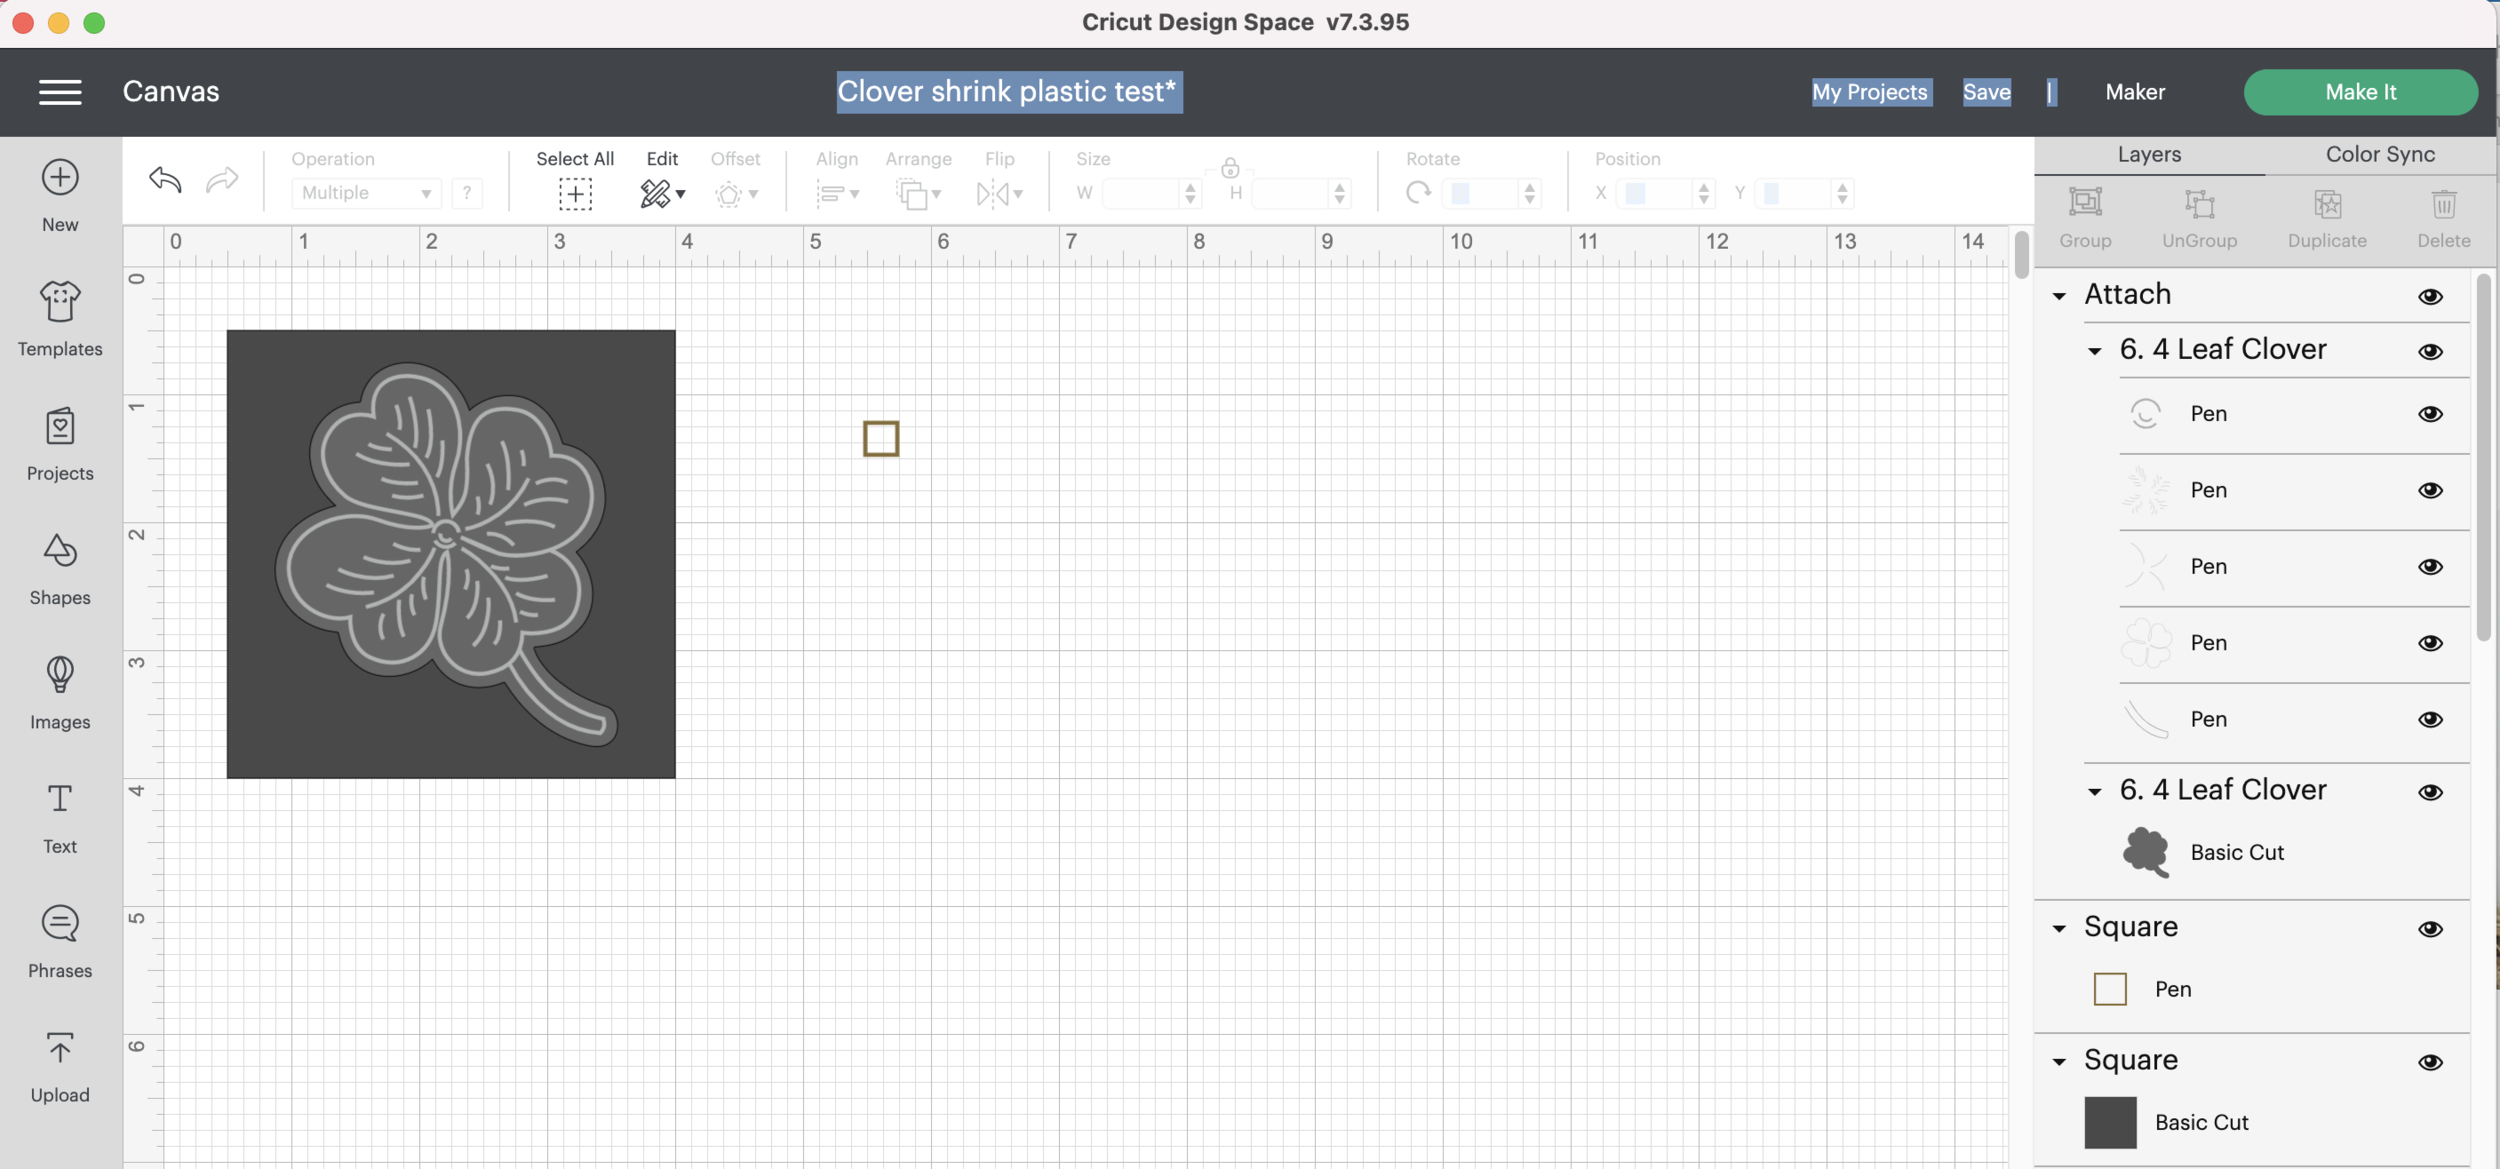
I’m also going to add a random little square to my file so I will be able to pause and remove the foil before cutting.

You’re probably saying “Just use the Pause button on your machine!” Well, unless my machine is faulty, my machine won’t pause until it has already started to cut with the blade.

I’m also doing this because Cricut has eliminated the ability to just skip unloading the mat and continuing with your cut. If you don’t eject your mat, don’t worry, your machine will do it for you! So I’ve gotta keep coming up with new ways to outsmart the Cricut!

Once I have my Cameo 4, I will make a version of this project using it so you can see why I like the Silhouette software so much better!

Make sure the operation for the foil portion of the four leaf clover is set to Draw/ Pen. The operation for the offset line around the clover should be set to Basic Cut.

I set the operation for my random square to Draw/ Pen. Make sure you select a different color from the clover drawing. Fingers crossed that my machine will request the gold pen after the silver pen!

Now, I’m going to attach all of my clover pieces together, DO NOT attach the squares.

Foiling and Cutting Cricut Design Space

Don’t forget to Save your project. Then click Make It.

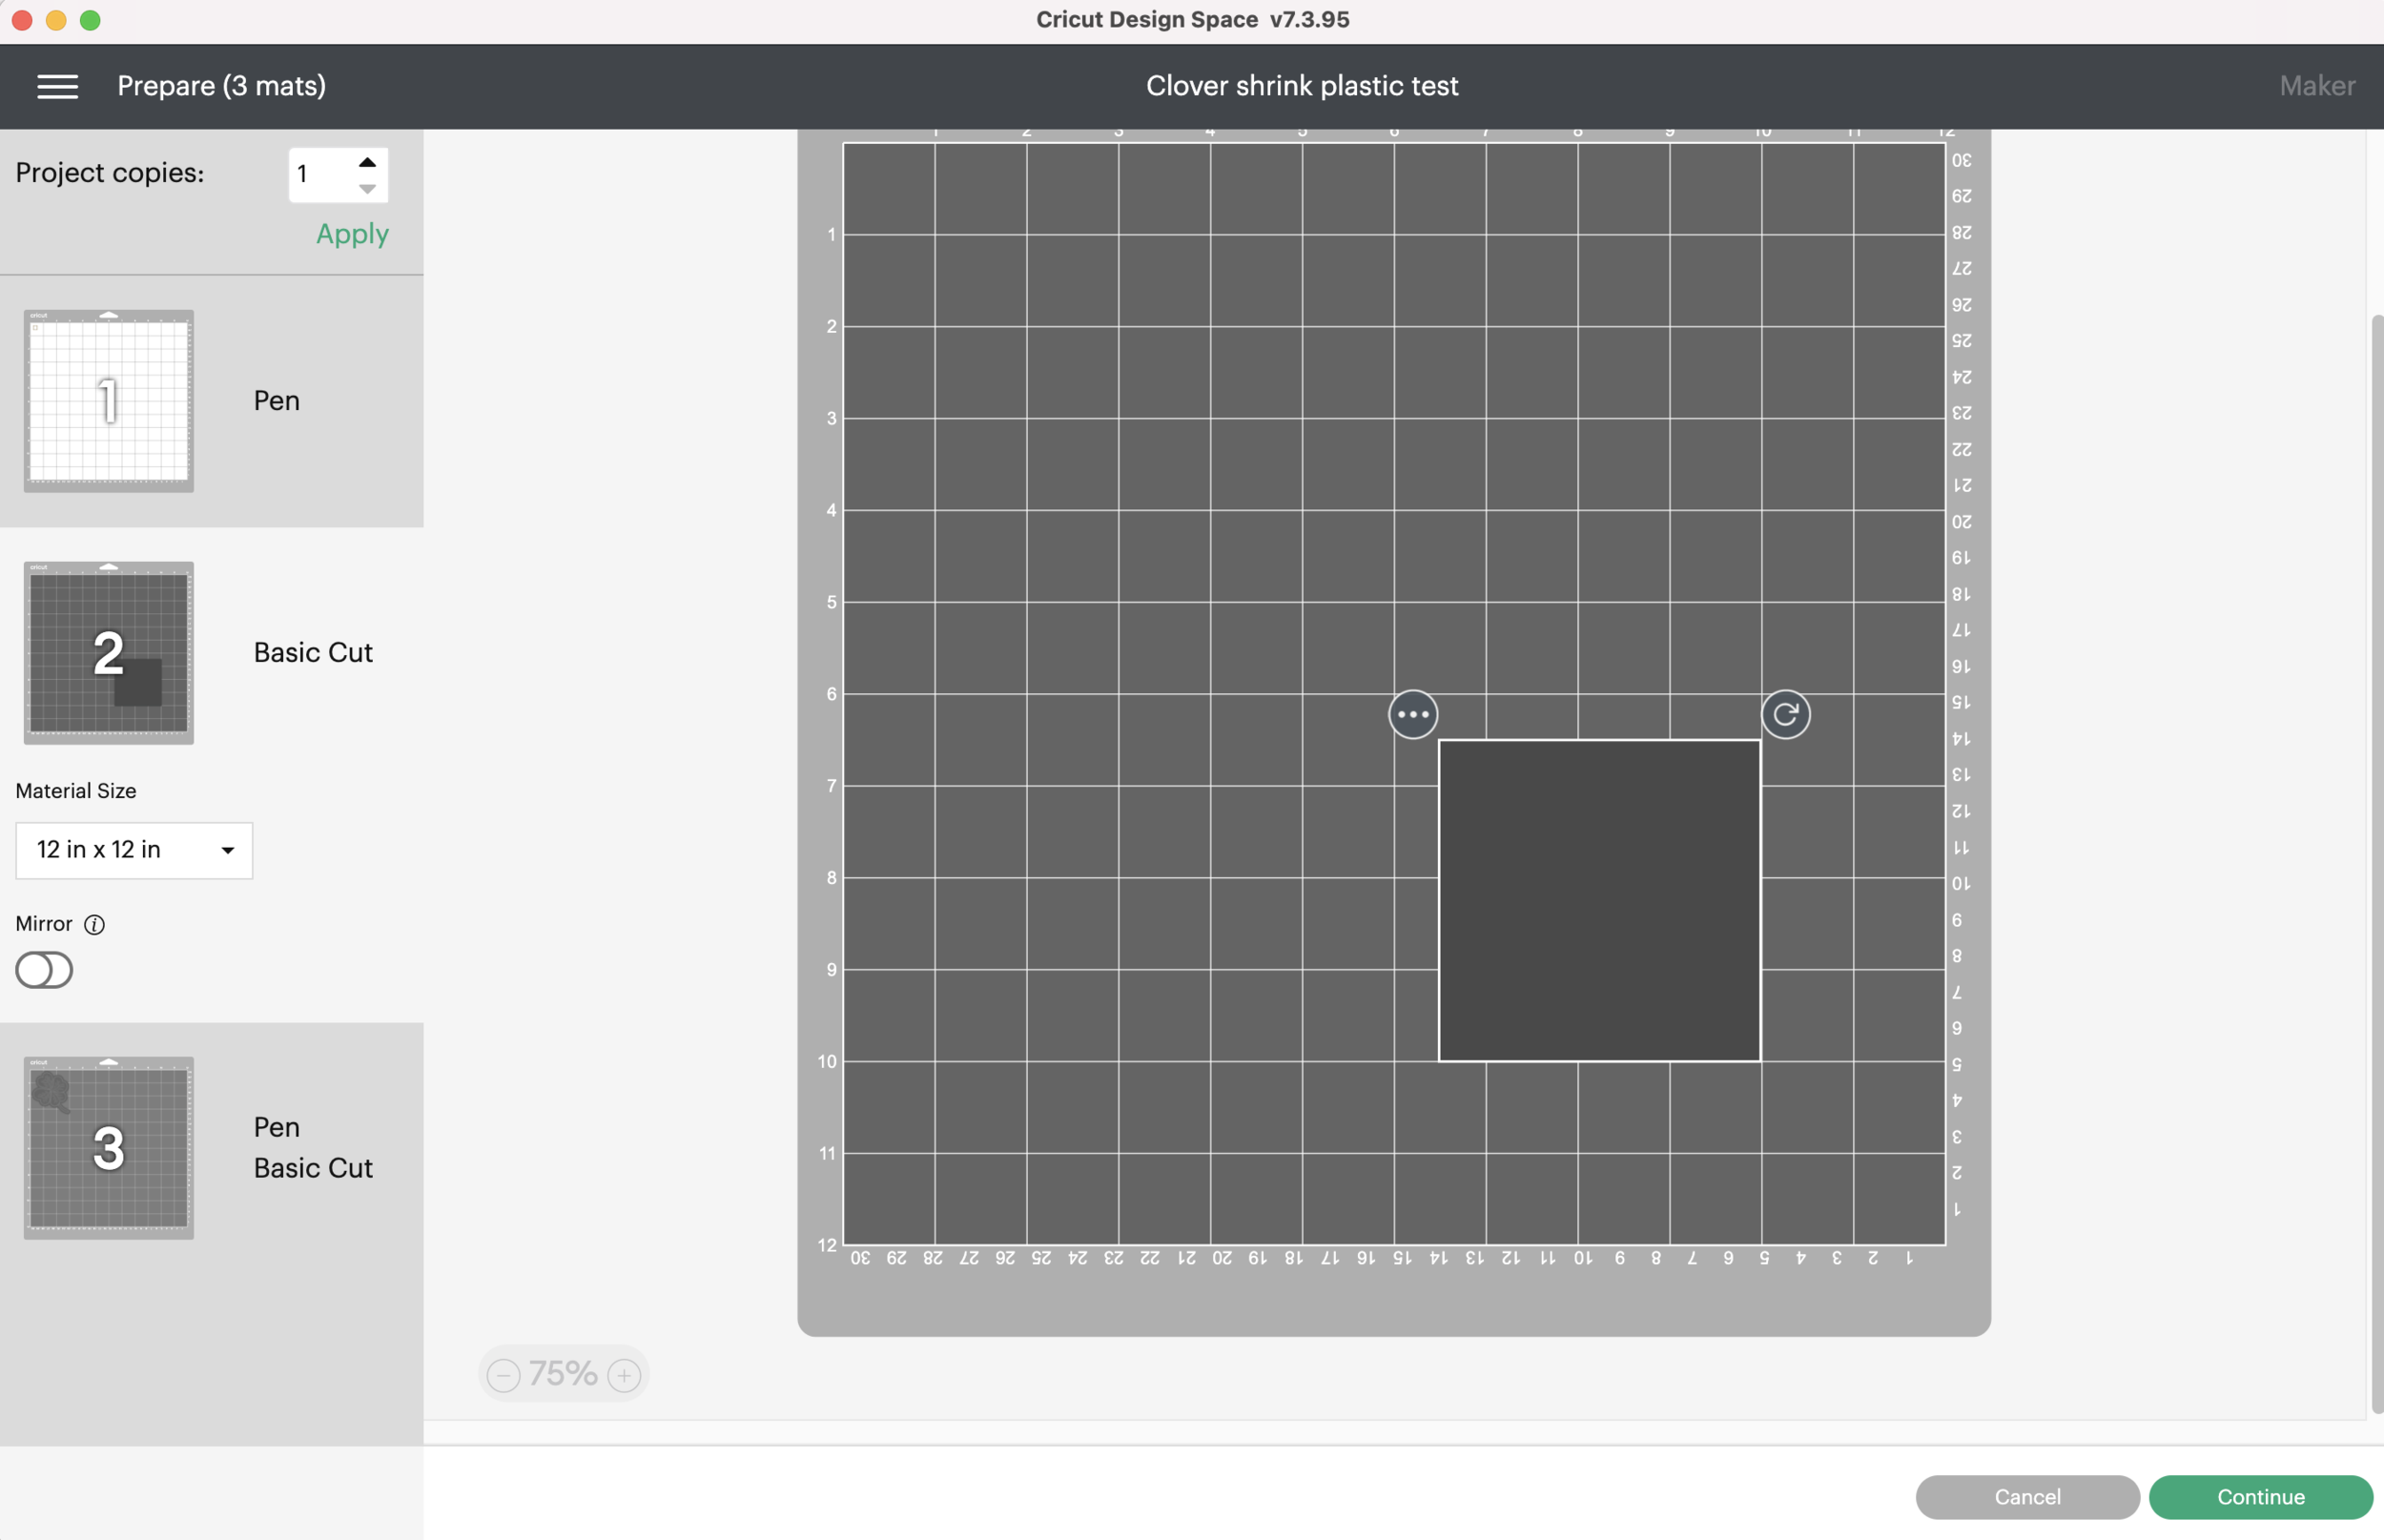
It’s set up for 3 separate mats at the moment. In mat number 2, I’m going to move my square down and over so it’s toward the bottom of my mat.

Foiling and Cutting Cricut Design Space

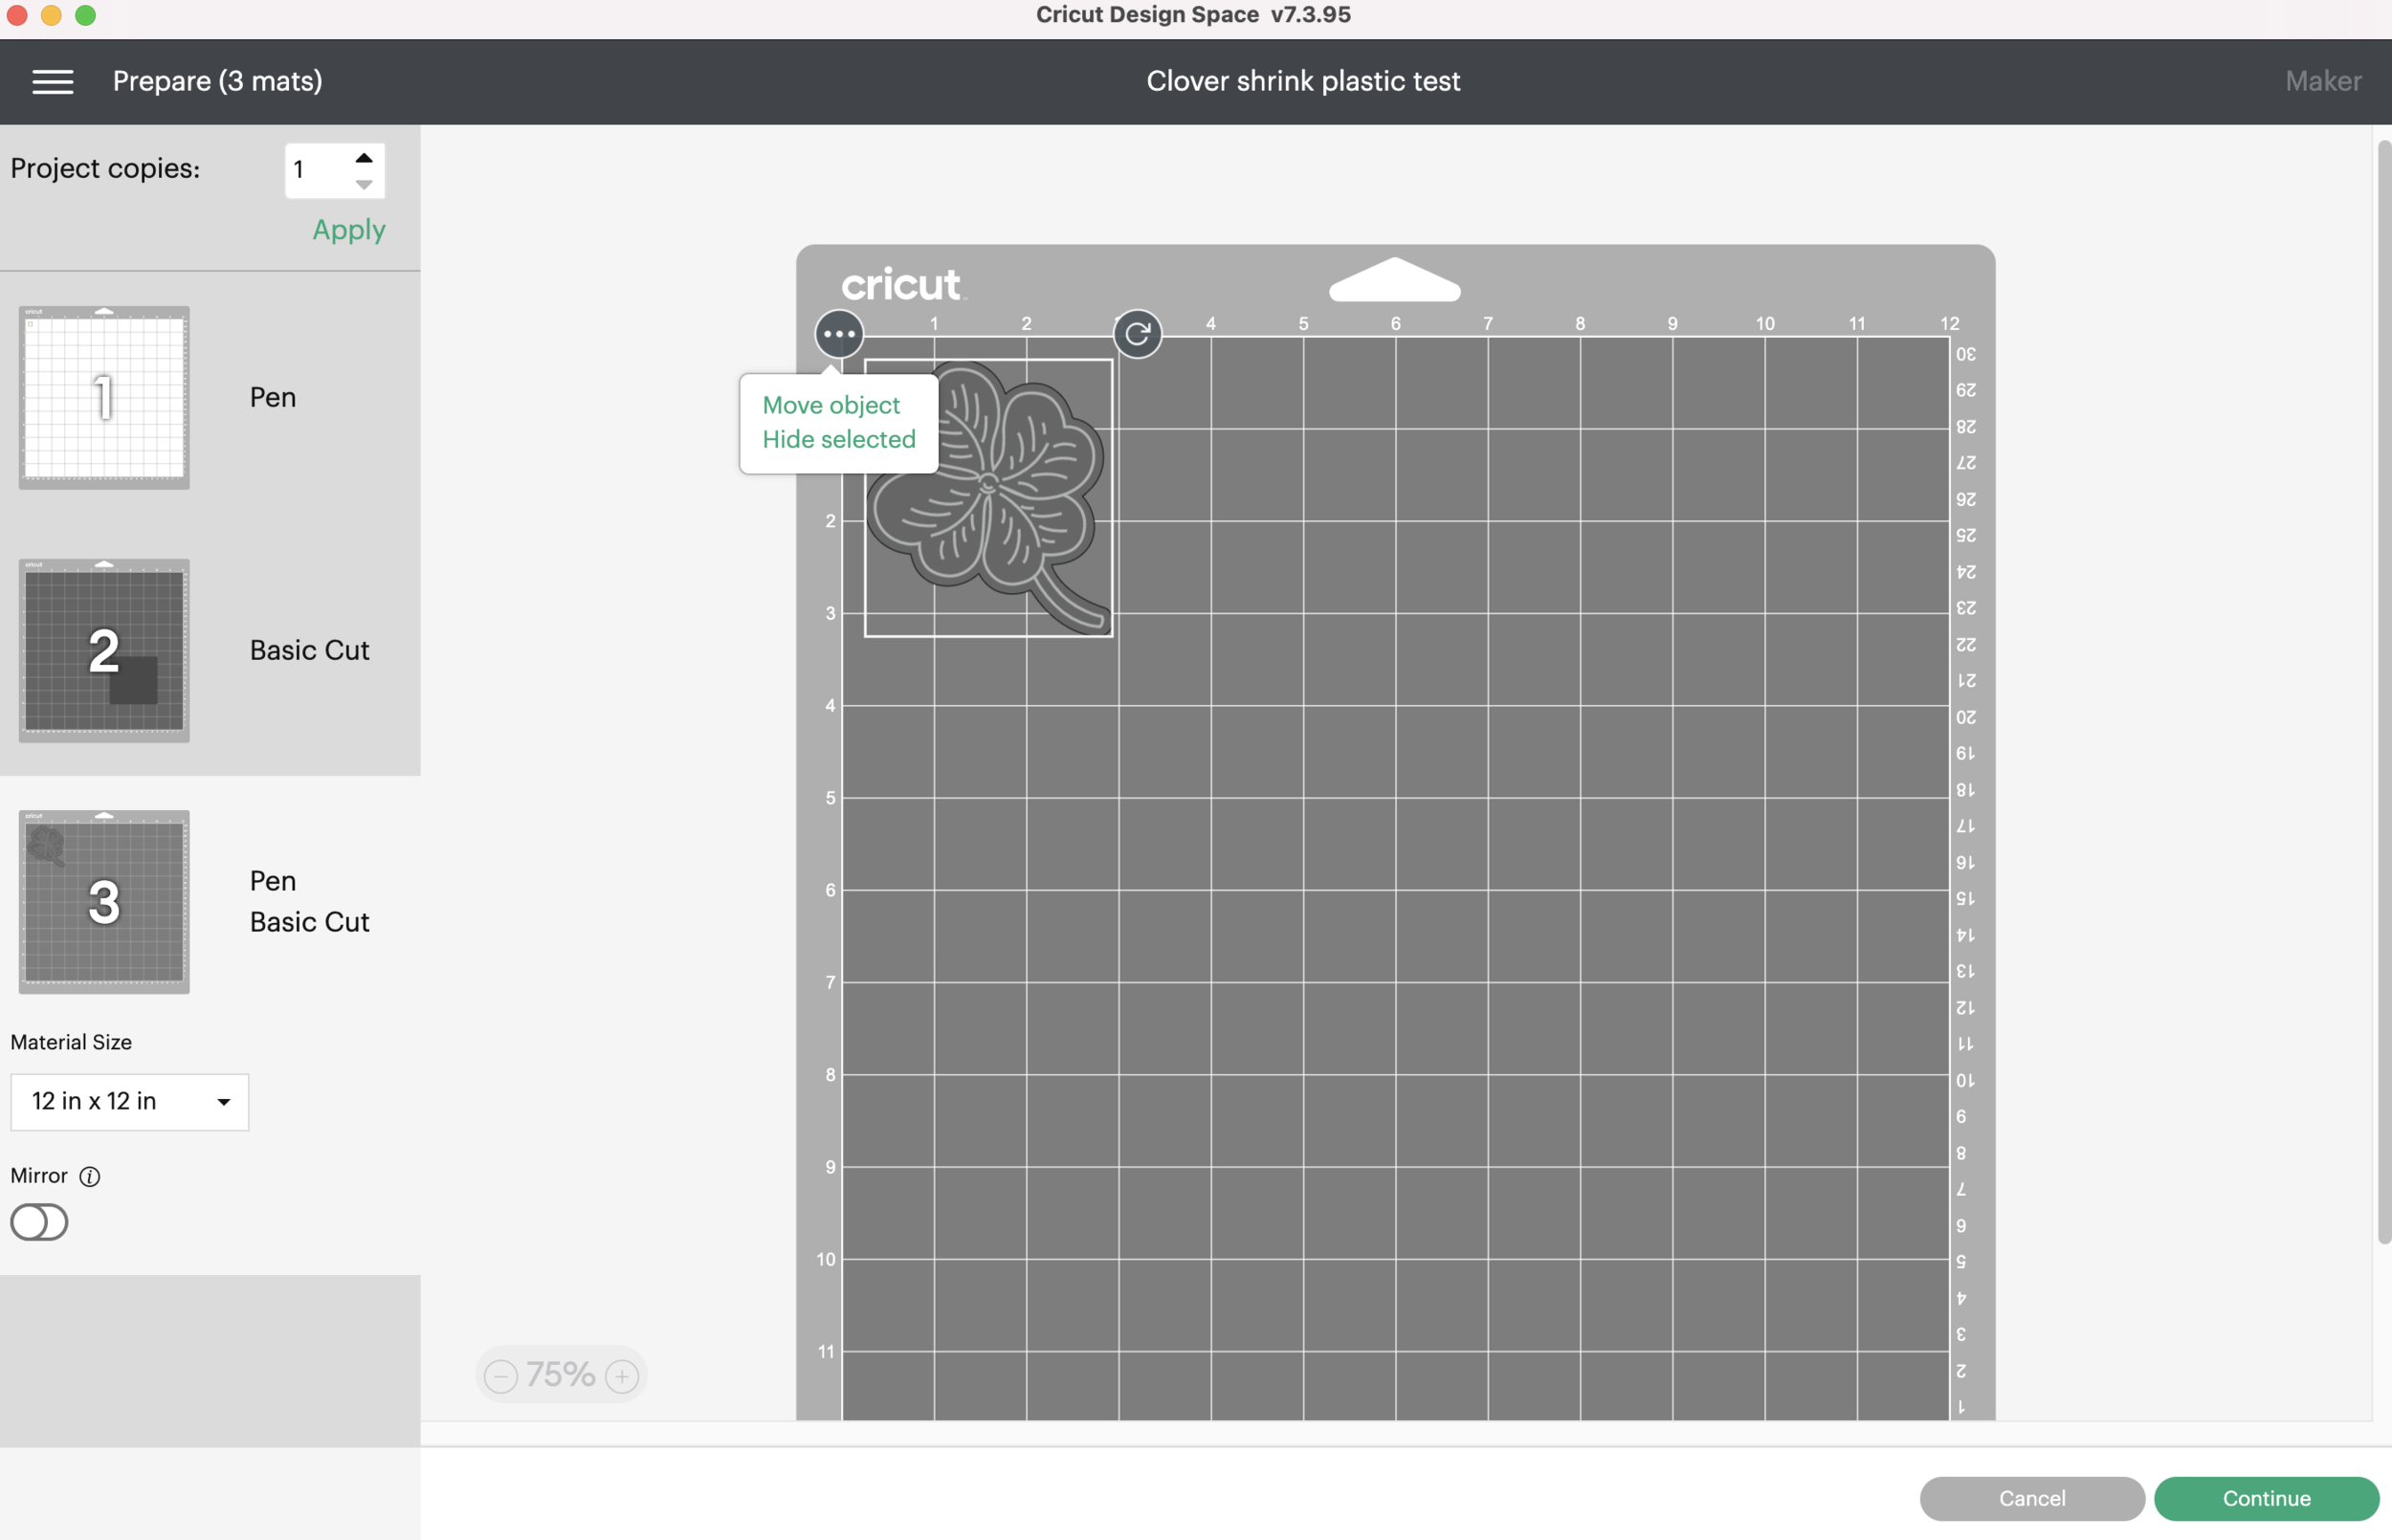
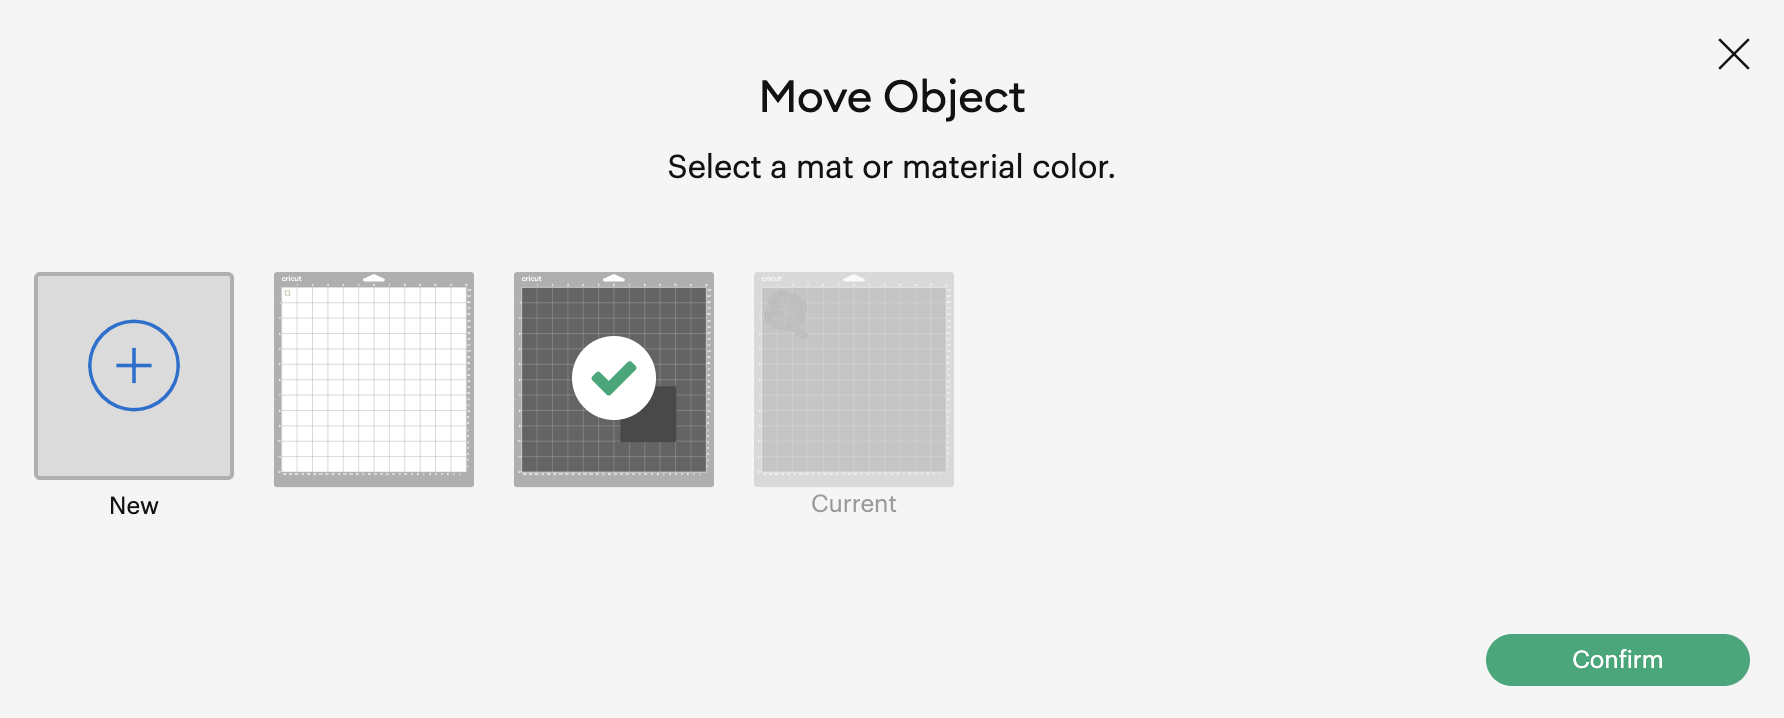
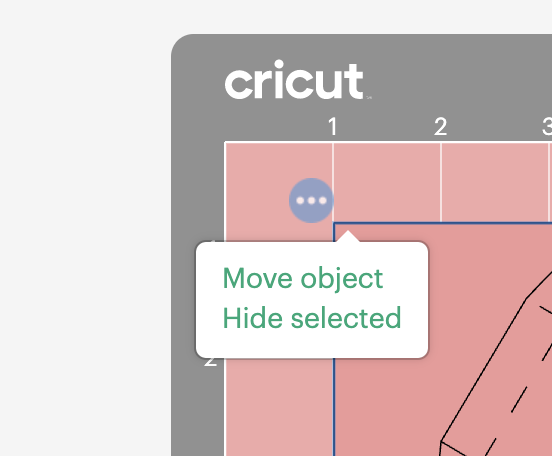
Next, I’m going to select mat number 3. Click on the 3 little dots in the corner and select Move Object.

Foiling and Cutting Cricut Design Space

Select the mat with the big square and click Confirm.

Foiling and Cutting Cricut Design Space

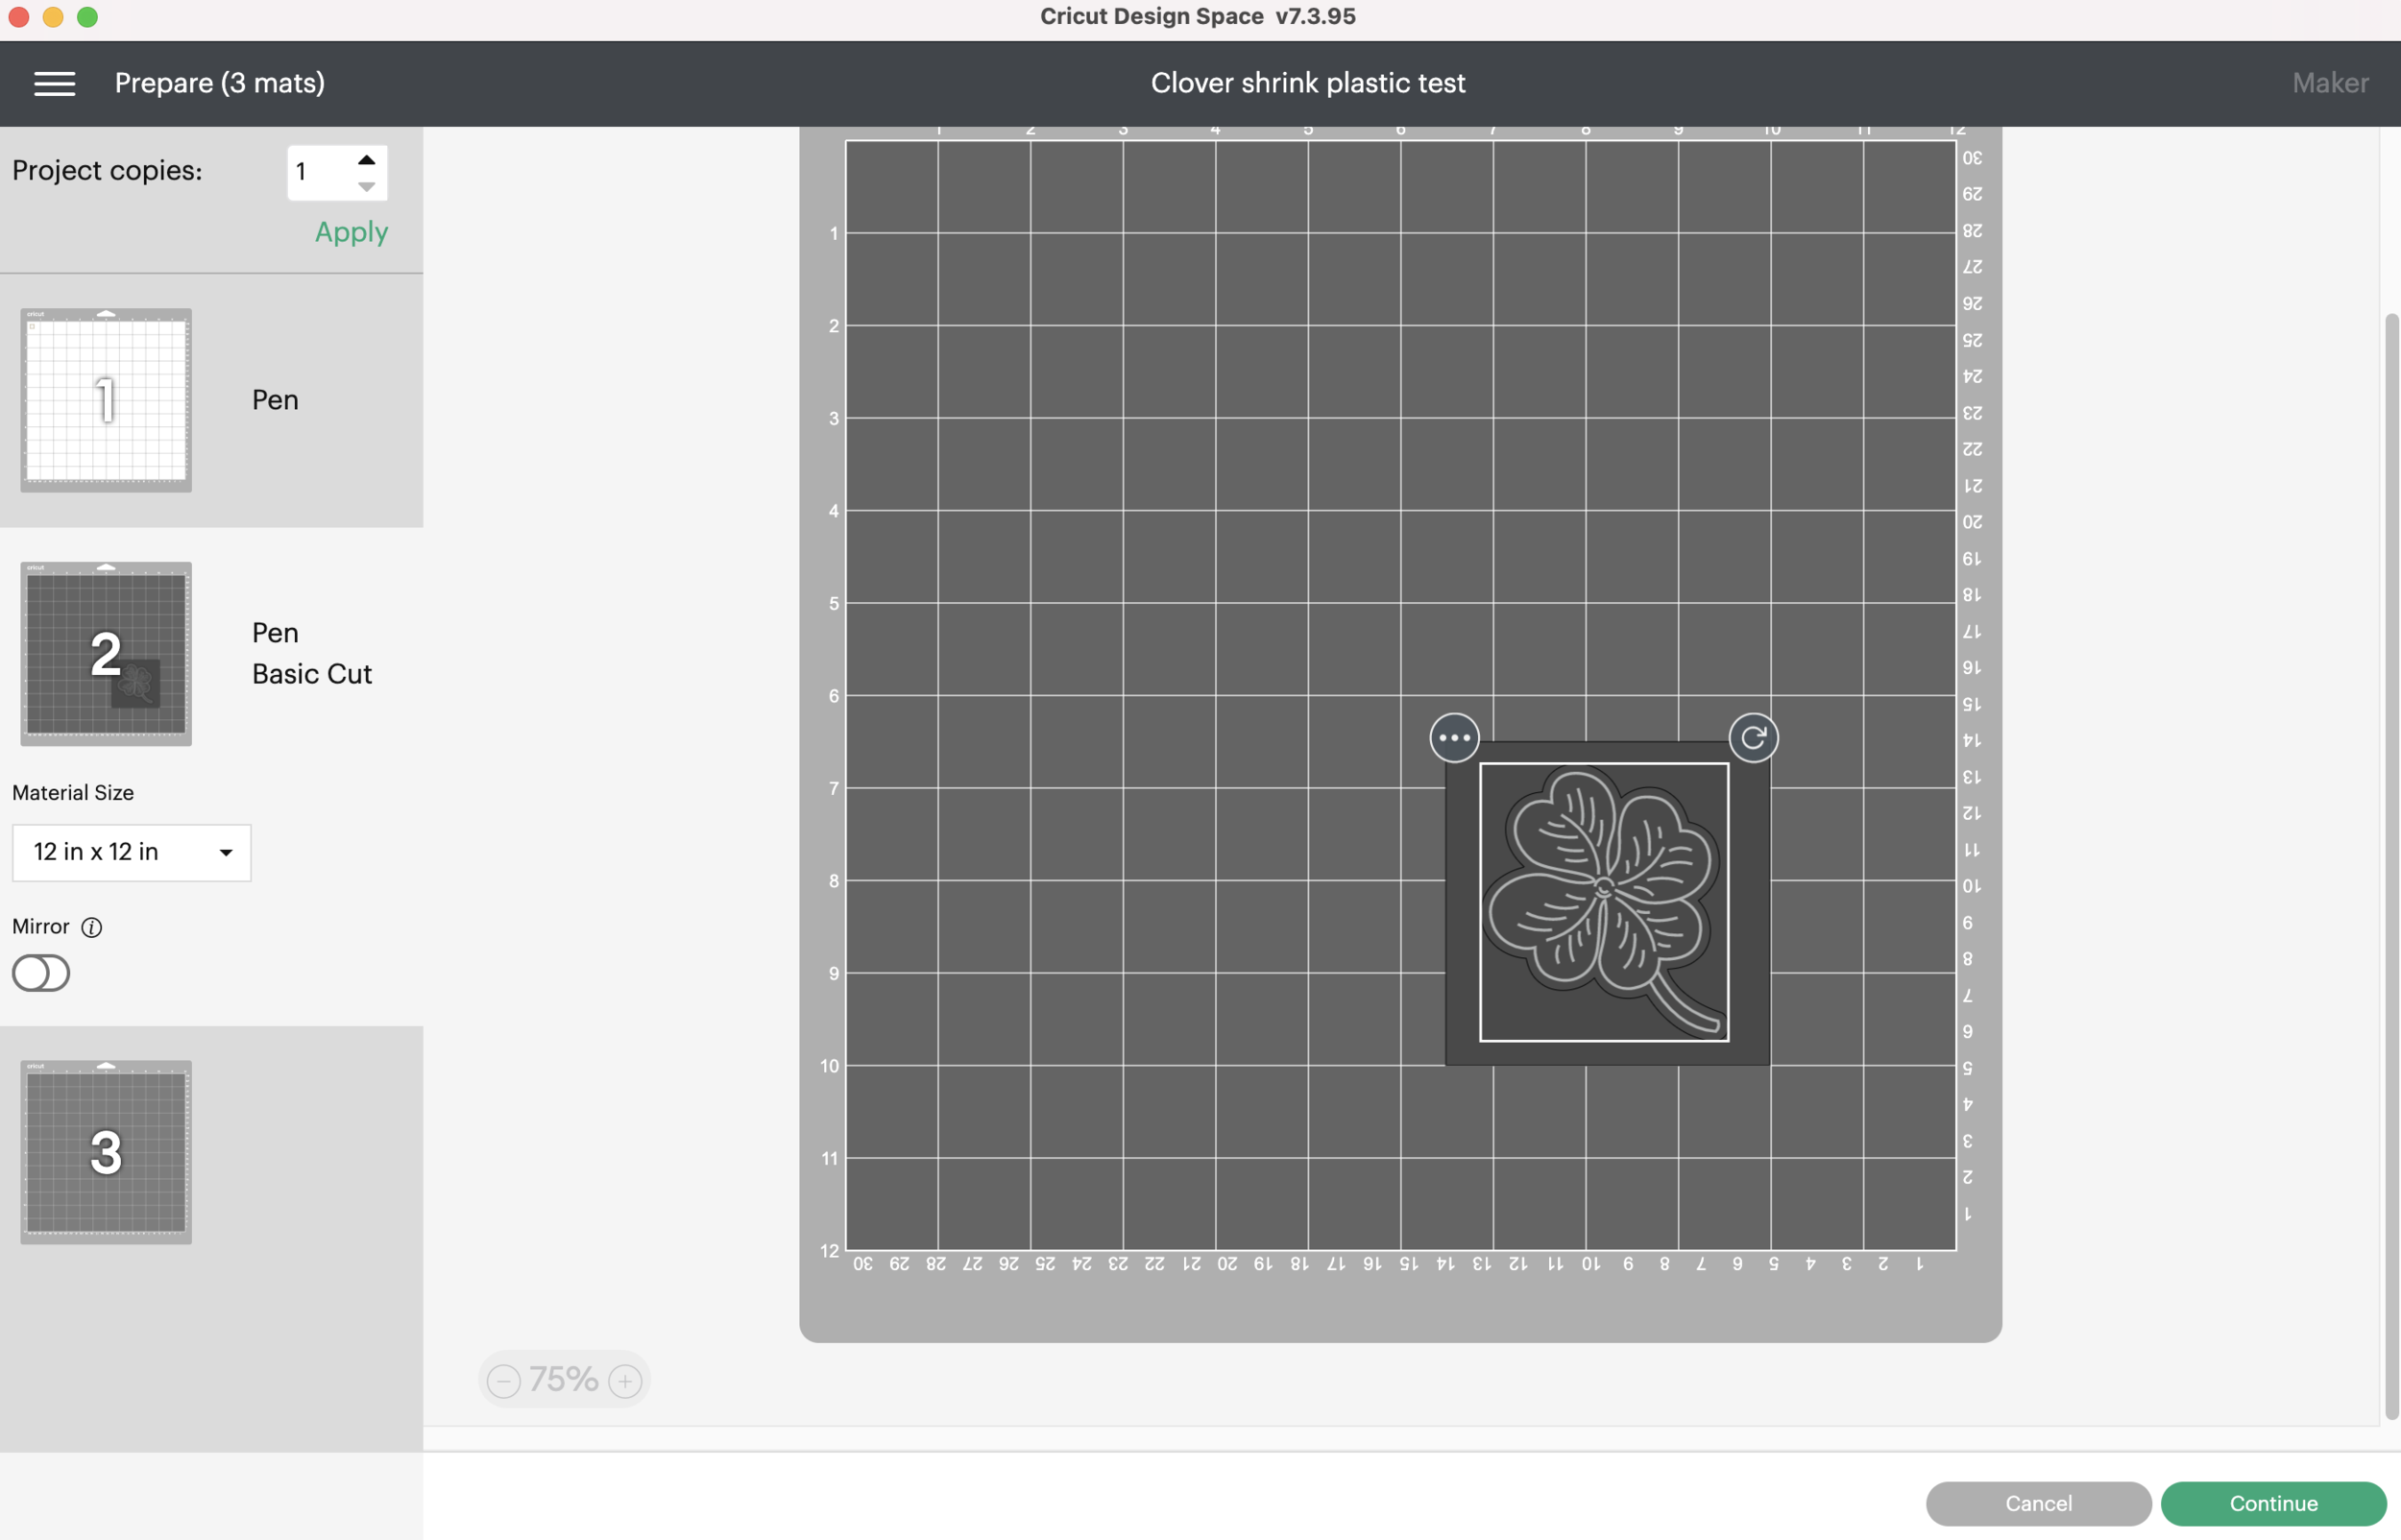
Now I’m going to place my clover over the big square.

Foiling and Cutting Cricut Design Space

Then I’m going to select mat 1, click the 3 little dots and move the small square to mat 2 with everything else. But I’m going to keep it in the upper left corner. So now, everything is on mat 2. Isn’t this such a pain?!!

Foiling and Cutting Cricut Design Space

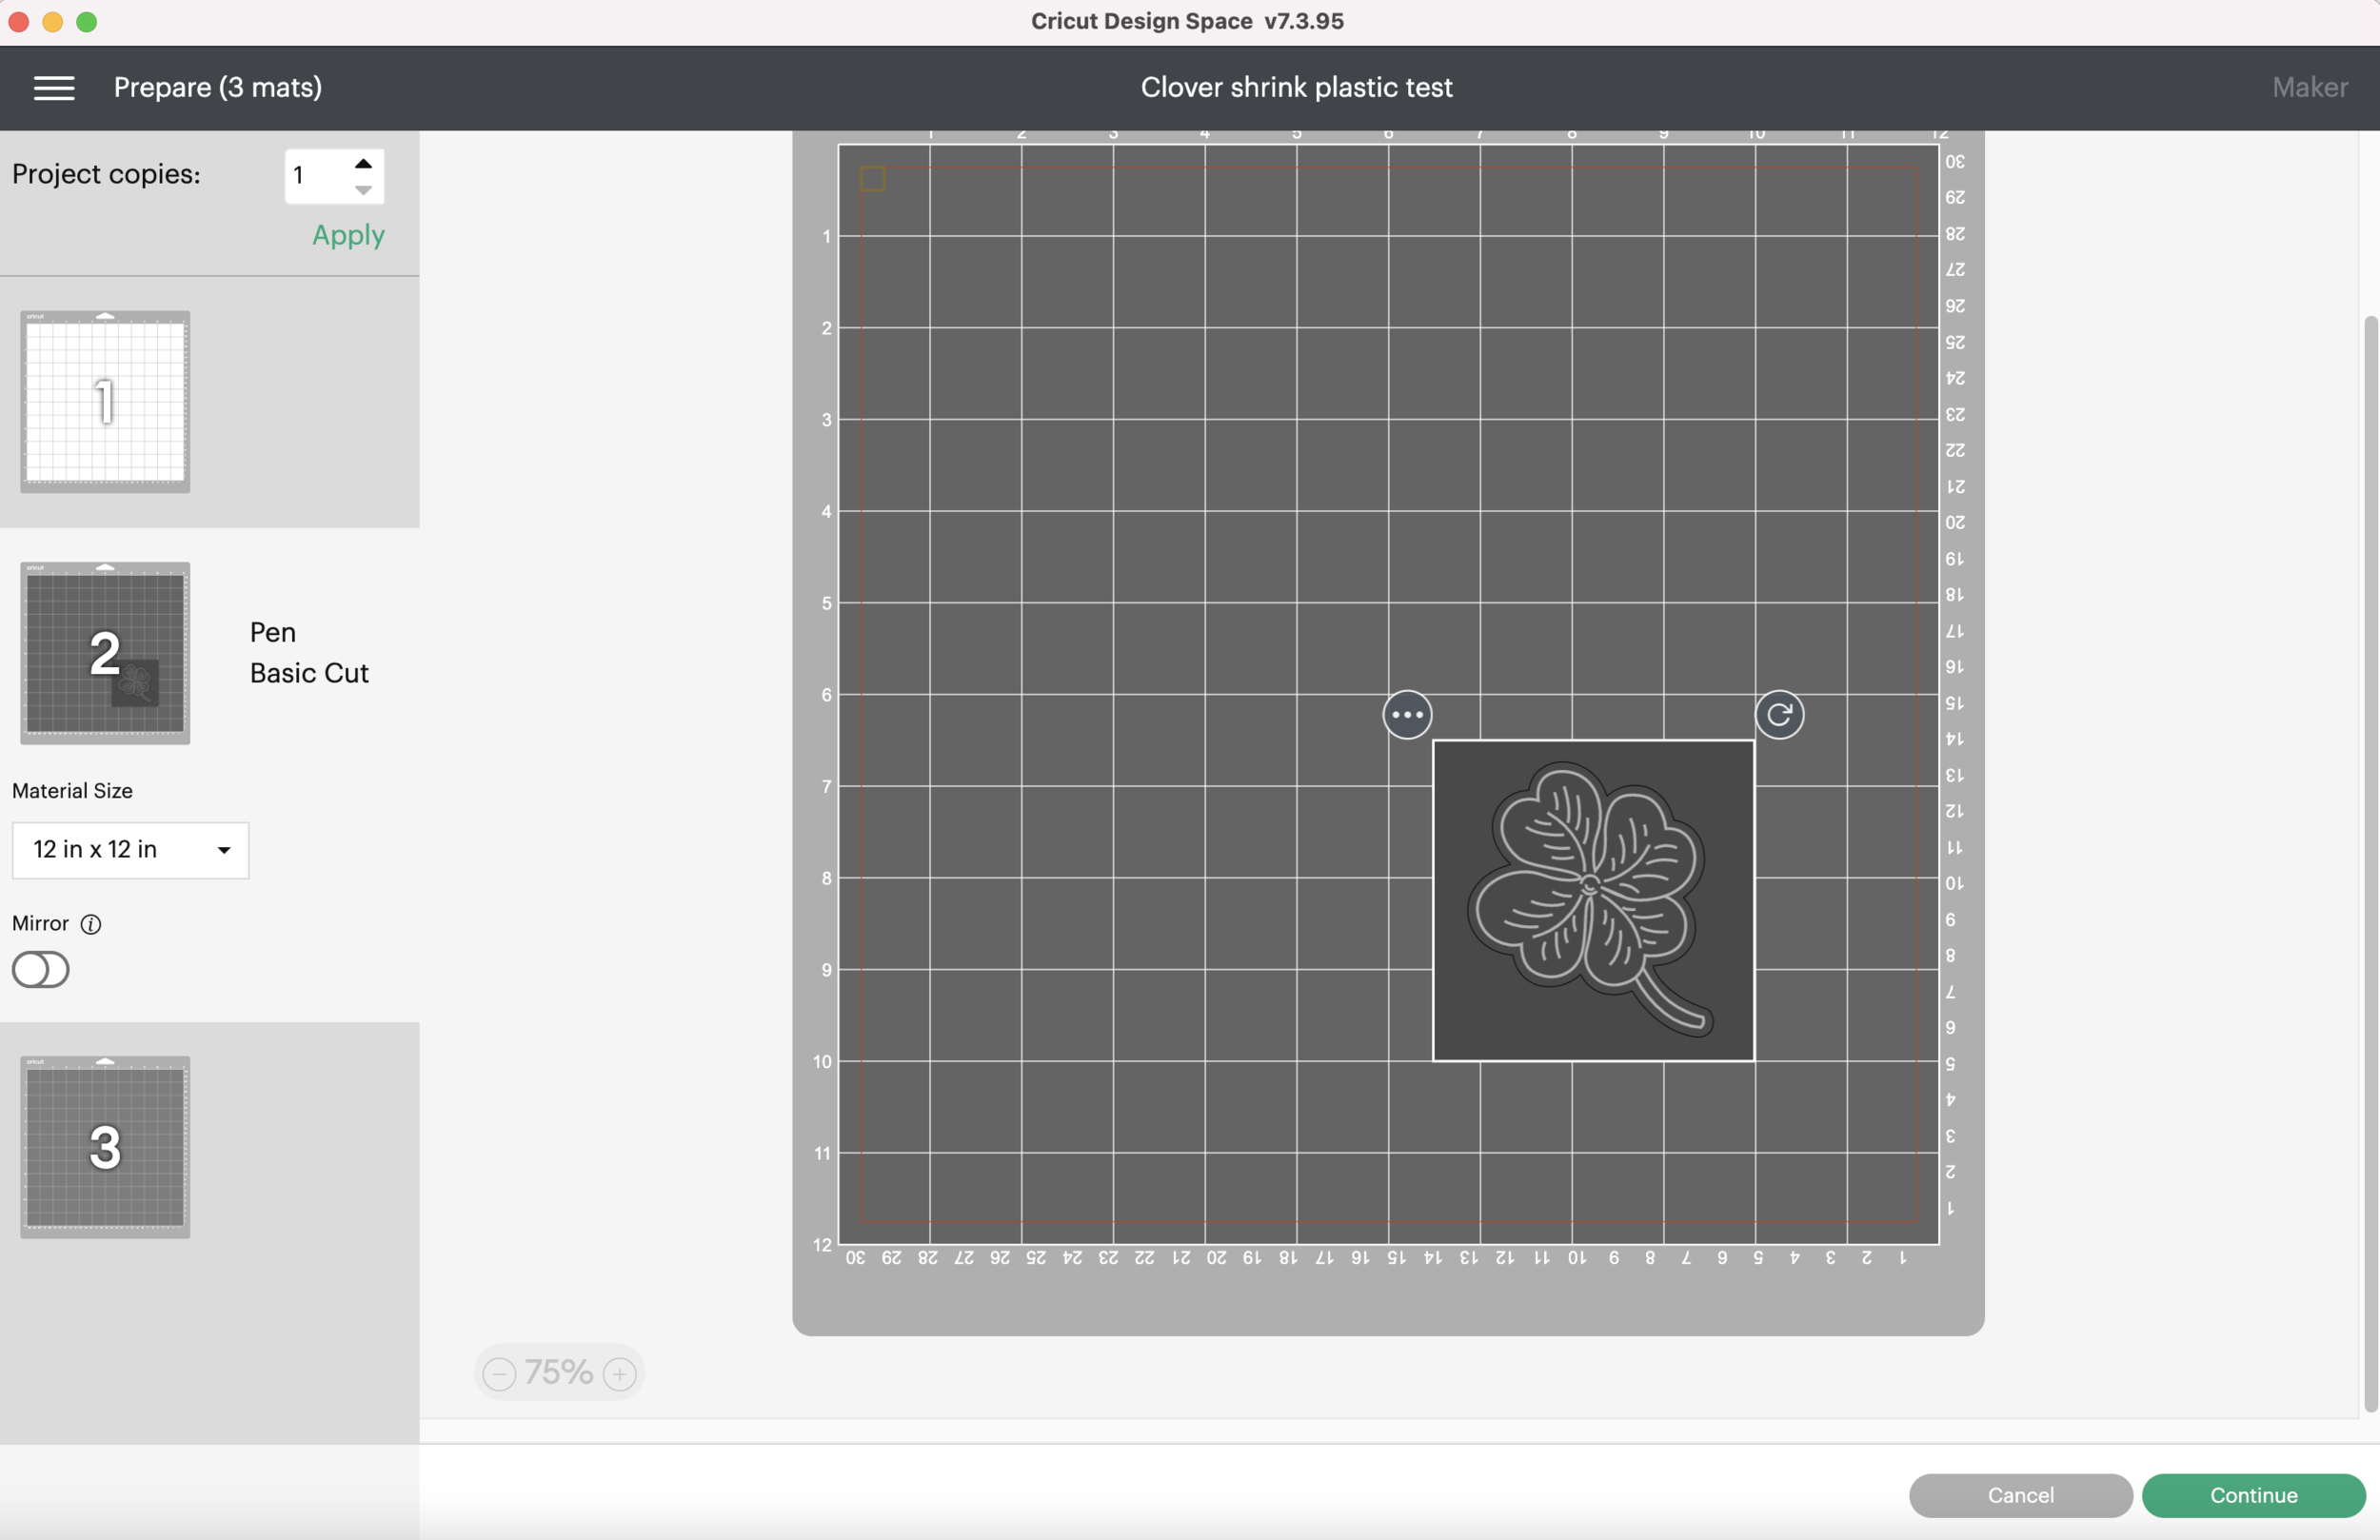
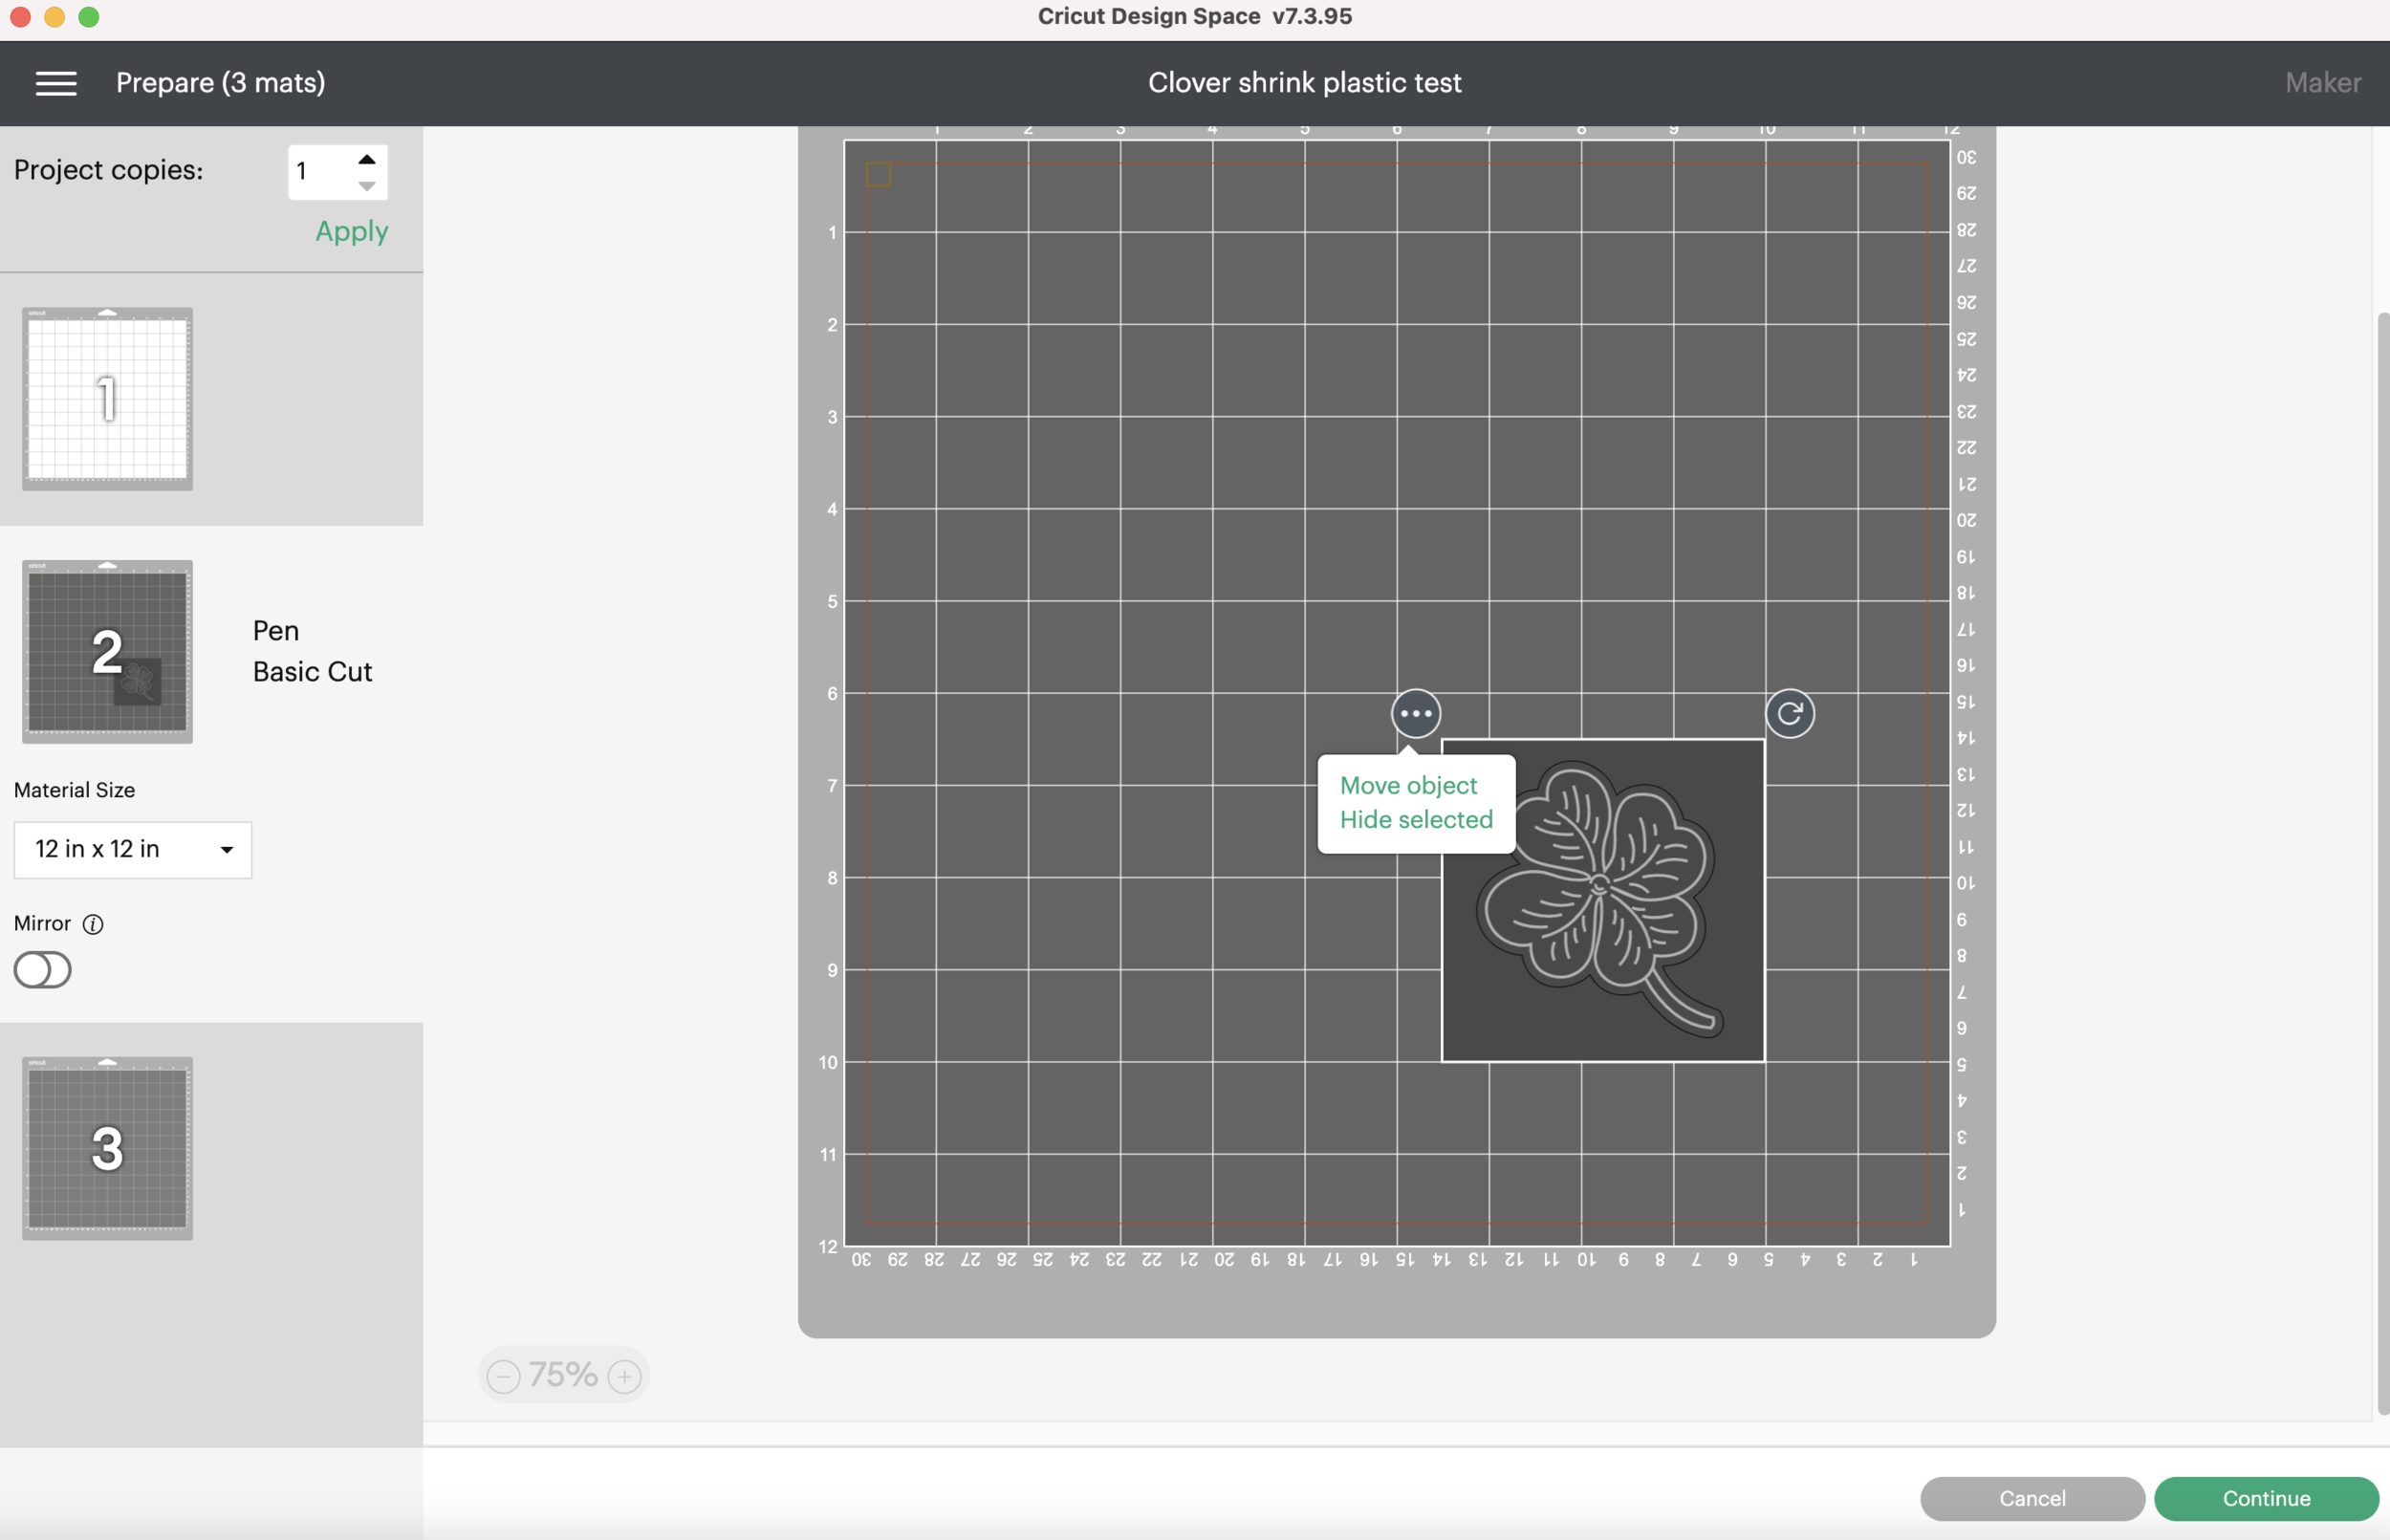
Now I will select the 3 dots and hide the large square. It was only there so I could put my clover in the correct place on the mat

Foiling and Cutting Cricut Design Space

It’s probably a good time to plug in your Foil Quill to get it warmed up!

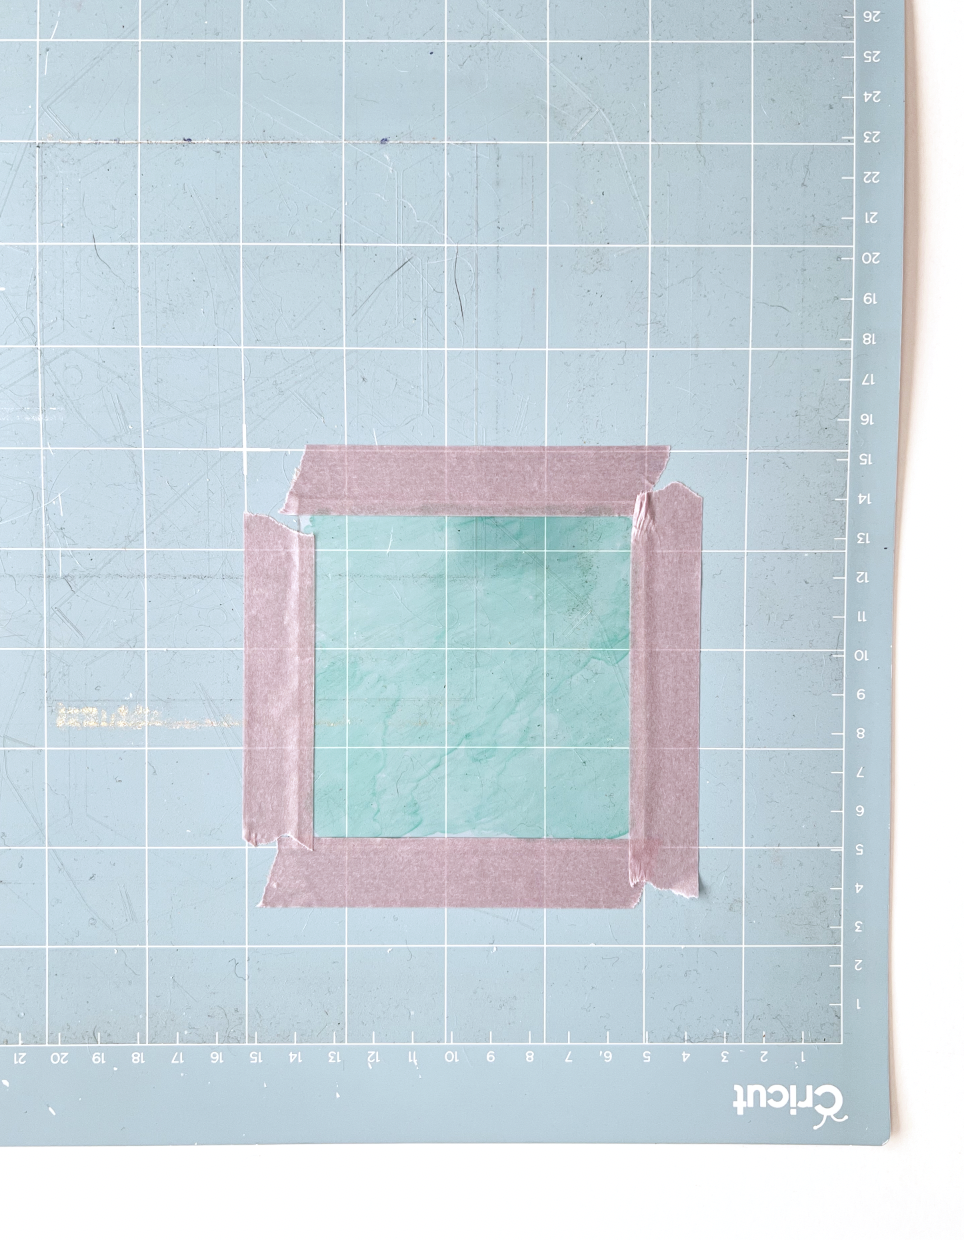
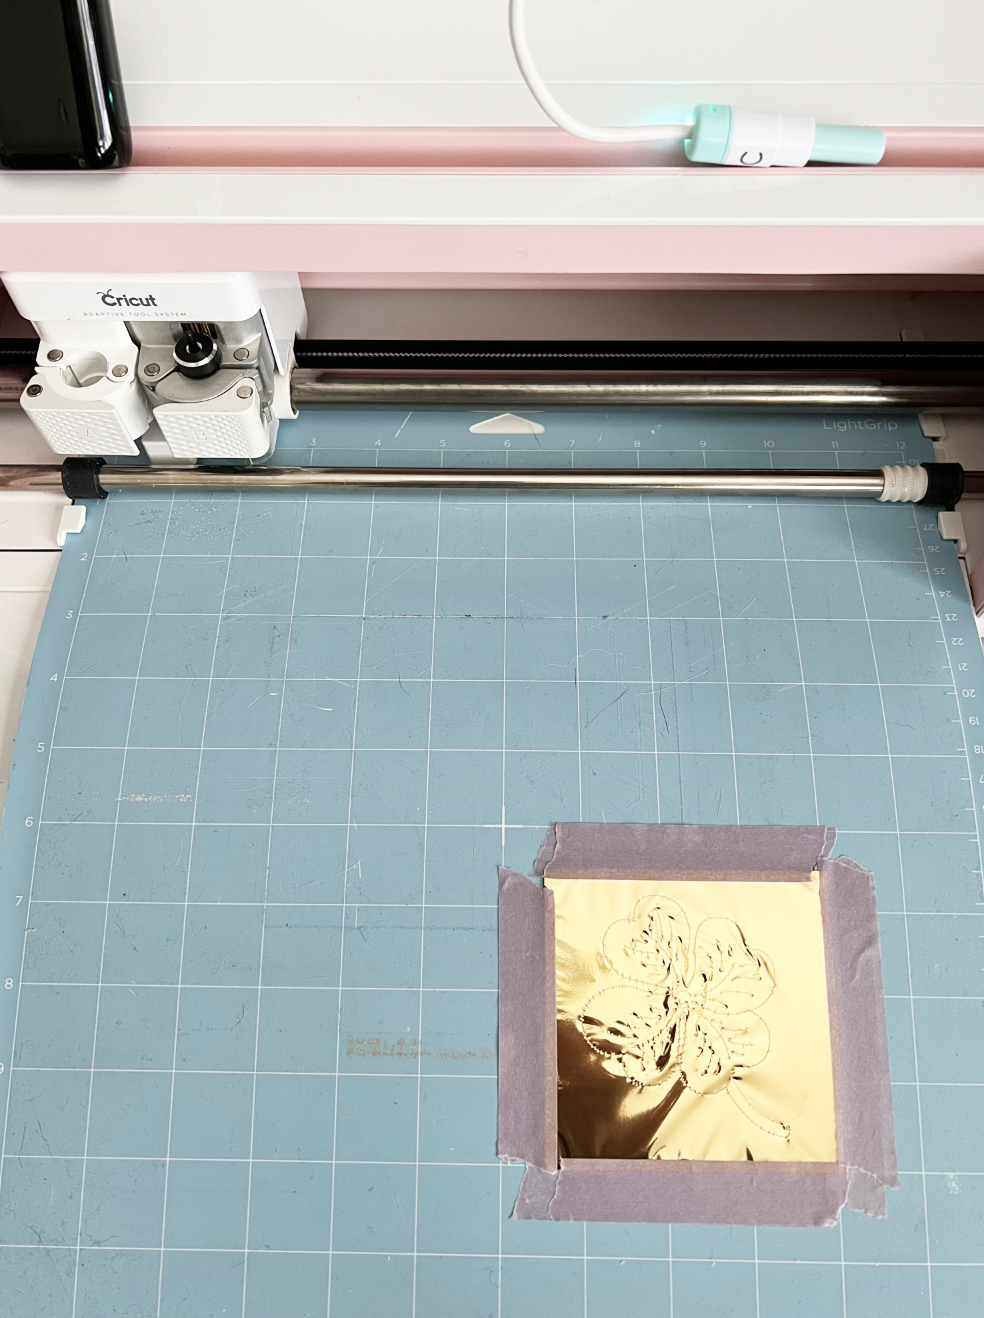
Now I’m going to tape my shrink plastic square on my mat on all four sides. It’s in the same position on my mat as the 3.5 x 3.5 square was in Design Space.

Foiling and Cutting Cricut Design Space

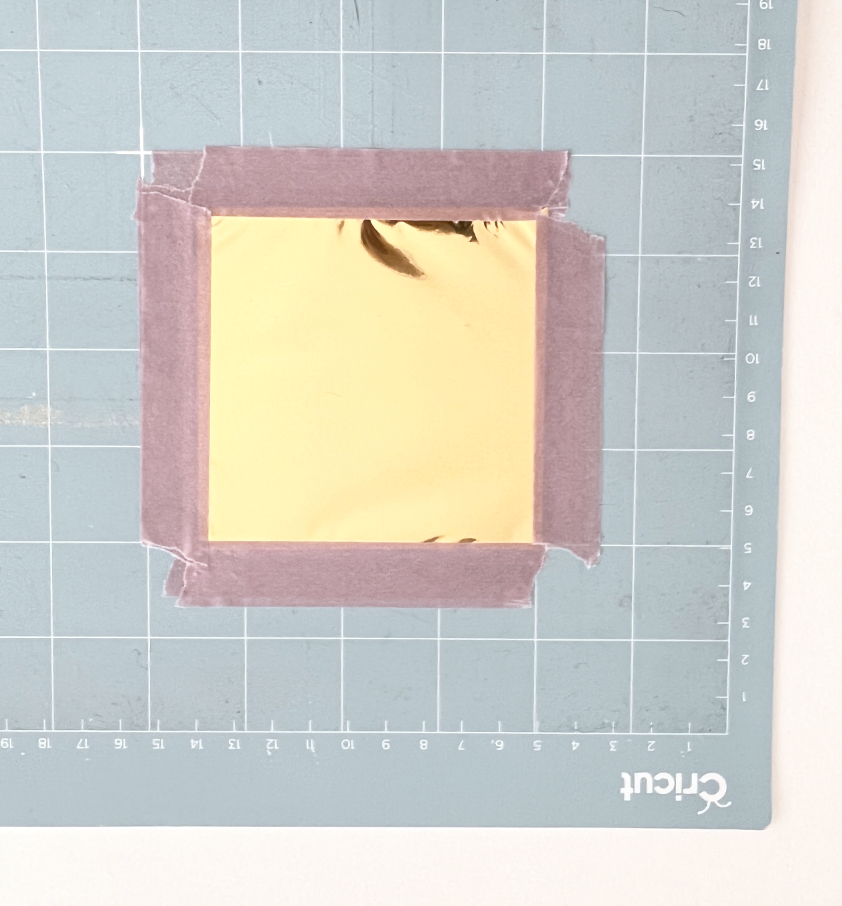
Then I’m going to tape my foil on top of the shrink plastic on all four sides.

Foiling and Cutting Cricut Design Space

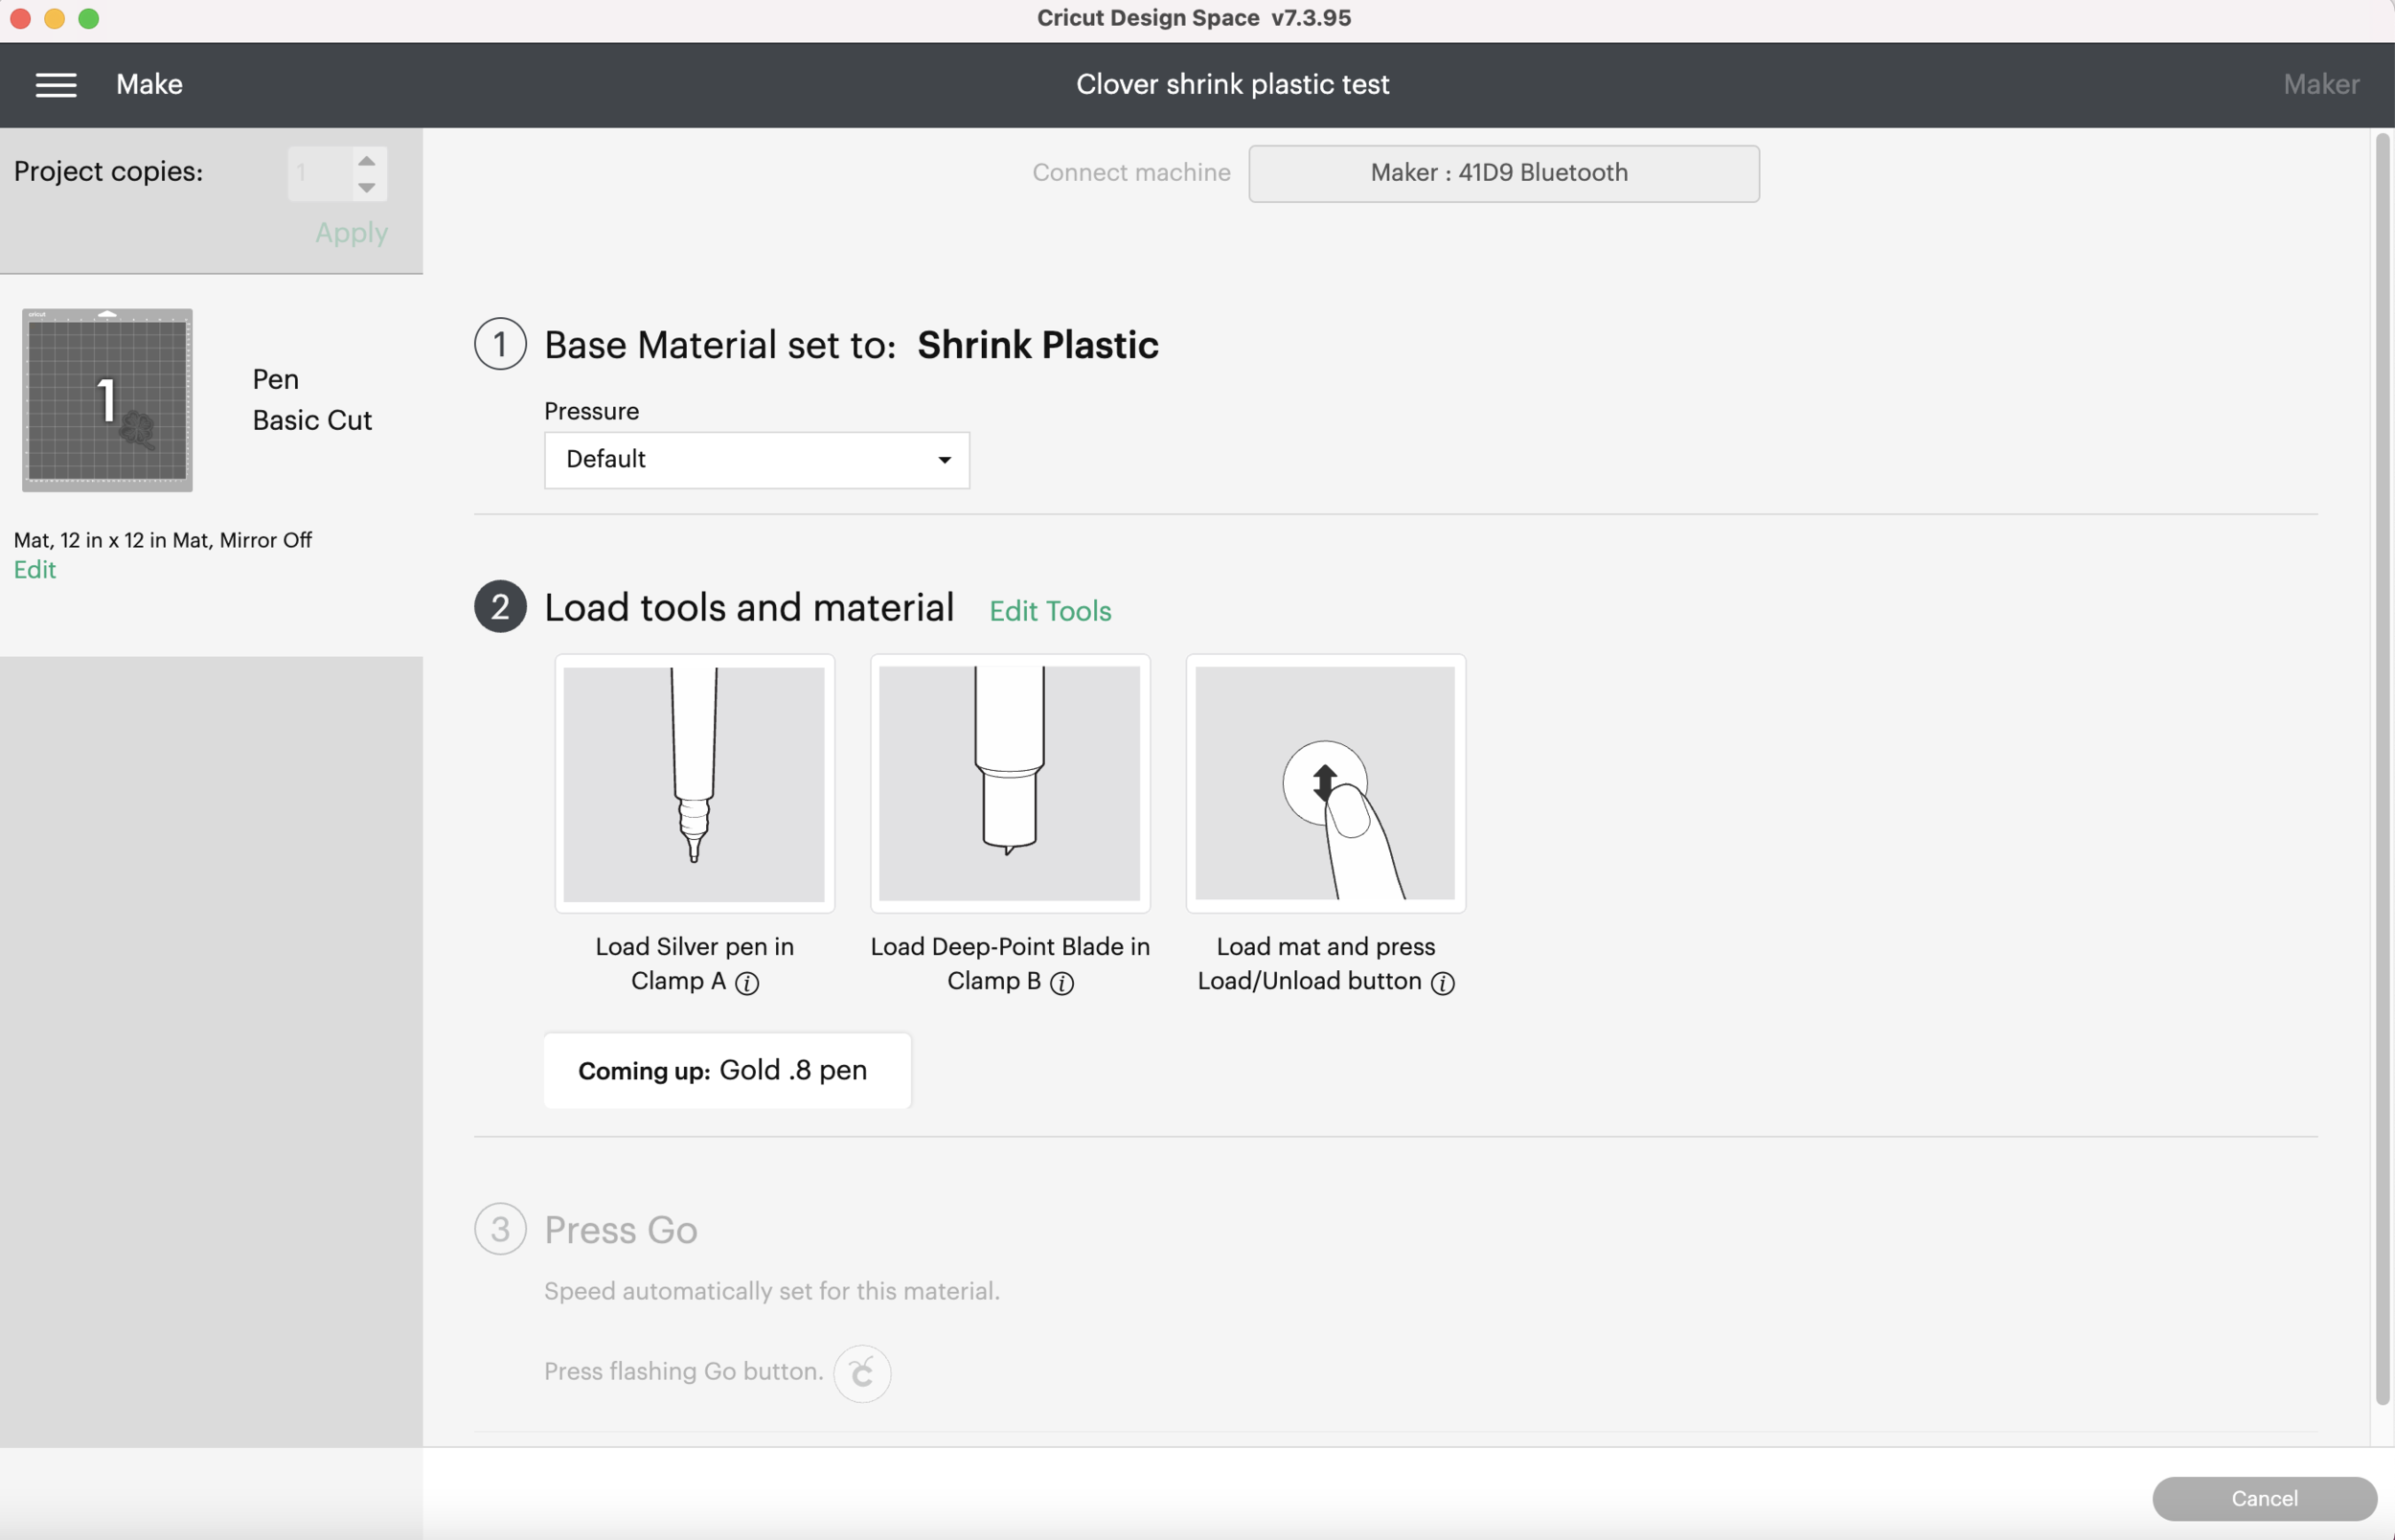
Back in Design Space, I’m going to click Continue. I tested some shrink plastic a while ago and I ended up making my own custom material setting that I named “Shrink Plastic.” (real original, I know). I’m going to search the materials and find my Shrink Plastic setting. (For some reason Cricut Design Space won’t allow me to save it as a favorite, I just get an error.)

Foiling and Cutting Cricut Design Space

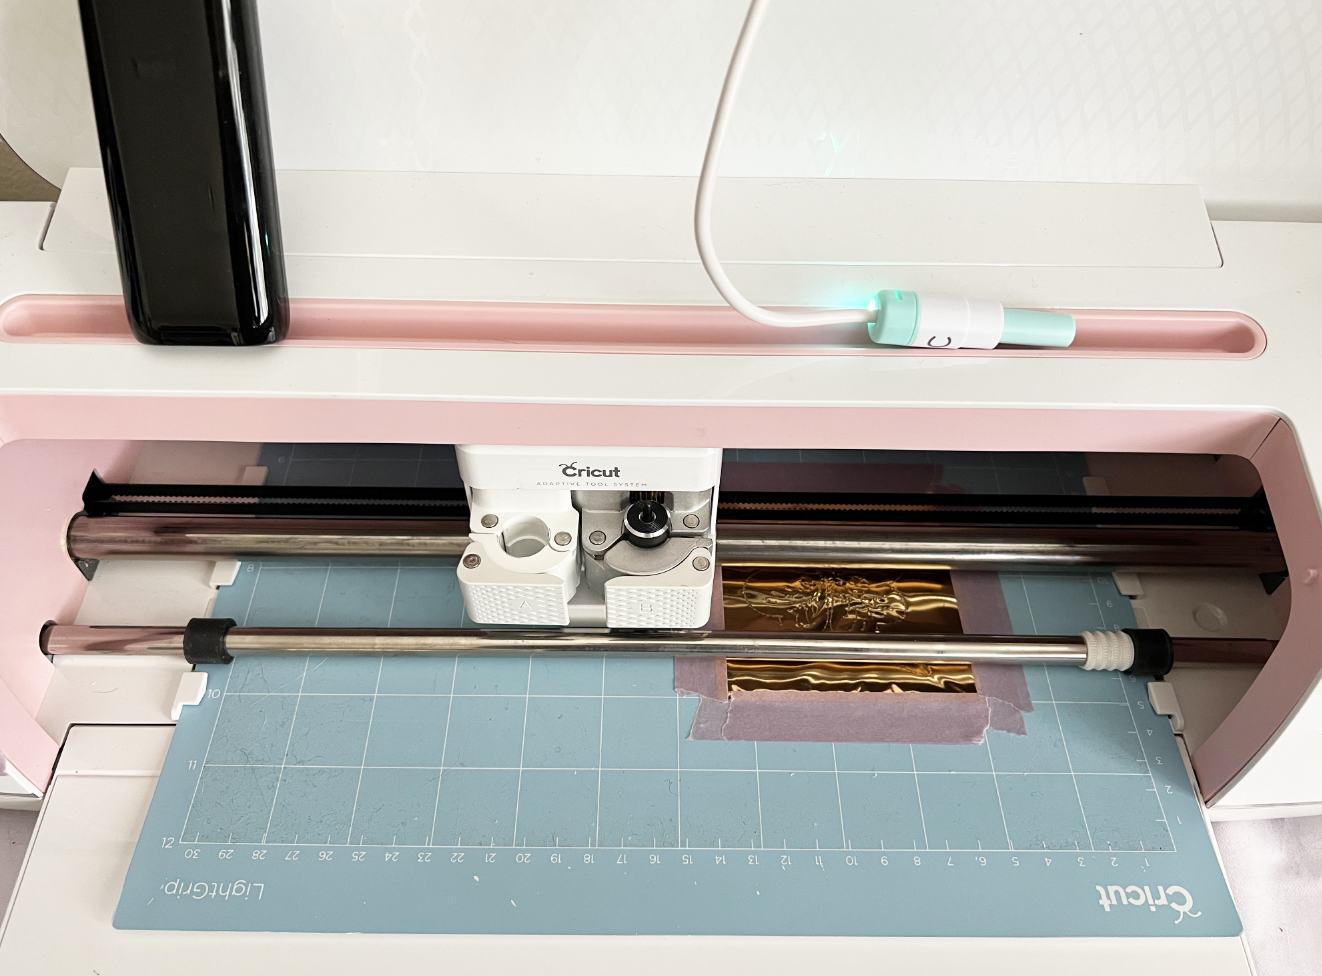
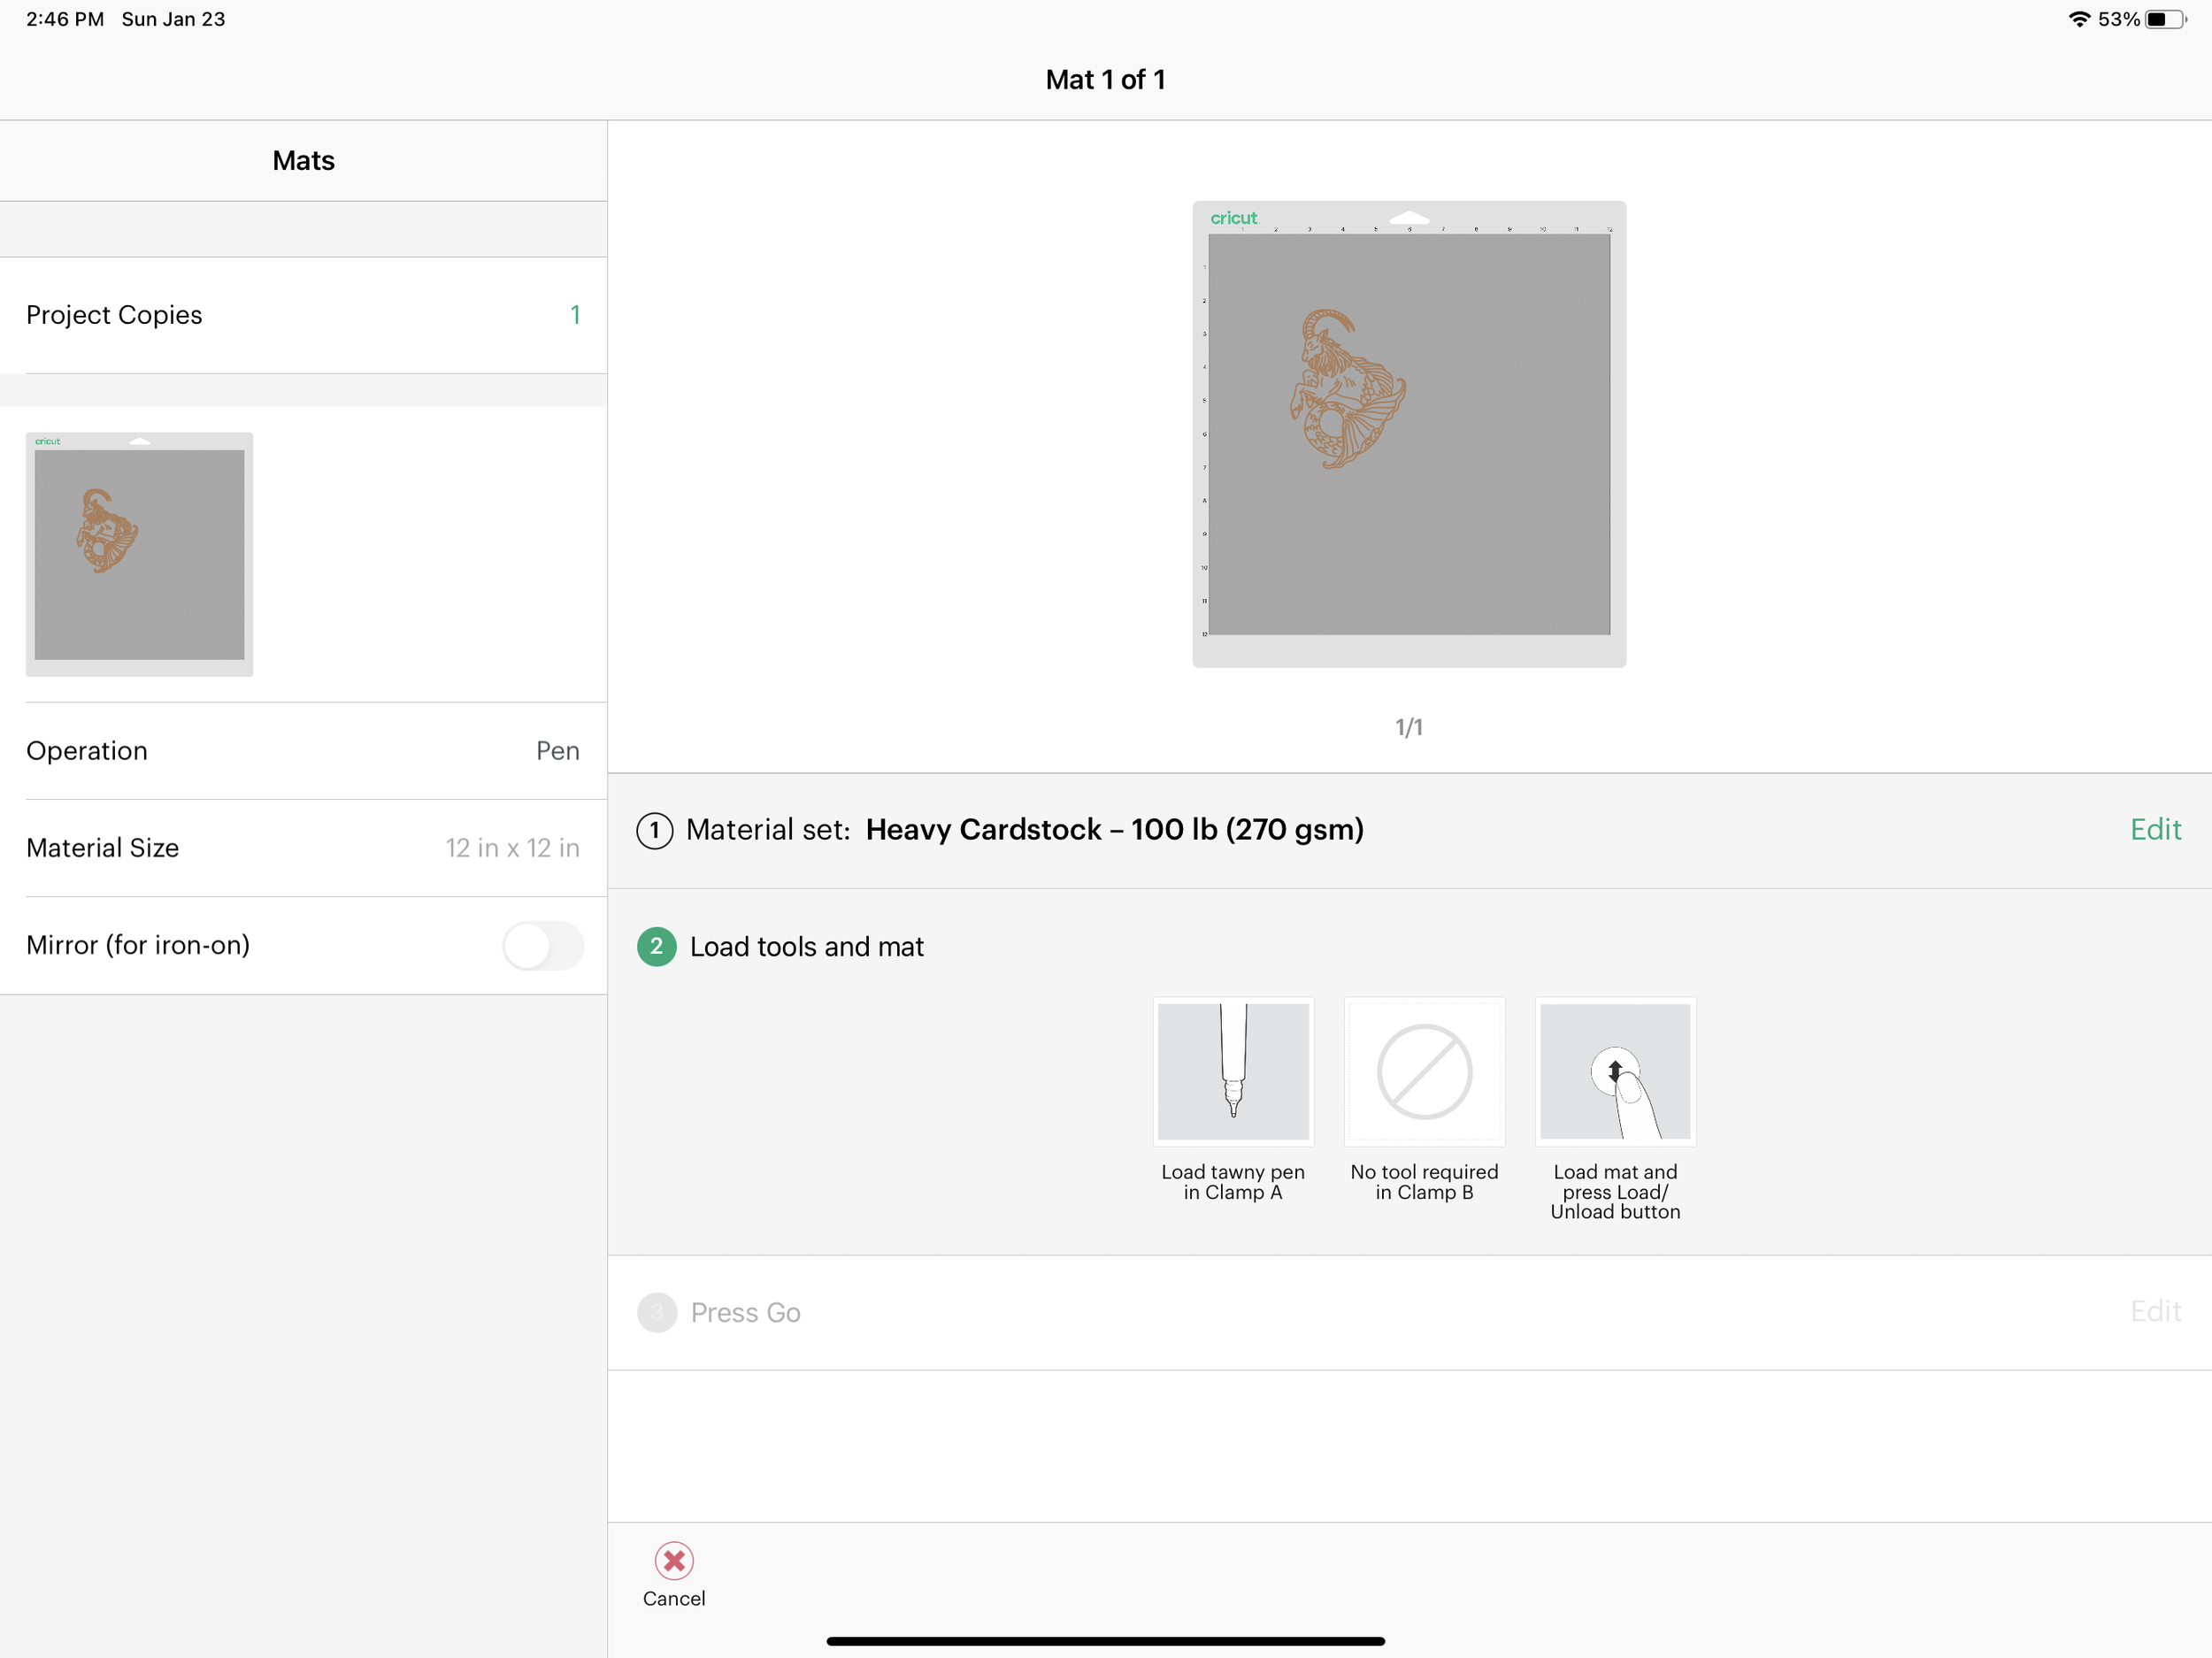
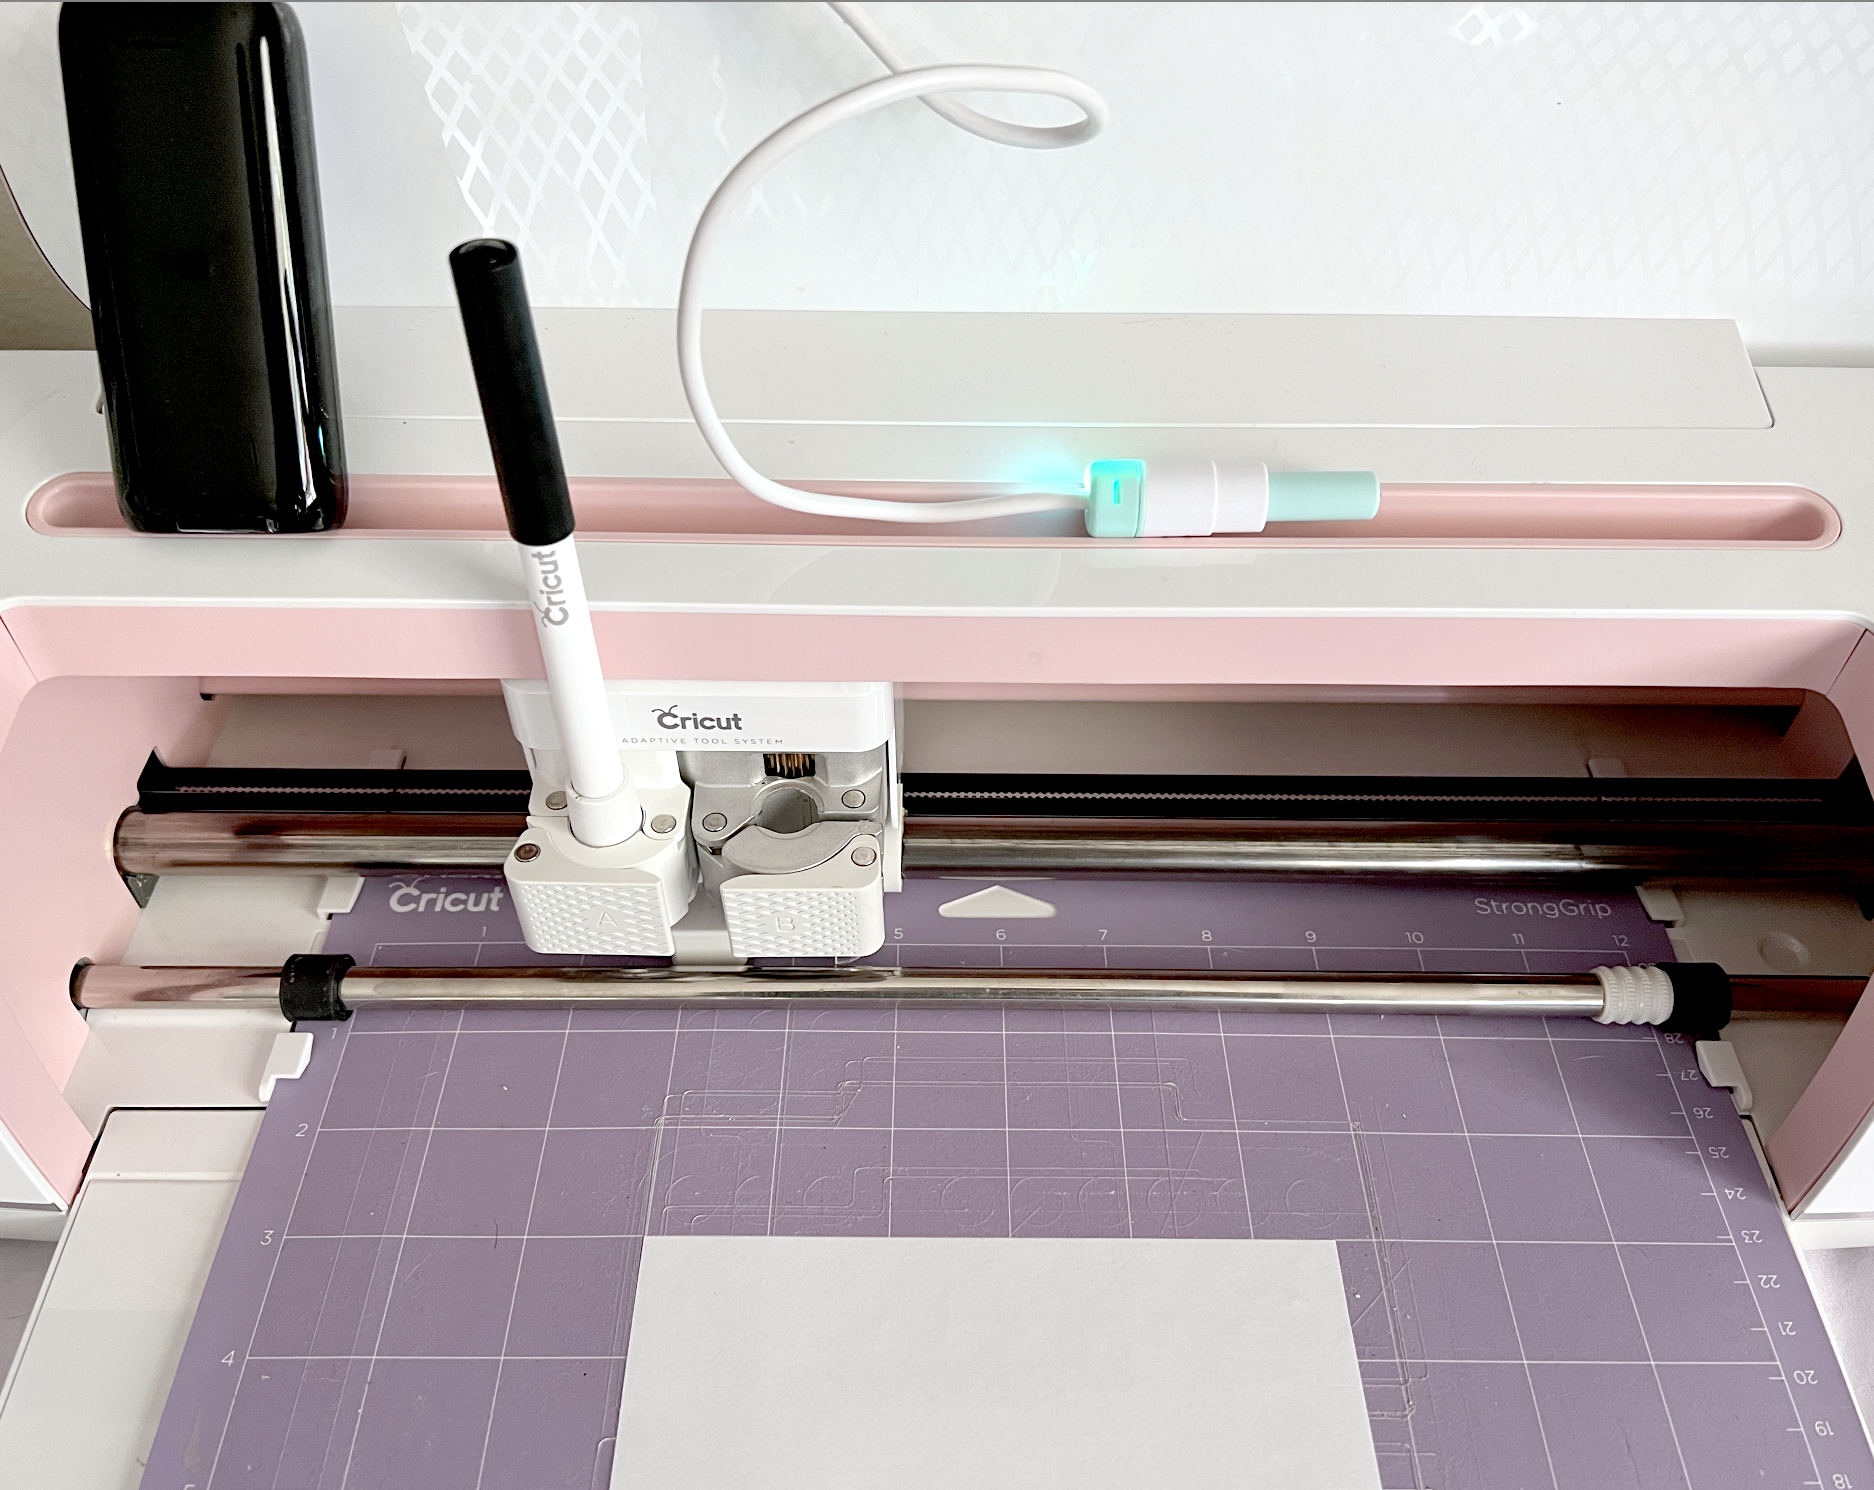
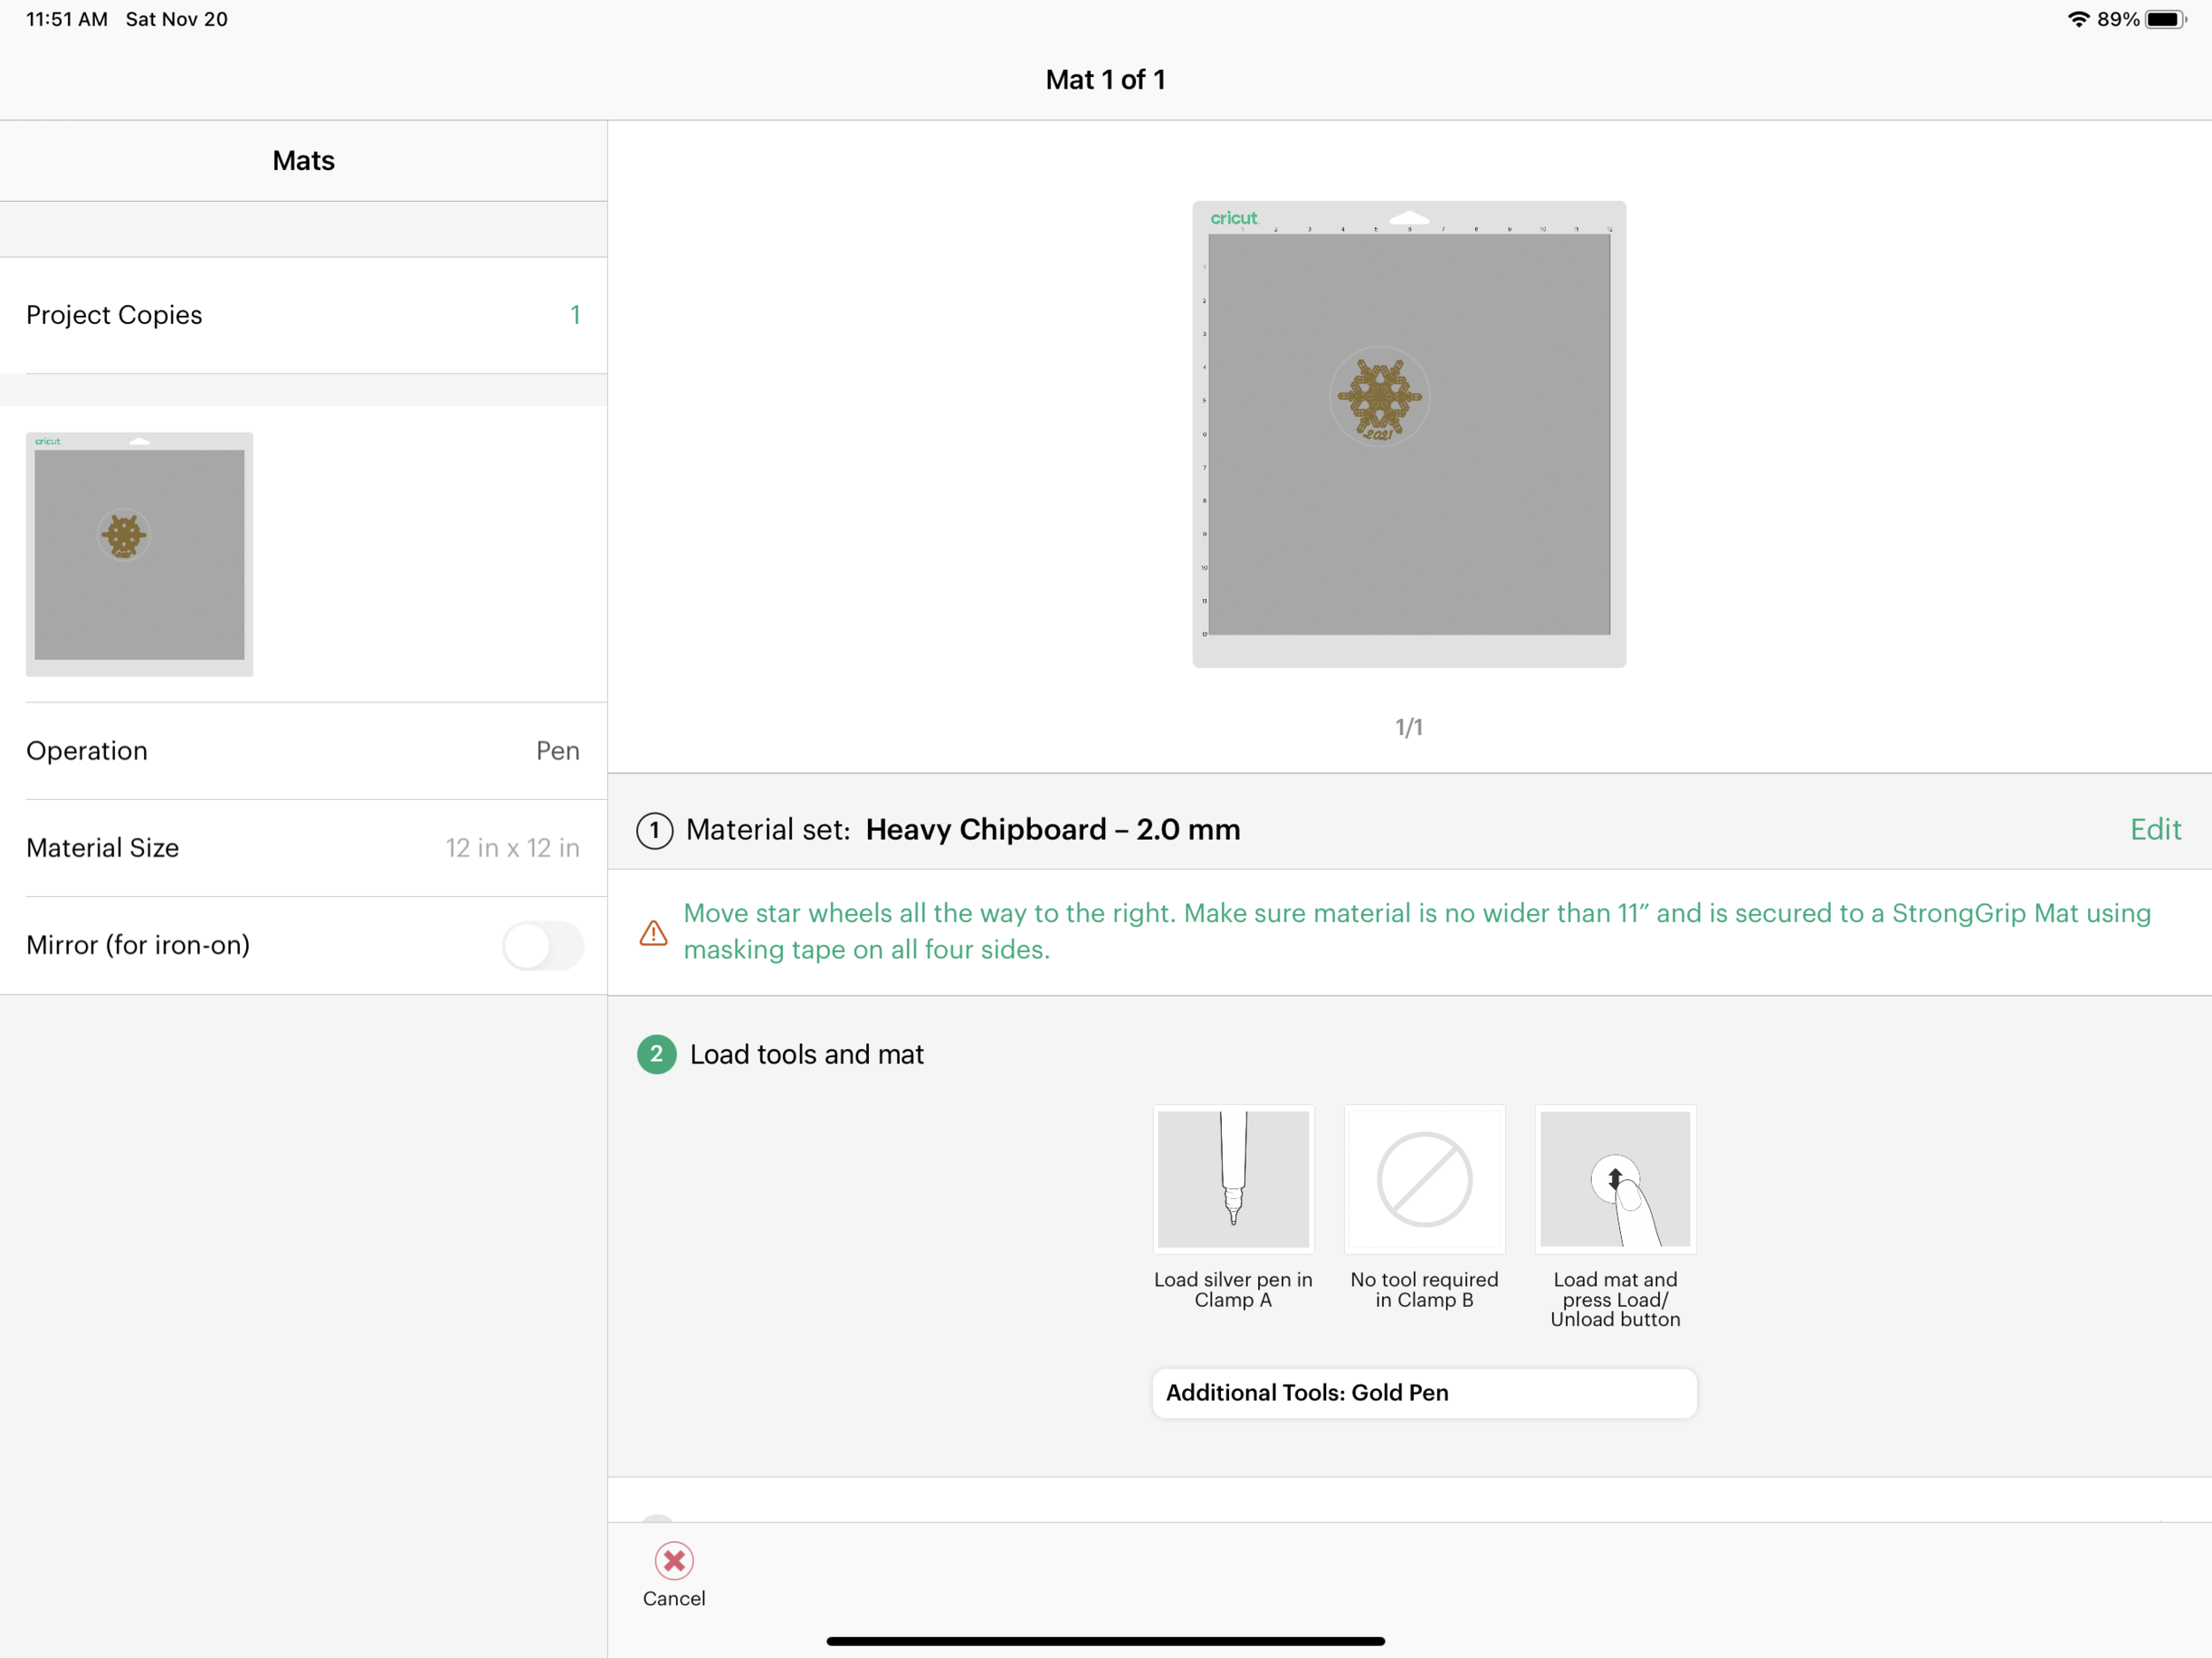
Design Space is prompting me to load the silver pen in clamp A. I'm using my foil quill in clamp A instead. I don’t have anything loaded into clamp B. I load my mat into my machine and I press the Go button.

Foiling and Cutting Cricut Design Space

After the machine is done foiling, my design is still under the rollers so I can’t remove the foil. (What a pain! This is why I have the little square up in the corner of my mat).

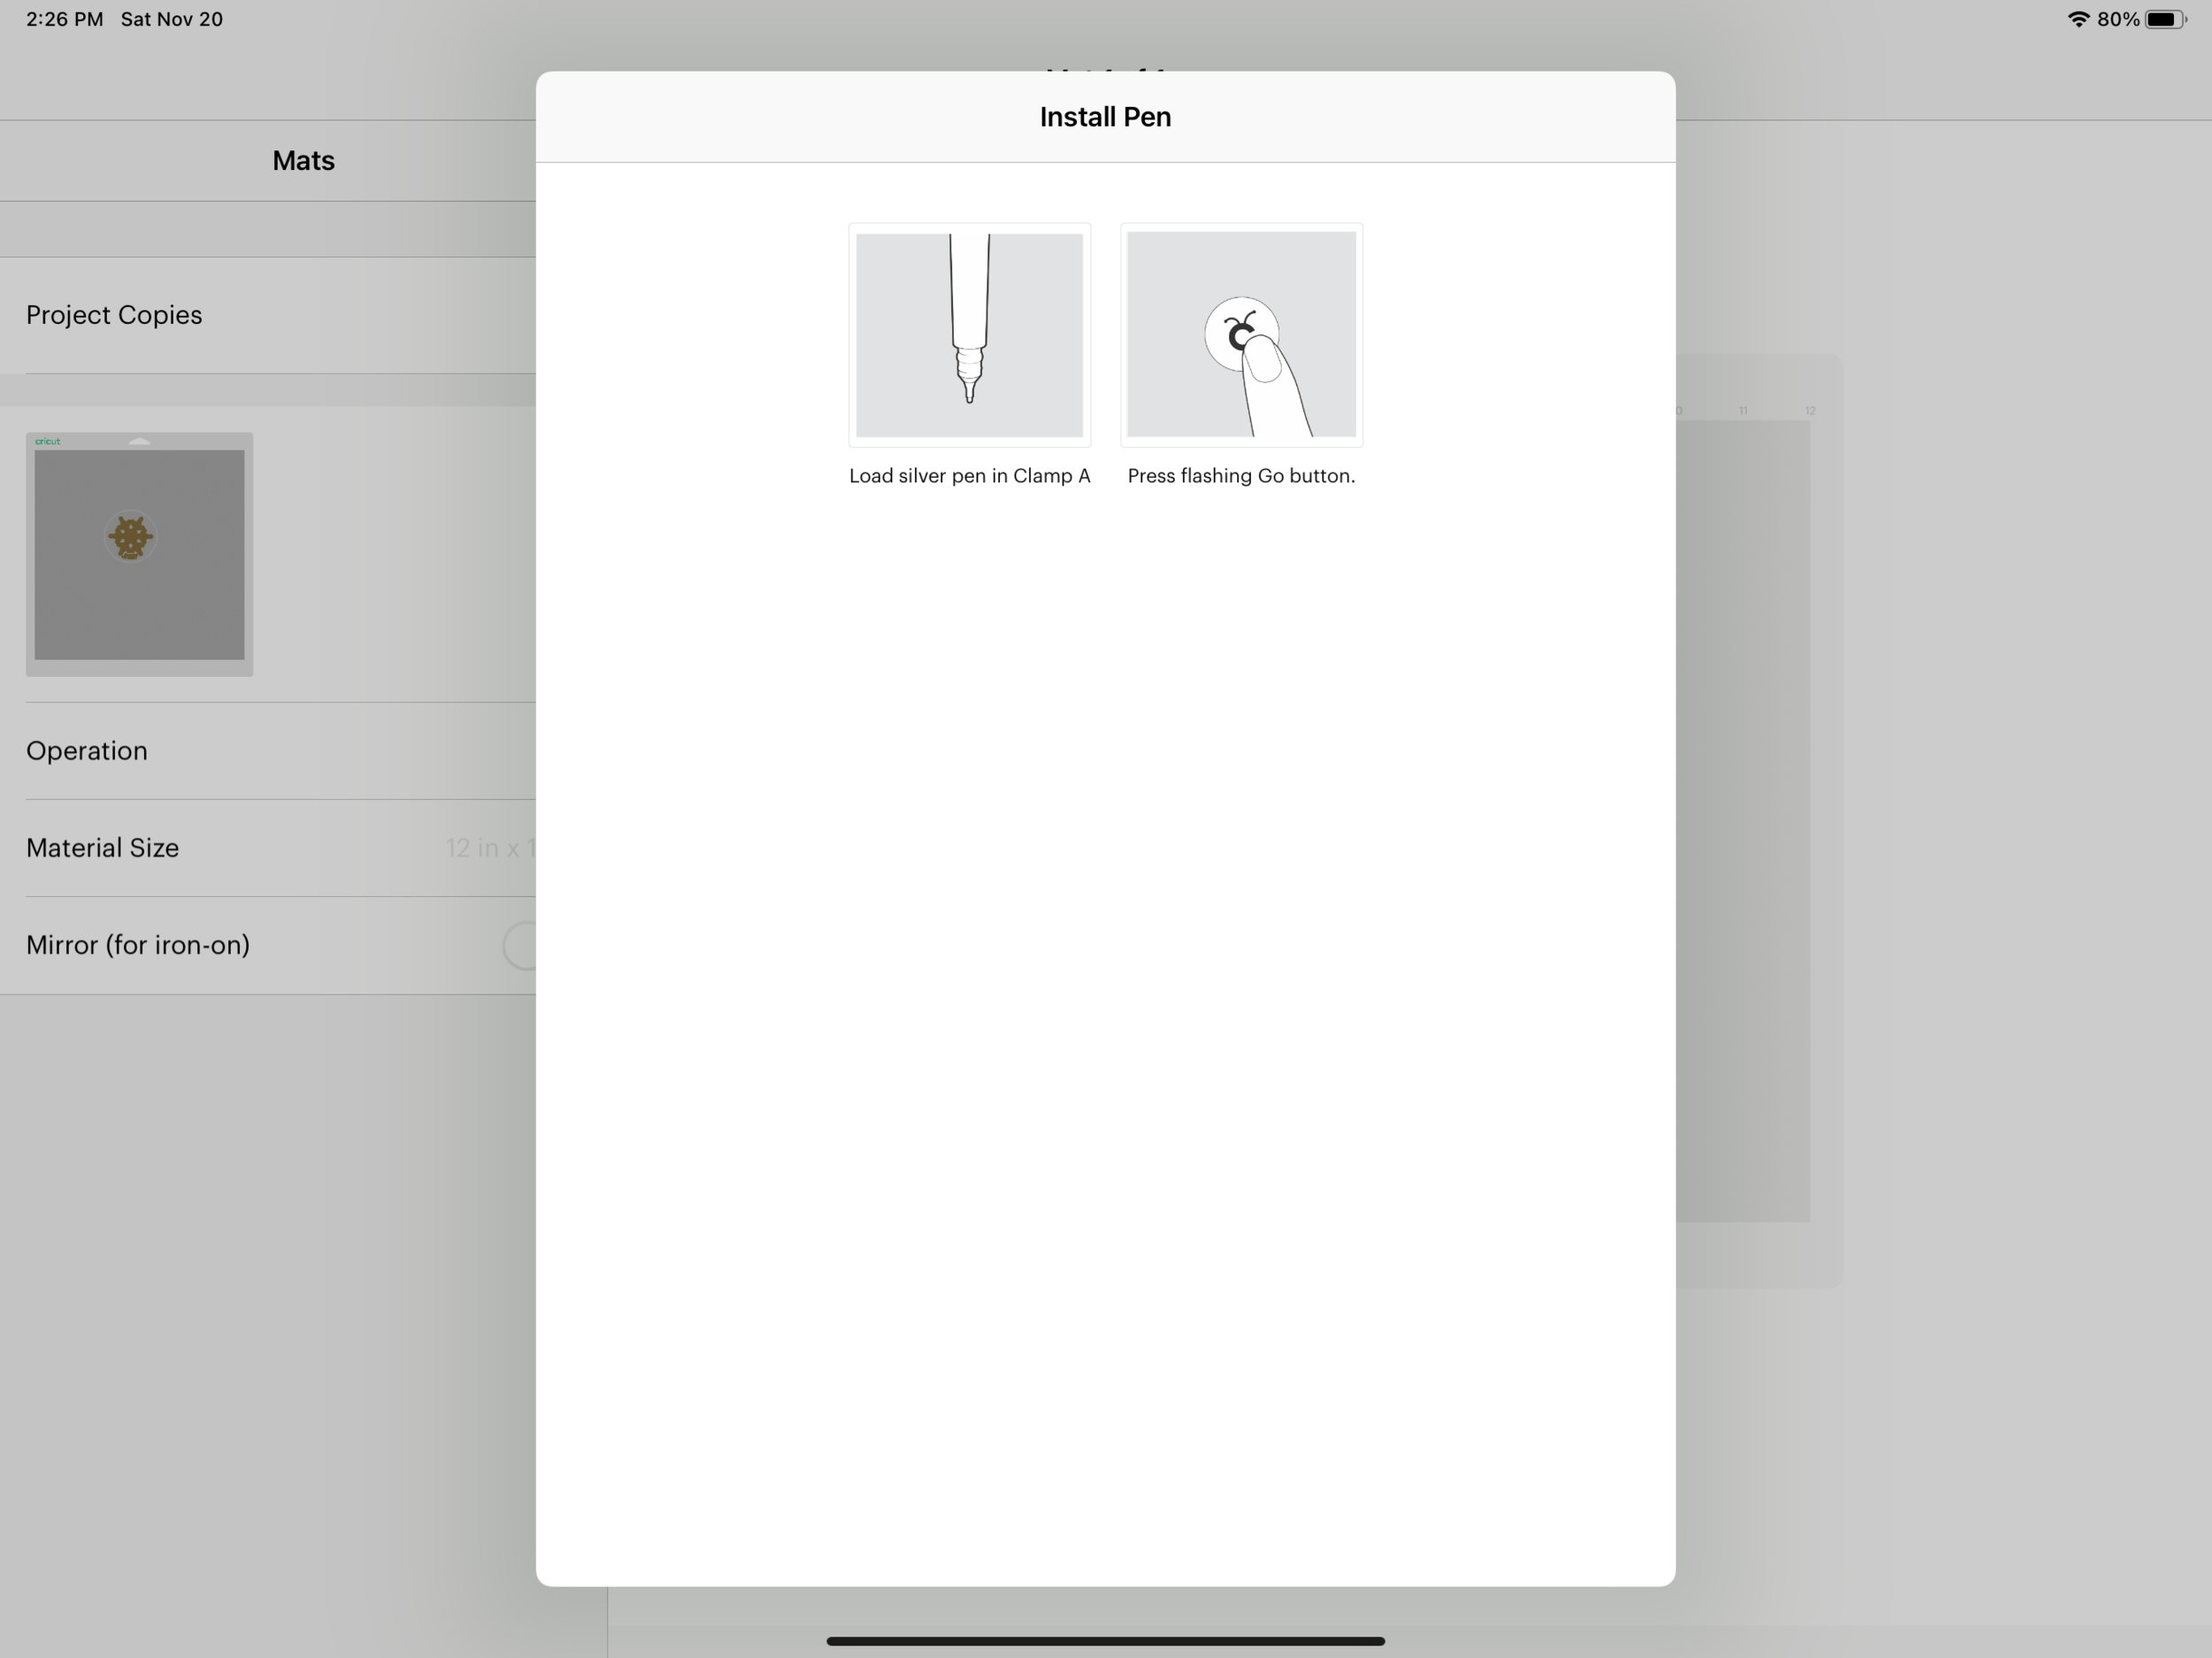
It’s going to prompt me to load the gold pen into clamp A. I’m actually going to remove the foil quill (Careful, that tip is hot!) and load the Deep Cut blade into Clamp B. Press go on my machine.

Foiling and Cutting Cricut Design Space

My machine is going to move to the top of the mat to “Draw” the little square. I need to QUICKLY press the Pause button on my machine. Now I can easily remove the foil from my design.

Foiling and Cutting Cricut Design Space

Once I press the Pause button again, my machine will continue with the Deep Cut blade.

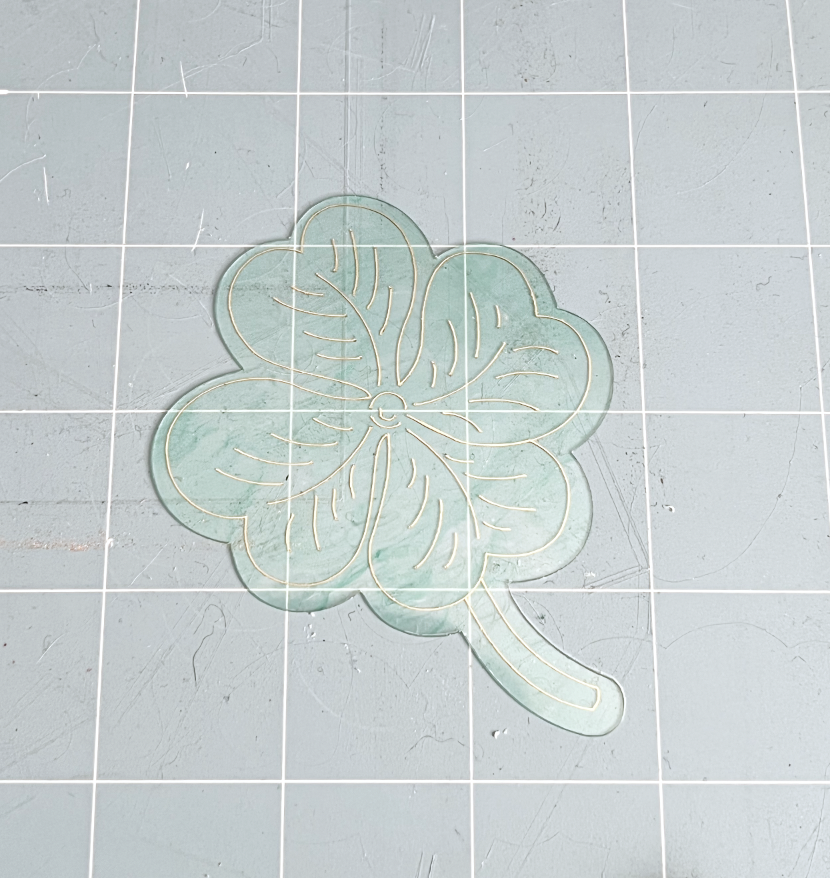
My cutline and drawing aren’t quite centered, so I may have to calibrate my machine. I’m going to go ahead and use this piece anyway since it won’t be as obvious once I shrink it.

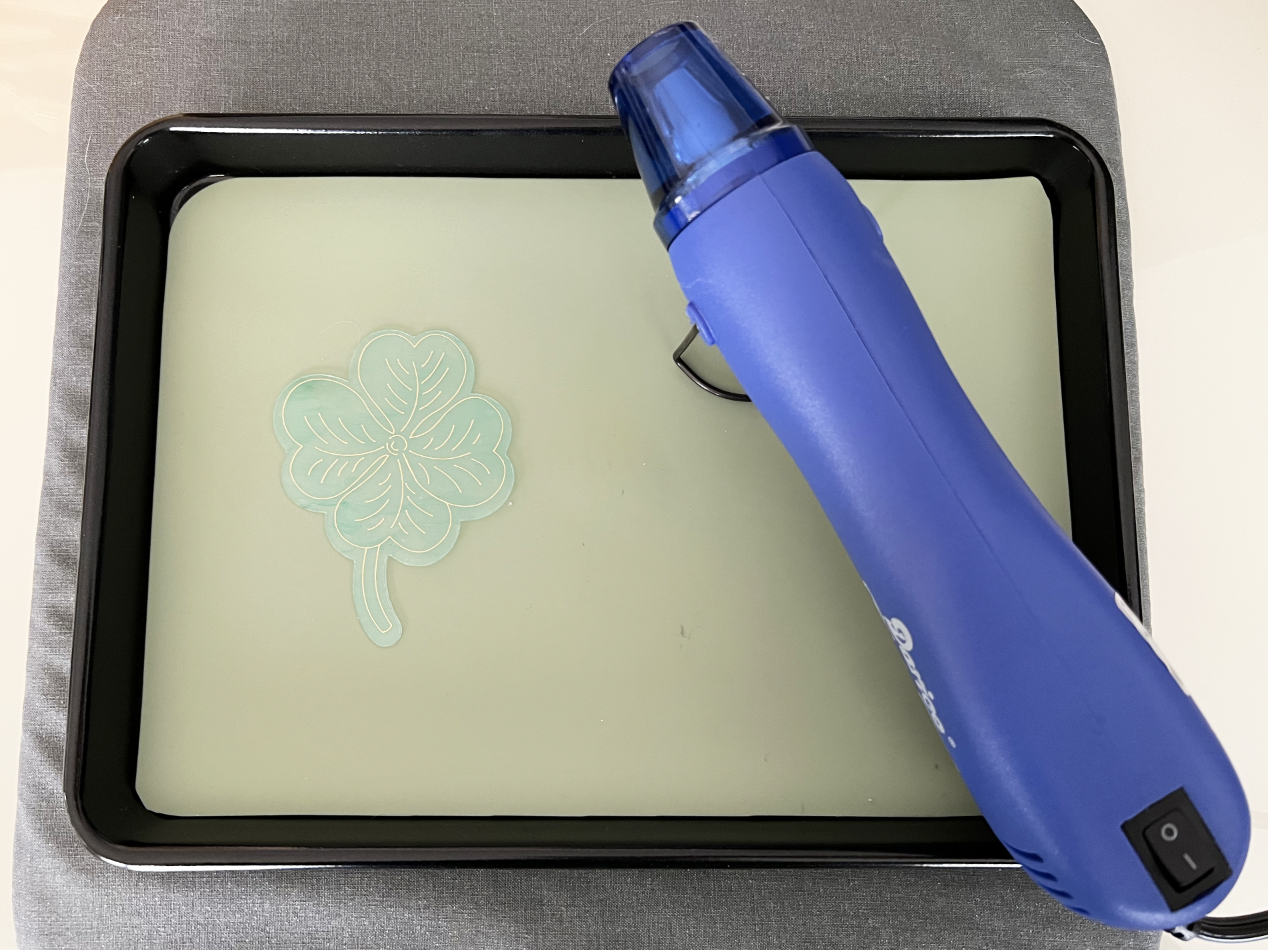
Now it’s time to shrink! I’m using my heat gun, but you can also use a toaster oven and follow the instructions from your shrink plastic manufacturer.

Foiling and Cutting Cricut Design Space

Be careful when it’s shrinking. If it curls up on itself too much the foil might transfer to another part of the design, like the left side of my clover in the photo below.

Foiling and Cutting Cricut Design Space

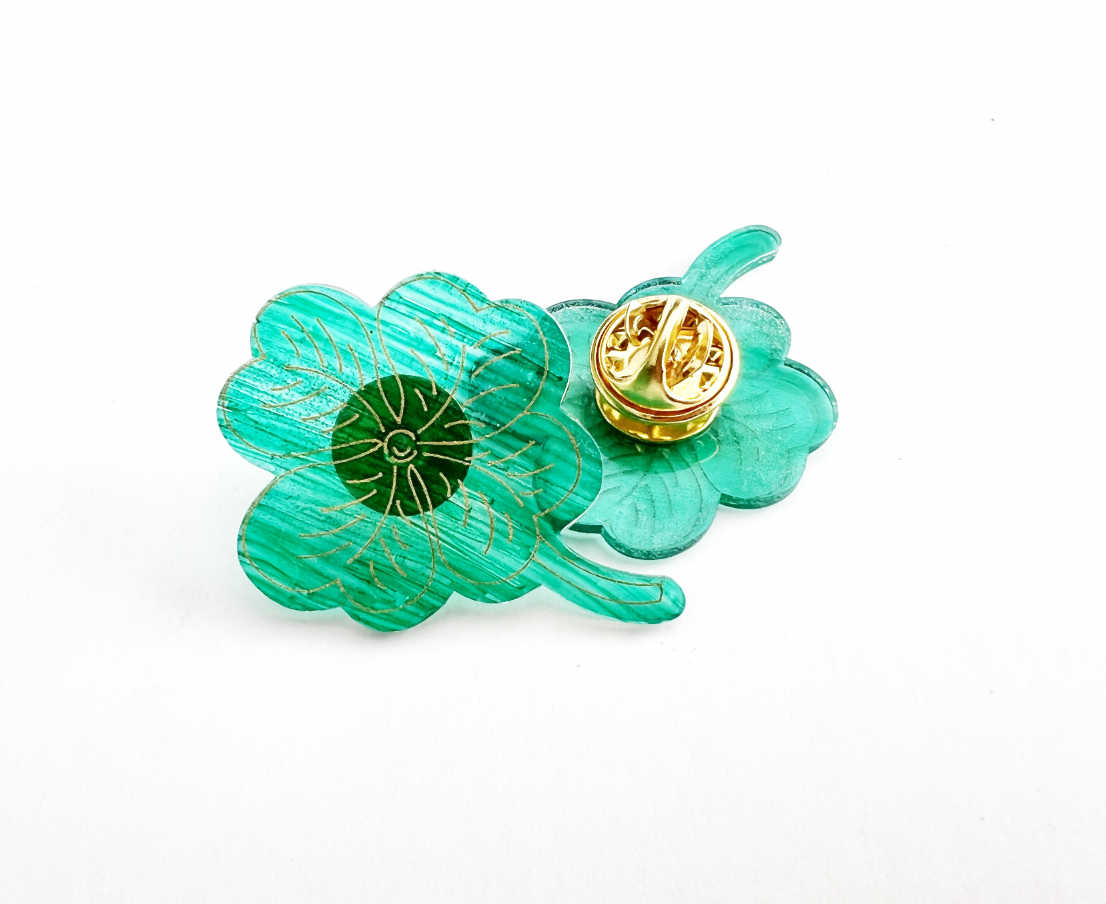
After it’s done shrinking, I glue a pin back on the back, and it’s ready to wear for St. Patrick’s day! If you don’t like the pin back showing through the shrink plastic you can also use this technique on the white shrink plastic.

Foiling and Cutting Cricut Design Space

Making Pins using Black Shrink Plastic and the Foil Quill

Hi Everyone!

This week I’m going to share a fun little project you can make with your WRMK Foil quill, black shrink plastic, and a single line SVG file.

Supplies:

(Links to items below may be affiliate links)

Single line SVG file (I will be using one from my Celestial collection)

Black shrink plastic

WRMK Medium tip Foil quill (the mint one)

WRMK gold foil

Silhouette or Cricut machine that is compatible with the WRMK Foil Quill (I will be using my Portrait 3)

Light grip cutting mat

Deep cut blade (I will be using my CB09 holder with a 60 degree blade)

Heat gun or toaster oven

Pin backing

Glue


Let’s get started!

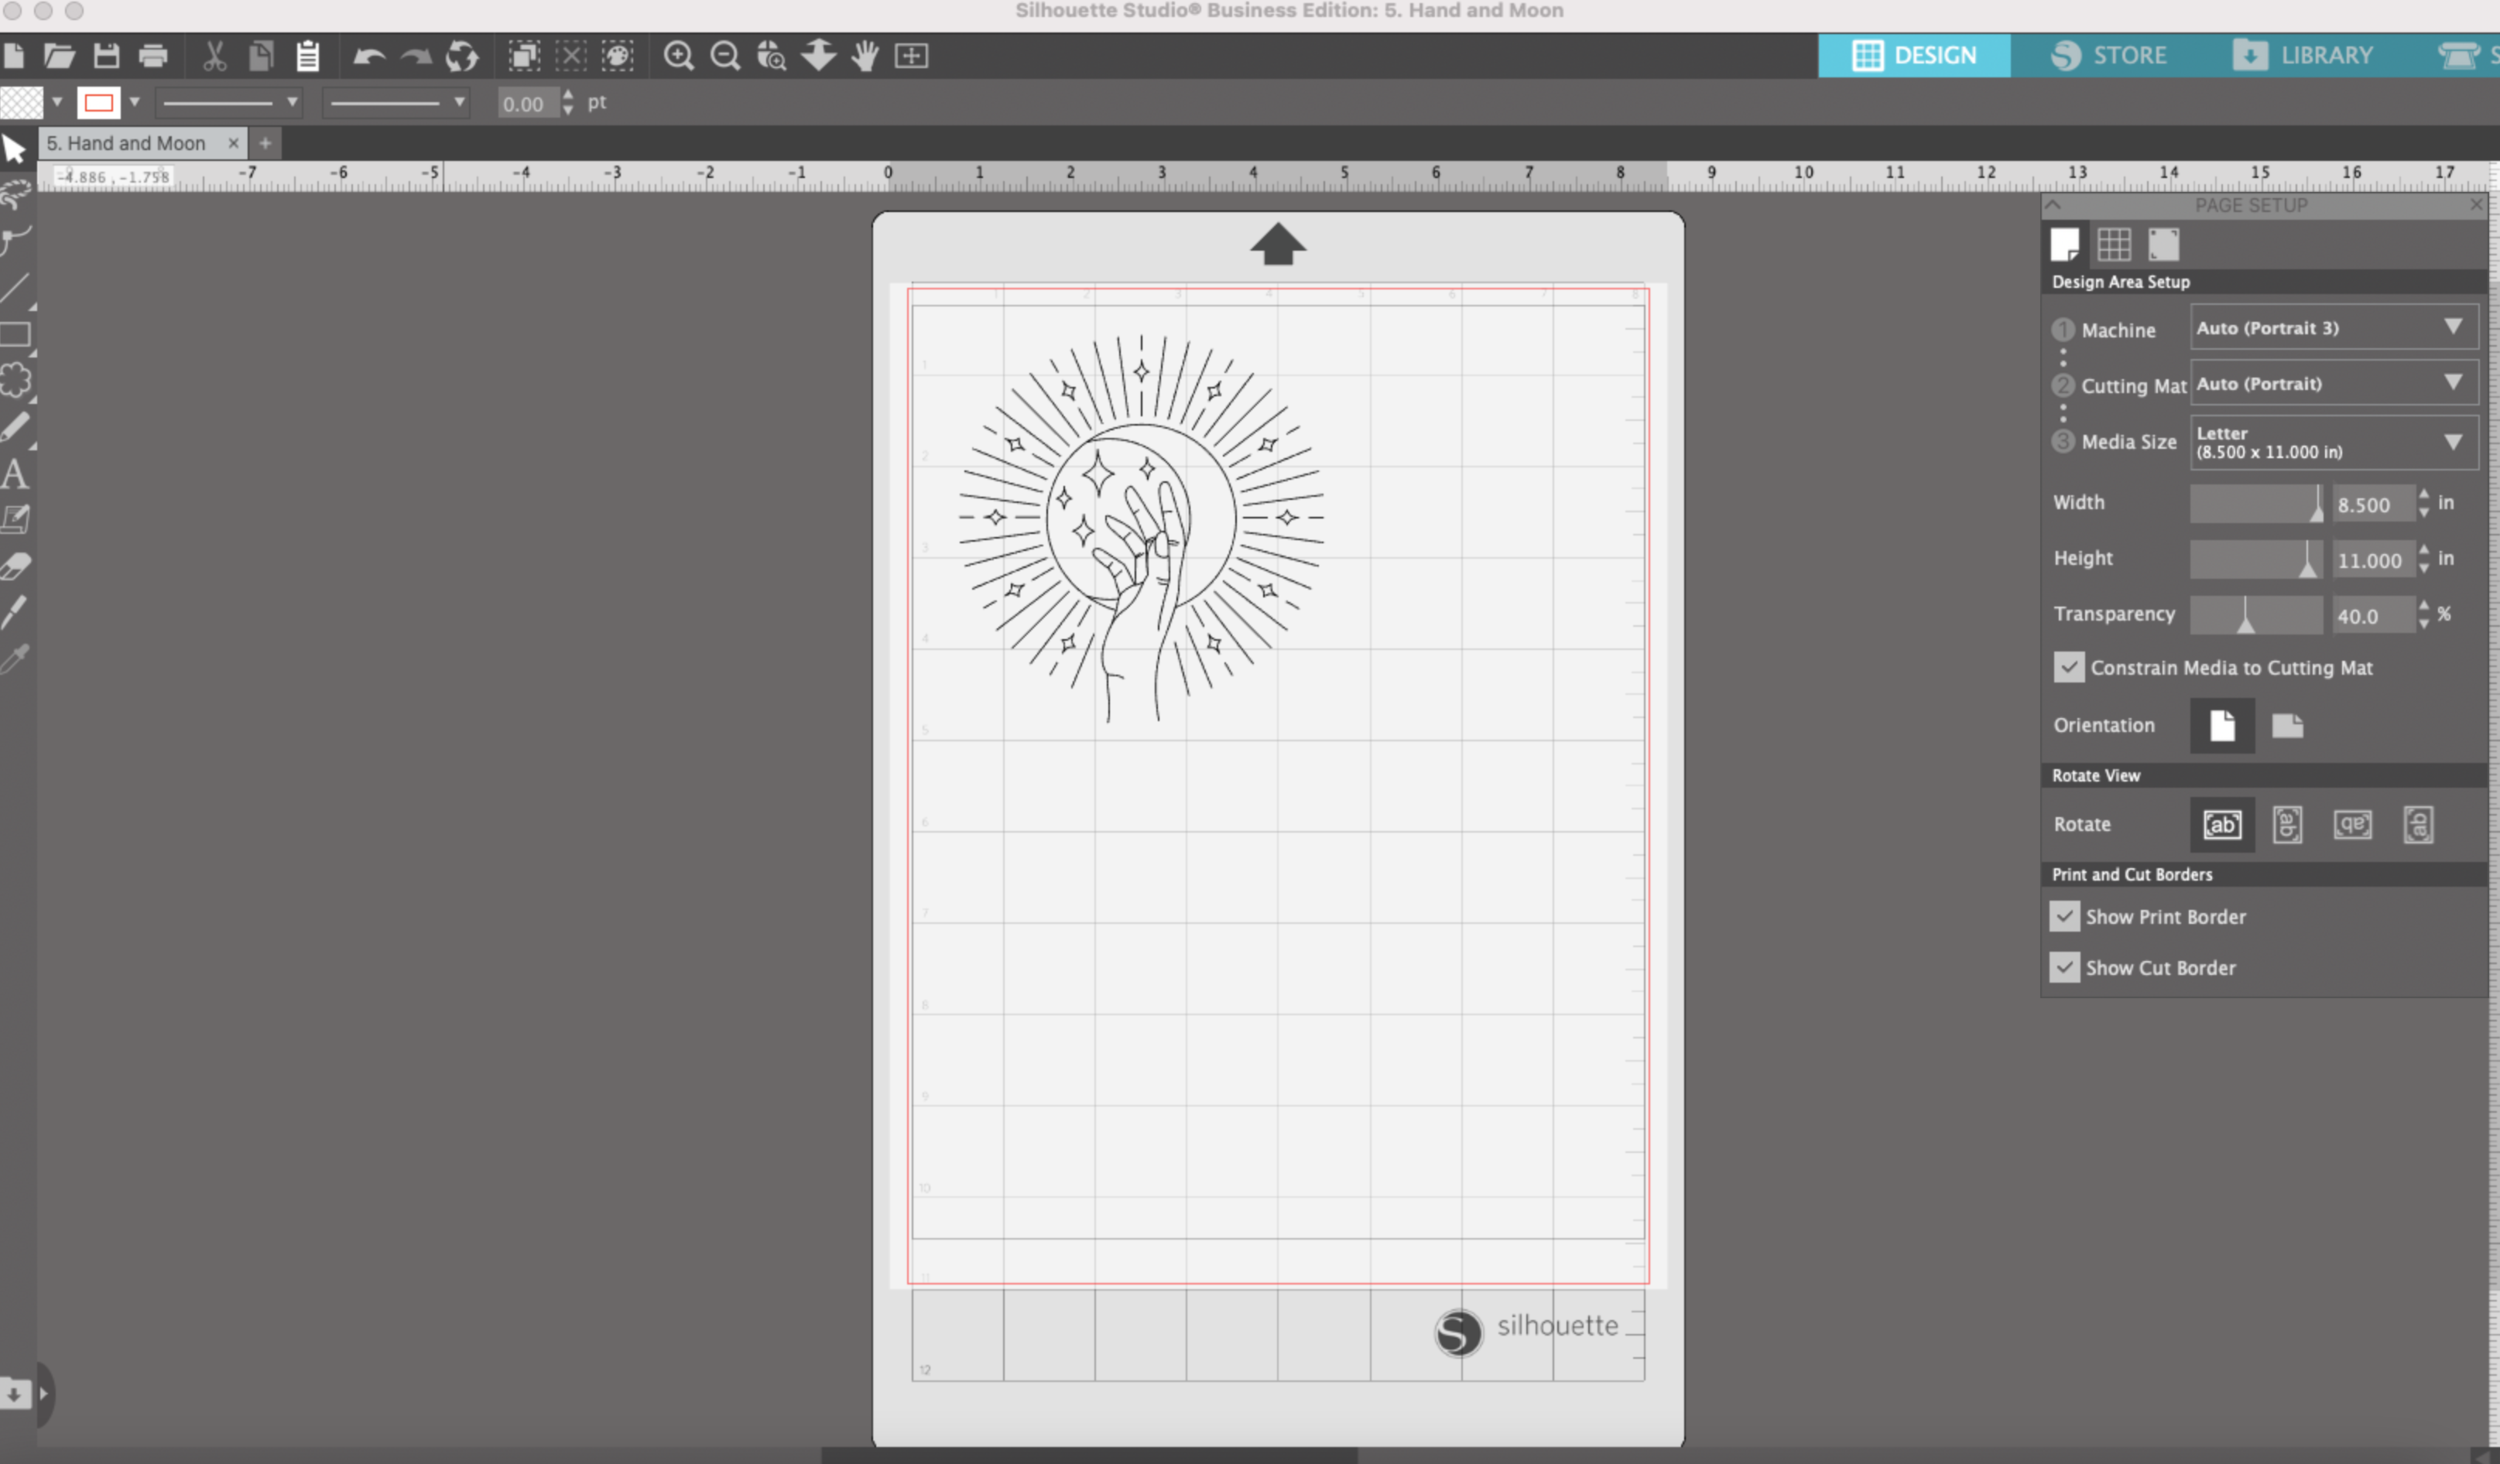
I’ve got my Single line SVG file opened in Silhouette Studio. I want to make this into a round pin that will end up being approximately 1 inch in diameter.

Shrink Plastic Pin with gold foil

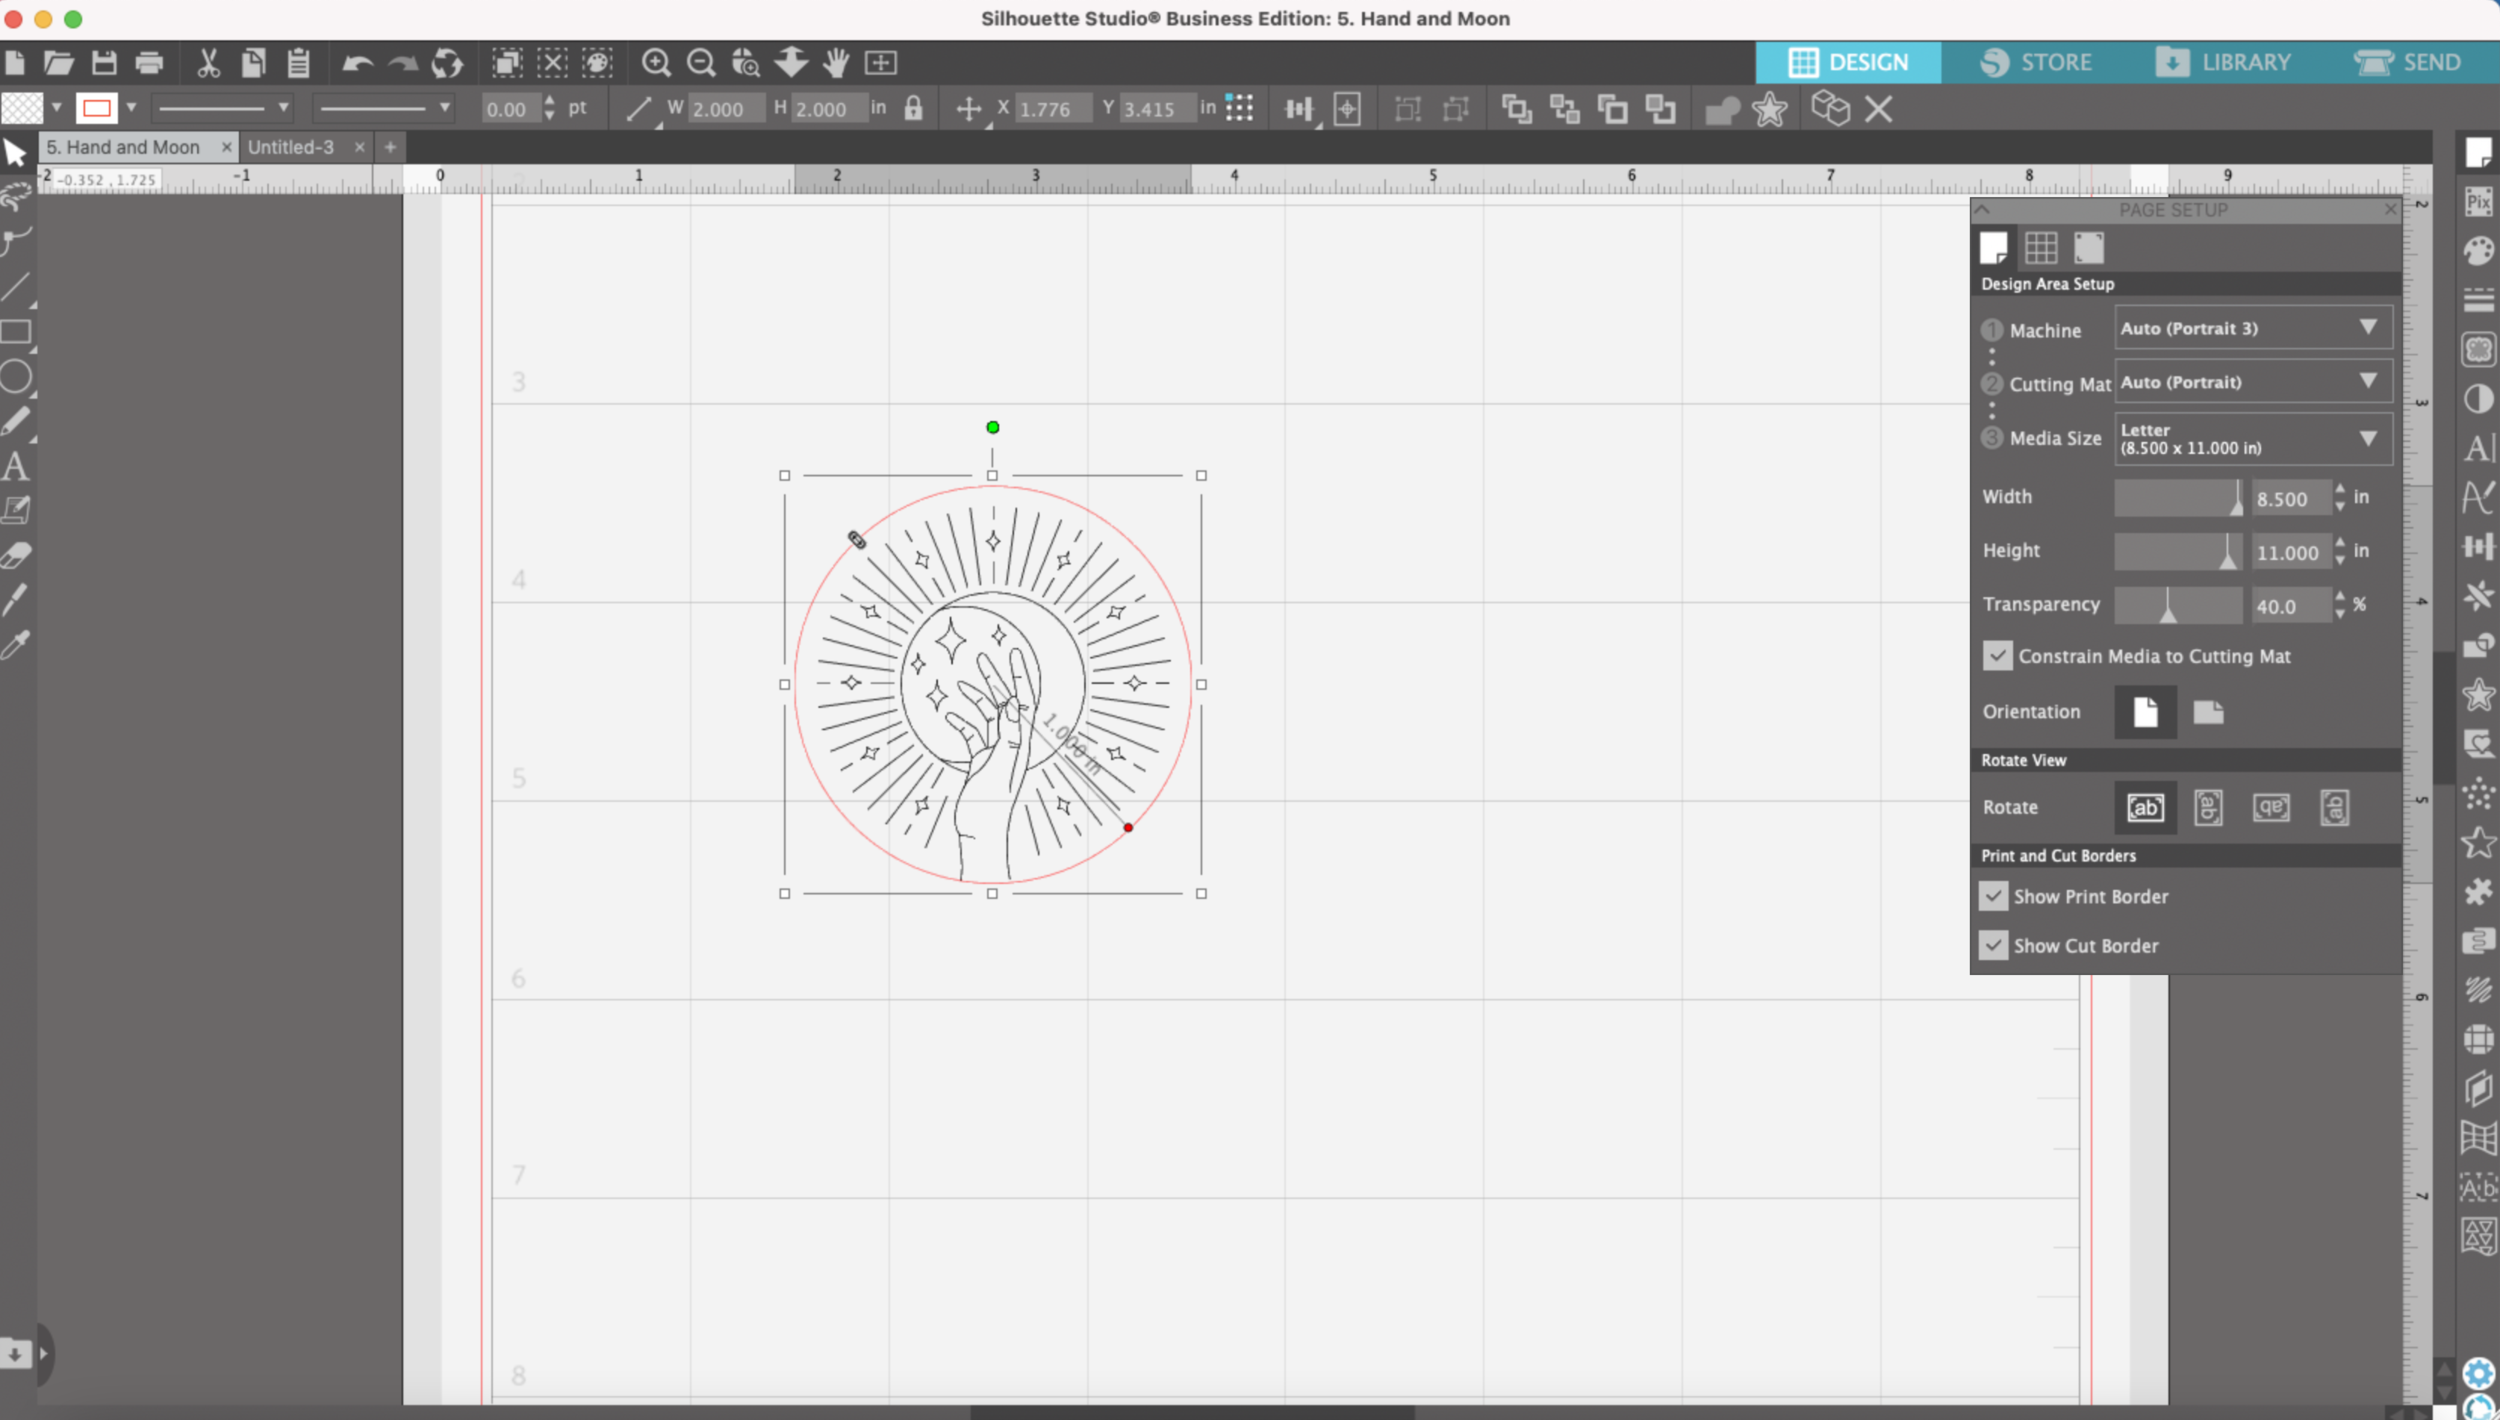
I will draw a 2” circle since my shrink plastic will shrink about 50 percent.

Now I need to scale down my art to fit inside the circle.

Shrink Plastic Pin with gold foil

I’m going to draw and cut this by line color, so I will be keep my artwork in black and the circle in red.

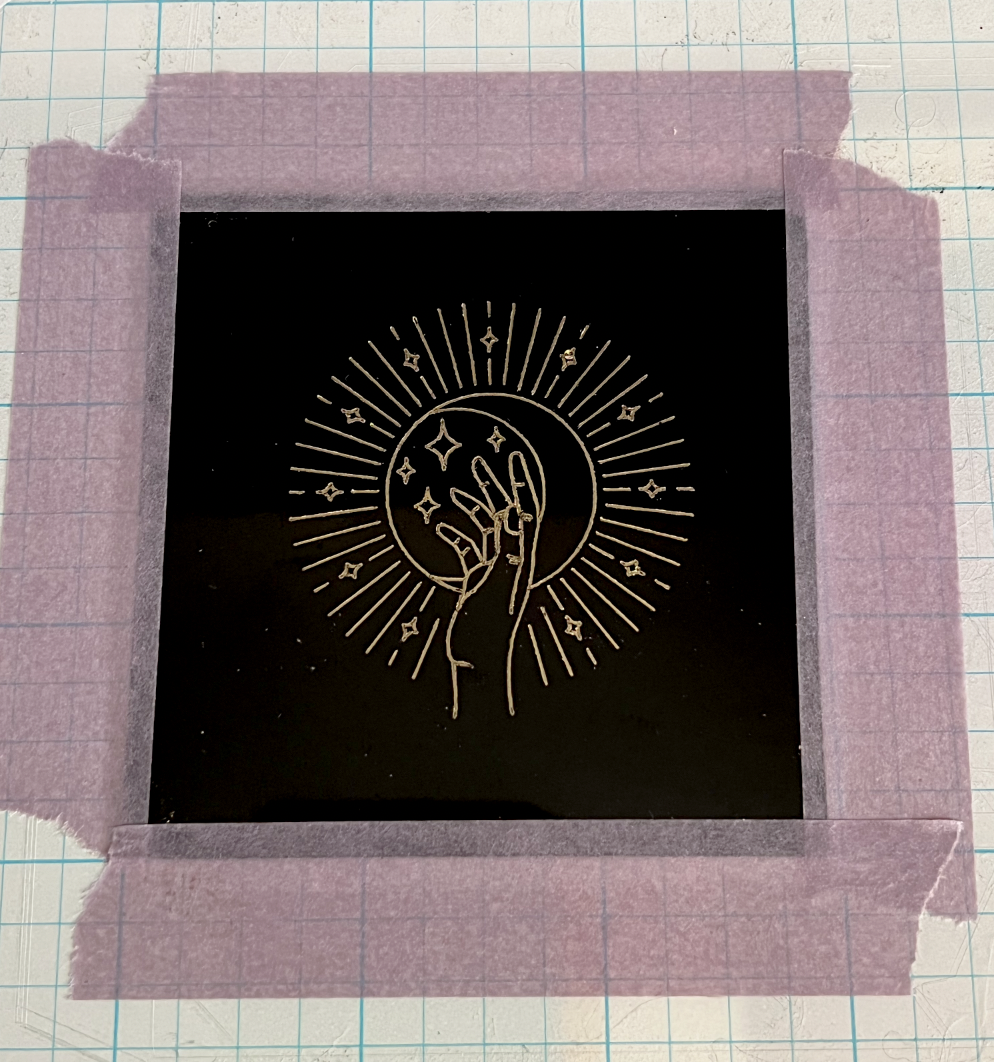
I cut down my black shrink plastic sheet to a 2.75 x 2.75 inch square. I also cut down my foil to a smaller square.

We’re going to do the foiling first. I’m going to place my back shrink plastic a little further down on the mat so it’s easier to remove the foil once it’s done.

Shrink Plastic Pin with gold foil

Make sure everything is taped down well to your mat so nothing shifts while foiling and cutting.

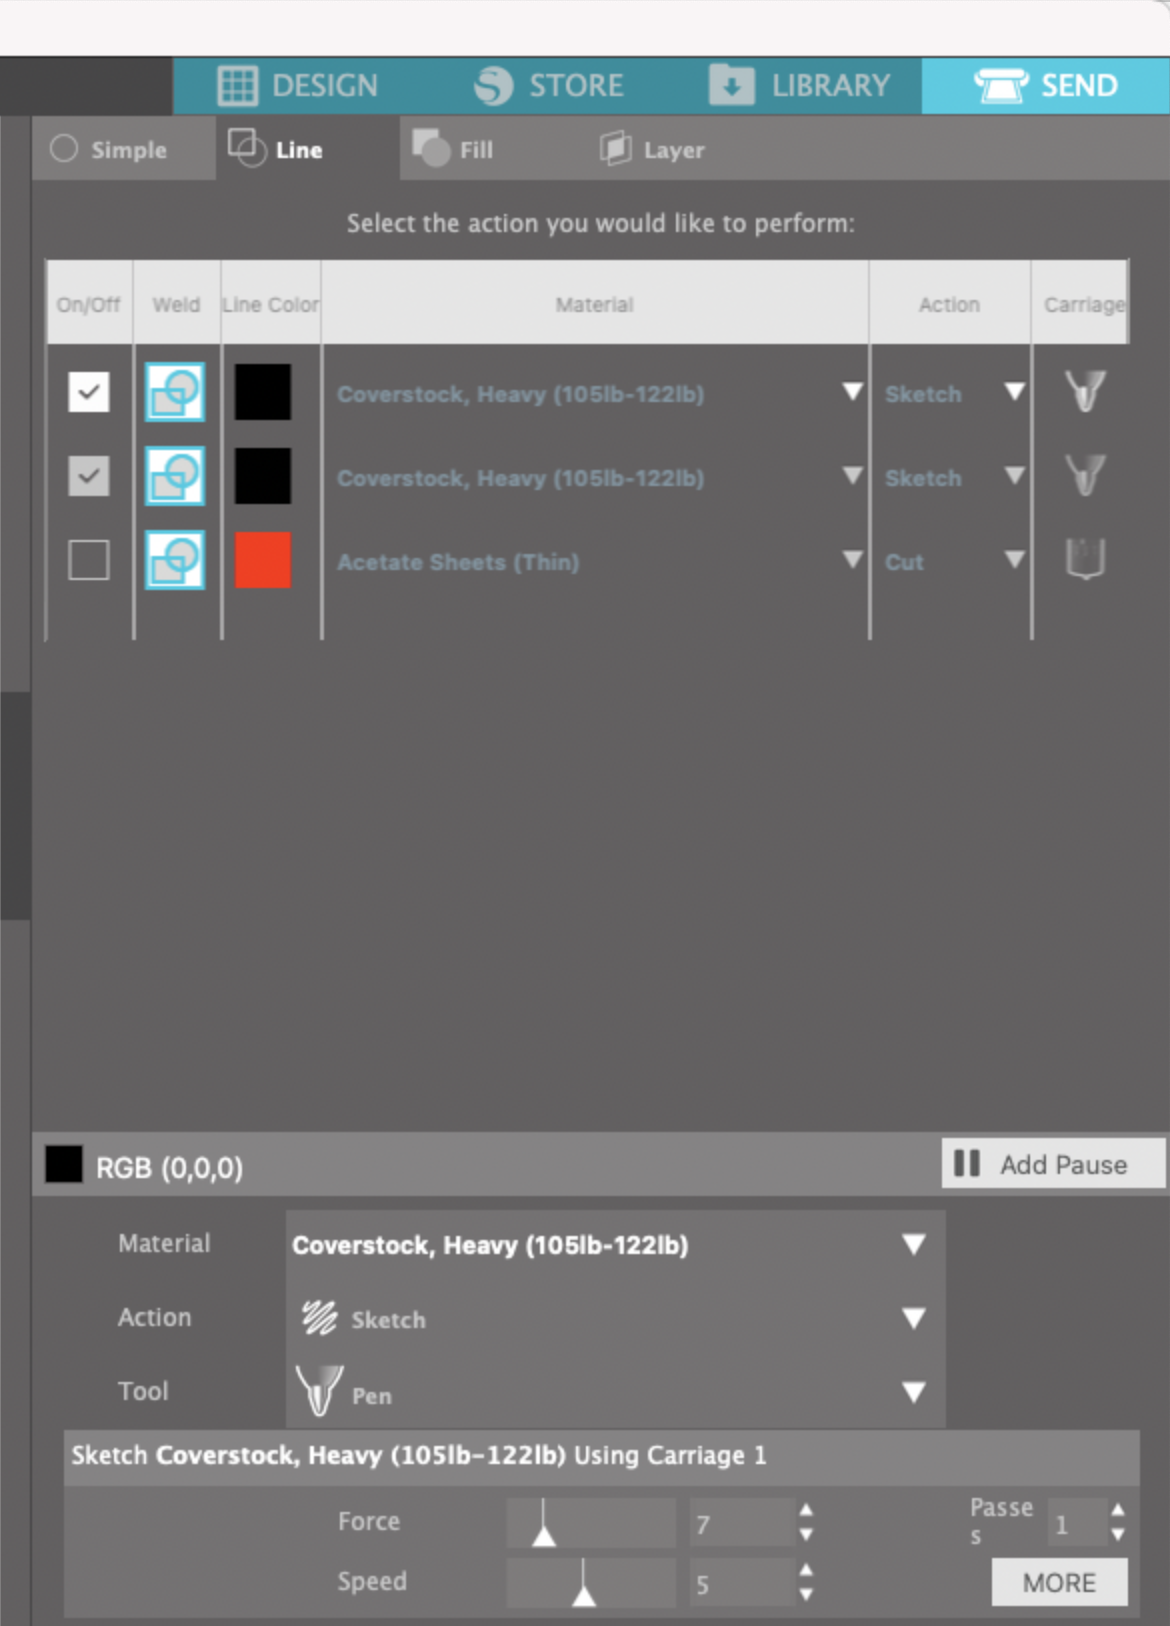
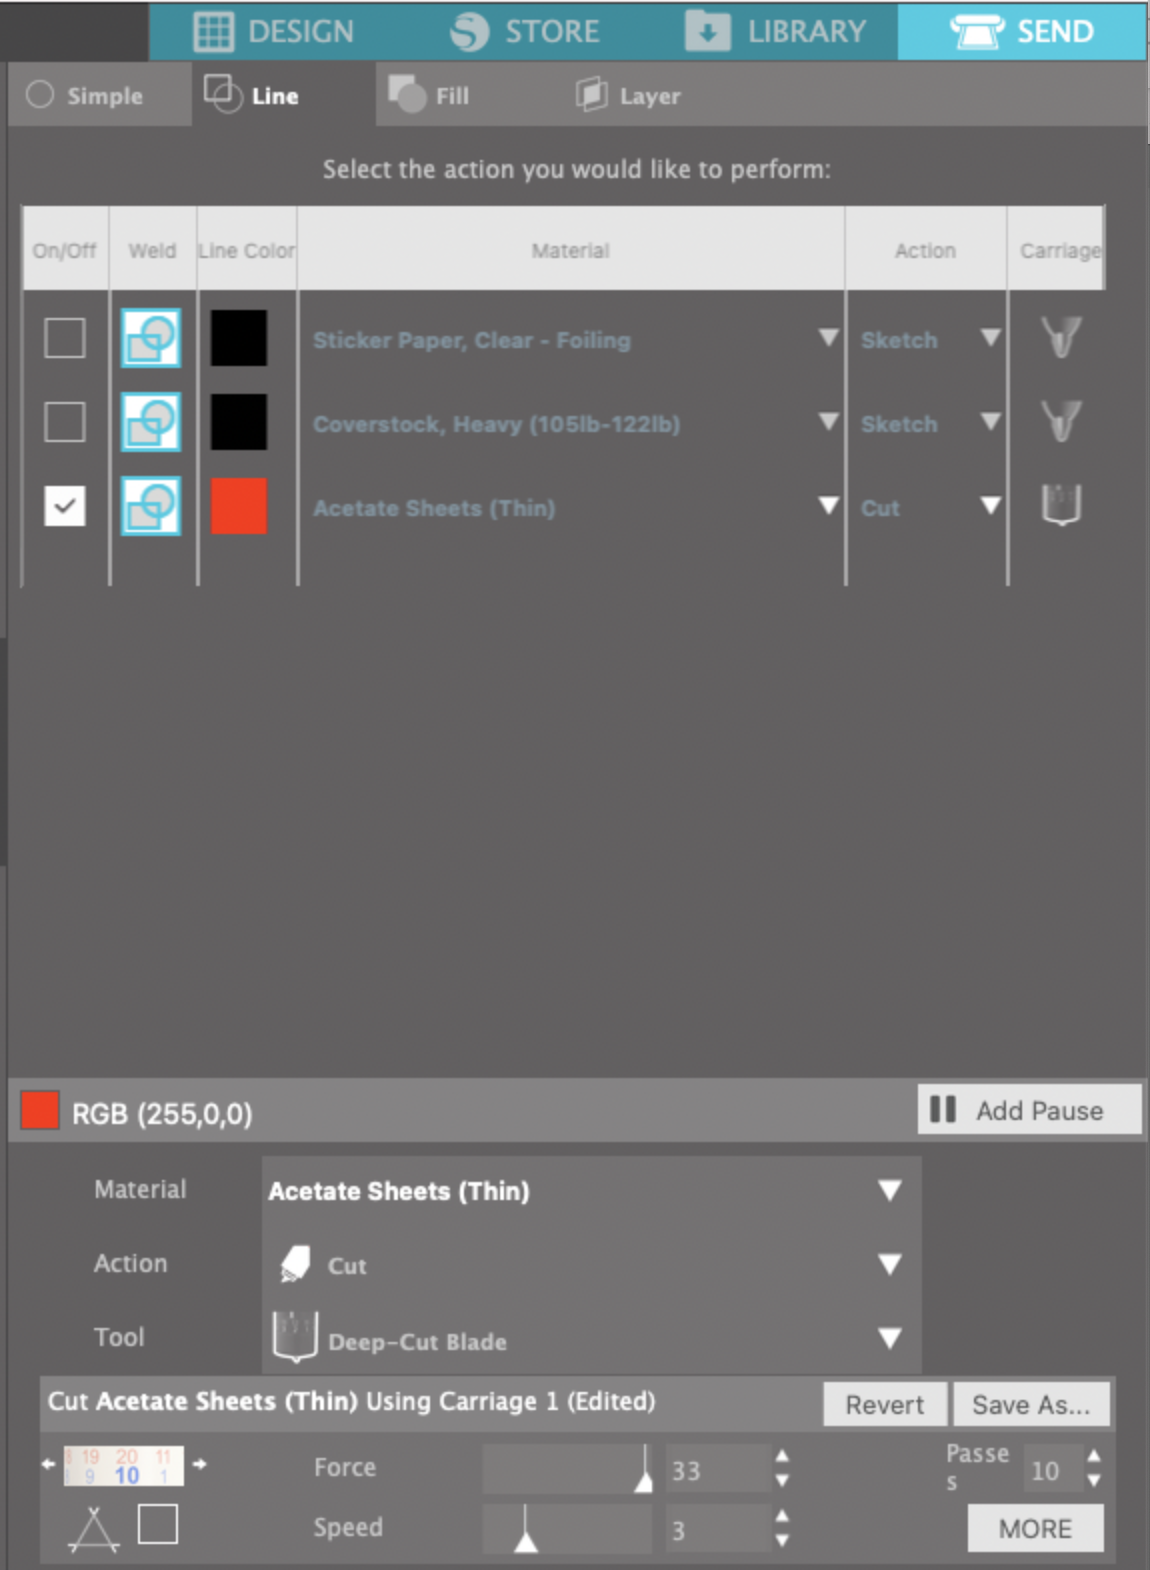
I’m using the Medium foiling tip. My Material is set to Coverstock, Heavy. The action is set to Sketch, tool is set to Pen. The force is set to 7 and speed is 5.

Shrink Plastic Pin with gold foil

After it’s done foiling, do NOT remove the mat! Carefully remove the foil.

Shrink Plastic Pin with gold foil

Now it’s time to cut. I’m using my CB09 blade holder with a 60 degree blade. I selected Acetate for the material. Tool is the Deep Cut blade, depth is 10, force is 33, speed is 3. Number of Passes is set to 10 which is the most Silhouette Studio will allow.

Shrink Plastic Pin with gold foil

After the first 10 passes, do not remove the mat from the machine. Carefully dust of any little plastic particles and send it through again for another 10 passes.

Once it’s done with the 2nd set of ten passes, do NOT remove the mat. Dust off any little plastic particles again. You can carefully lift a corner of the shrink plastic off the mat to see if it’s close to be cut through. Just make sure you don’t accidentally shift the placement on the mat.

I typically have to make 30-40 total passes, even then it’s not always cut all the way through, but it’s enough I can carefully pop it out.

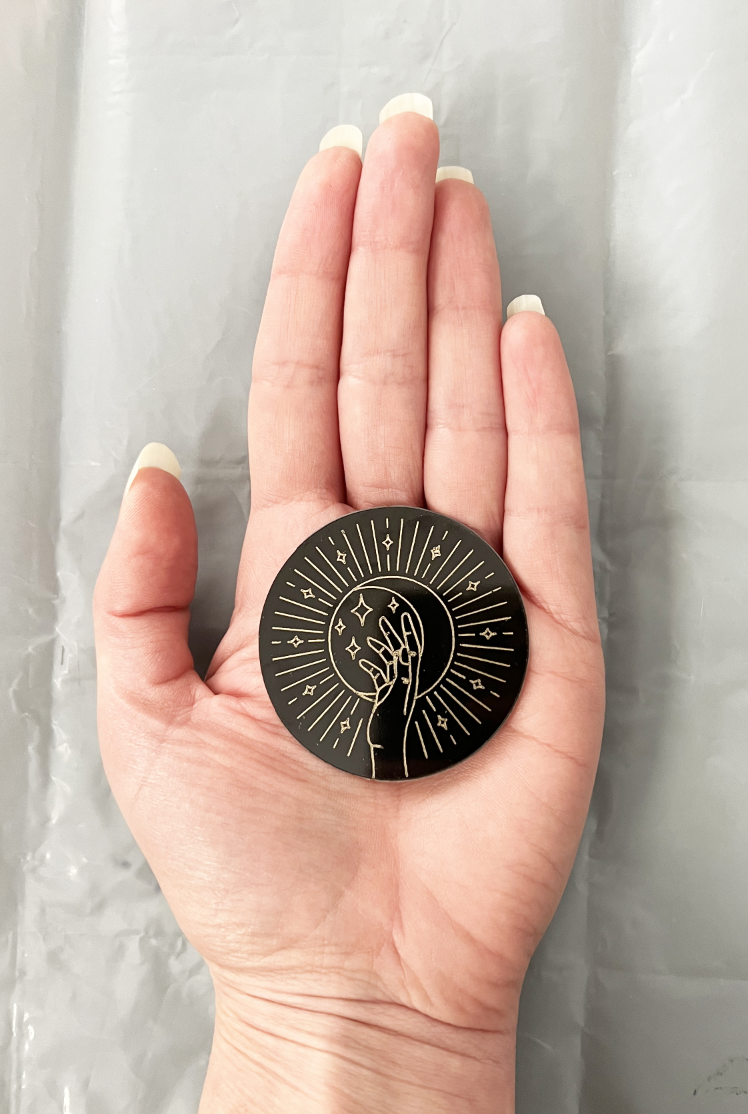
Here it is before shrinking so you can get an idea of the size difference.

Shrink Plastic Pin with gold foil

Now it’s time to shrink it! I’m going to be using my heat gun and little metal spatula on some teflon sheeting. But you can also follow the instructions that come with your shrink plastic and do it in a toaster oven.

Shrink Plastic Pin with gold foil

Once it’s done shrinking, while the plastic is still warm, you can use a metal spatula or other flat object to help flatten your piece.

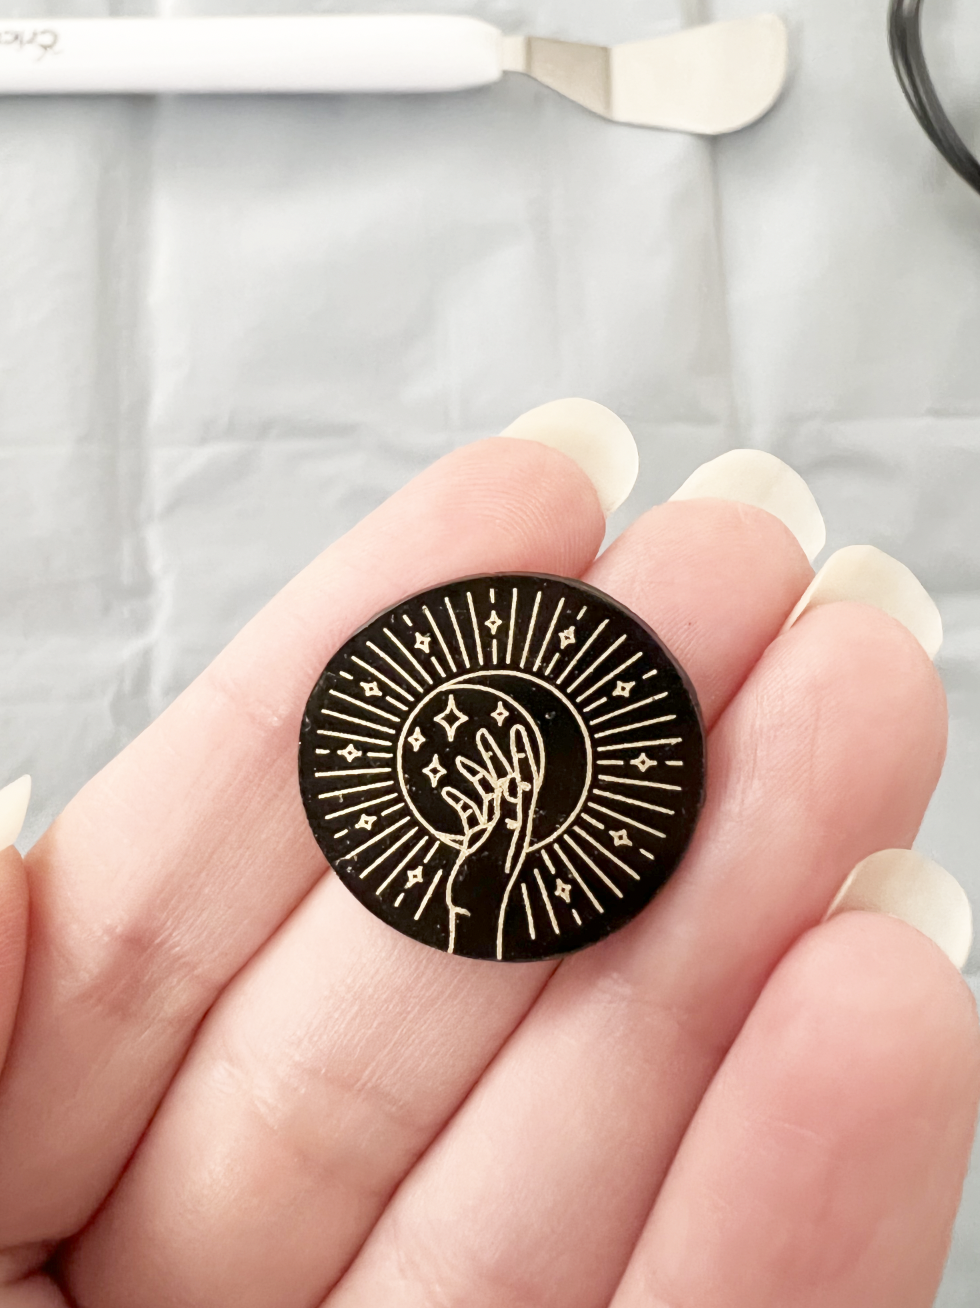
The shrink plastic doesn't shrink perfectly even, so my circle is now a little lopsided, but it’s not too bad. I love how the gold foil keeps all the little details and still adds a little bit of shine. I haven’t noticed the gold foil scratching off, so it’s up to you if you want to apply some sort of sealer on top.

Shrink Plastic Pin with gold foil

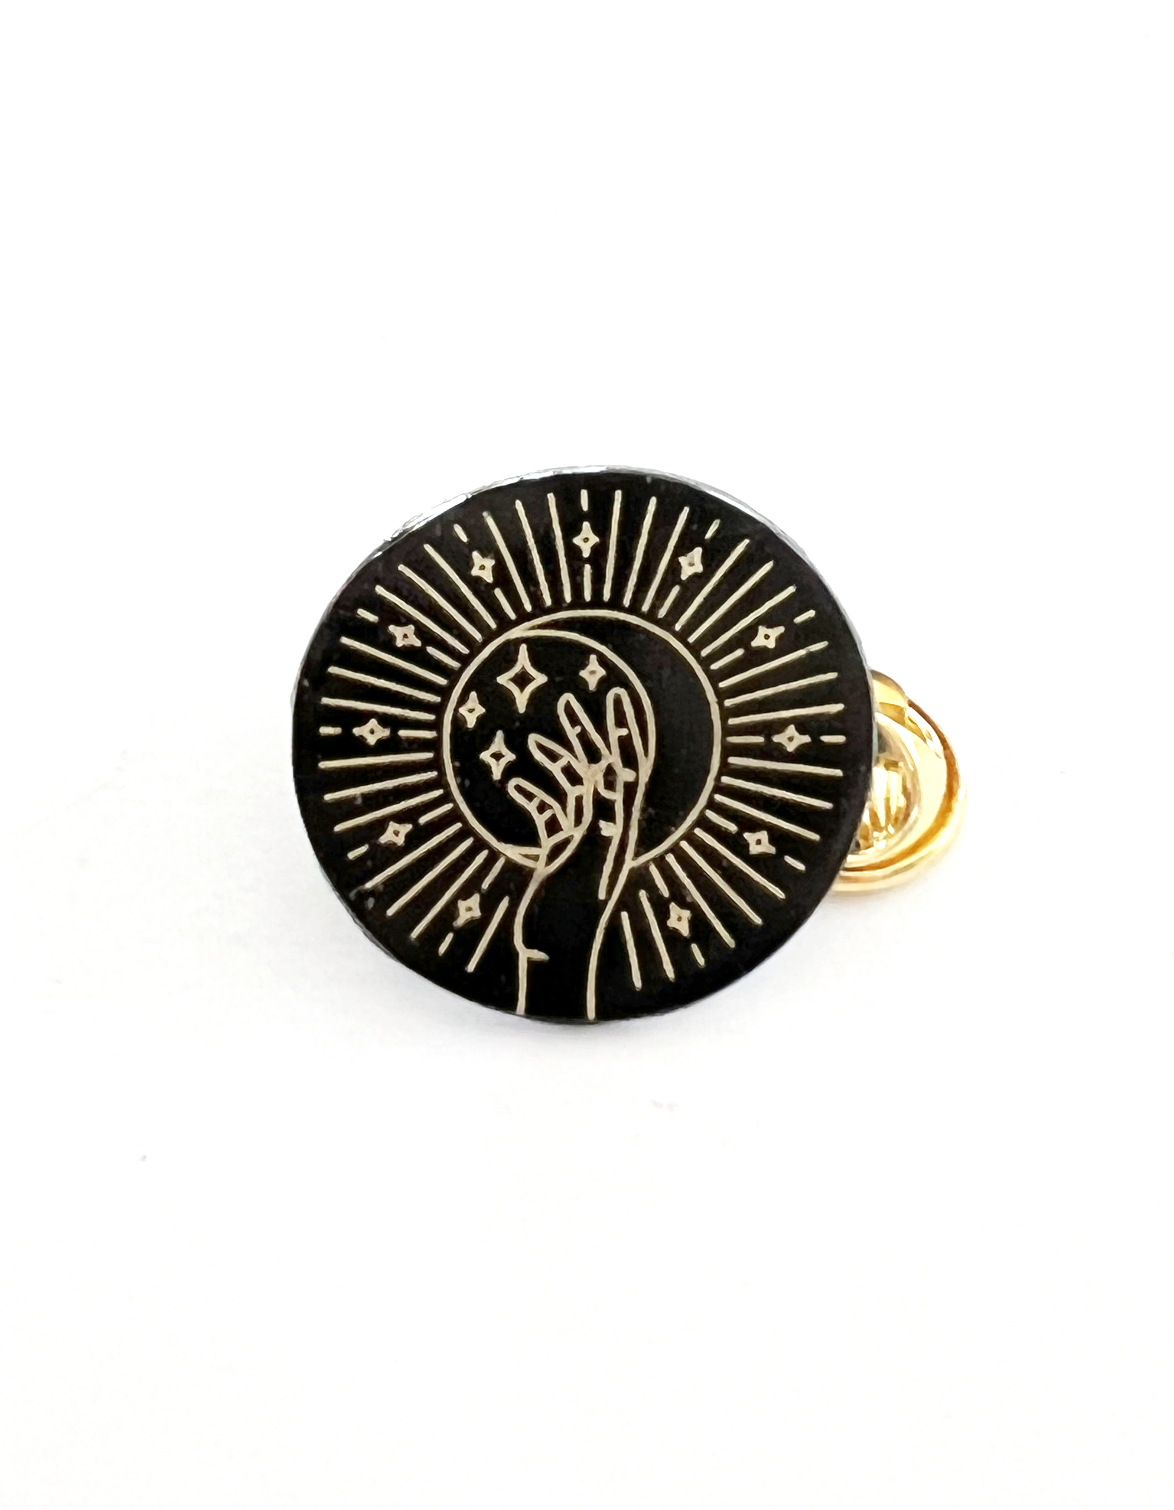
I’m going to glue my pin onto the back ,and now it’s finished and ready to go on a jacket, a bag, a hat, or anywhere else you like to add pins!

Shrink Plastic Pin with gold foil

Creating Watercolor Style Clip Art in Procreate to Use With Your Cricut or Silhouette Machine

Hi Everyone!

This week I’m going to share a watercolor style technique that I like to use in Procreate to make clip art that I can use with my Cricut or Silhouette machine.

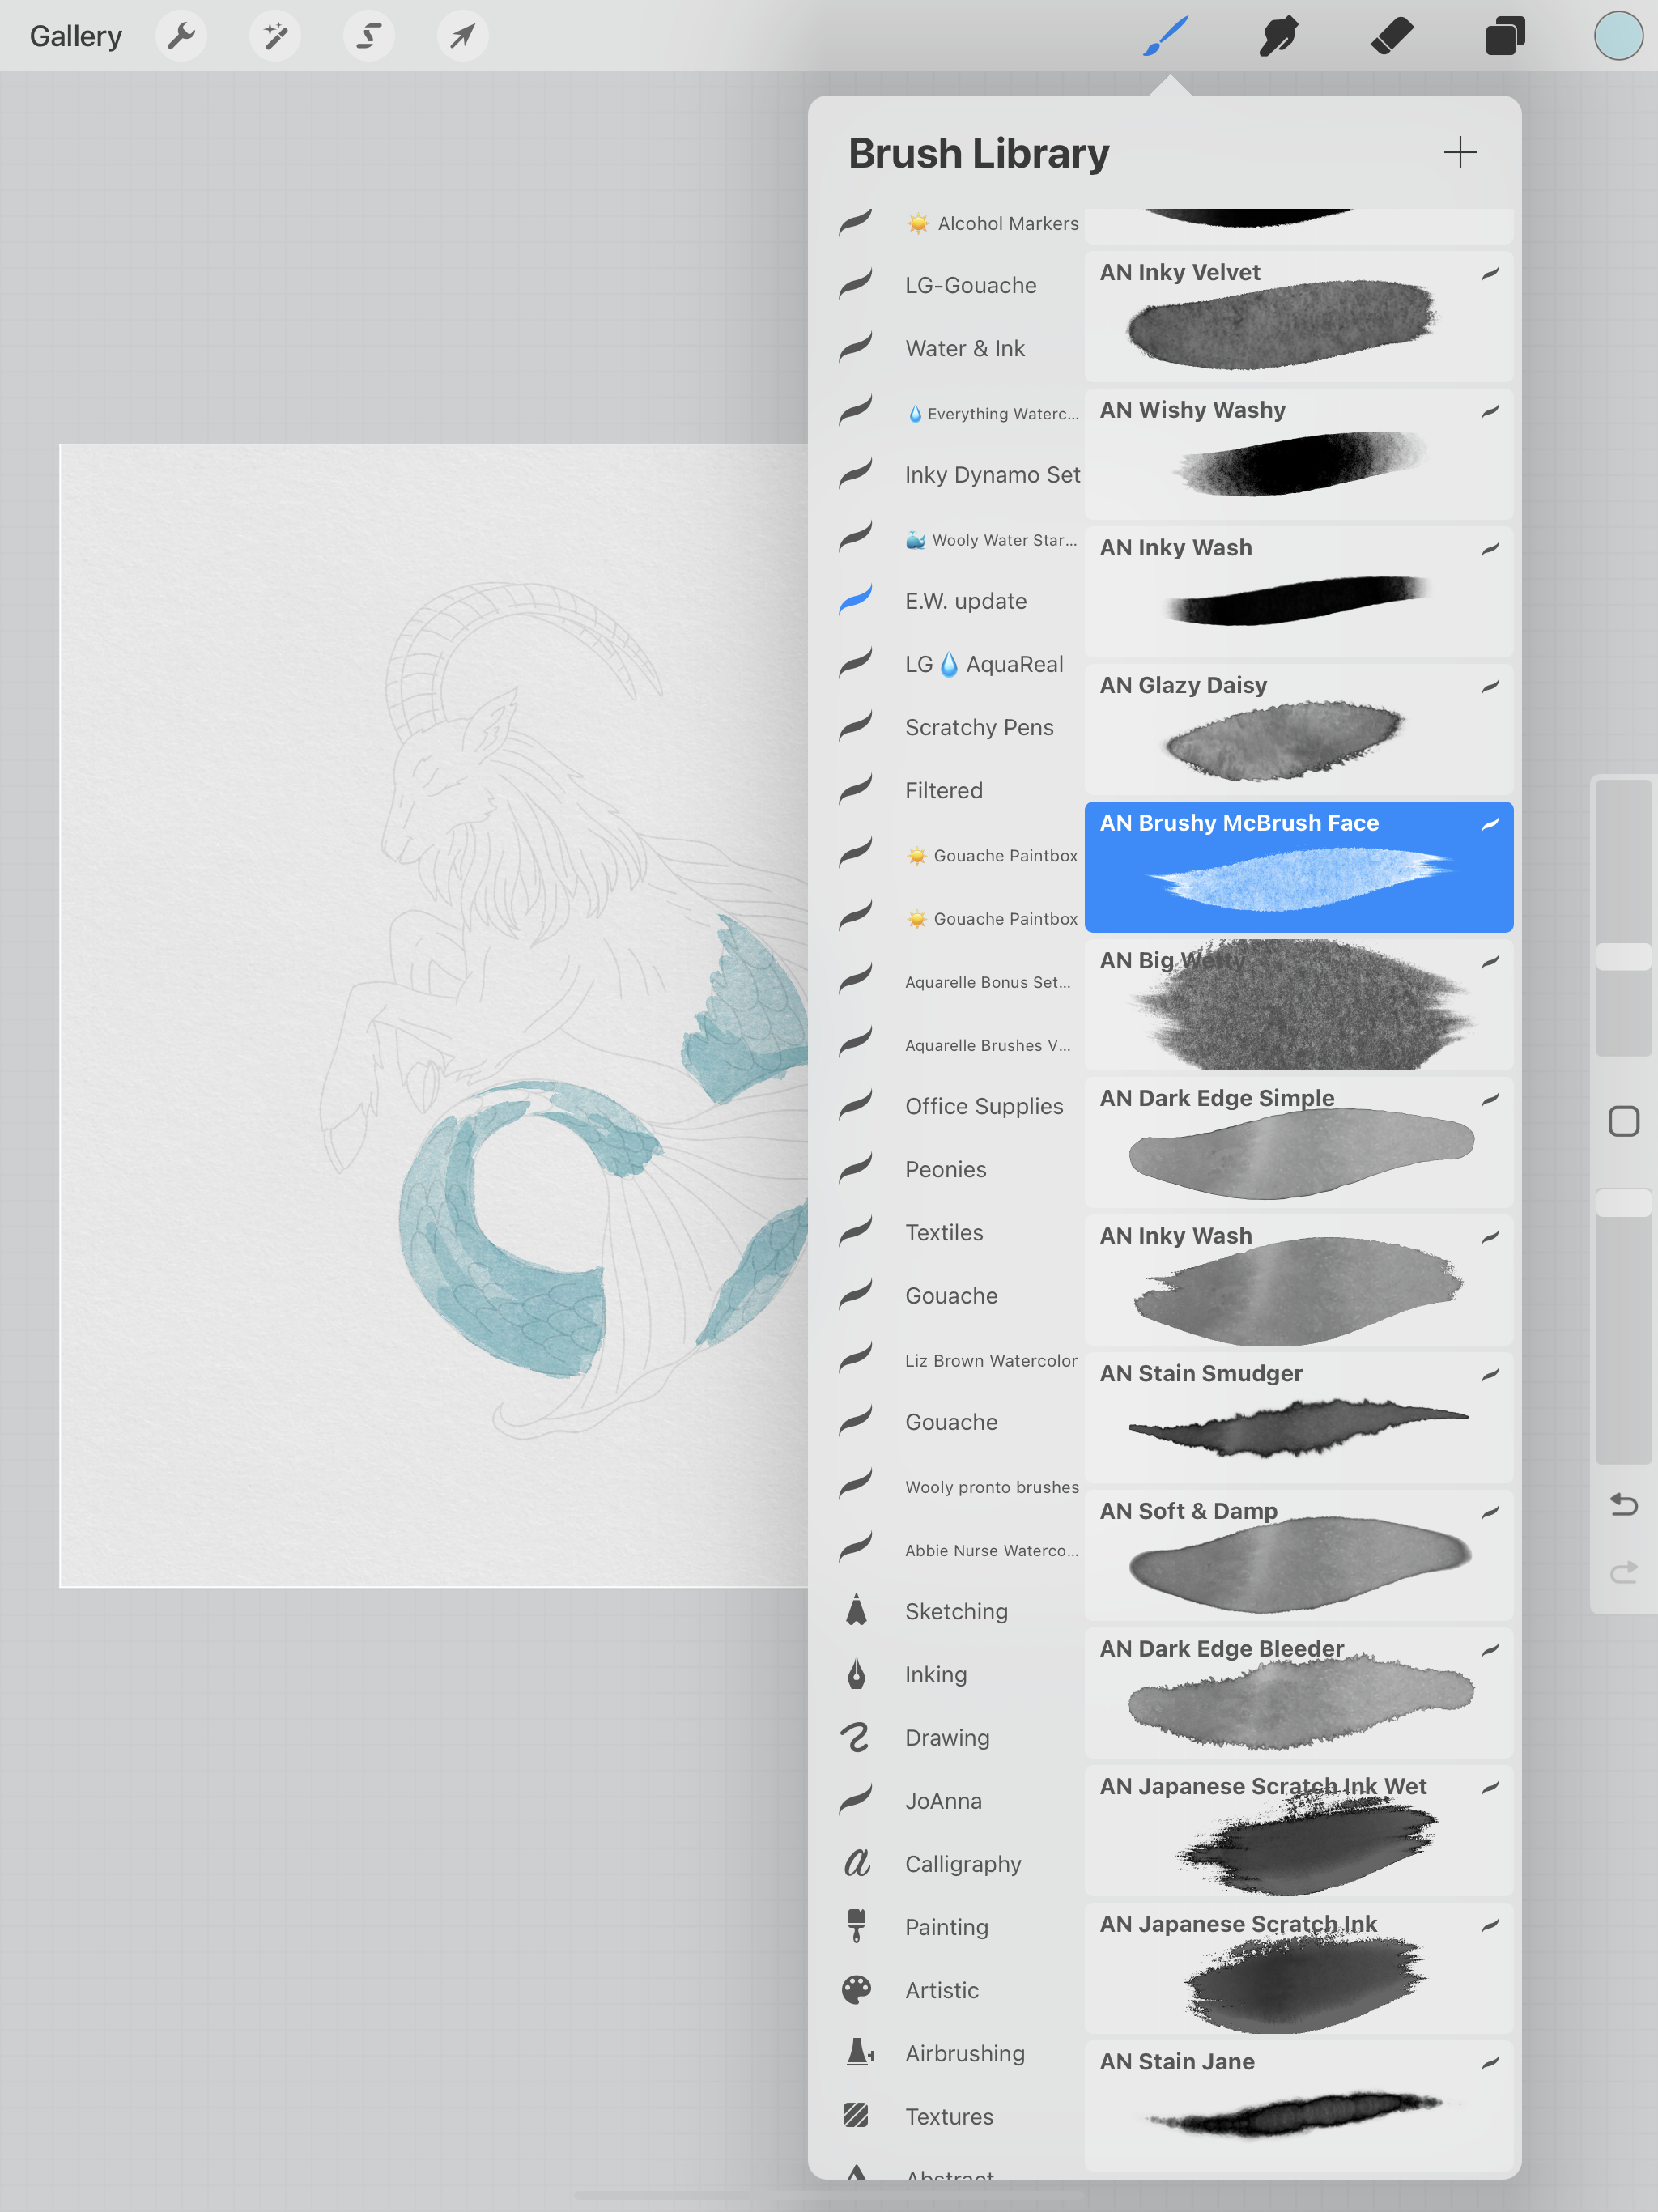
I will be using the Brushy McBrush Face brush from the Everything Watercolor brush set from Uproot Brushes. This is a great set of brushes and it also comes with some very nice paper textures. The paper textures make a huge difference when trying to make convincing digital watercolor artwork.

Let’s get started!

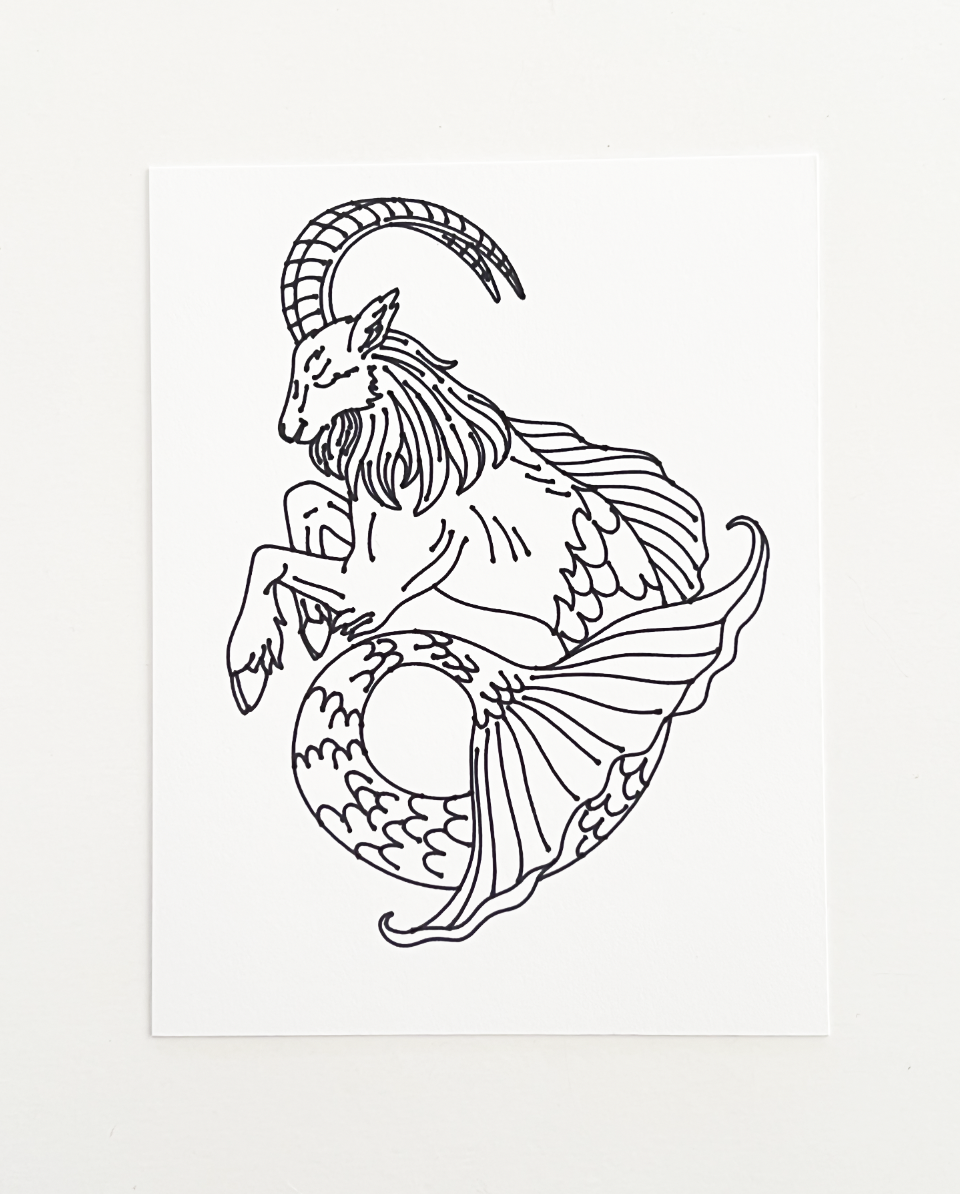
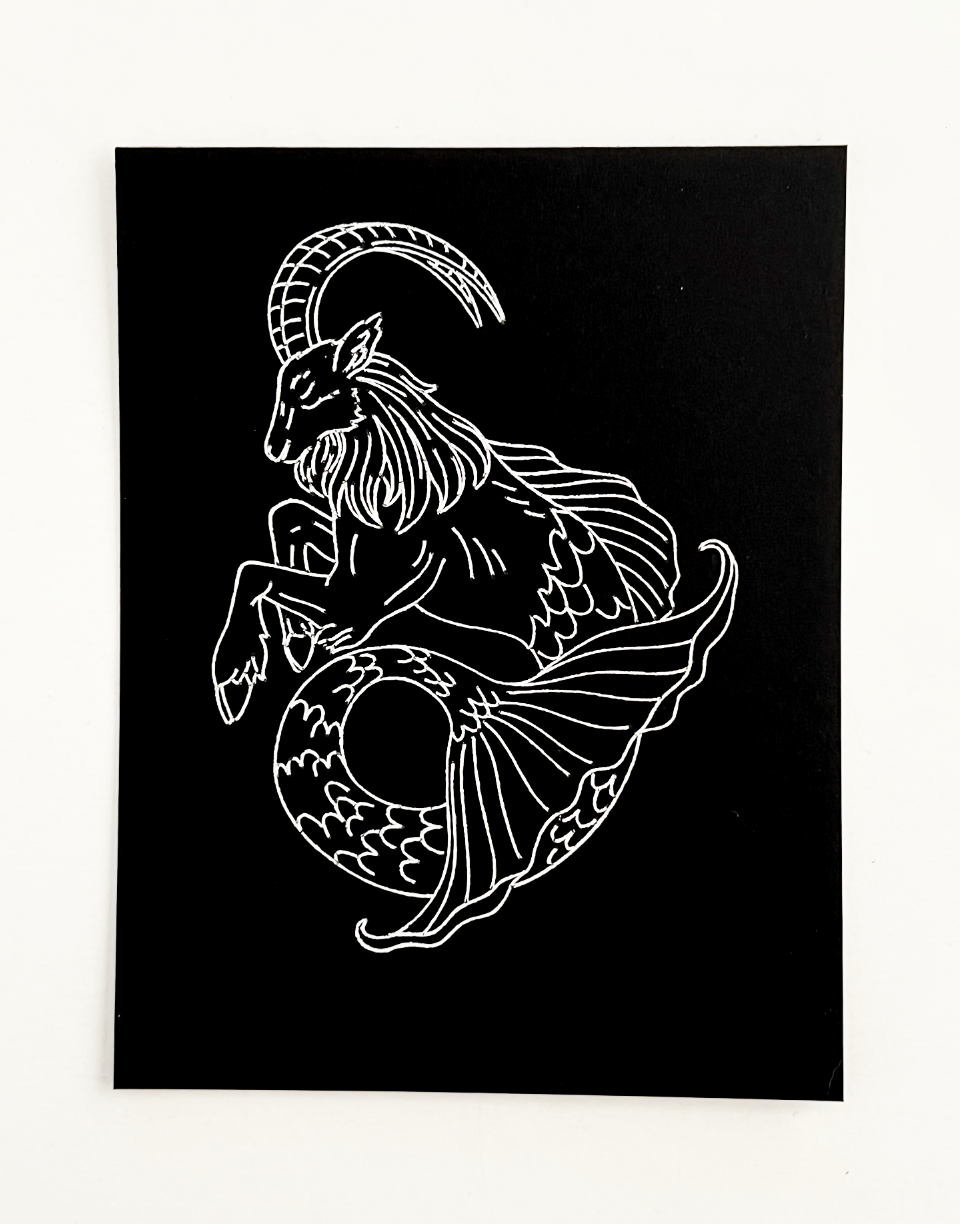
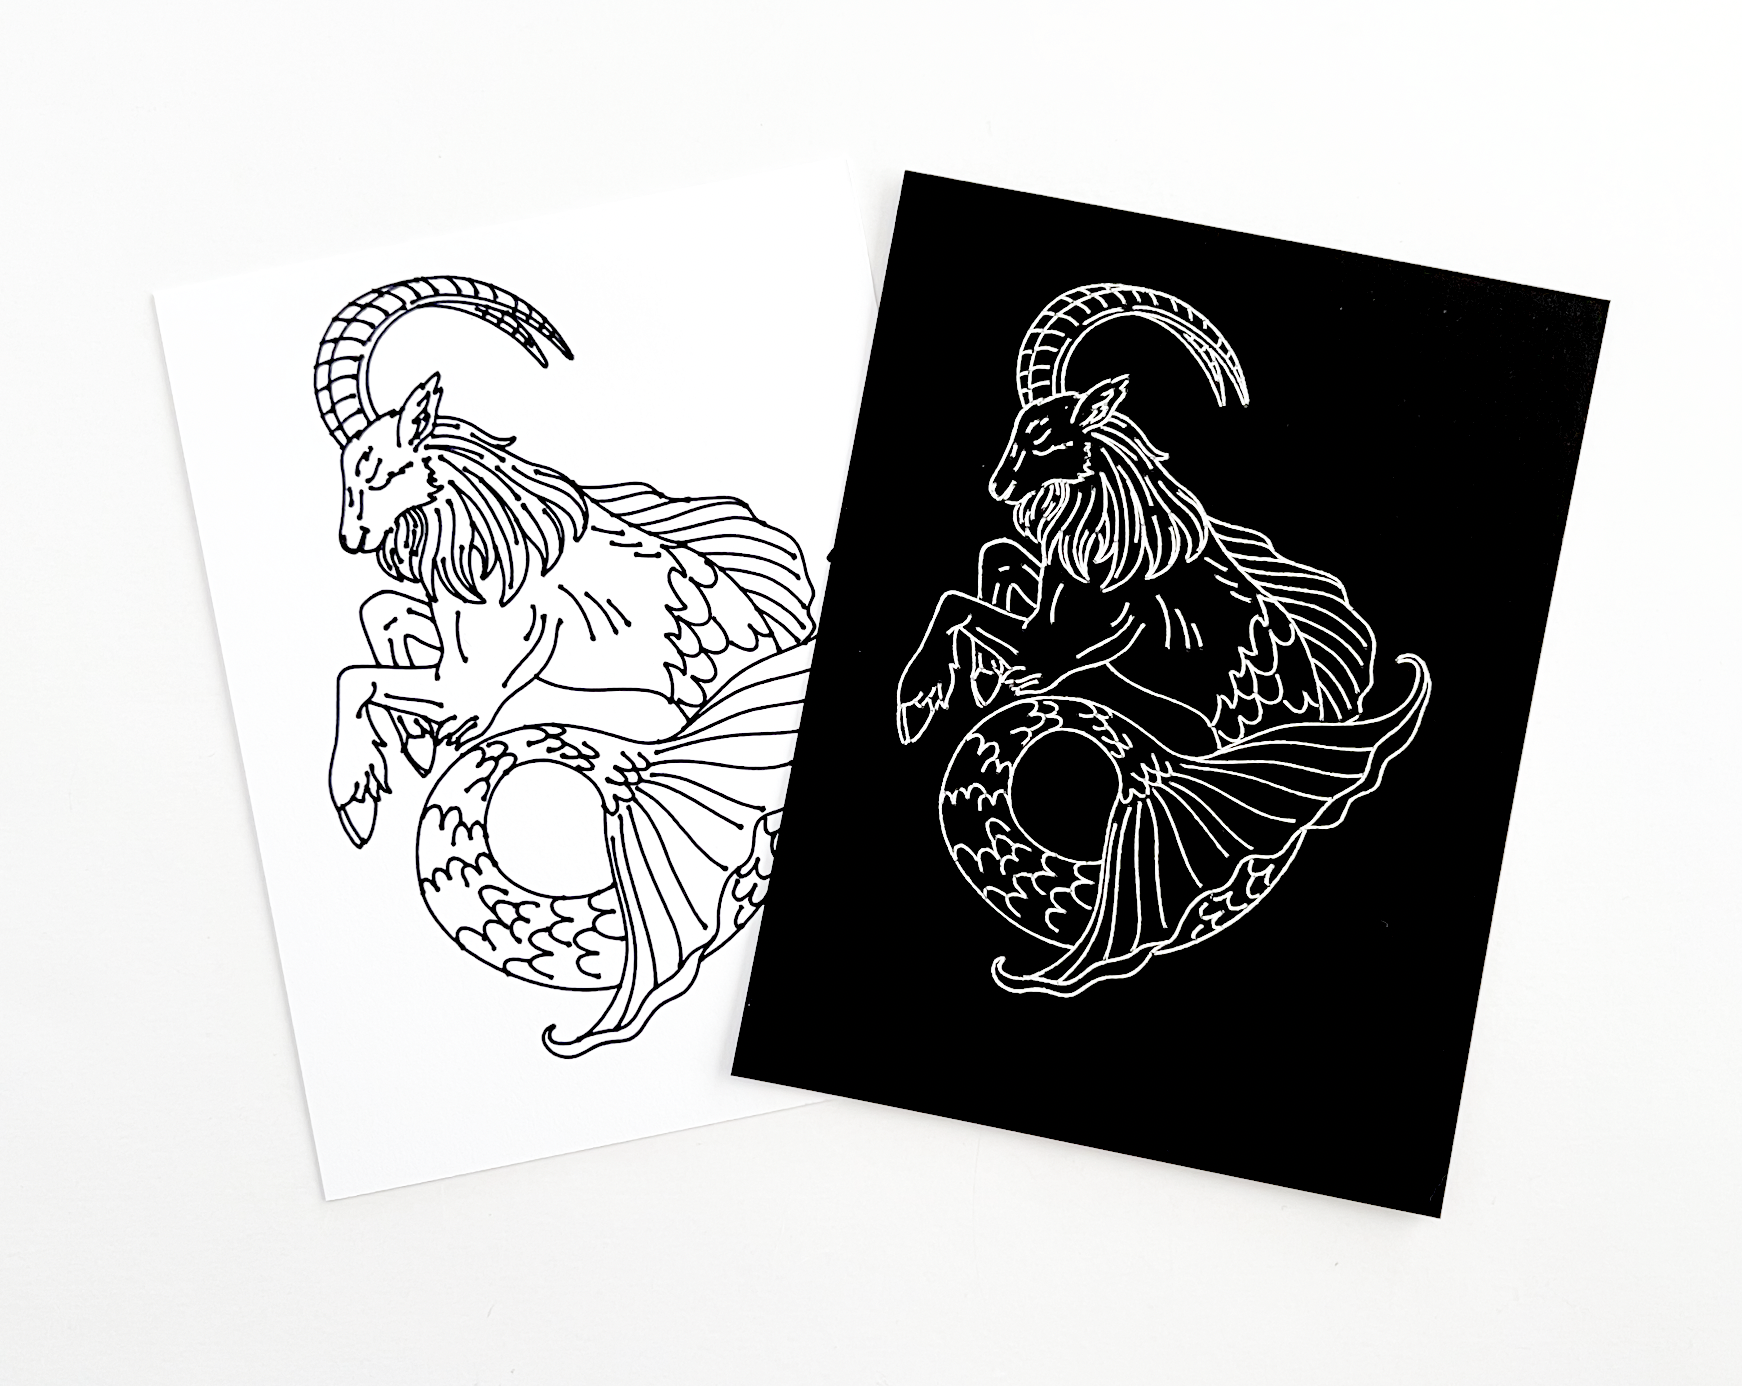
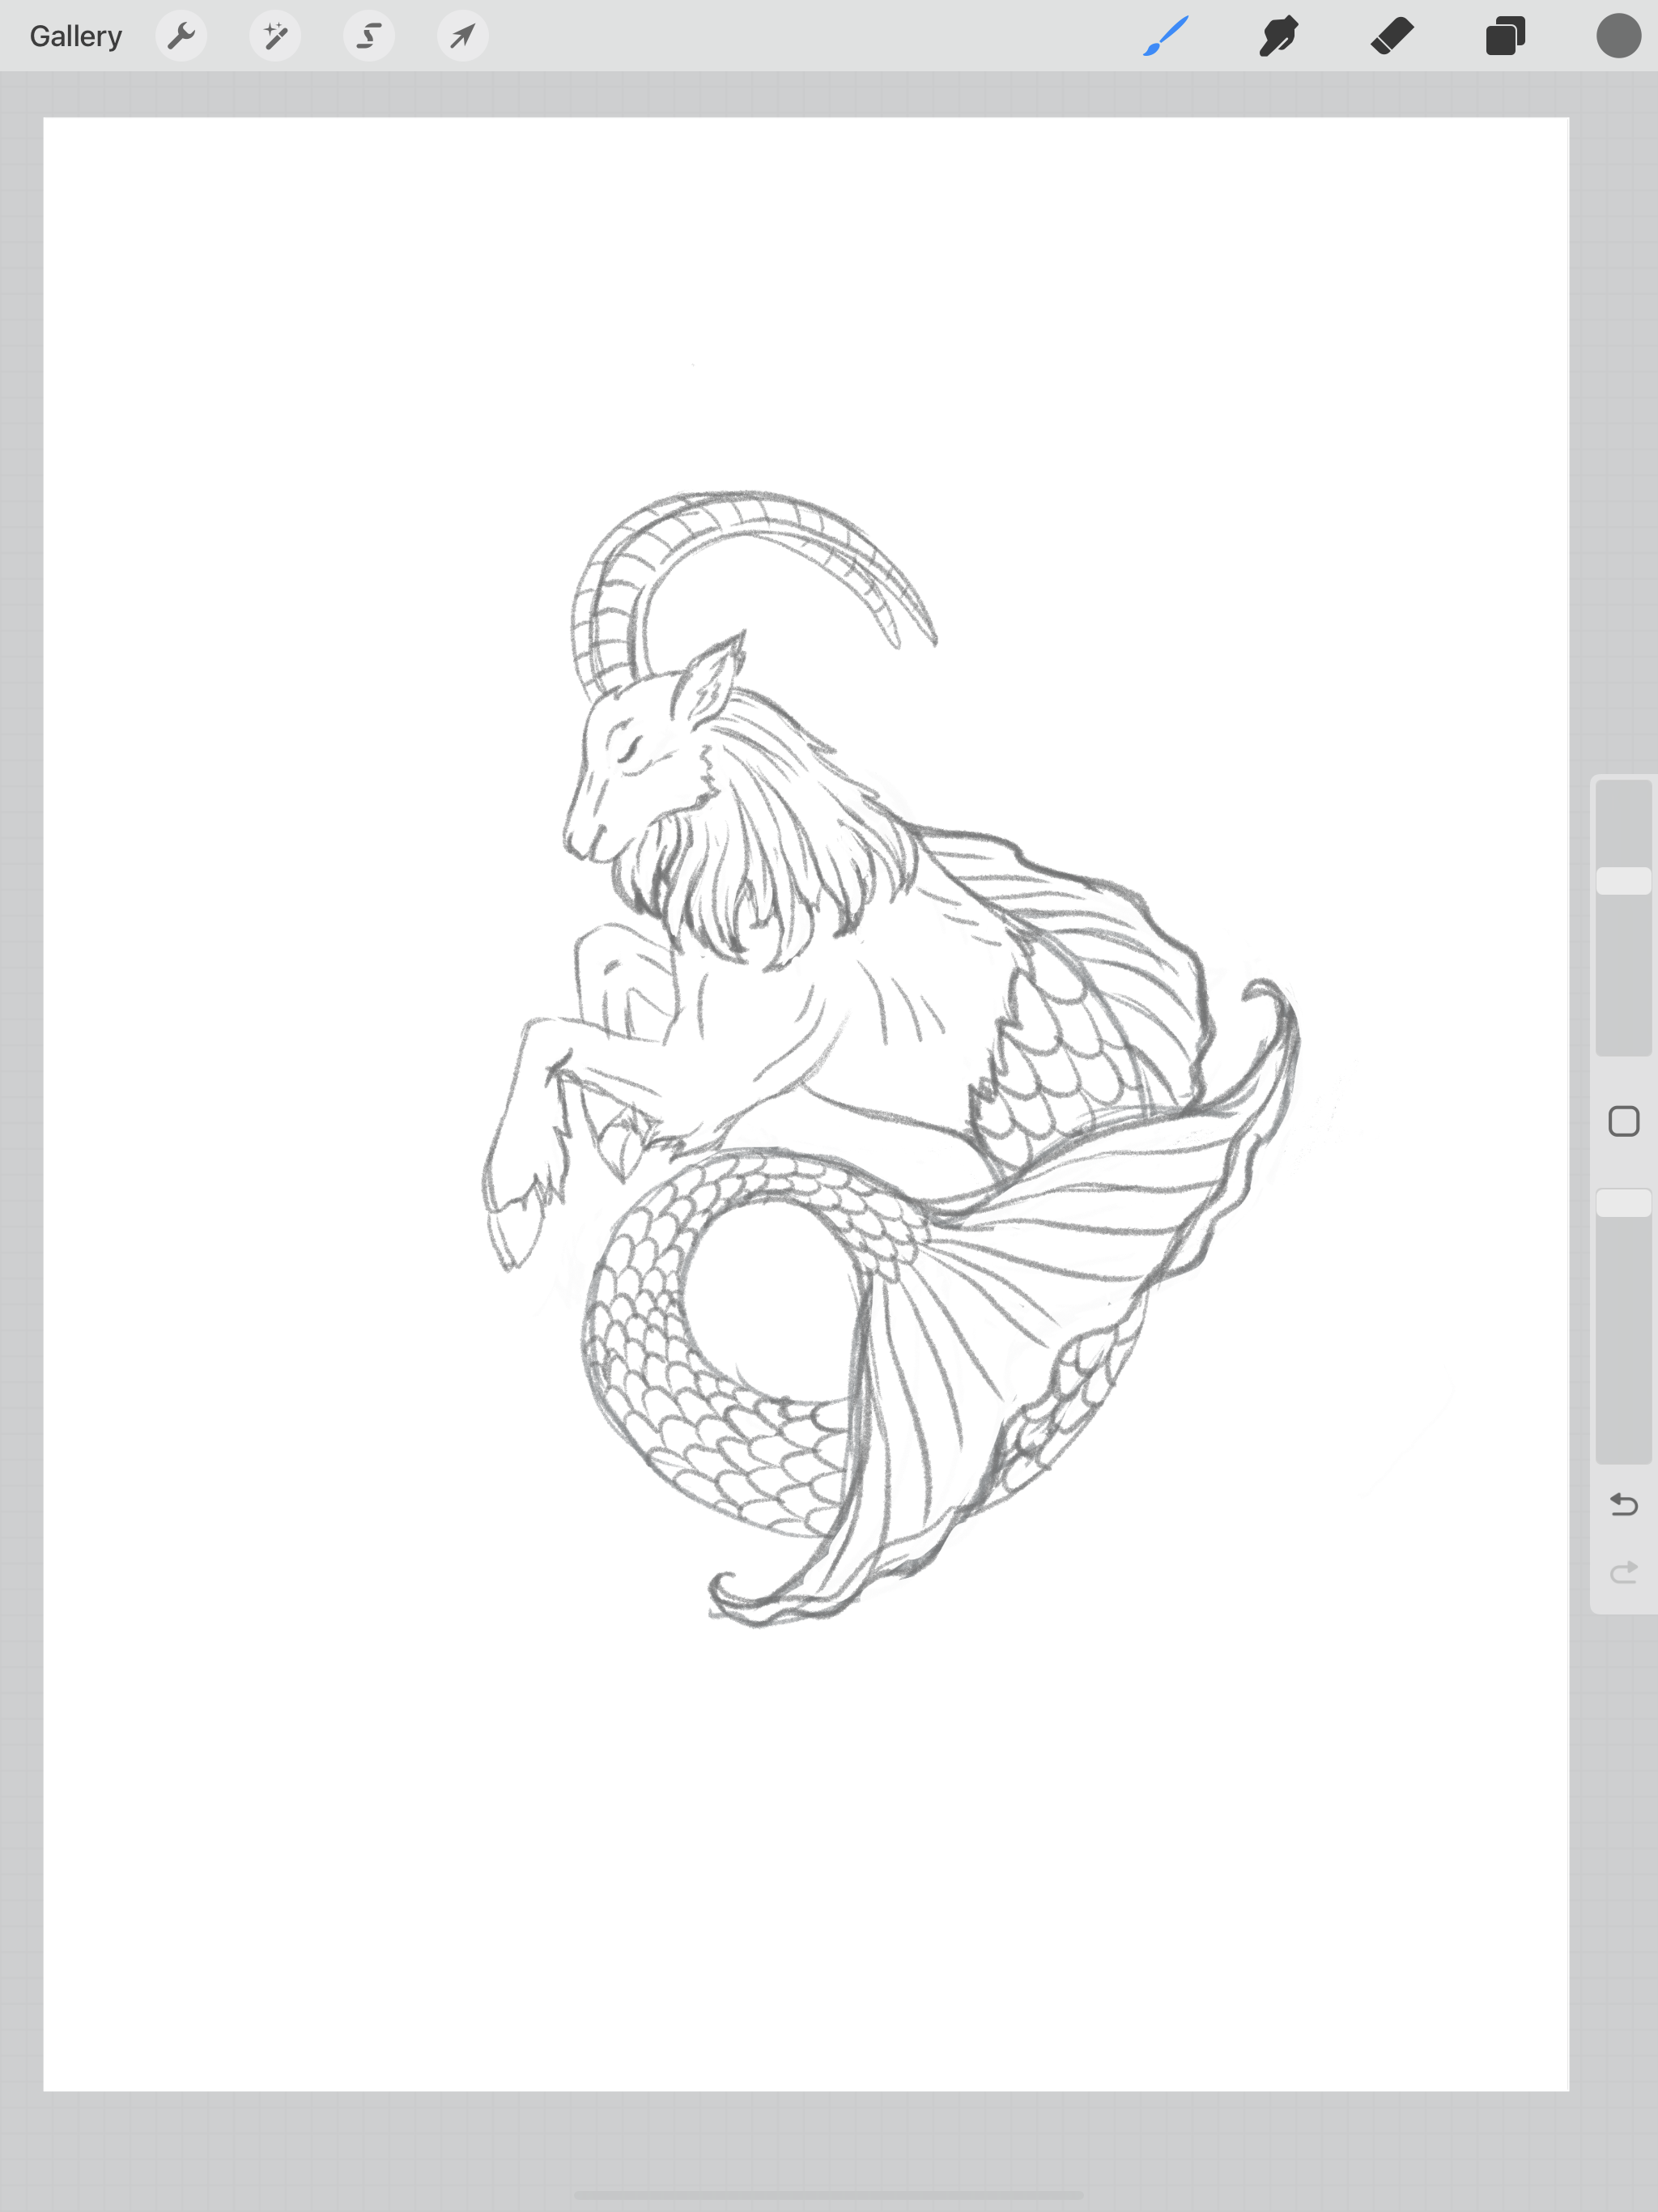
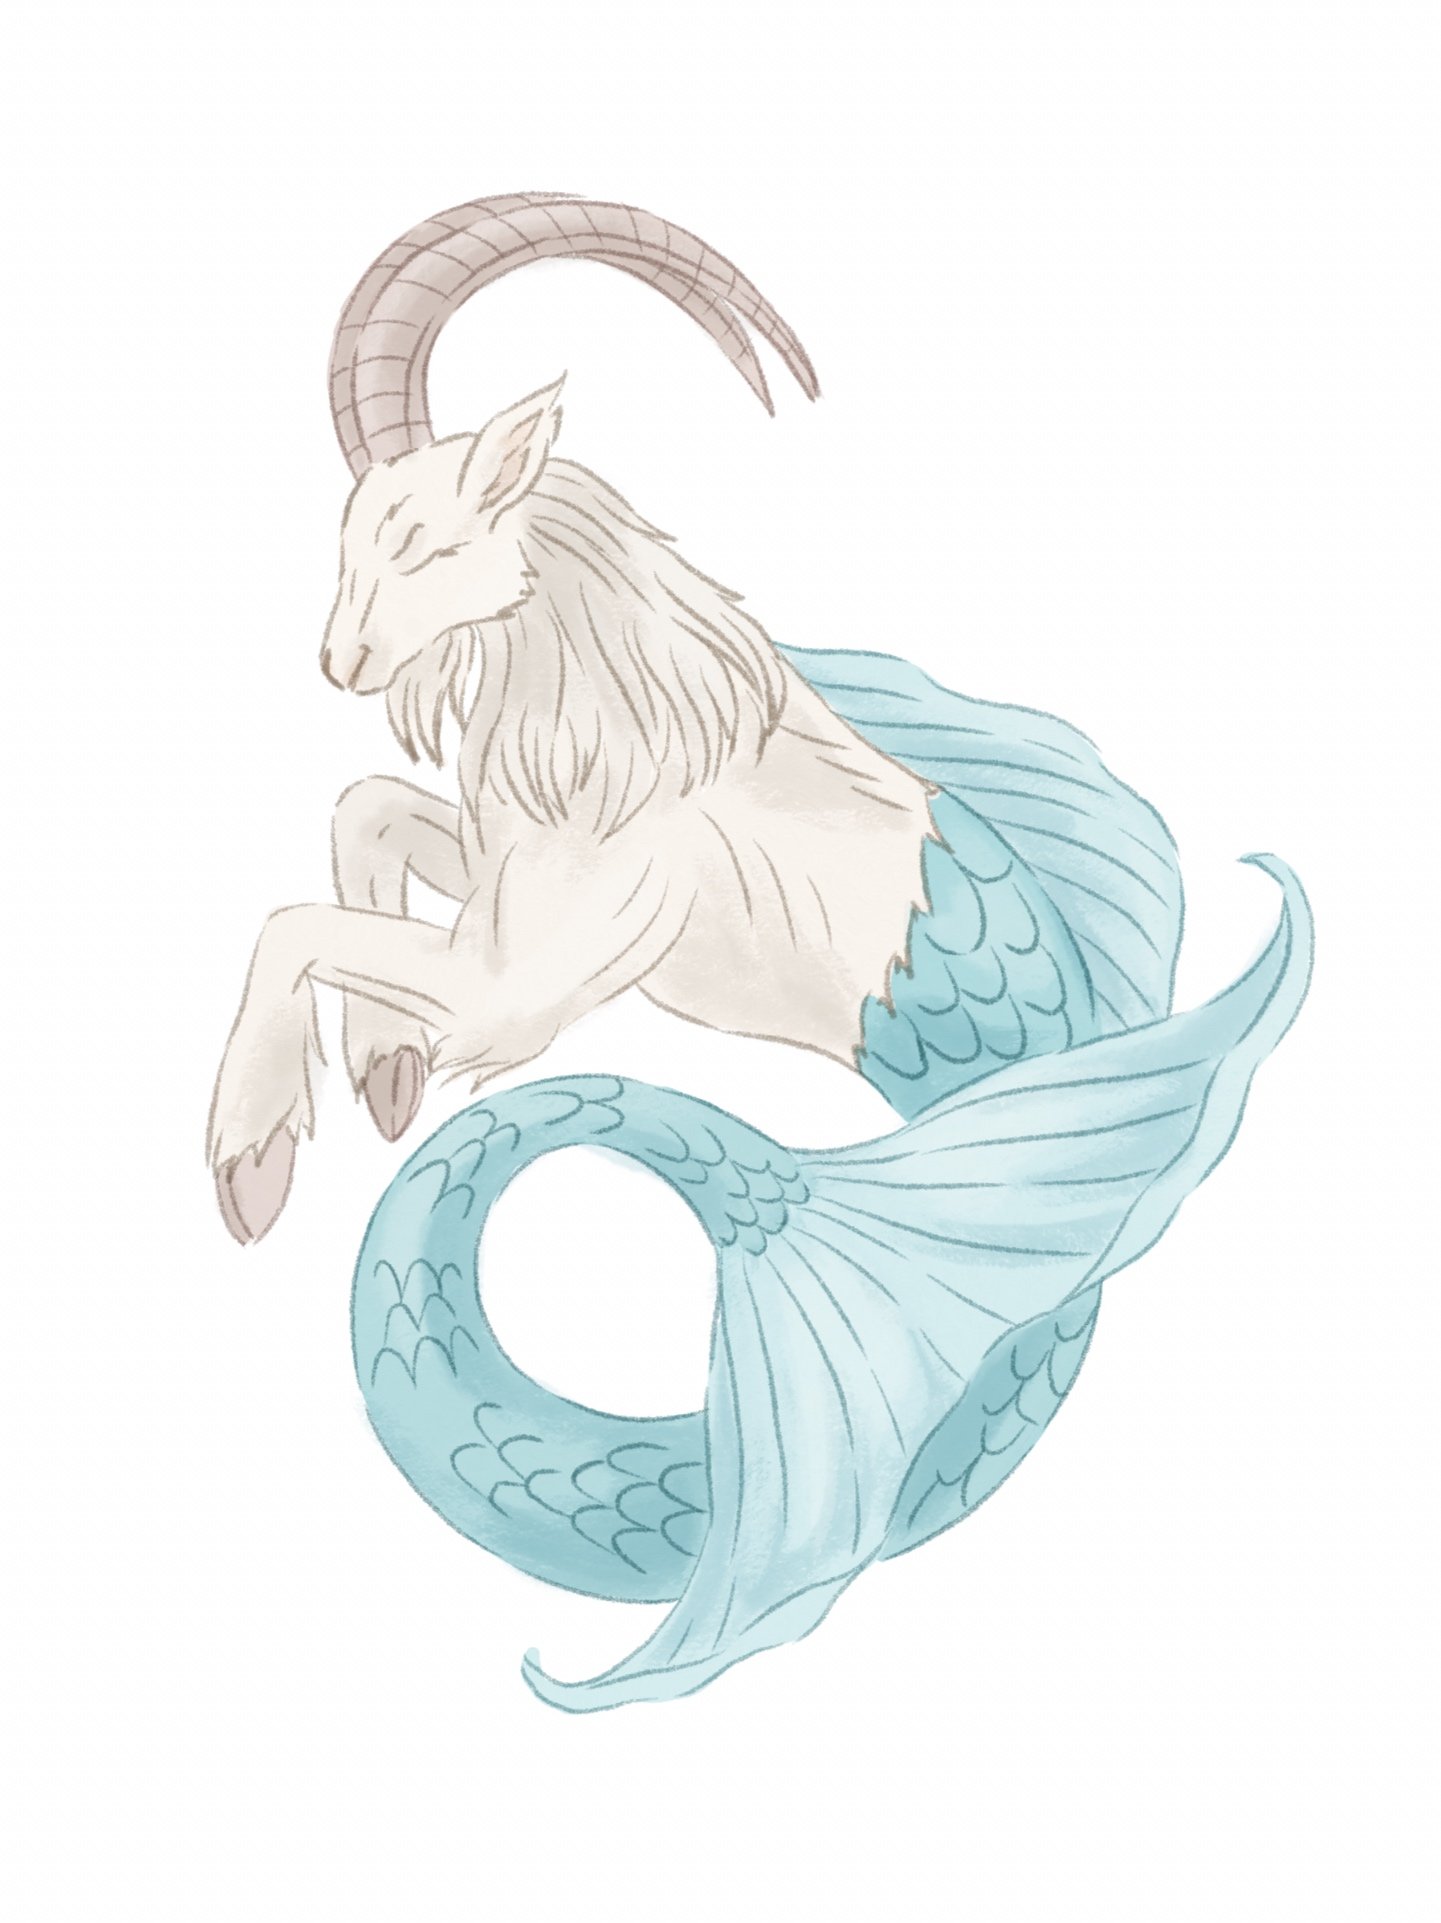
I will be using my same Capricorn line drawing from the past few weeks. In the end you will see all the different ways I’ve used this same base drawing and rendered it different ways. This is also a great way to figure out what kind of drawing/ painting style you prefer to use for your own artwork.

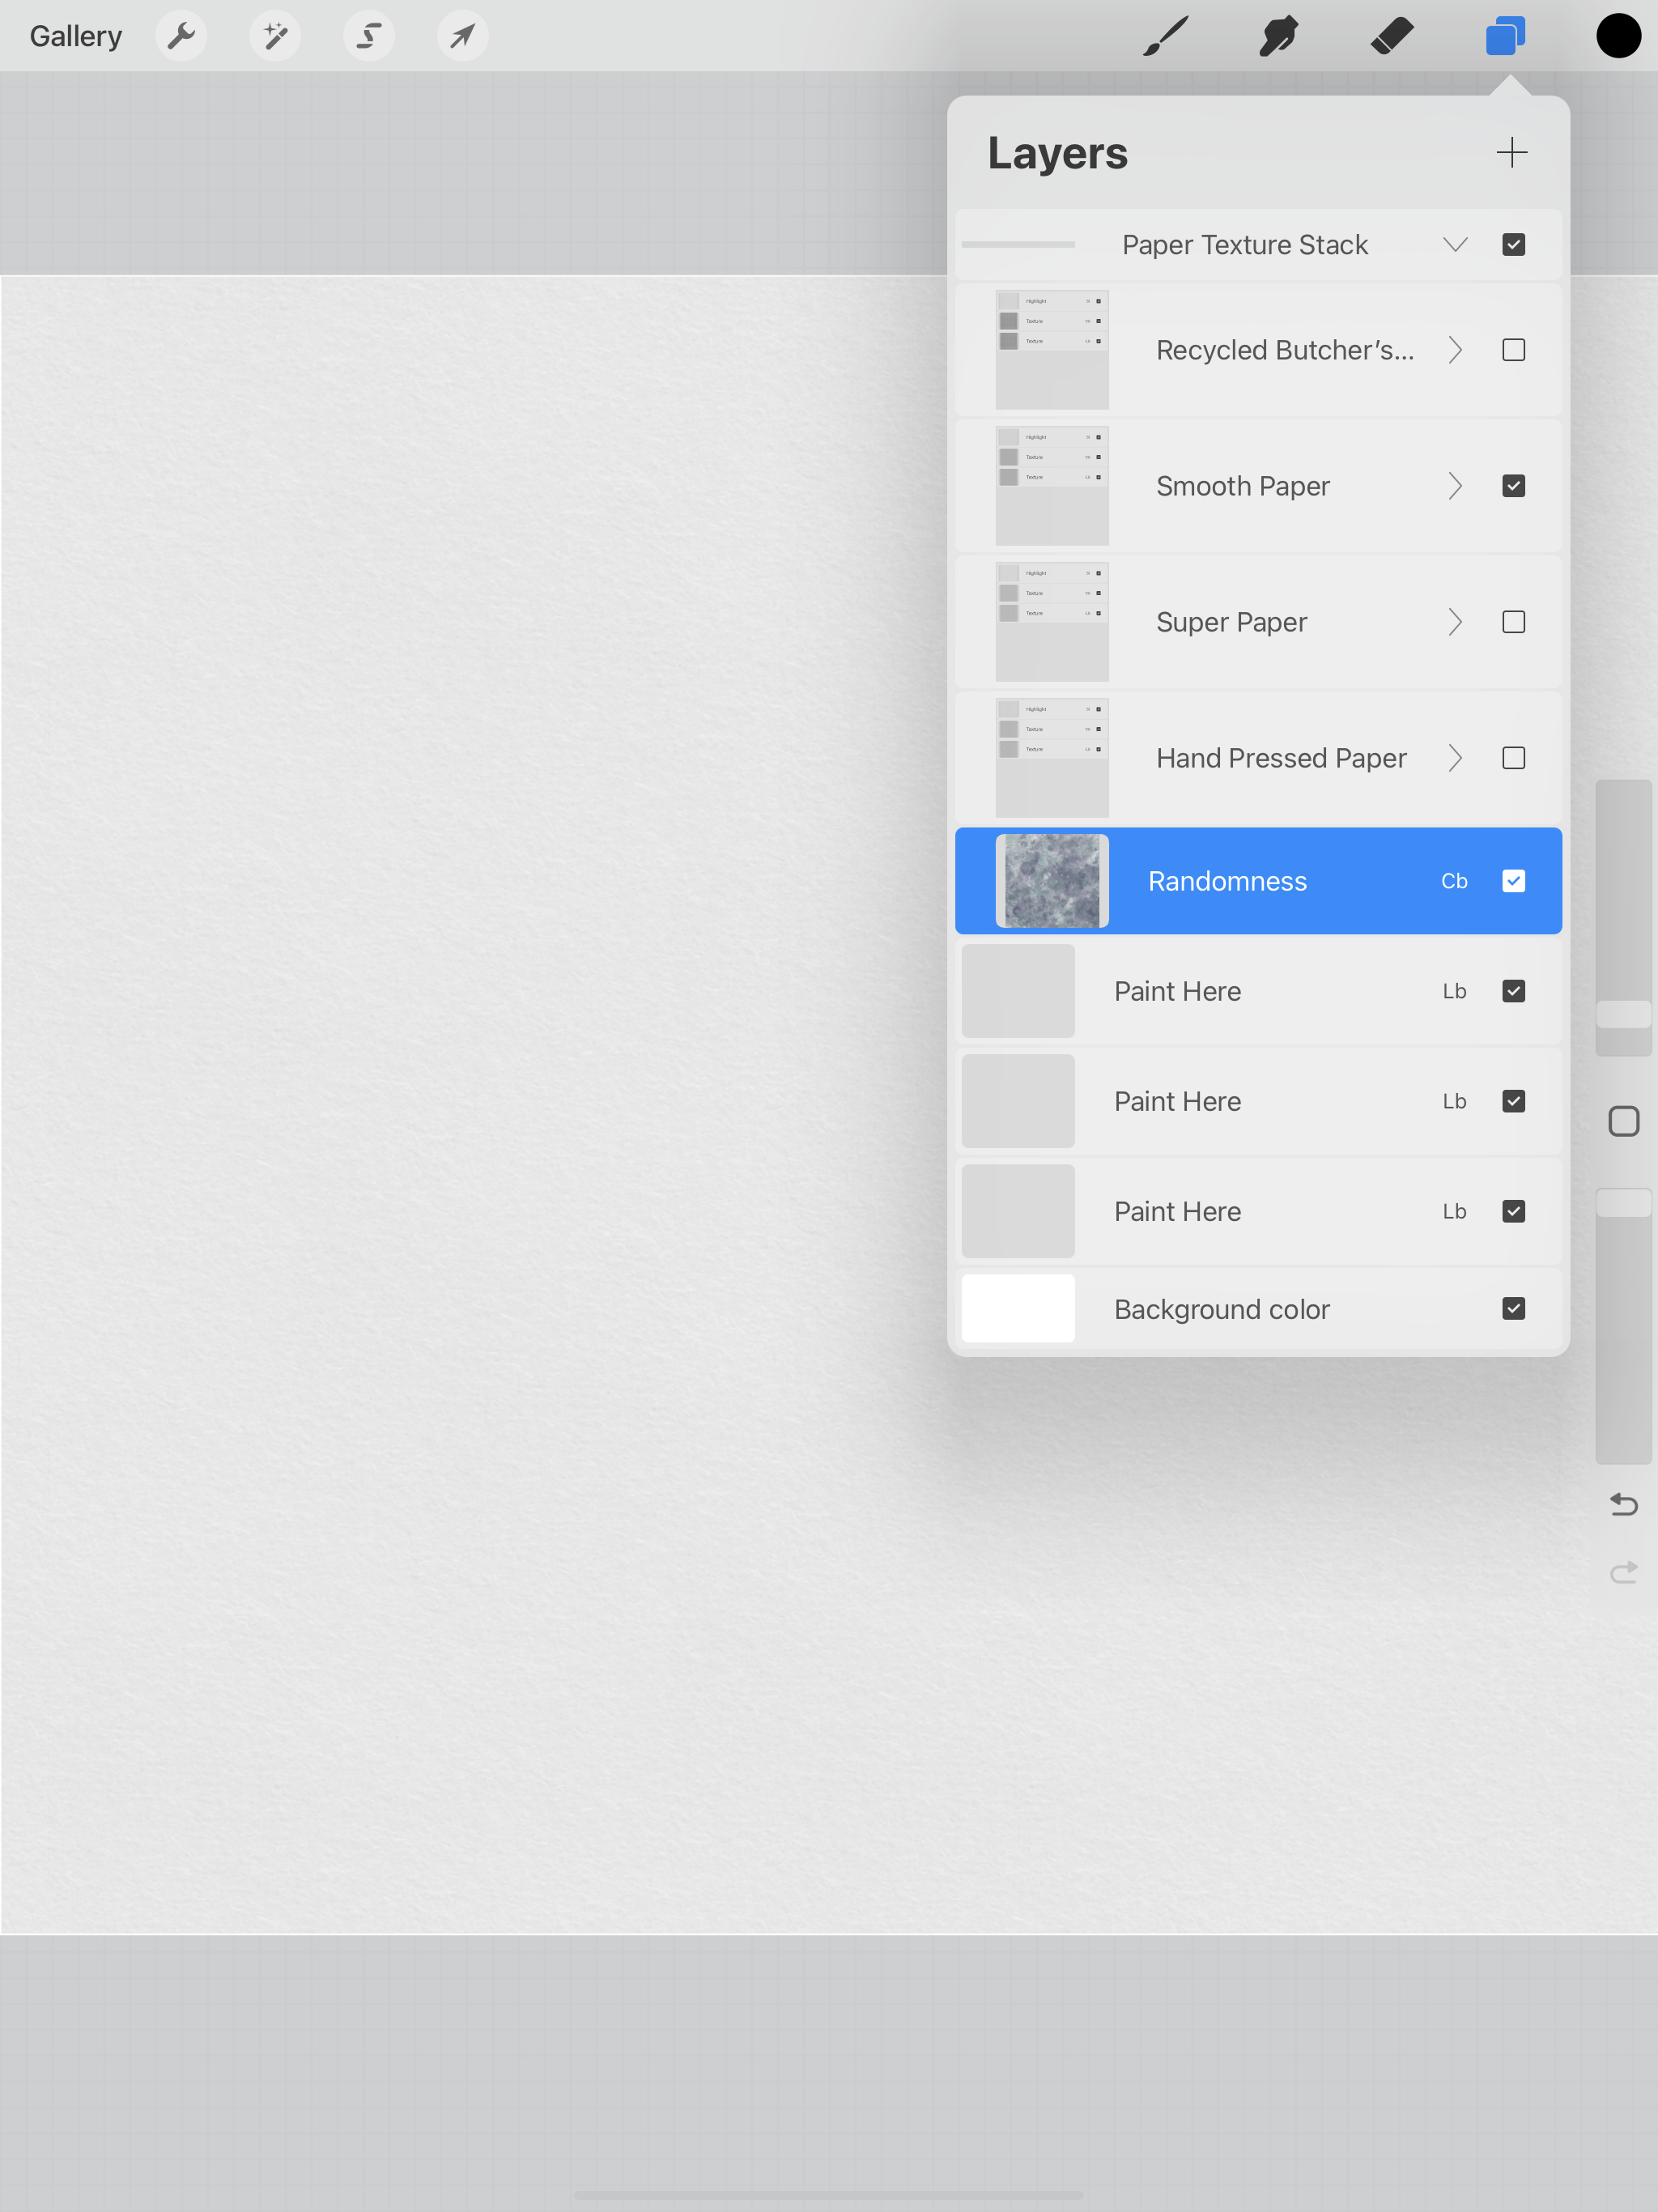
I’m going to be using the Smooth Paper texture canvas that comes with the Everything Watercolor brushes. I will go ahead and delete the others so I can have more layers to work with for my painting.

Watercolor style clip art in Procreate - paper texture

I copy and pasted my Capricorn line drawing and put it underneath the paper texture. I also lowered the opacity of my drawing to where I can barely see it. The paper texture always needs to stay on top, you painting and drawing layers will always be below the texture stack.

Watercolor style clip art in Procreate - sketch layer

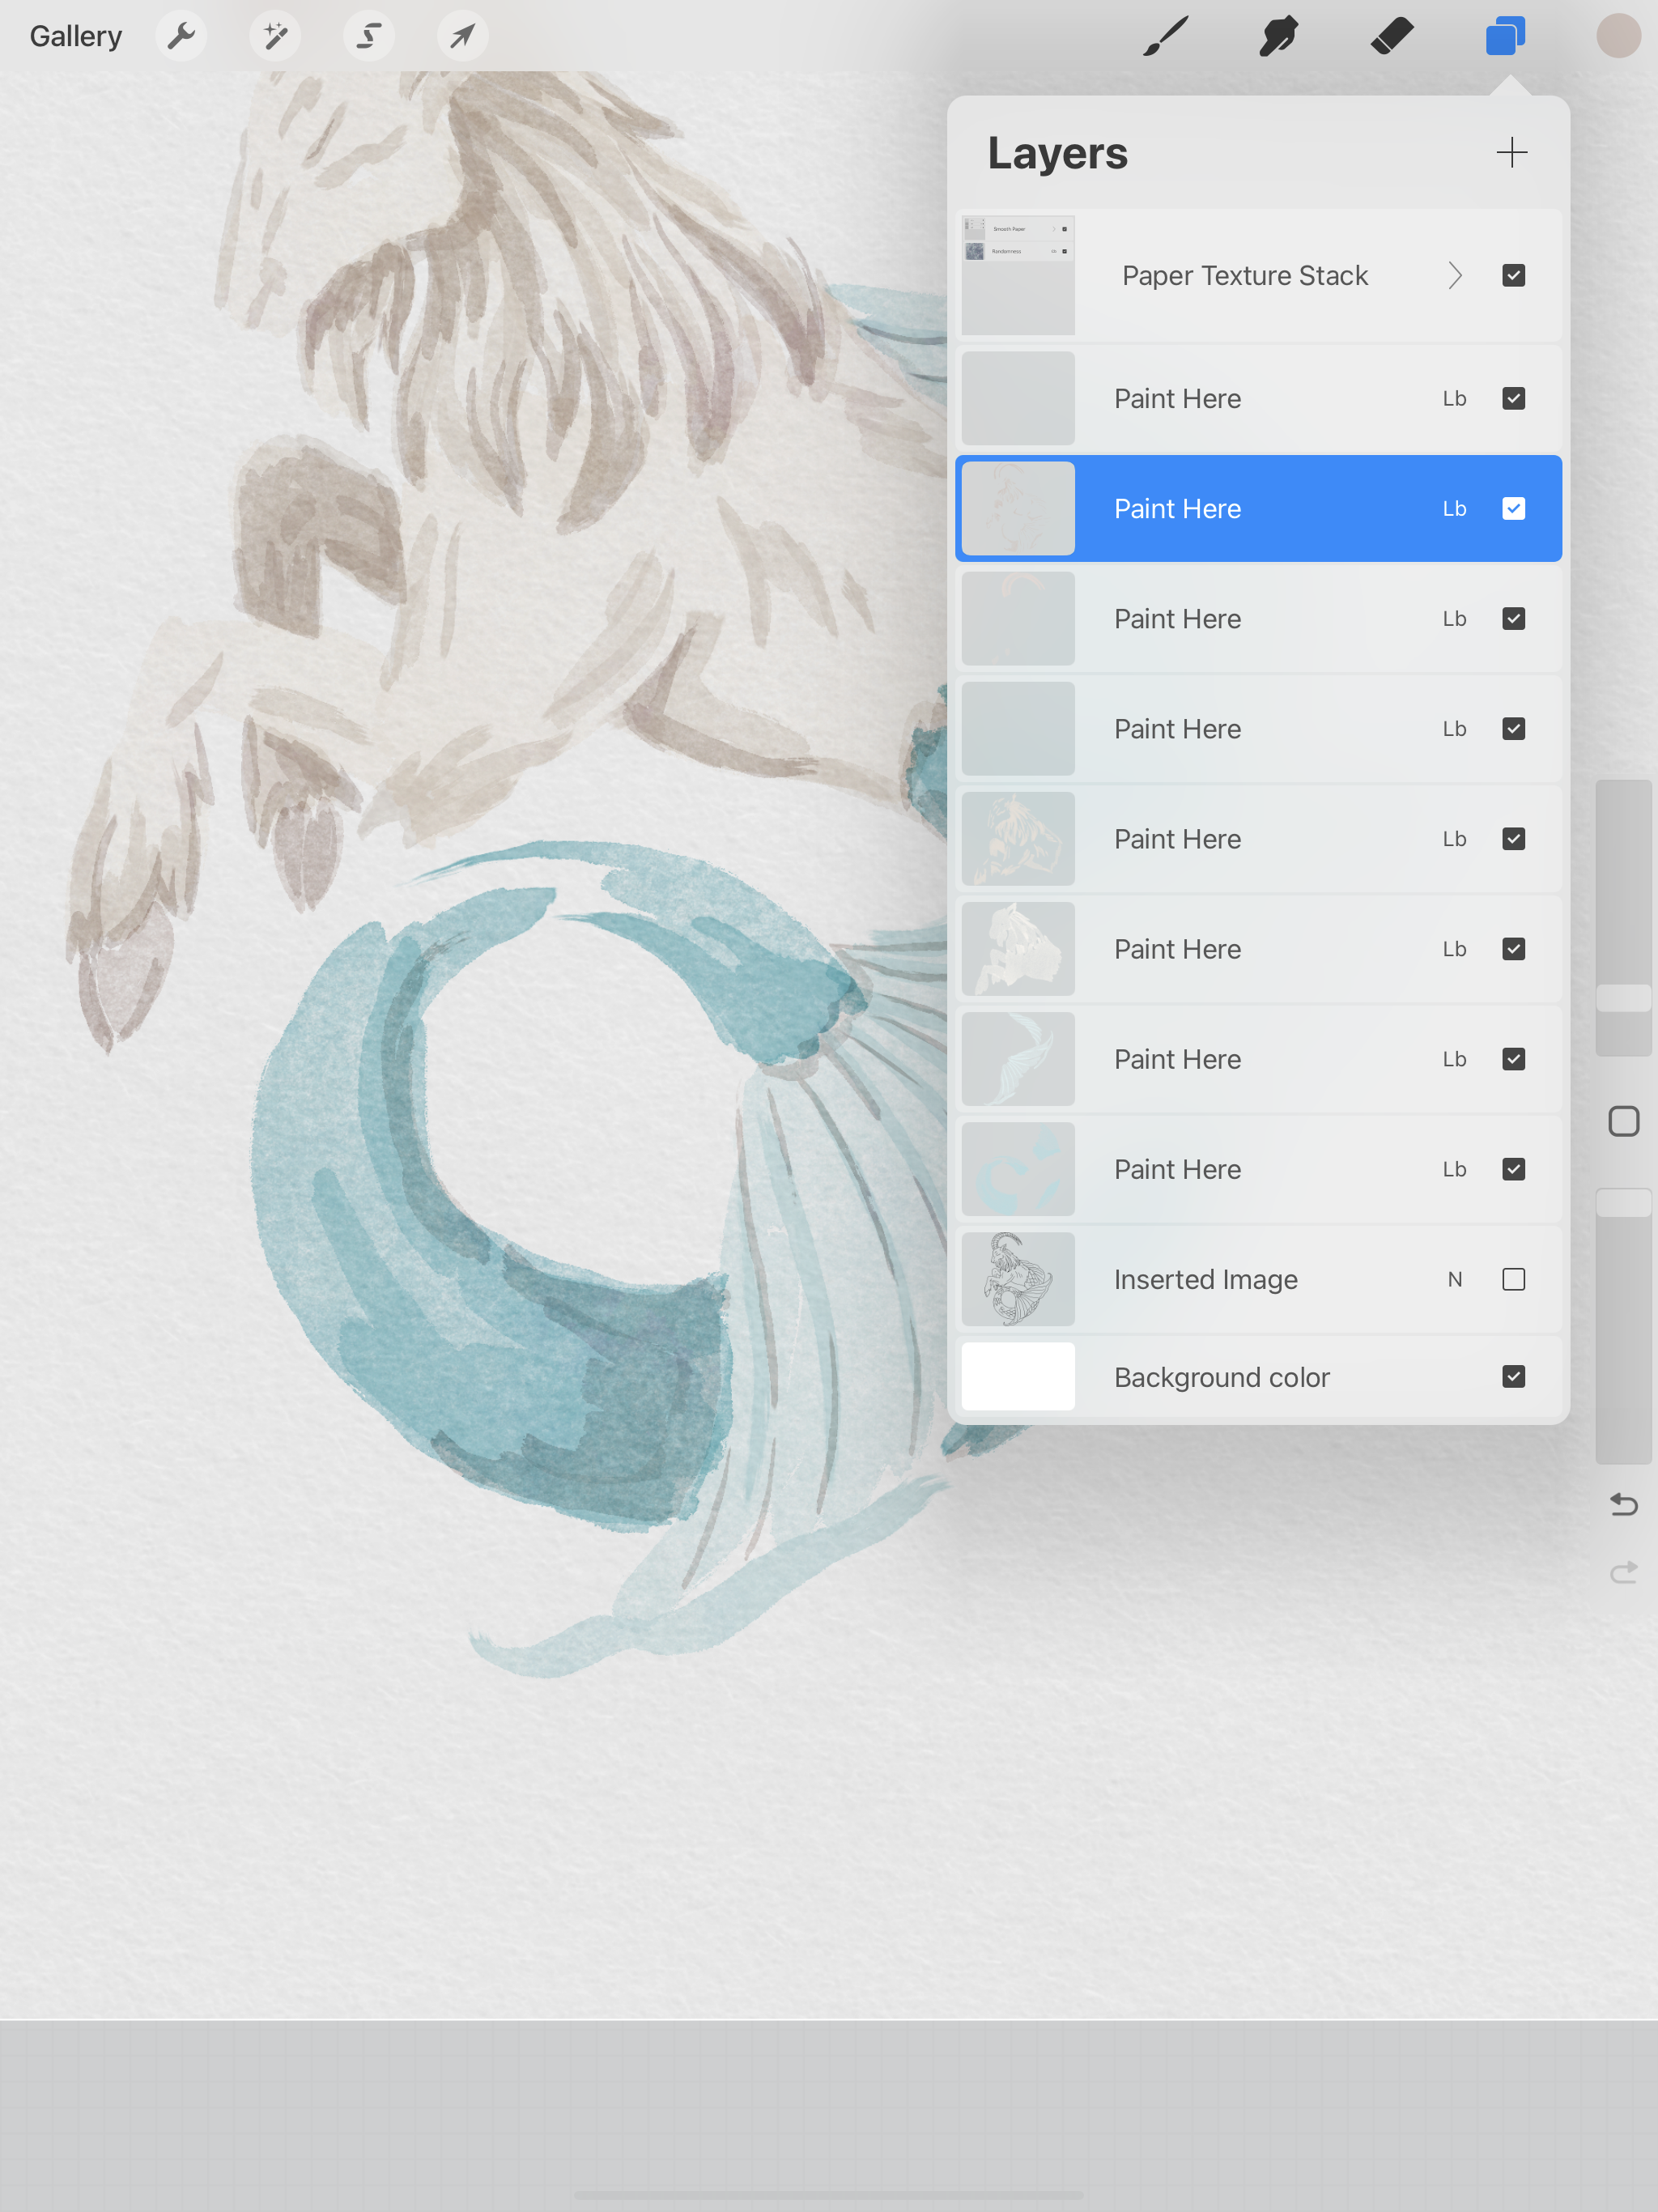
There are already some layers labeled “Paint Here”, I’m going to go head and duplicate these while they’re still empty, but you can always add more later.

For simplicity, I’m going to use the same colors that I did last week, and I’m going to start with the tail again. I select my Brushy McBrush Face brush and start painting on one of the “Paint Here” layers. With this brush, once you lift your pencil off the screen, when you draw/ paint over the same area again it will get darker.

I really love the ends and edges of this brush, they’re a little rough so it looks like i’m painting with an actual brush.

This brush also layers very nicely, once I’ve got my base layer down I can go back in and make some darker areas like with real watercolor.

Watercolor style clip art in Procreate - brushes

I still like to keep all of my colors on separate layers, so it’s easier for me to go back and make any color adjustments if needed.

Once I’ve got my base colors down, I’m going to add some more shadows. The color I started out with was little dark, but I ended up adjusting my layer opacity to 50%.

Watercolor style clip art in Procreate - layers

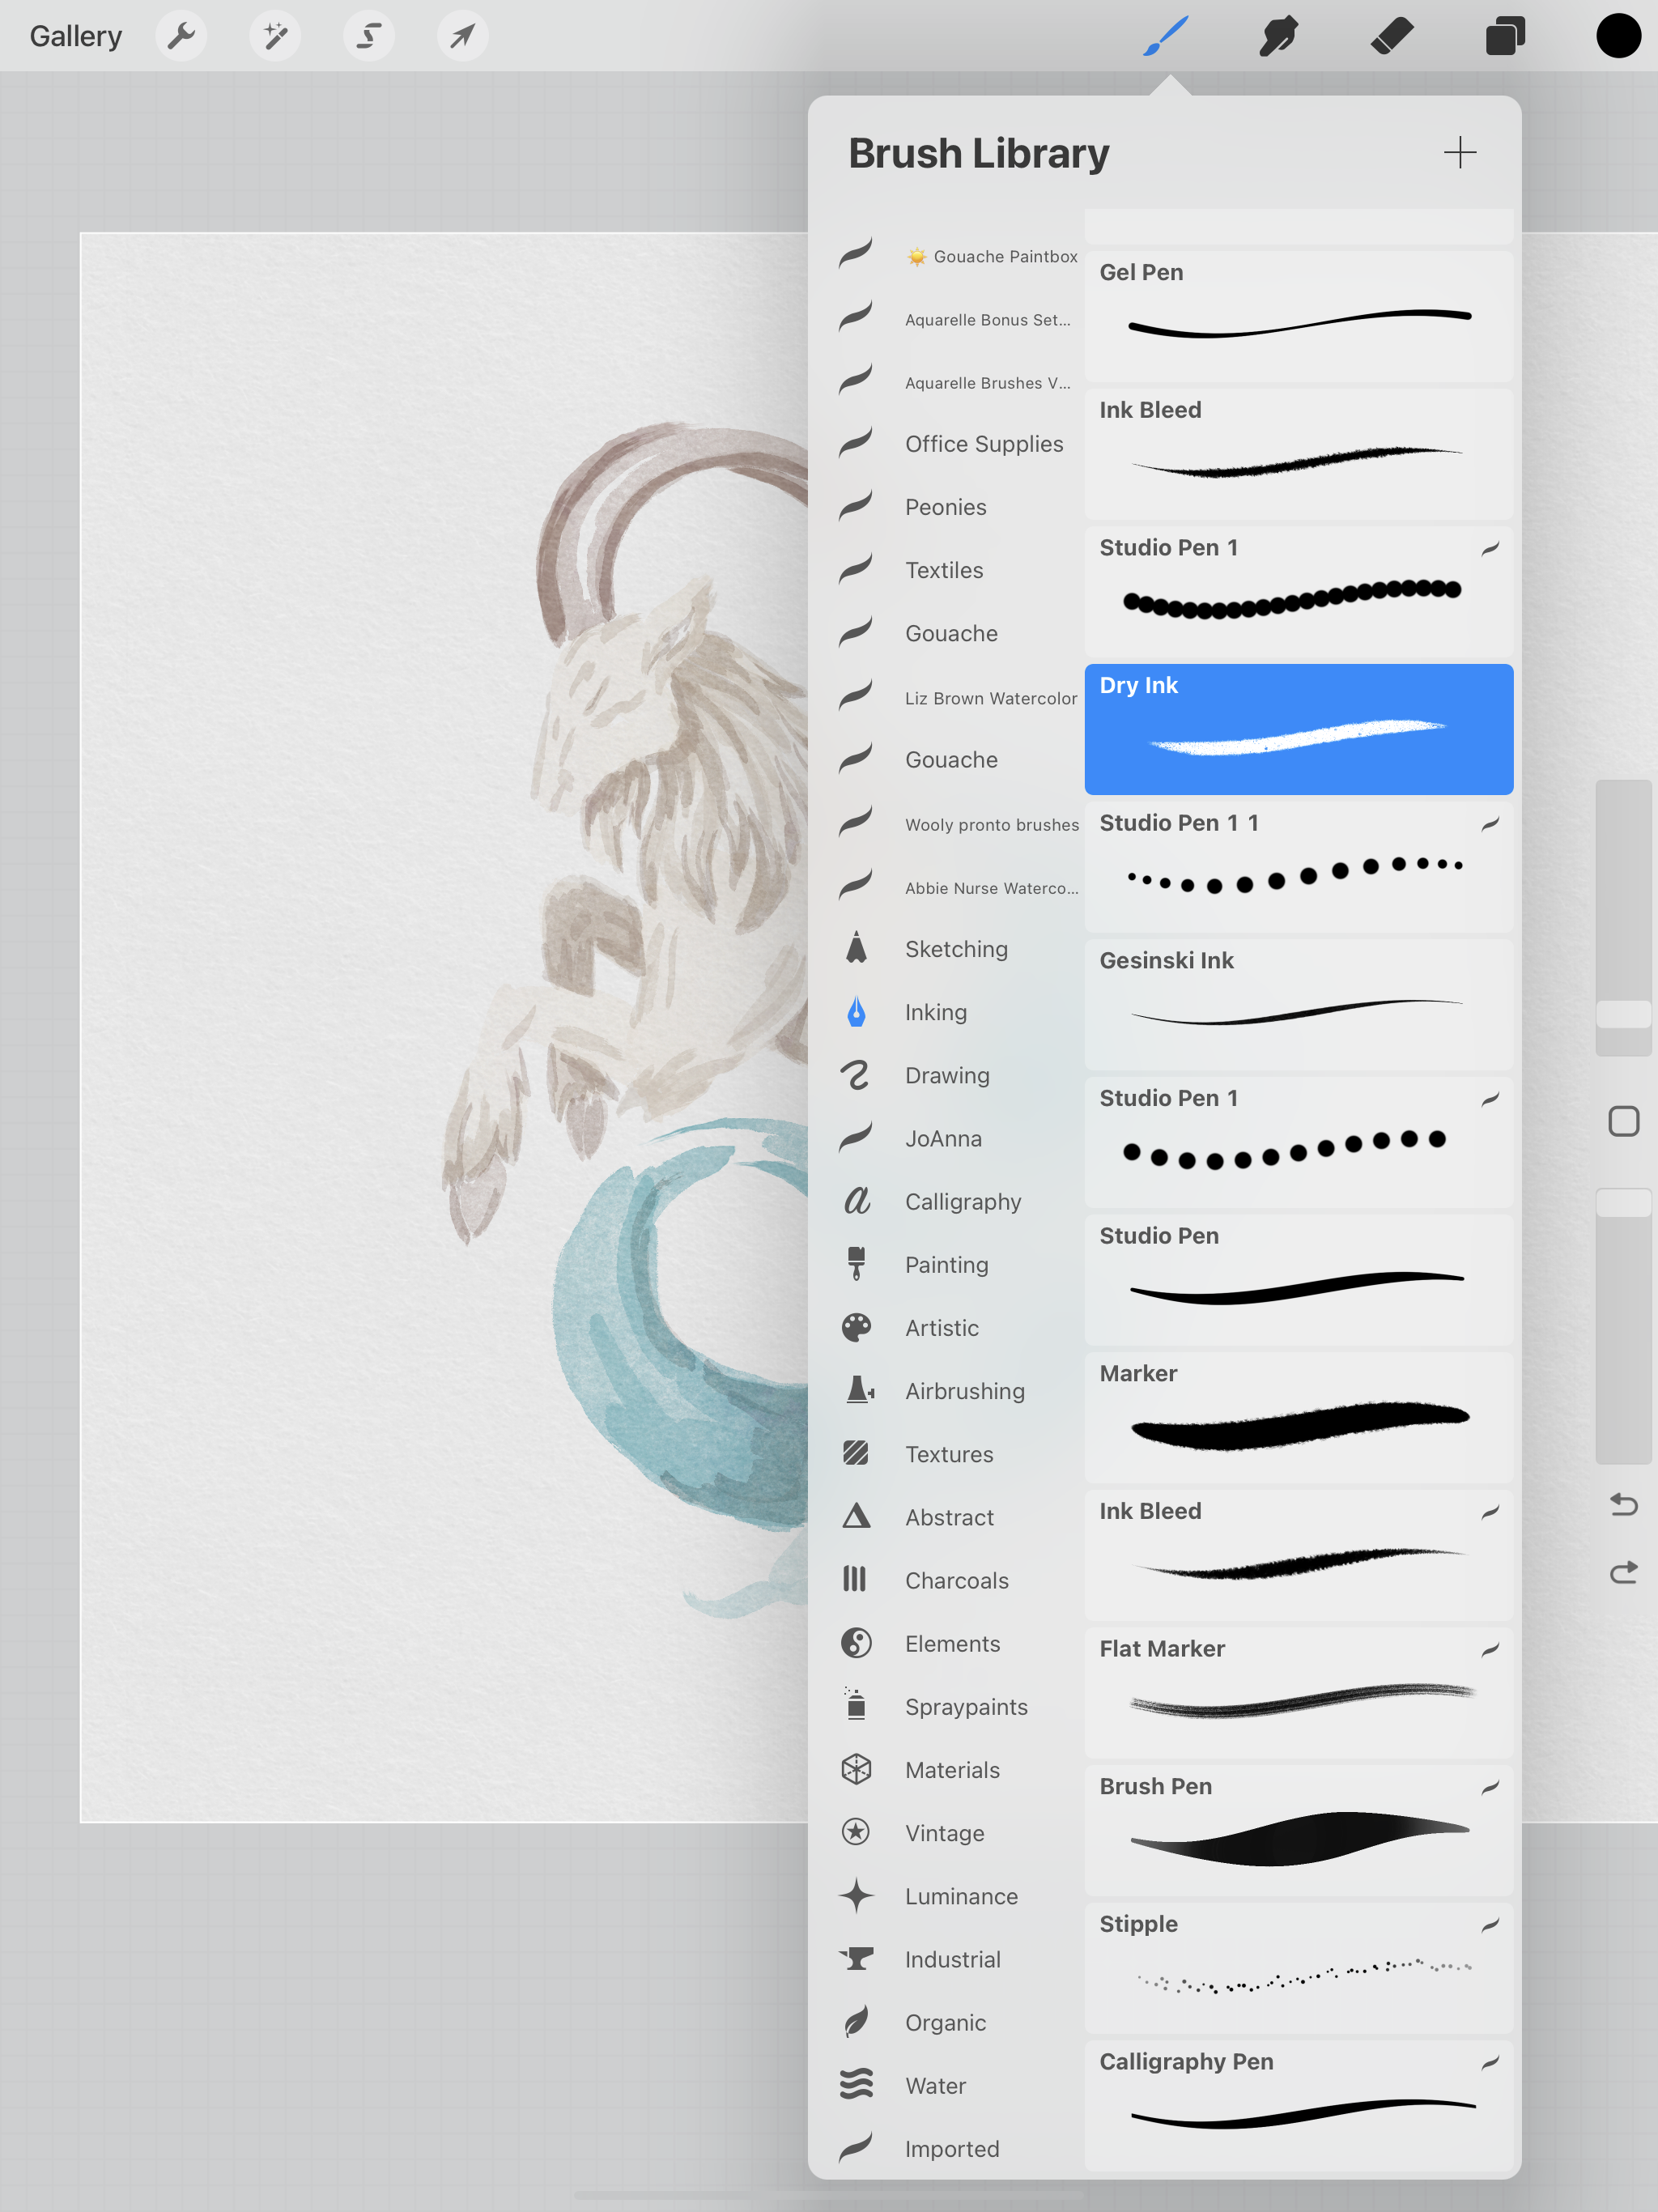
Now for my finishing touch, I’m going to use the Dry Ink pen that comes with Procreate (you can find it in the Inking brushes) I want this to look like I quickly went around it with an old Micron pen. I’m going to loosely trace around my original one drawing, but I’m not going to worry about being too precise. I want this illustration to have a looser feel than my gouache style painting from last week.

Watercolor style clip art in Procreate - ink pen

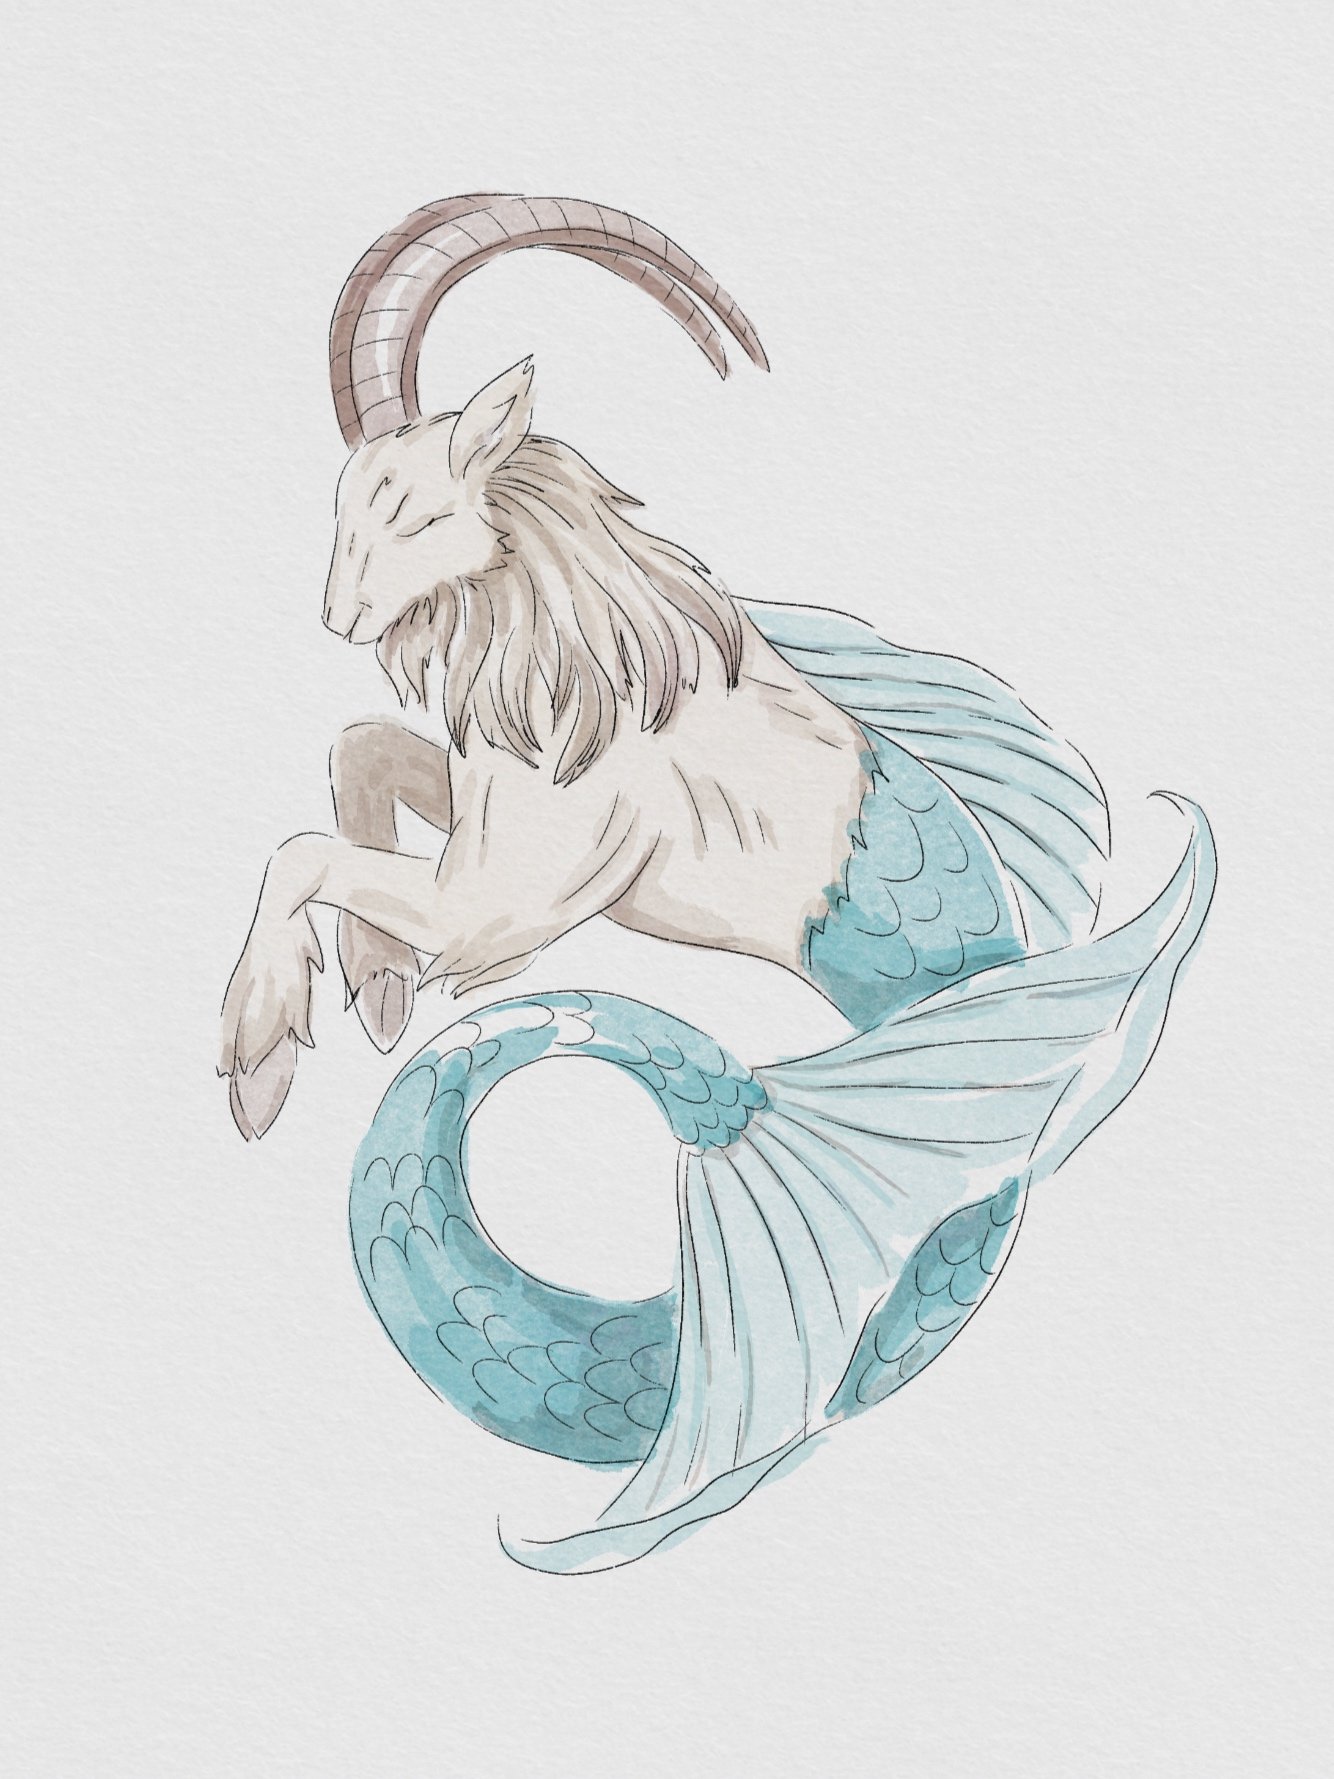
Now it’s finished, and here’s a side by side with my painting from last week. I can use these painting as clip art for stickers and I also plan to make some repeating patterns once I have finished all the zodiac signs.

Watercolor style clip art in Procreate - finished design

Watercolor style with black ink details

Gouache style clip art in Procreate

Gouache style with pencil details

Creating Gouache Style Clip Art in Procreate to Use With Your Cricut or Silhouette Machine

Hi Everyone!

The last few weeks I showed you my process for how I create and test my single line SVG files. If single line SVGs aren’t really your thing, for the next few weeks I’m going to share with you some other methods for how I create artwork to use with my Cricut or Silhouette machine.

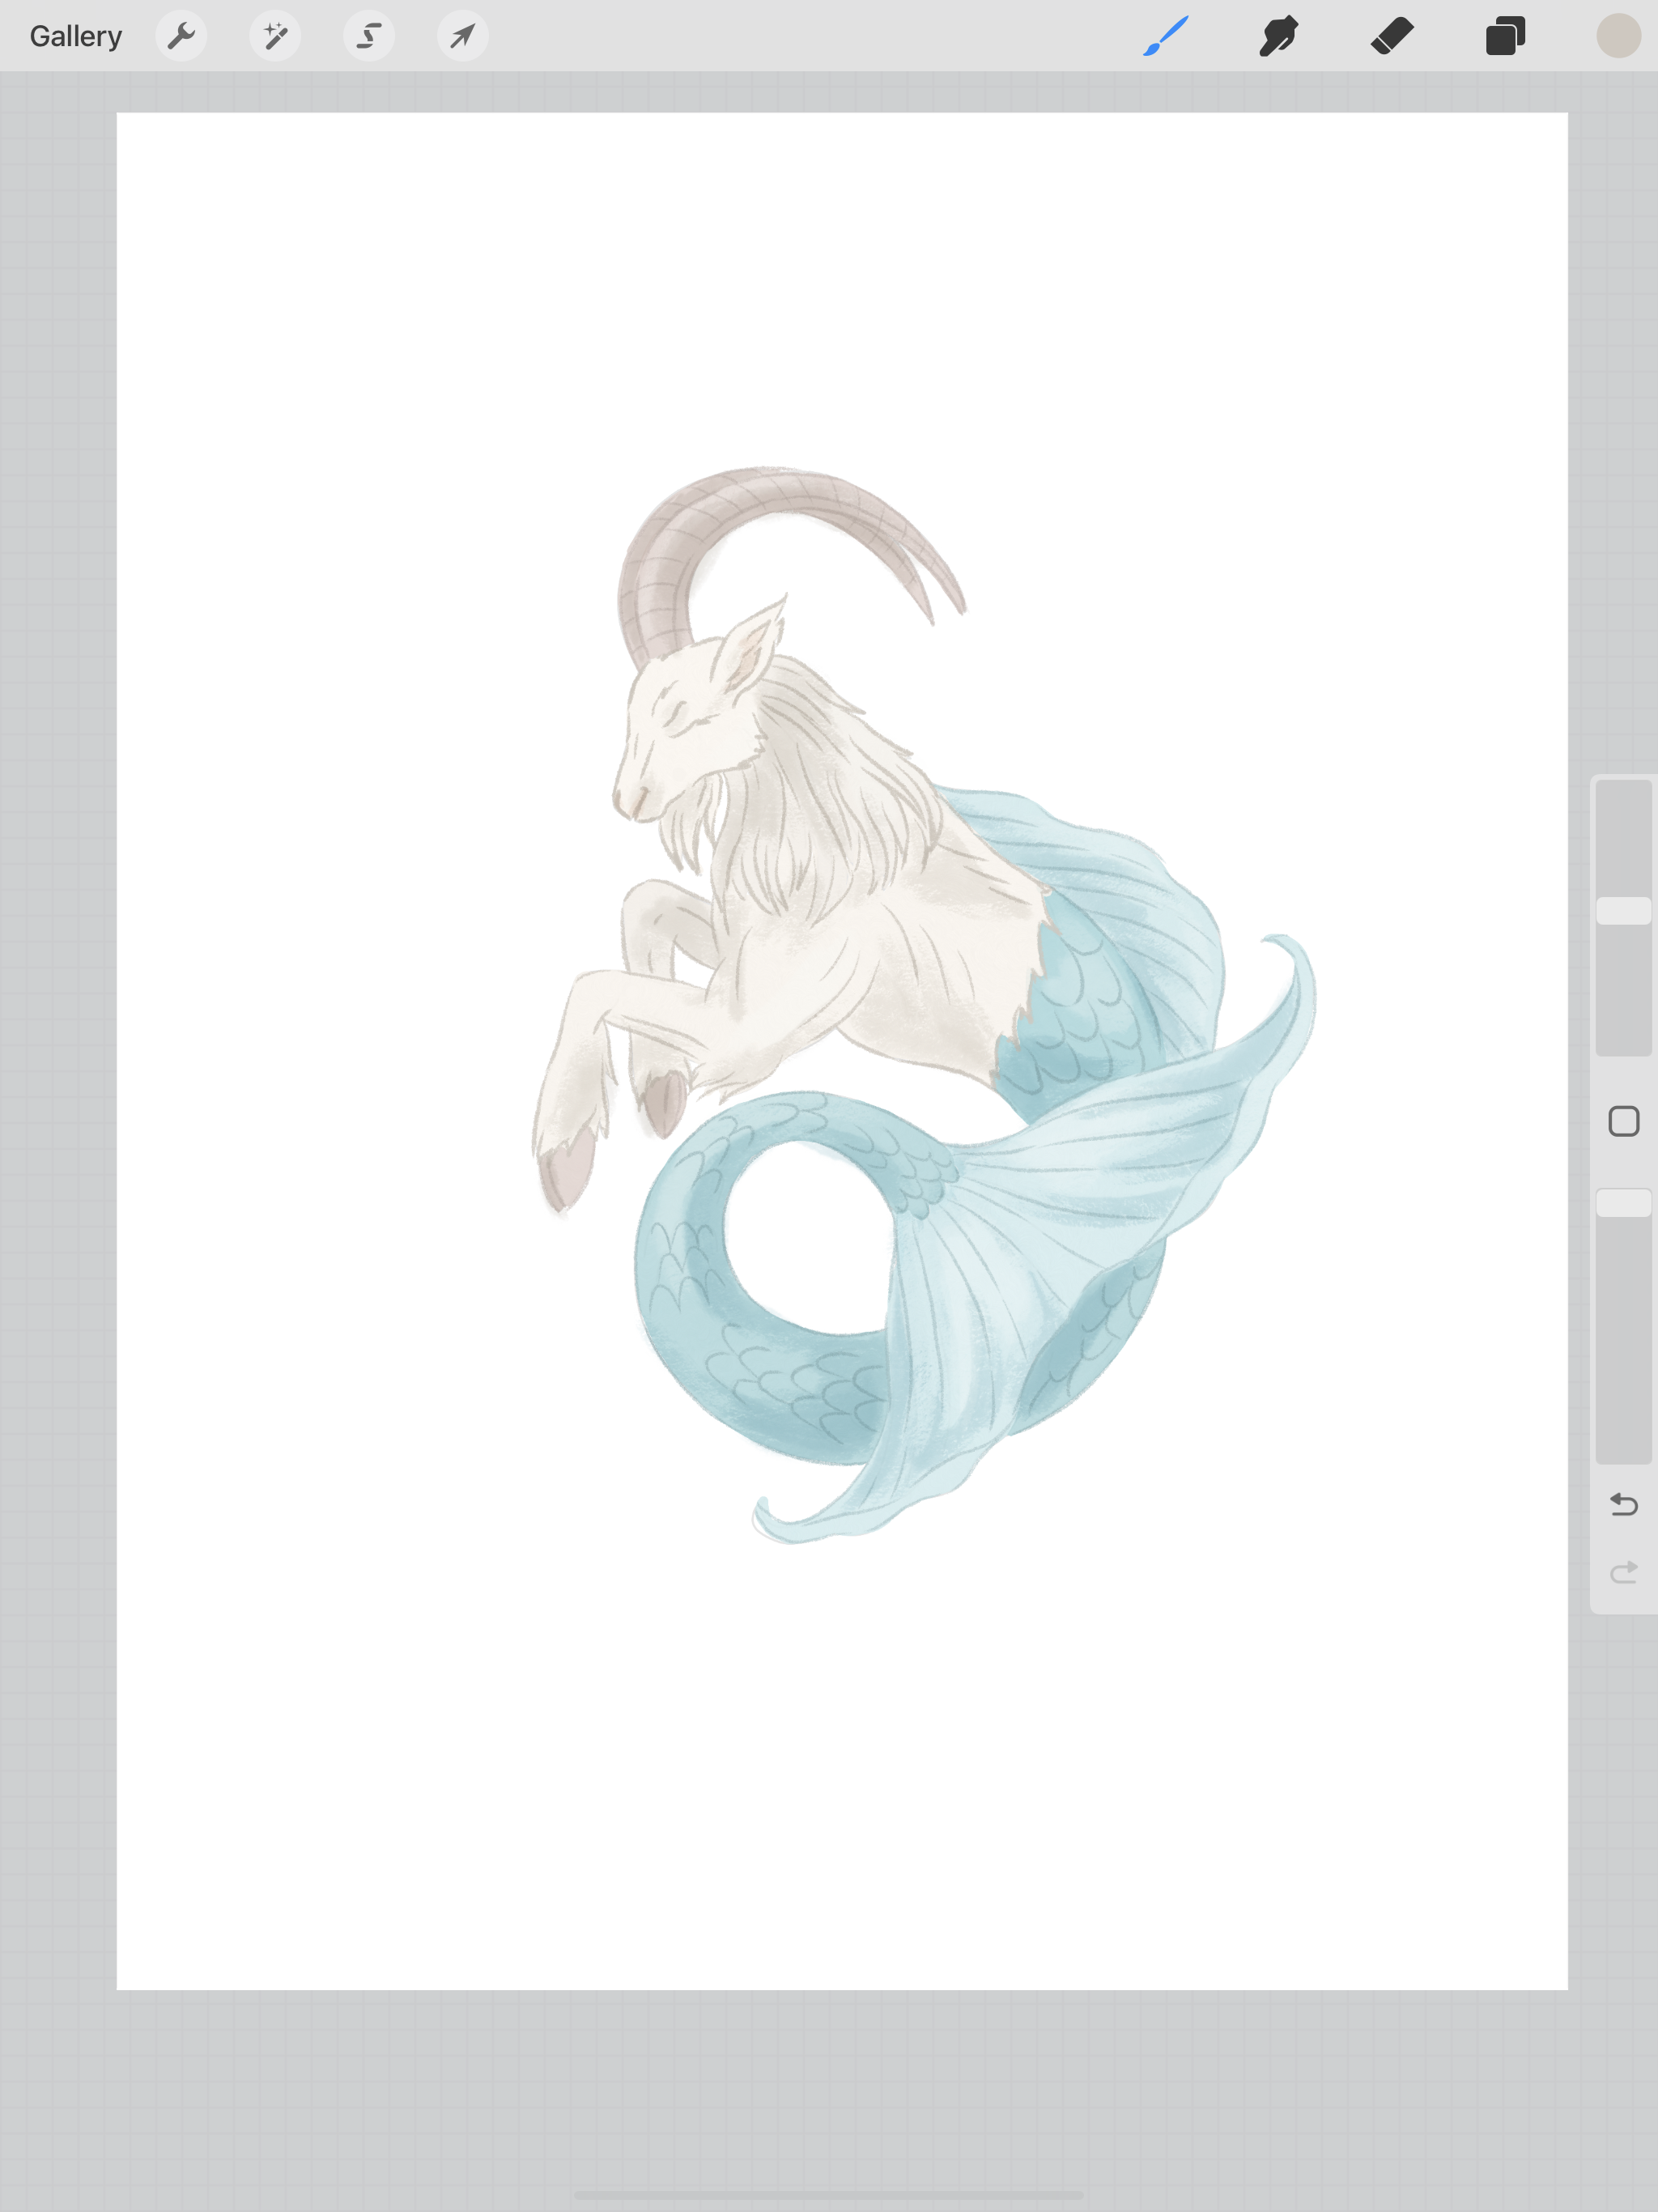
Since I already have this nice outline of my Capricorn, I’m going to use it as a guide to do a full color gouache-style version in Procreate on my iPad Pro. I’ll be able to use my finished artwork as clip art for stickers and other things.

Creating Clip Art in Procreate

Procreate is one of my absolute favorite apps for the iPad. It is a paid app, but it’s worth every penny in my opinion. It comes with some great brushes already included, there are numerous brush sets you can purchase from other artists, or you can even create you own custom brushes.

Today, I’m going to use a combination of brushes that are included with Procreate and some brushes that I have purchased. But you can absolutely create your own artwork using just the brushes that are already come with Procreate. Let’s get started!

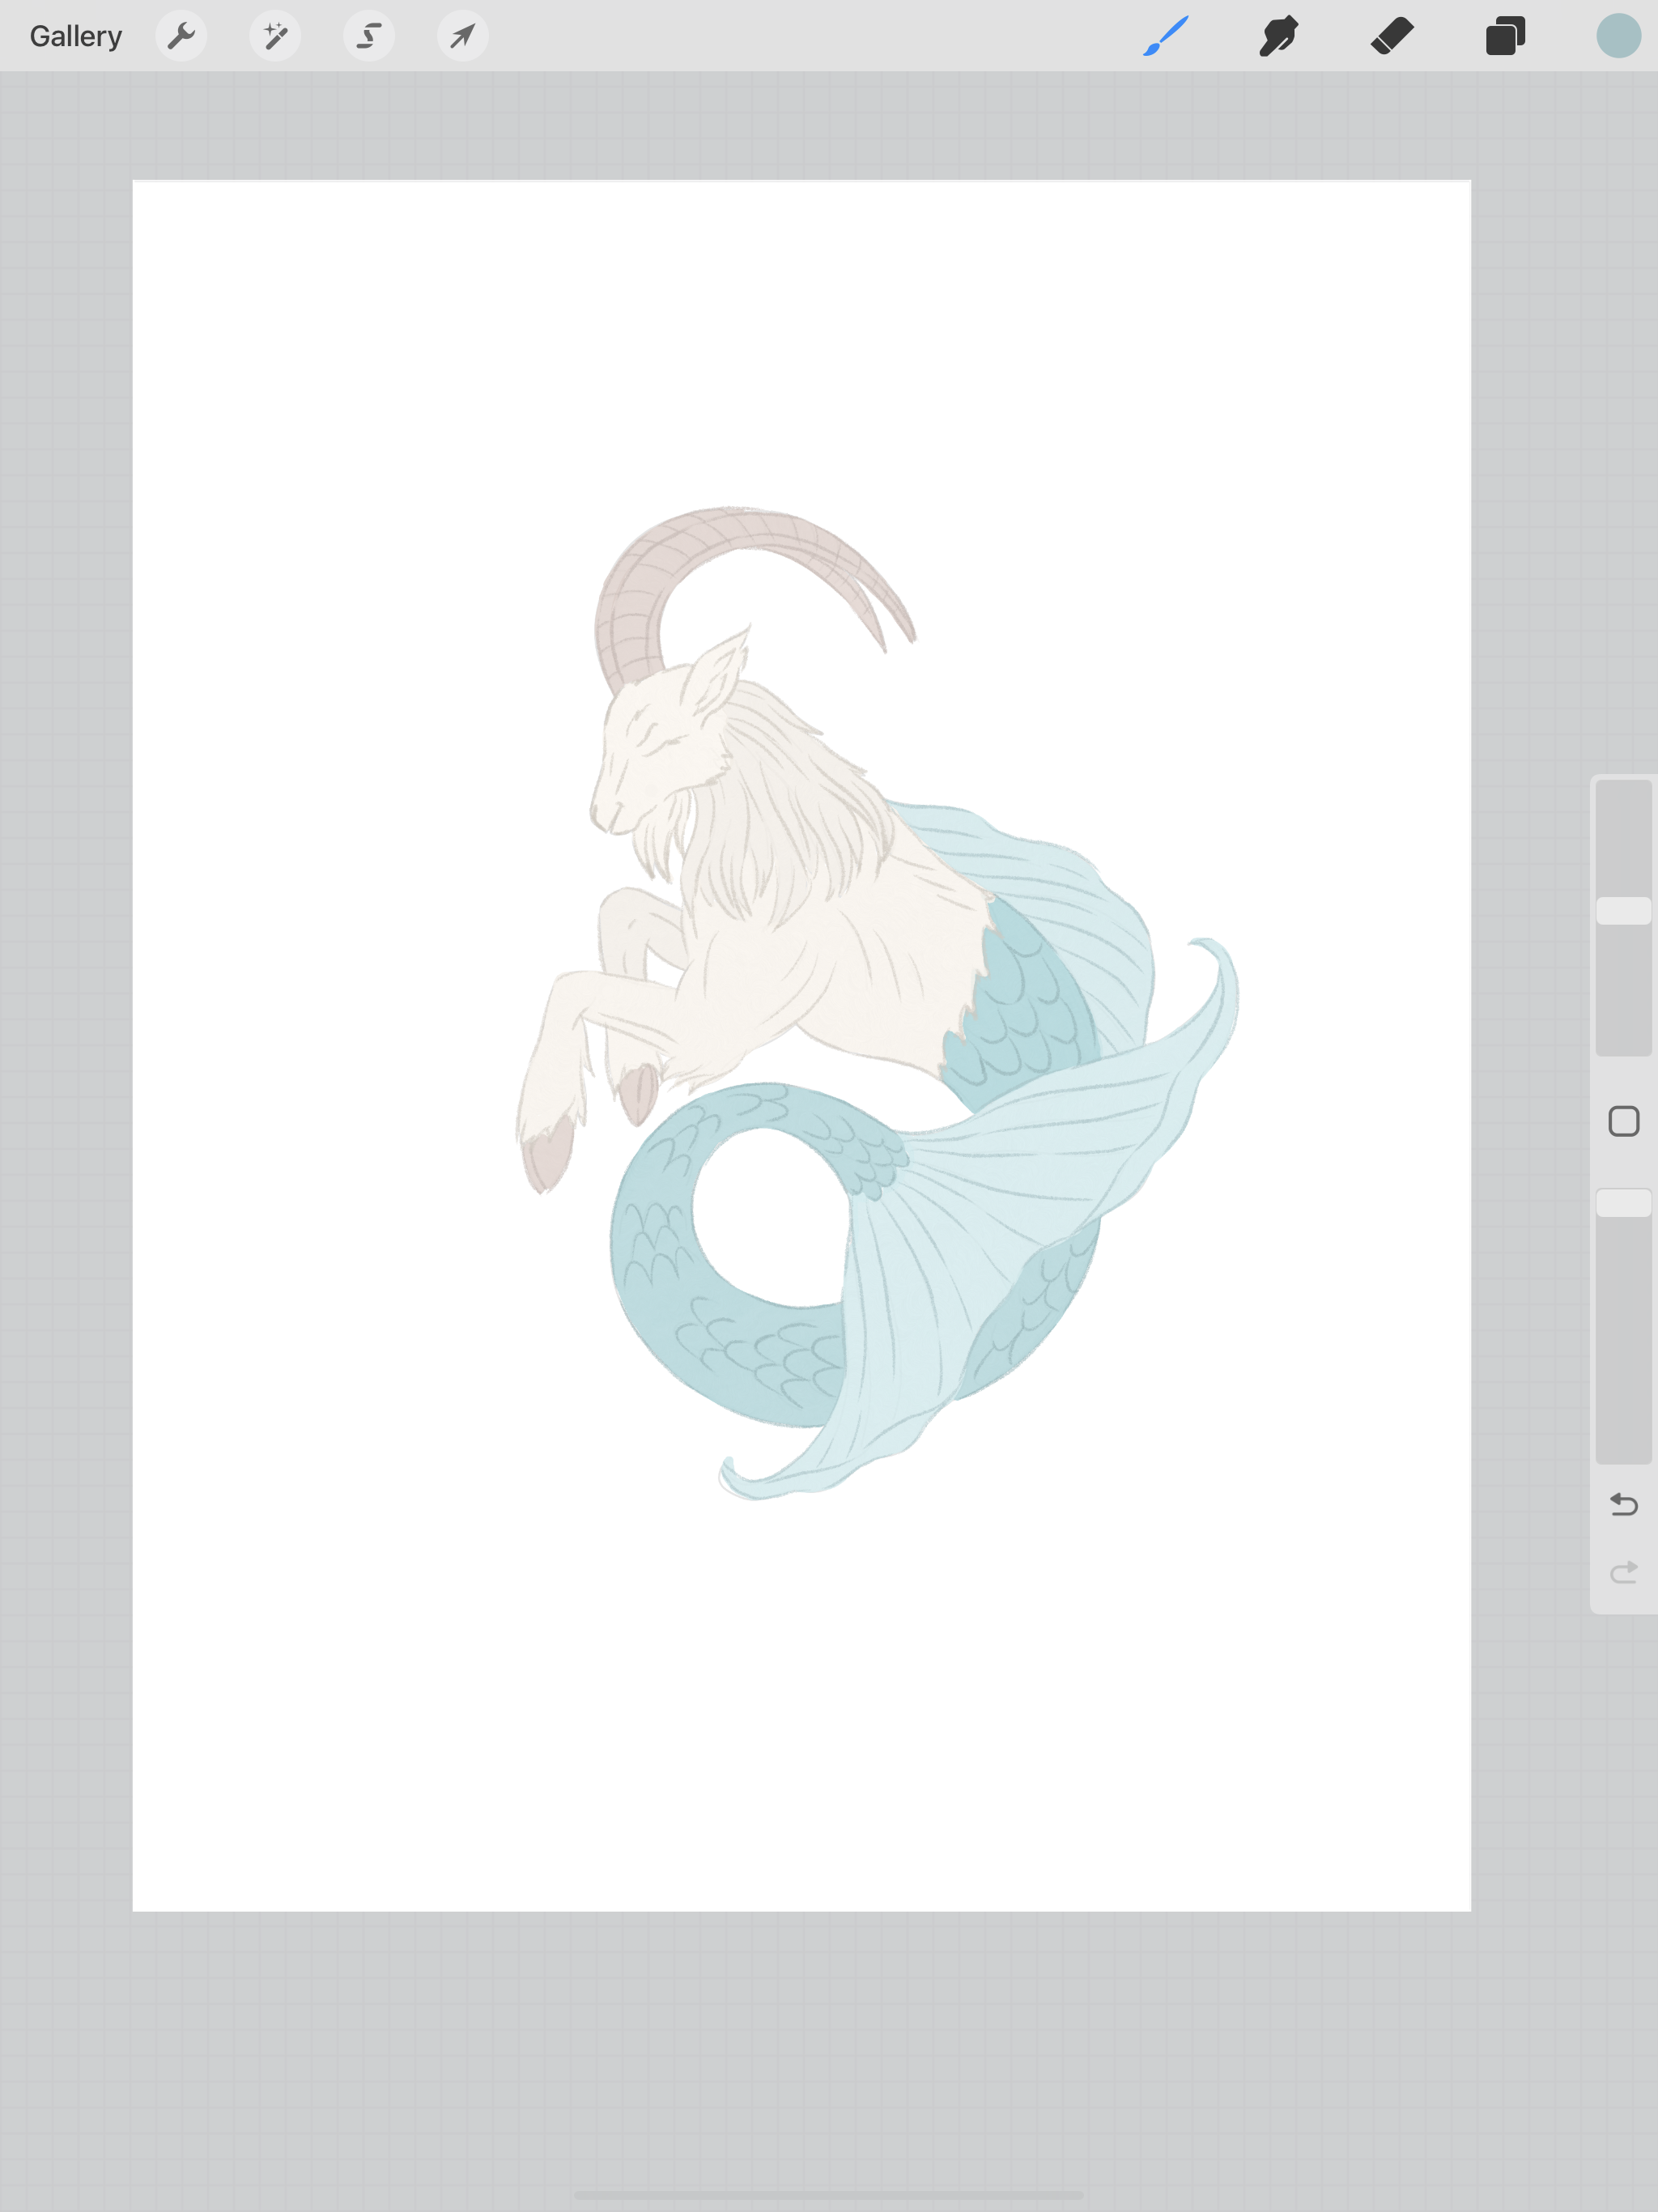
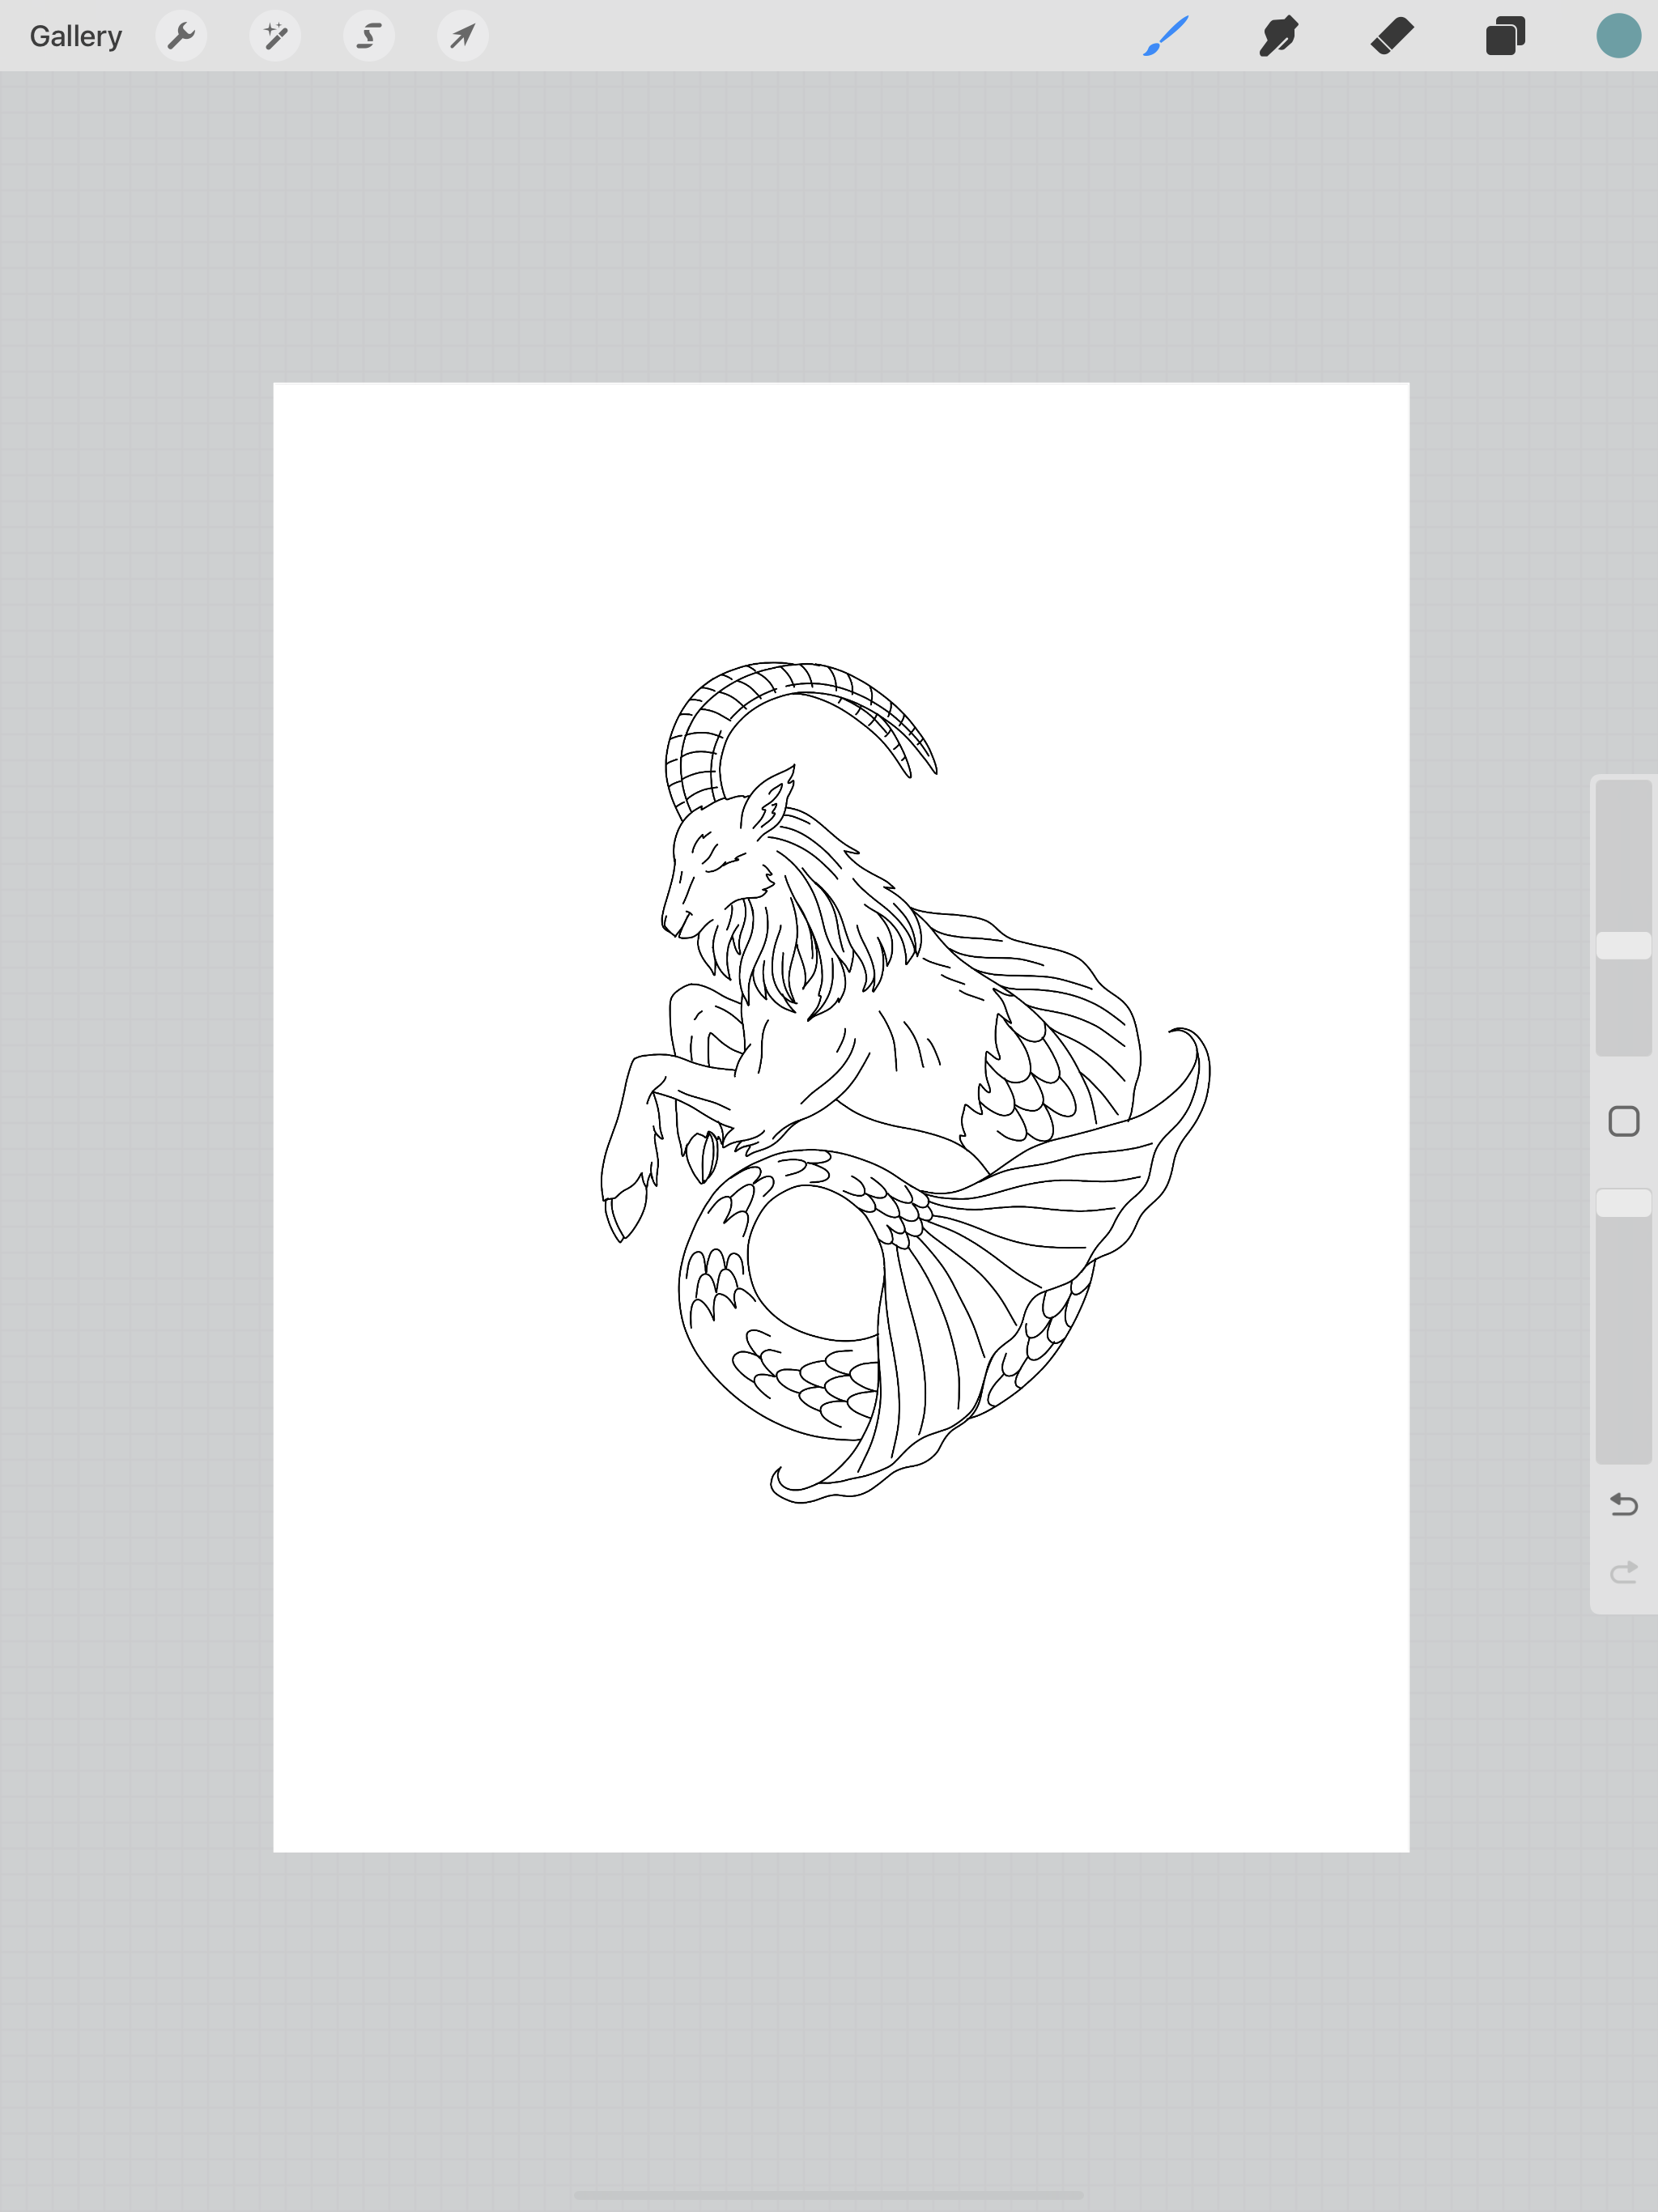
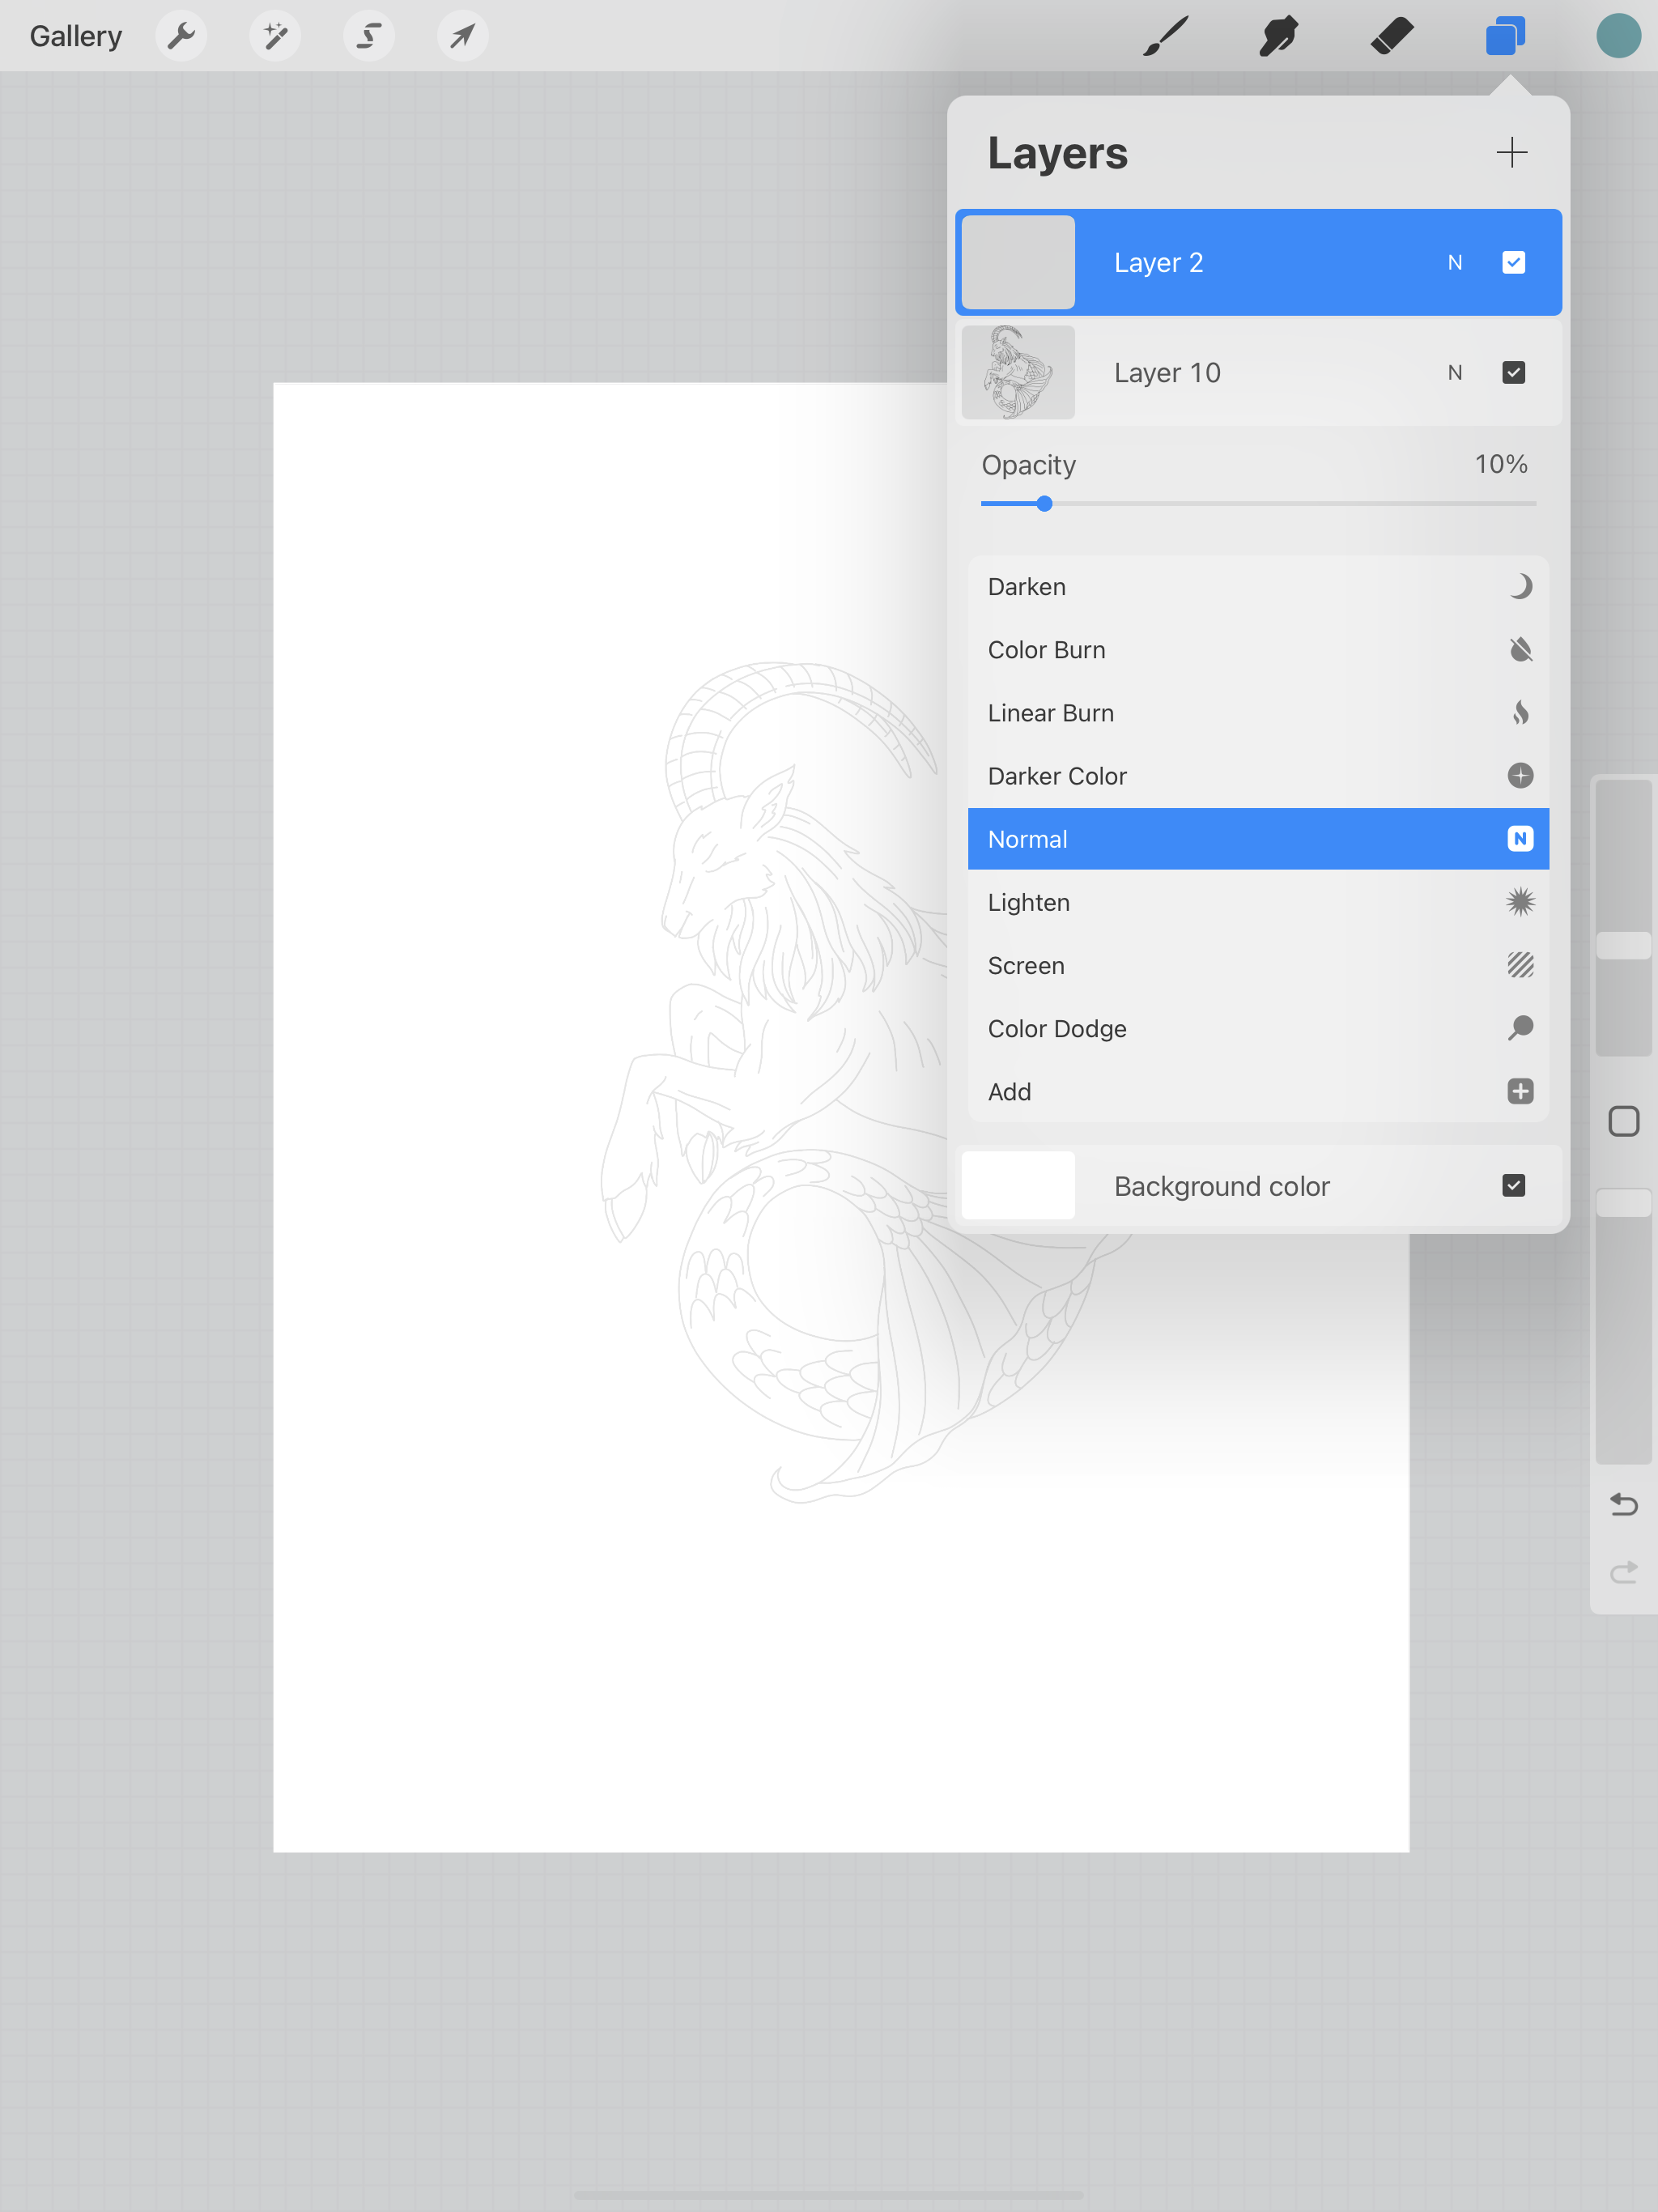
I’m going to open my file that contains my line work for my Capricorn single line file. You can also start with a rough sketch too. I’m going to lower the opacity of this layer to about 10%, it’s visible but won’t interfere with my painting on top too much.

Creating Clip Art in Procreate - Layer Opacity

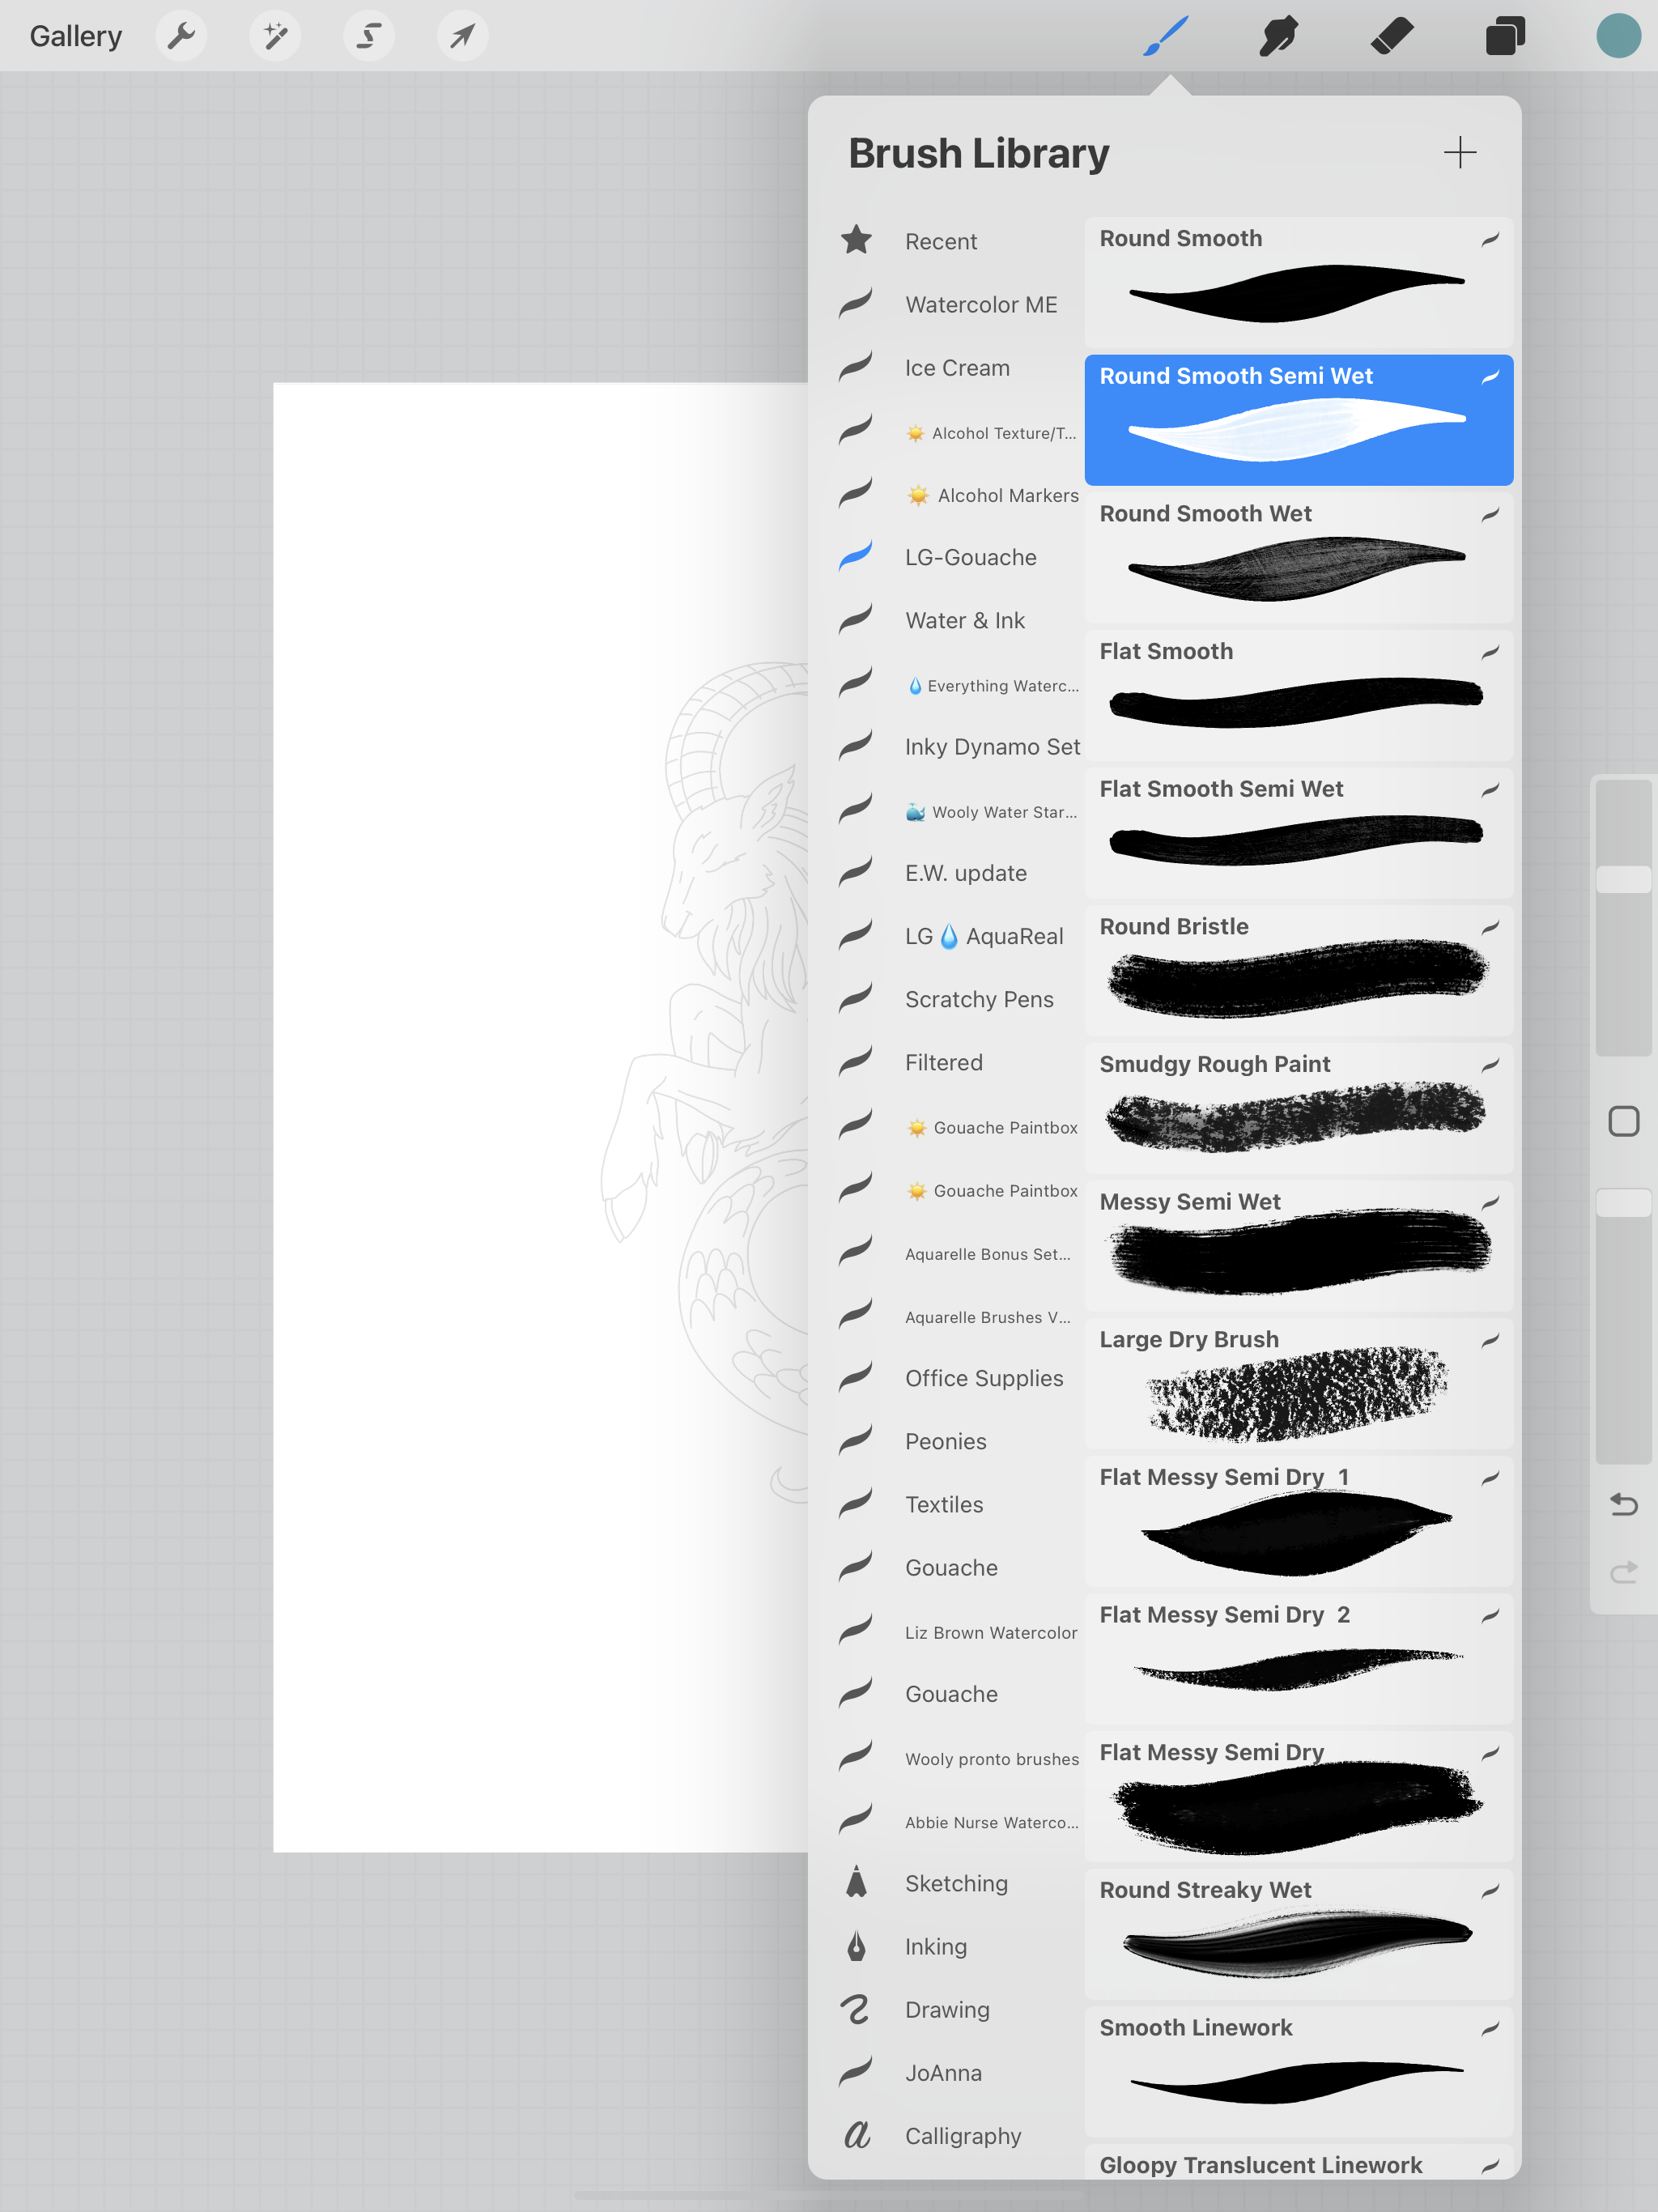
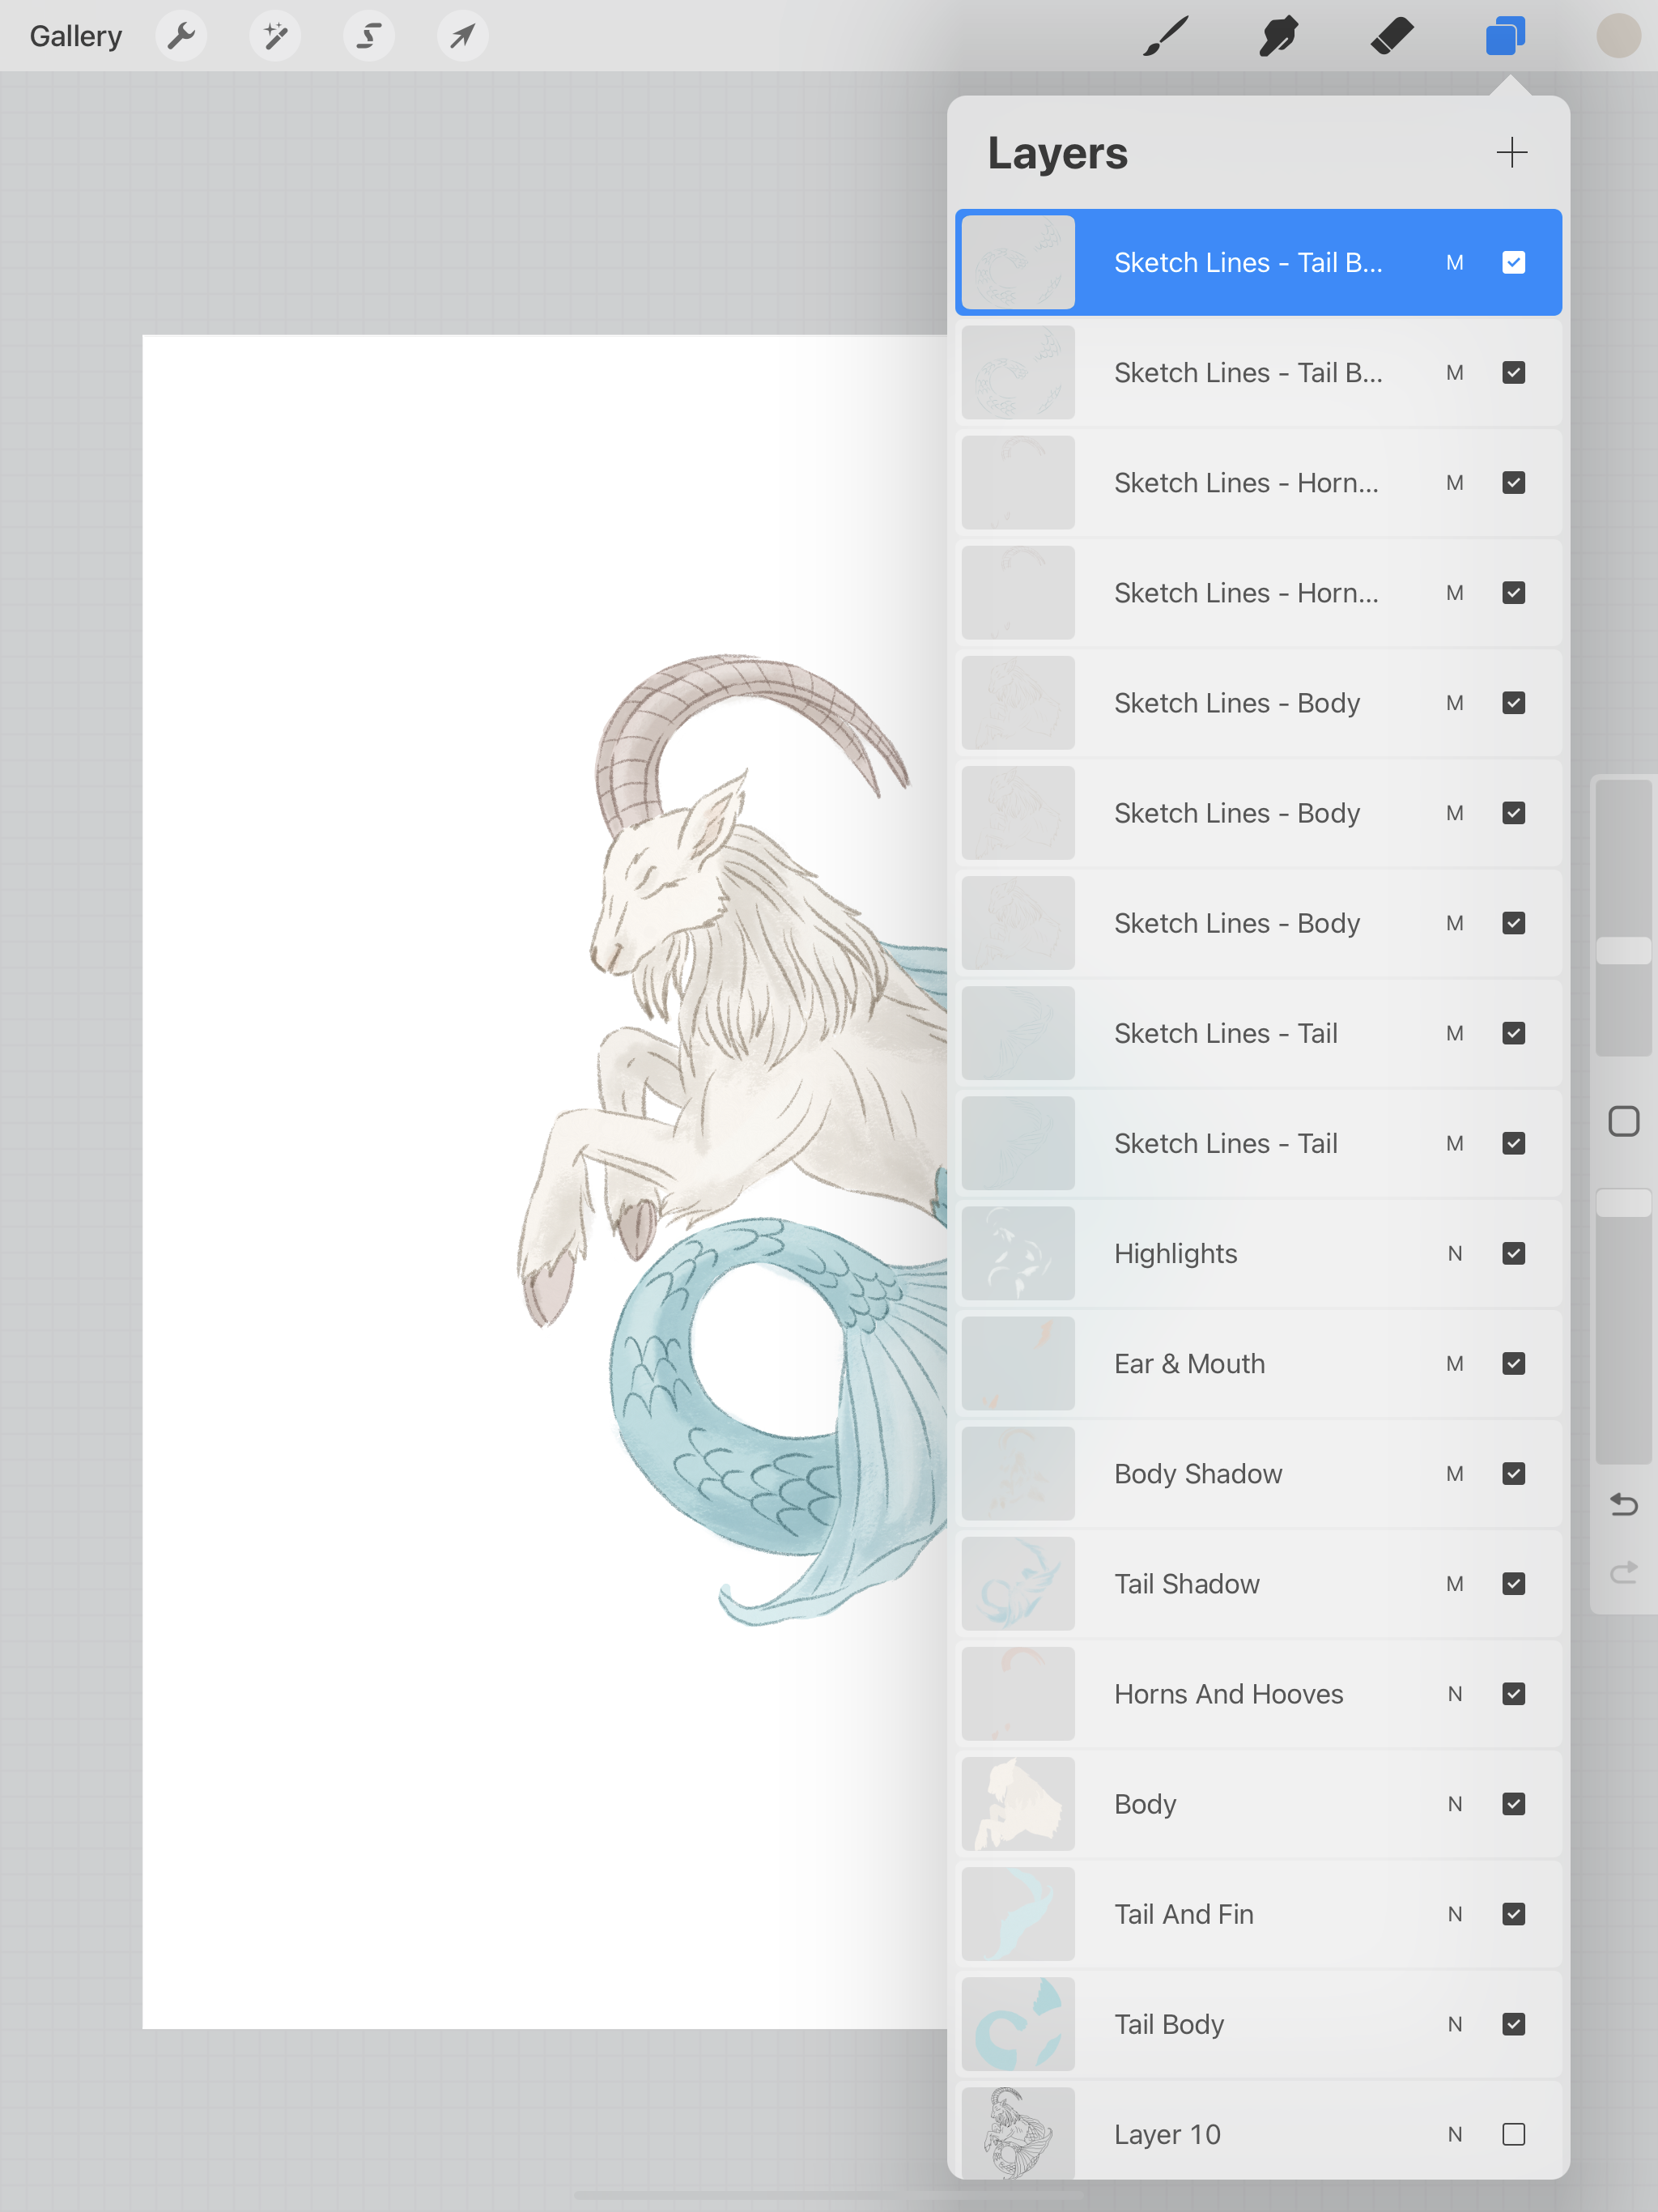
I like to work in a lot of layers, I think it’s easier to make adjustments to individual layers if I need to make any changes the further I get into my drawing or painting. I’m going to start with the tail first and I’m just going to fill in my base layer without any details. I’m using the Round Smooth Semi Wet brush from Lisa Glanz’s Gouache brush set. This is one of my favorite brush sets that I have purchased, I love using these brushes for my gouache style artwork.

Creating Clip Art in Procreate - Brushes

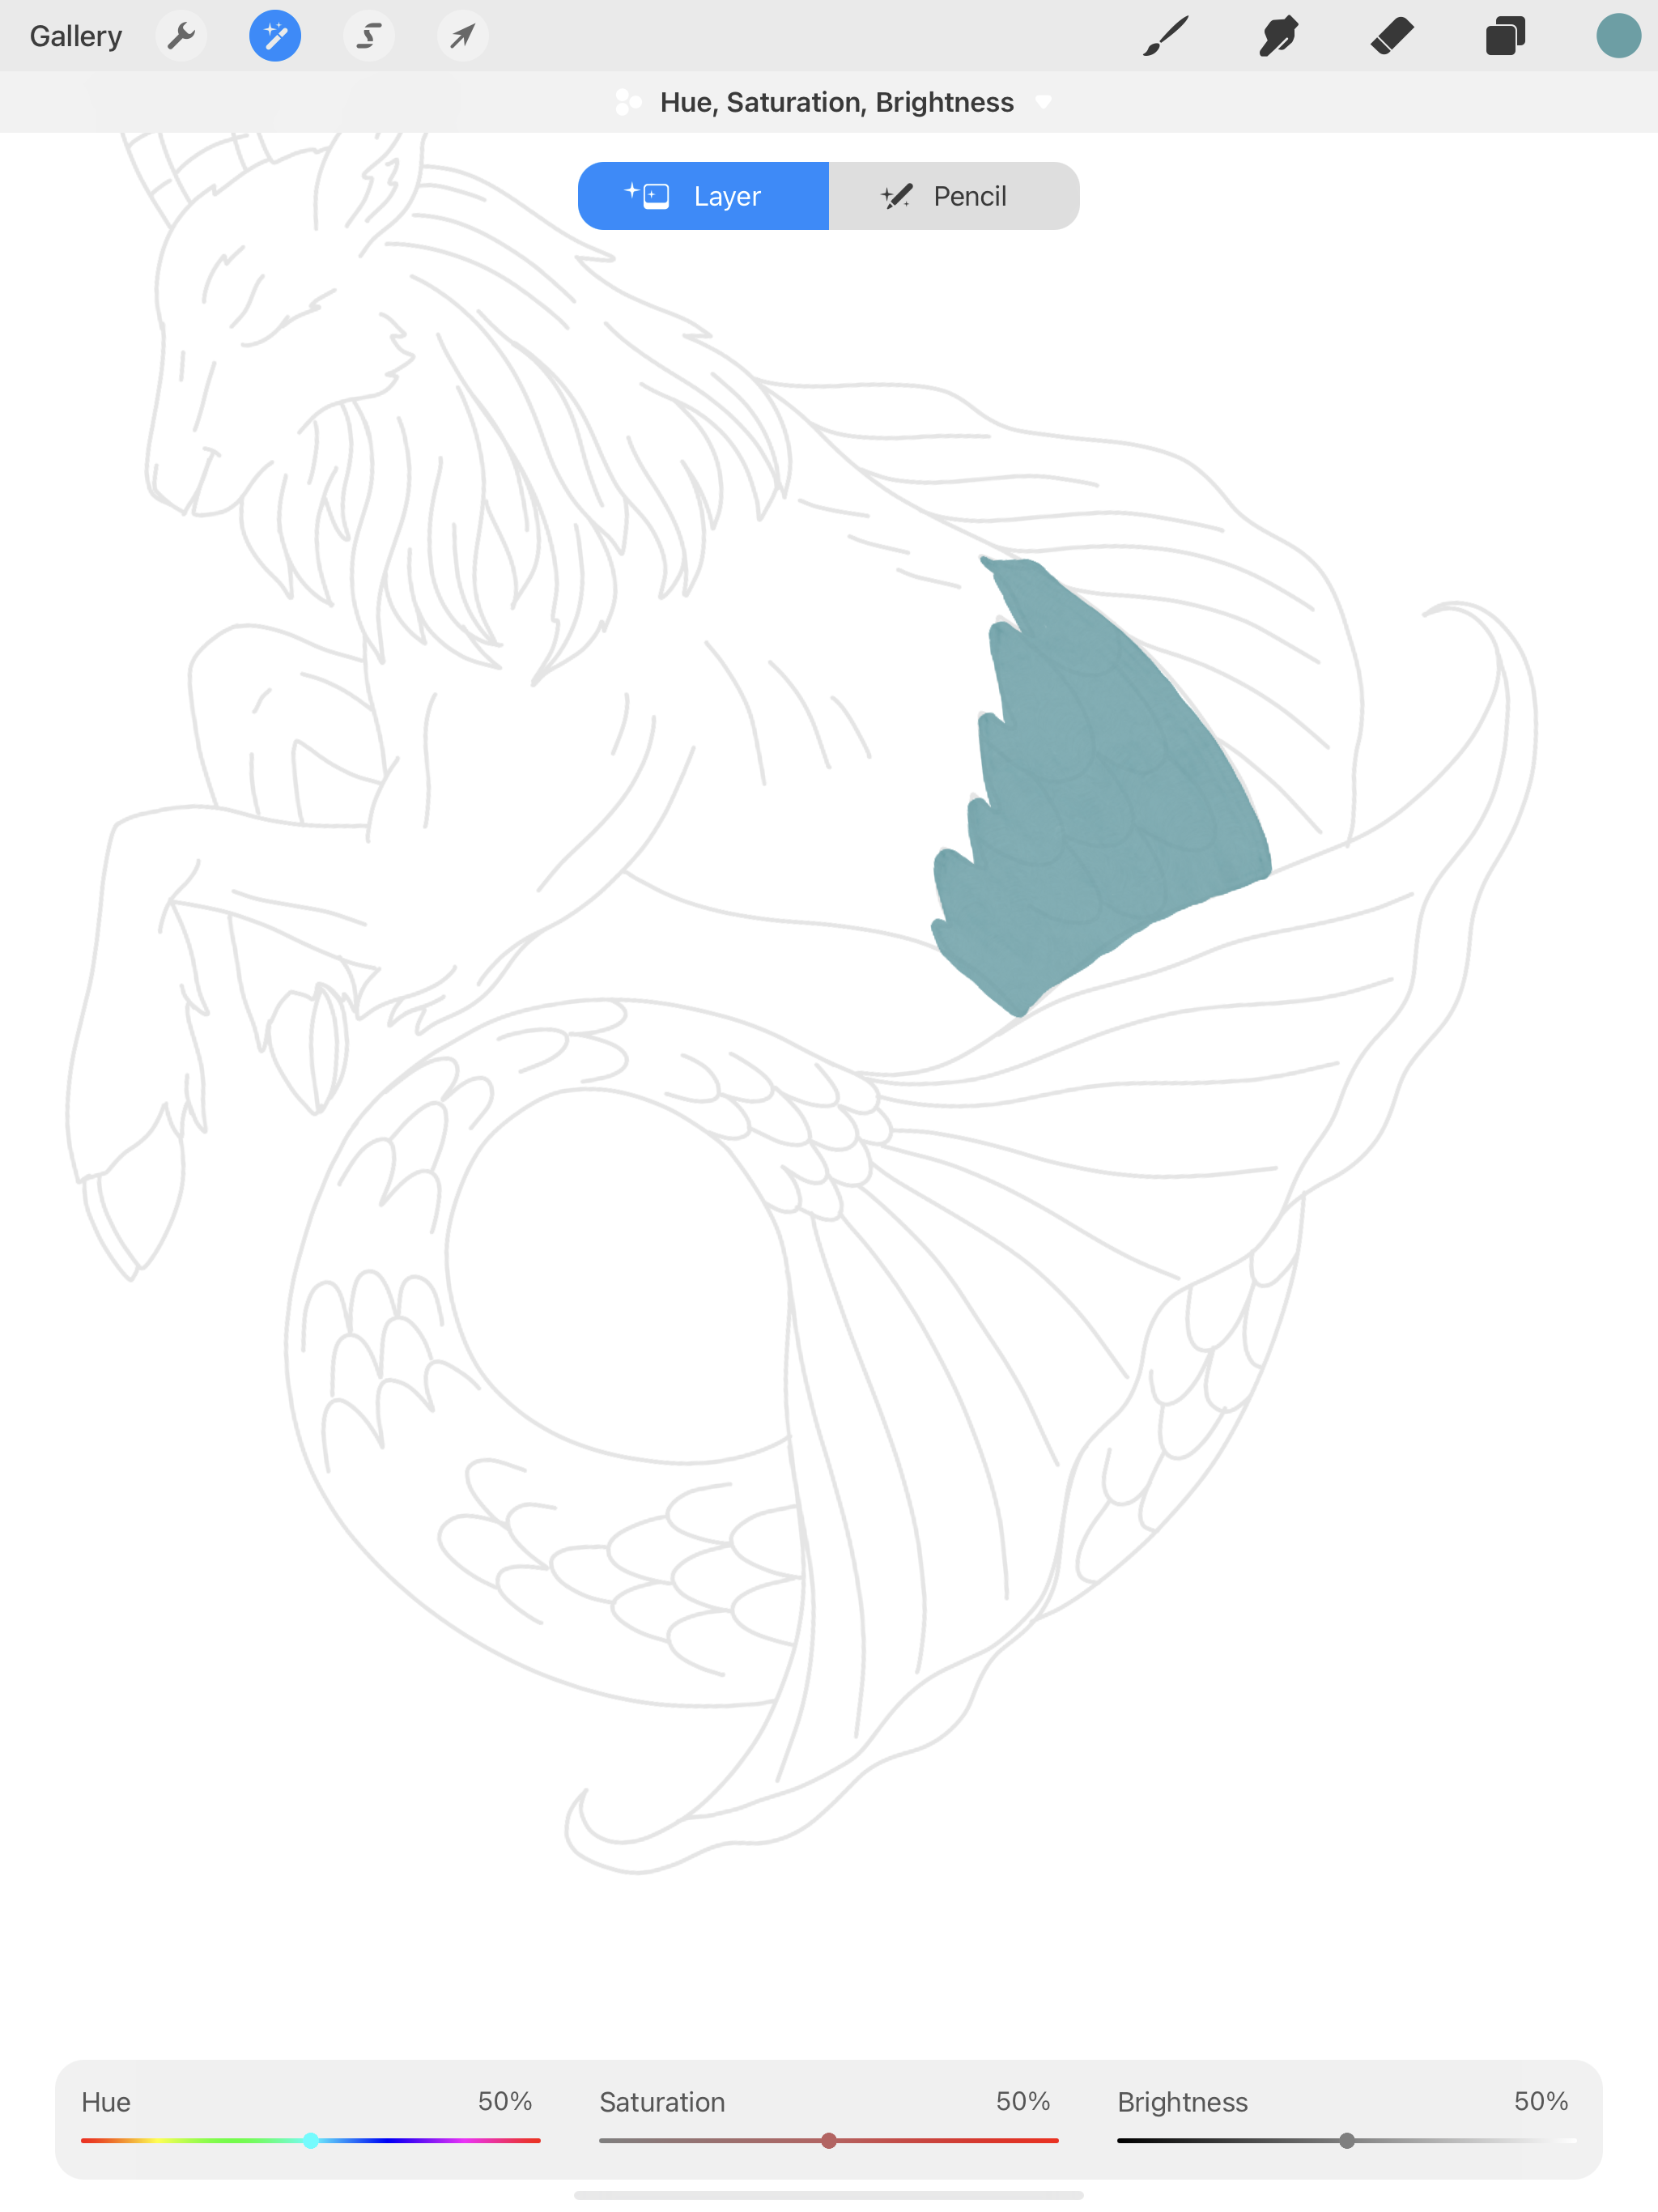
The initial color I started with is a litter darker than I wanted, so I’m going to use Hue, Saturation, Brightness to adjust the color to my liking.

Creating Clip Art in Procreate - Hue Saturation

I will use the color picker tool (the little square between the brush sliders) to grab the new adjusted color. Then I will continue to fill in the tail.

Creating Clip Art in Procreate - Color Picker

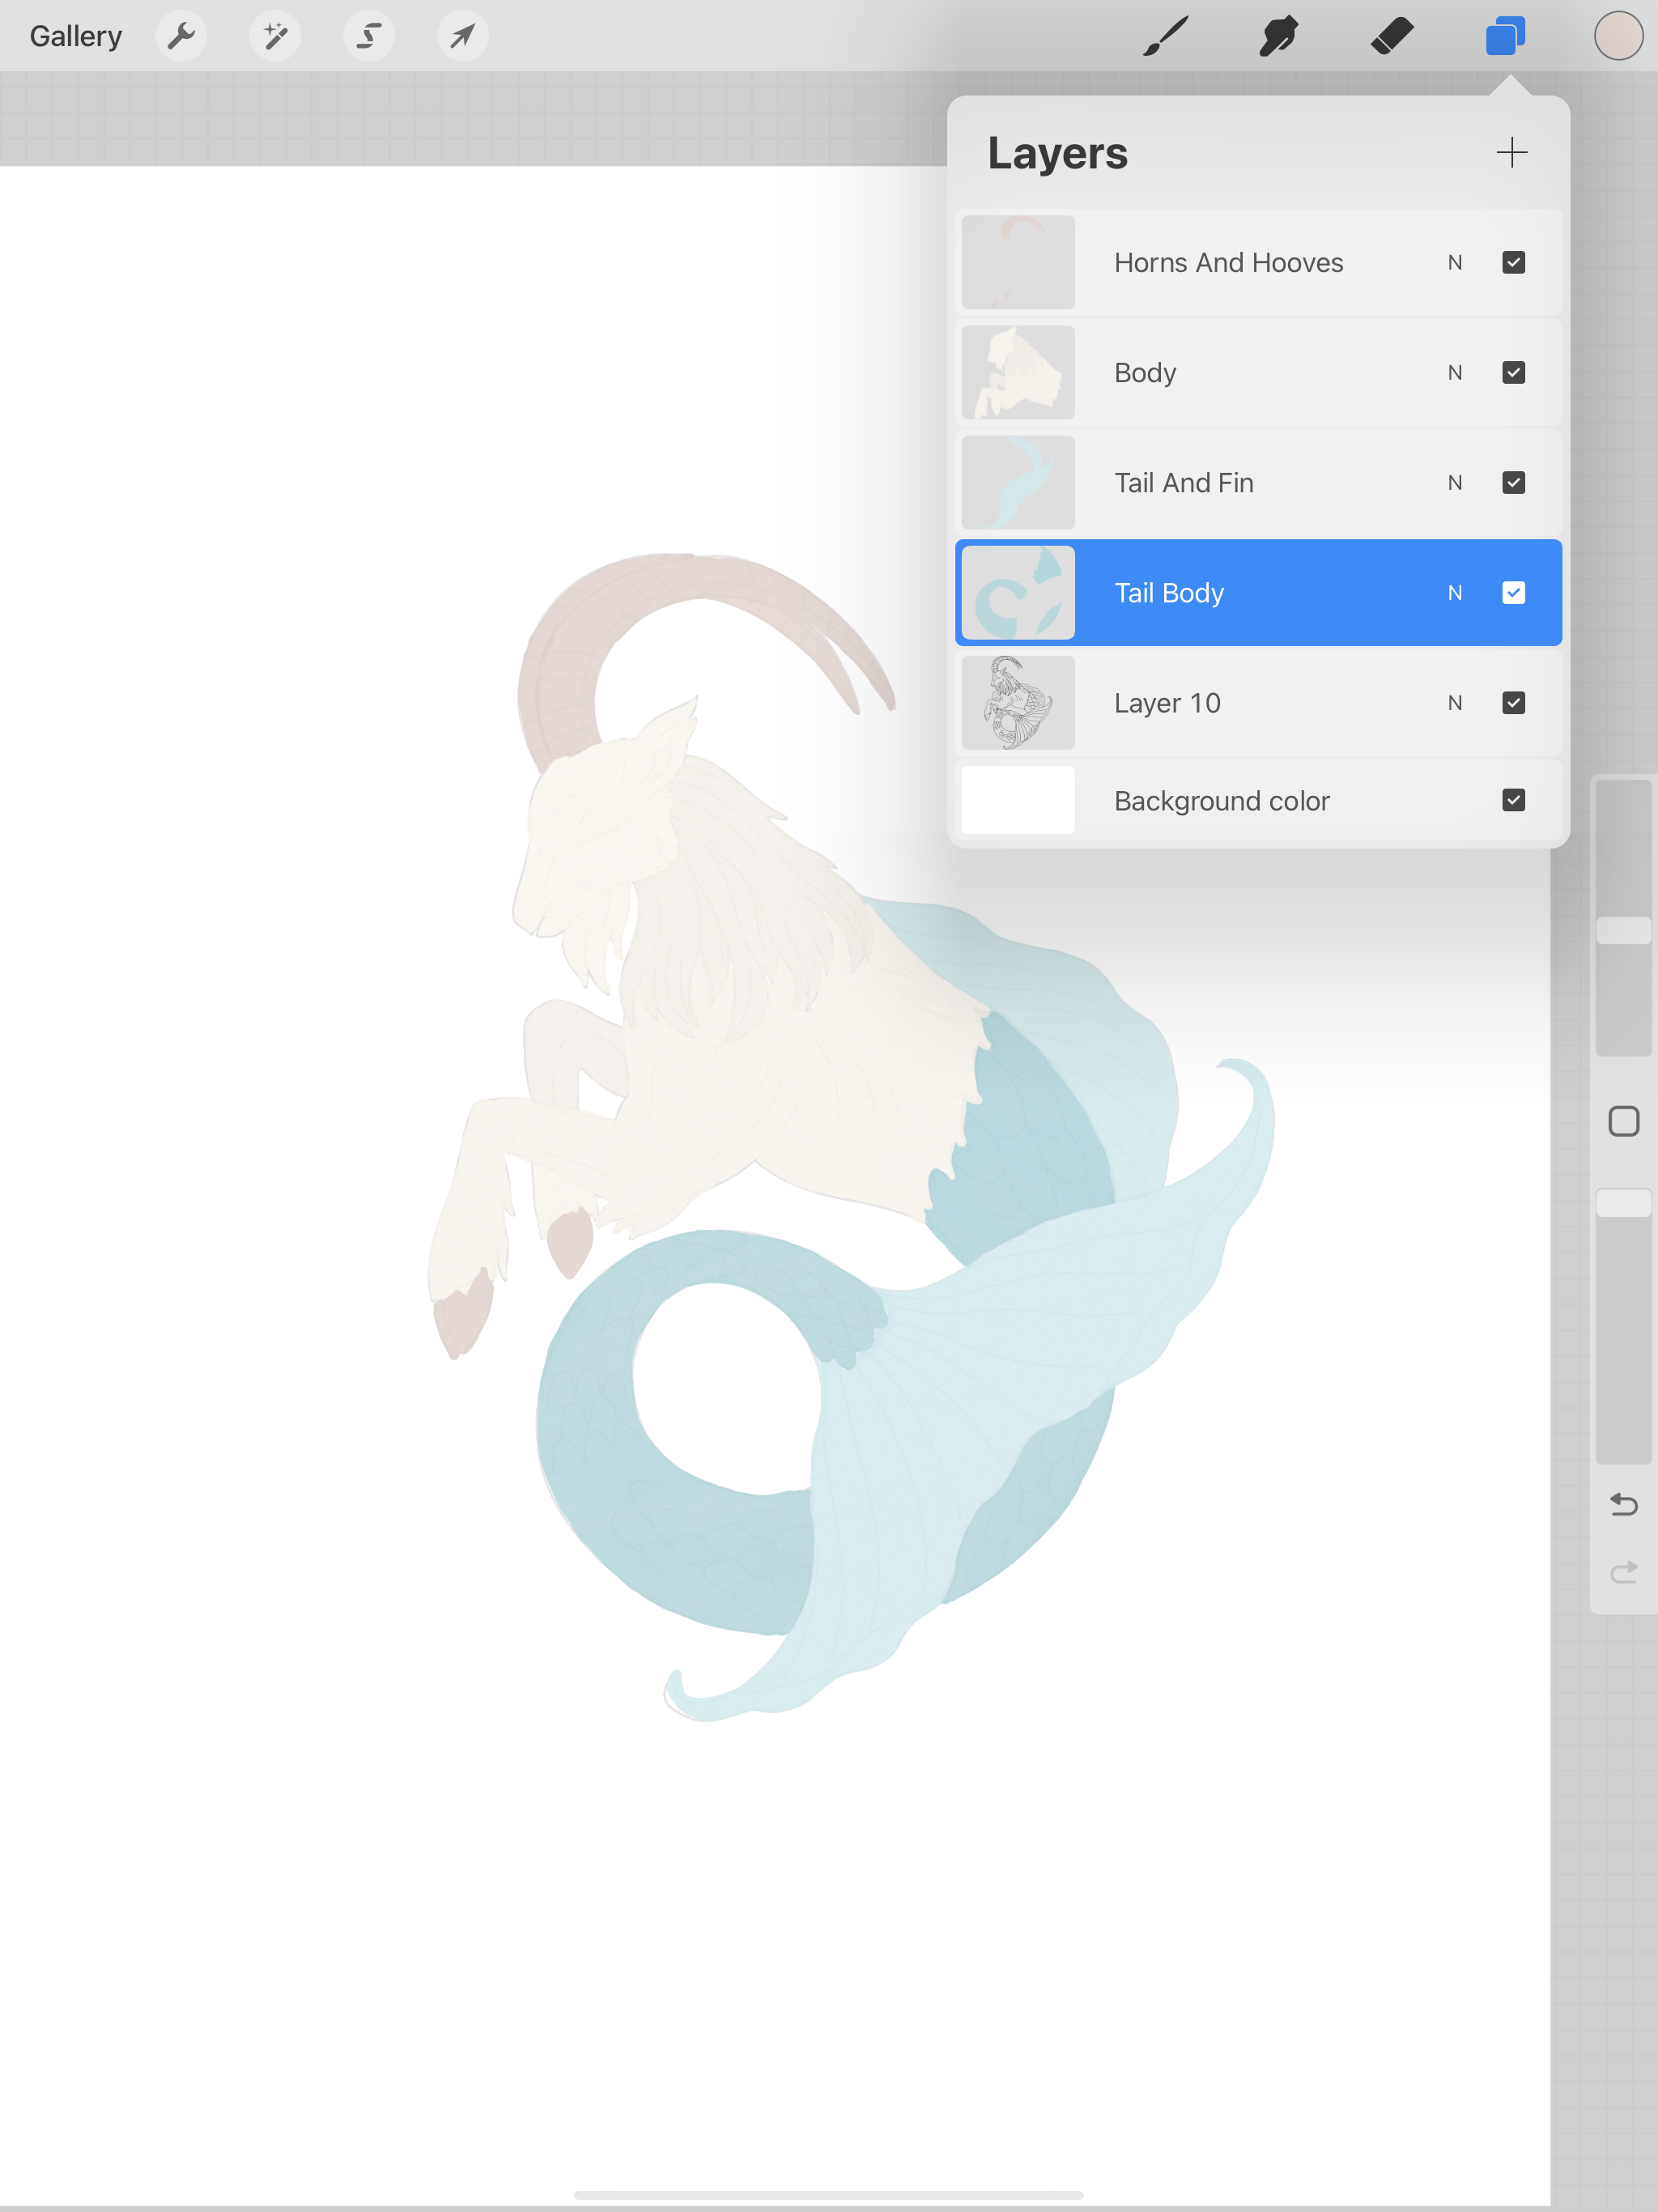
I like to have separate layer for each base color. Once I’m finished with the tail, I’m going to fill in the body on it’s own layer.

After the body, I fill in the horns and hooves on their own layer.

Creating Clip Art in Procreate - Base Layers

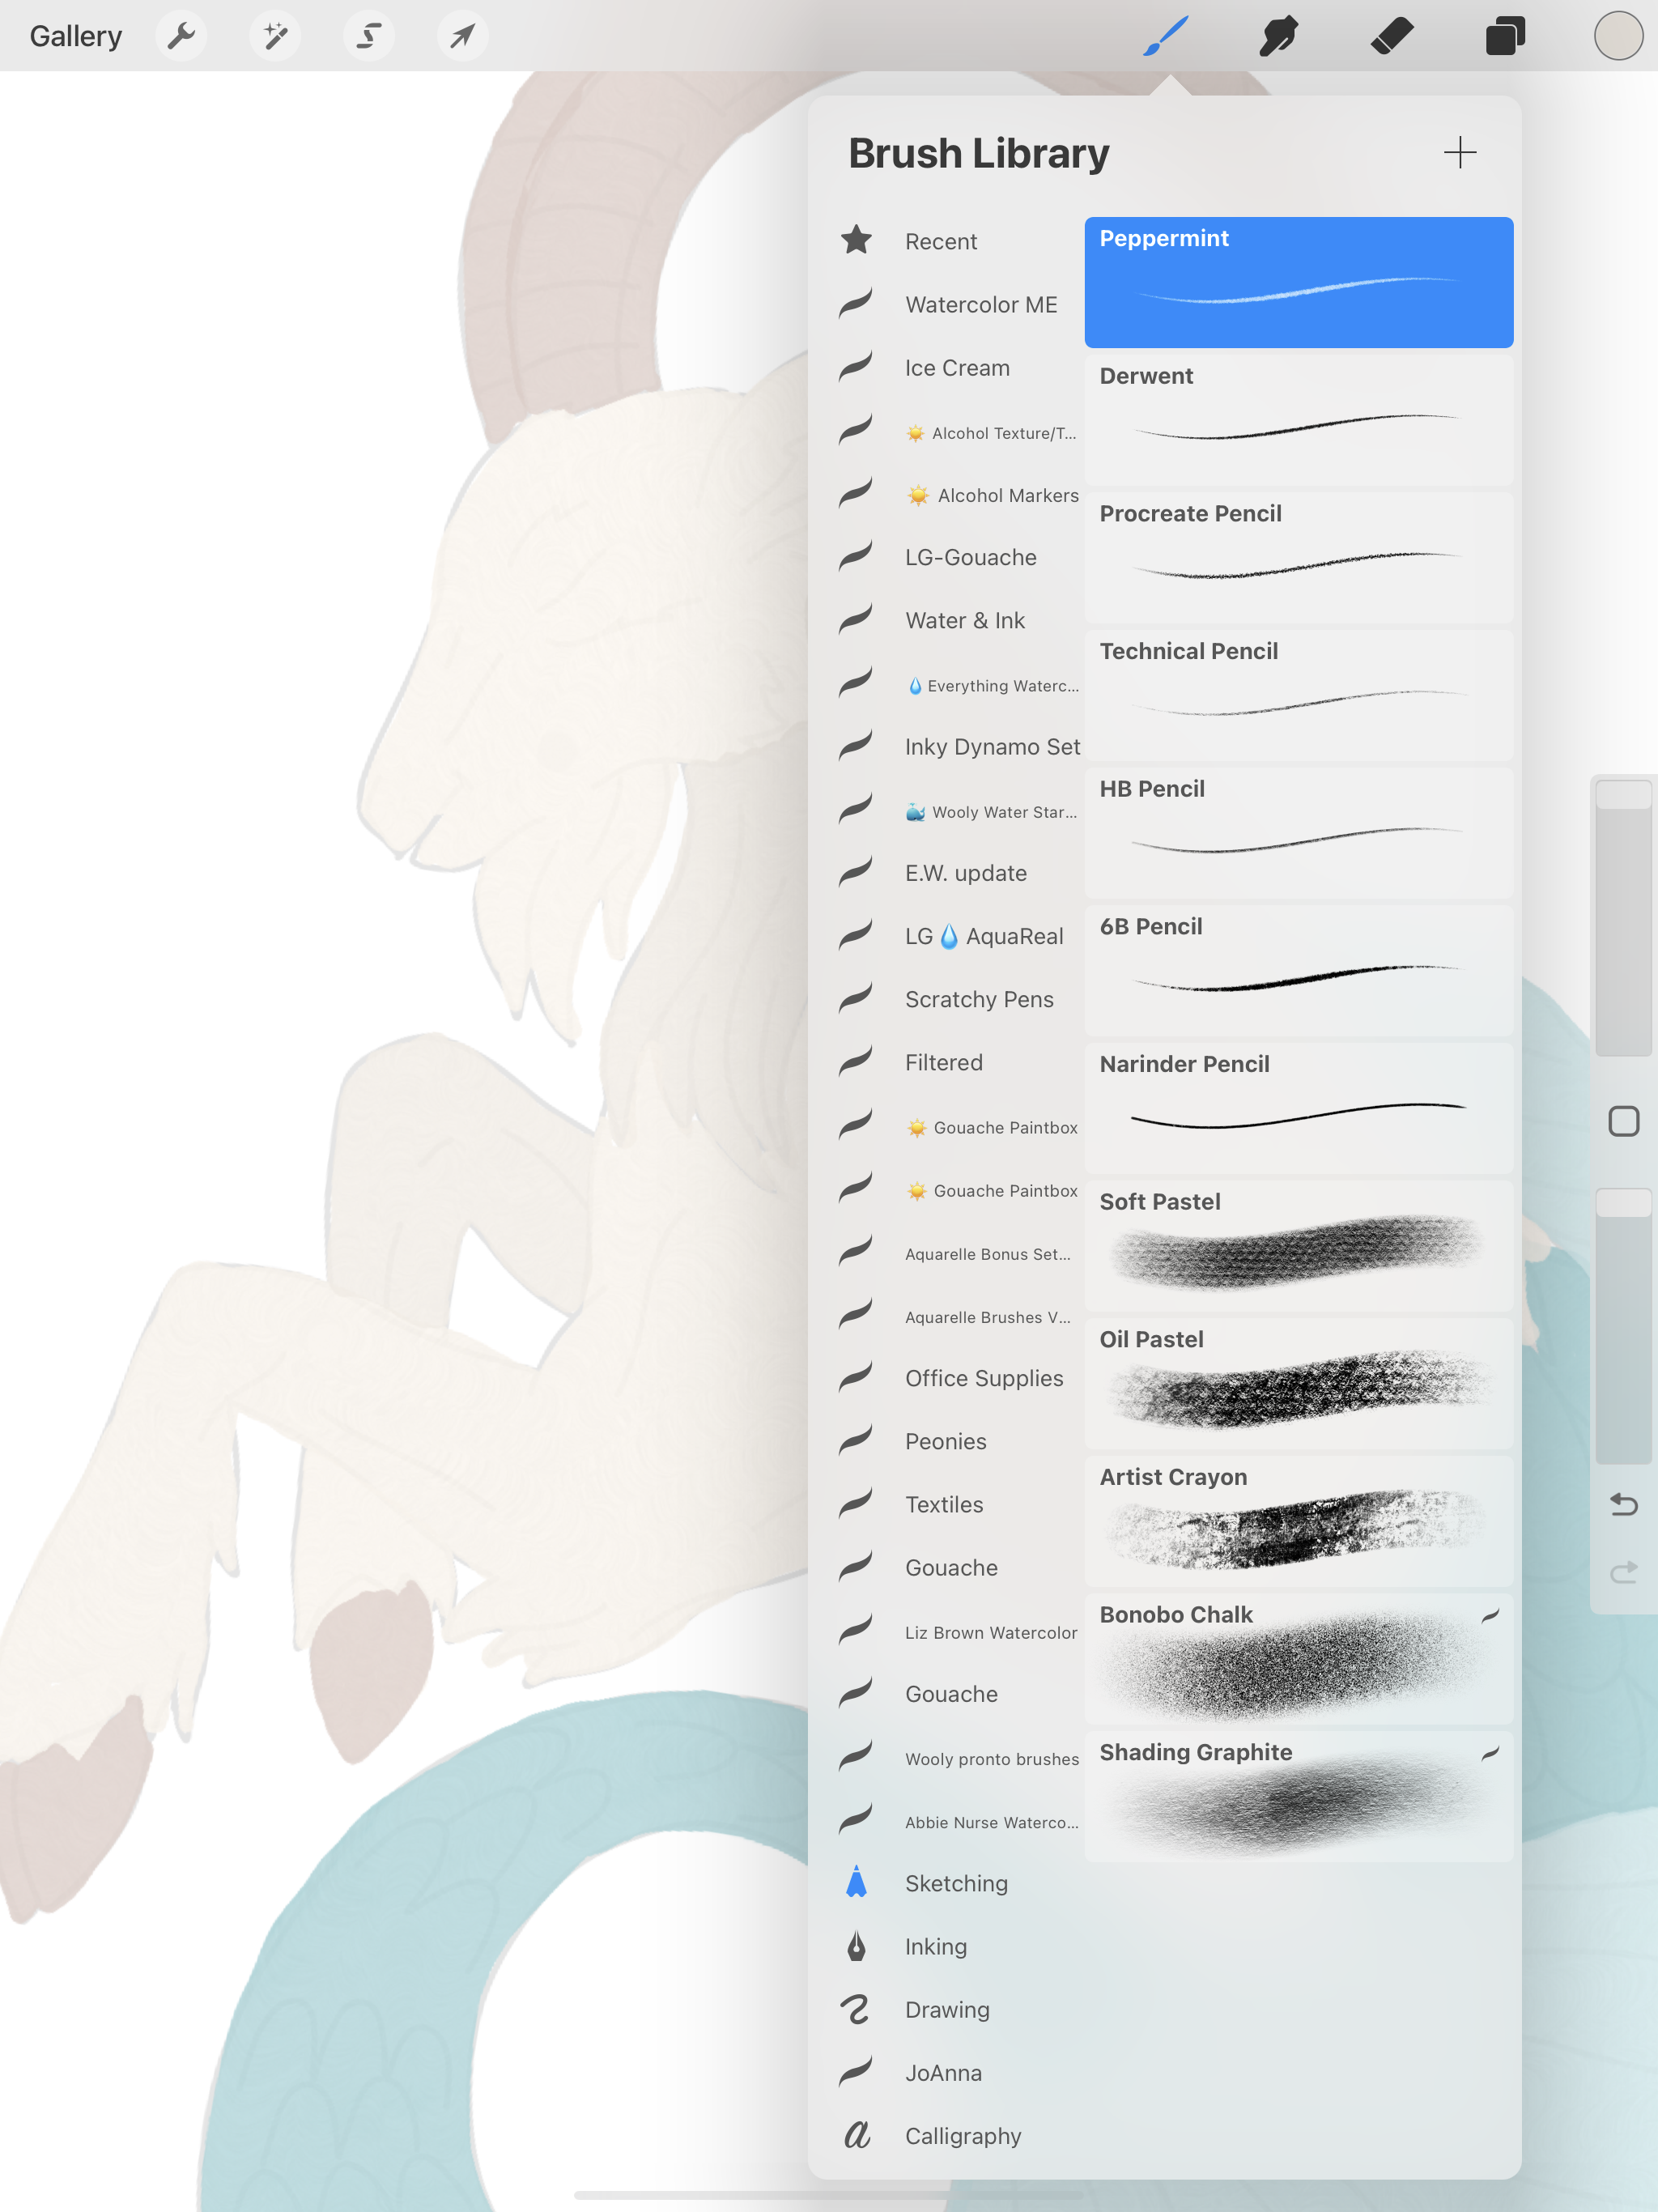
Now I’m going to go in and do some detail work with the Peppermint pencil. This is one of my brushes that is already included with Procreate. The details for the body will be on their own layer and the details for the tail and horns will be on their own layer.

Creating Clip Art in Procreate - Peppermint Pencil
Creating Clip Art in Procreate - details

After I’m done with the details, i’m going to go back and add some shadows and highlights with the Thick Sticky brush from Bardot Brushes Gouache Paintbox set. Since I’m working with layers, I can sandwich my shadows and highlight between my pencil details and my base layers.

Creating Clip Art in Procreate - shadows and highlights

Looking at my drawing/ painting, I want the pencil lines to be a little darker, so I set my layers to Multiply. I still want to to be a little darker, so I swipe left on the layer and duplicate them a few times. Now it’s to my liking!

Creating Clip Art in Procreate - multiply and duplicate layers

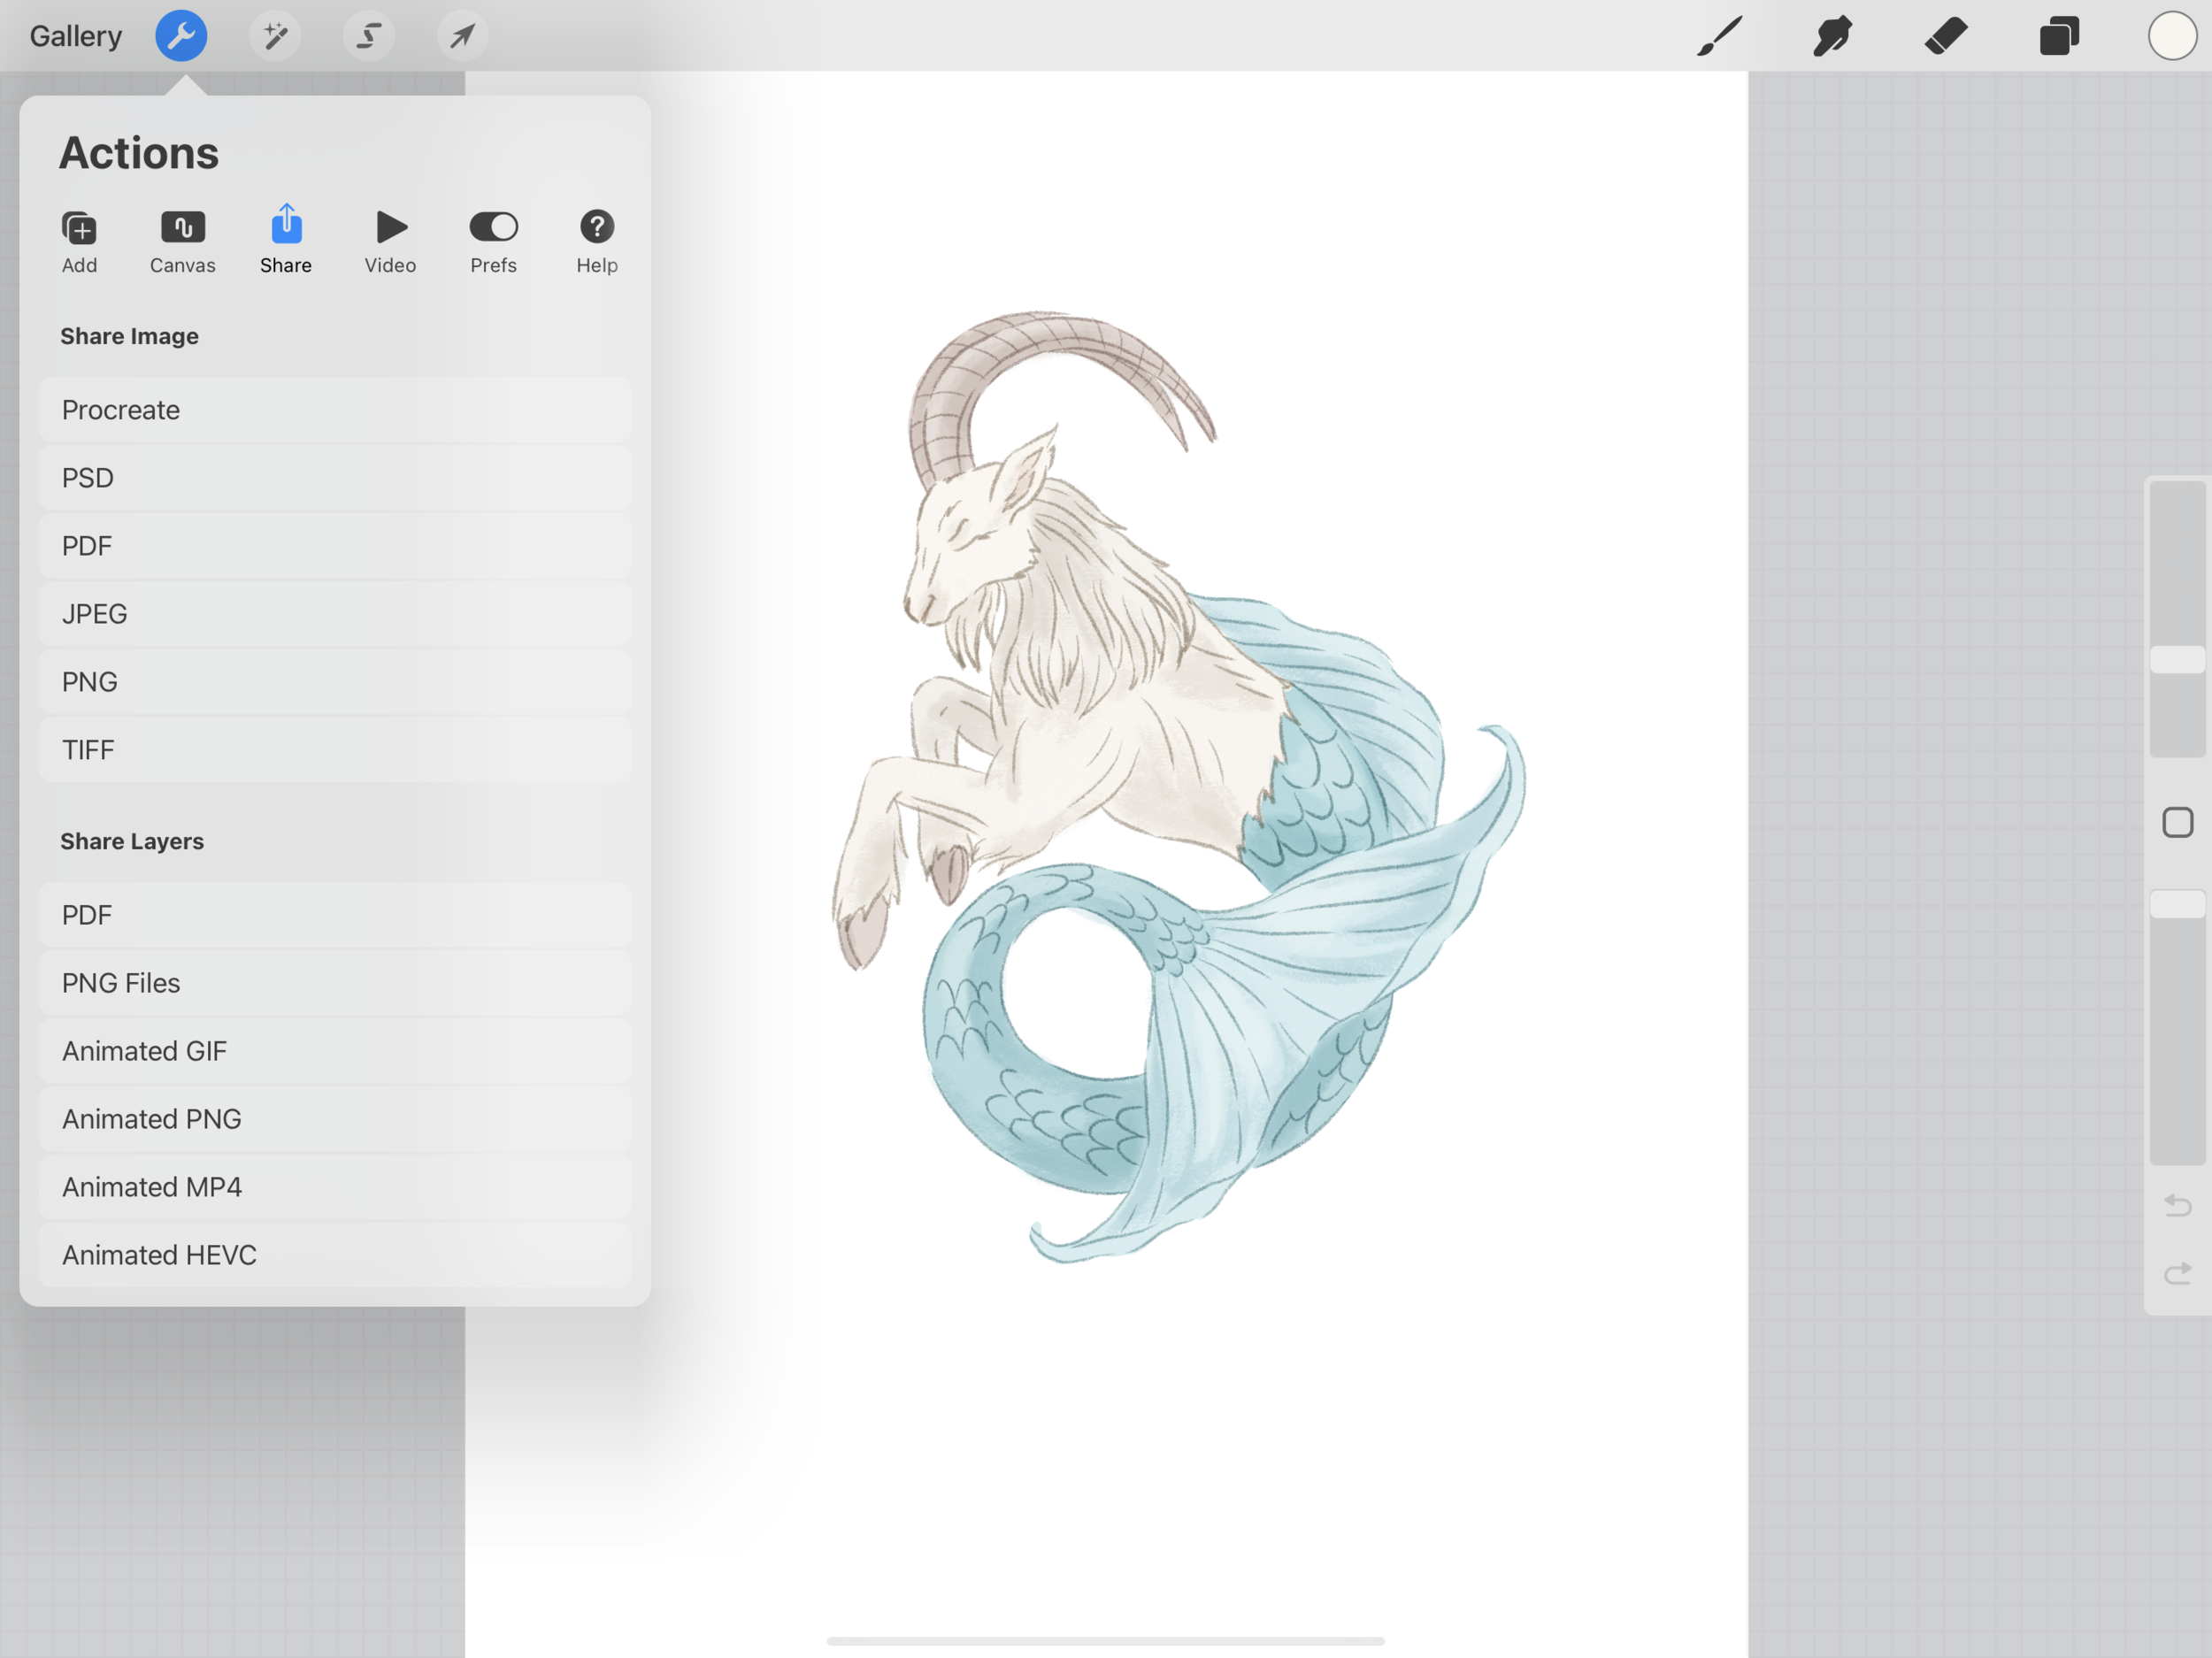
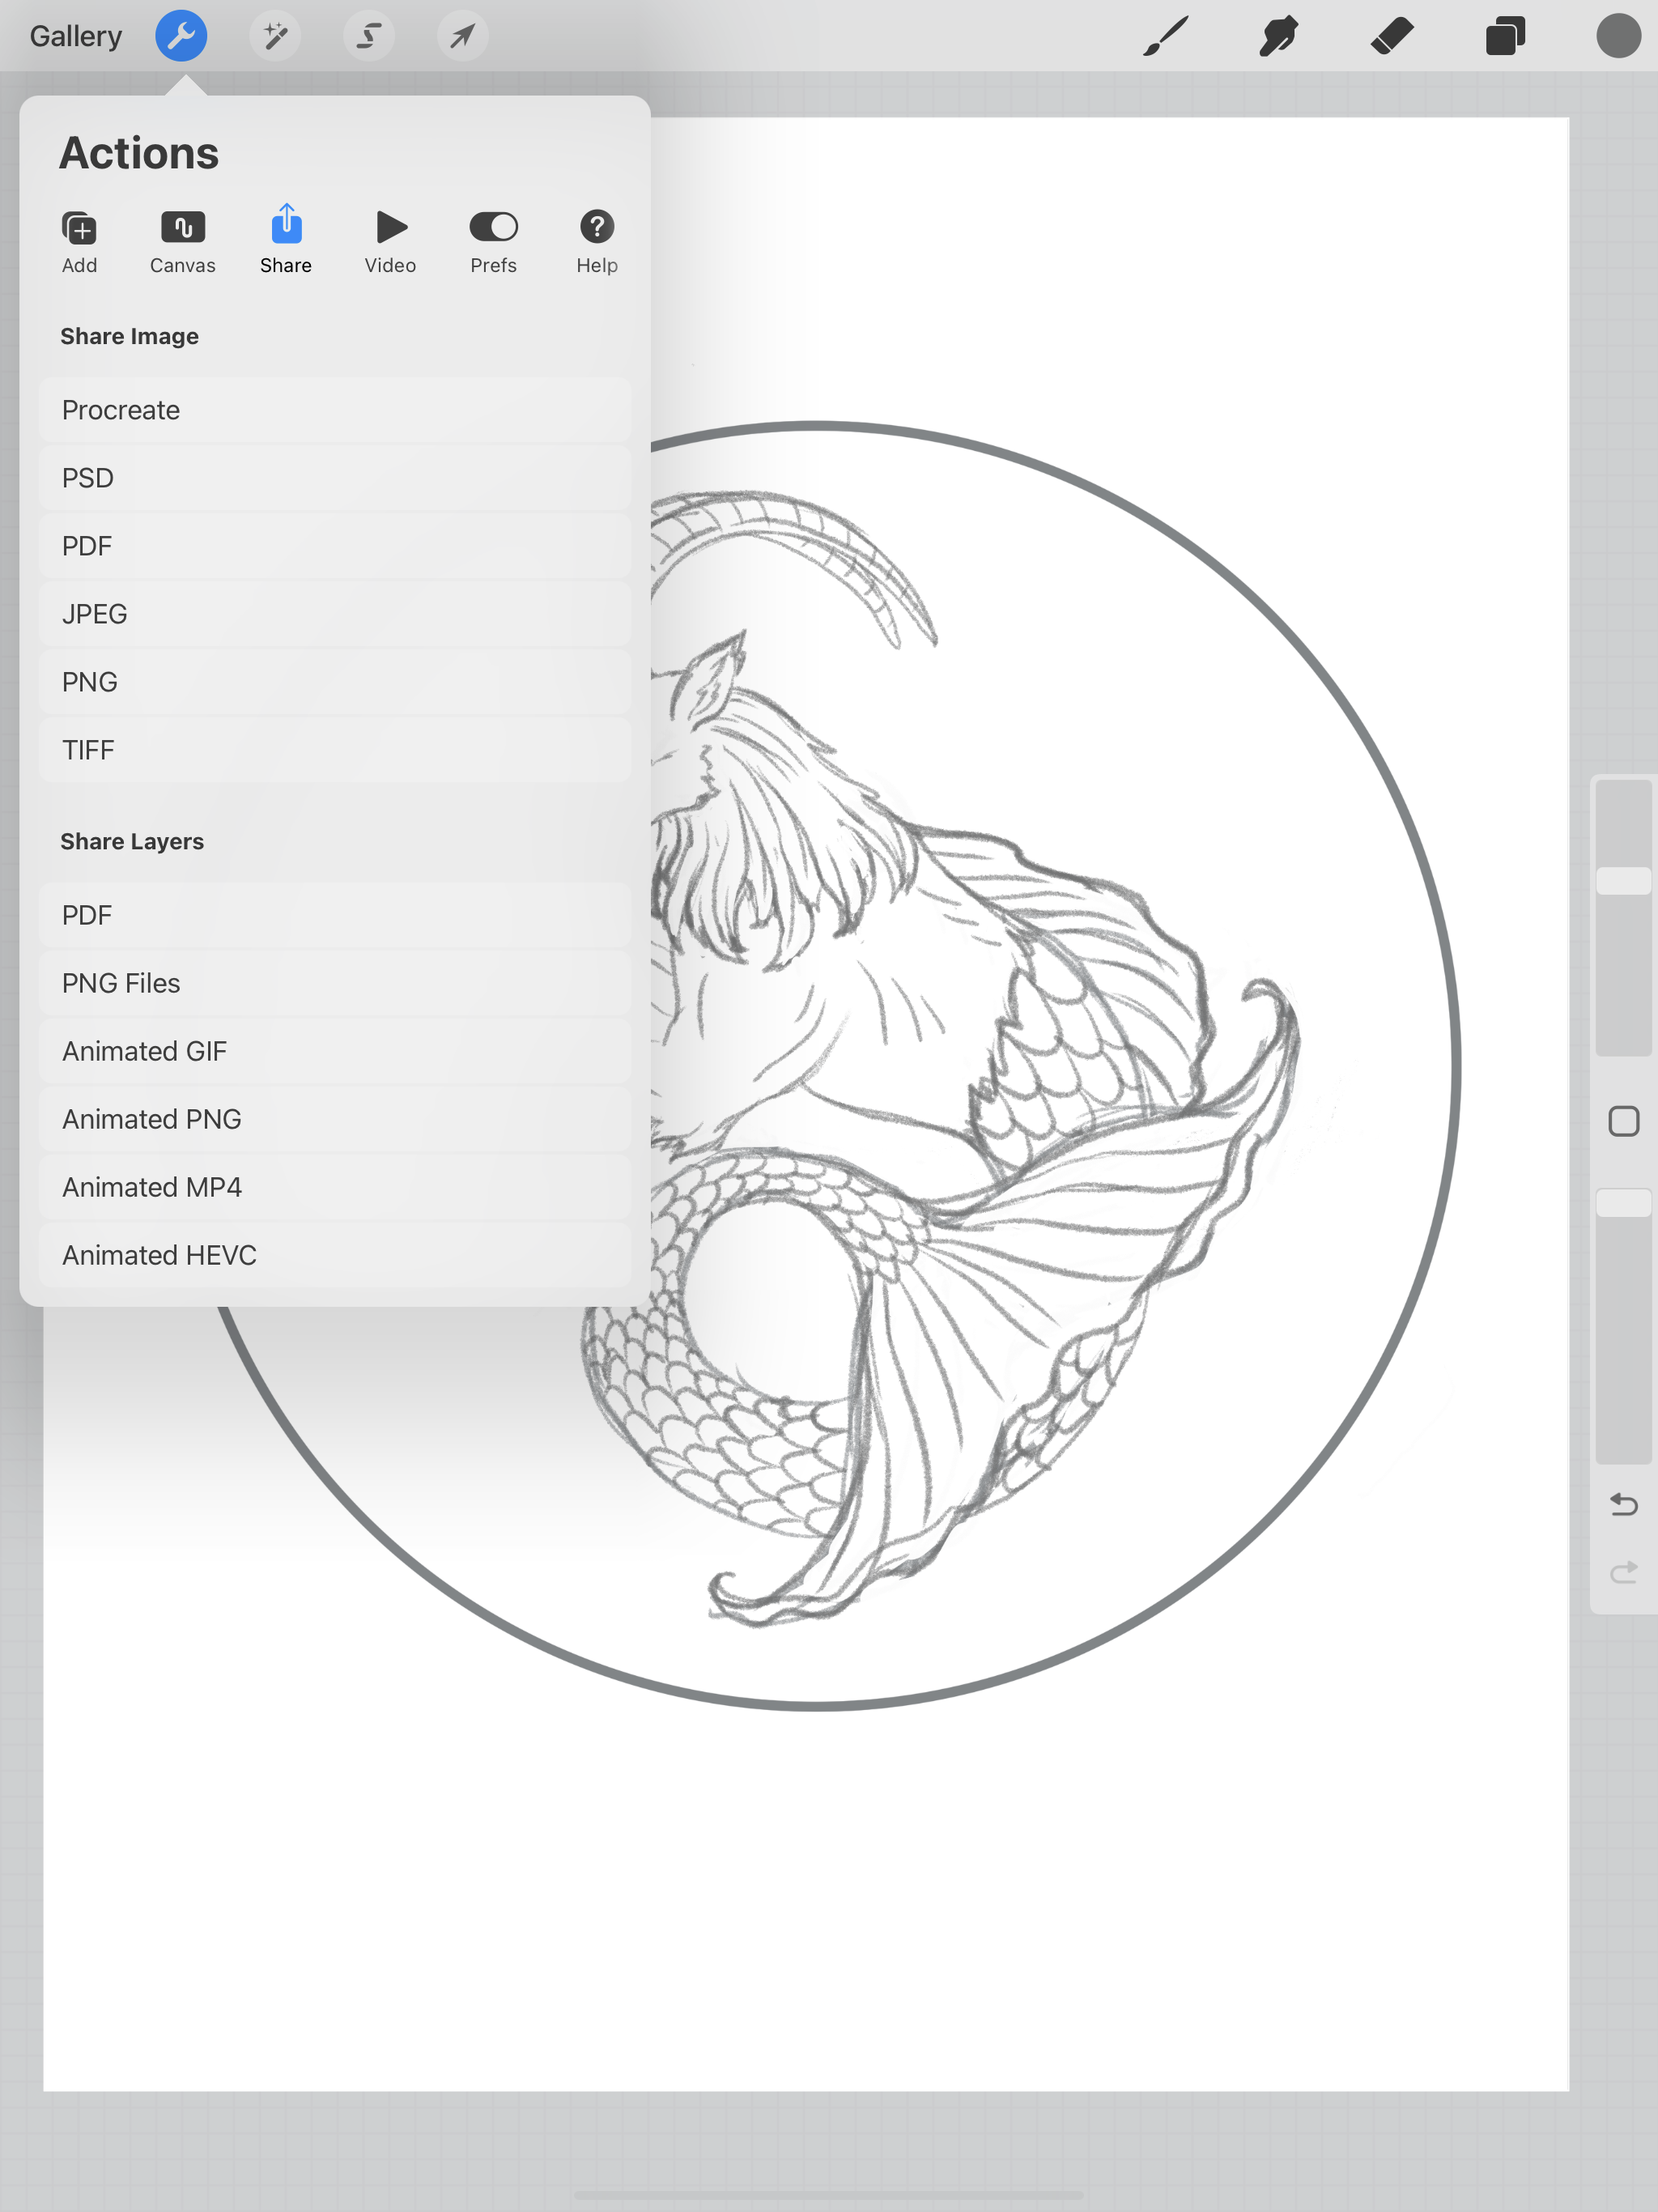
To use this file as a print and cut, I will need to export it as a PNG, this will give it a transparent background and will merge all my layers. If I want to make any color adjustments, I can always go back to my layered file in Procreate and re-export it.

Creating Clip Art in Procreate - export as png

Creating a Single Line SVG File in the Adobe Illustrator App Using Vectorize

Hi Everyone!

This week I wanted to share another method you can use to create your single line SVG file in the Illustrator App using the Vectorize tool.

One great thing about the Illustrator App is they continue to improve it. I’m not sure when they came out with the vectorize tool, but I stumbled upon it when I was tracing my sketch manually with the pencil tool.

Initially, I tried it out with my rough sketch, and the results weren’t great.

Vectorize a sketch in Illustrator app

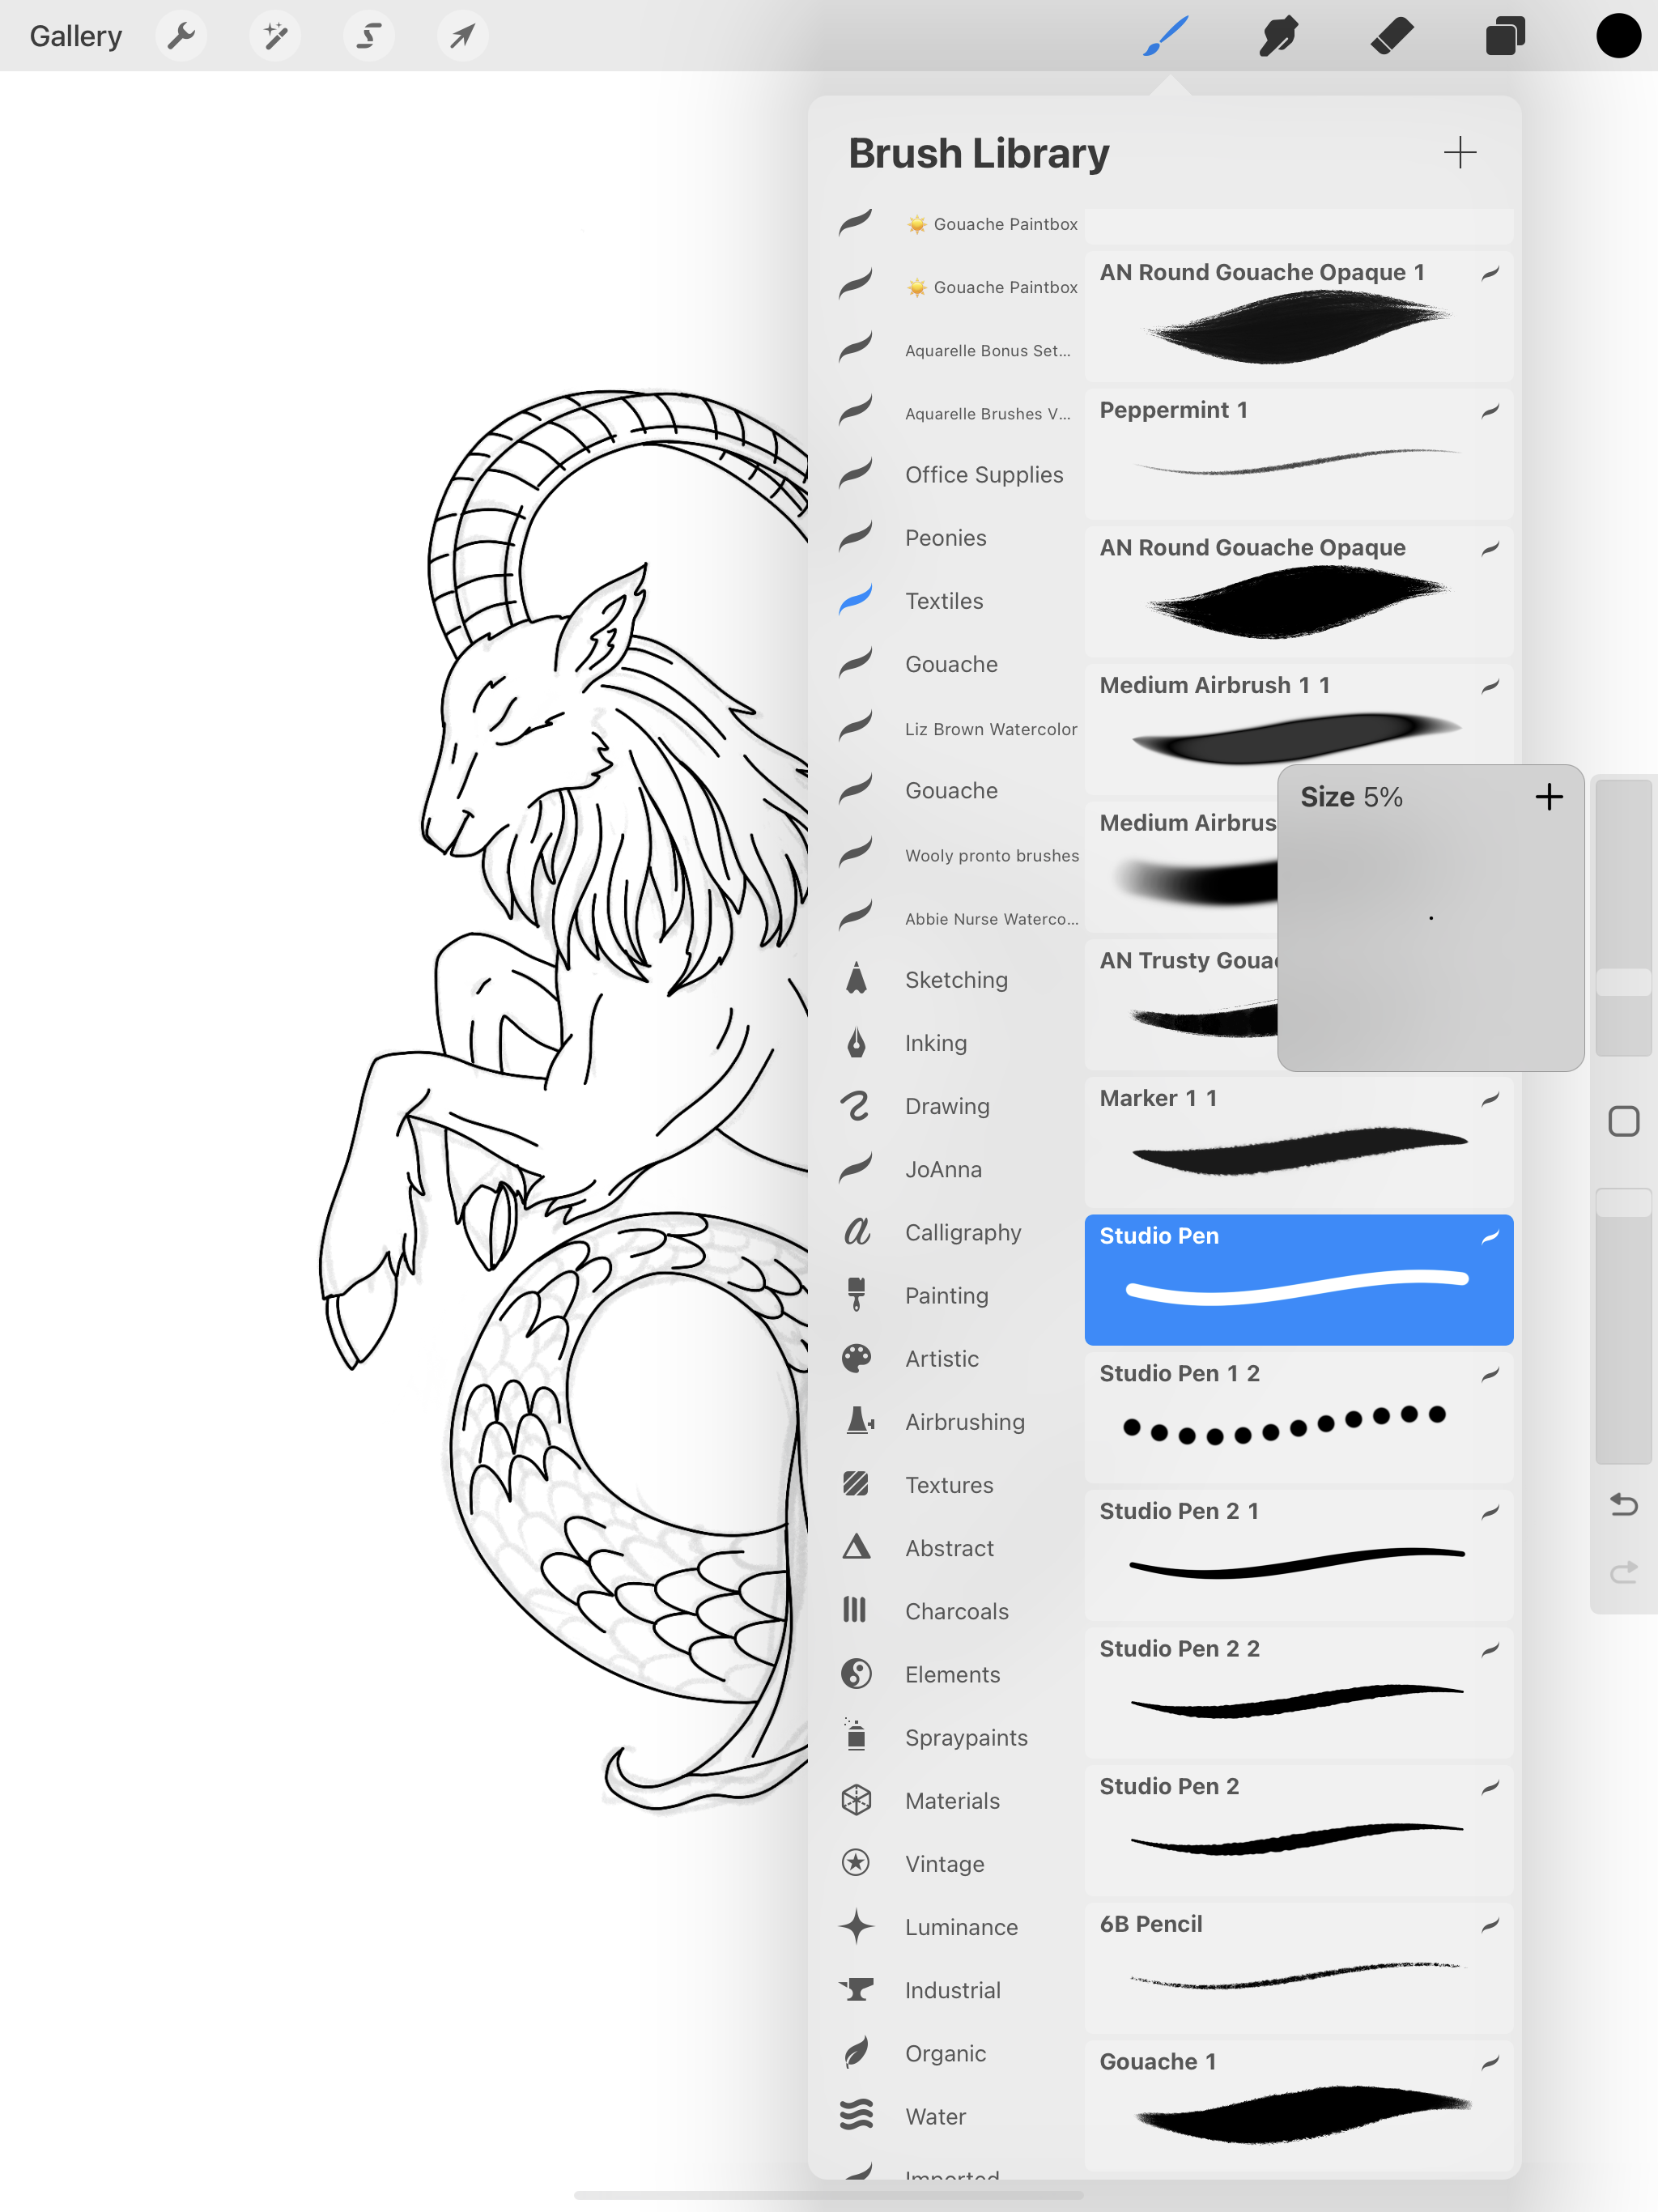
I went back into Procreate and I traced over my rough sketch with Studio Pen brush at 5% for a more refined drawing. The thinner you draw your lines here in Procreate, the better single line file you will get in Illustrator.

line drawing in procreate

I saved my file as a PNG. At this point, it looks like it would make a good draw file in Cricut Design Space, but that is definitely not the case, you will get the dreaded double lines.

Double line drawing in Cricut Design Space

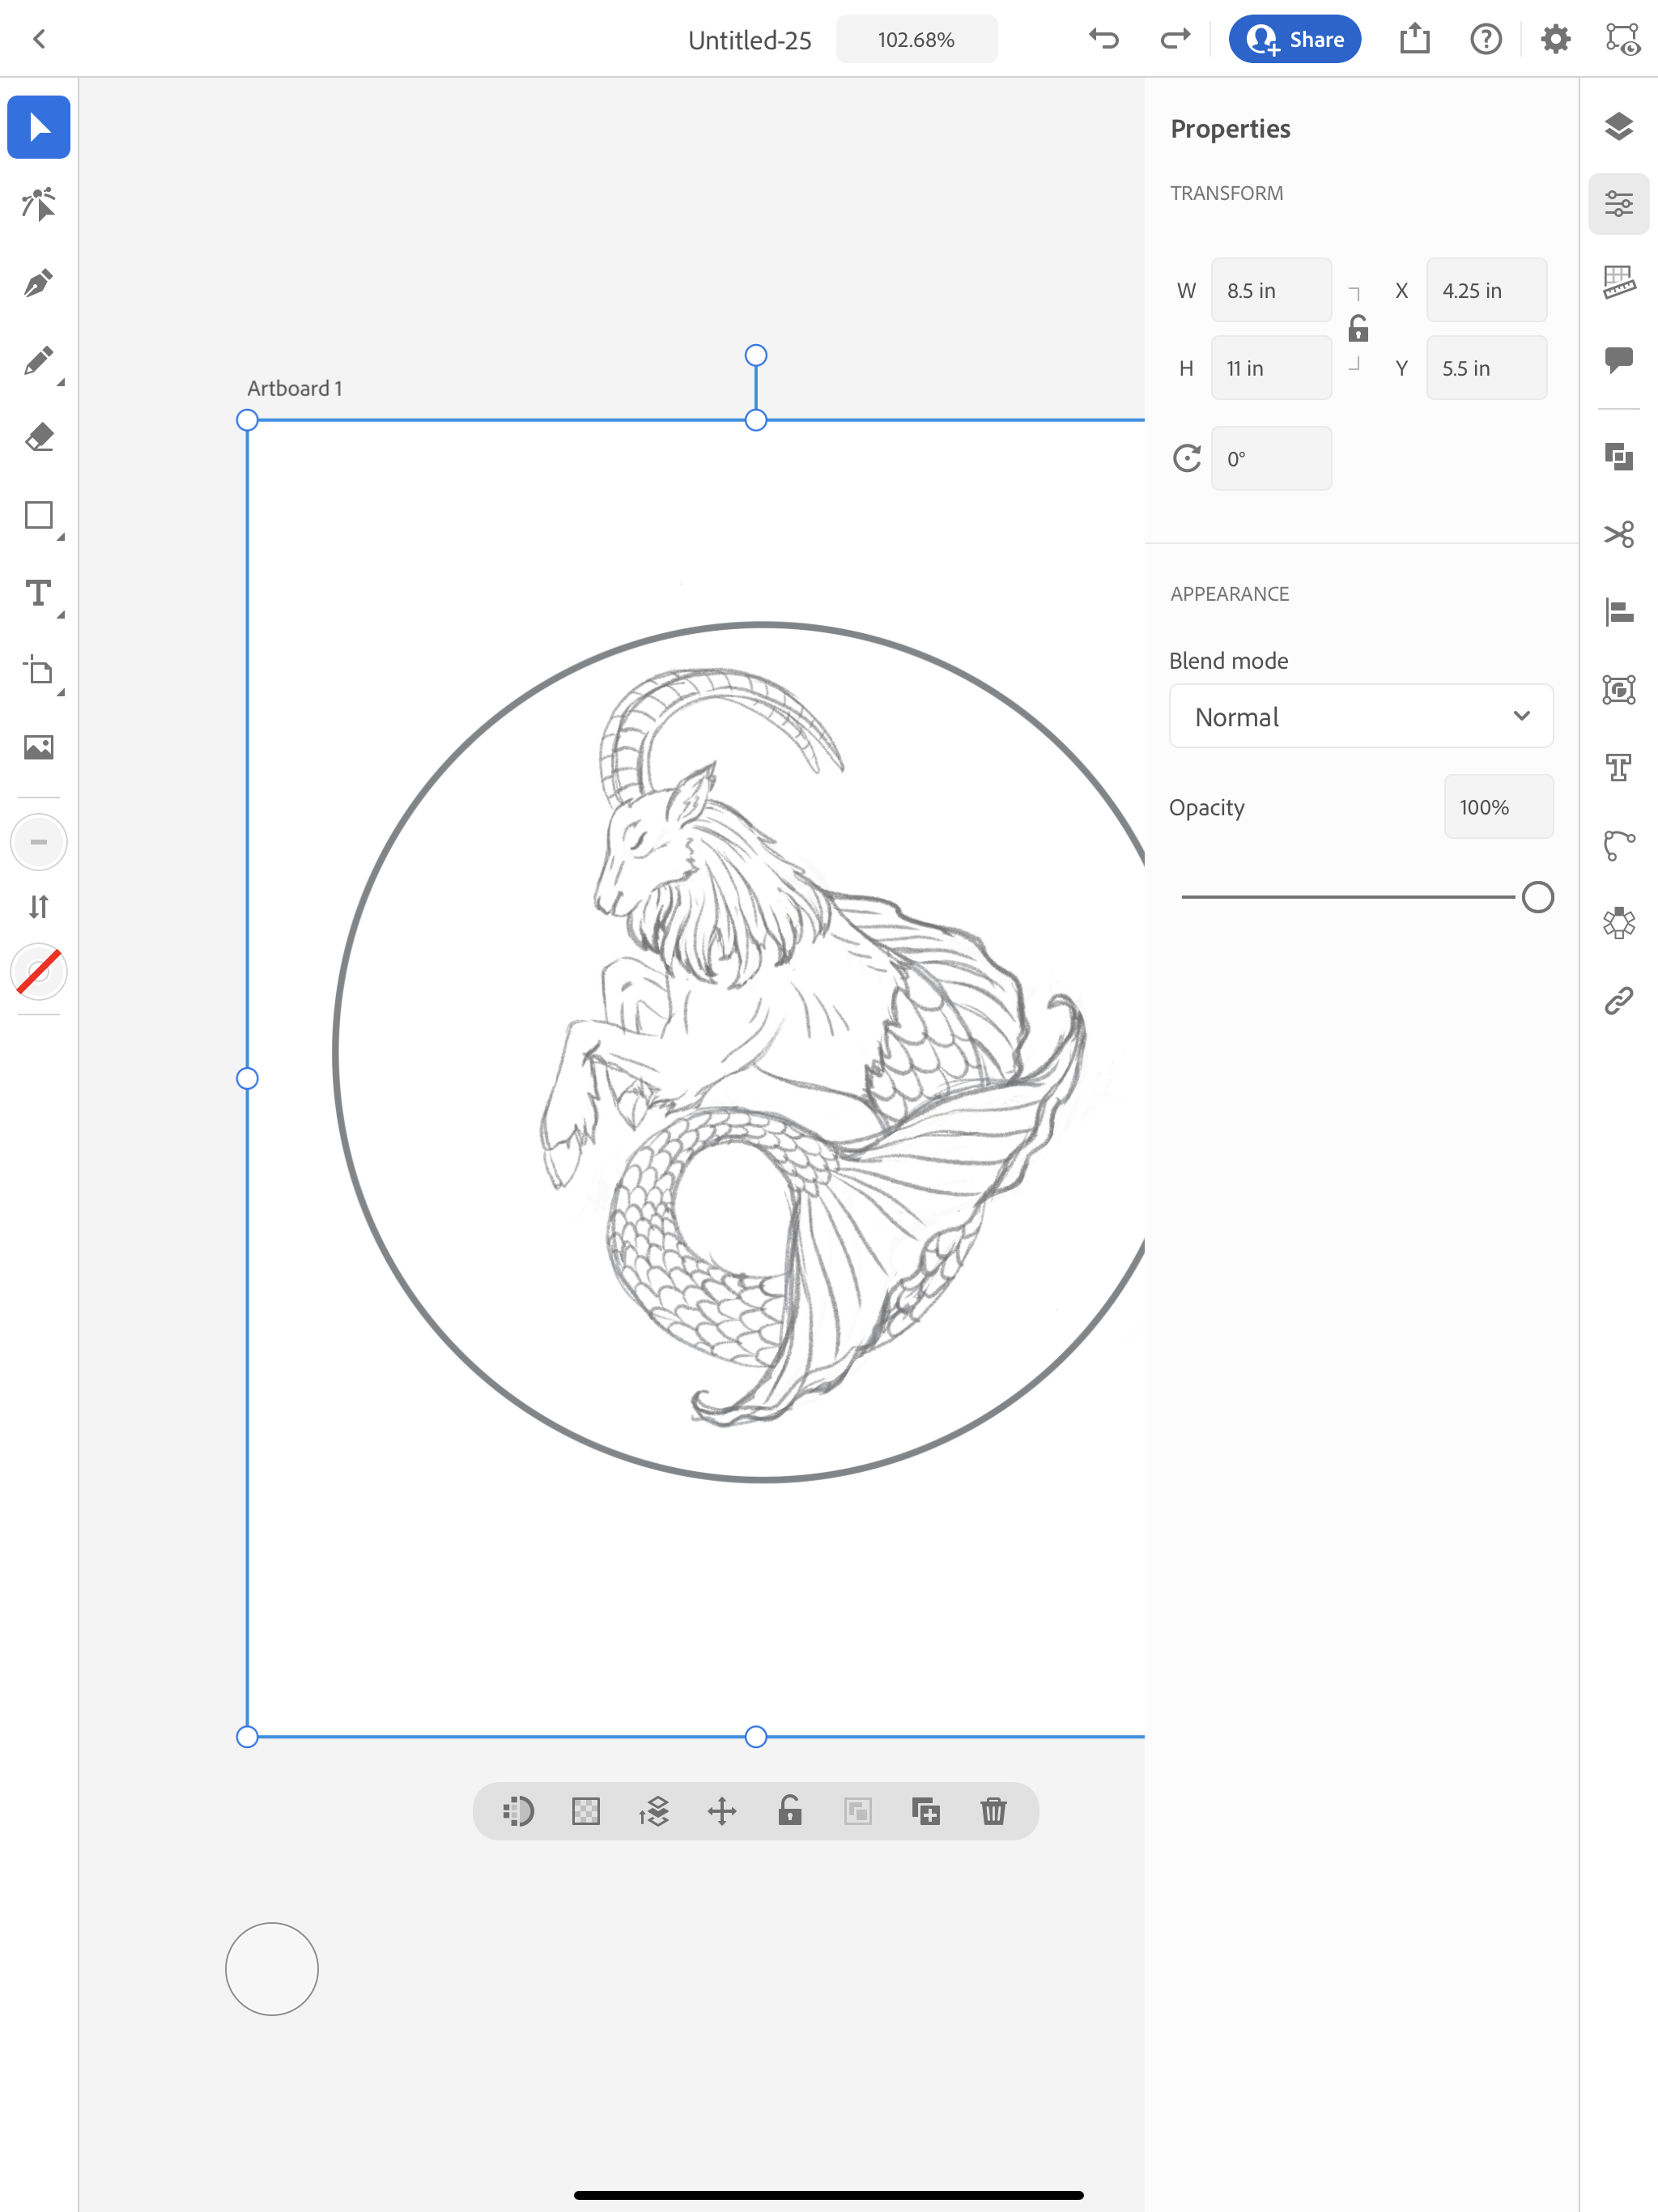
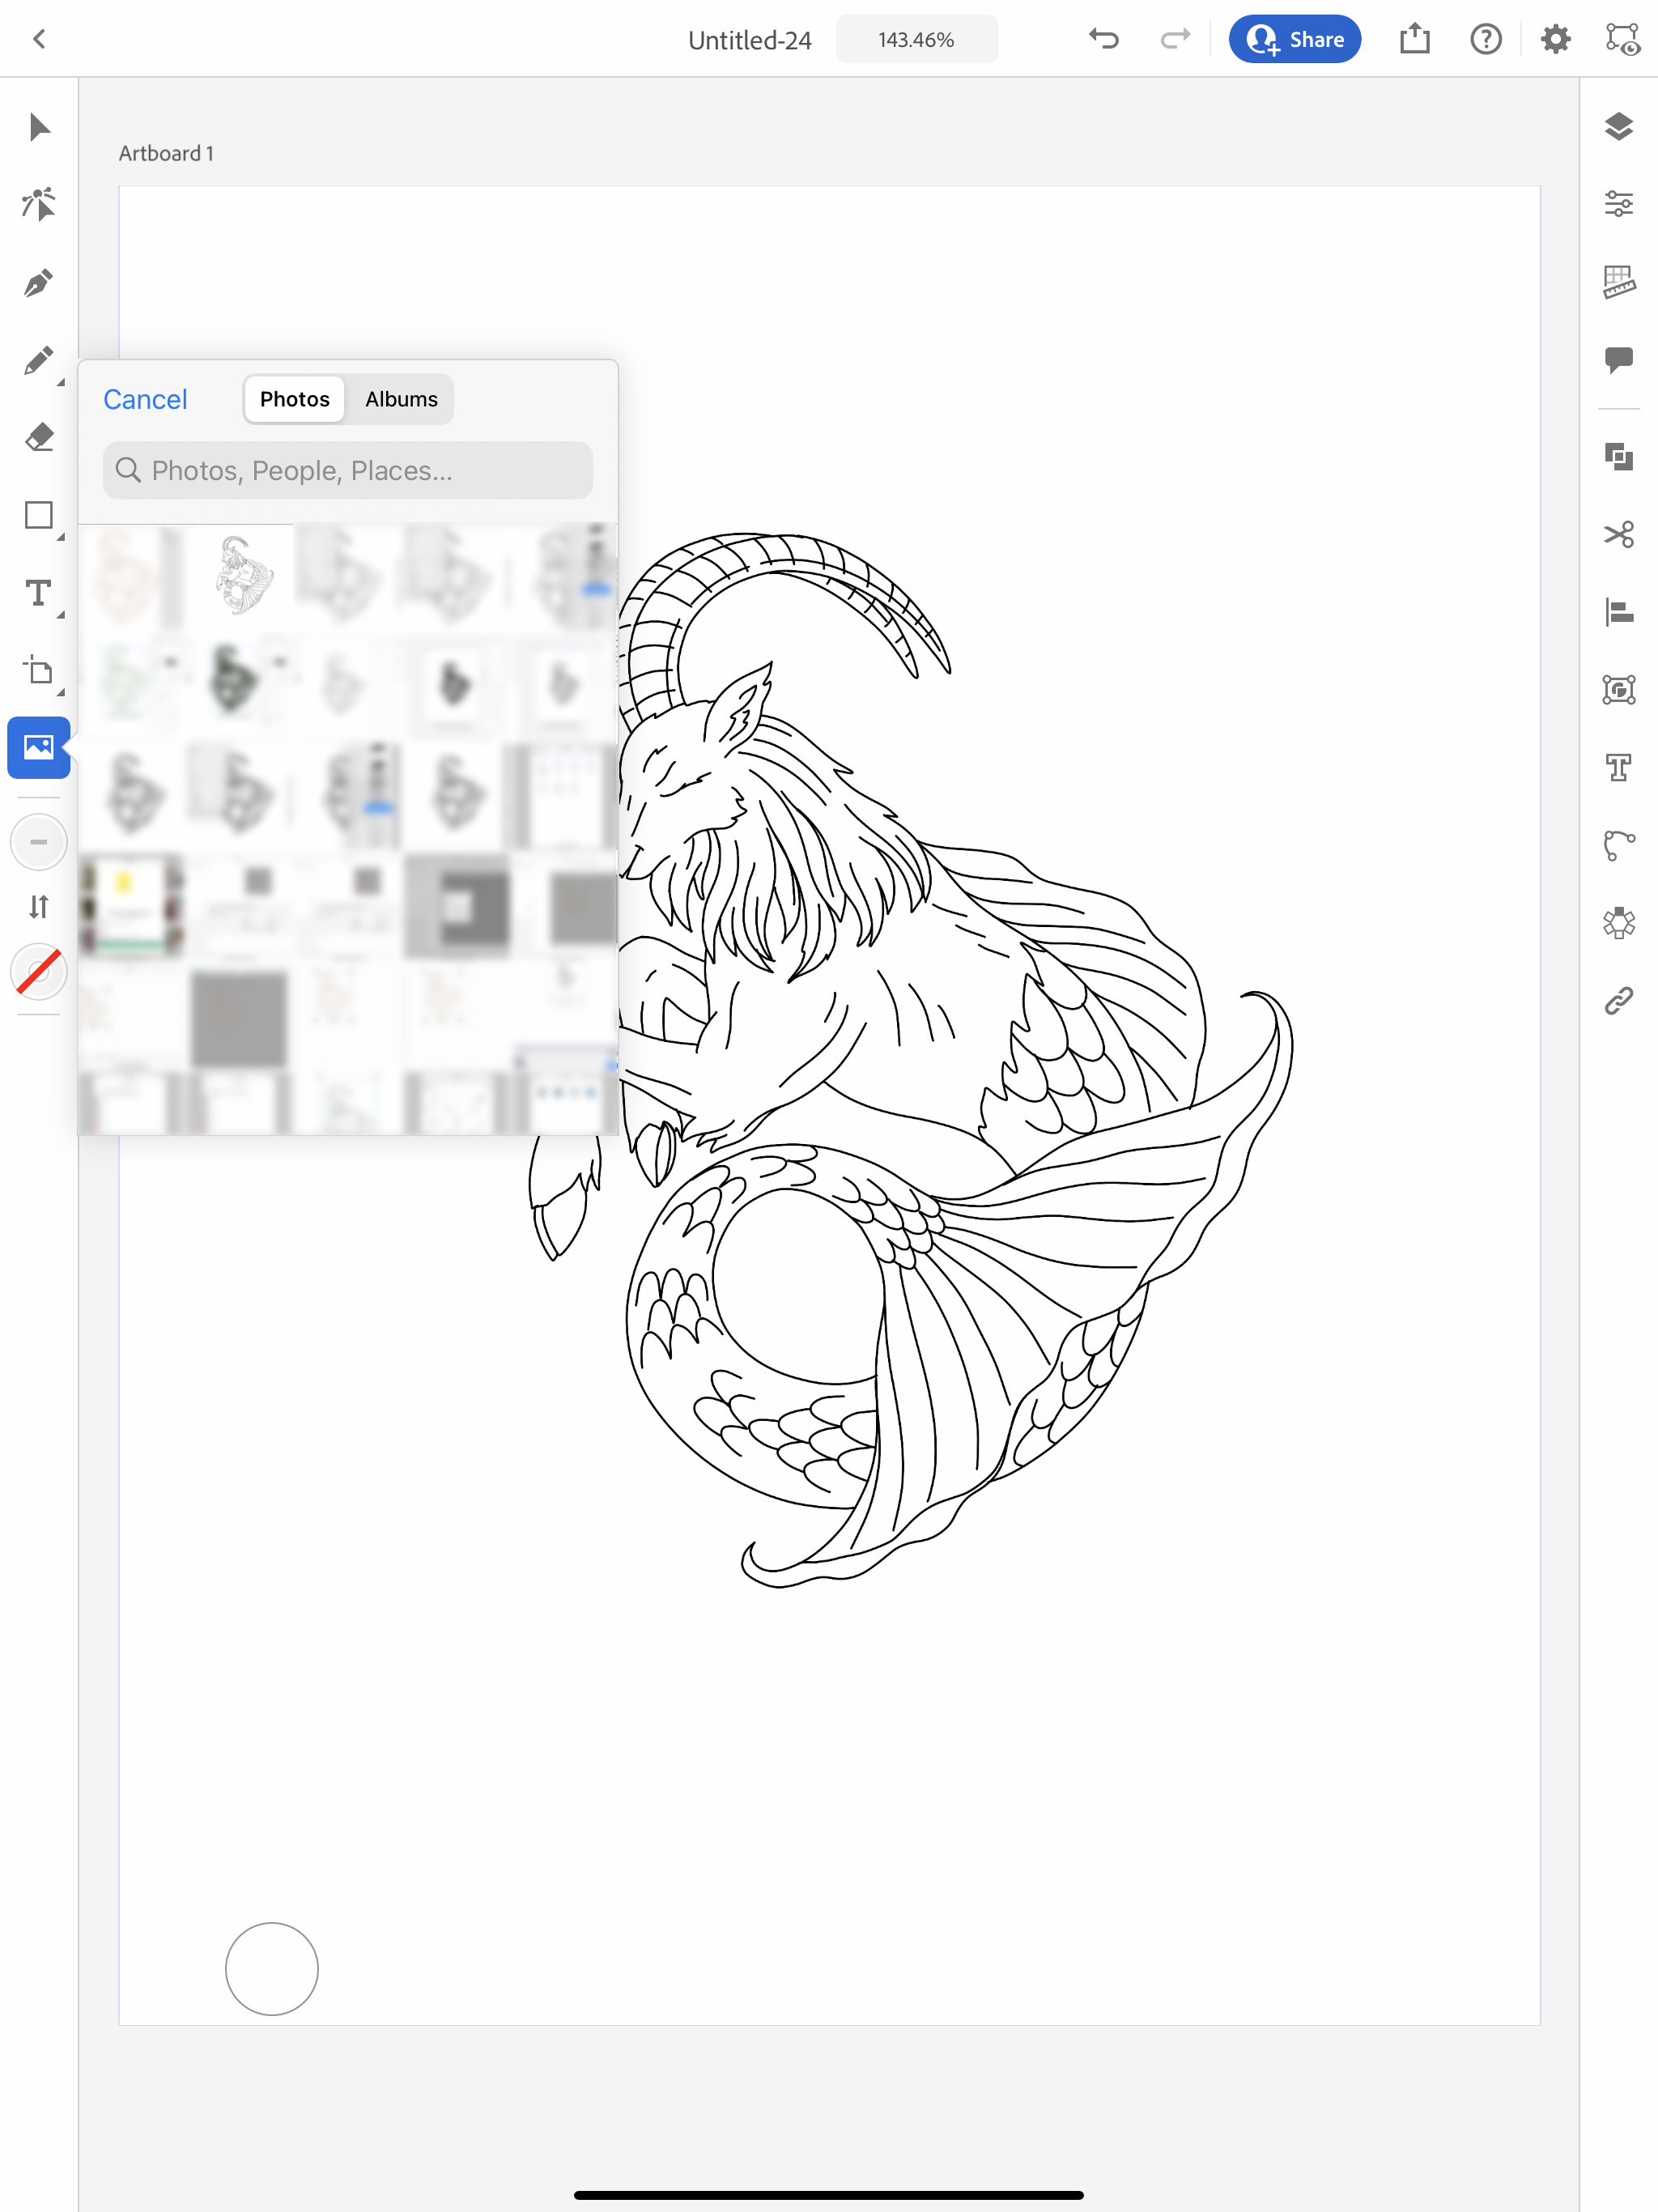
So we will need to do some additional steps in Illustrator to get a proper Draw file. I’m going to import my PNG file into the Illustrator app.

Vectorize a sketch in Illustrator app

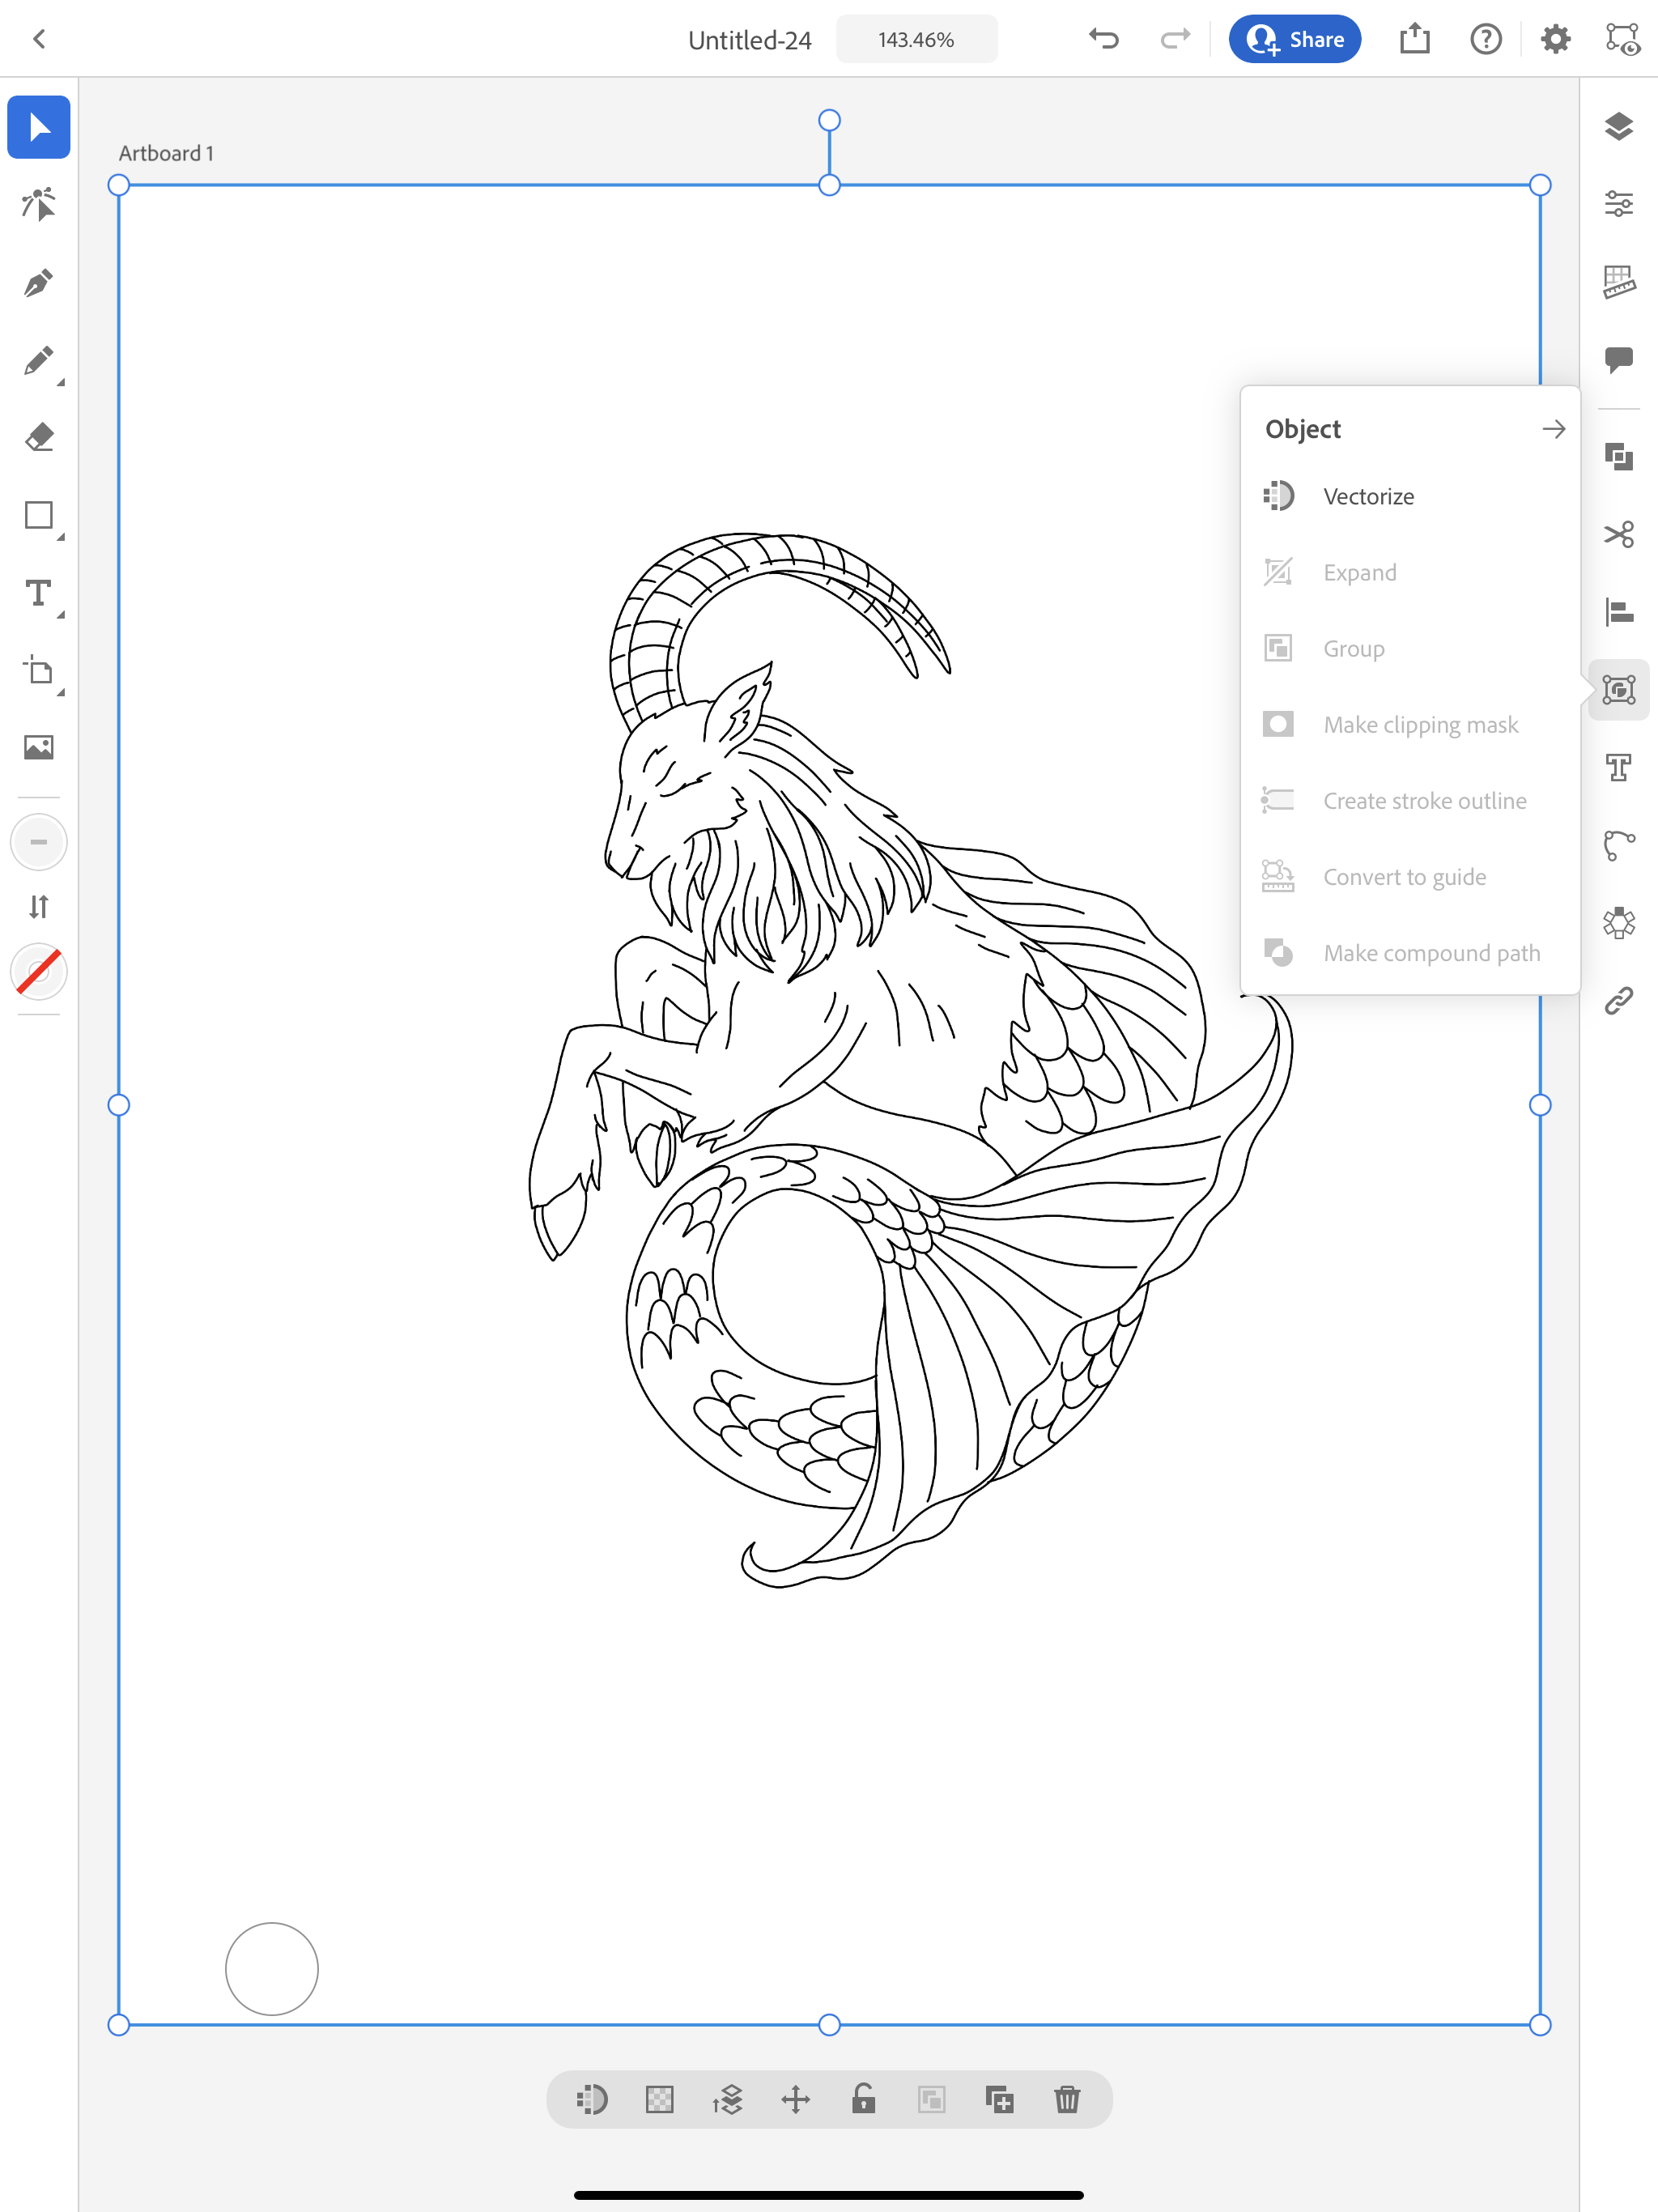
With my image selected, in the tool bar on the right side, I’m going to click on Object and in the dialog box I will select Vectorize.

Vectorize a sketch in Illustrator app

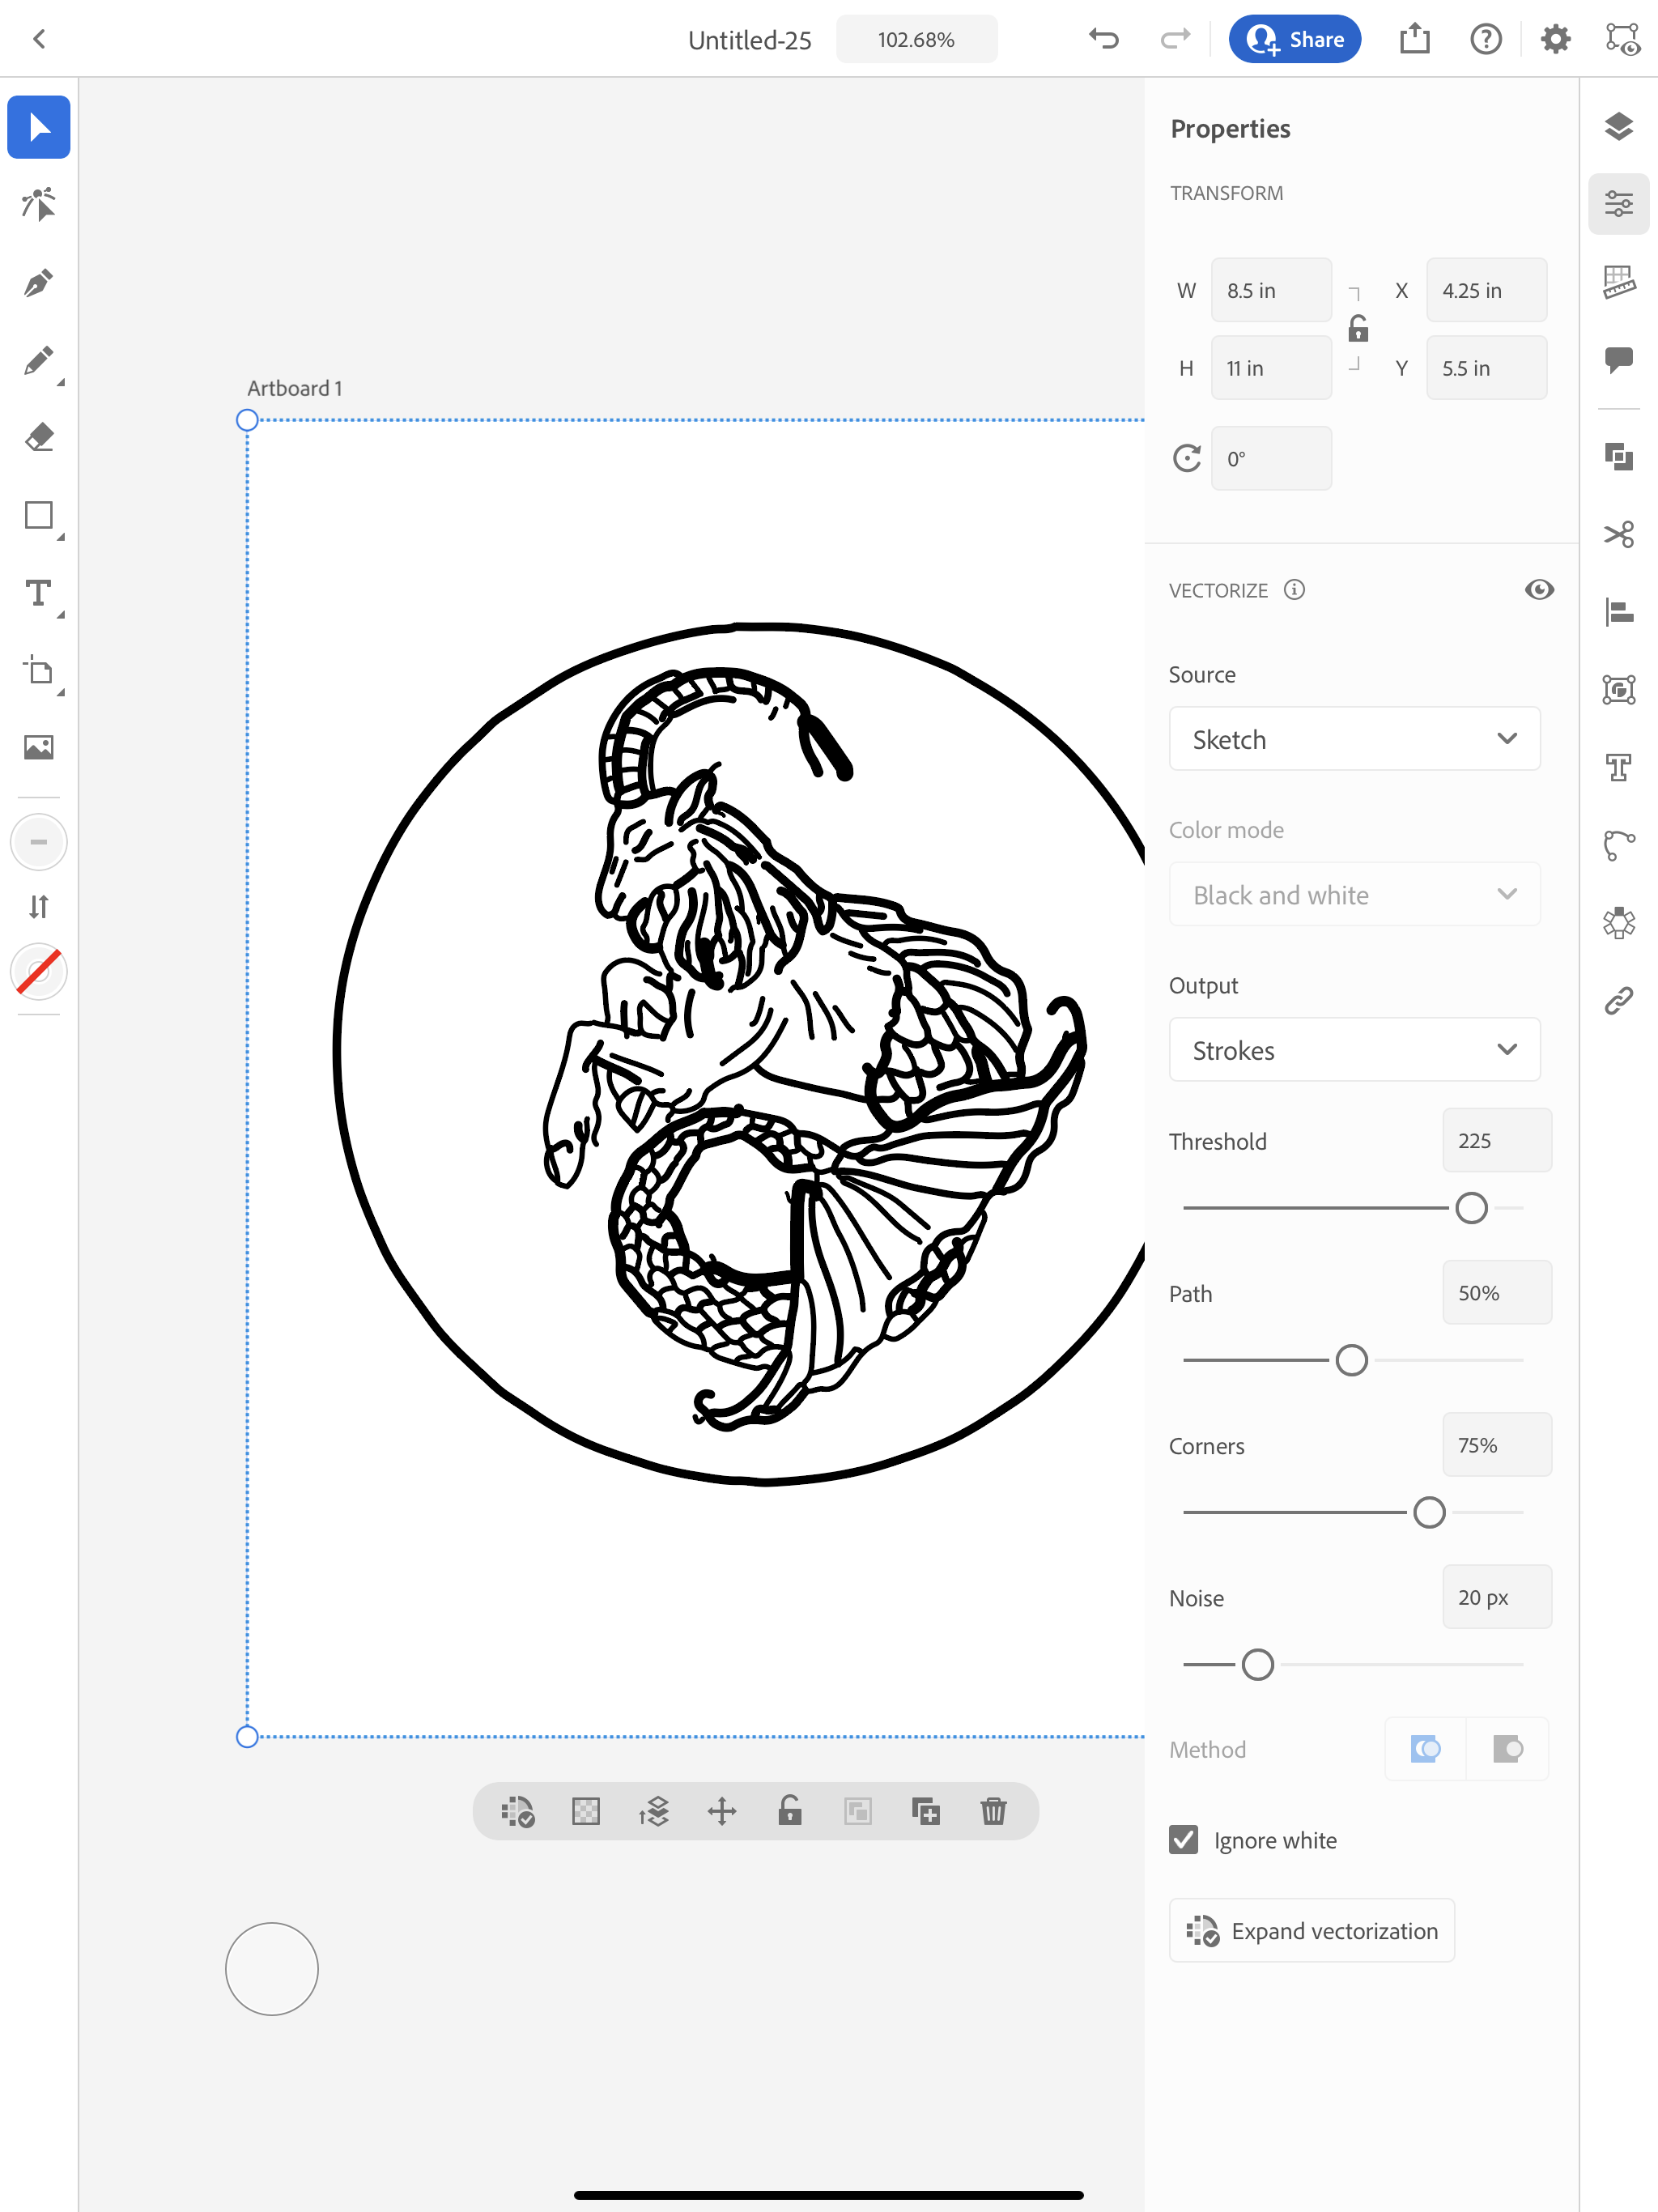
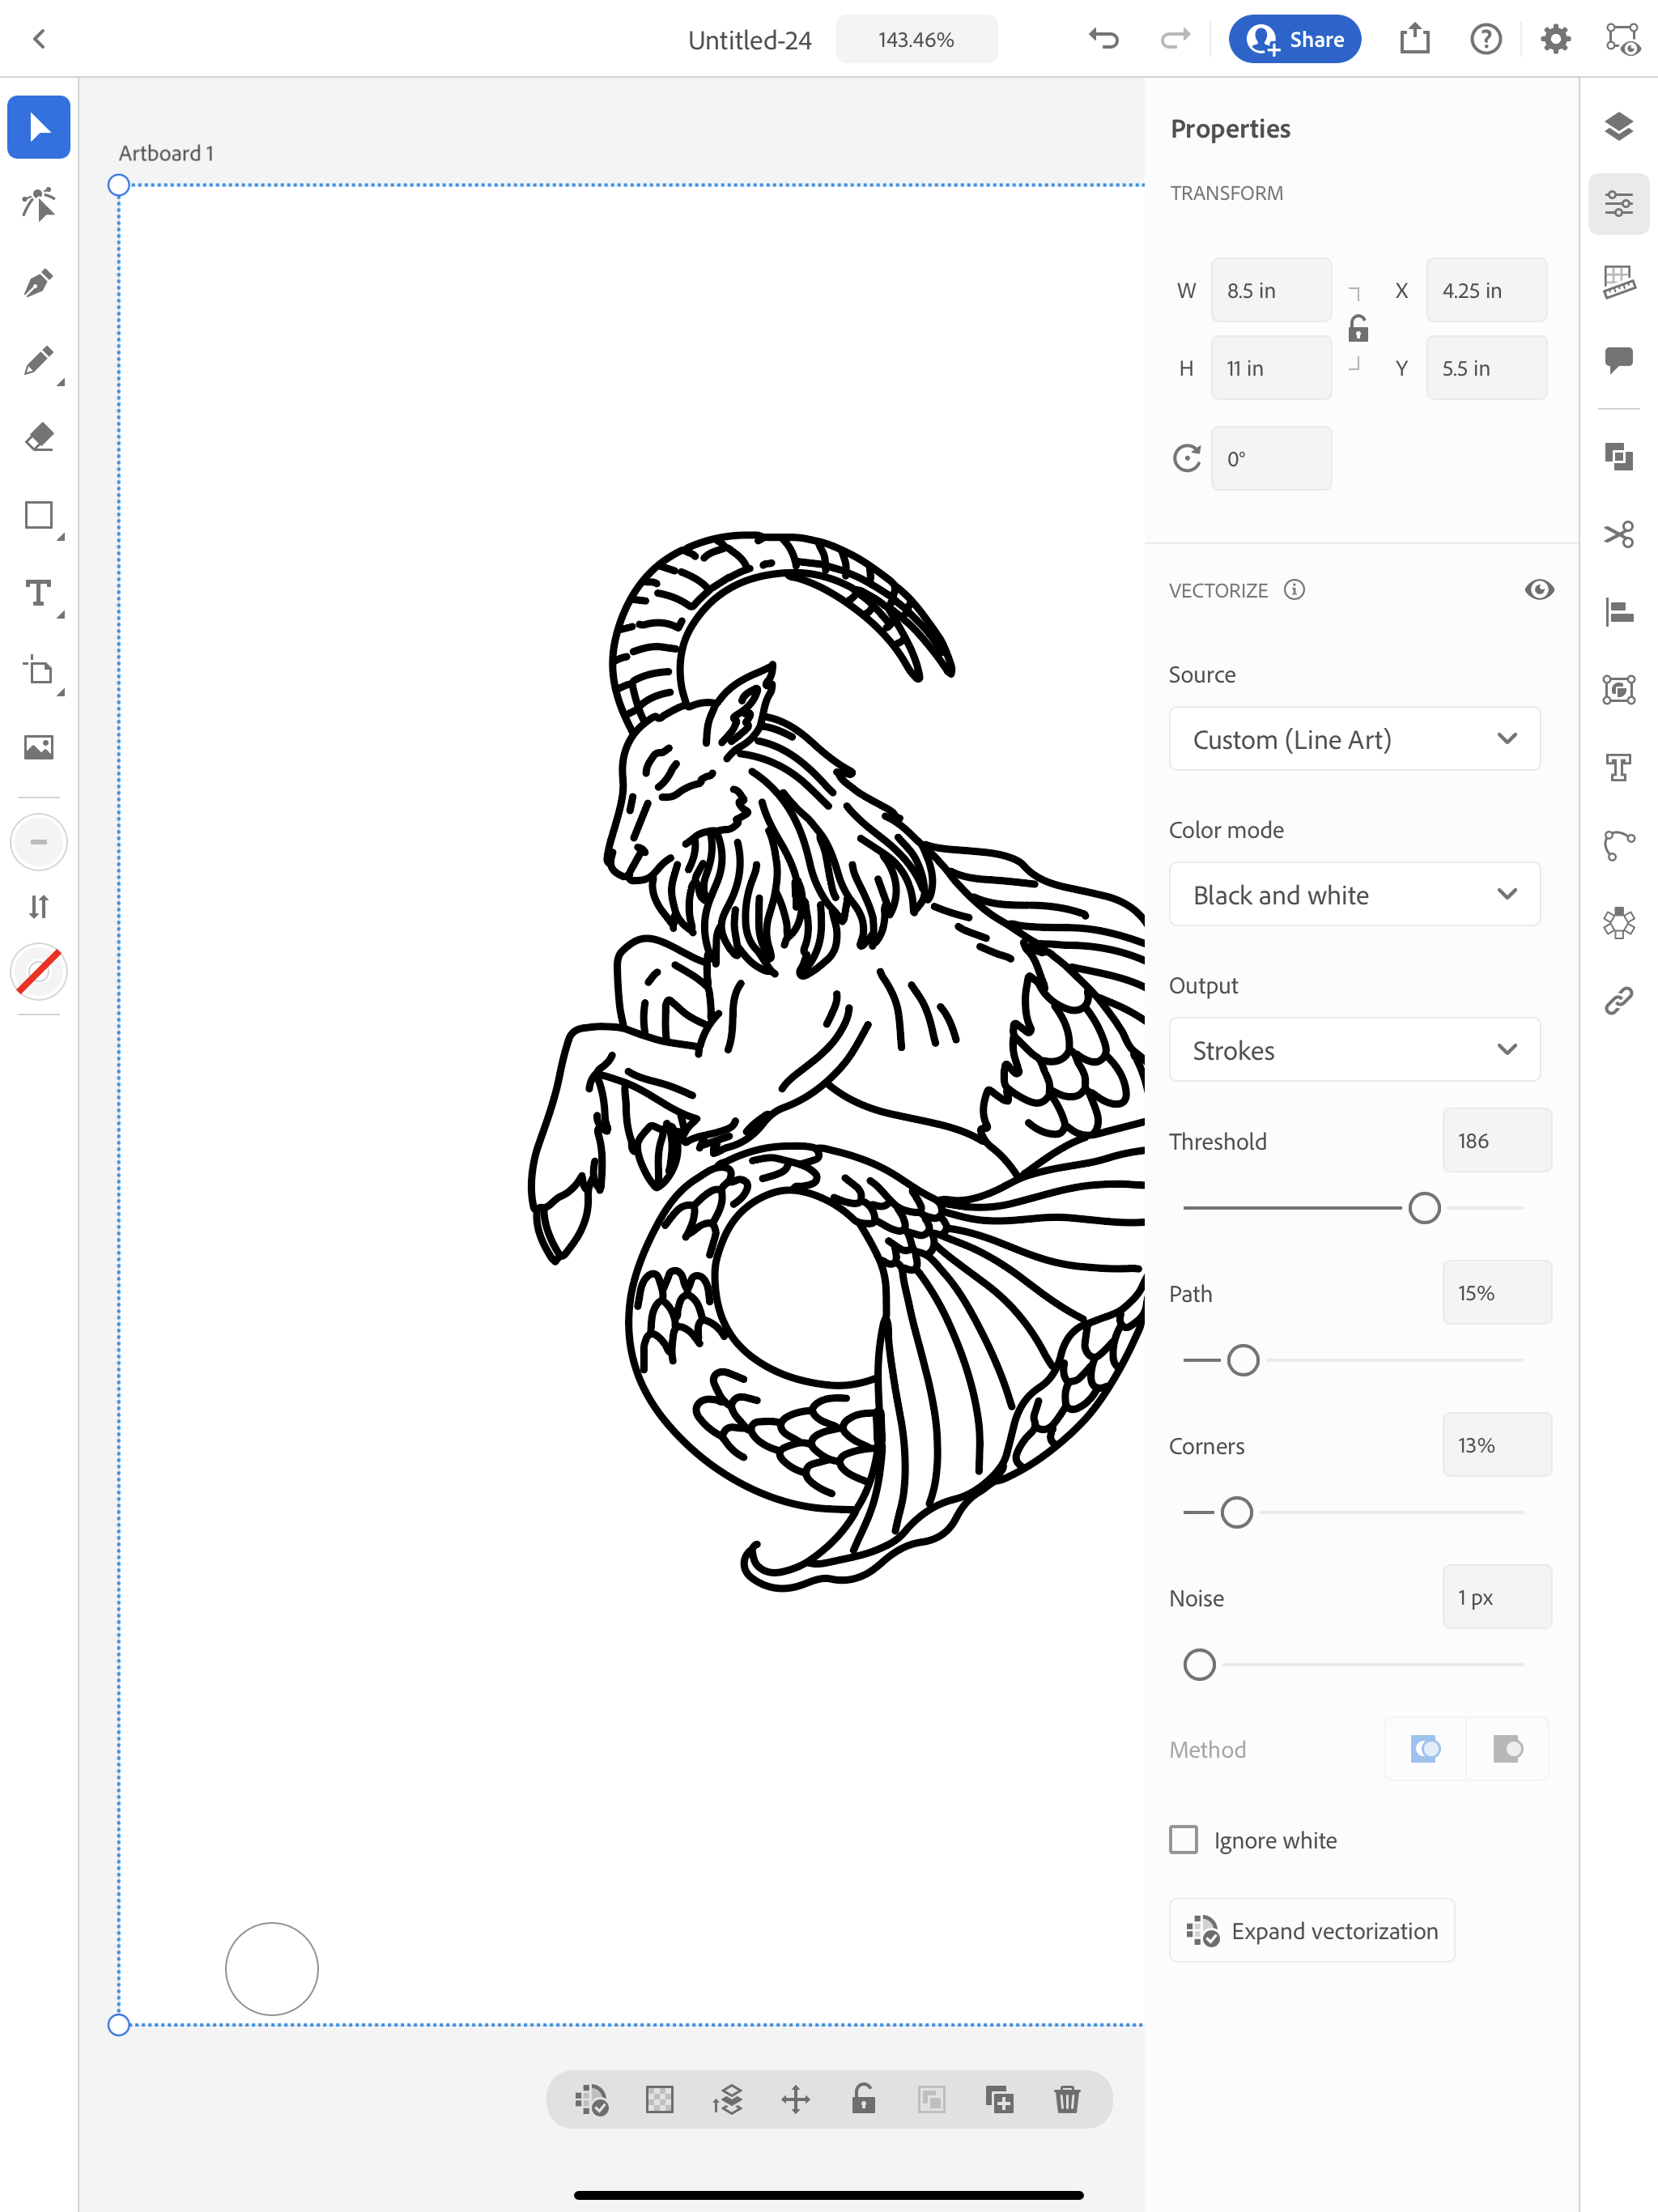
This works a lot like Image Trace in the desktop version of Illustrator. I’m going to make sure I have my color mode set to Black and White and my Output set to Strokes. You can play around with the sliders a little bit to help refine your drawing.

Vectorize a sketch in Illustrator app

Once you get it to where you like it, you can click Expand Vectorization and now you will have a drawing composed of single line strokes.

Vectorize a sketch in Illustrator app

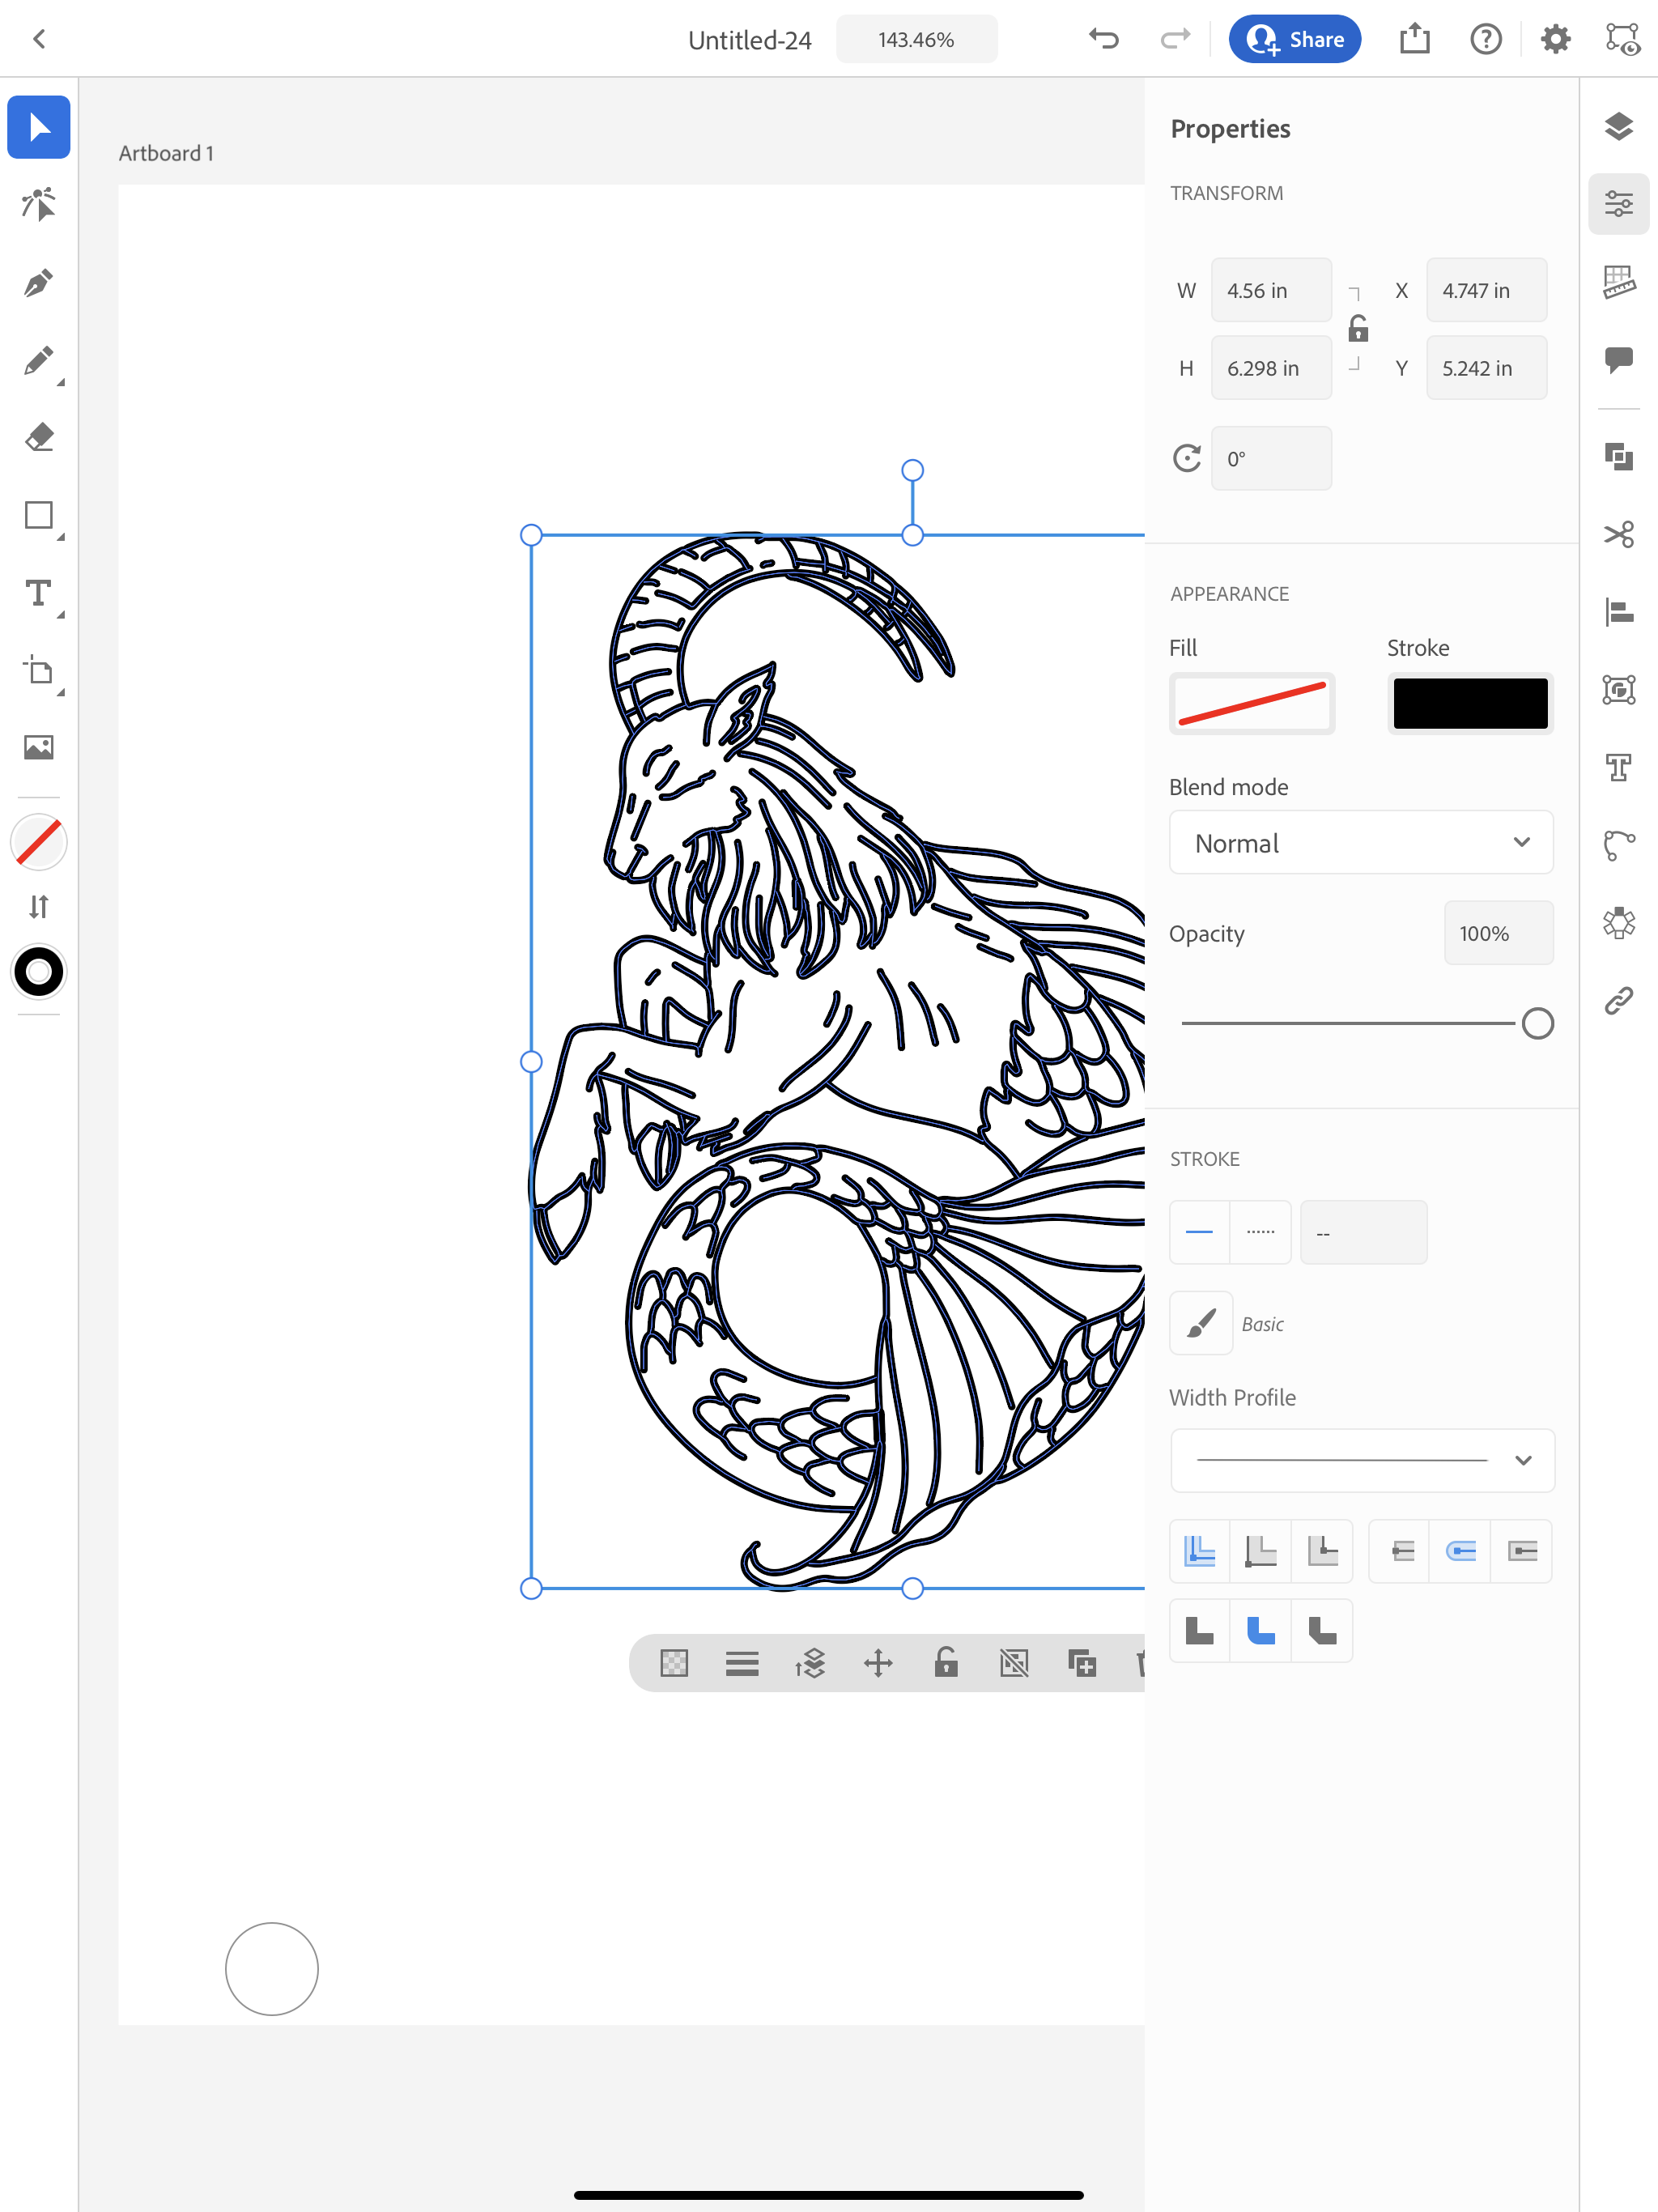
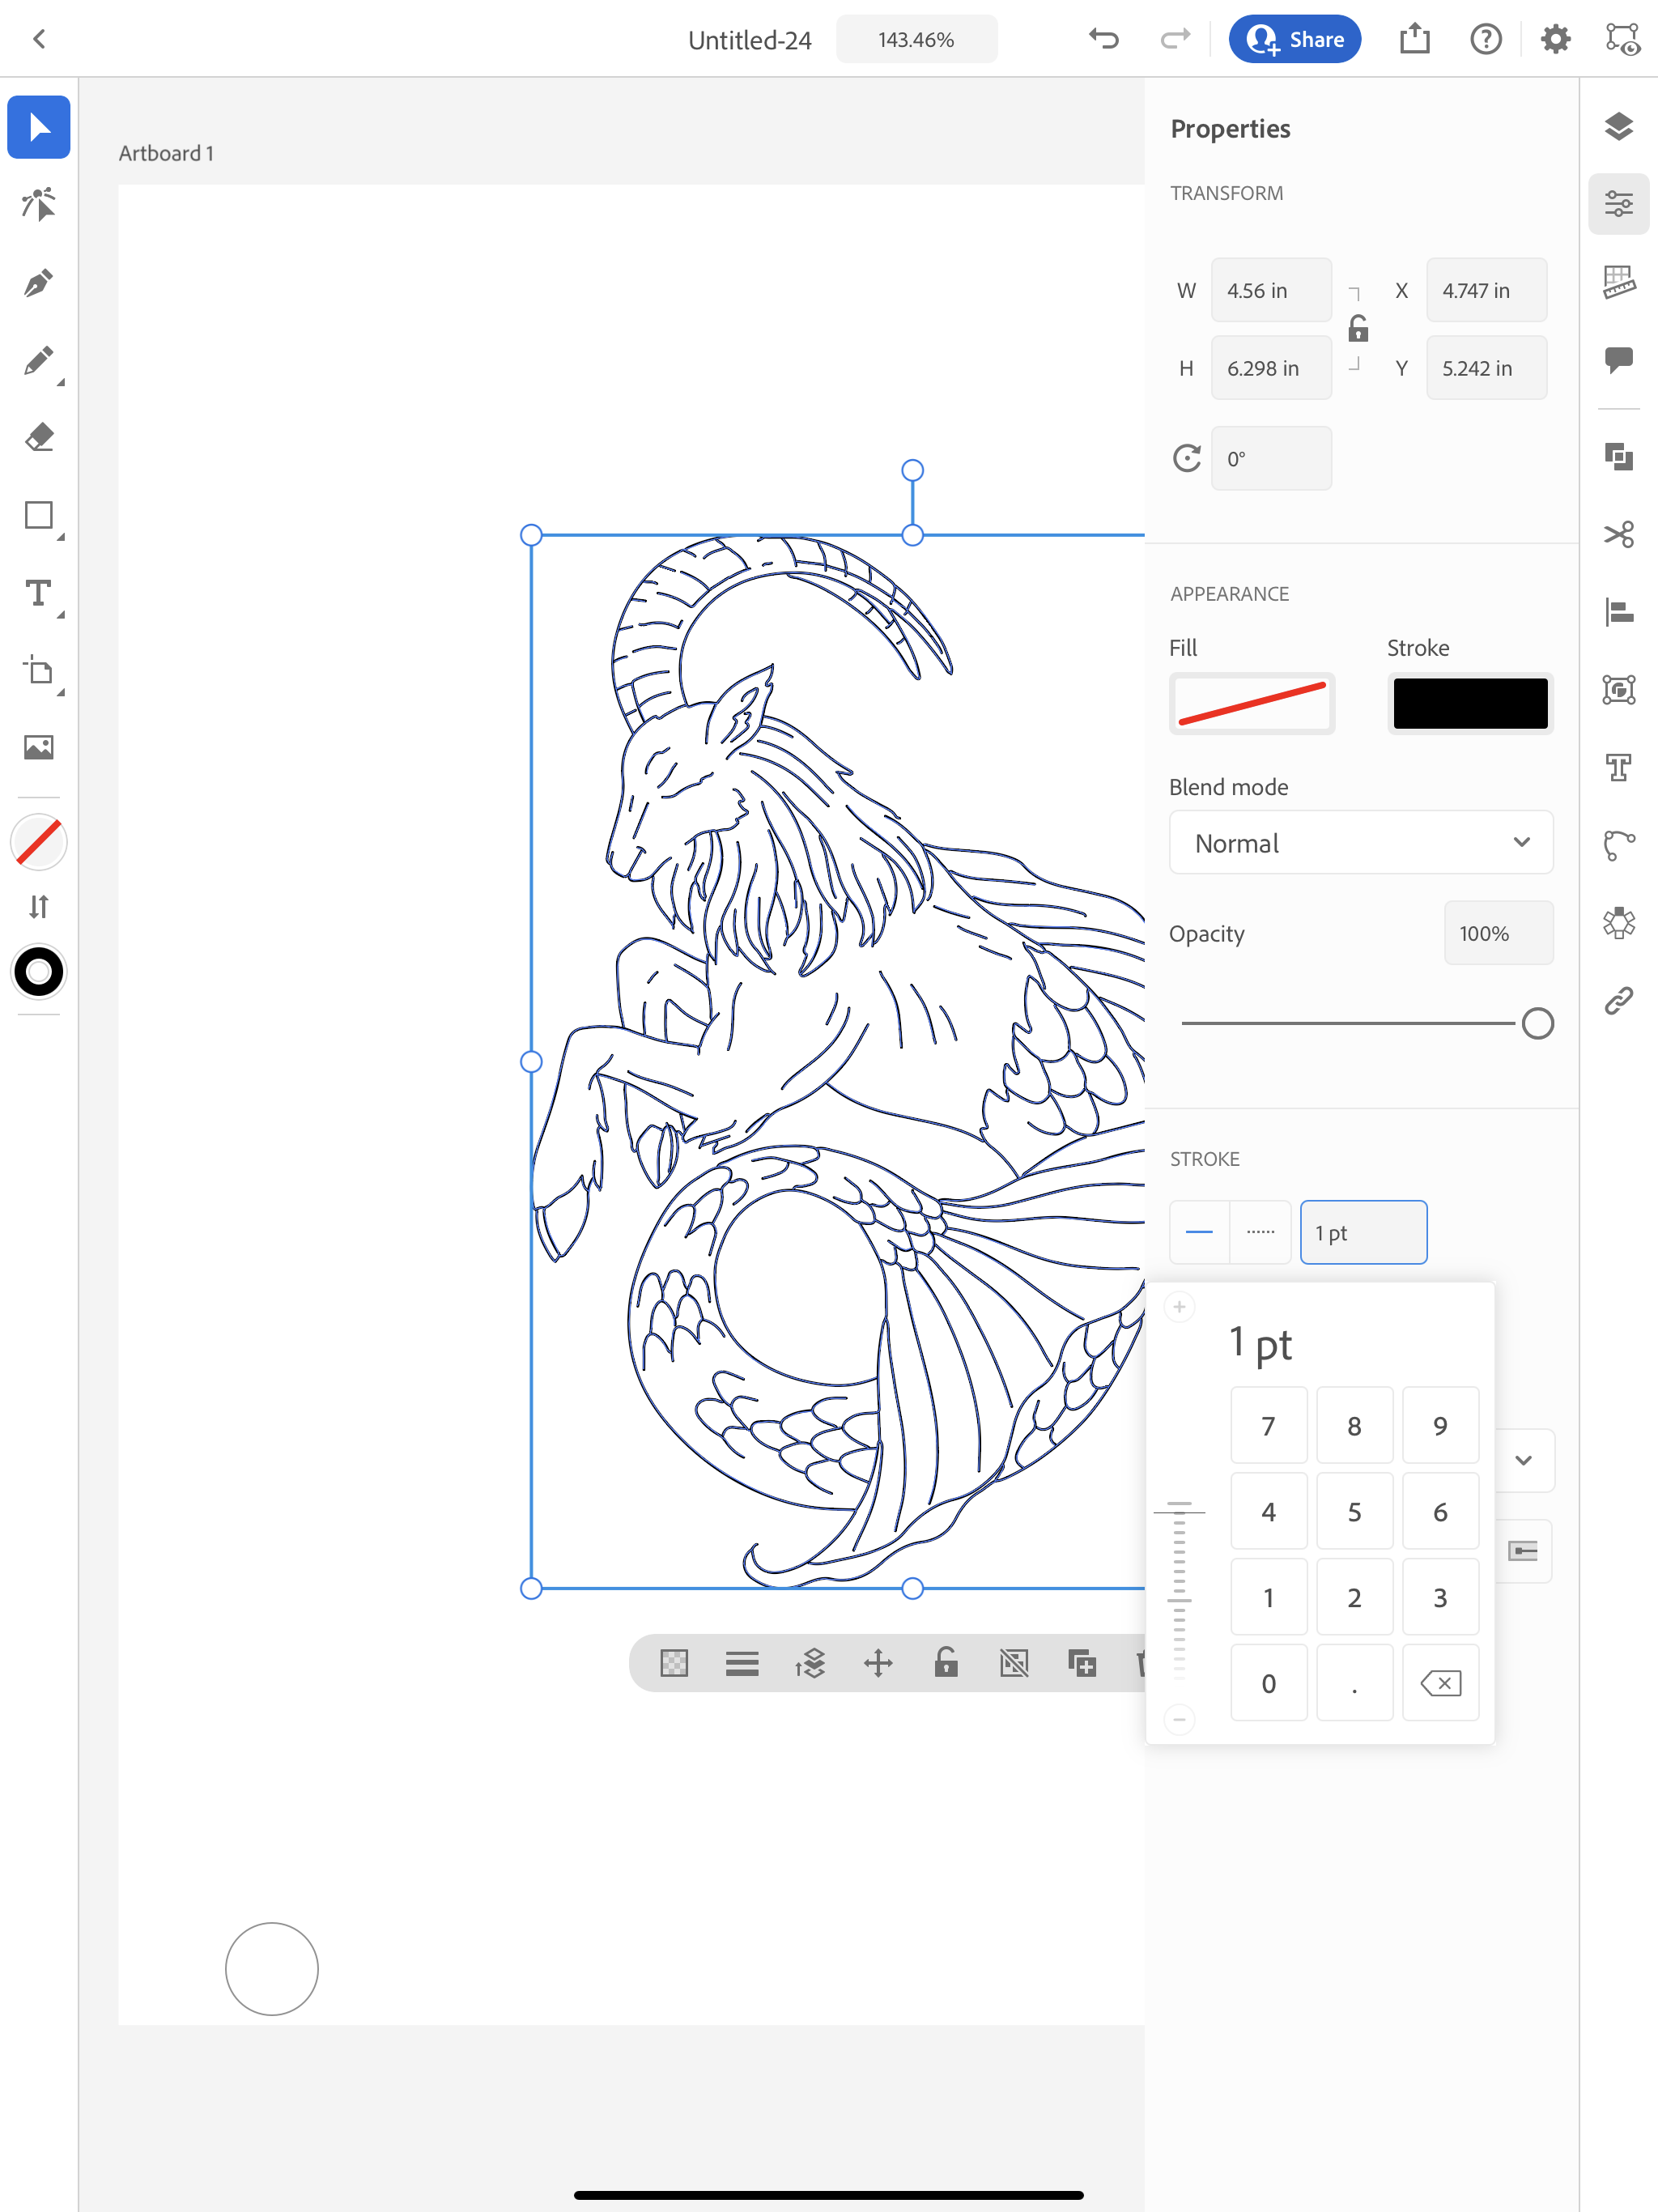
One last thing I’m going to do is make all of my strokes 1pt in width.

Vectorize a sketch in Illustrator app

Now I can go through and refine my drawing even more with the direct selection tool and add any parts that may be missing with the pen or pencil tool. Once I’m satisfied with the way it is, I can save this as an SVG and import it into the Cricut Design Space App.

Creating Your Own Single Line SVG File - Part Three

Hi Everyone!

This week I’m going to test the single line SVG file that I created in the Illustrator app last week. I’m going to do this all on my iPad, so I’m going to test it with the Cricut app.

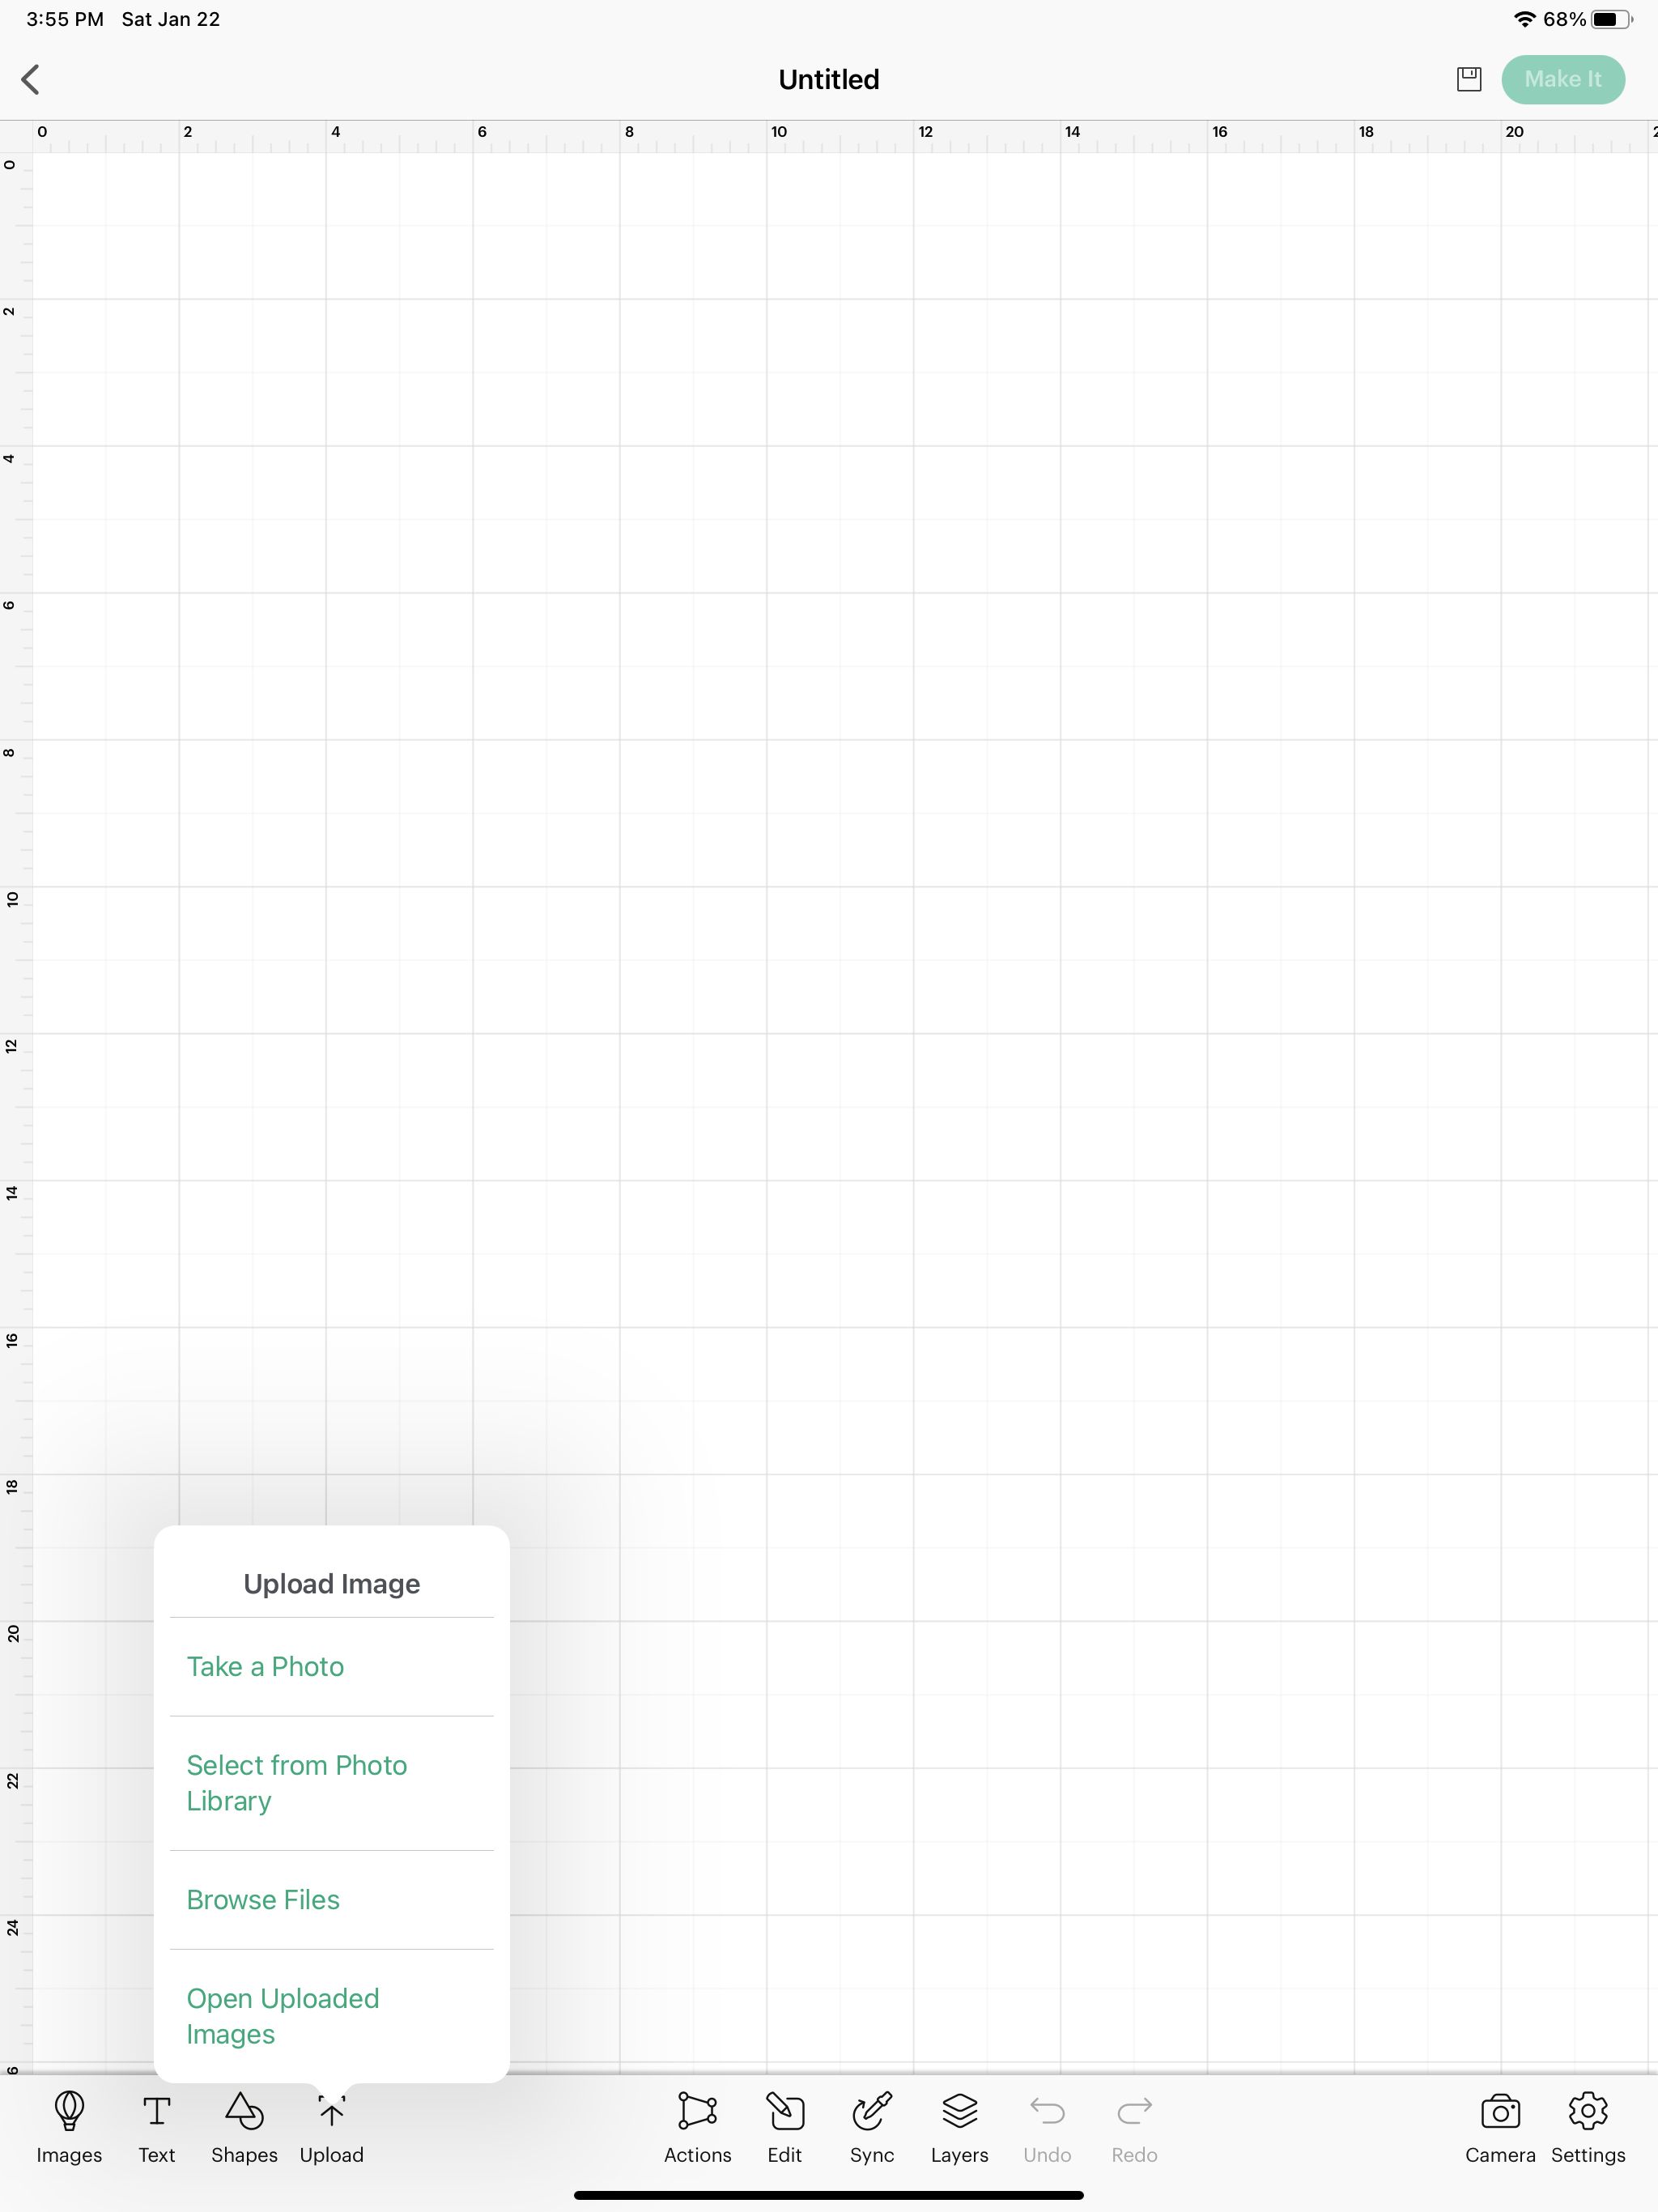
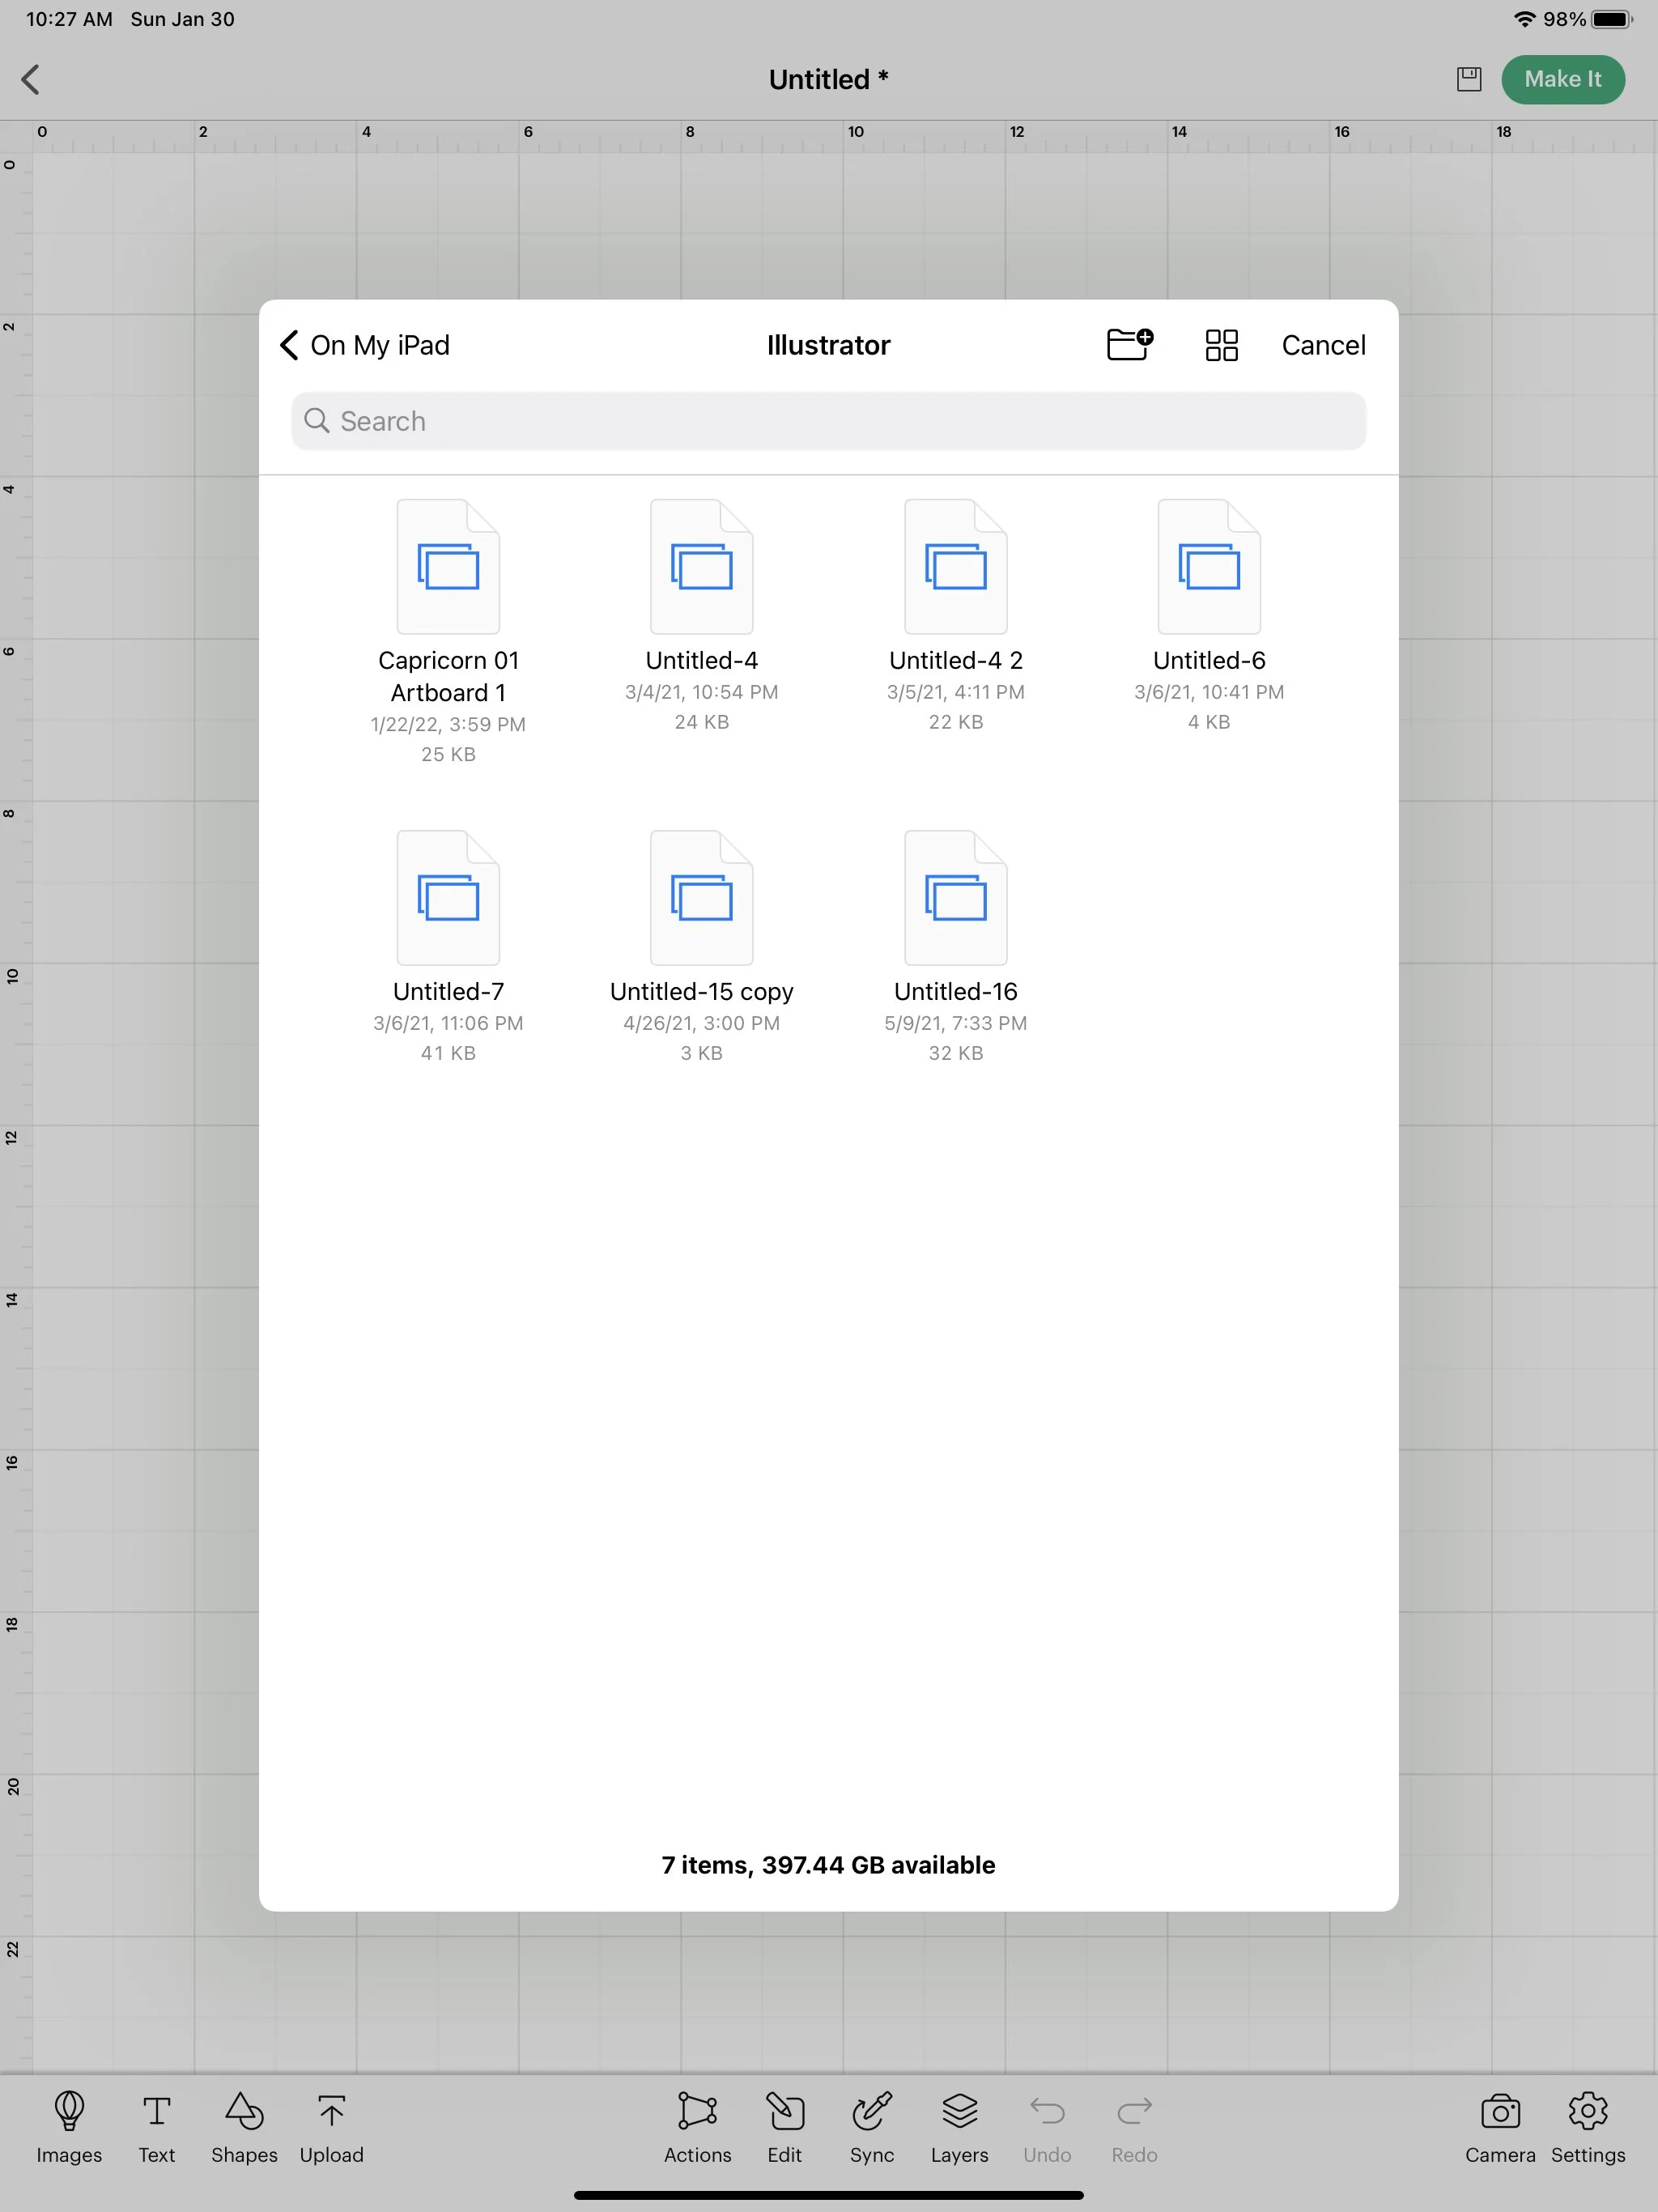
First, I’m going to open the Cricut app and start a new project. Then, down at the bottom of the screen, I’m going to select UPLOAD and BROWSE FILES.

Testing Single Line SVG file in Cricut Design Space

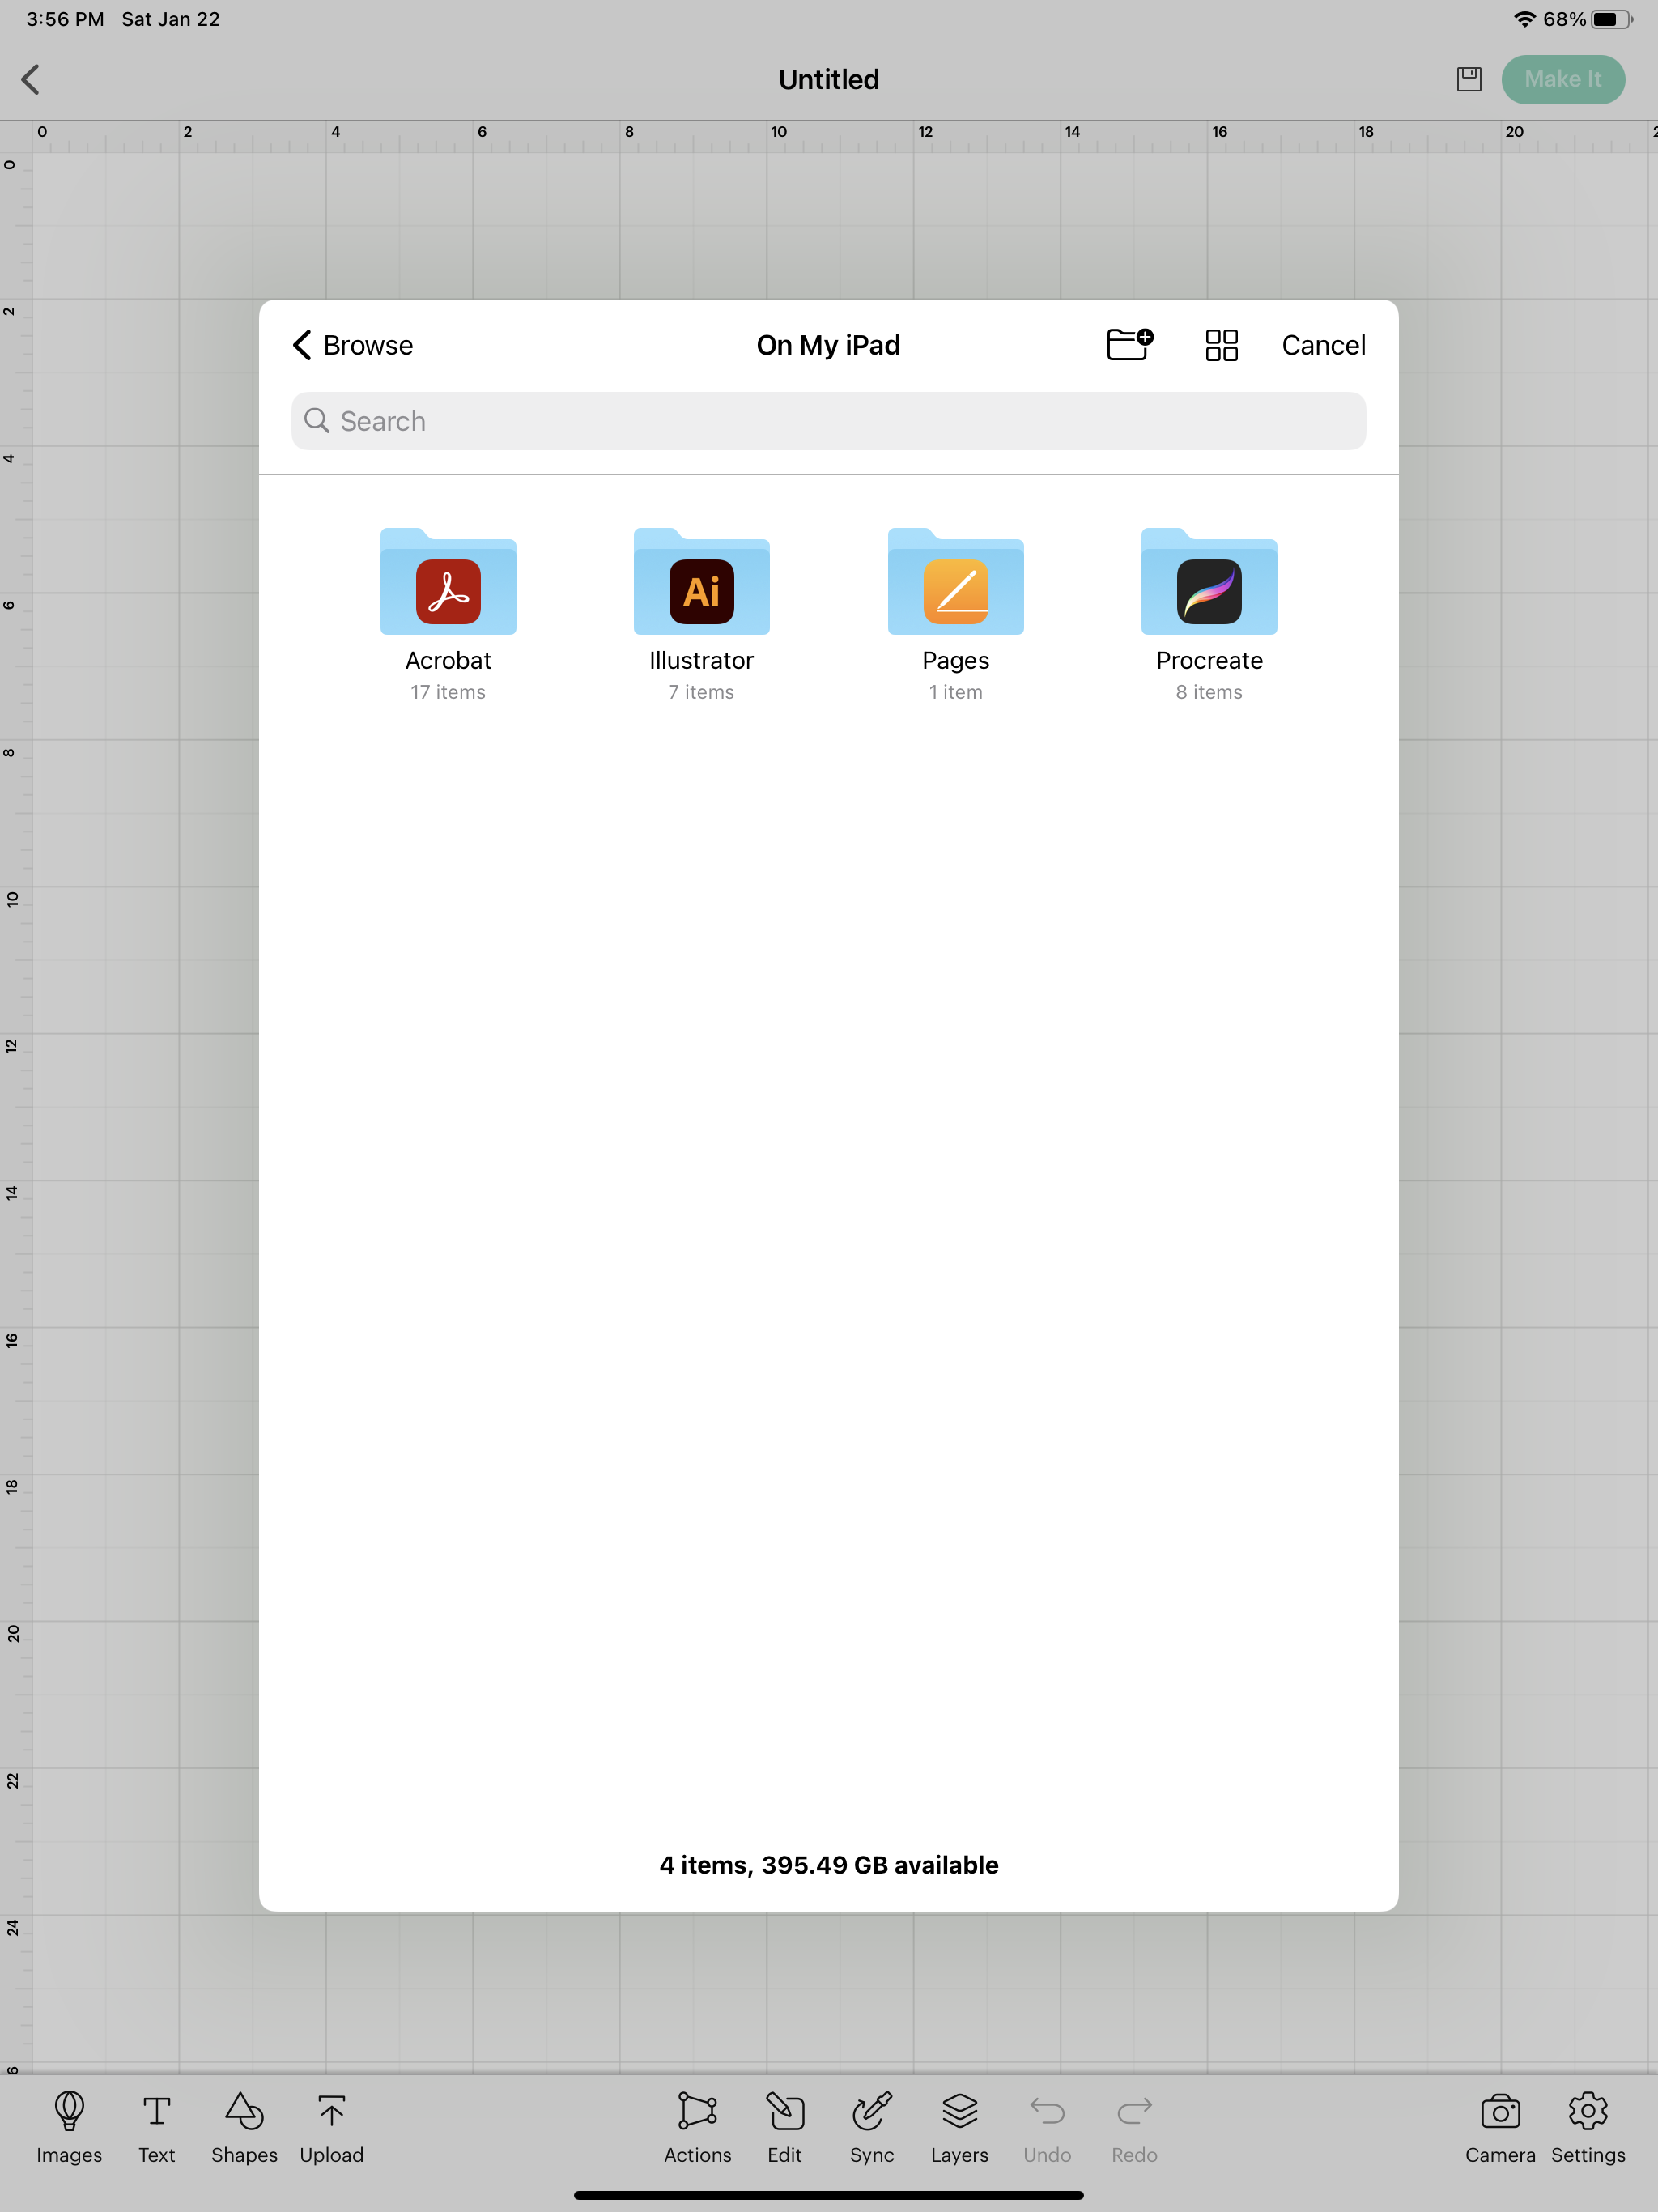
In last week’s tutorial, I saved my design on my iPad as an SVG file. Now. I need to locate that file on my iPad. I saved mine in my Illustrator folder.

Testing Single Line SVG file in Cricut Design Space

Inside the Illustrator folder I select my Capricorn file.

Testing Single Line SVG file in Cricut Design Space

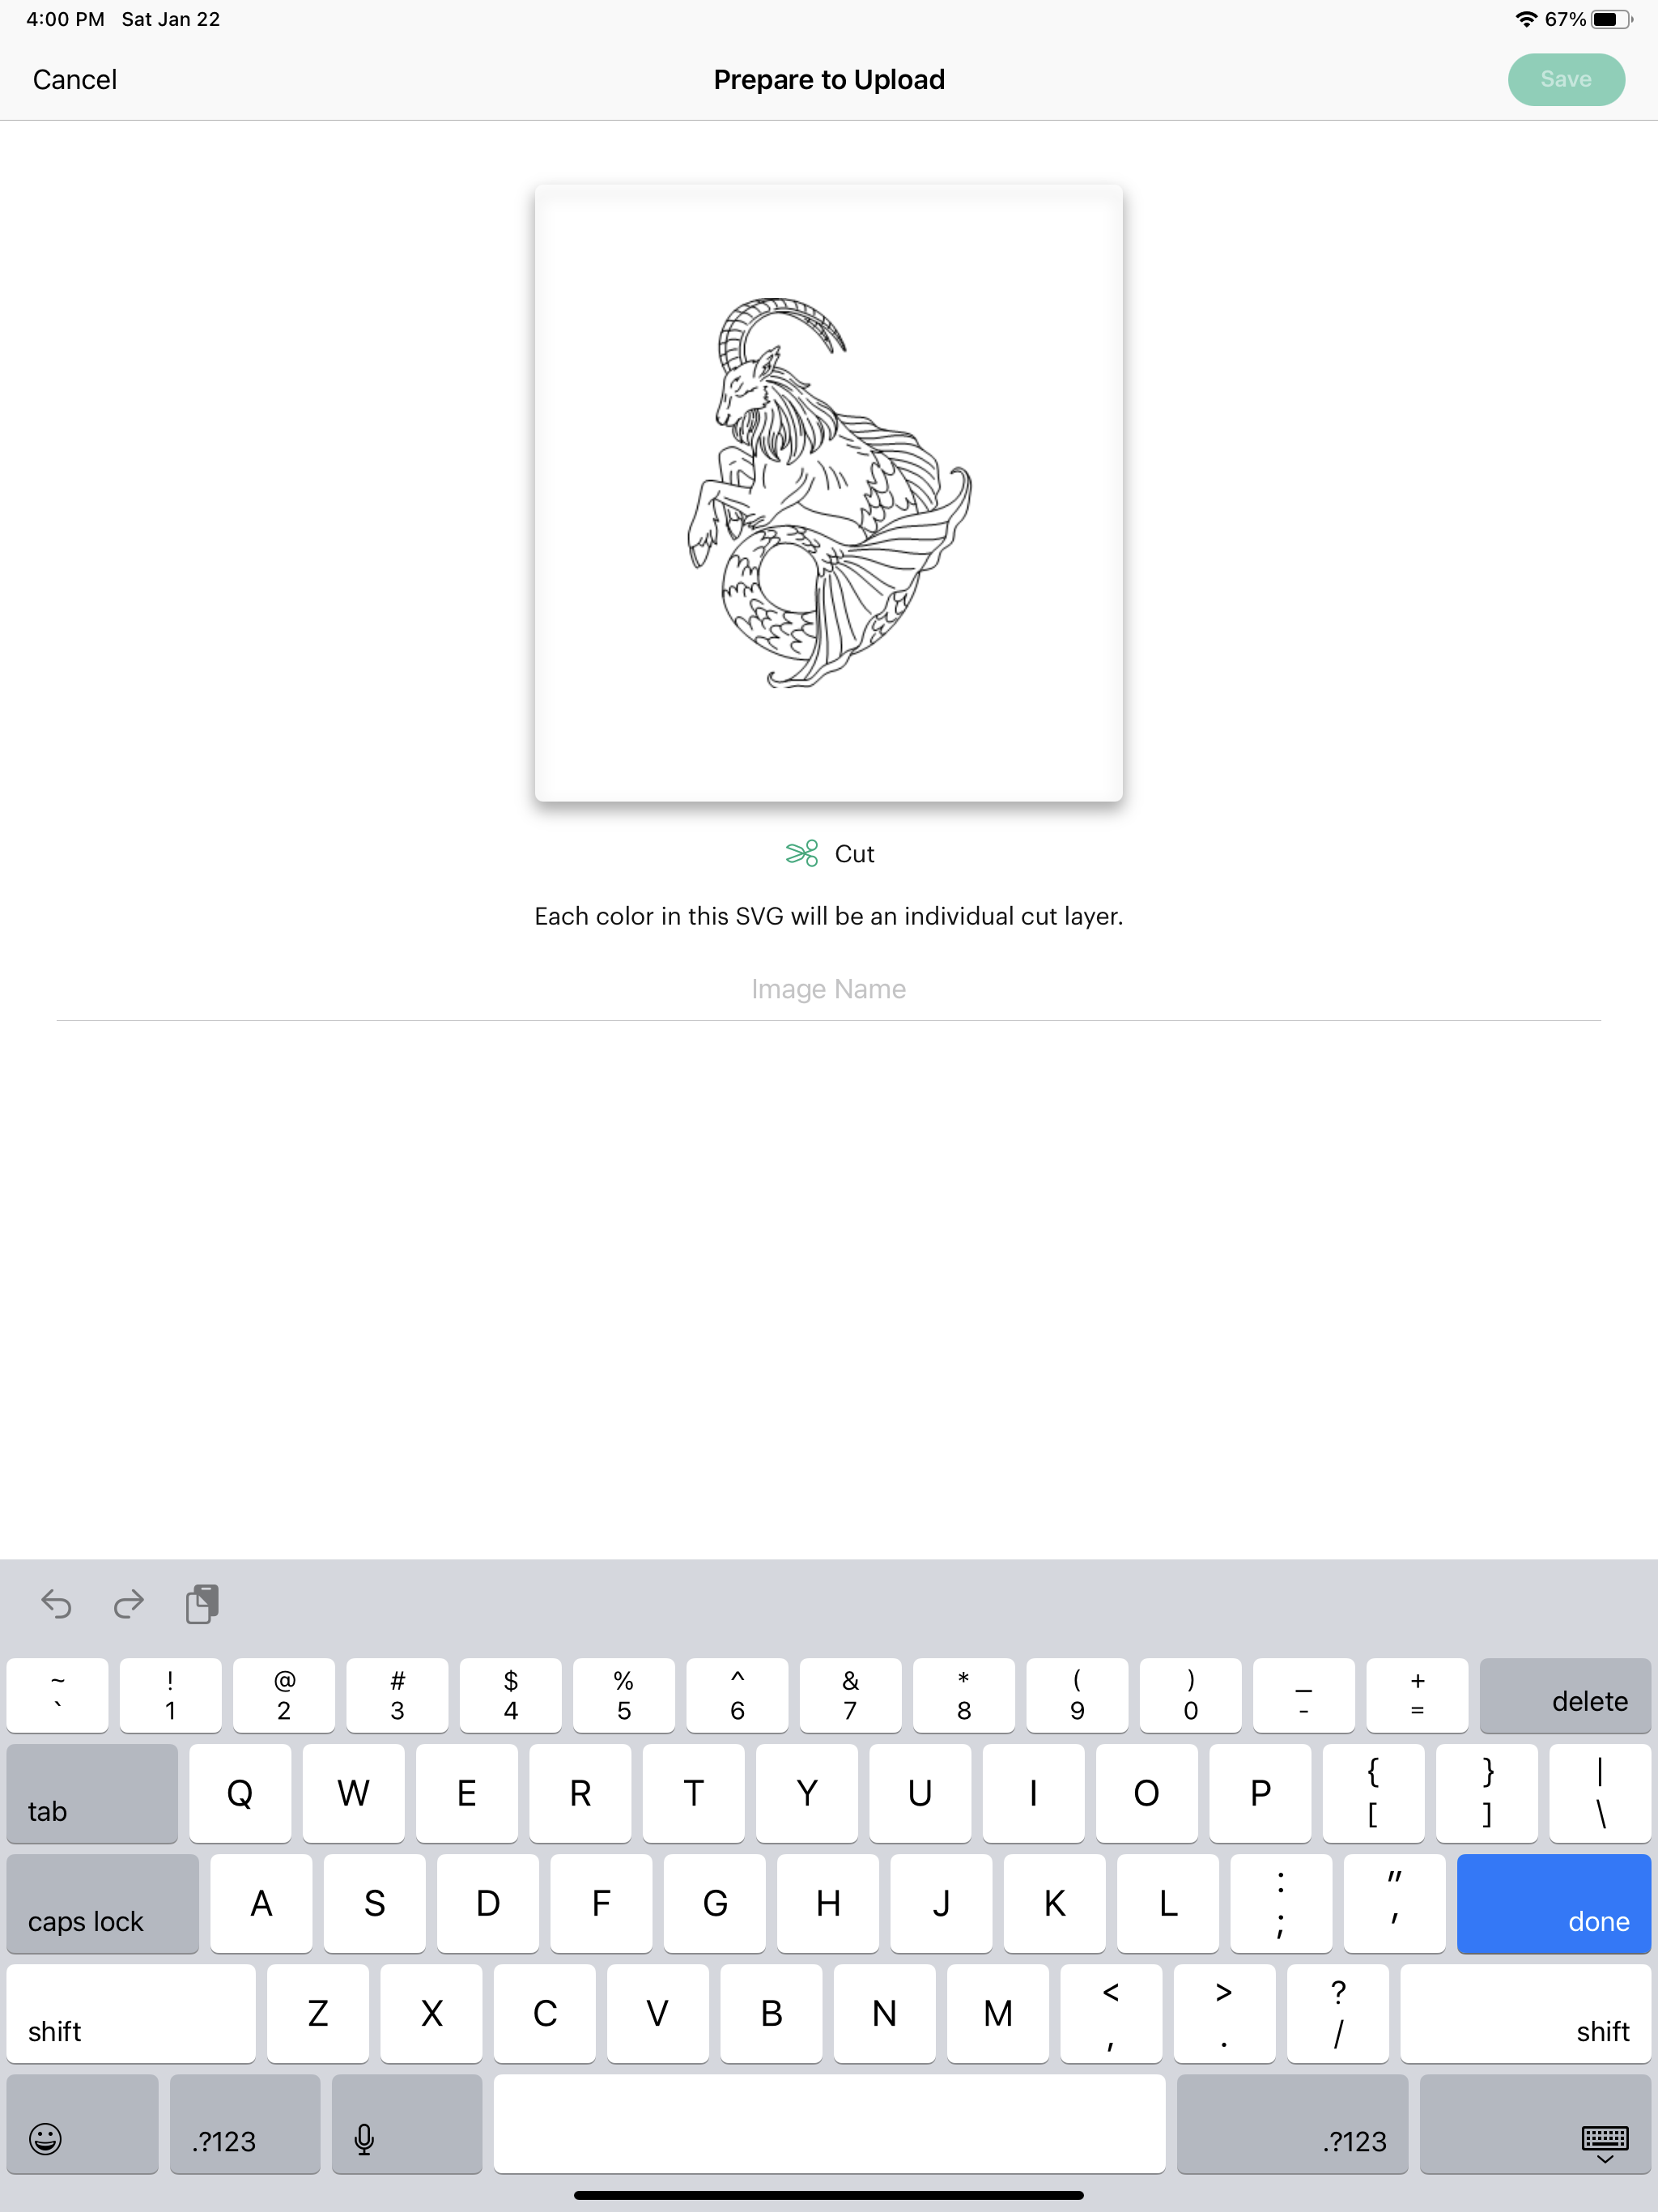
Cricut Design Space will show a preview of the file. It will default to a CUT image. I can’t change it to a DRAW file until it’s uploaded into Design Space. So now, I can name my file and click save in the upper right corner.

Testing Single Line SVG file in Cricut Design Space

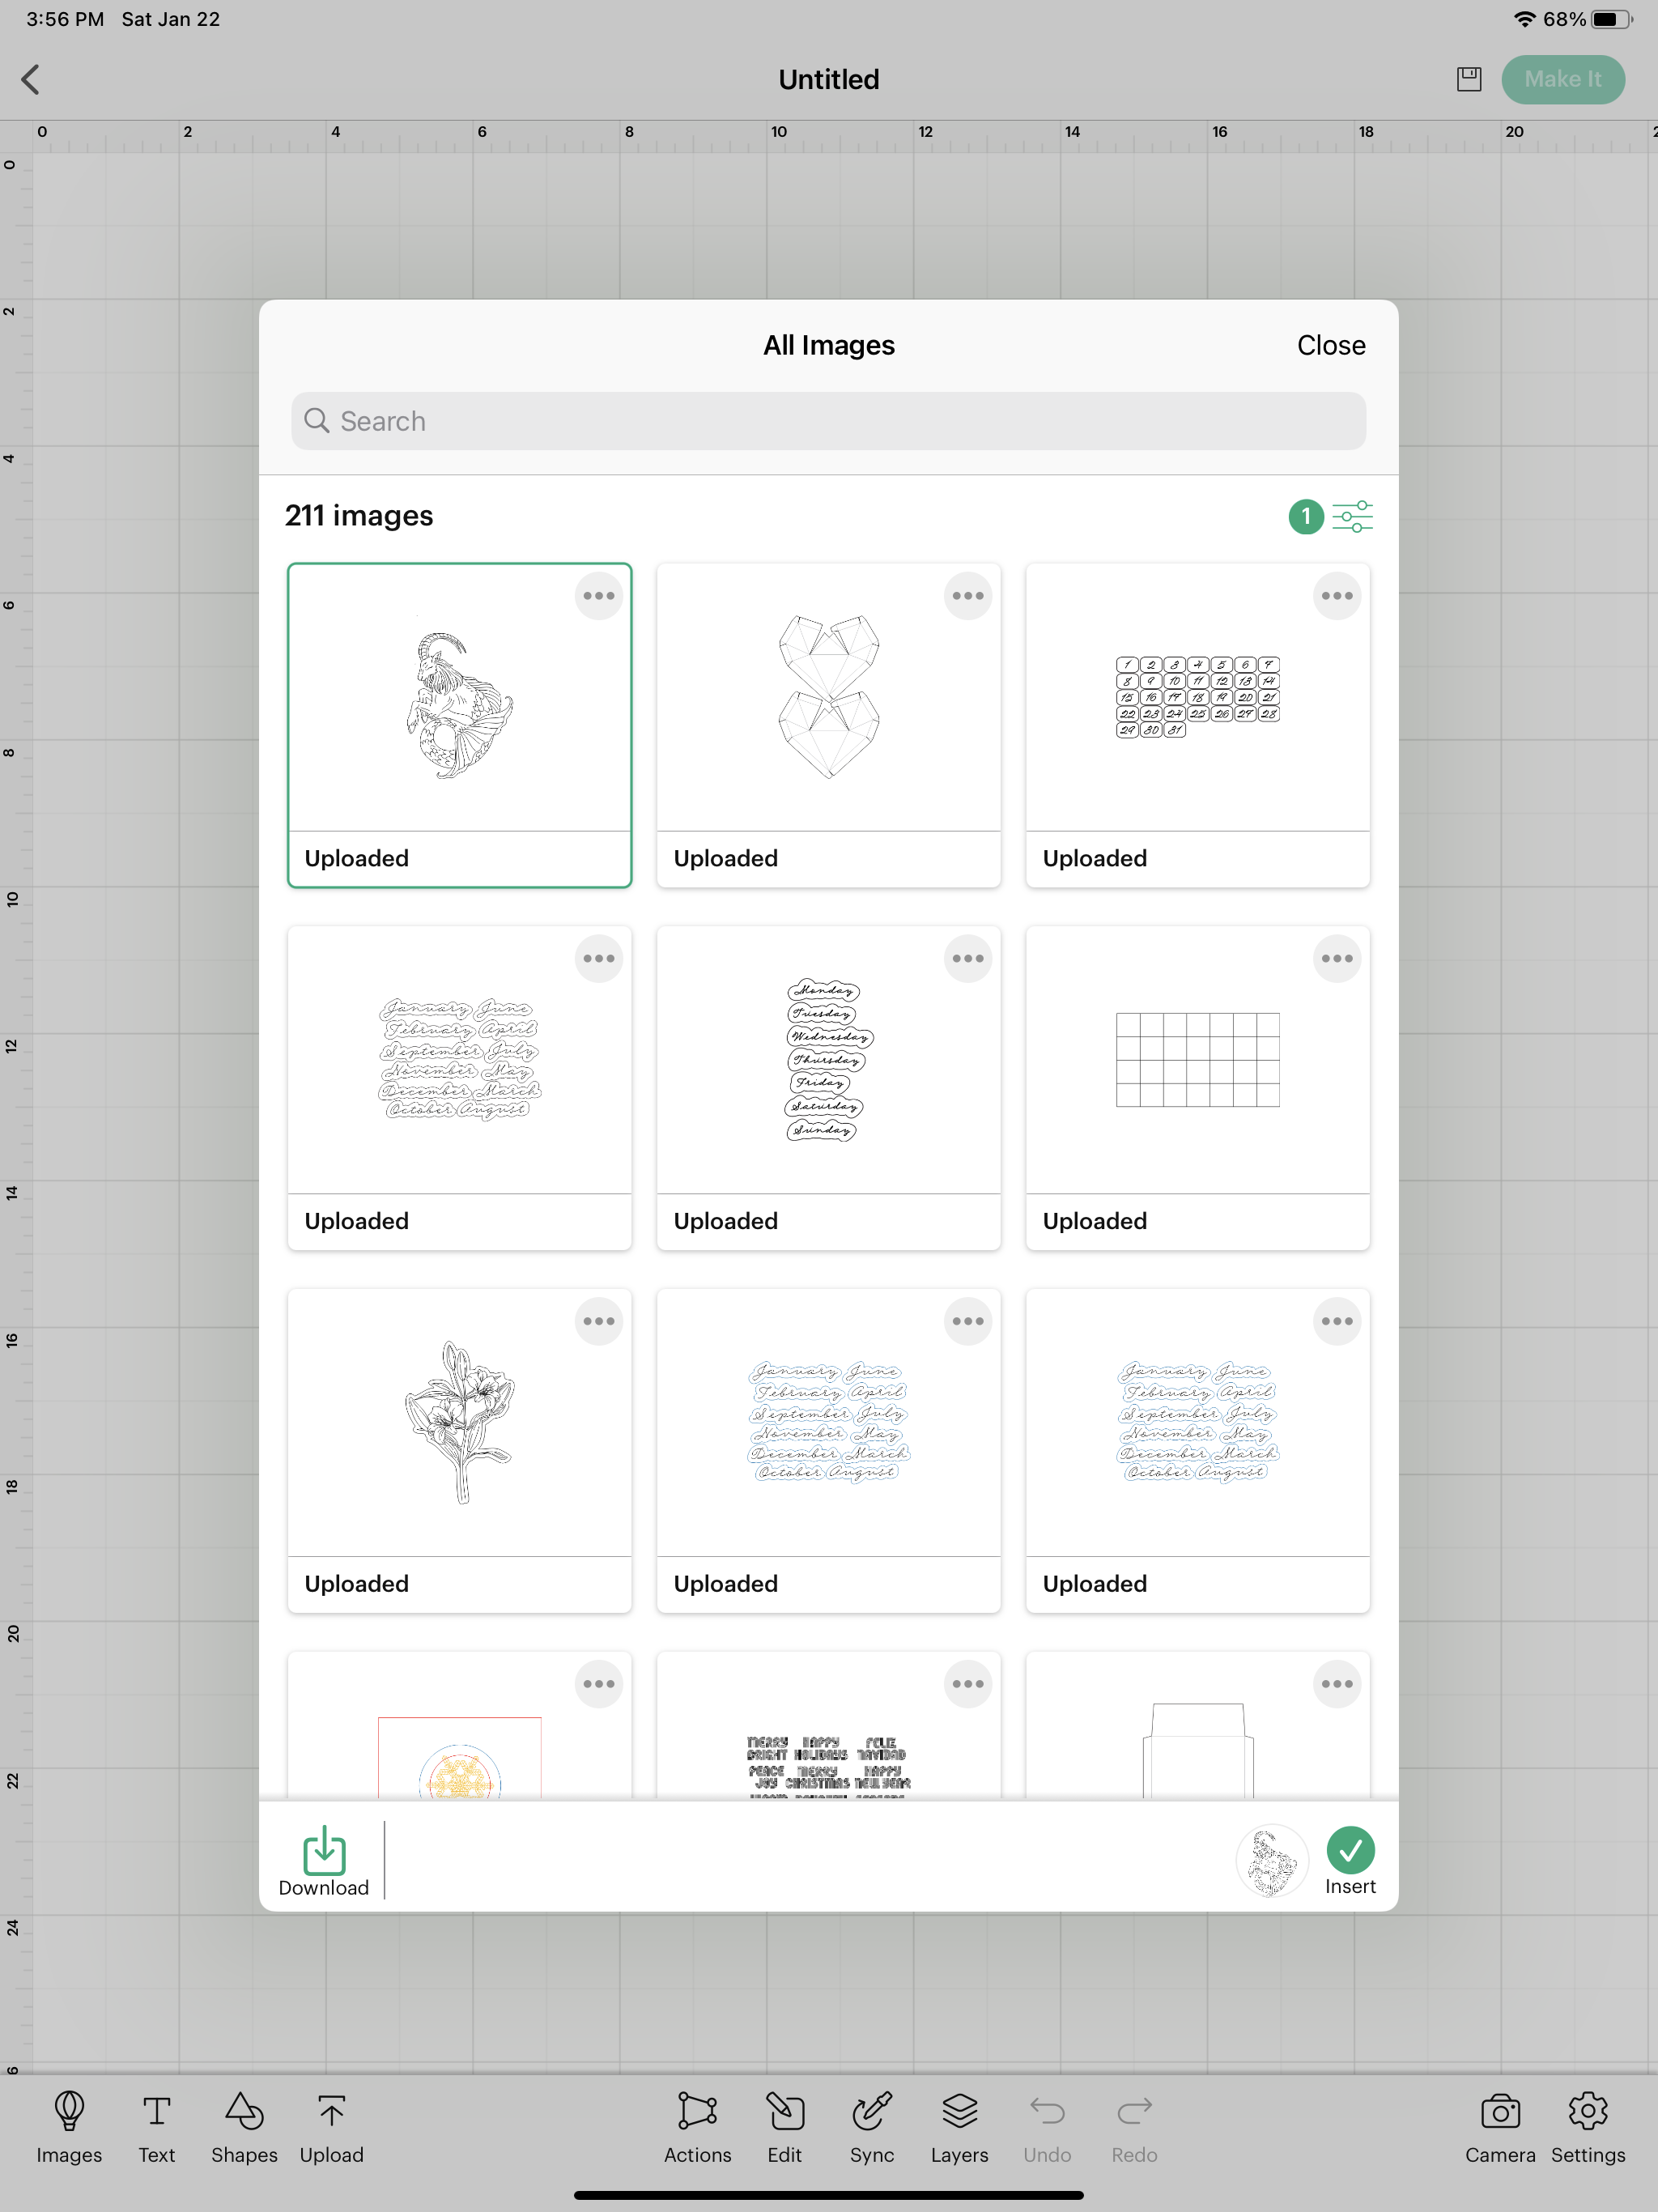
After I click save, Design Space will bring up all my uploaded images. I select my Capricorn file and click INSERT down in the bottom right corner.

Testing Single Line SVG file in Cricut Design Space

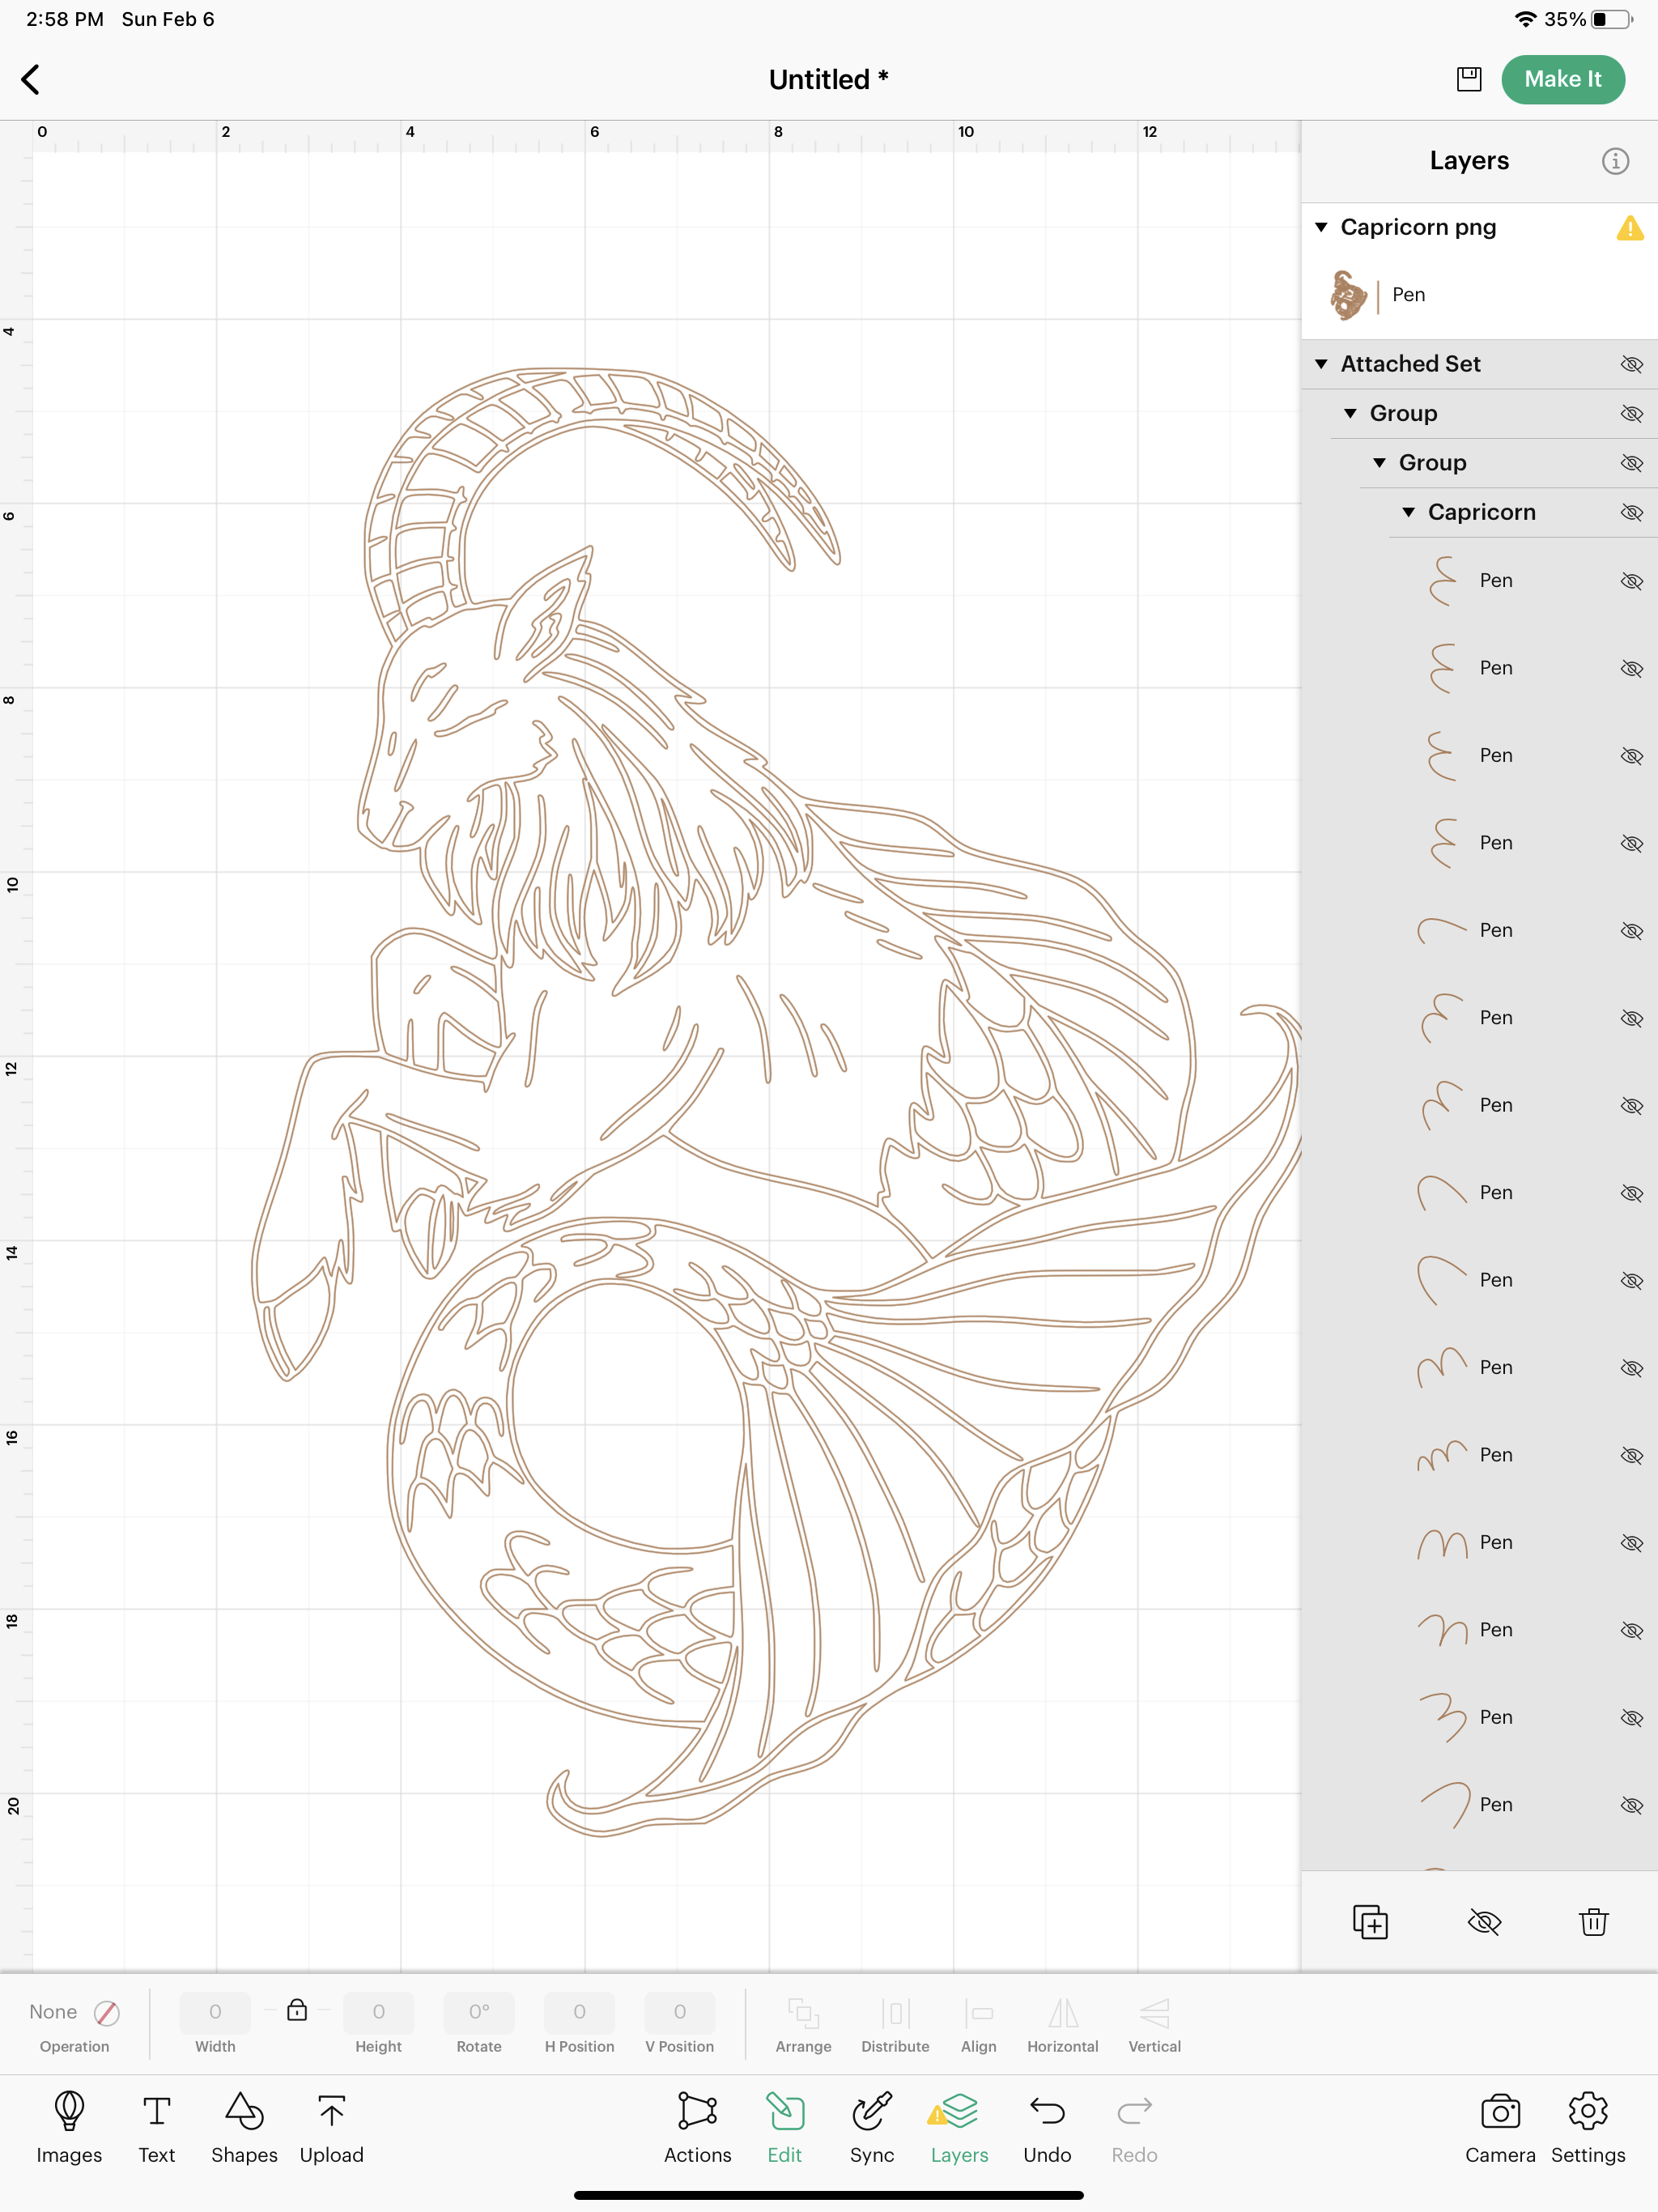
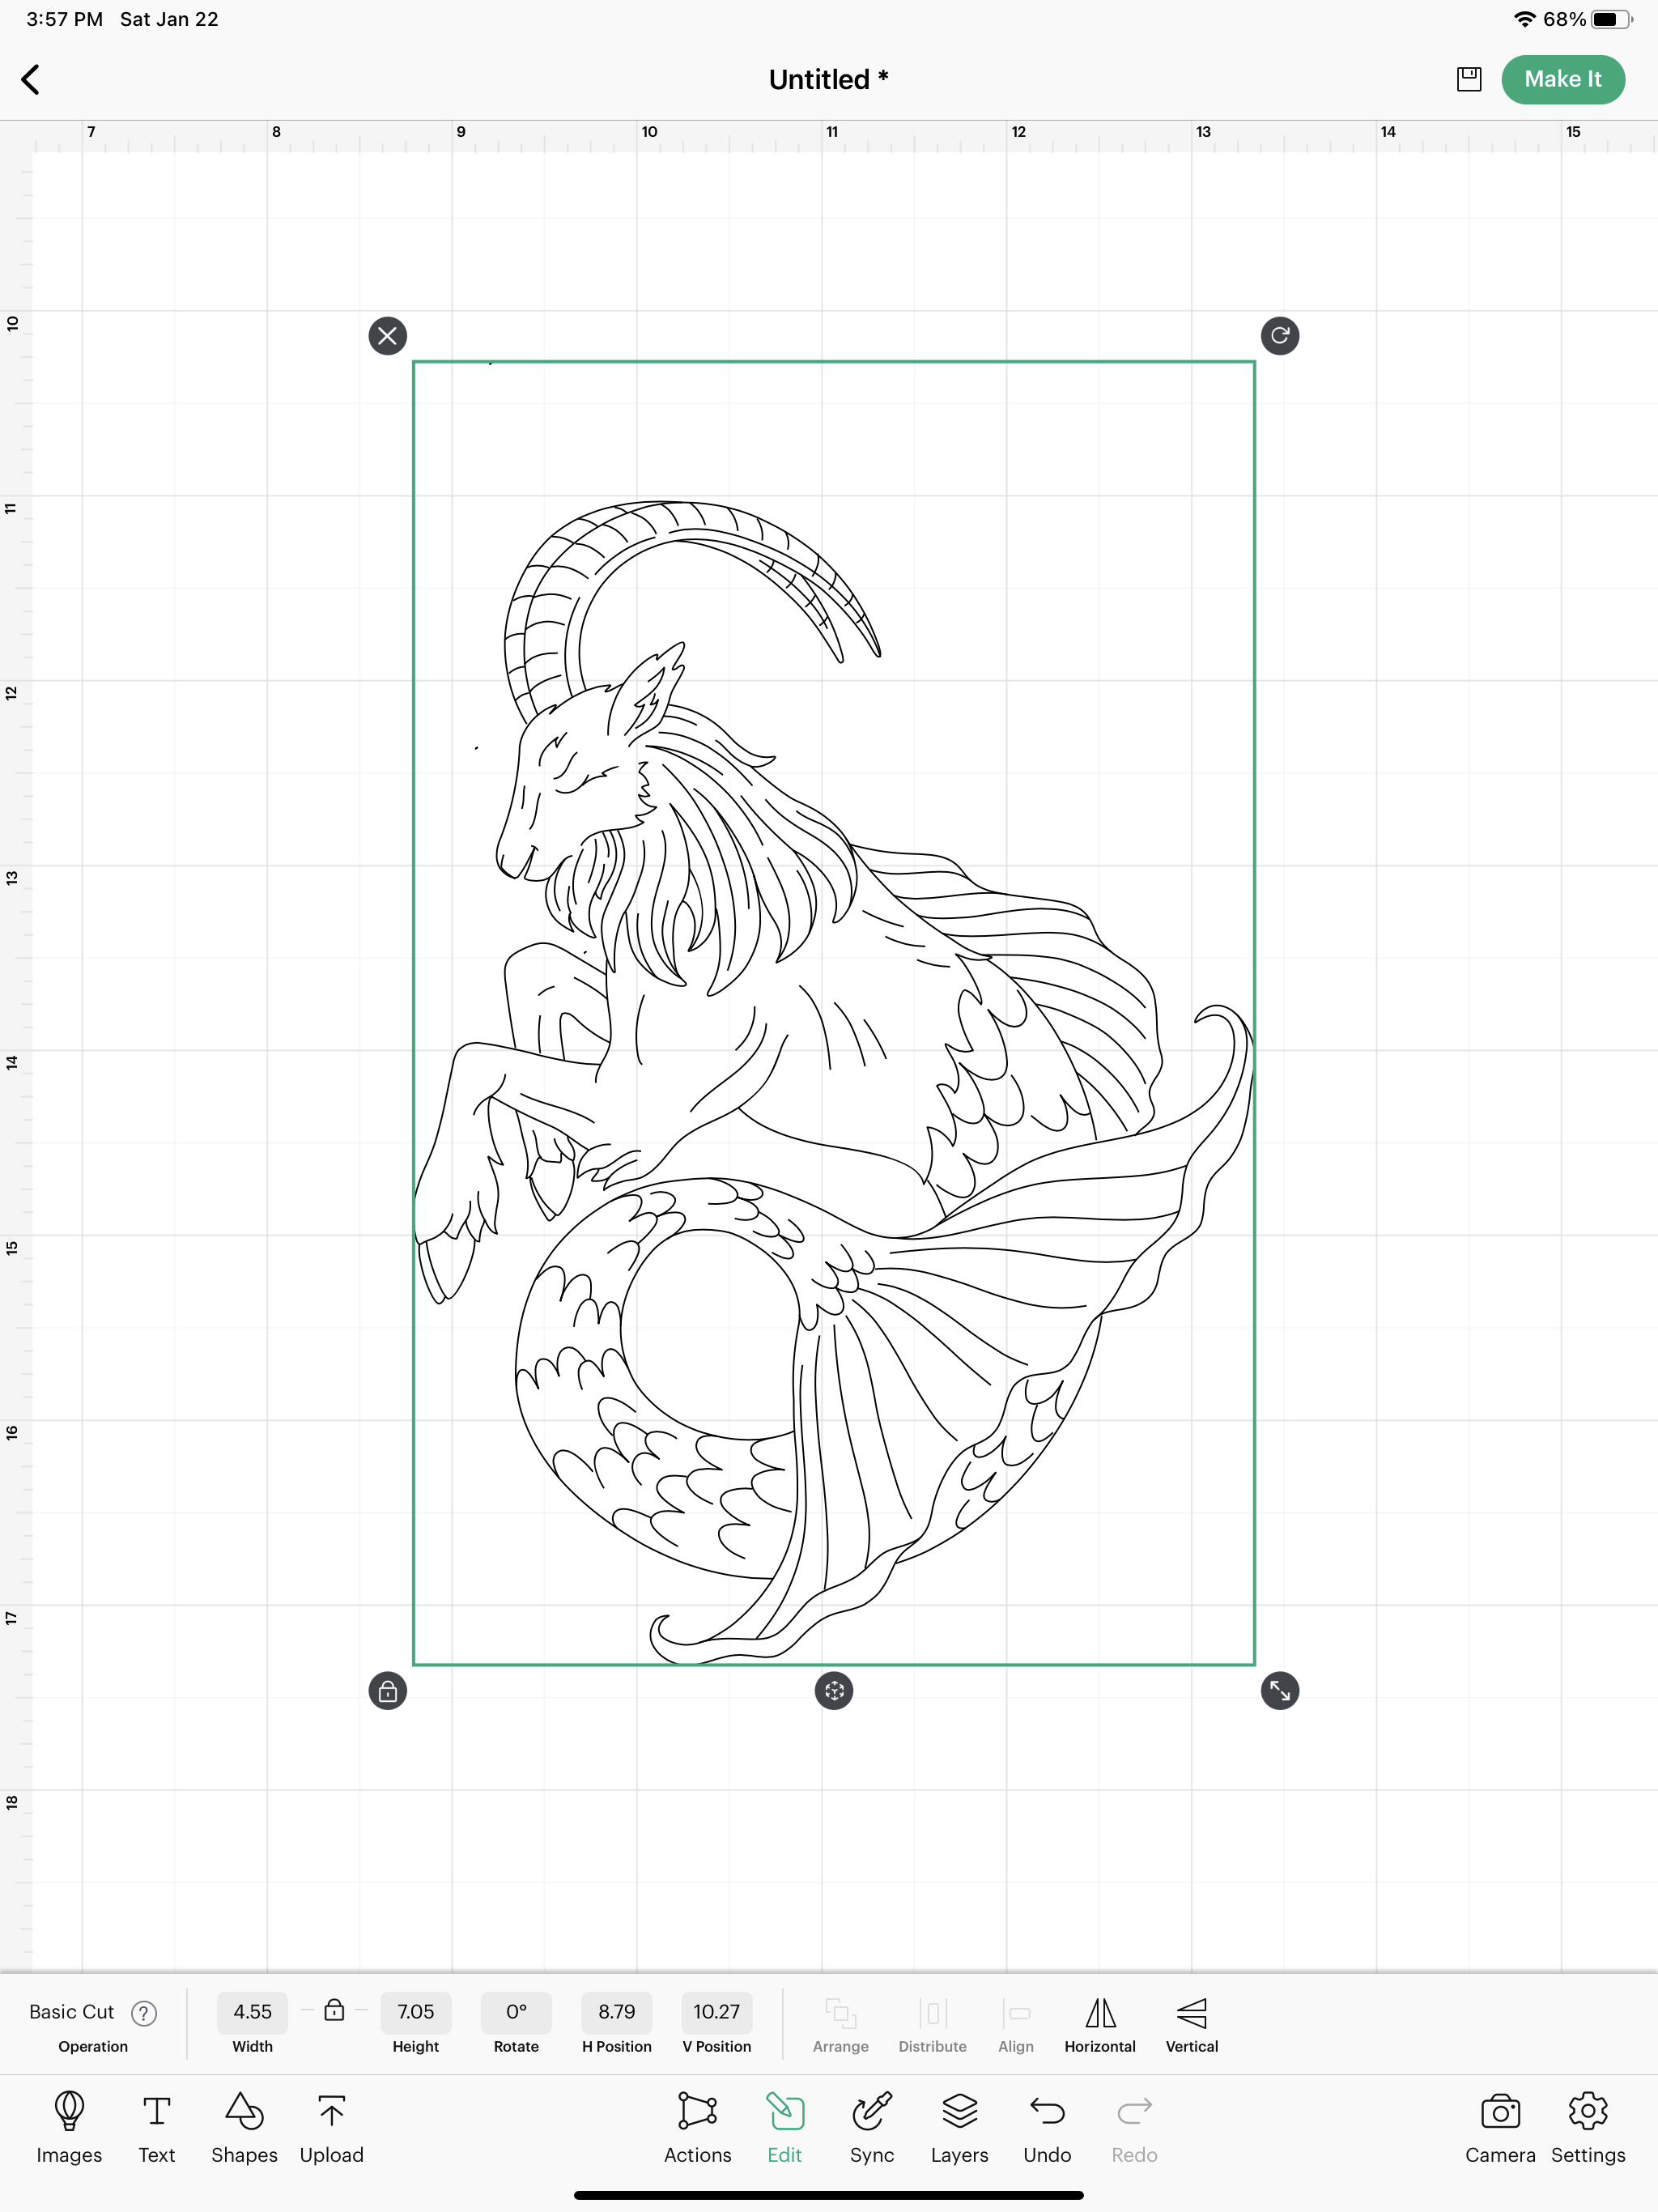
Now, my file is on my canvas. I’m going to scale it down a little bit, so it fits on the piece of cardstock I will be using to do my test drawing. I’m also going to change this to a DRAW file. Down in the bottom tool bar, select EDIT, then where it says BASIC CUT on the bottom left, select that and change it to DRAW/ Pen.

Testing Single Line SVG file in Cricut Design Space

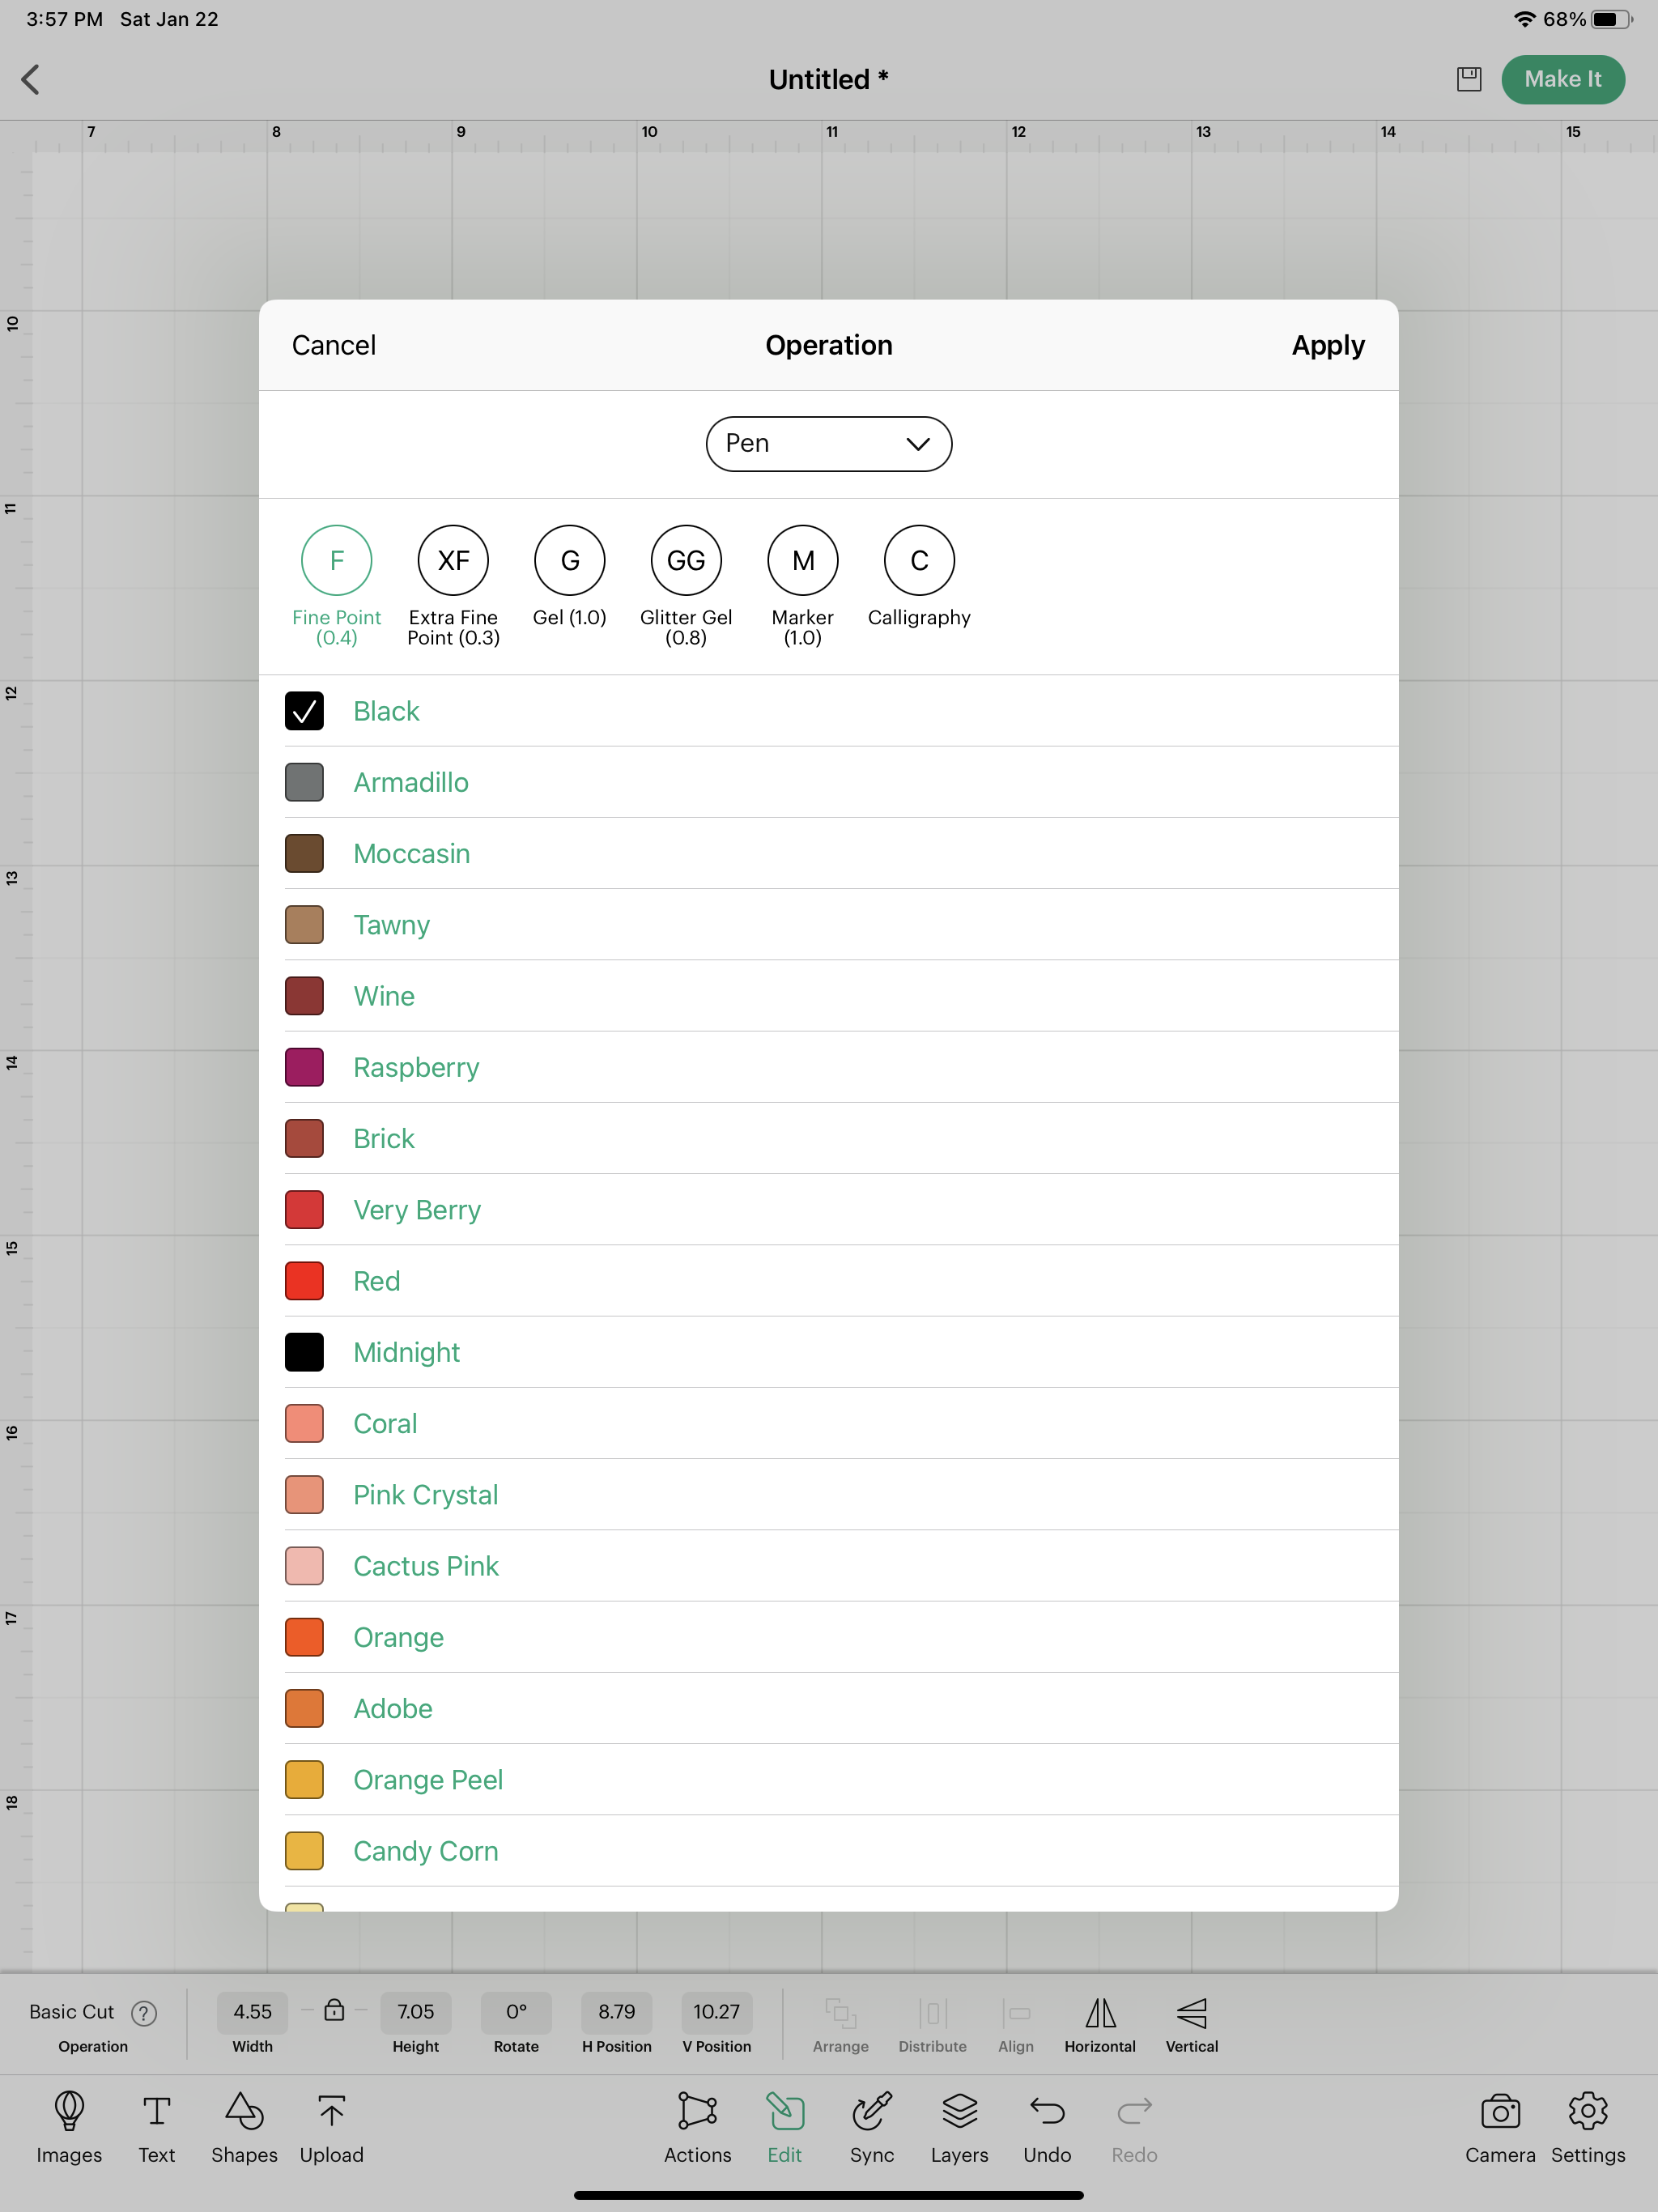
Here I can change the pen type and color. I’m using my Fine Point Black pen. I’m going to change the color just for visibility purposes in Design Space. My machine cannot determine the actual pen color I’m using, so I can select whatever color I want.

Testing Single Line SVG file in Cricut Design Space

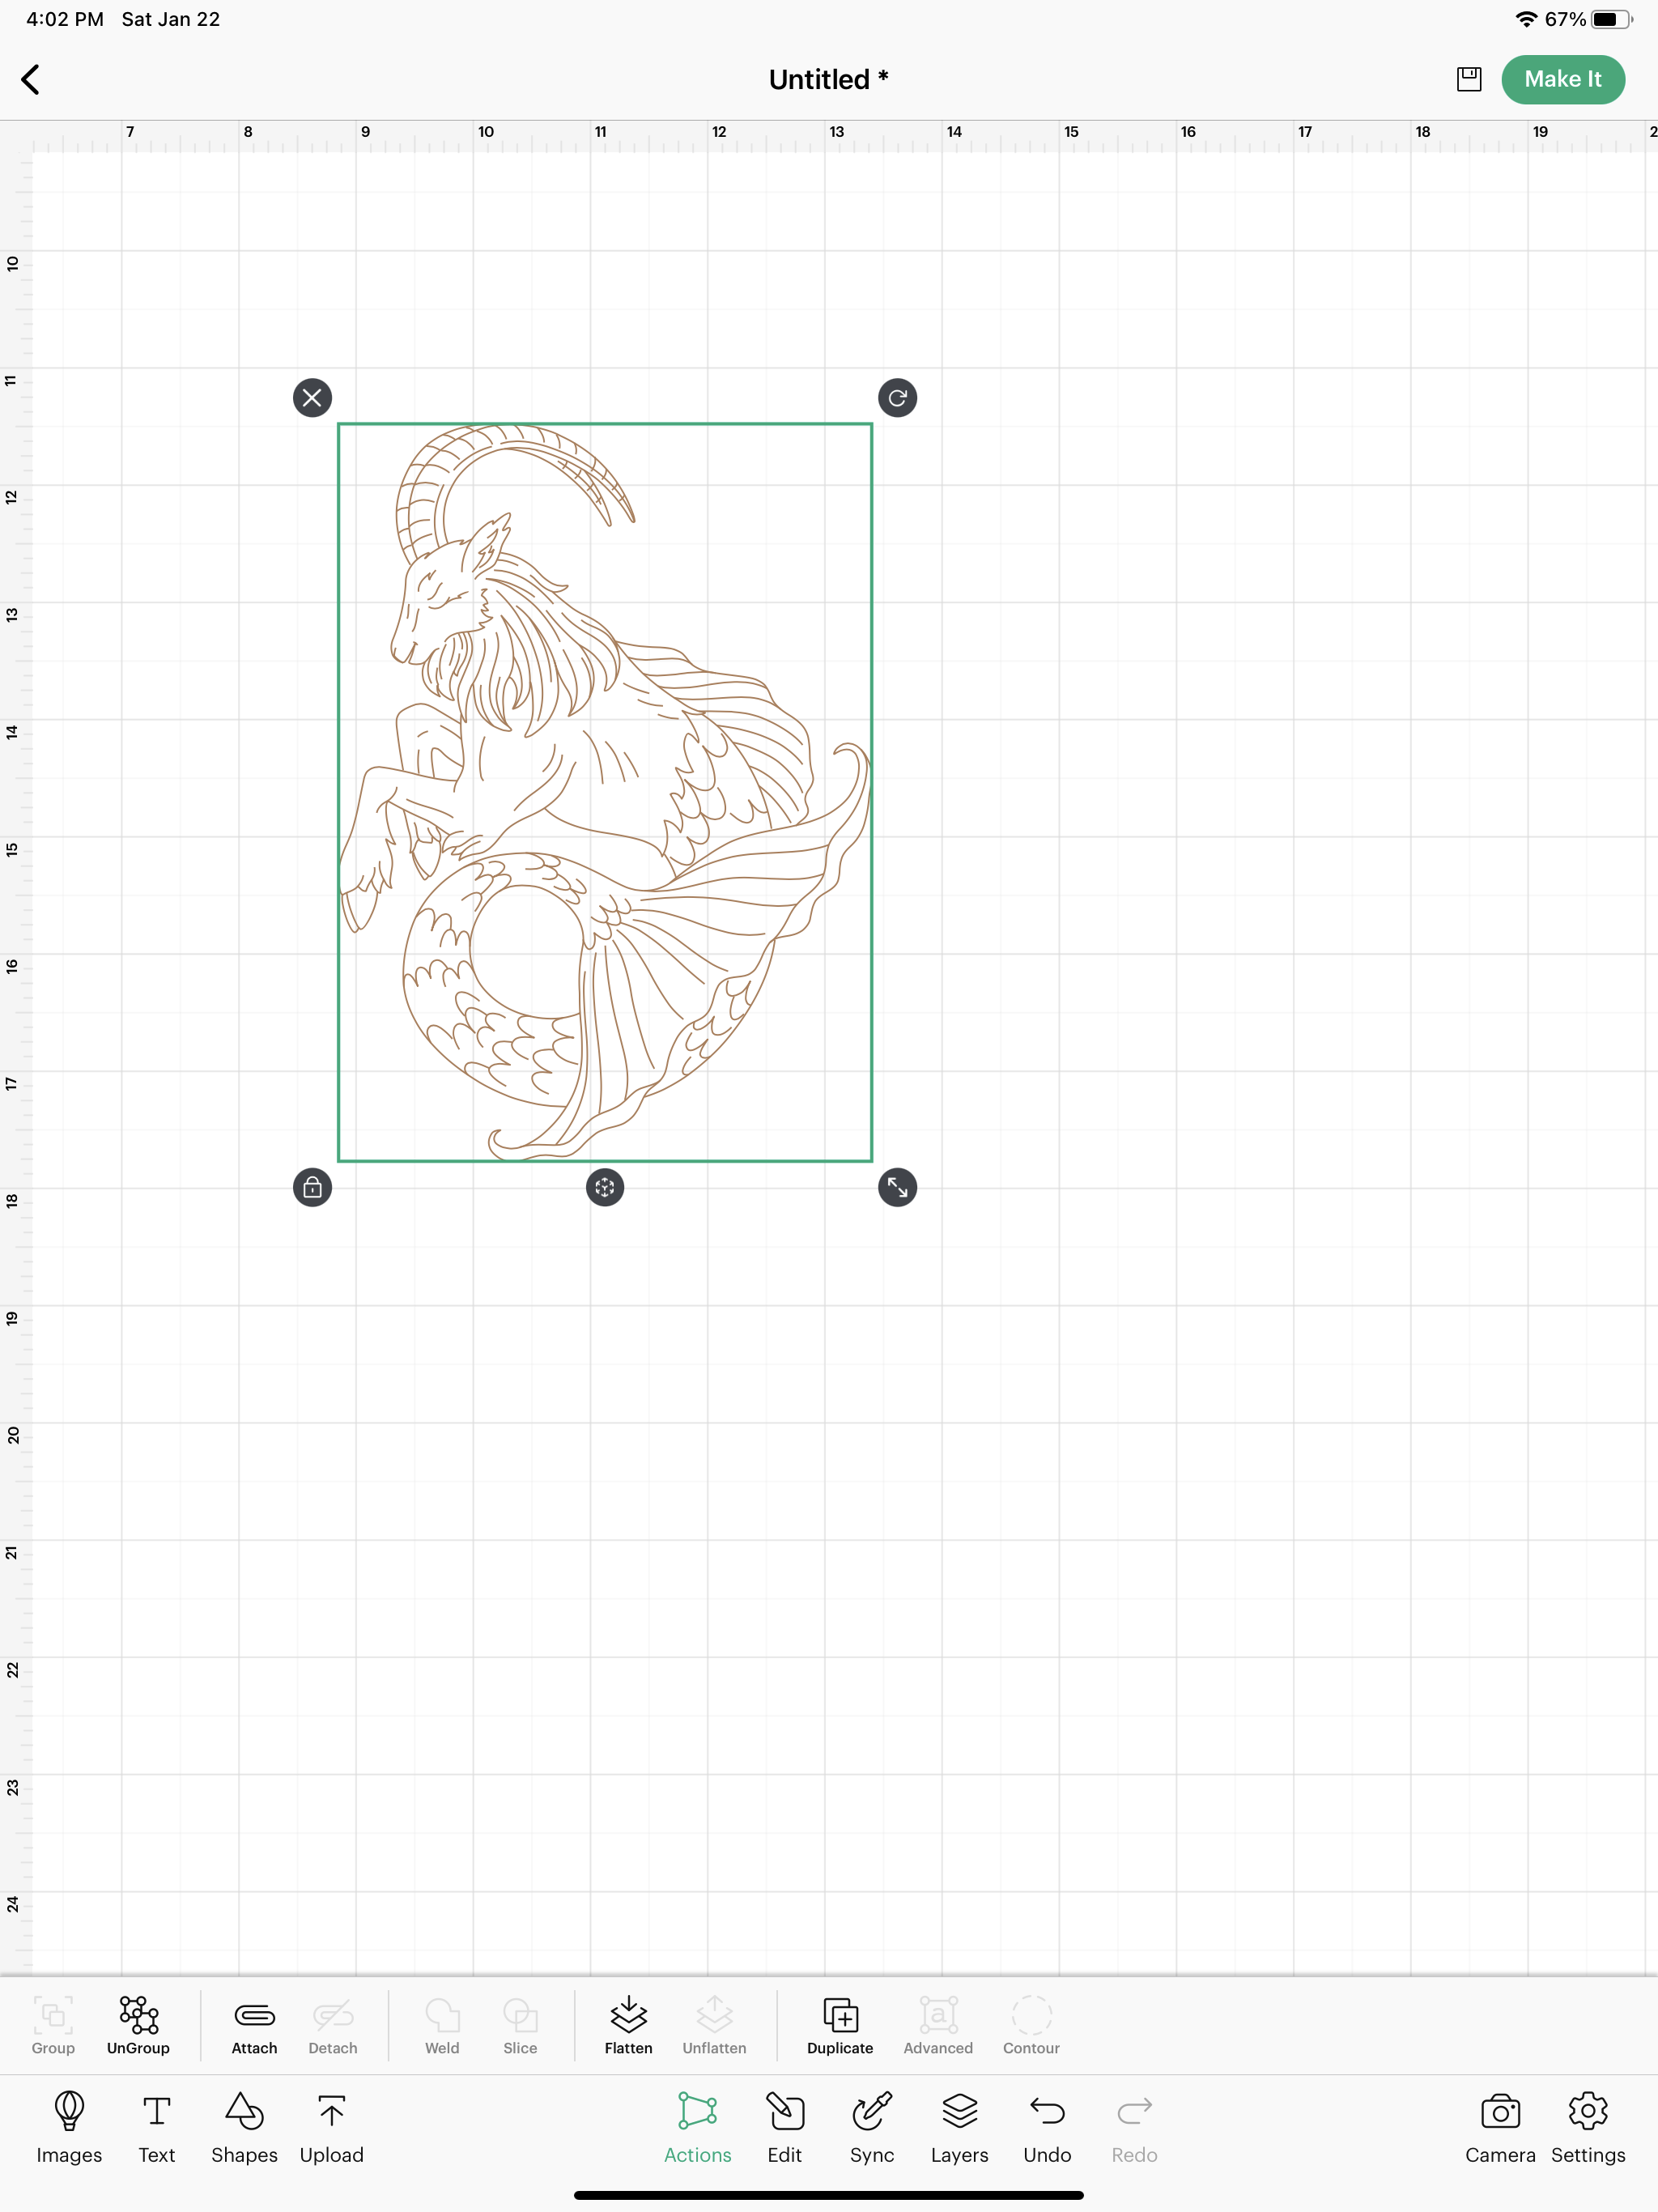
Even though all of my lines are already grouped together, I still need to ATTACH them. Otherwise Design Space will spread them out all weird on the mat when I select Make It. Down in the bottom tool bar I select ACTIONS then I select ATTACH. Now I’m ready to SAVE my file and then select Make It.

Testing Single Line SVG file in Cricut Design Space

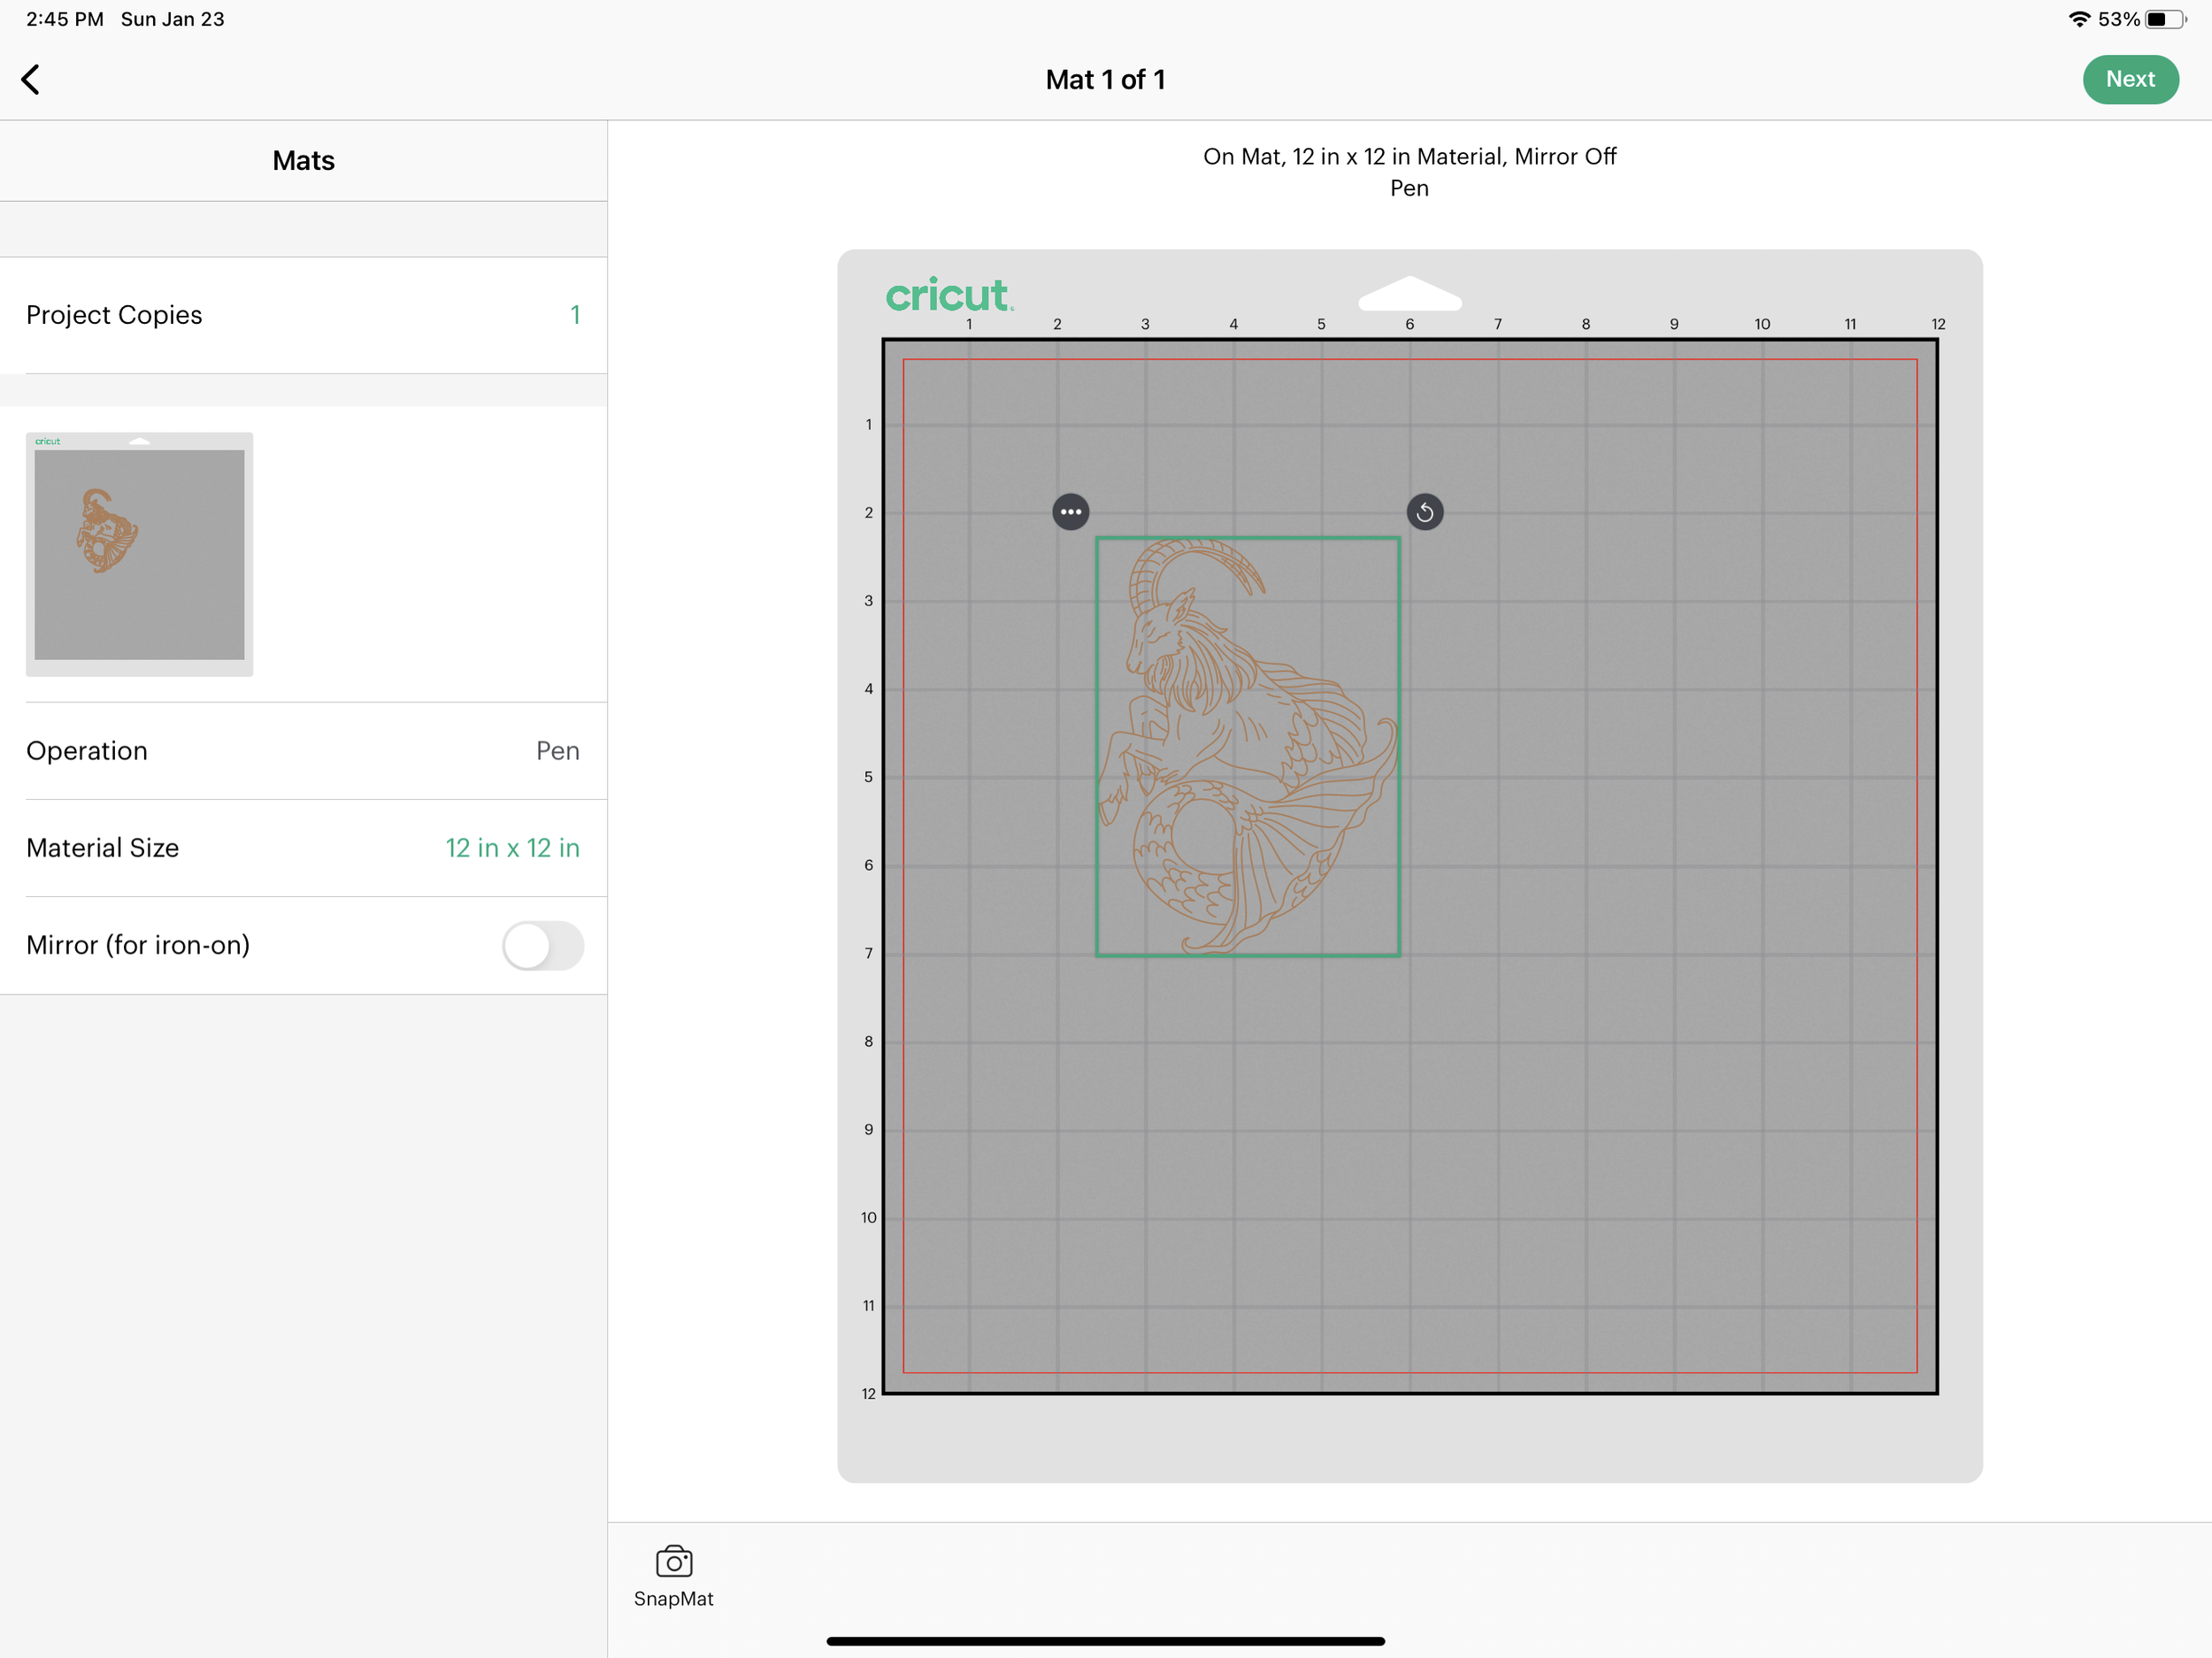
I’m going to position my design relative to where I have my piece of cardstock on my actual mat.

Testing Single Line SVG file in Cricut Design Space

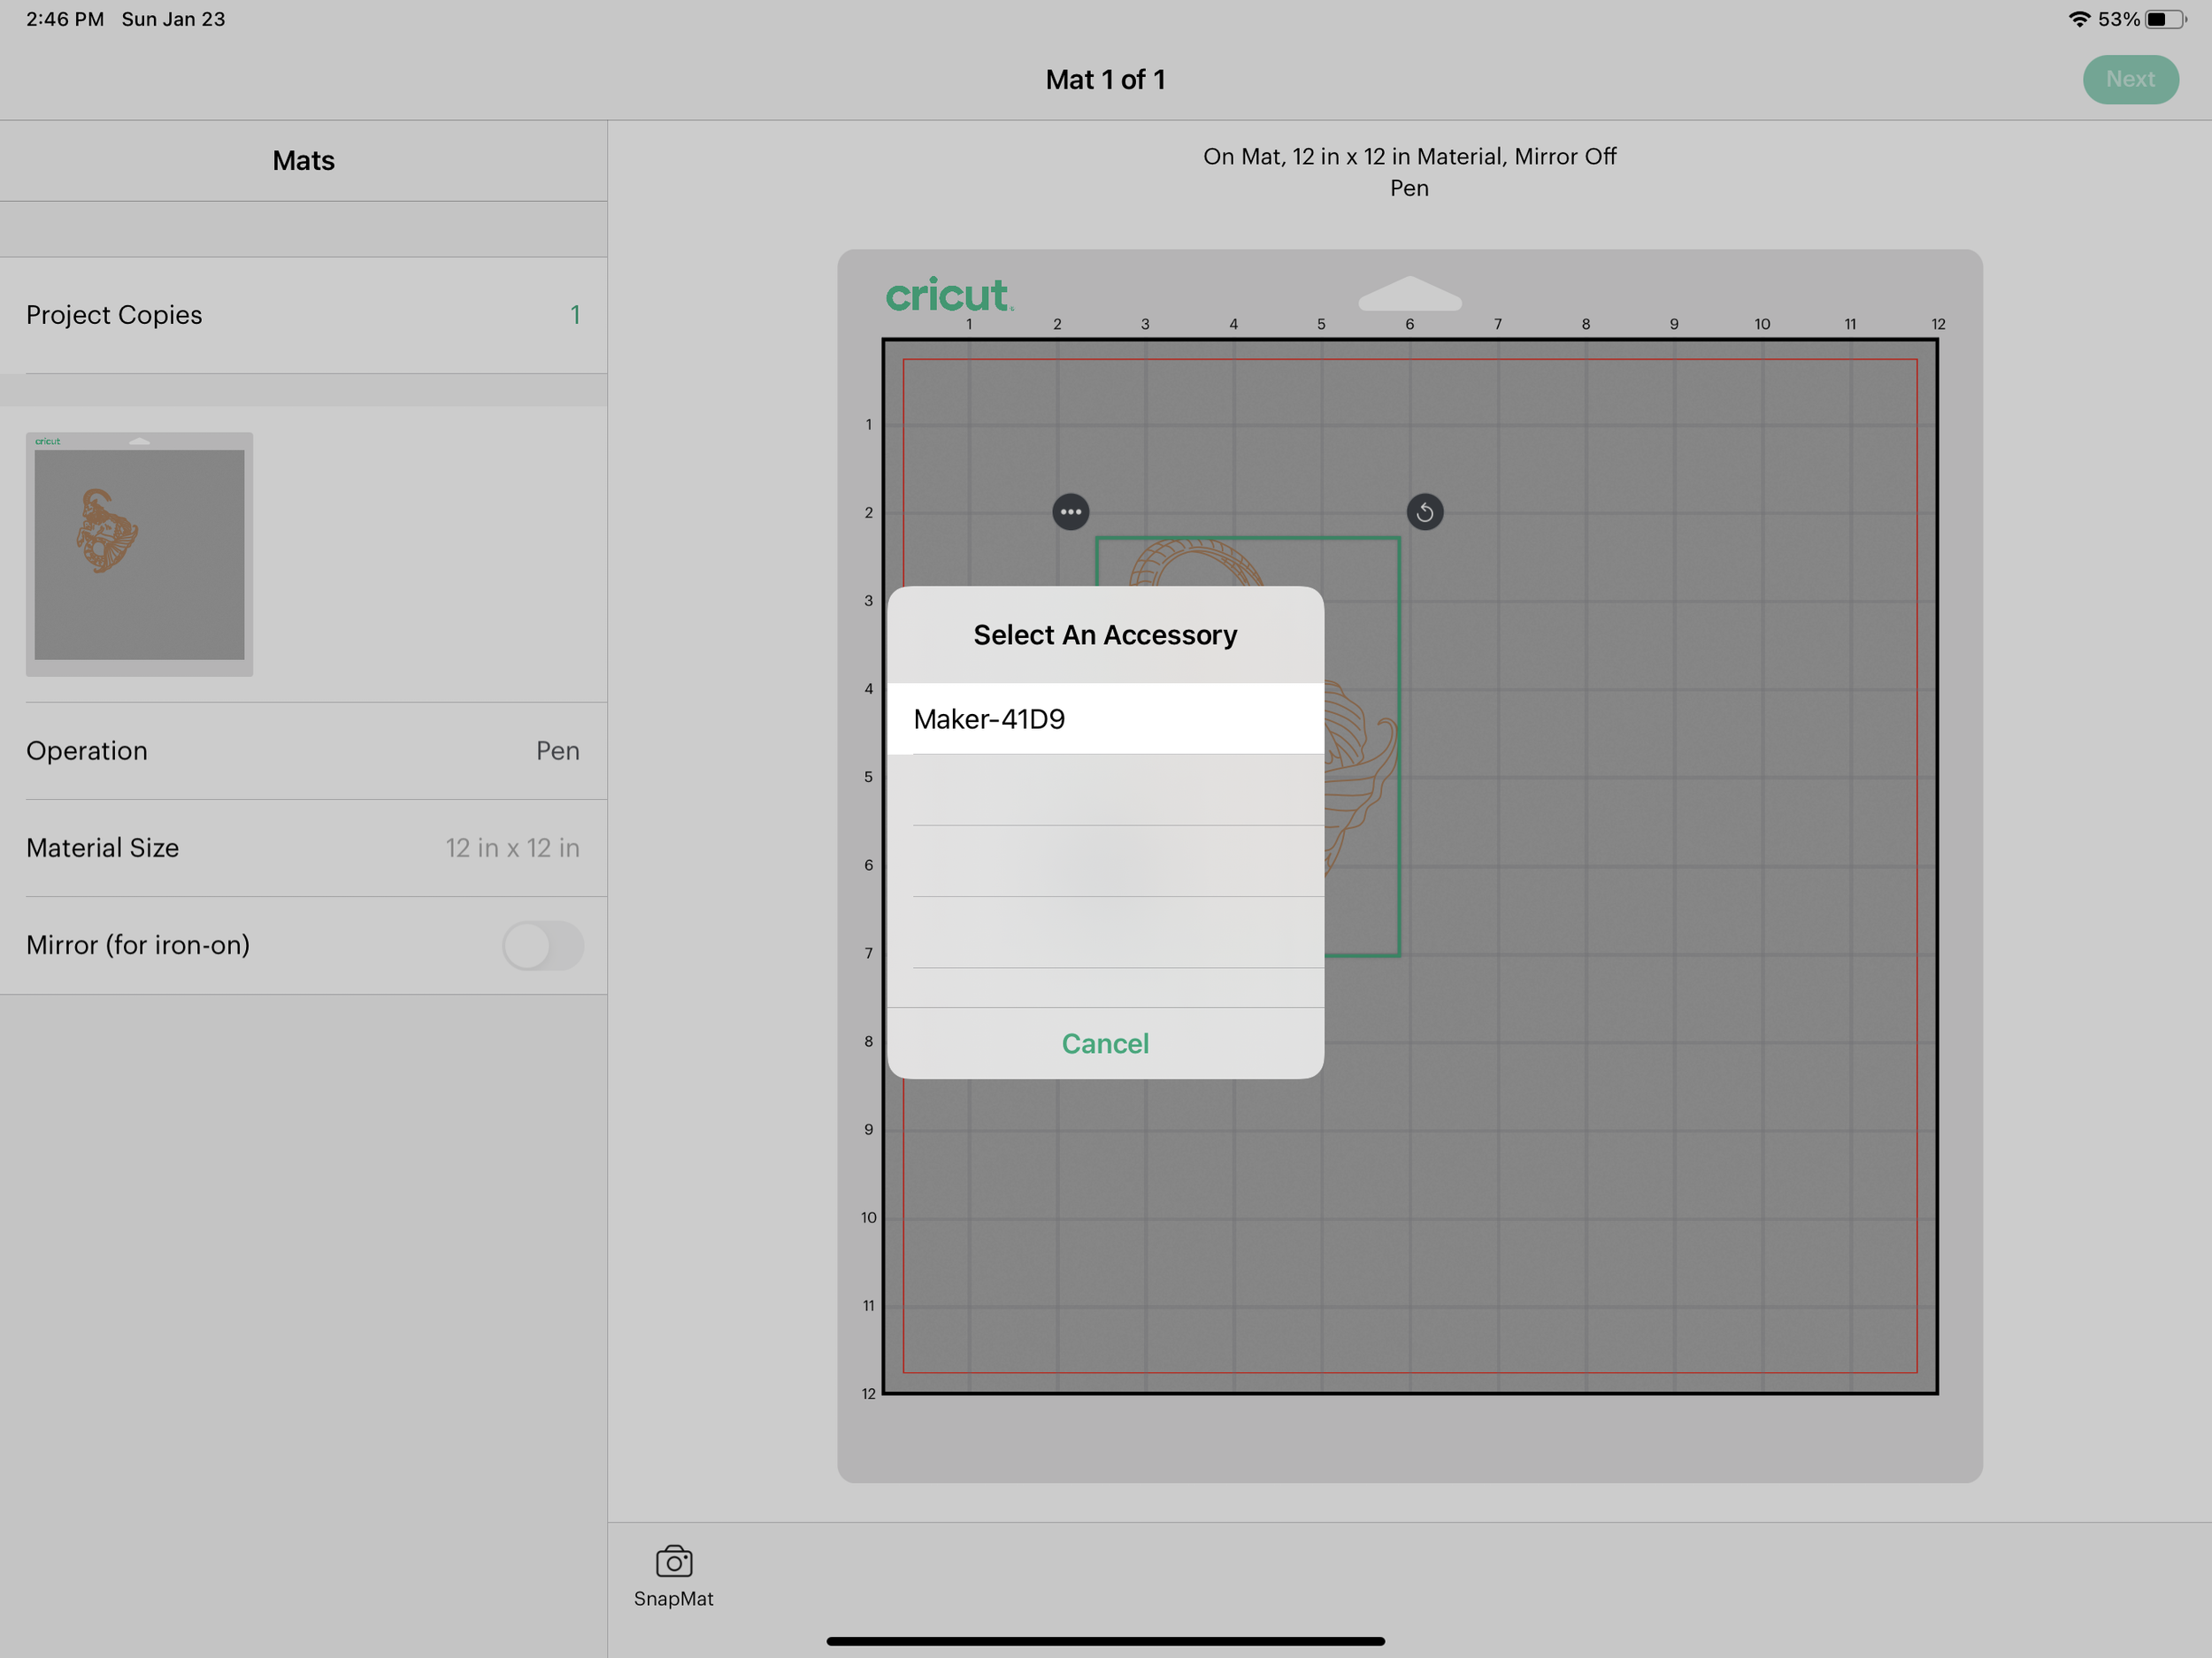
Click NEXT and then select my Maker machine.

Testing Single Line SVG file in Cricut Design Space

I’m using a scarp piece of cardstock, so I select Heavy Cardstock as my material. and I load my Black fine point pen and my mat into my machine, and Press GO!!

Testing Single Line SVG file in Cricut Design Space

After my machine is done drawing, I check my design to see if skipped any of my lines. If any parts of your design are missing, try re-uploading your SVG file into Design Space.

Testing Single Line SVG file in Cricut Design Space

It looks like all of my lines are there, now I’m going to try out my design with my WRMK foil quill. I can use my Foil Quill with my iPad because my machine treats it like a pen. I cannot use my Cricut Foil Transfer tool with my iPad, I don’t know why Cricut hasn’t figured that one out yet.

But here it is with silver foil on black cardstock! Now that I’ve tested my file and it works, I can use it for whatever projects I want.

Testing Single Line SVG file in Cricut Design Space

Creating Your Own Single Line SVG Files - Part Two

Hi Everyone!

This week is part two of how to create your own single line SVG files. I’m going to share with you how I take my sketch from Procreate and use the Adobe Illustrator app on my iPad Pro to create the SVG file.

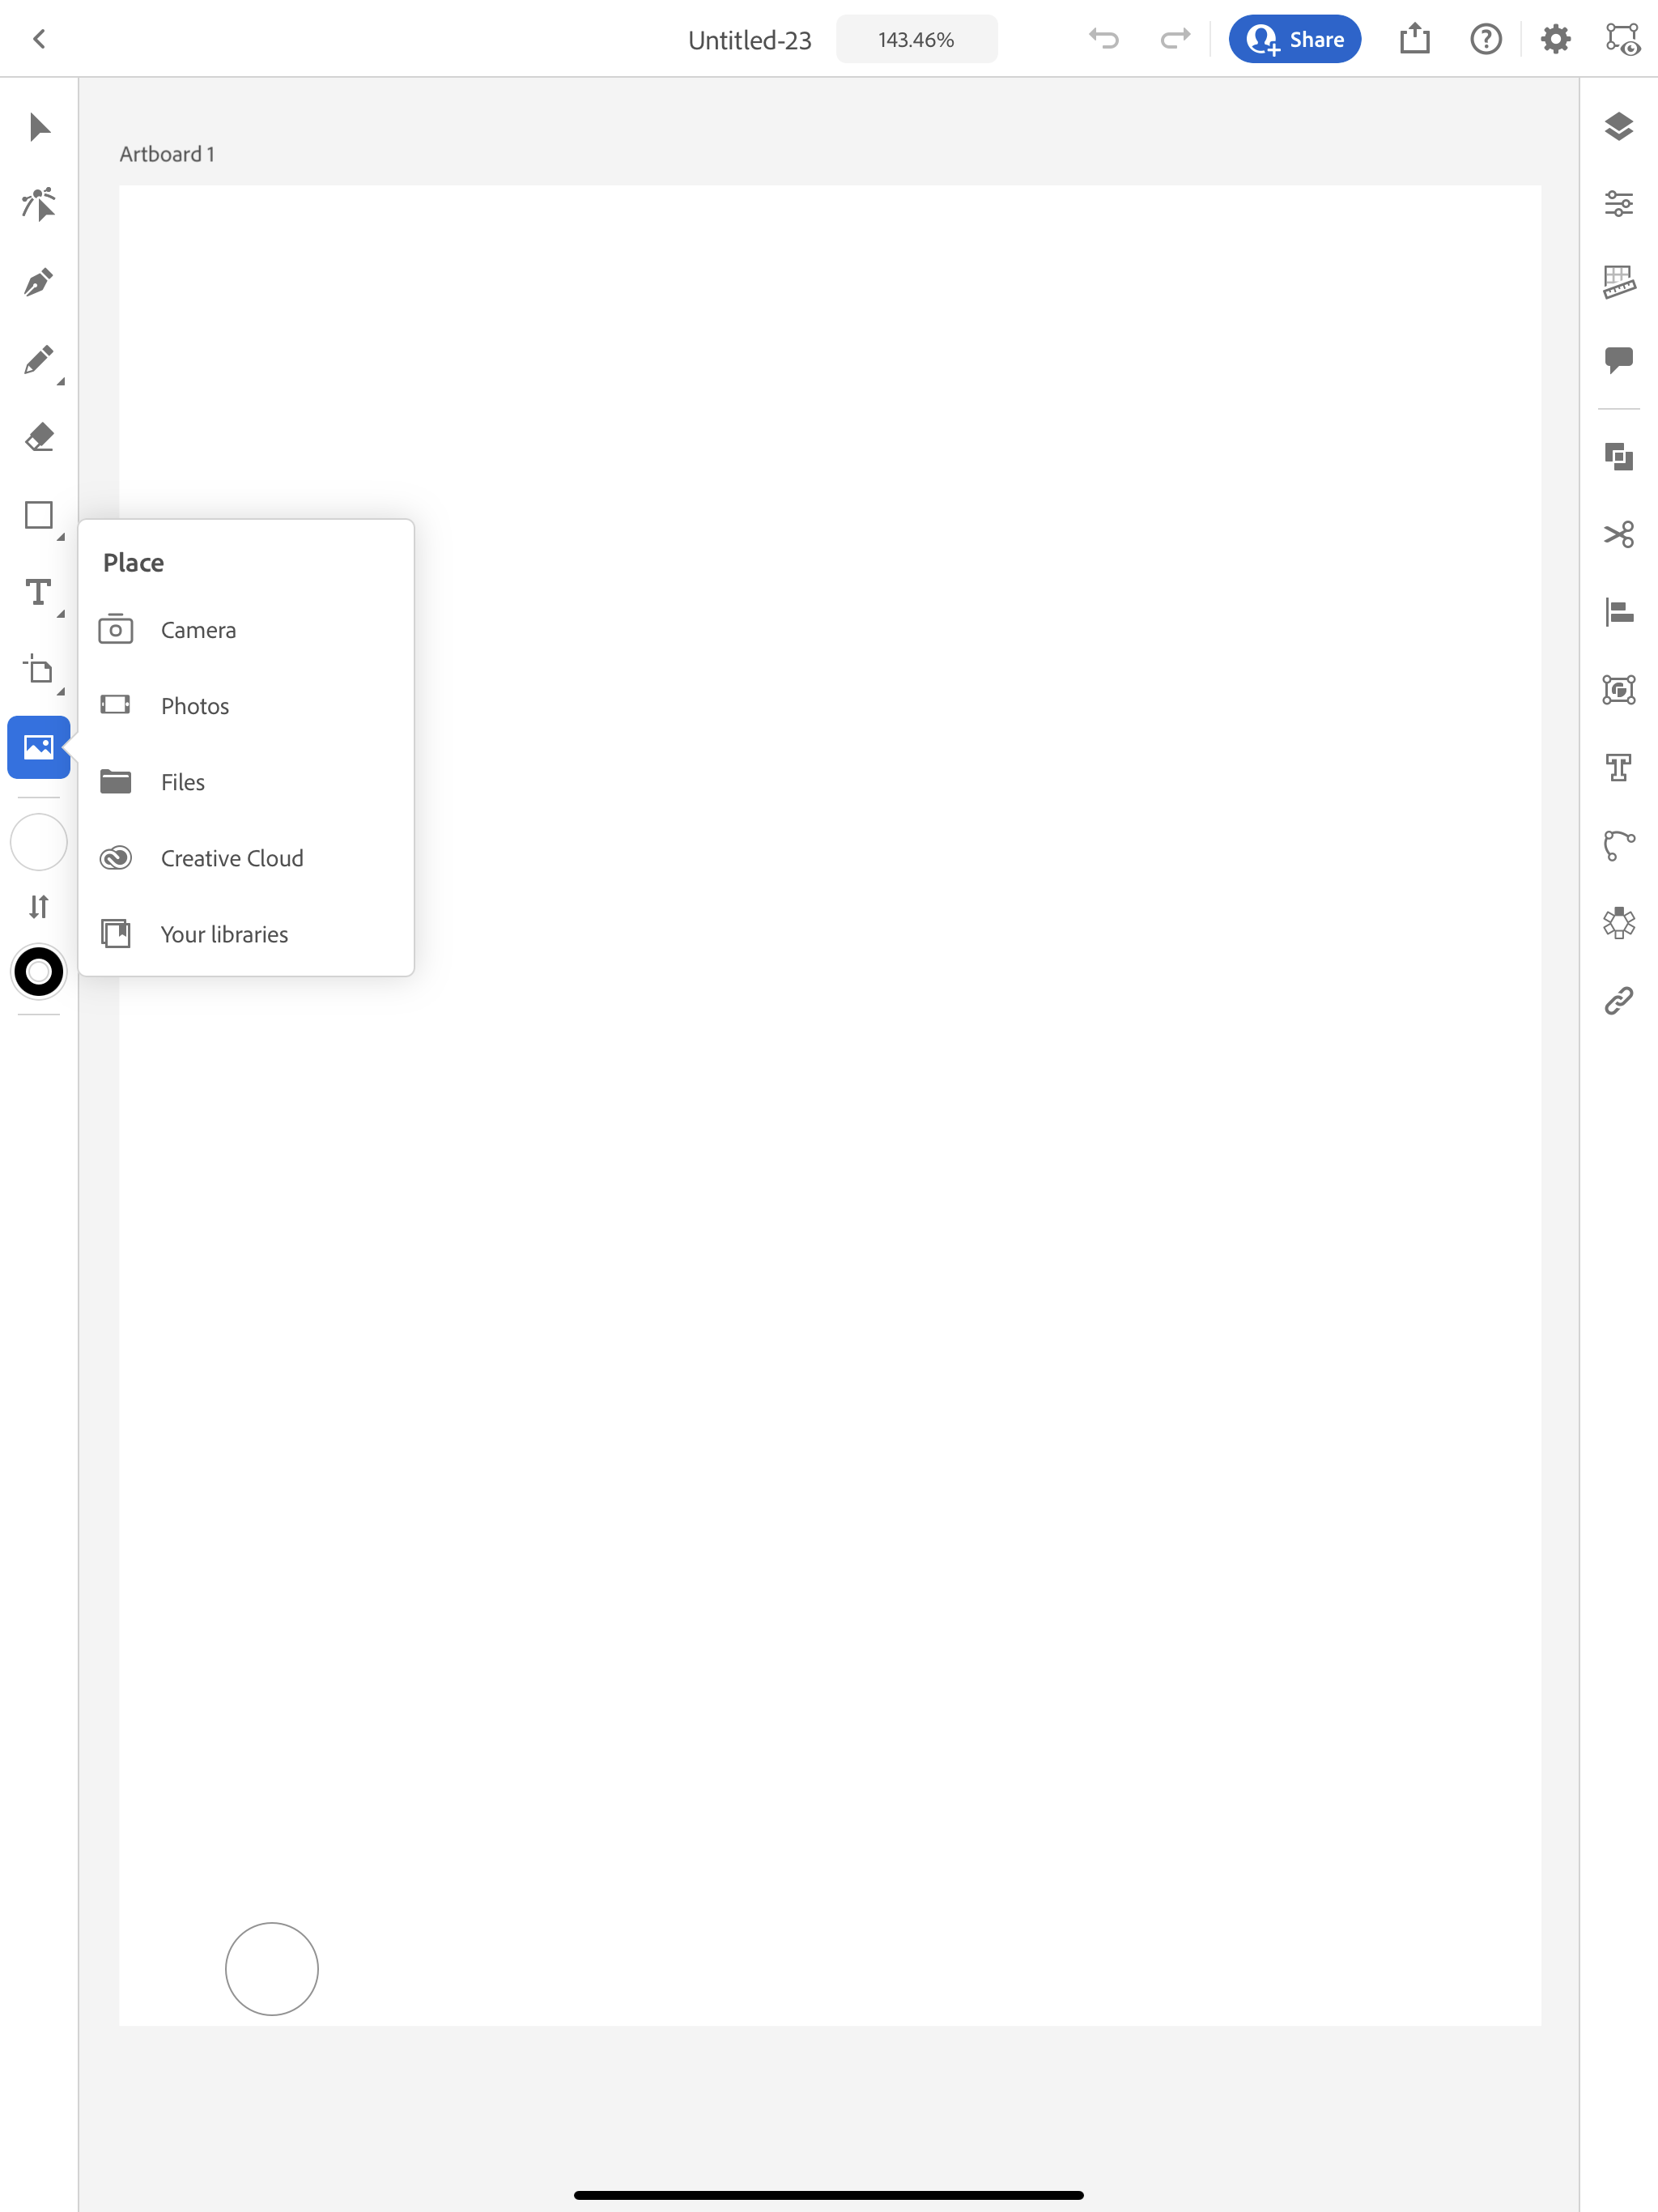
Last week exported my file from Procreate as a JPEG. I’m going to bring that file into the Illustrator app by selecting the picture icon in the tool bar on the left and finding that file on my iPad.

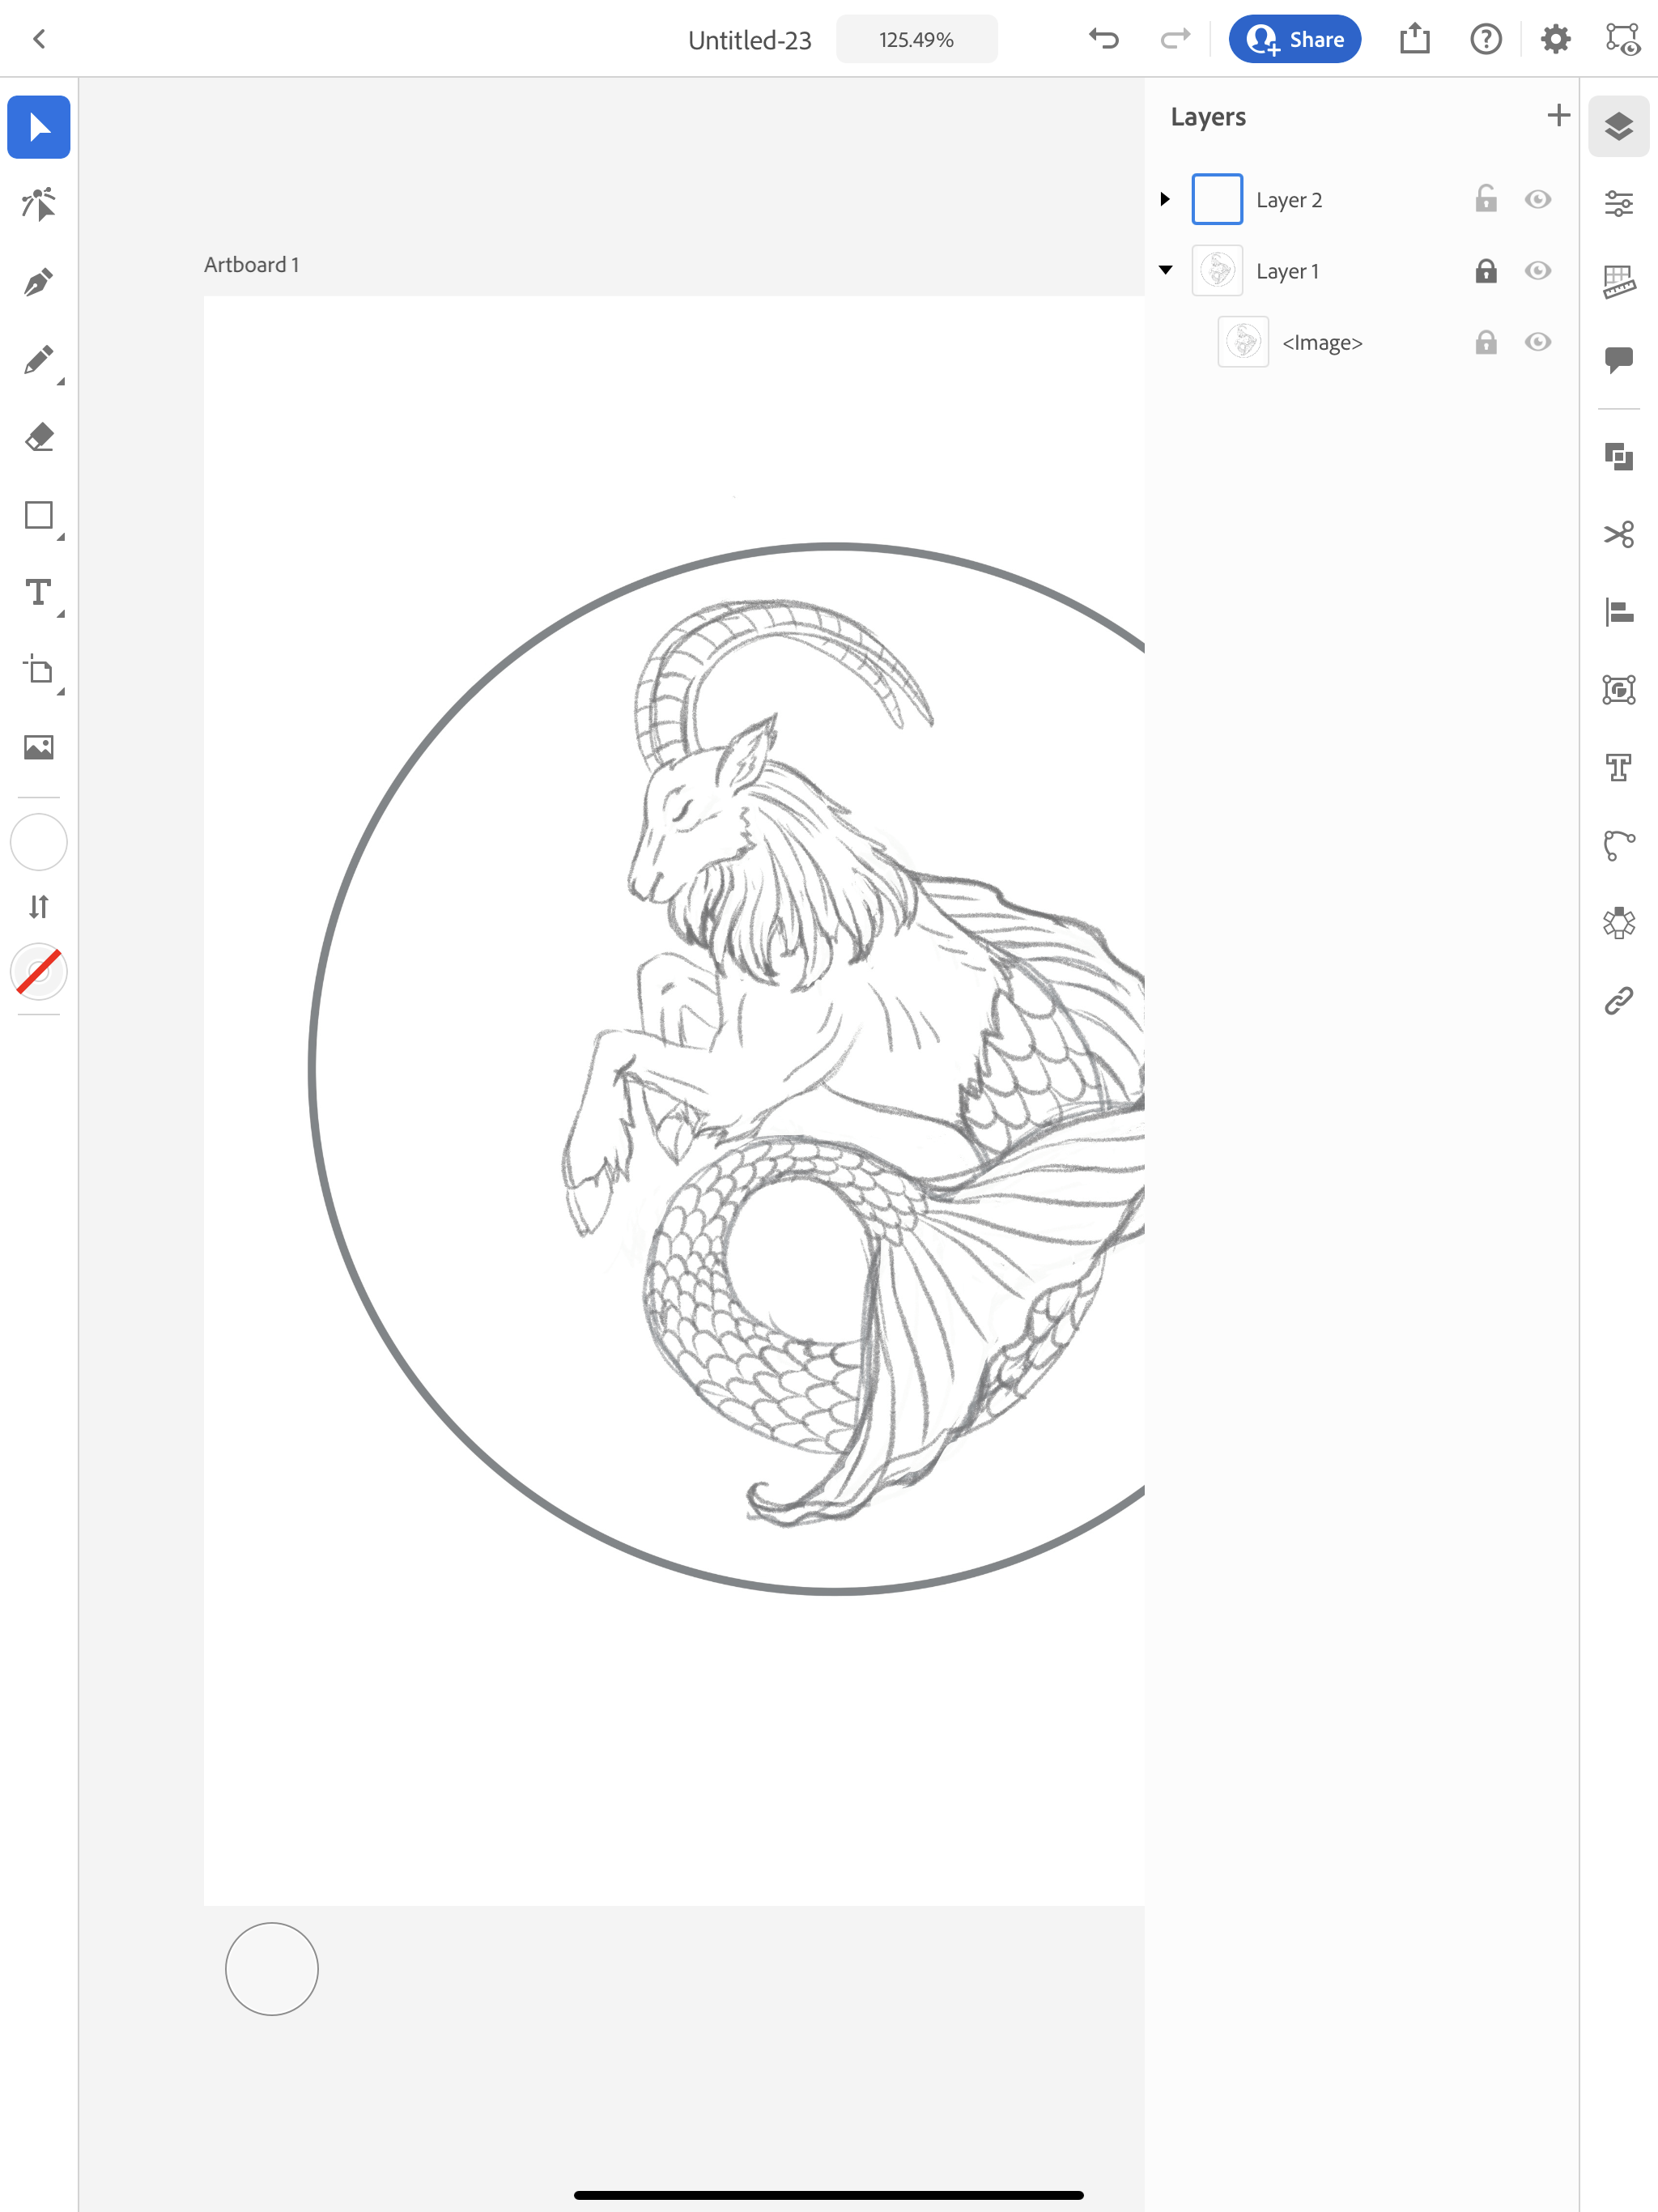
Inserting Image in Illustrator App

You can adjust the size of the image, I typically keep my pretty large at this point. I’m going to add a new layer above my sketch layer, then I’m going to lock my sketch layer.

Inserting Image in Illustrator App

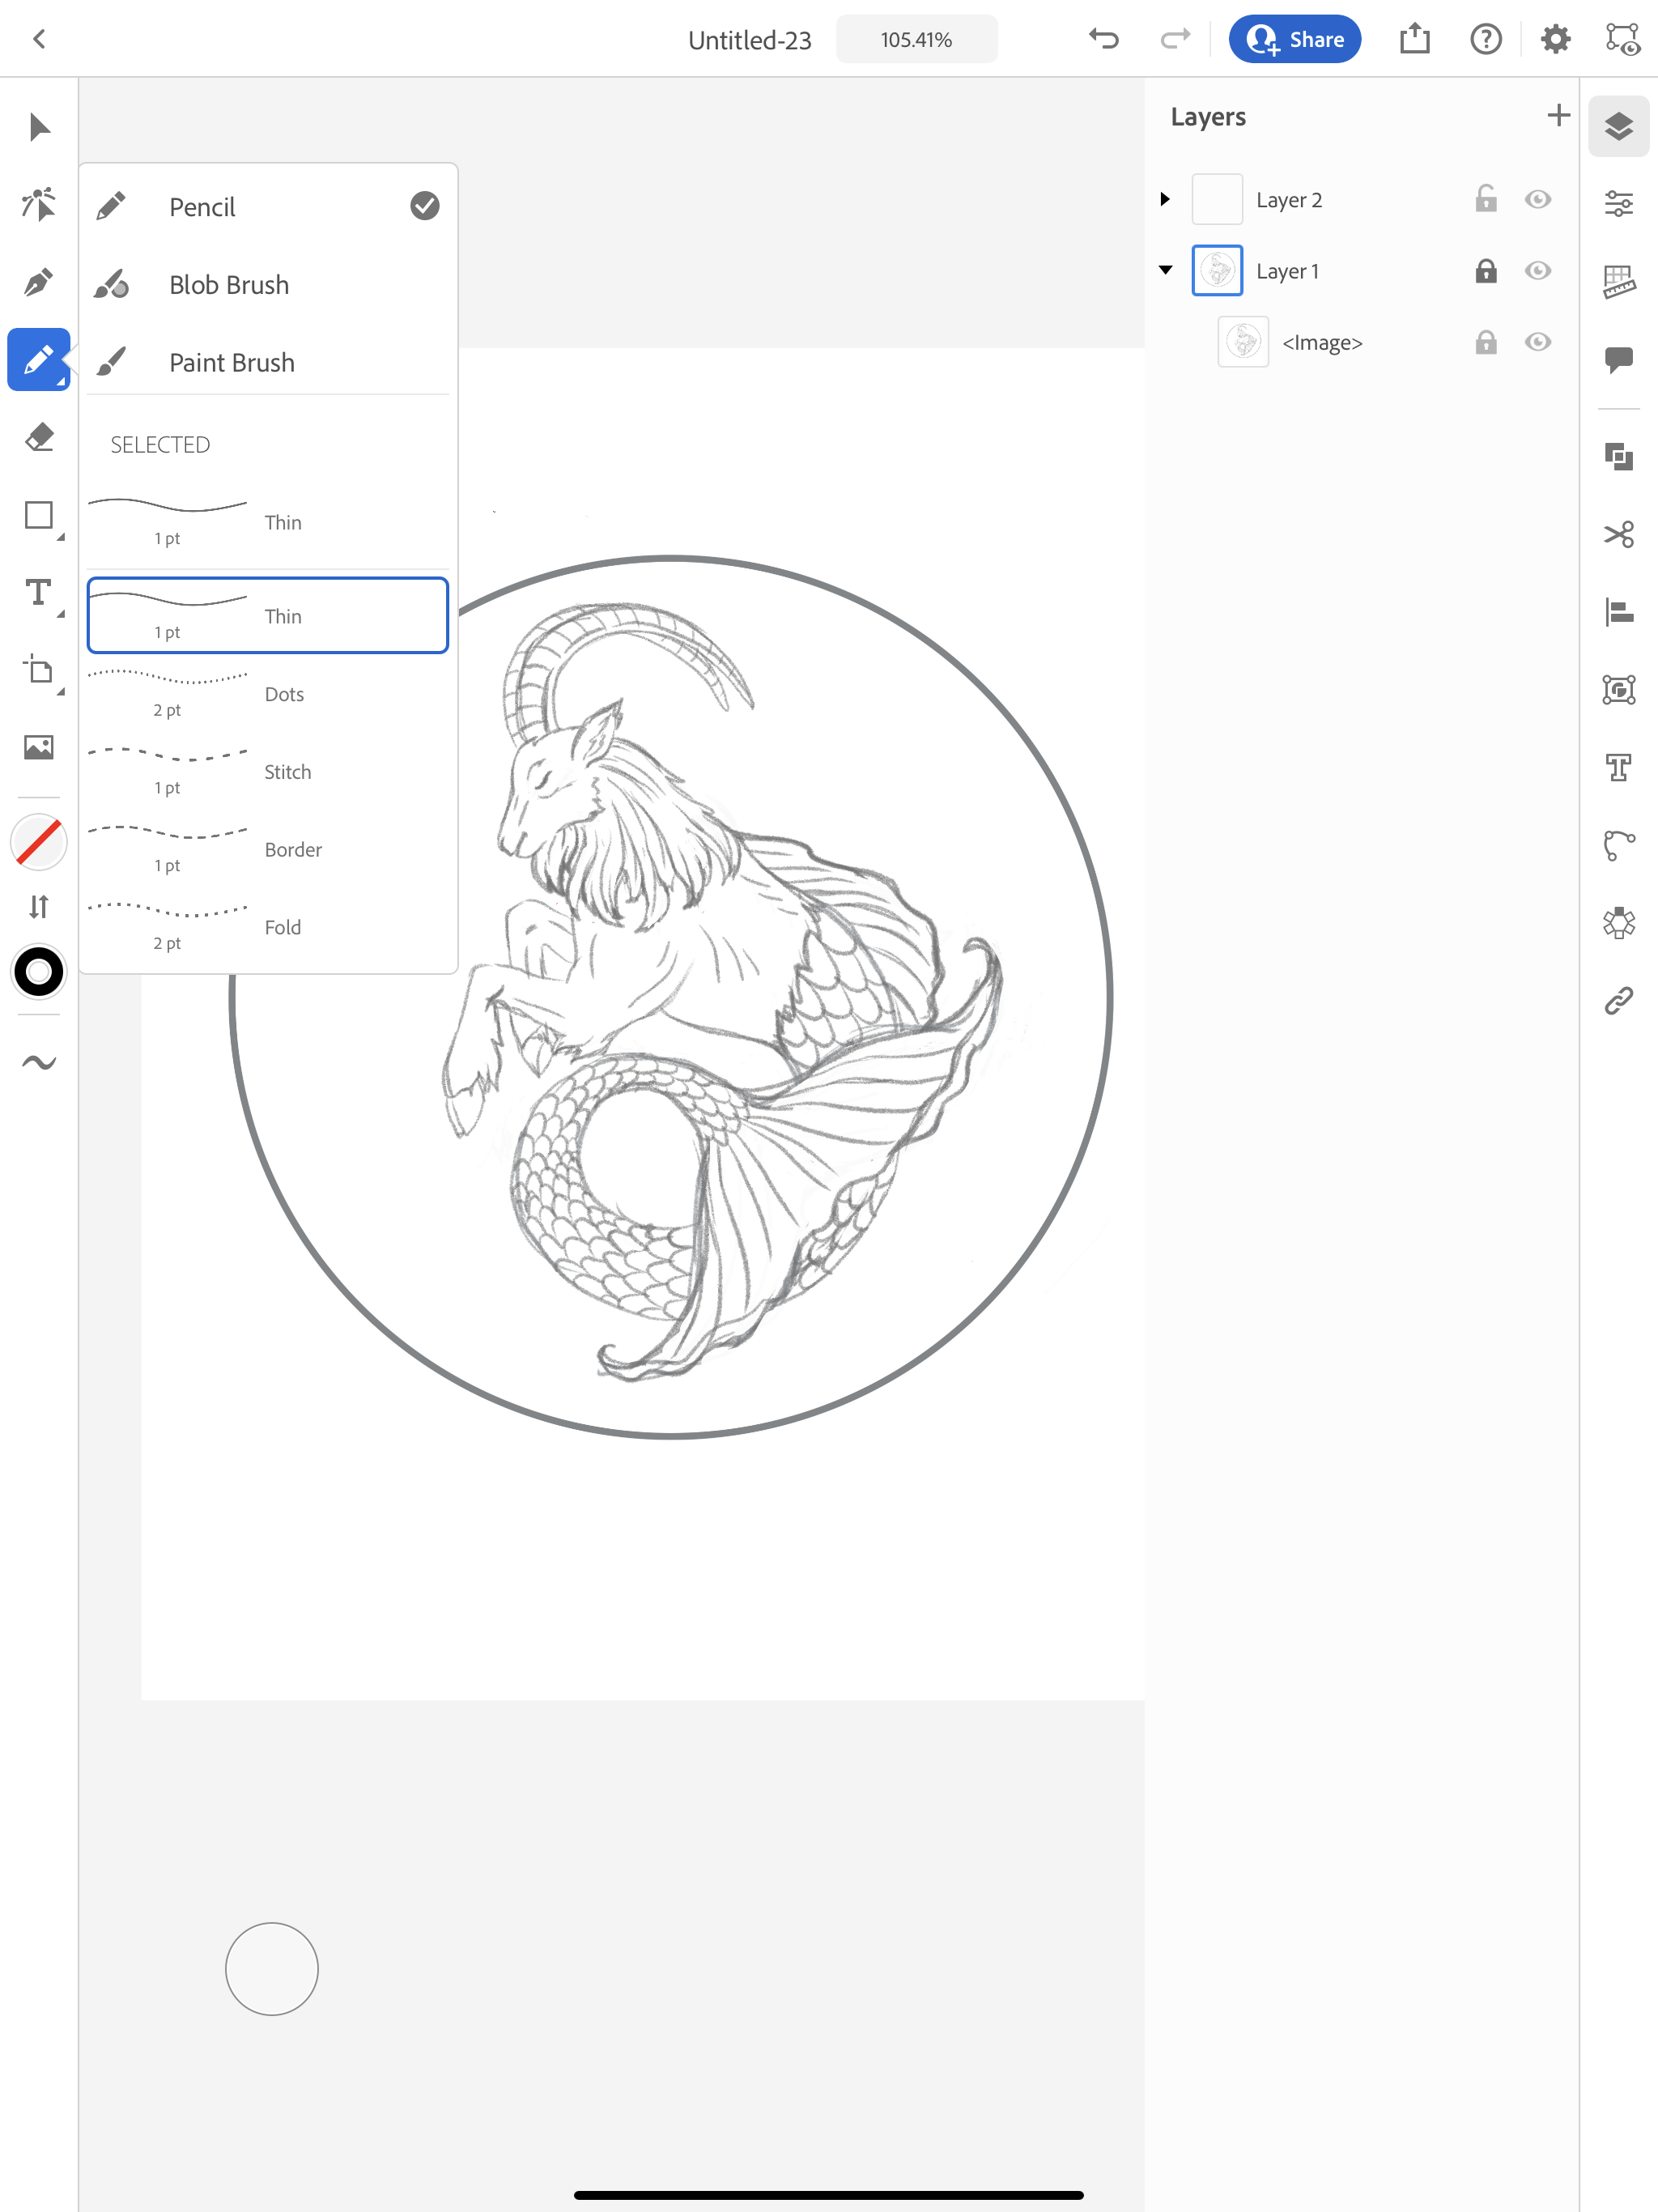
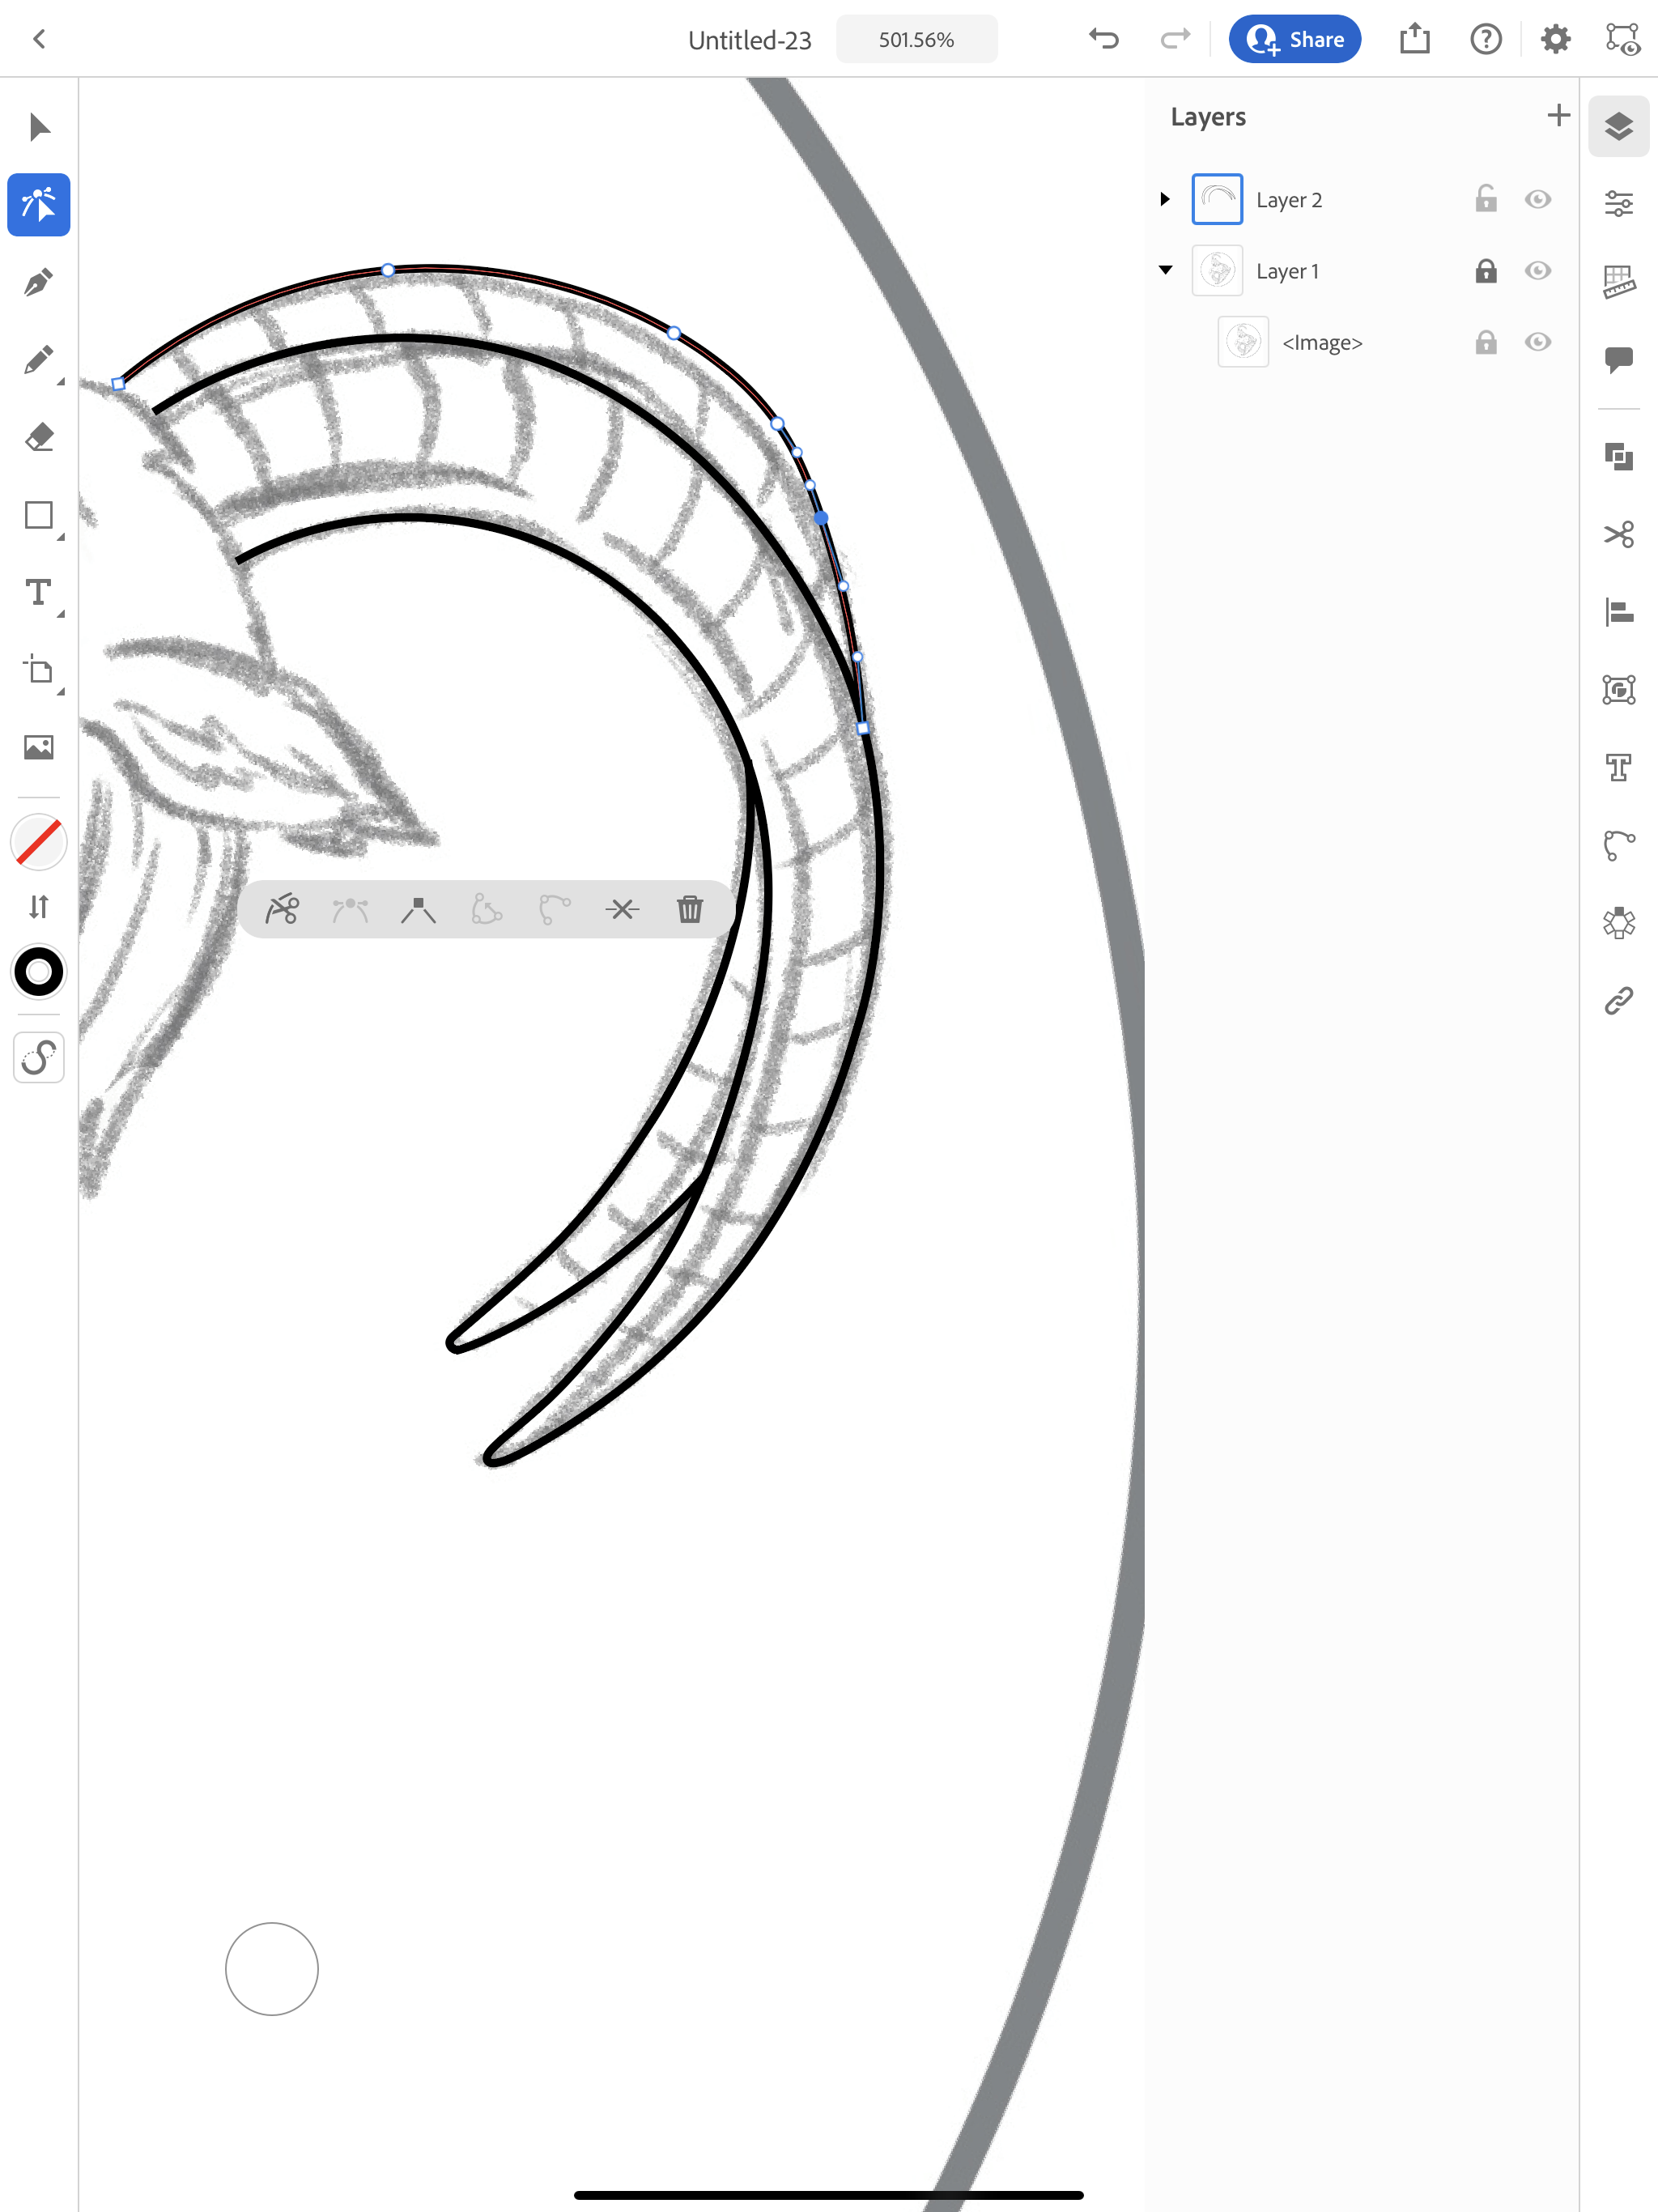
I typically start with a basic out line of my image and then fill in all the little details on a separate layer. You need to use either the pencil tool or the pen tool to create a single line SVG. This is so your image is made up of individual paths and not filled shapes. I’m going to use the pencil tool since it feels most natural when I’m tracing my image using my Apple Pencil.

Pencil tool Illustrator App

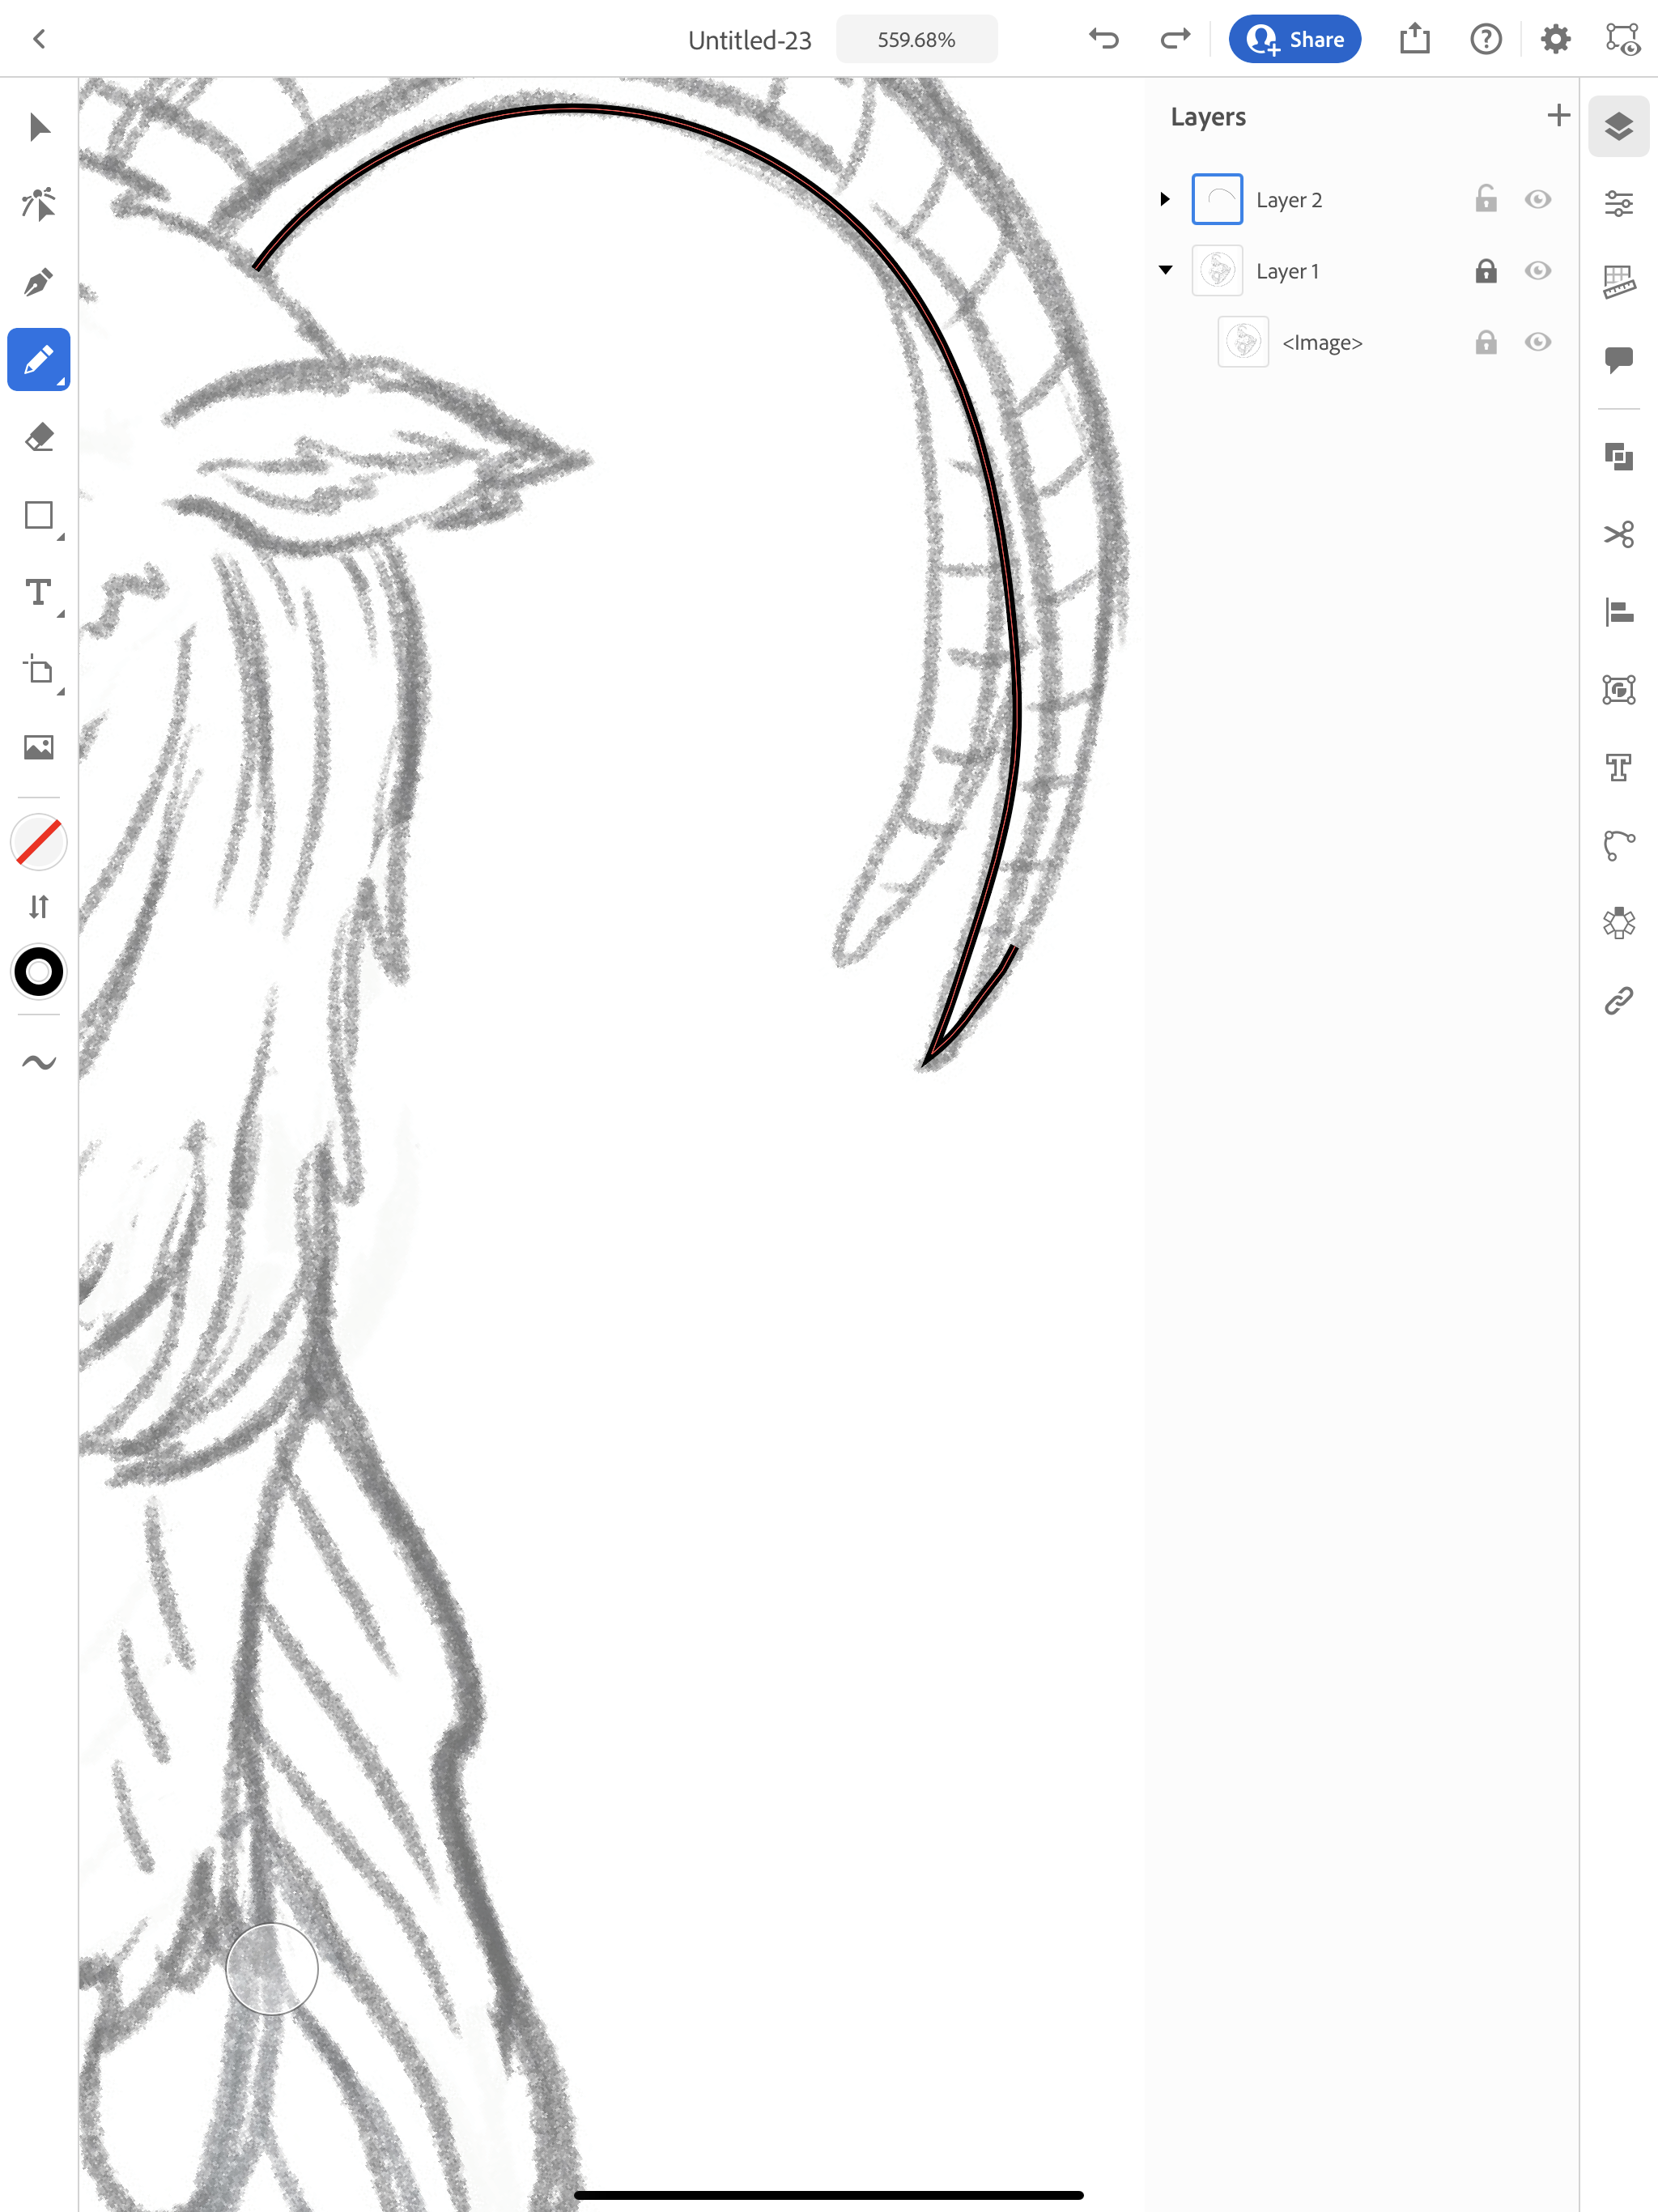
I’m going to start tracing the outline of the horns with my pencil. If you need to stop and lift up your pencil, you can continue that same line again by selecting the path and start drawing at one of the end points.

Pencil tool Illustrator App

Now, you can choose the draw the rest of the outline or start refining each section as you go along. I’m going to refine each section as I go along. Using the Direct selection tool, I can delete anchor points, change curved points to sharp angles and vice versa.

Direct Selection tool Illustrator App

After the outline is complete, I will create a new layer for the details.

Creating single line SVGs Illustrator app

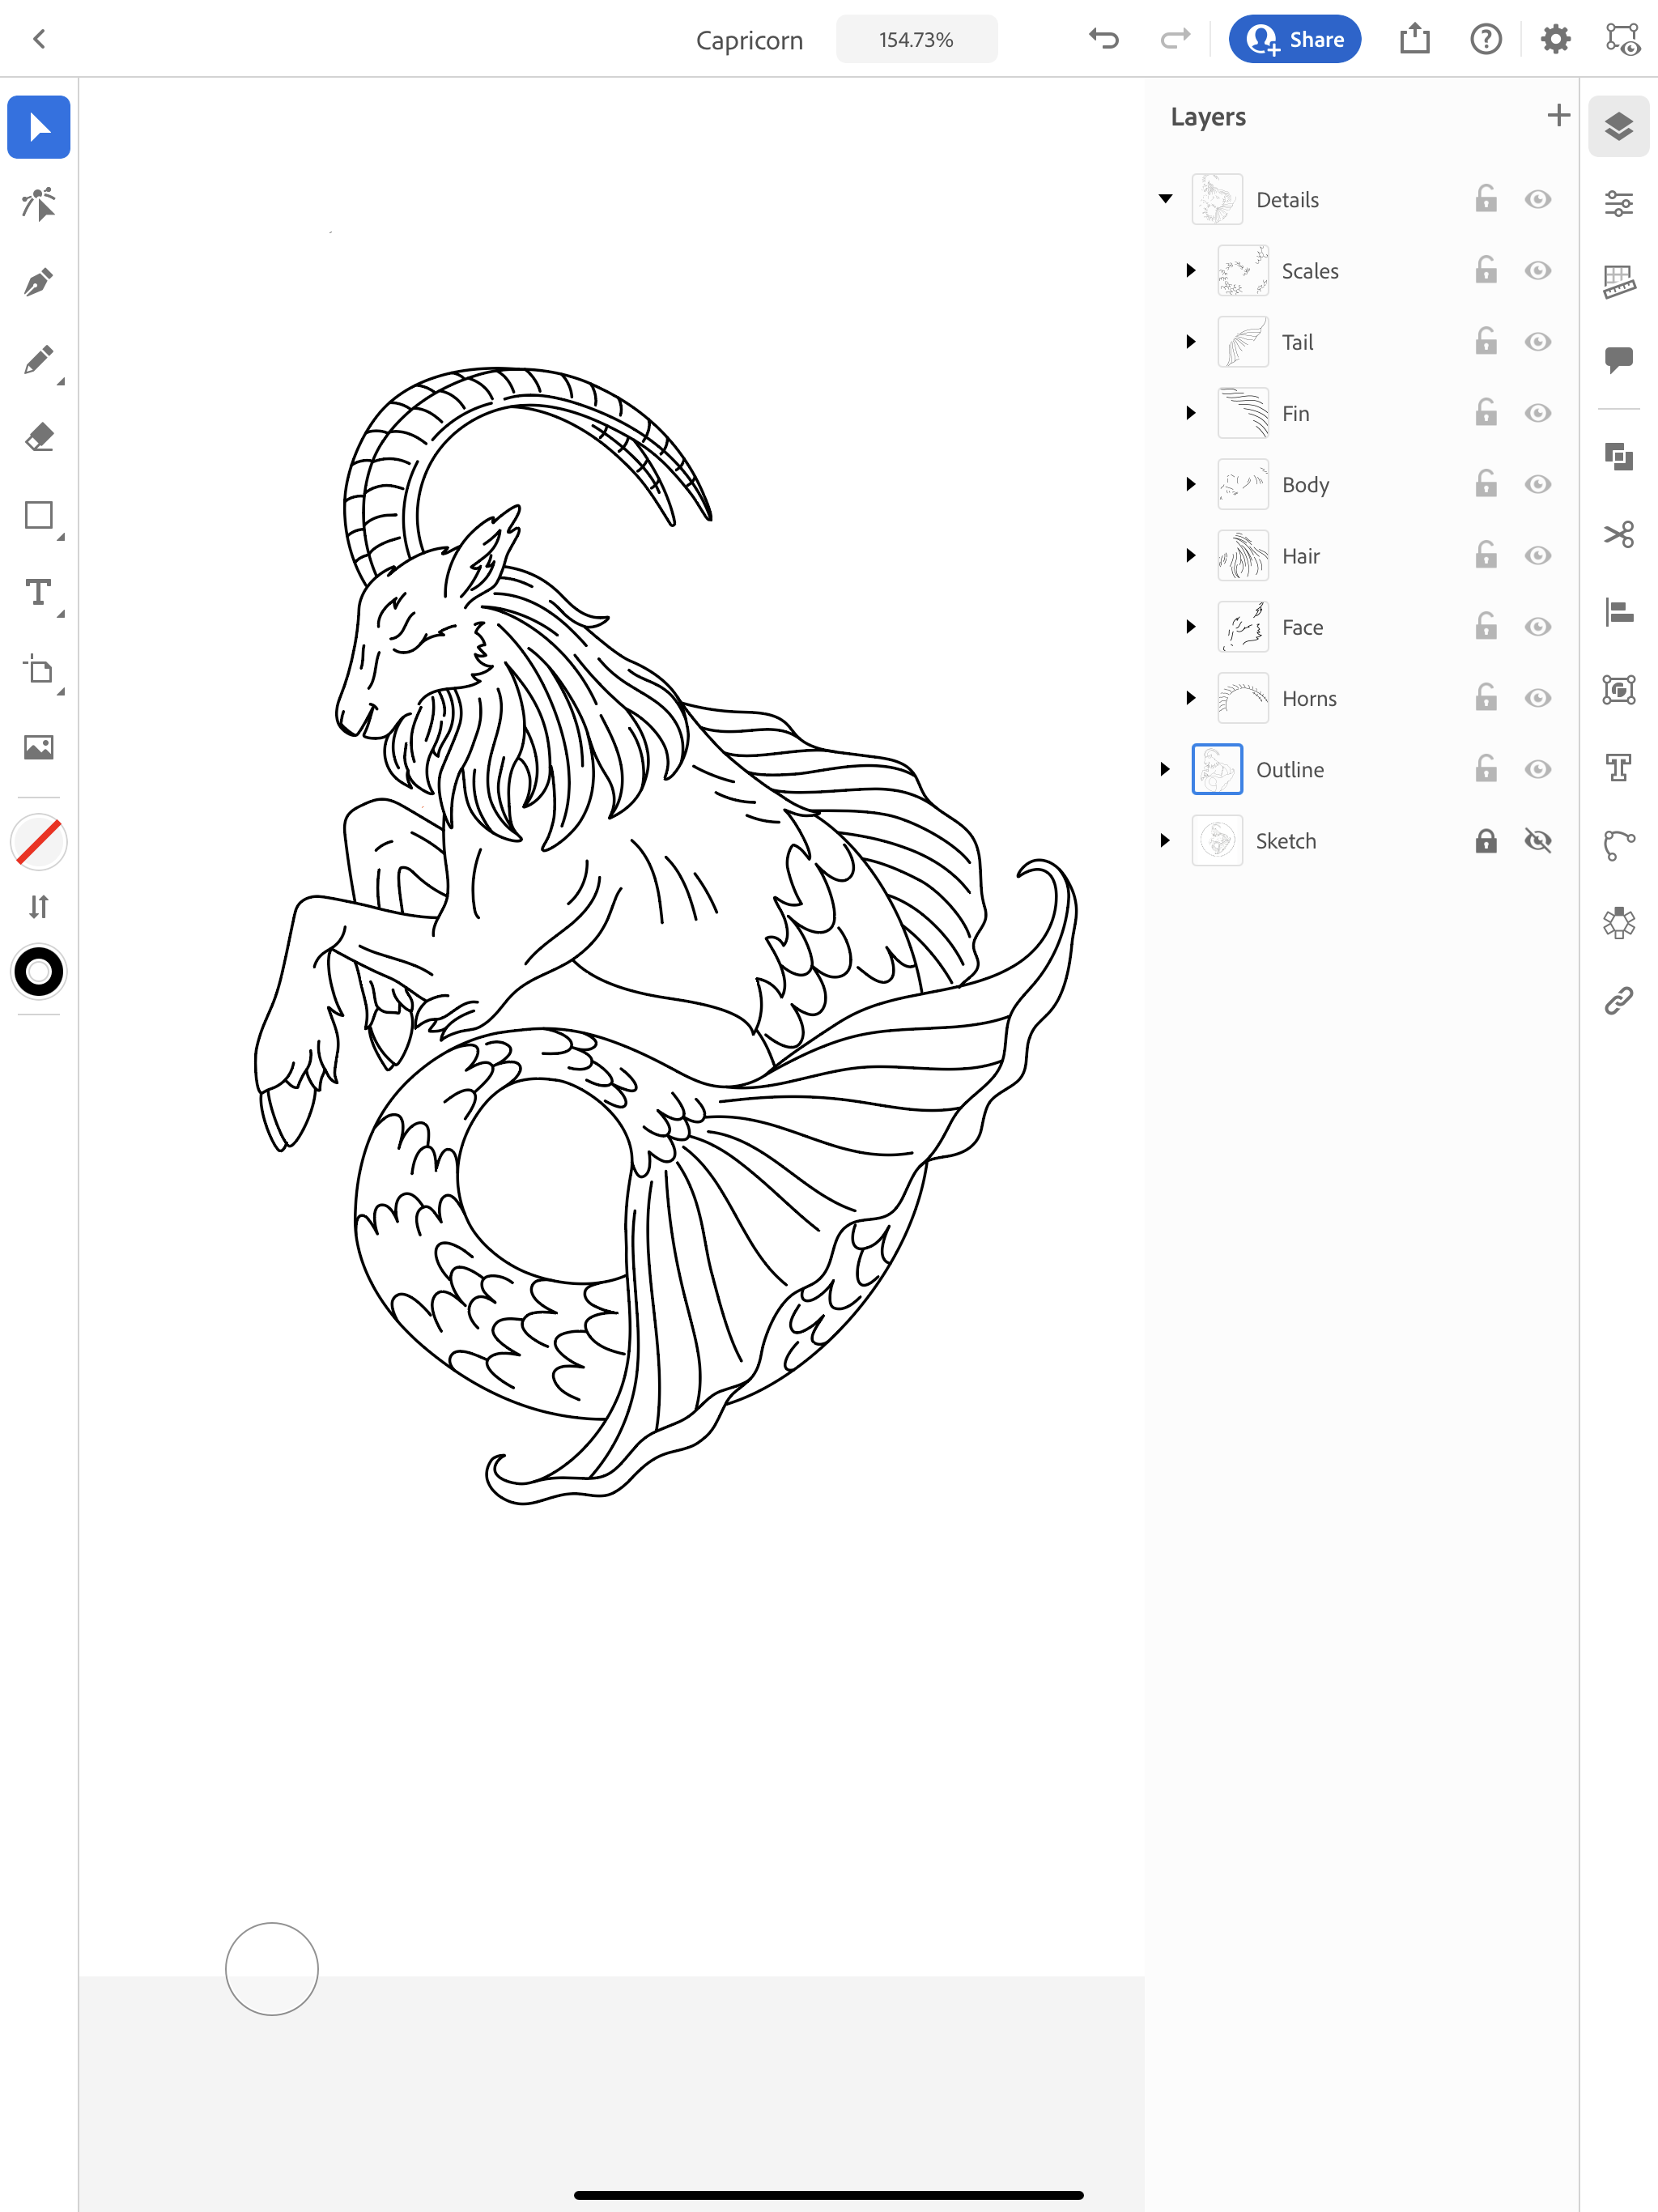
I do the details by sections in the drawing. As you can see, I simplified the scales on the fish tale from my original drawing. Now is great time to make any adjustments to your drawing. Once I finish the details, I make each section a subgroup in my layer.

Creating single line SVGs Illustrator app

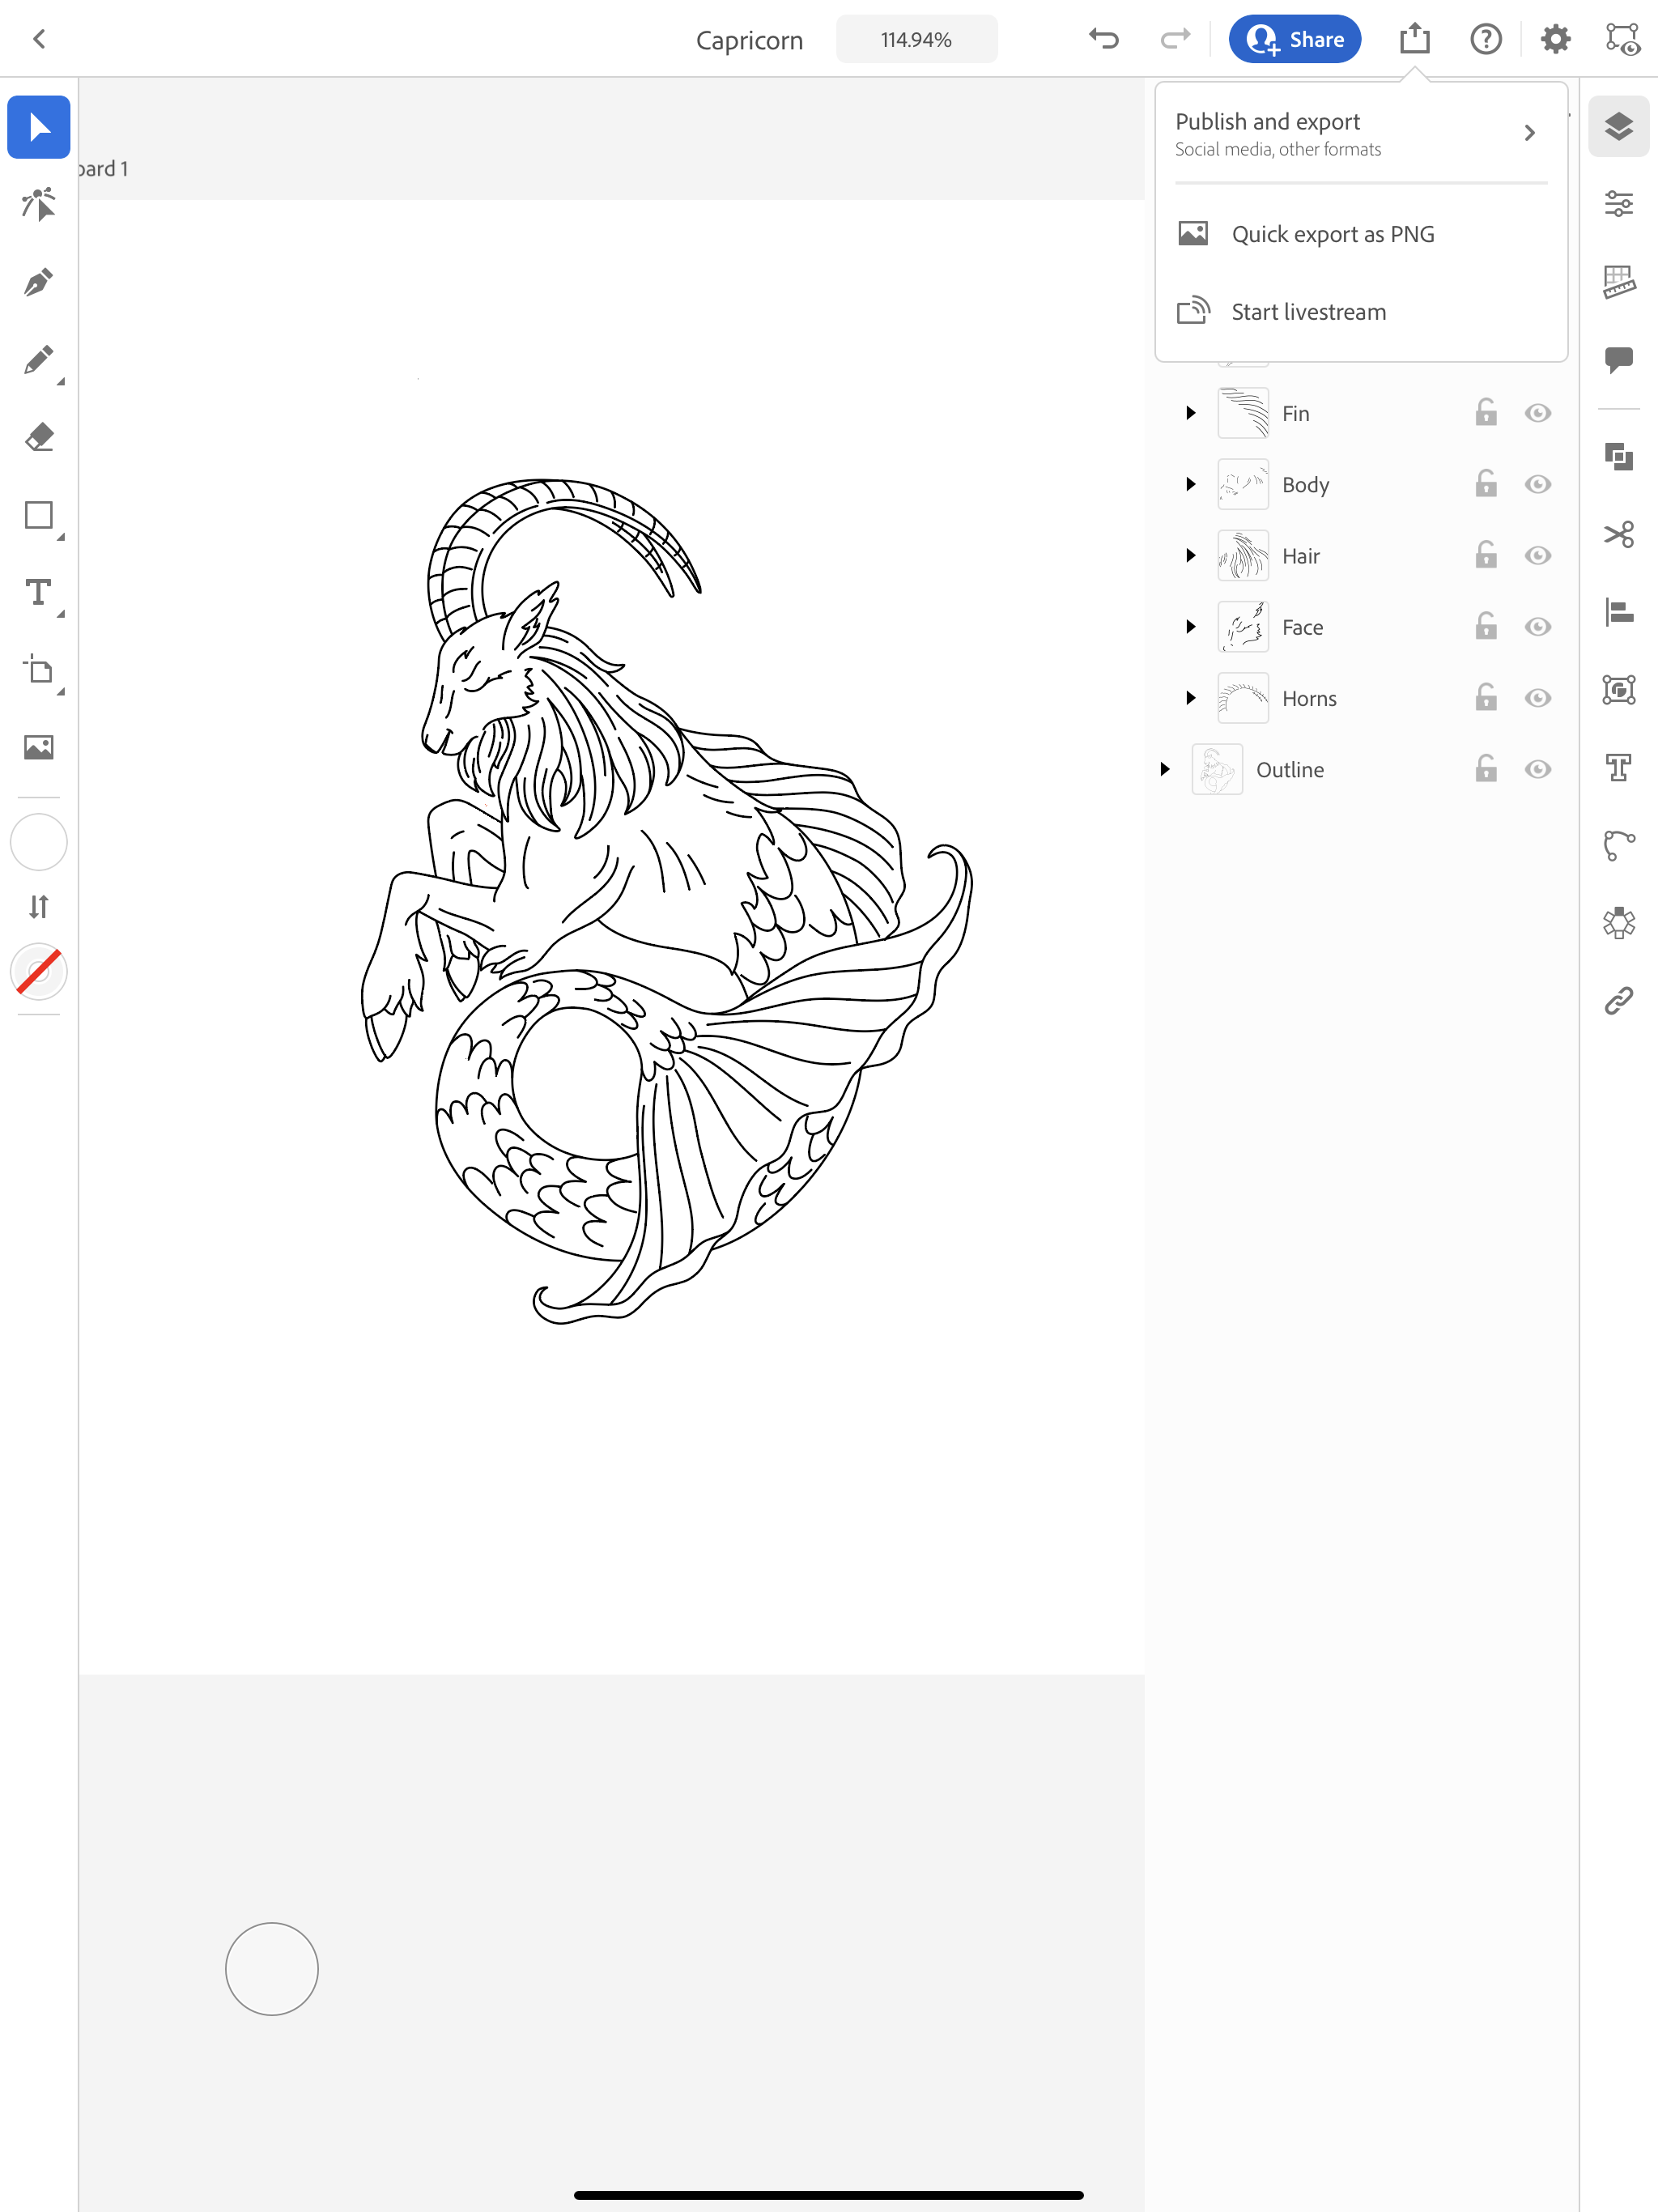
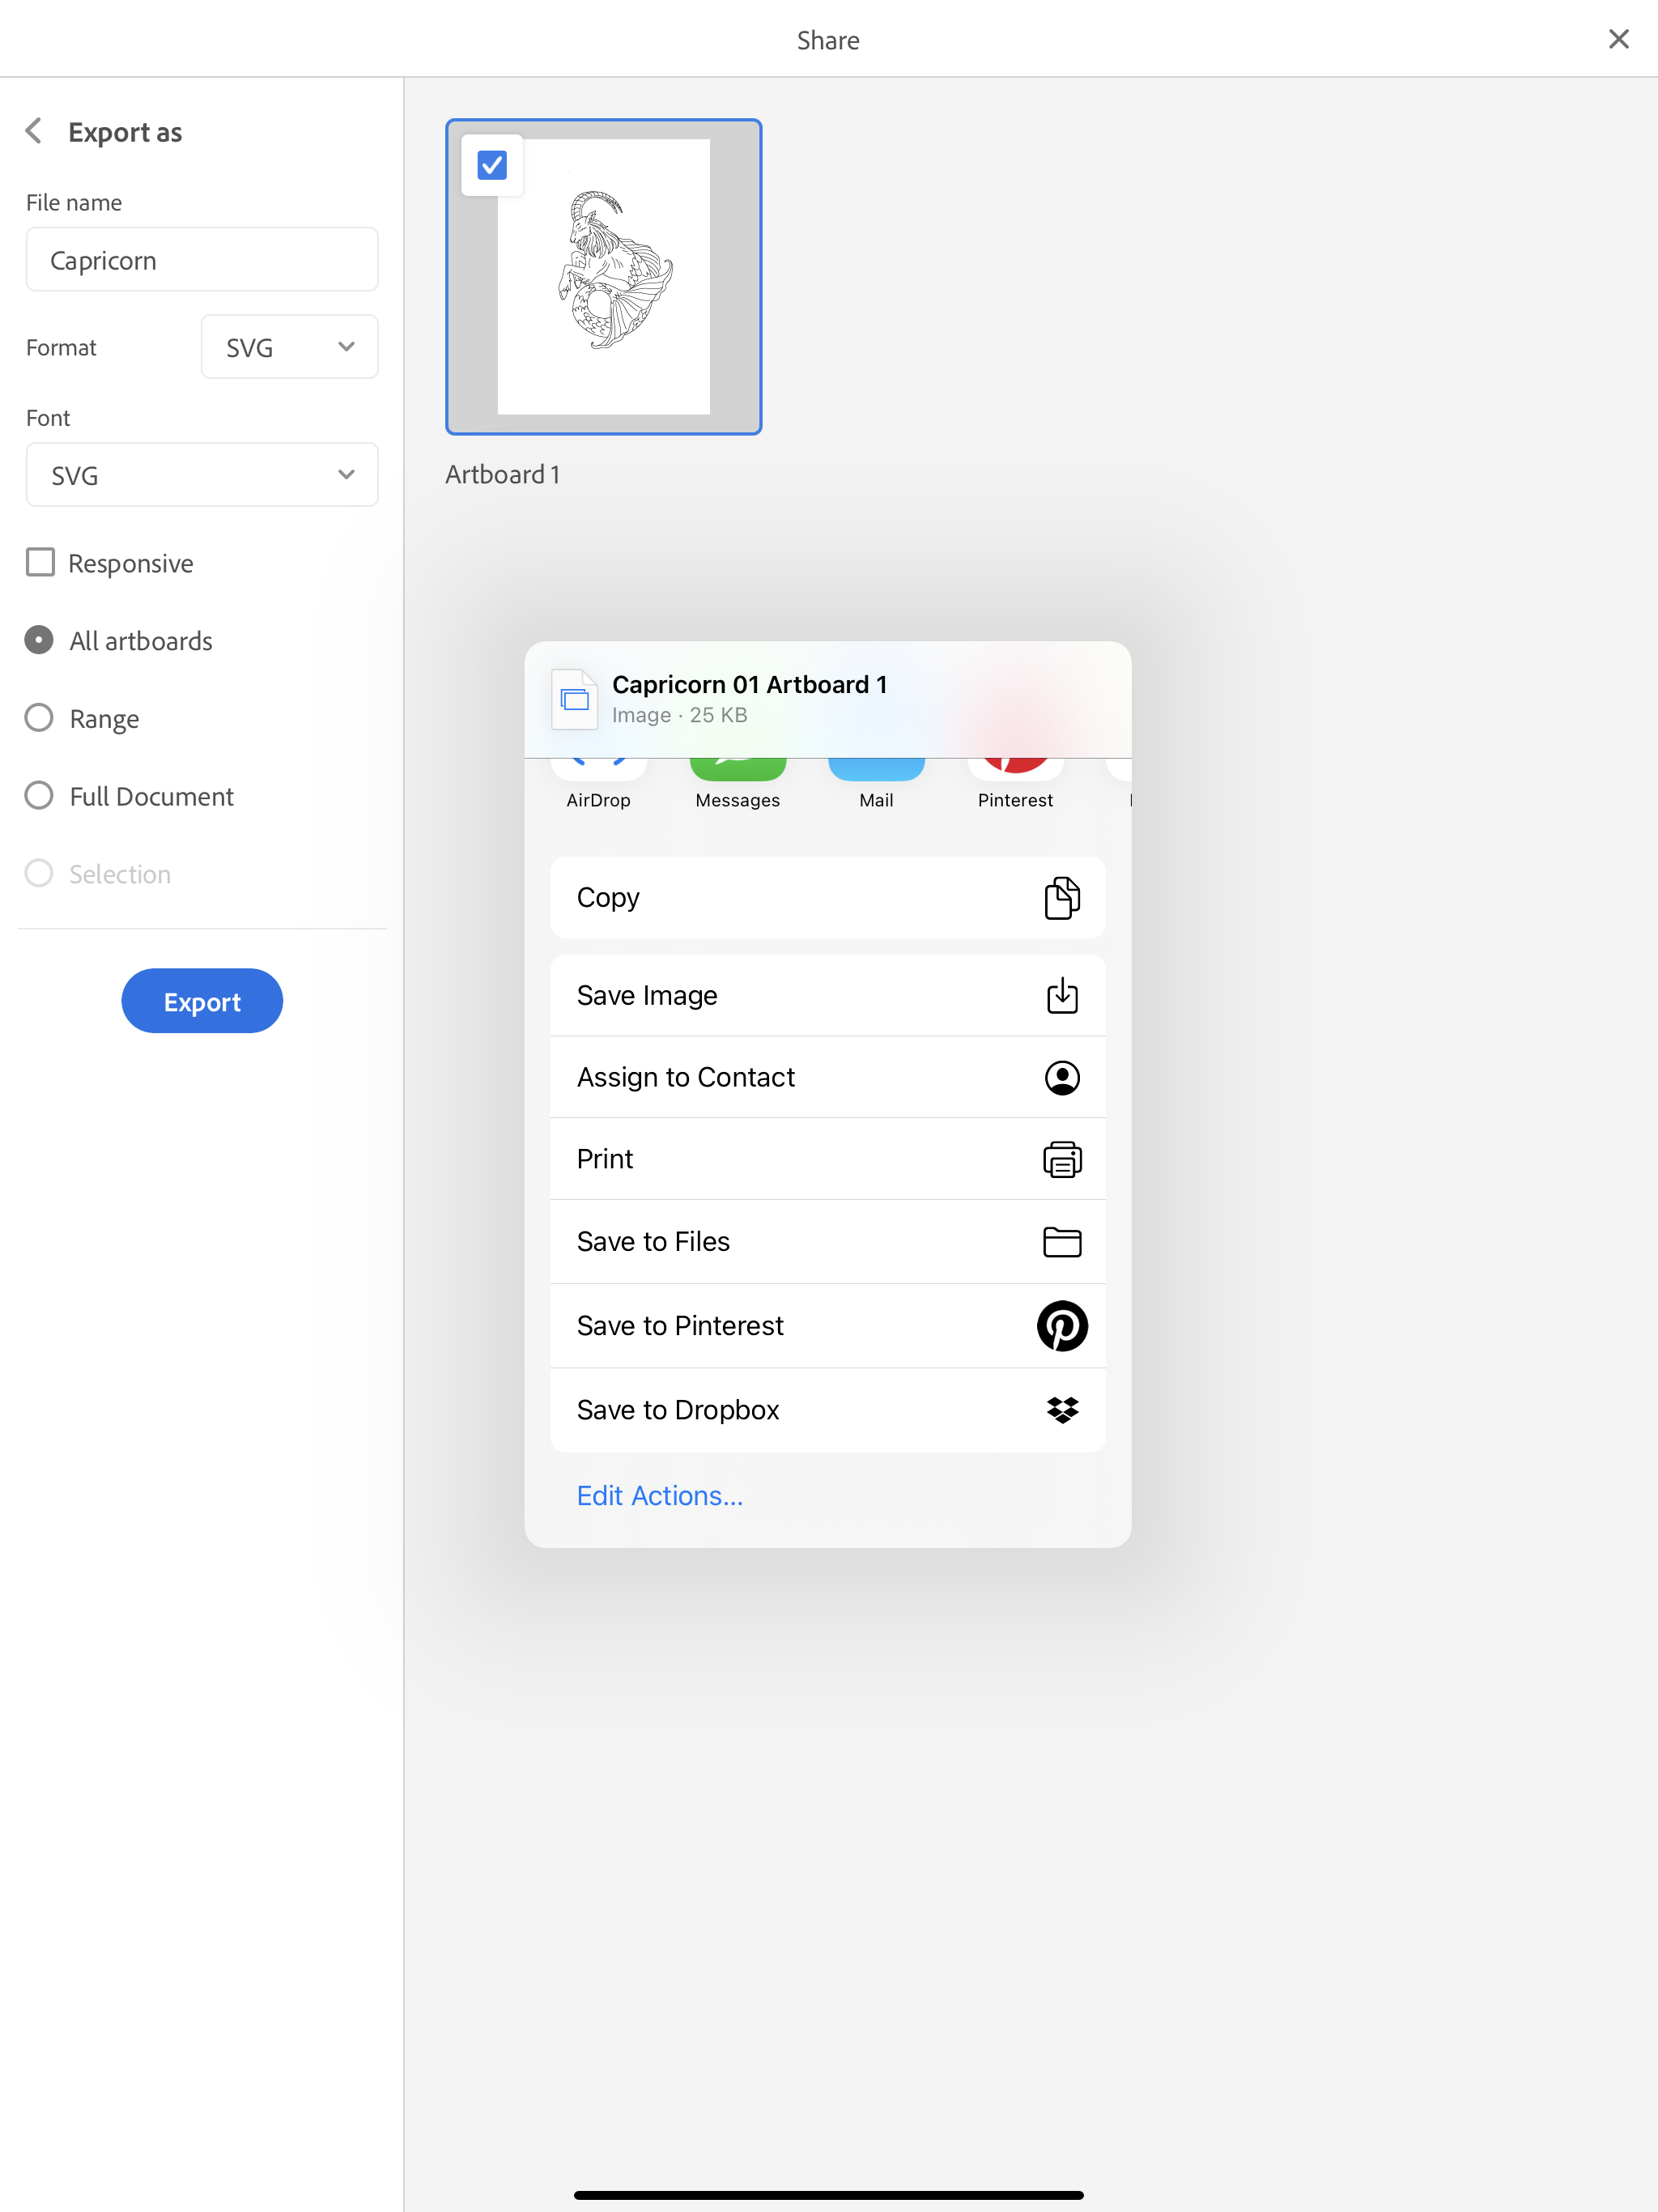
Now it’s time to export this file as SVG. Click on the box with the arrow in the upper right tool bar across the top in the app. Select “Publish and export.”

Export as SVG Illustrator app

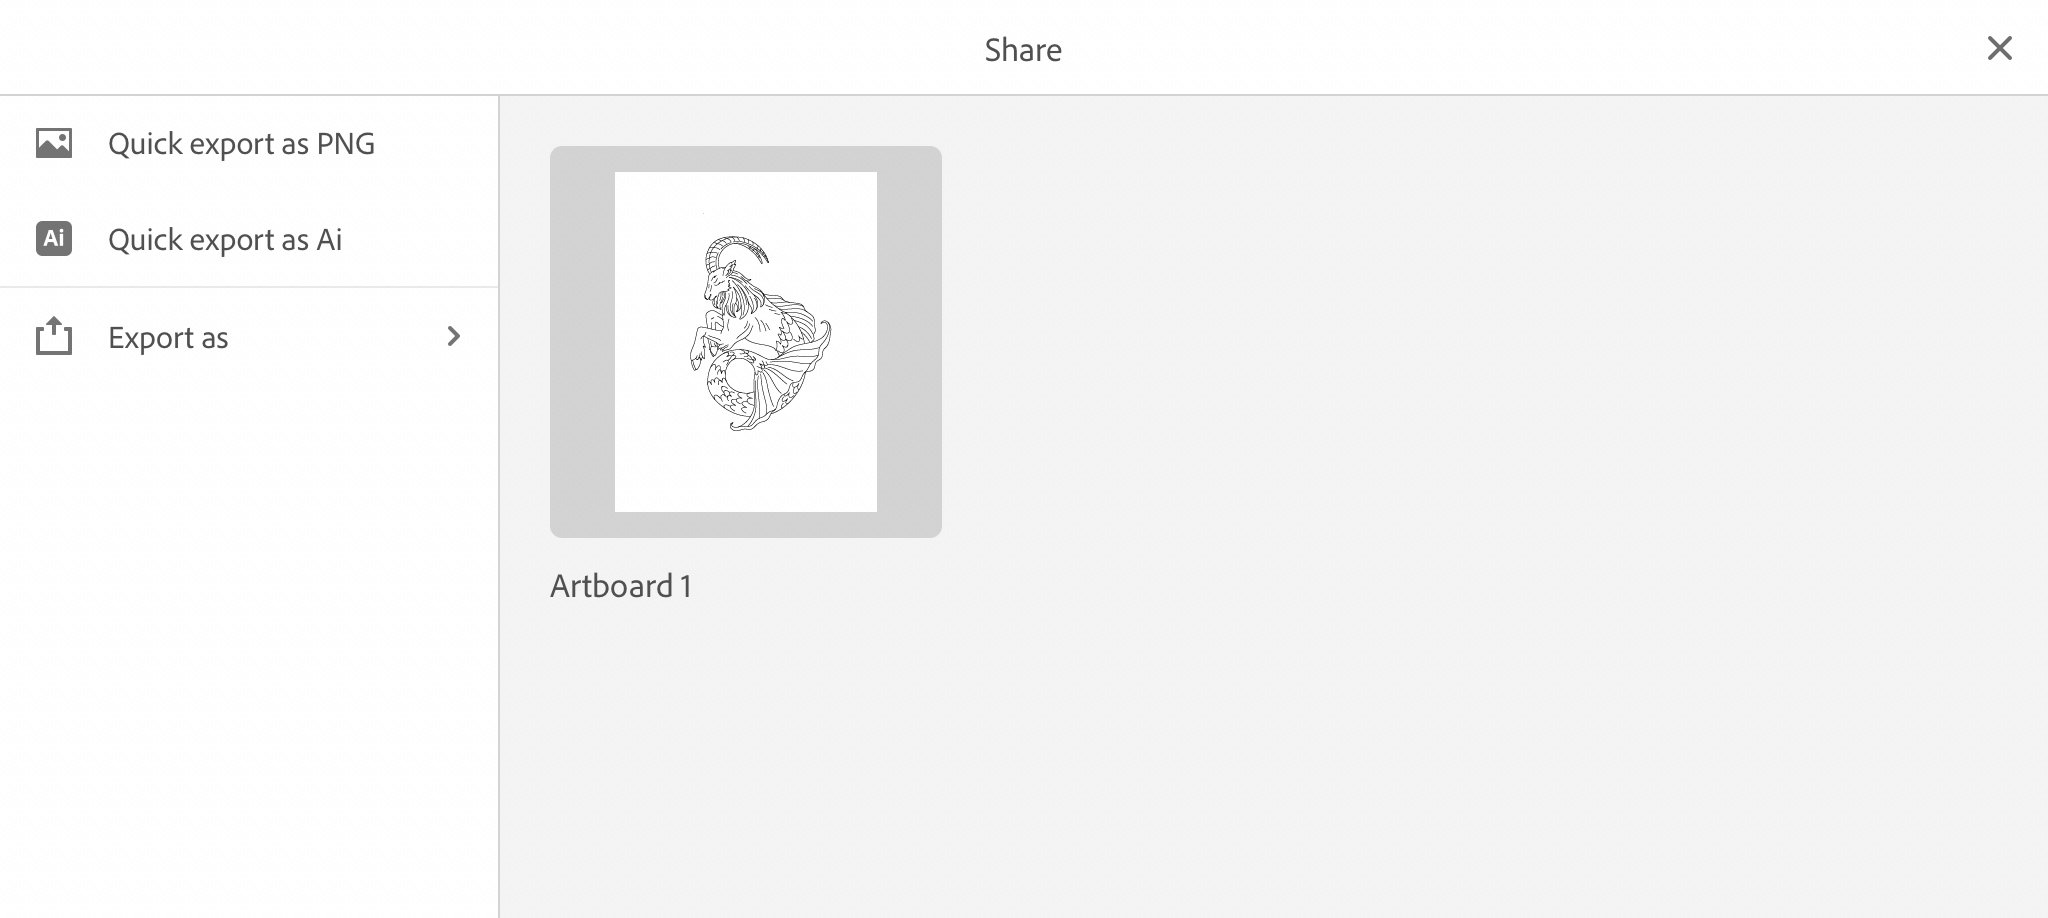
On the left side of the screen, select “Export as.”

Export as SVG Illustrator app

In the drop down next to Format, select SVG and click the blue Export button.

Export as SVG Illustrator app

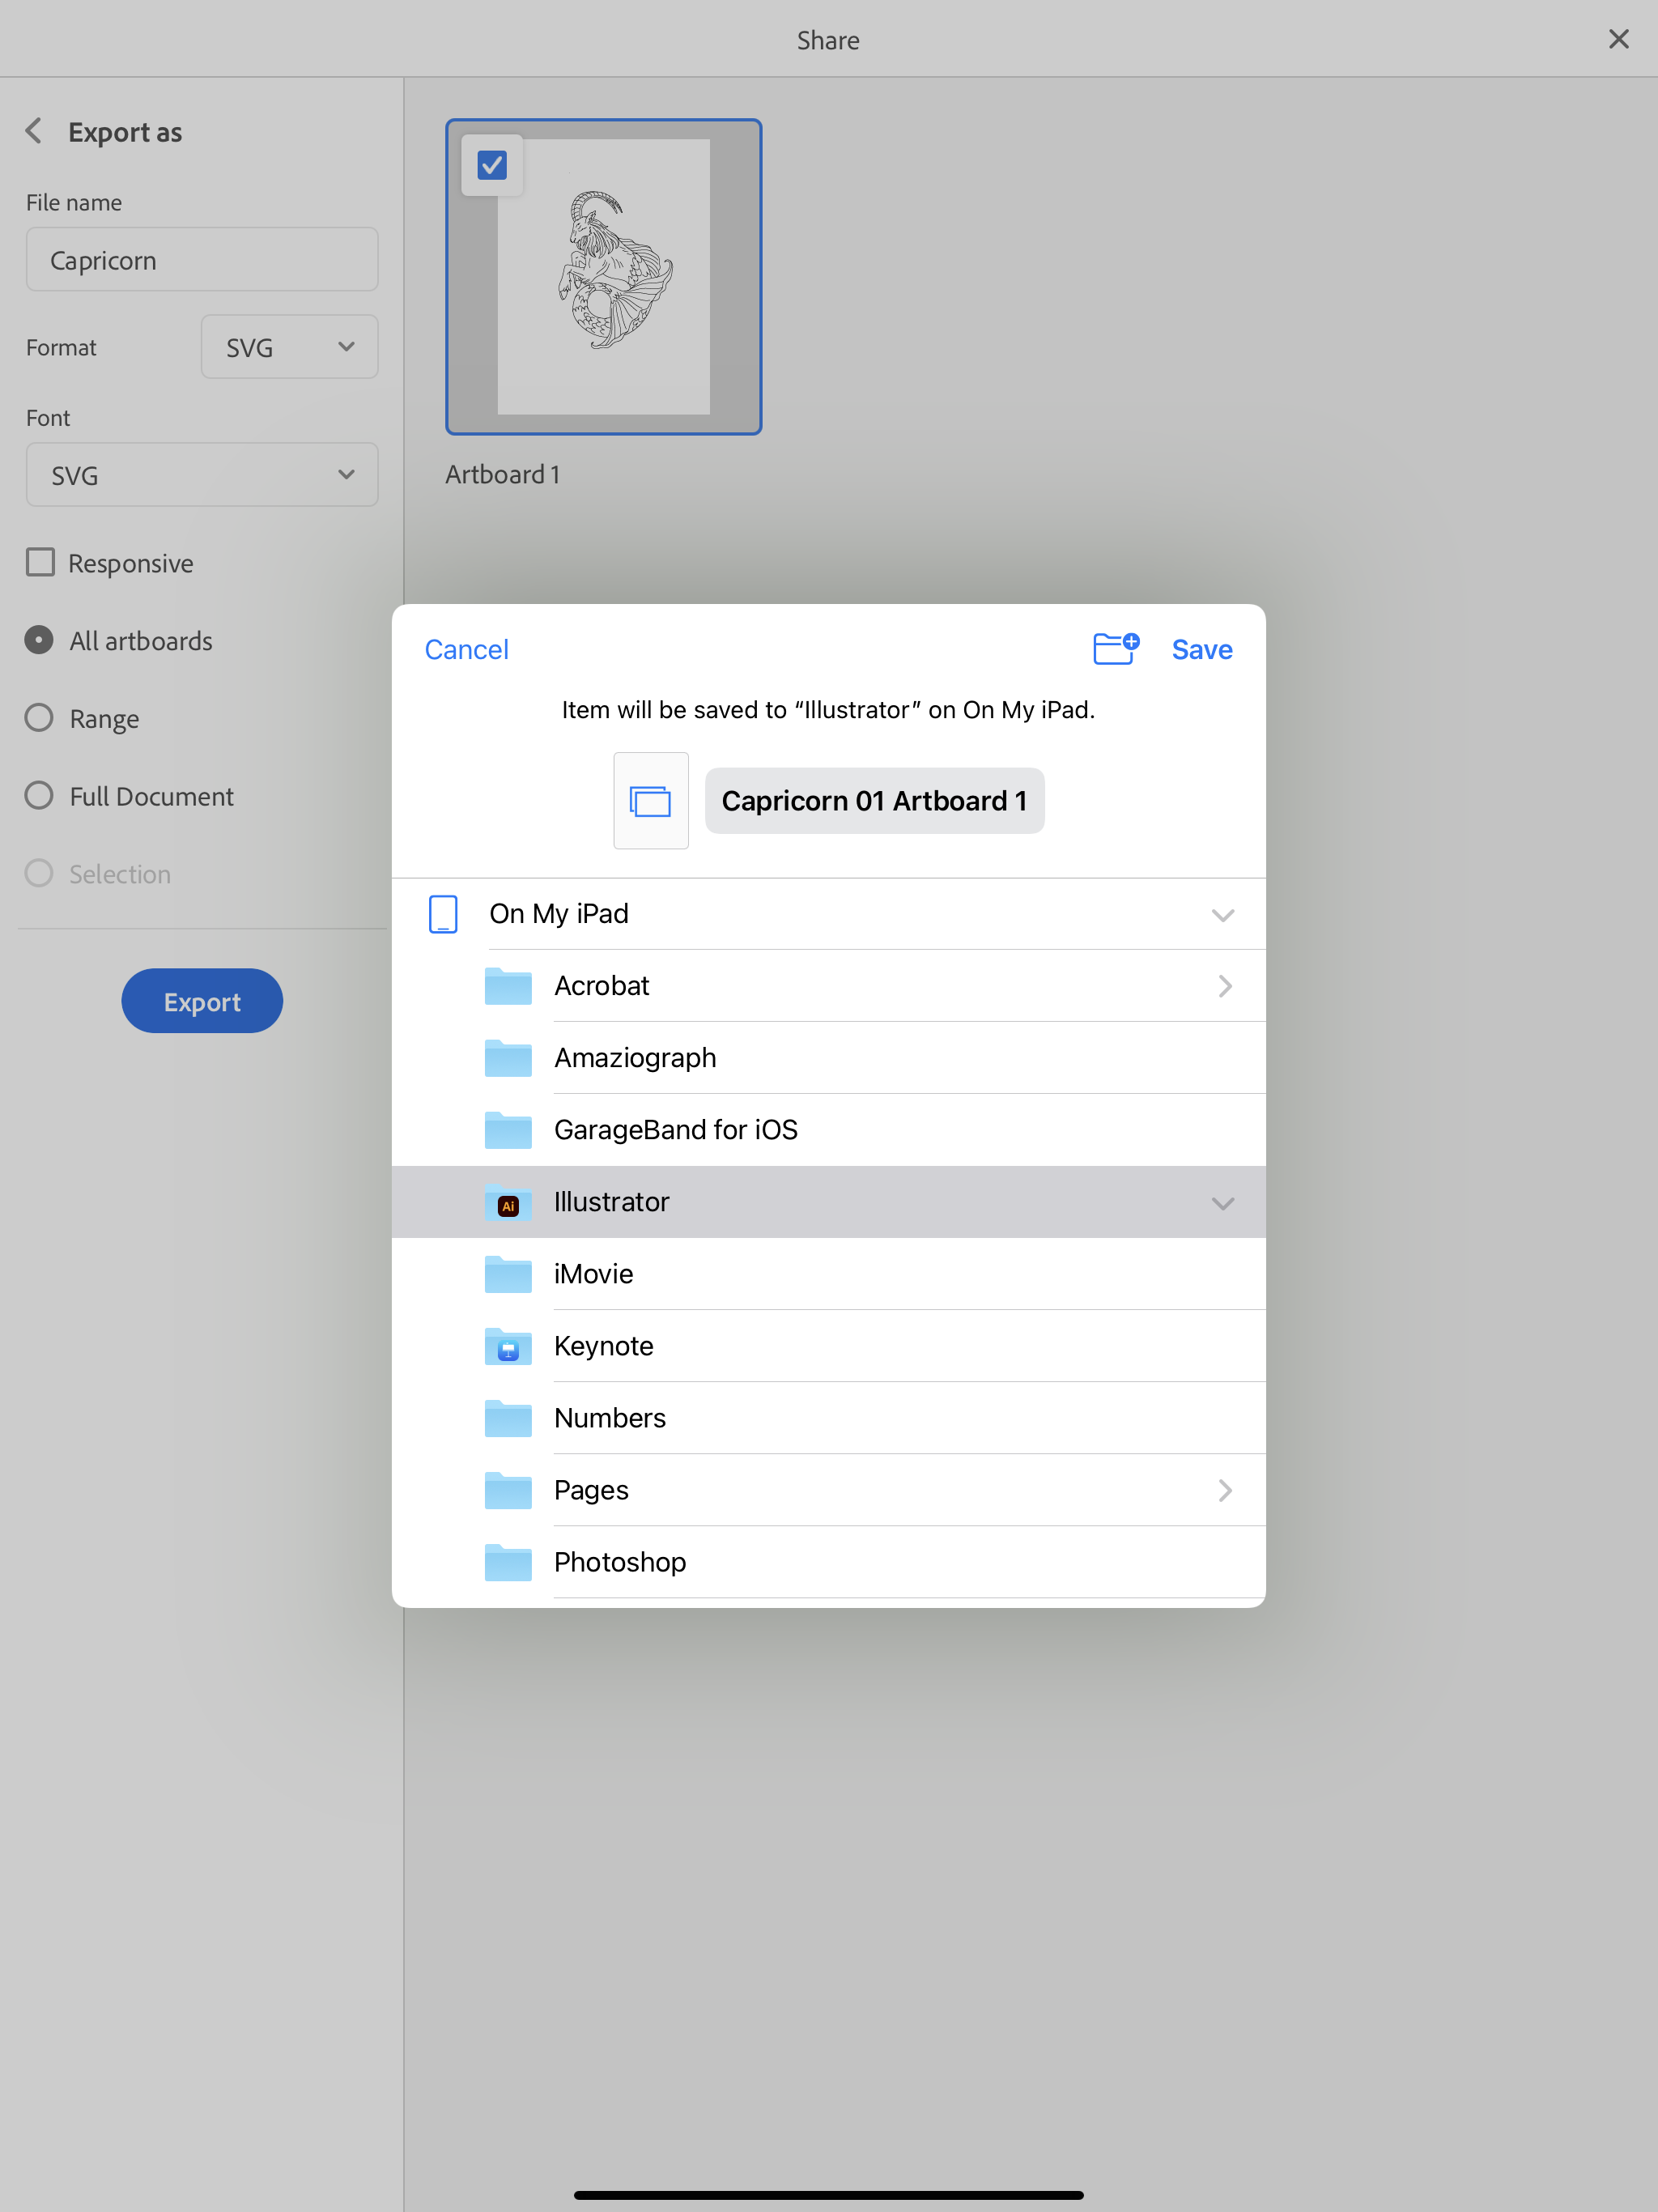
I’m going to select “Save to Files.”

Export as SVG Illustrator app

Then I select the “Illustrator” folder. Next week I will show you how to test this file using the Cricut App on my iPad.

Export as SVG Illustrator app

Creating Your Own Single Line SVG Files - Part One

Hi Everyone!

One of my goals this year is to create more SVG files to add here and my Etsy shop. There are a lot of SVG cut files available out there, but not as many single line or draw files. I thought I would share my process for how I create my single line SVG files.

I start off by trying to come up with an idea for a collection of files, this year I want to do all of the zodiac symbols. Since we’re still in January, I’m going to start off with Capricorn, which is often depicted as a sea goat.

I love using Pinterest to gather inspiration and I created a board where I’m collecting images of all the different zodiac symbols. I’ll keep adding to this board as I work my way through all the zodiac signs.

After I’ve gathered a few images I go through them and I start to pick out what parts I like from each image.

I really like how the fish tails loop around on these.

I think I want a profile view for the head.

Next, I’m going to start creating a rough sketch on my iPad Pro in one of my favorite apps, Procreate. If you don’t have an iPad, you can also do your sketch the good old fashioned way with pencil and paper.

I would like for these to fit on a round shape like a key ring or coaster, so I’m going to start out. with a circle shape and keep my design within that shape.

I like to sketch with the Peppermint Pencil, it’s one of the brushes that comes with Procreate. It’s almost like sketching with a real pencil!

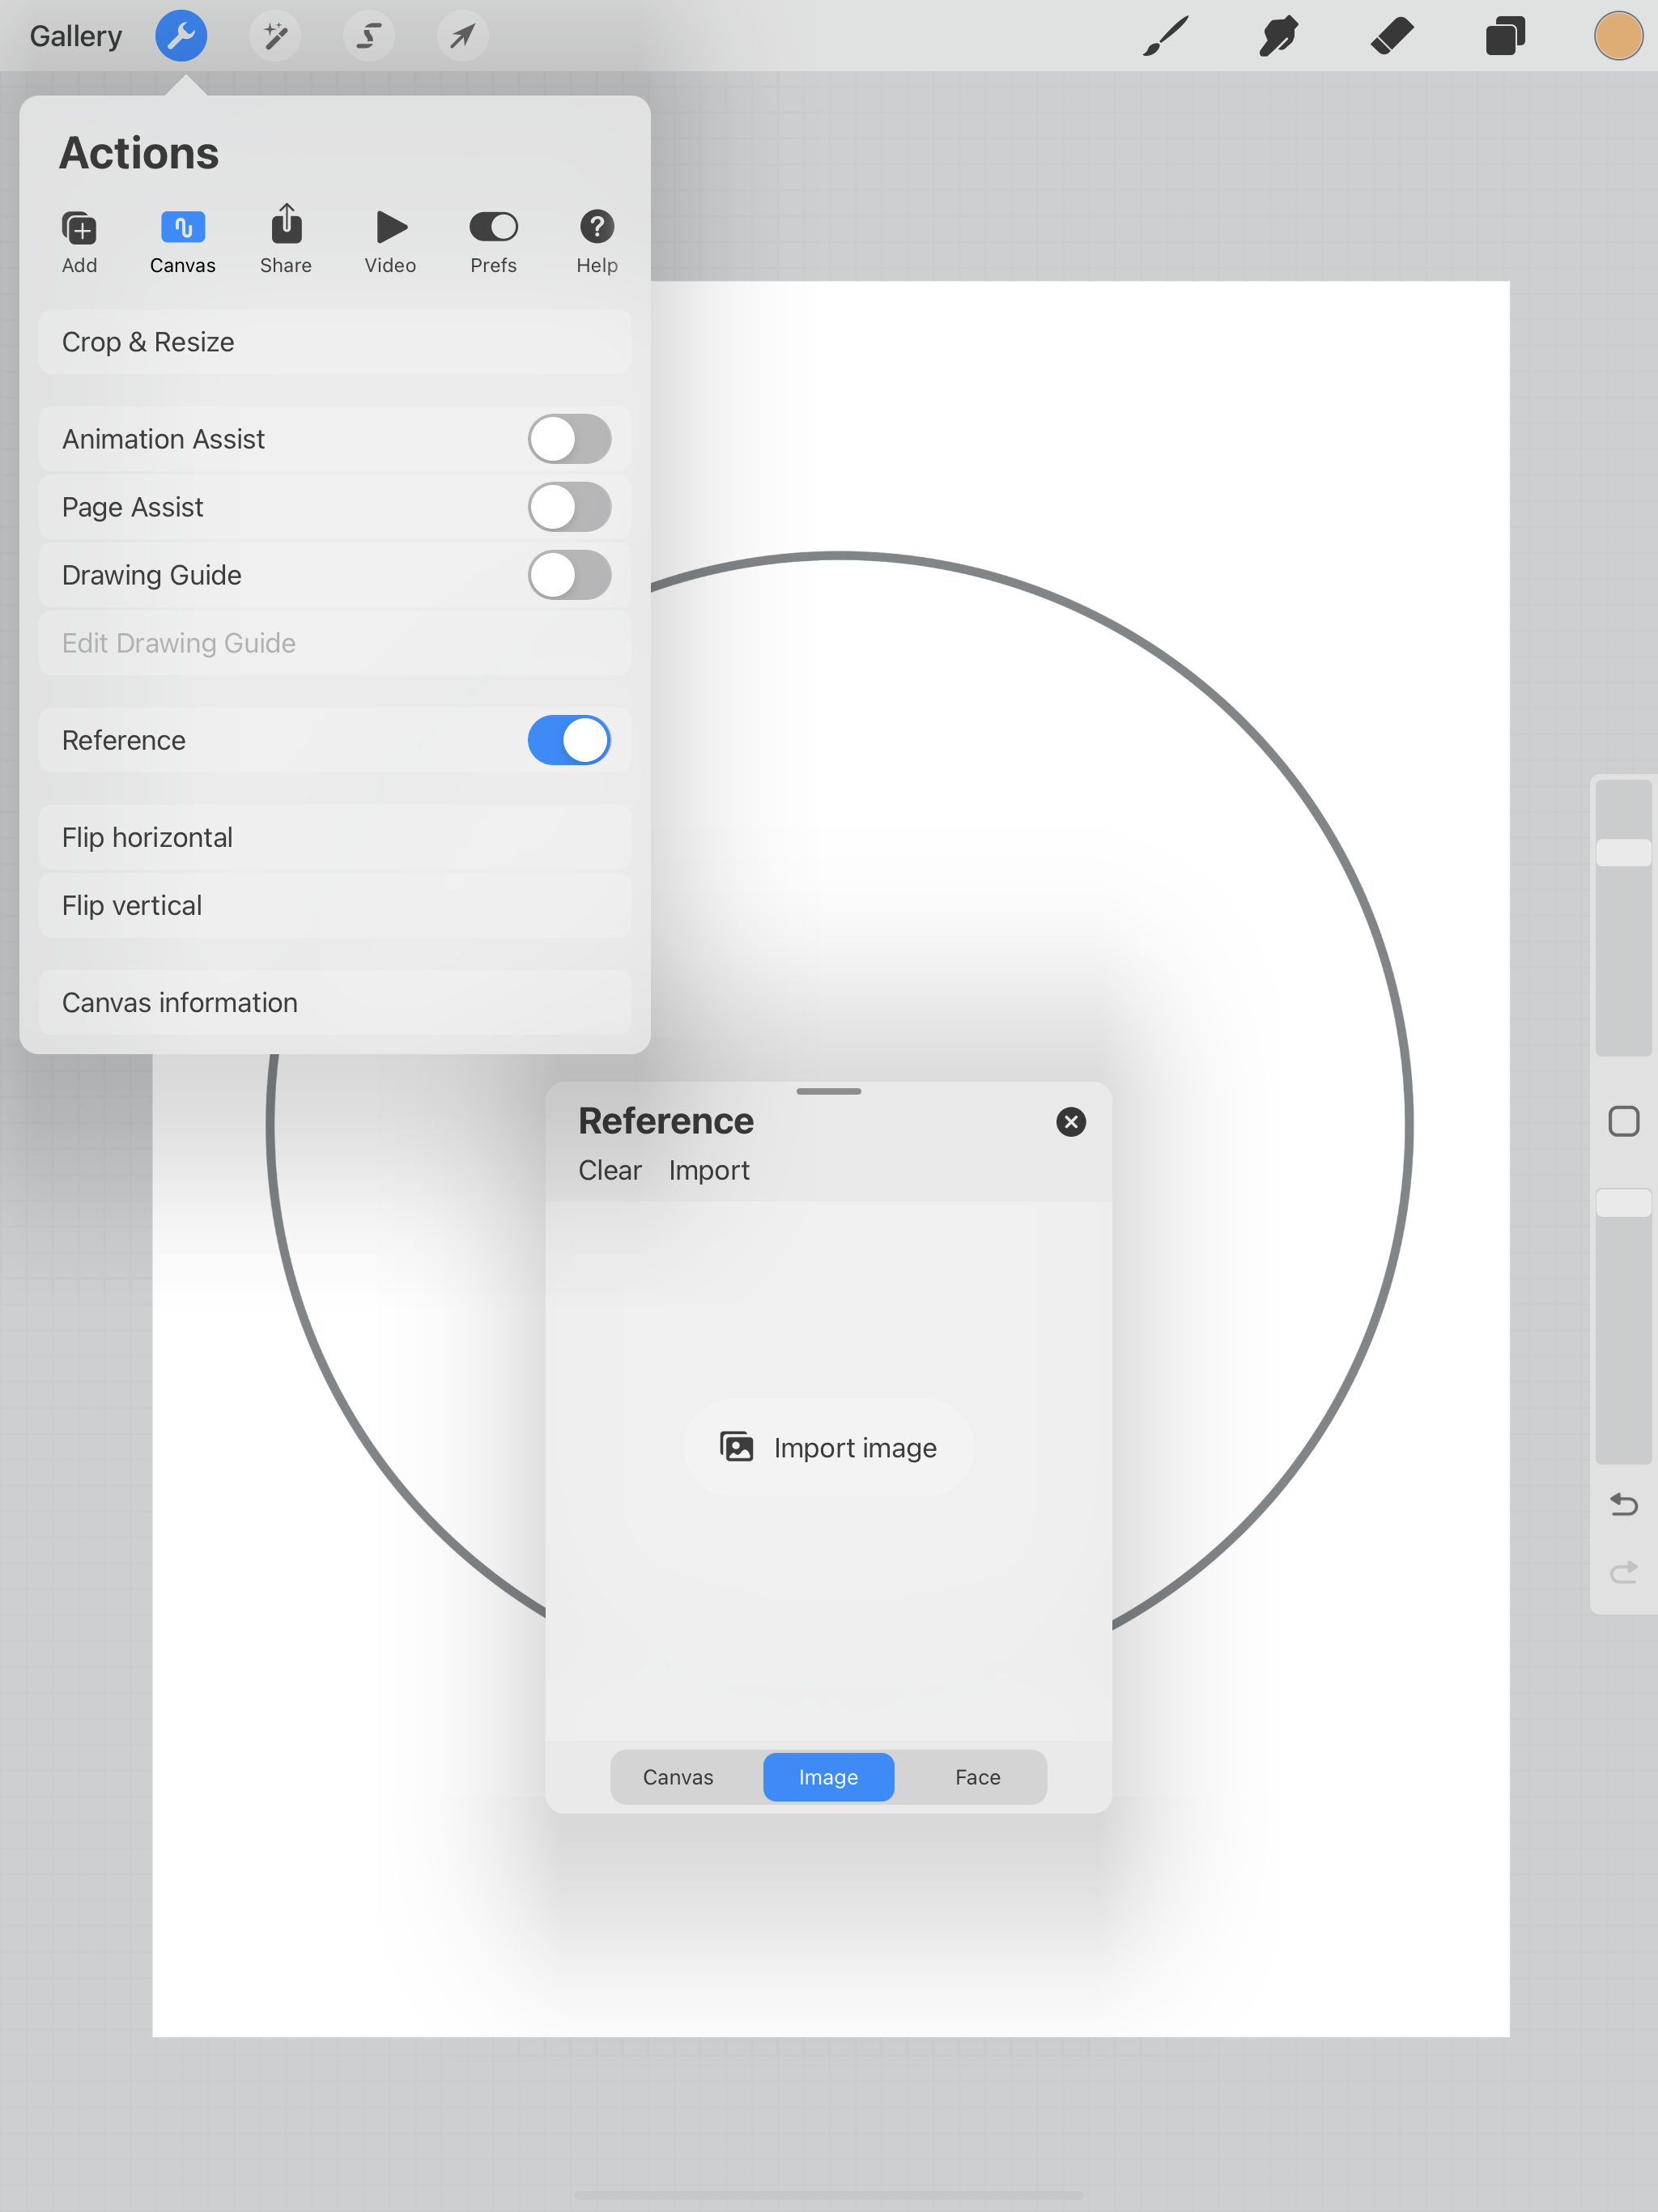
Another great thing about Procreate is you can have your reference image in a separate little window inside Procreate.

Creating a sketch in Procreate

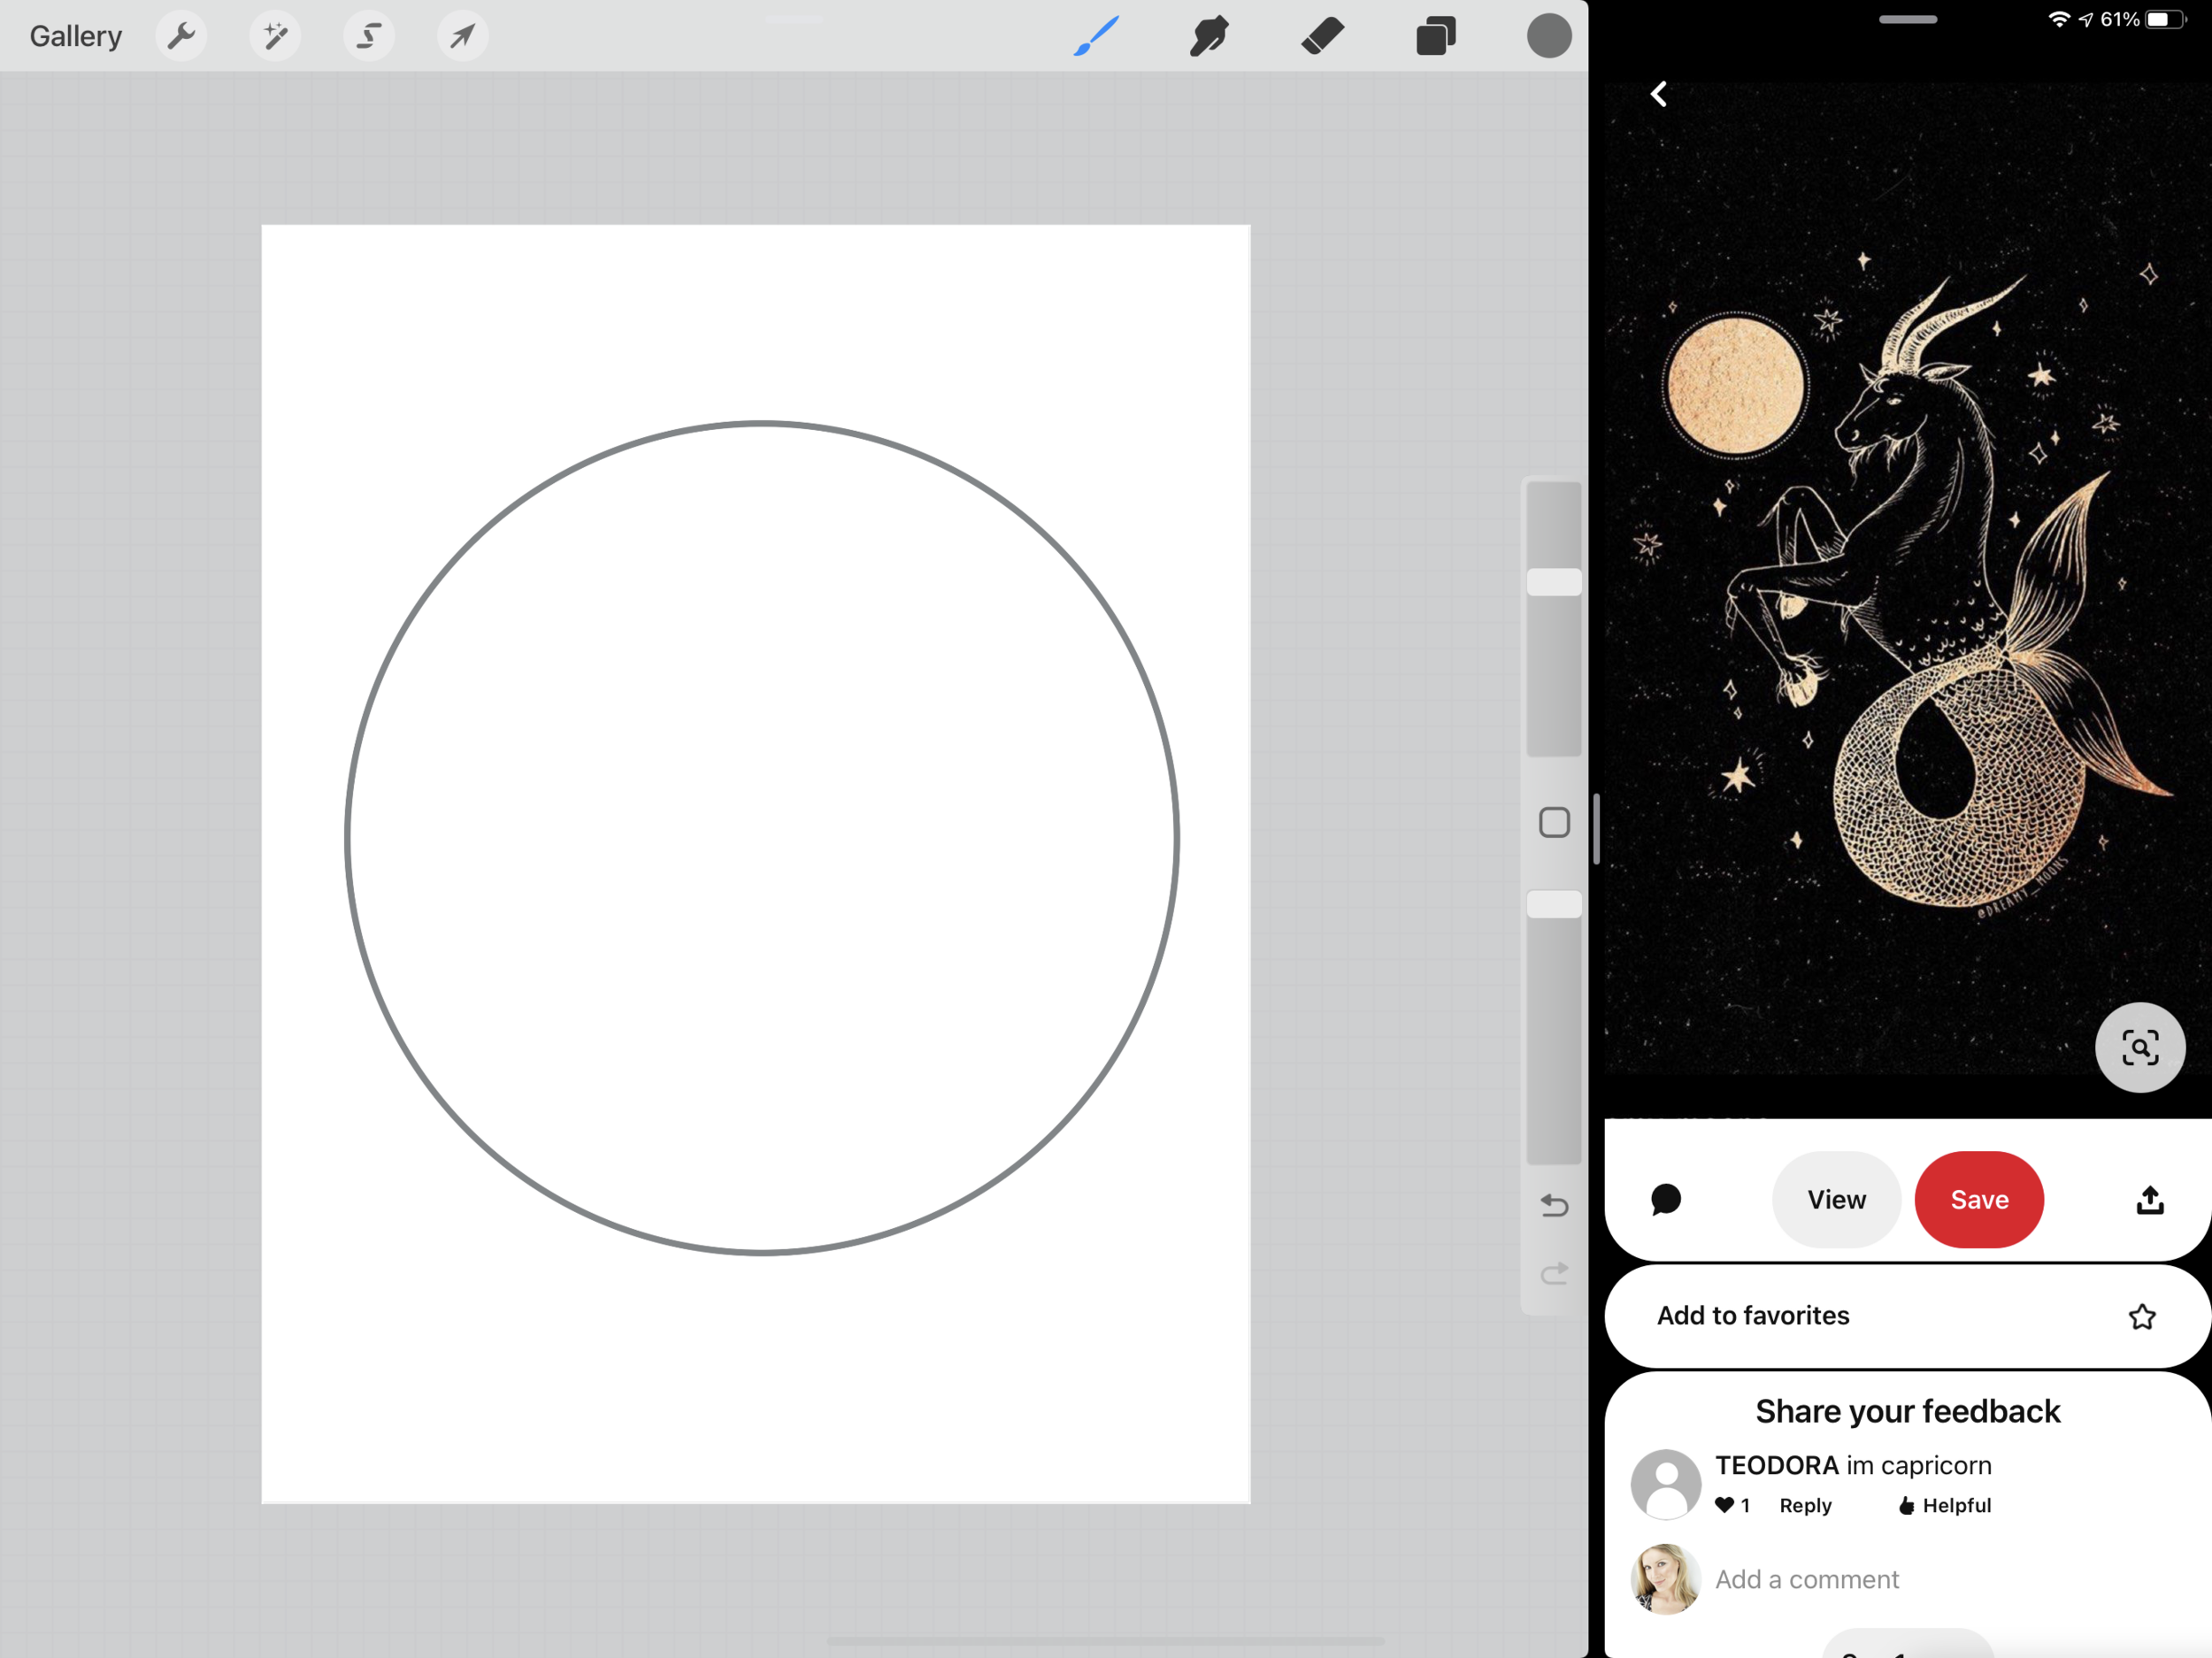
Or you can do a split screen with Procreate and Pinterest.

Procreate Split Screen

I’m going to work with my reference image in a window in Procreate. So I take some screenshots of my Pinterest images that I will be referencing.

After I work out my sketch, I can either take a screenshot, save it as a JPEG or PNG file to bring into the Illustrator app.

Exporting from Procreate

If you made your sketch on regular paper, you will need to scan you image so you can bring it into Illustrator or another vector program of your choice.

Next week I will share with you how I turn my sketch into vector line art in the Illustrator App on my iPad.

Capricorn sketch Procreate

Low Poly Heart Box

Hi Everyone,

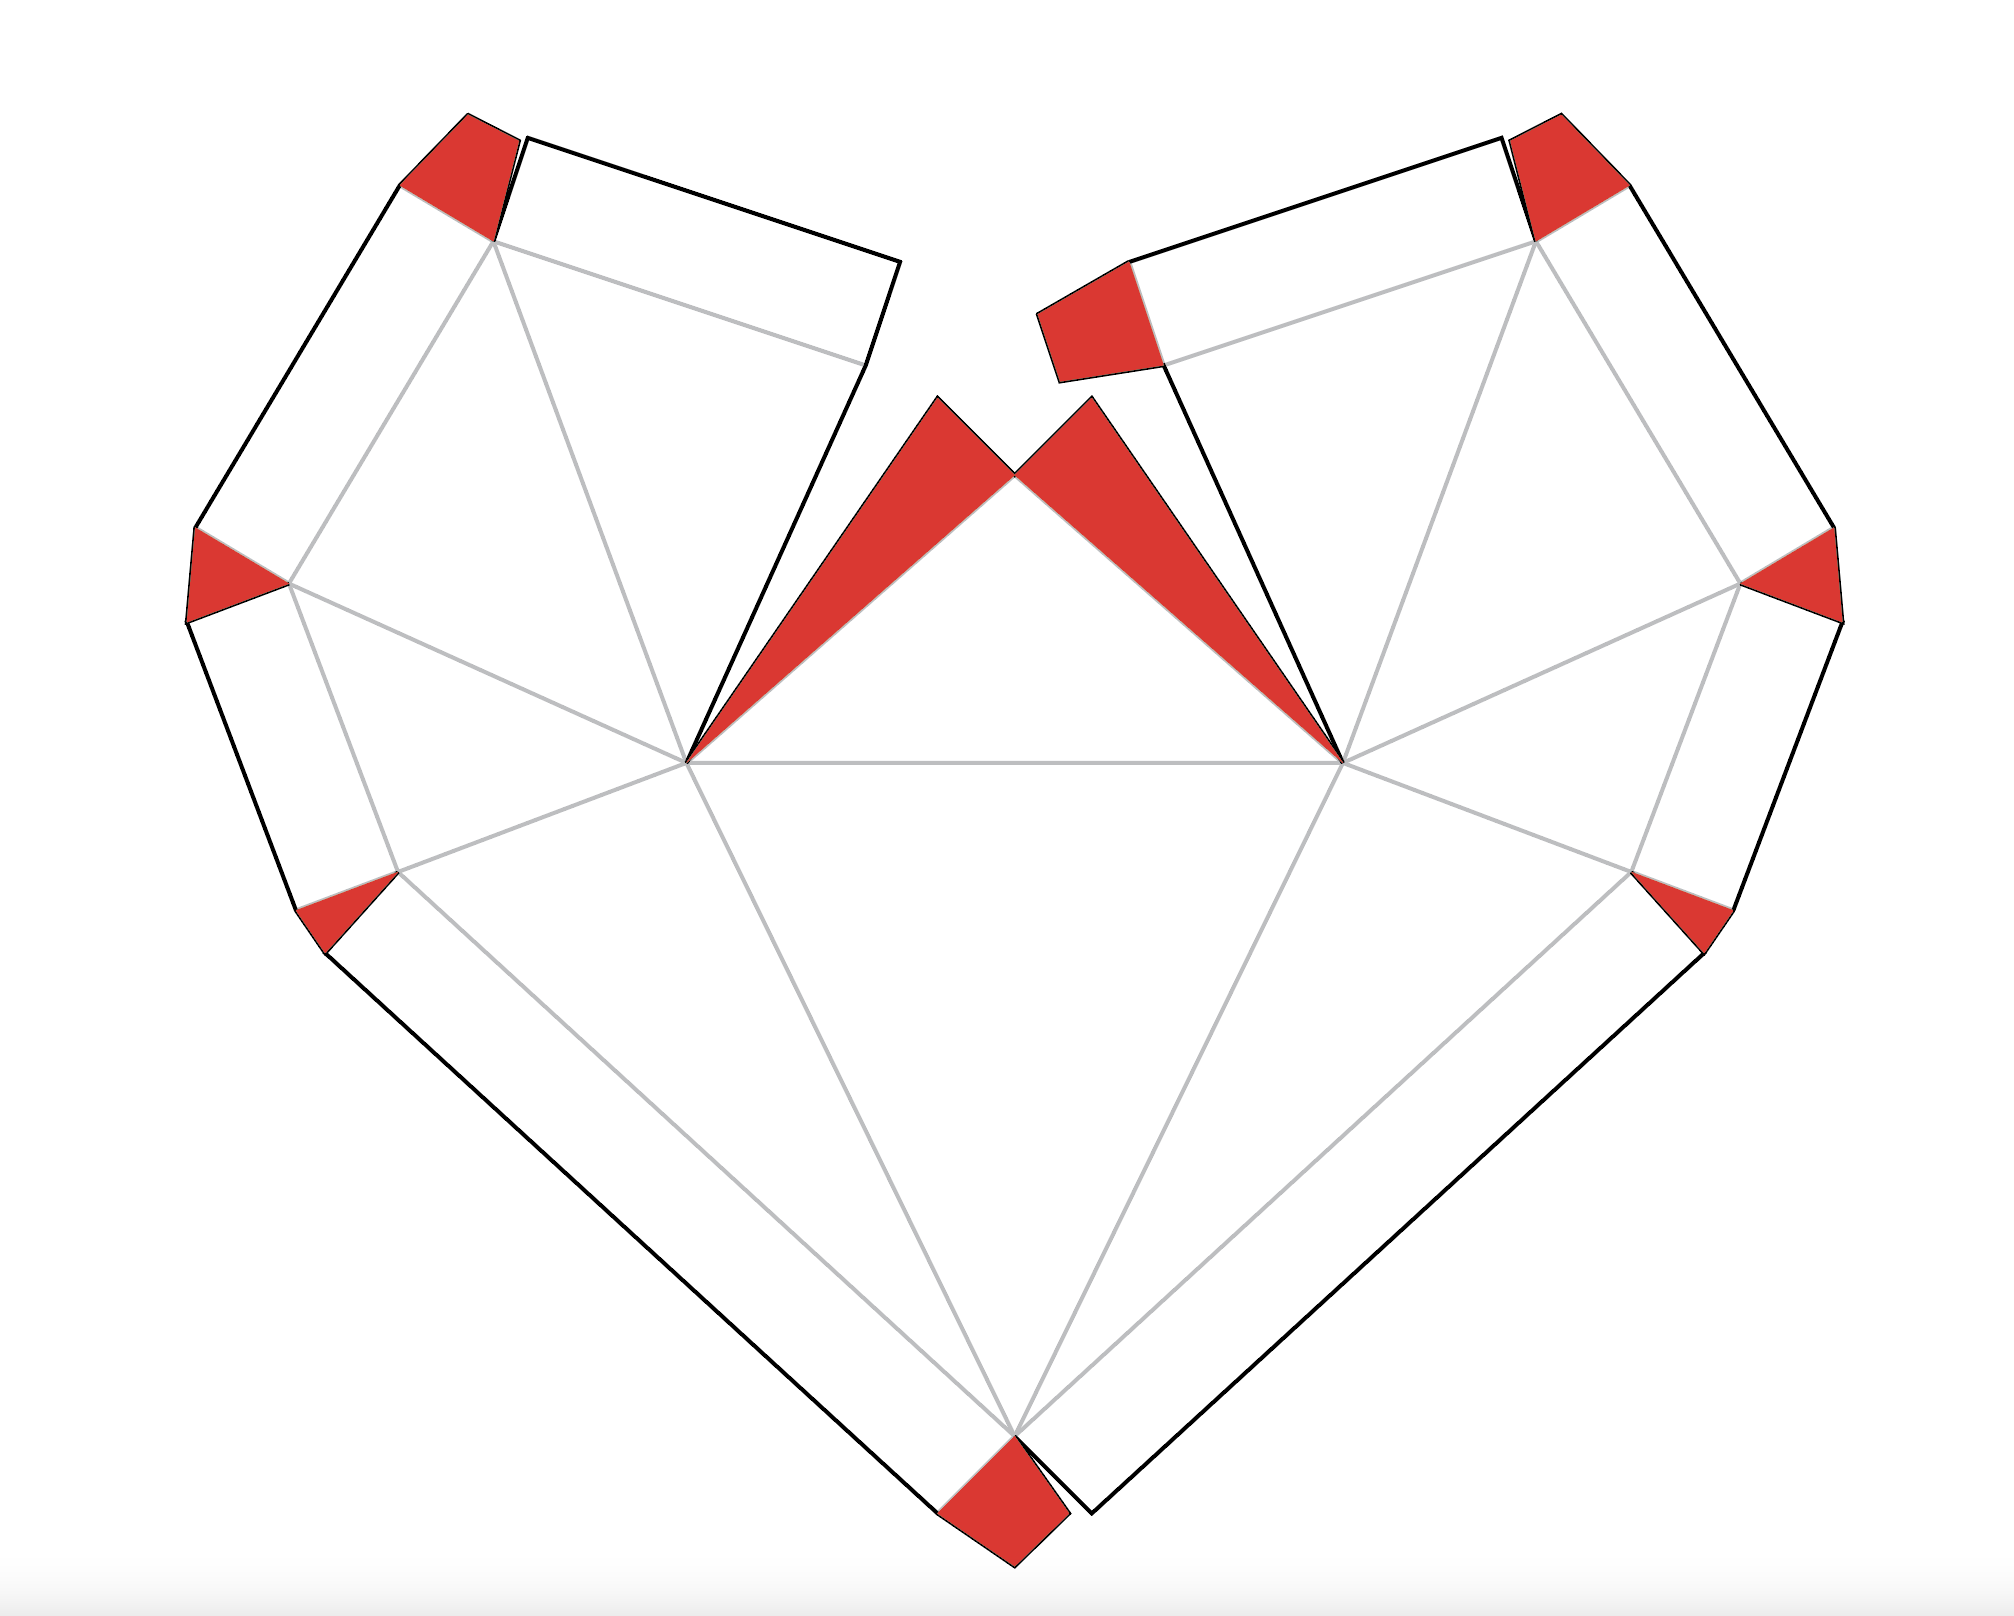
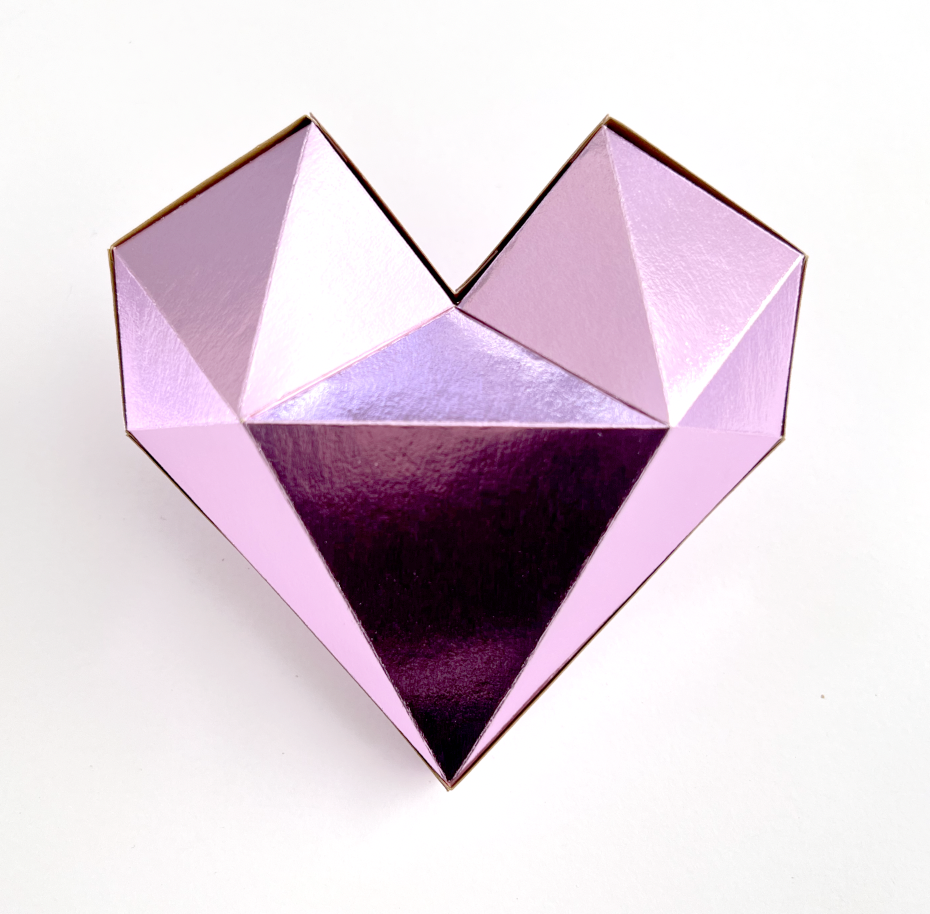
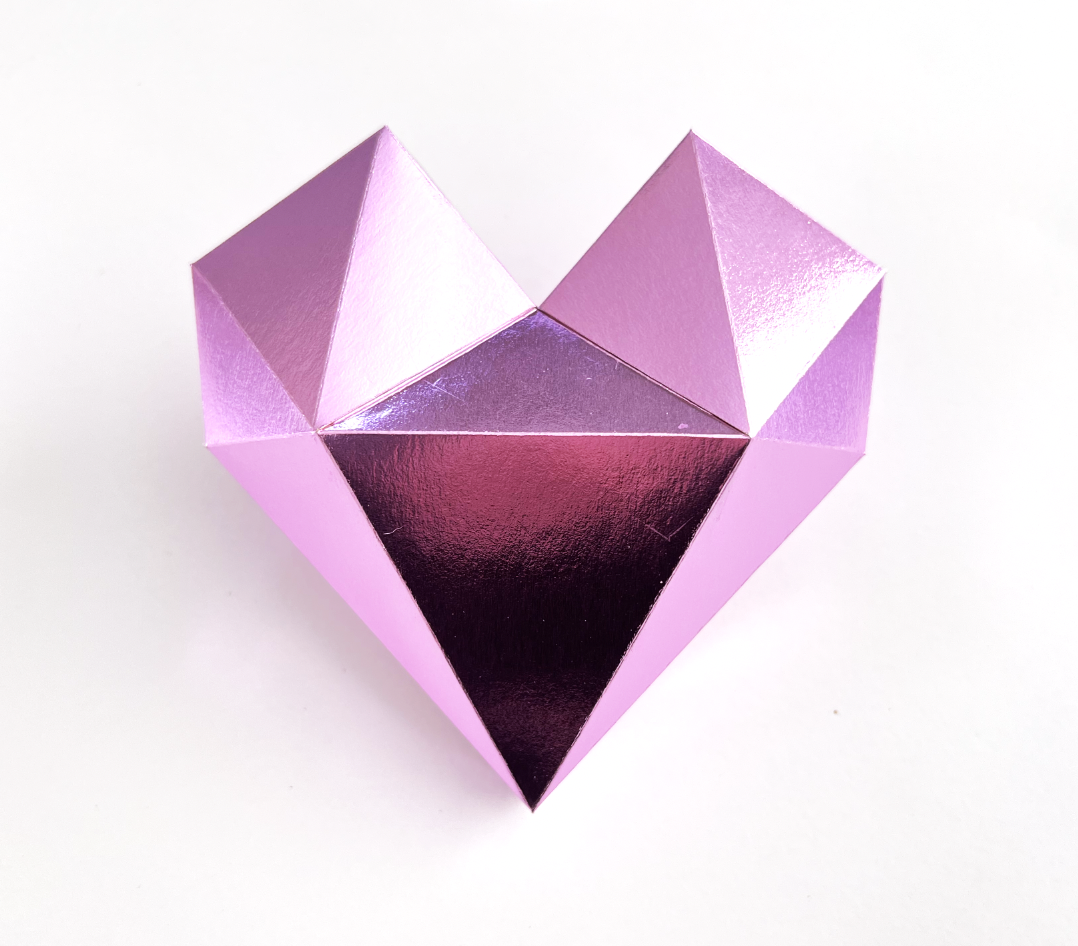
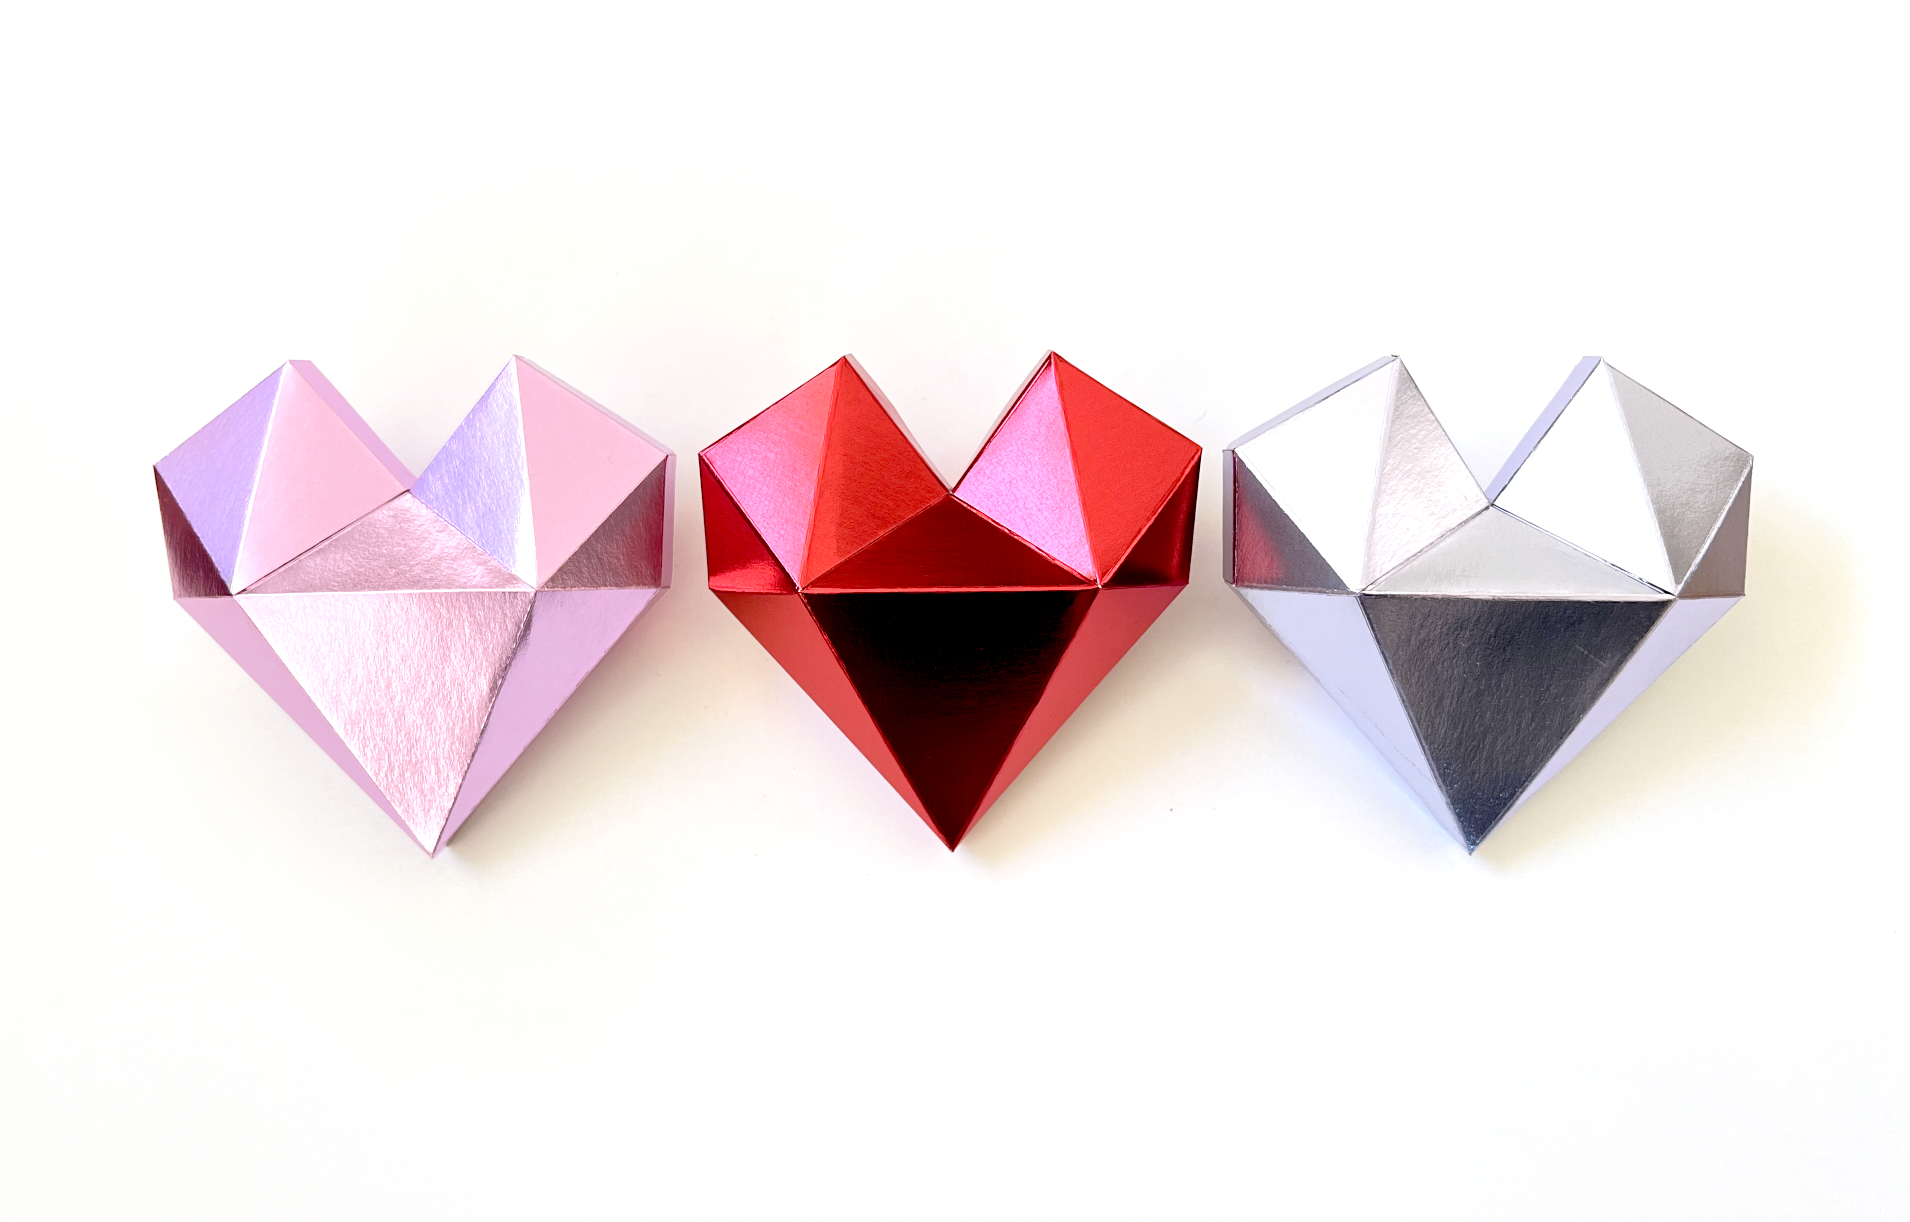
This week I’m working on some Valentine’s Day designs. I’ve been testing a pattern for a heart box on my Silhouette and Cricut machines so I can post here and in my Etsy shop. Here are the project details for making this on a Cricut Maker if you want to try it out for yourself!

Supplies:

(some links below may be affiliate links)

My Heart Box Pattern SVG

Cricut Machine (I will be using my Maker)

Light Grip mat (the blue one)

8.5” x 11” Foil Cardstock (or whatever cardstock you prefer)

Scoring Wheel or Scoring Stylus

Fine Point Blade

Tape runner or glue pen

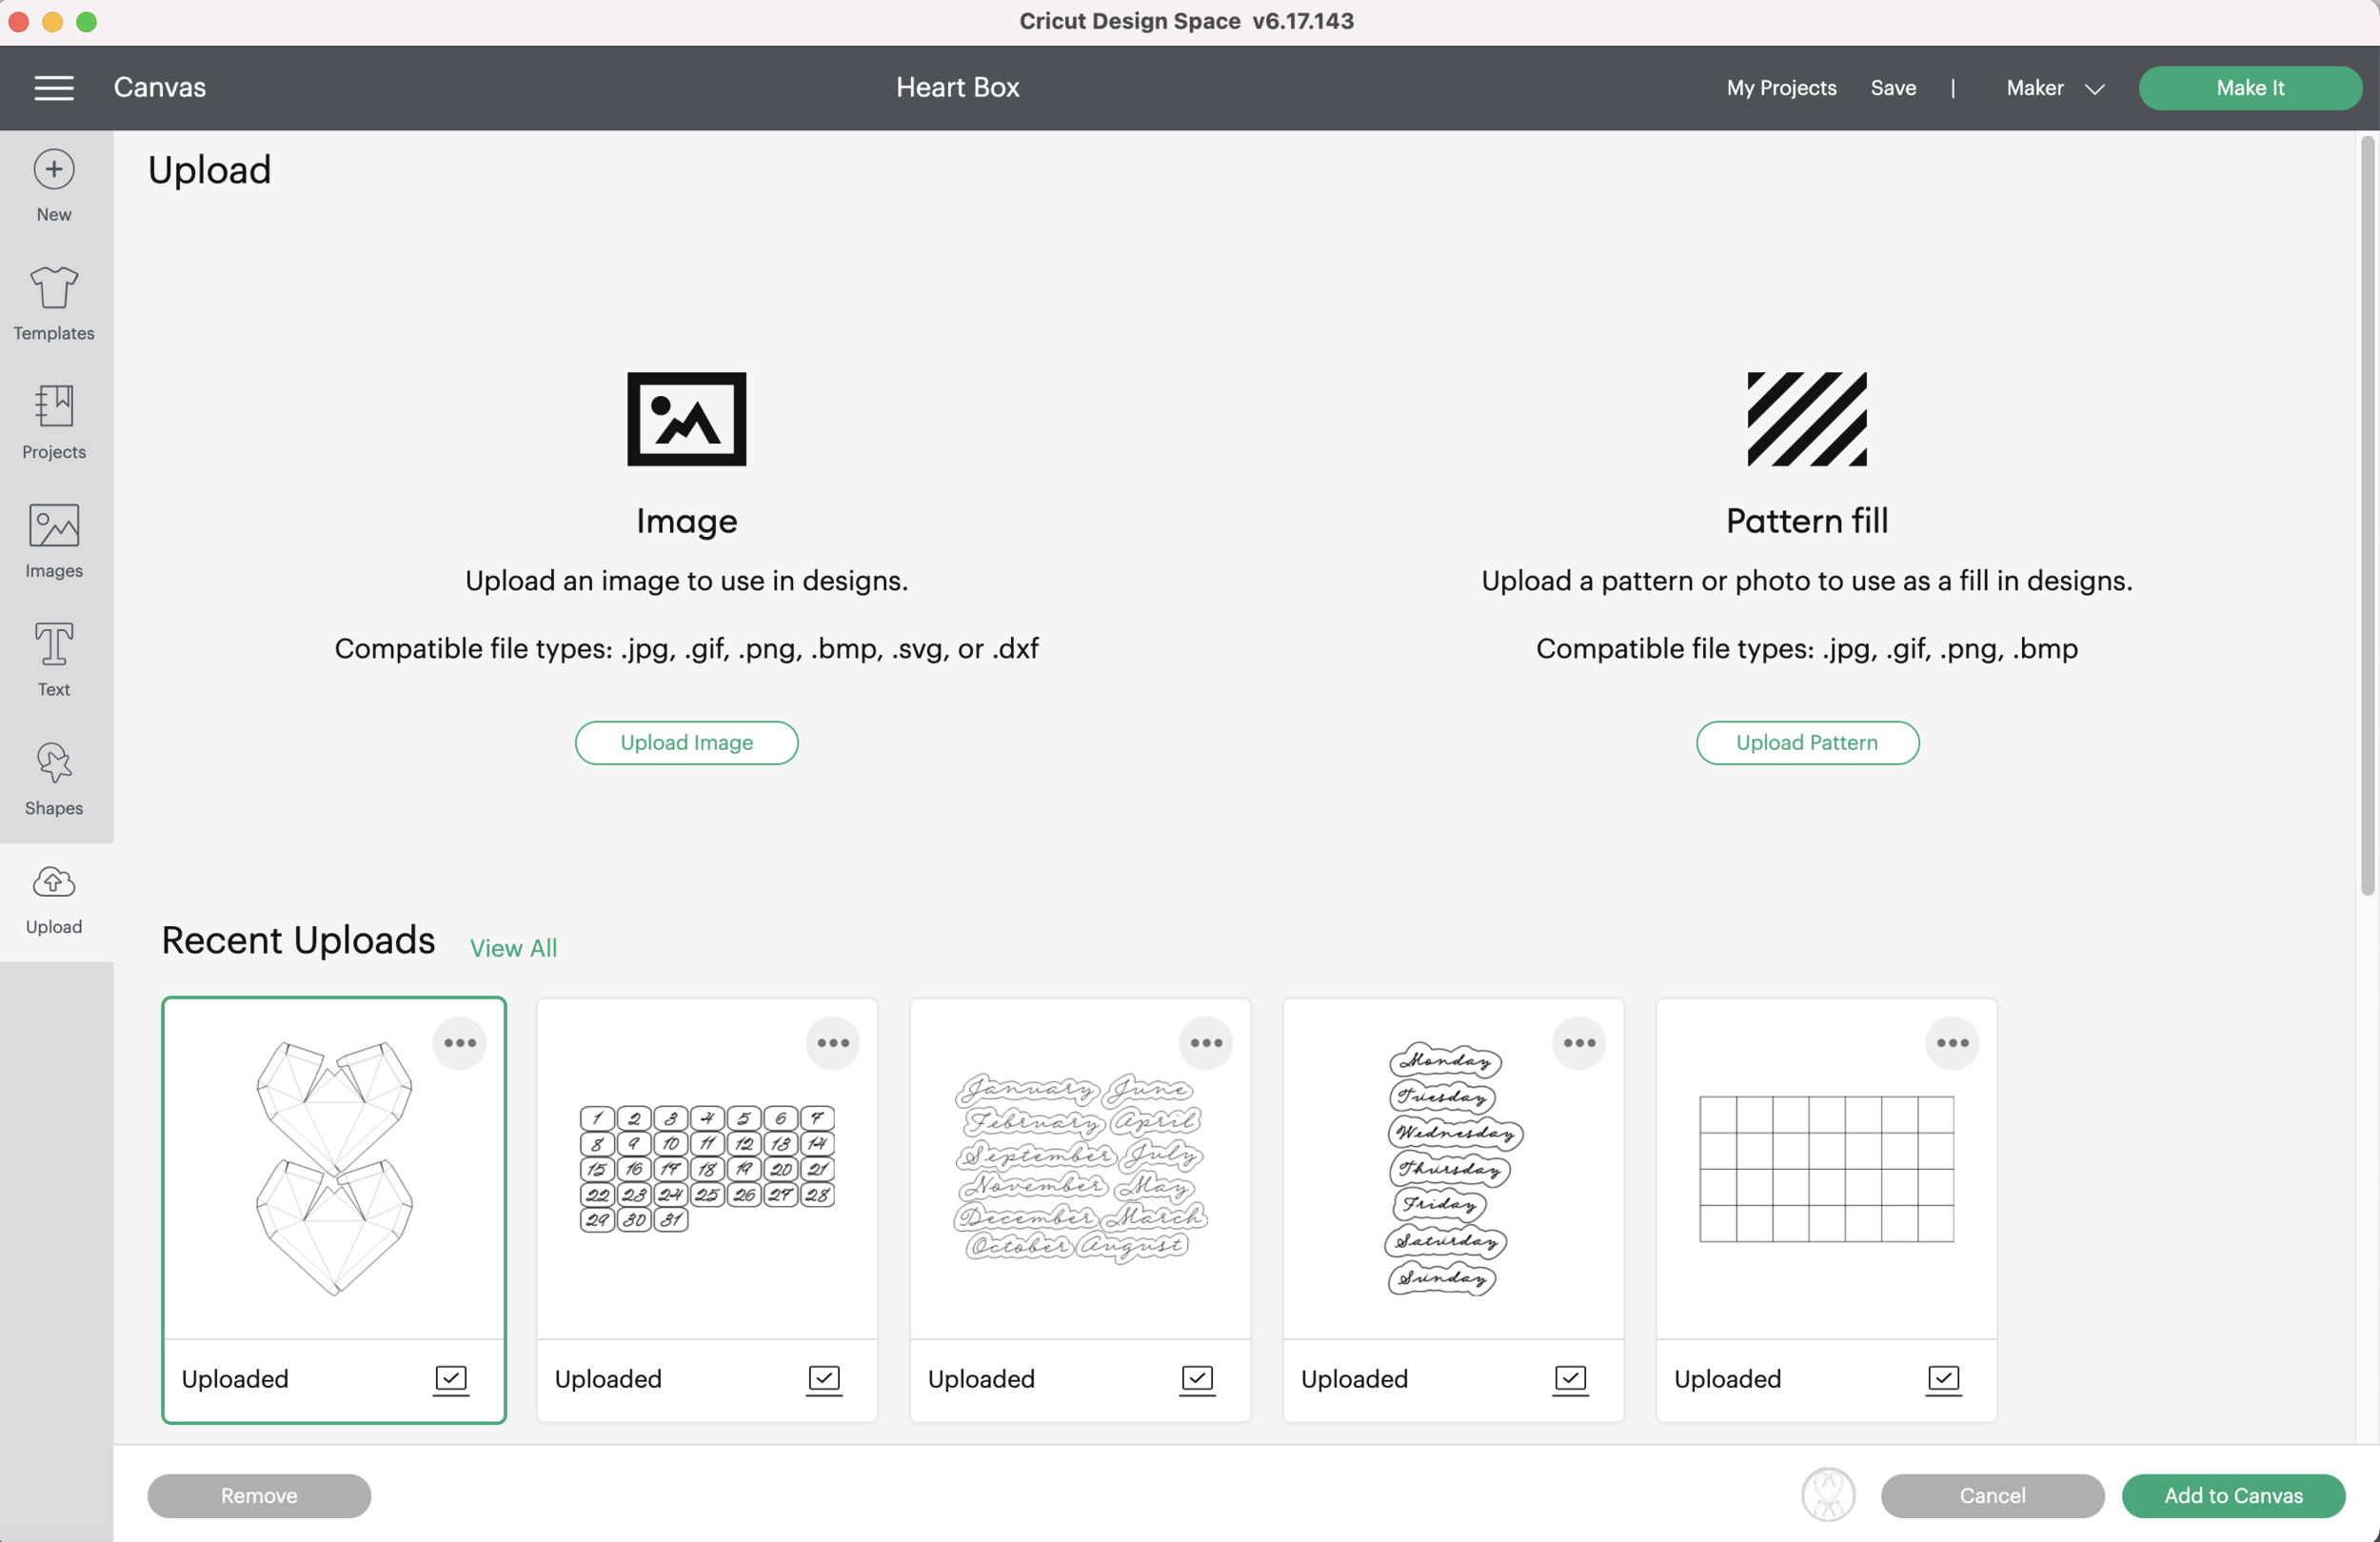
Upload to SVG into Cricut Design Space and insert it onto a blank canvas.

Low Poly Heart Box

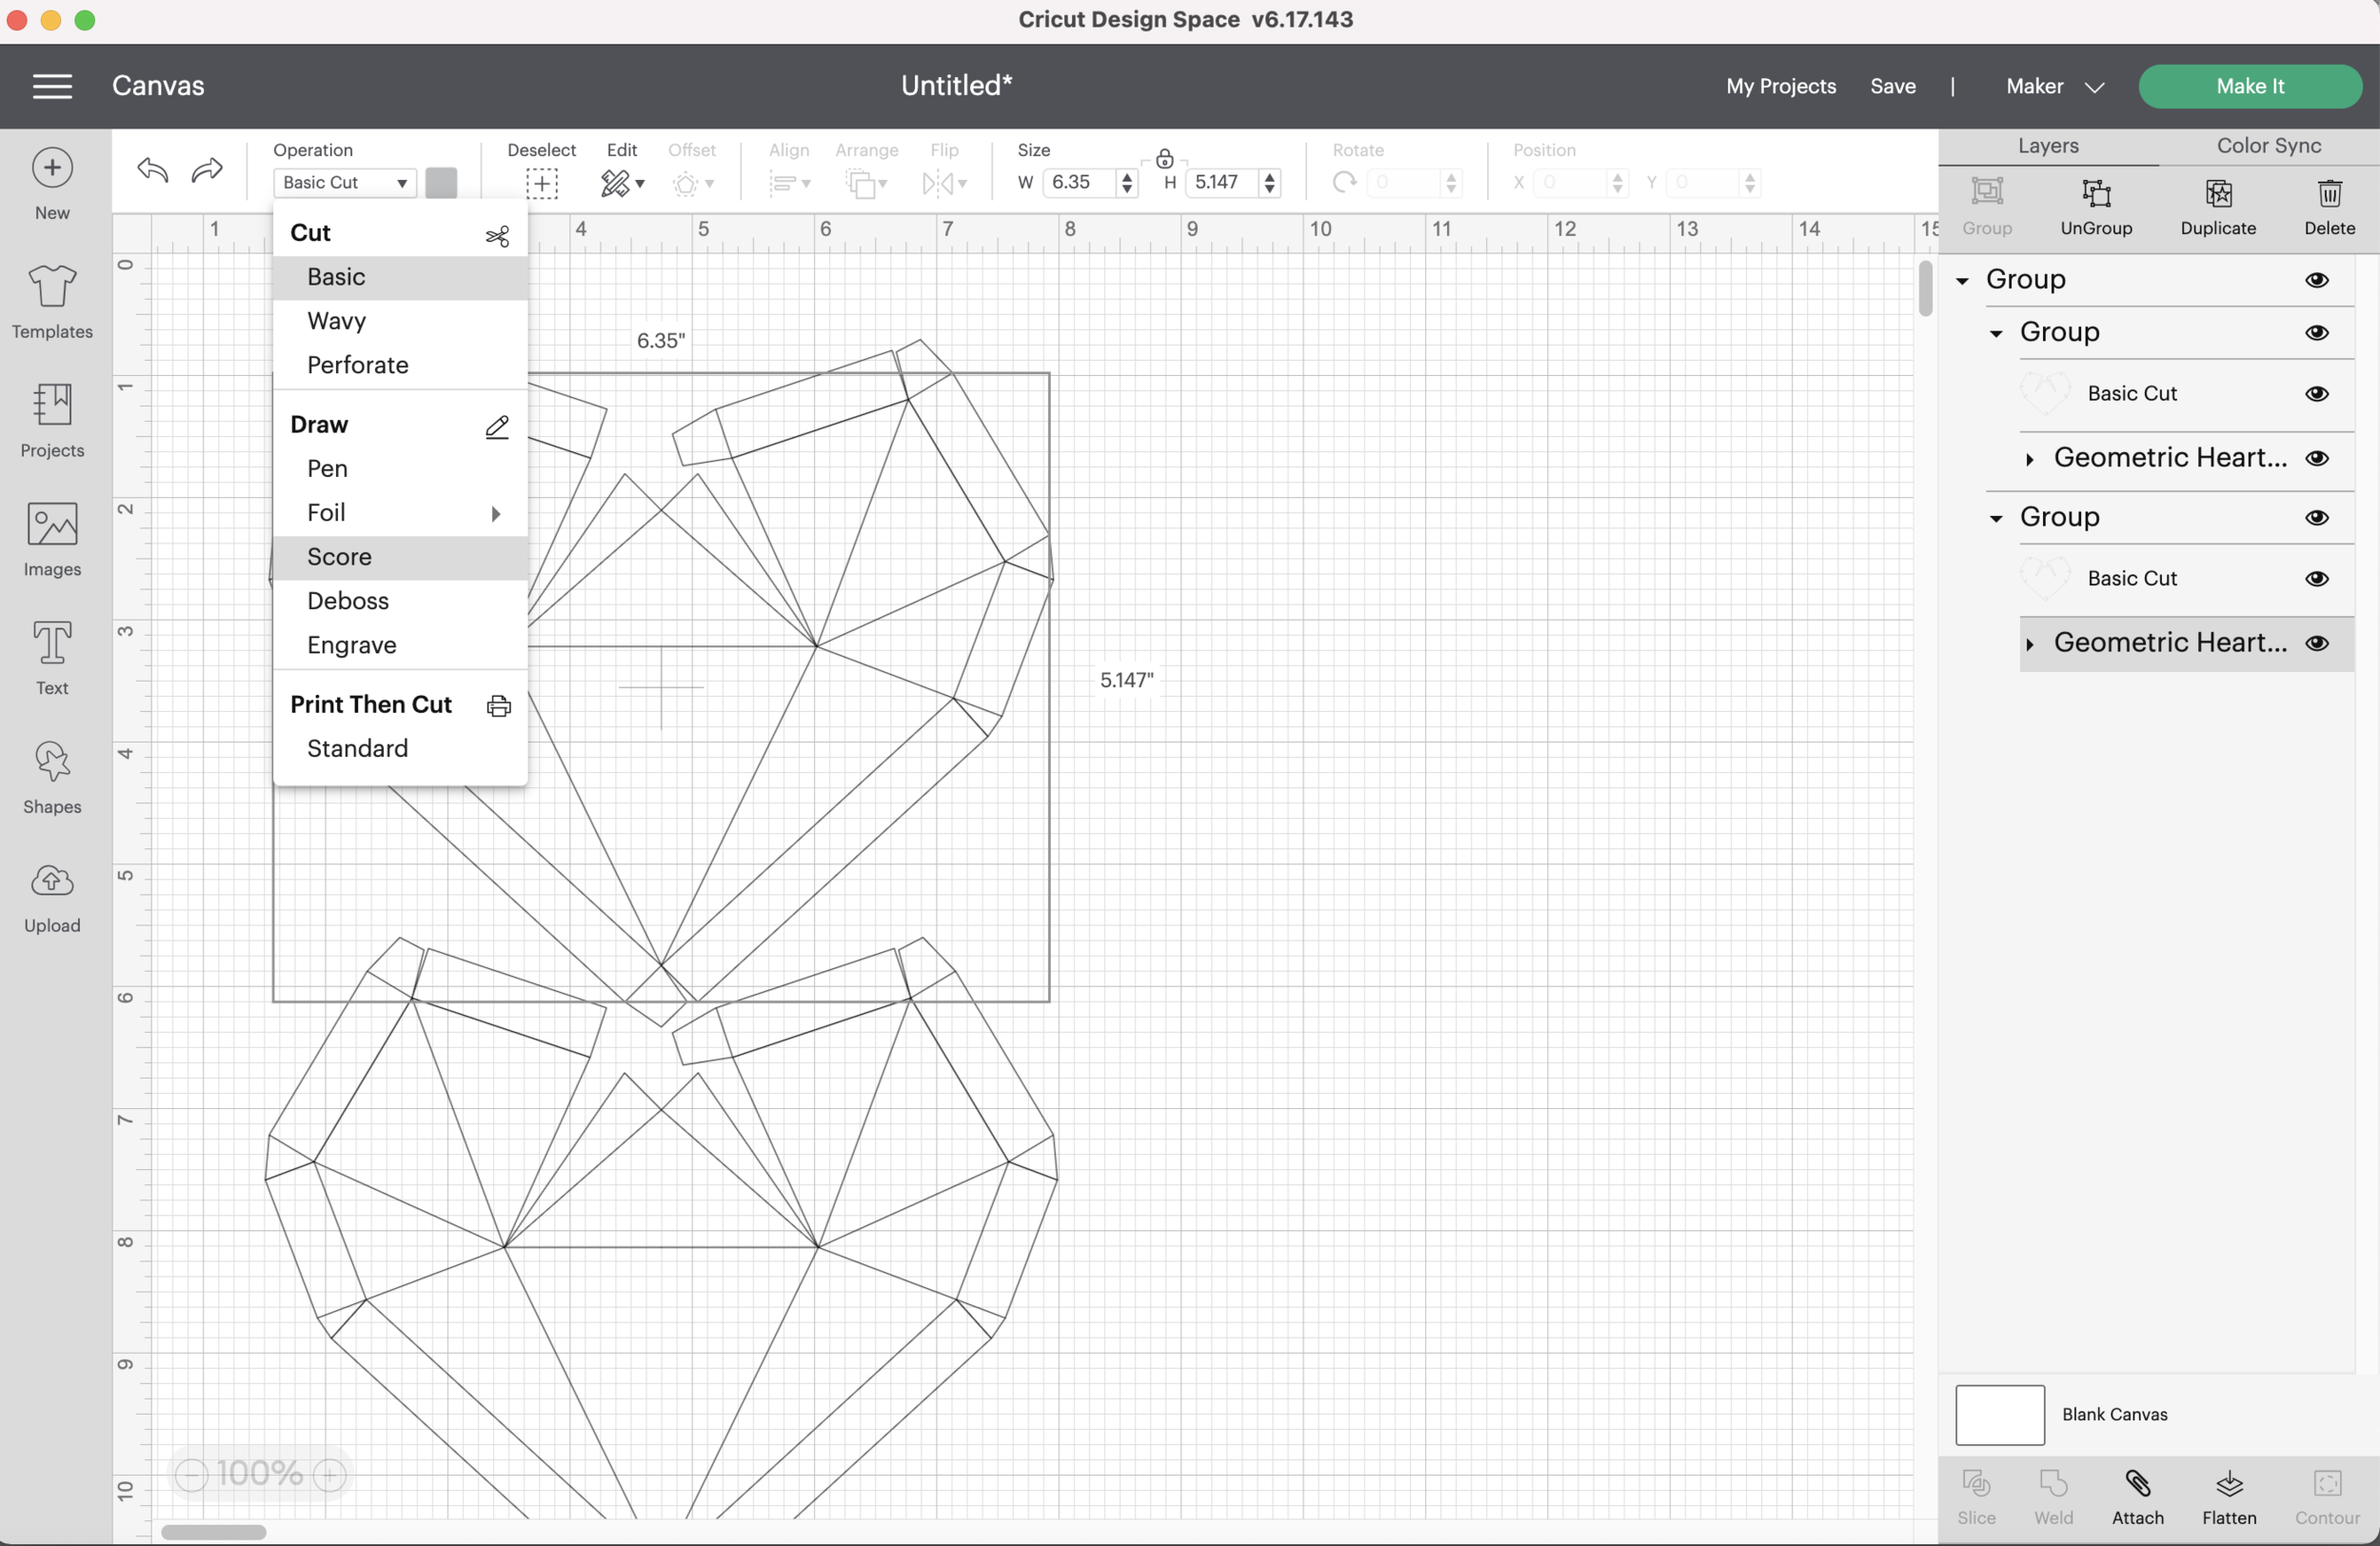
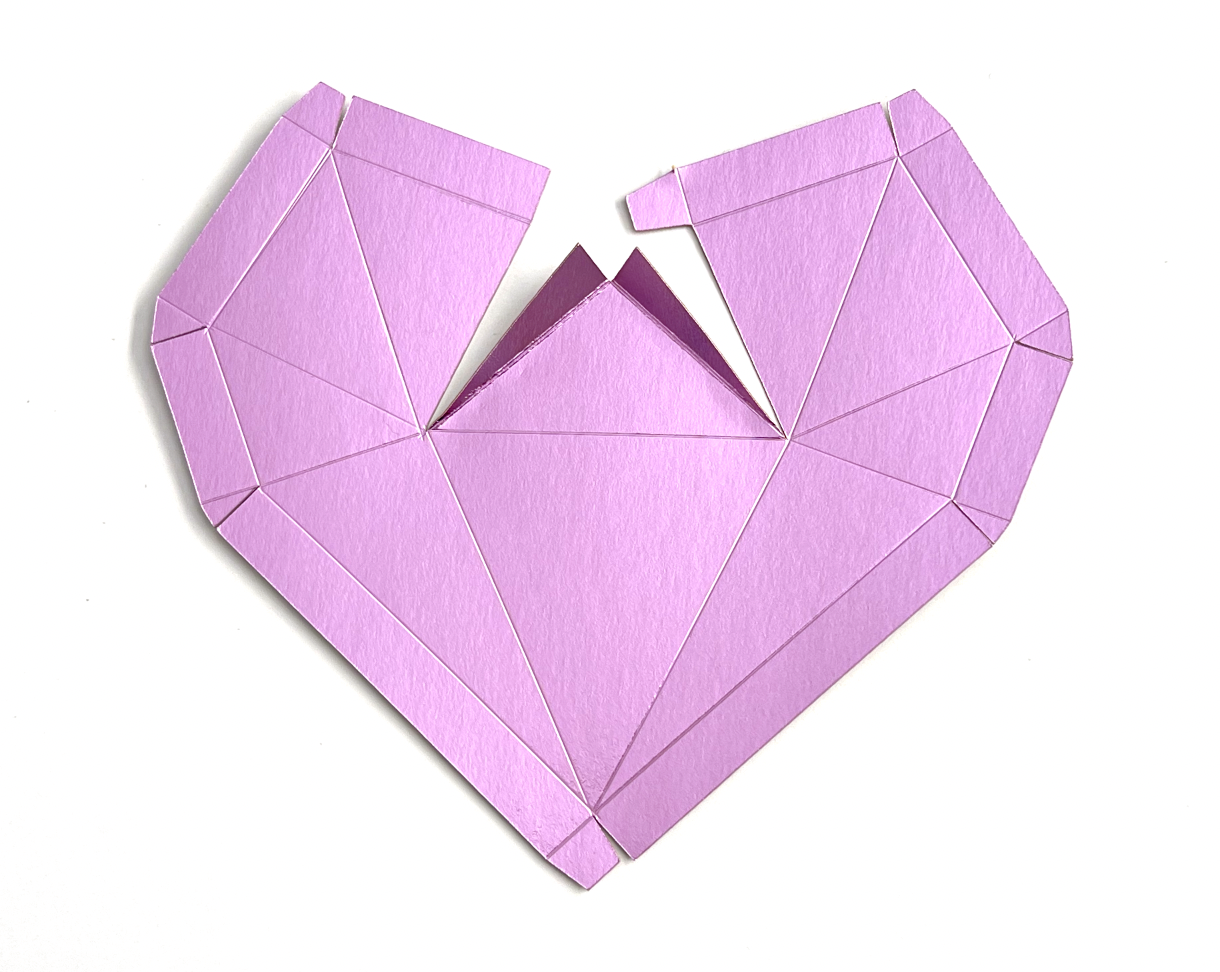
The top heart is the back of the box, to bottom heart is the front of the box. The back of the box is slightly smaller than the front.

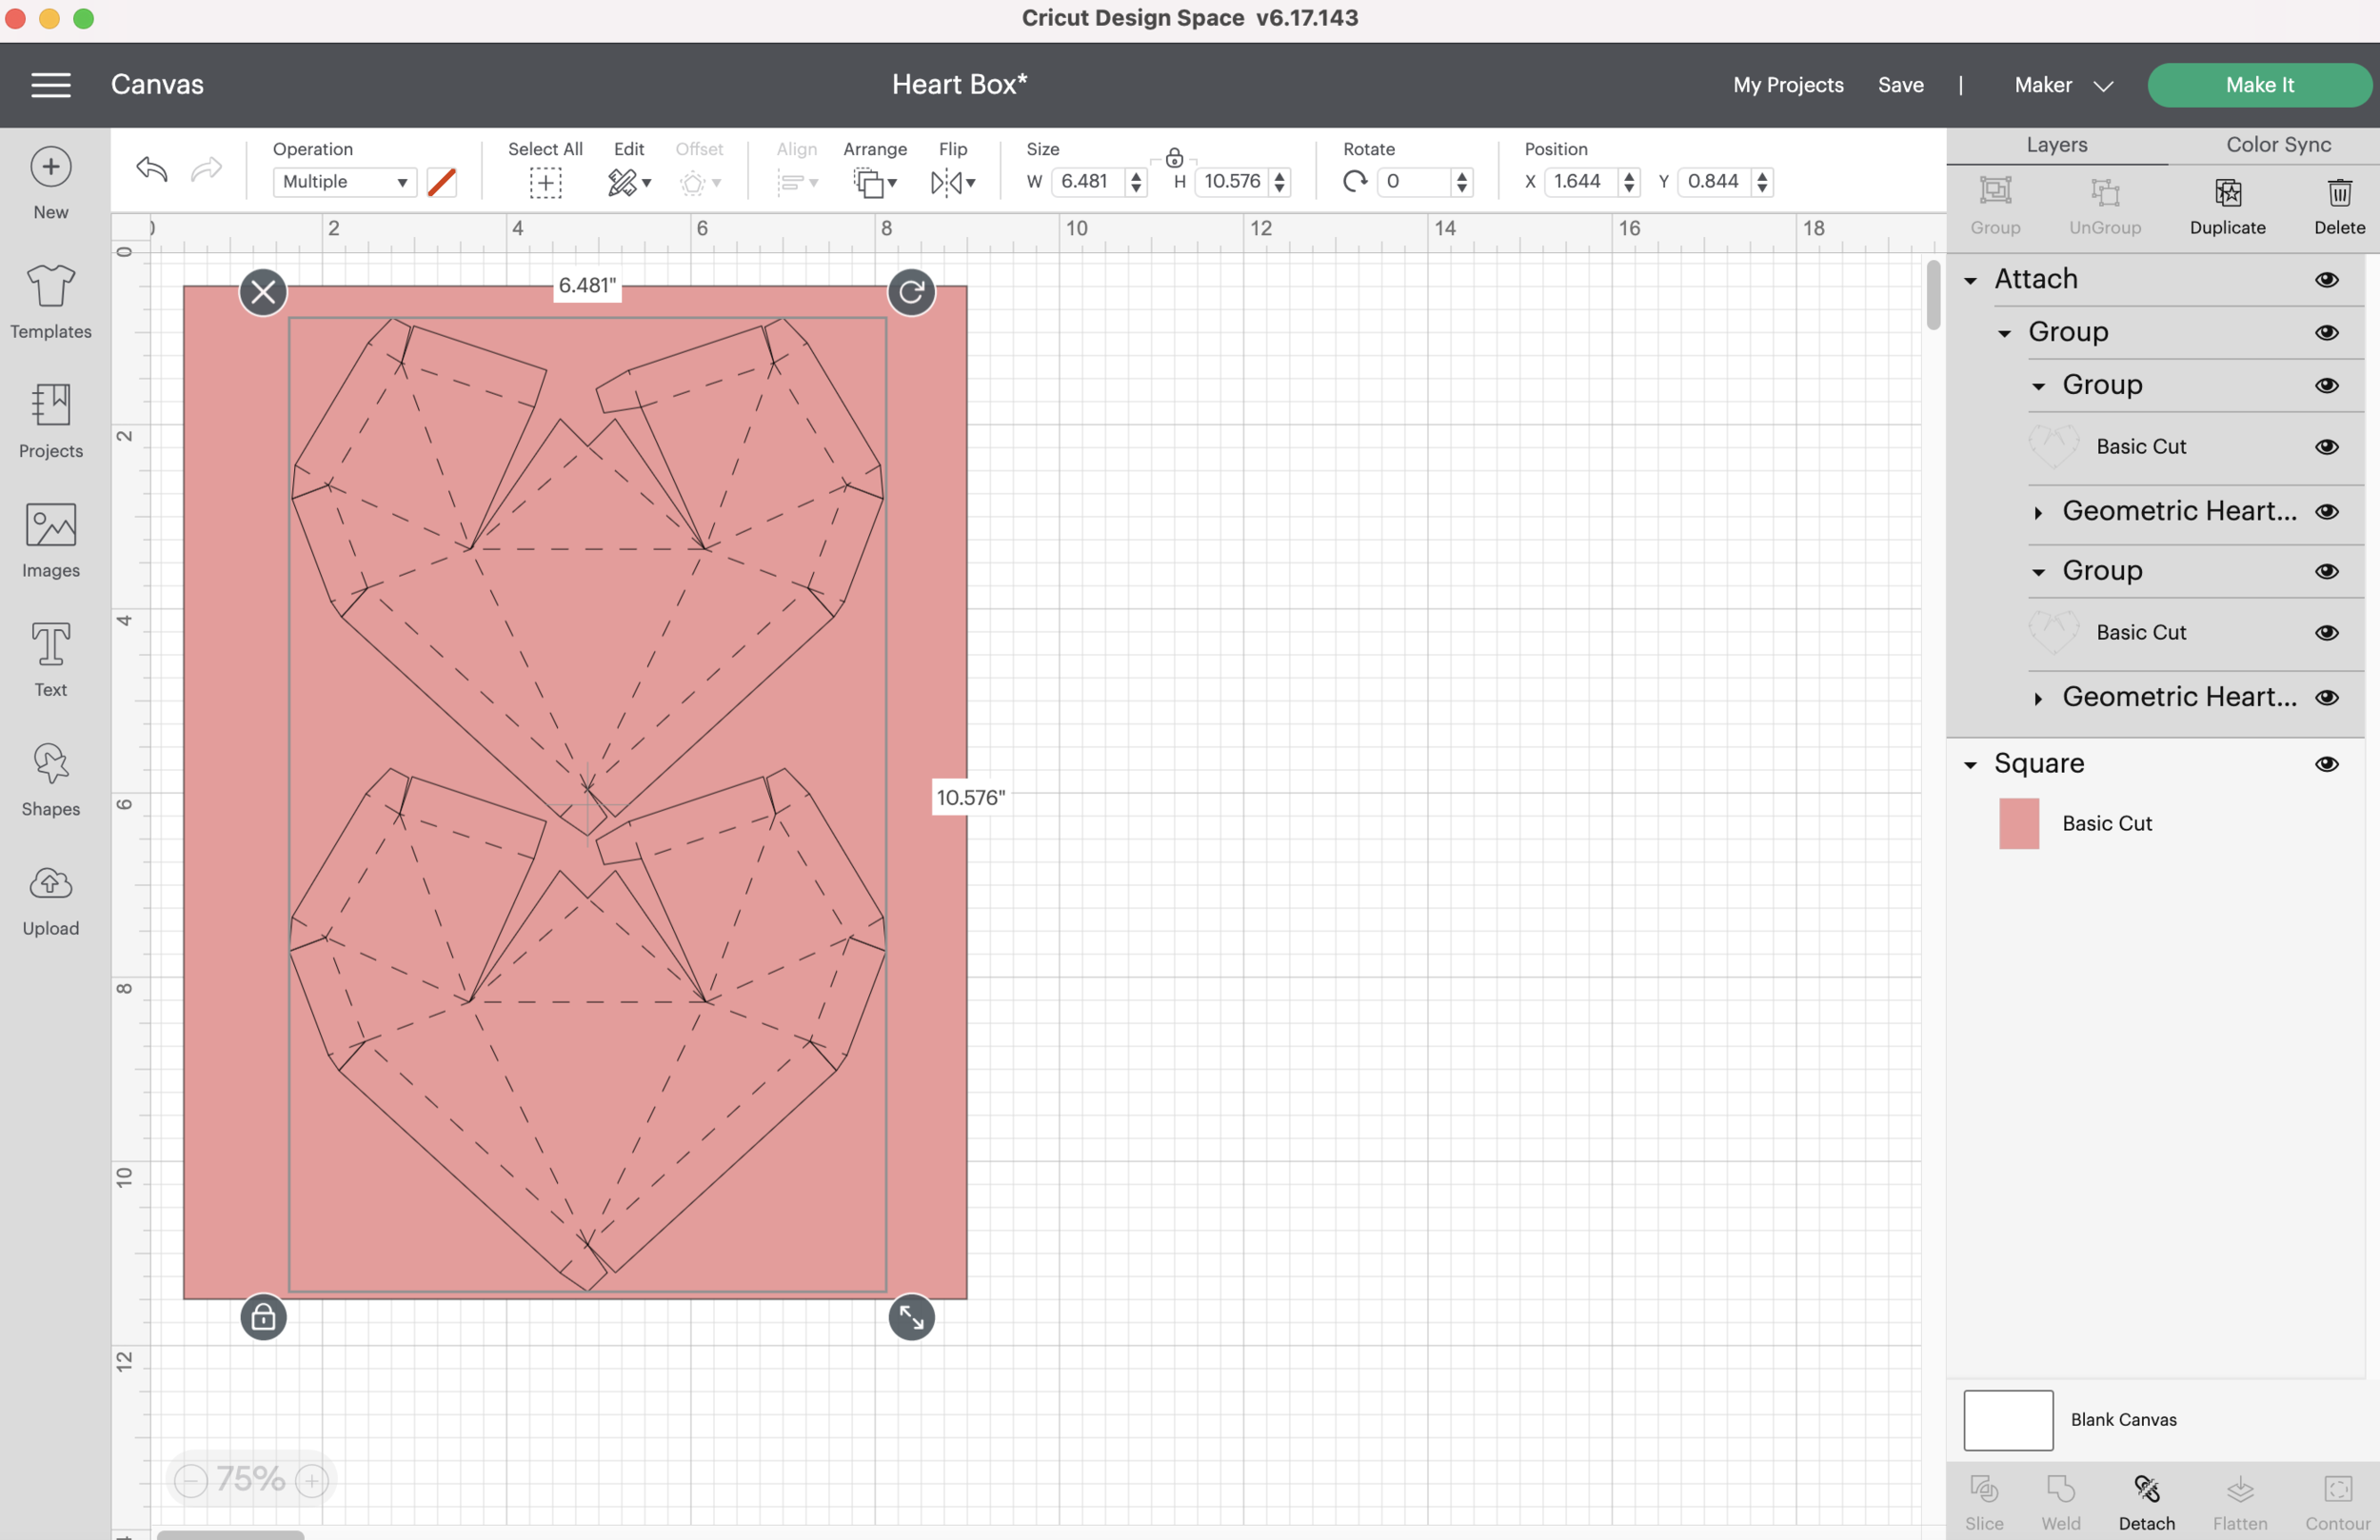
Select the groups that contains the score lines and change them from Basic Cut to Score Lines. Now your score lines should look like dashed lines.

This part is optional, but since I’m using 8.5x11 cardstock I want to make sure my hearts are placed so they cut in the correct area.

Make an 8.5 x 11 rectangle and put it behind the hearts. Make sure the hearts fit within the rectangle. Attach just the hearts together, leave the rectangle on it’s own.

Low Poly Heart Box

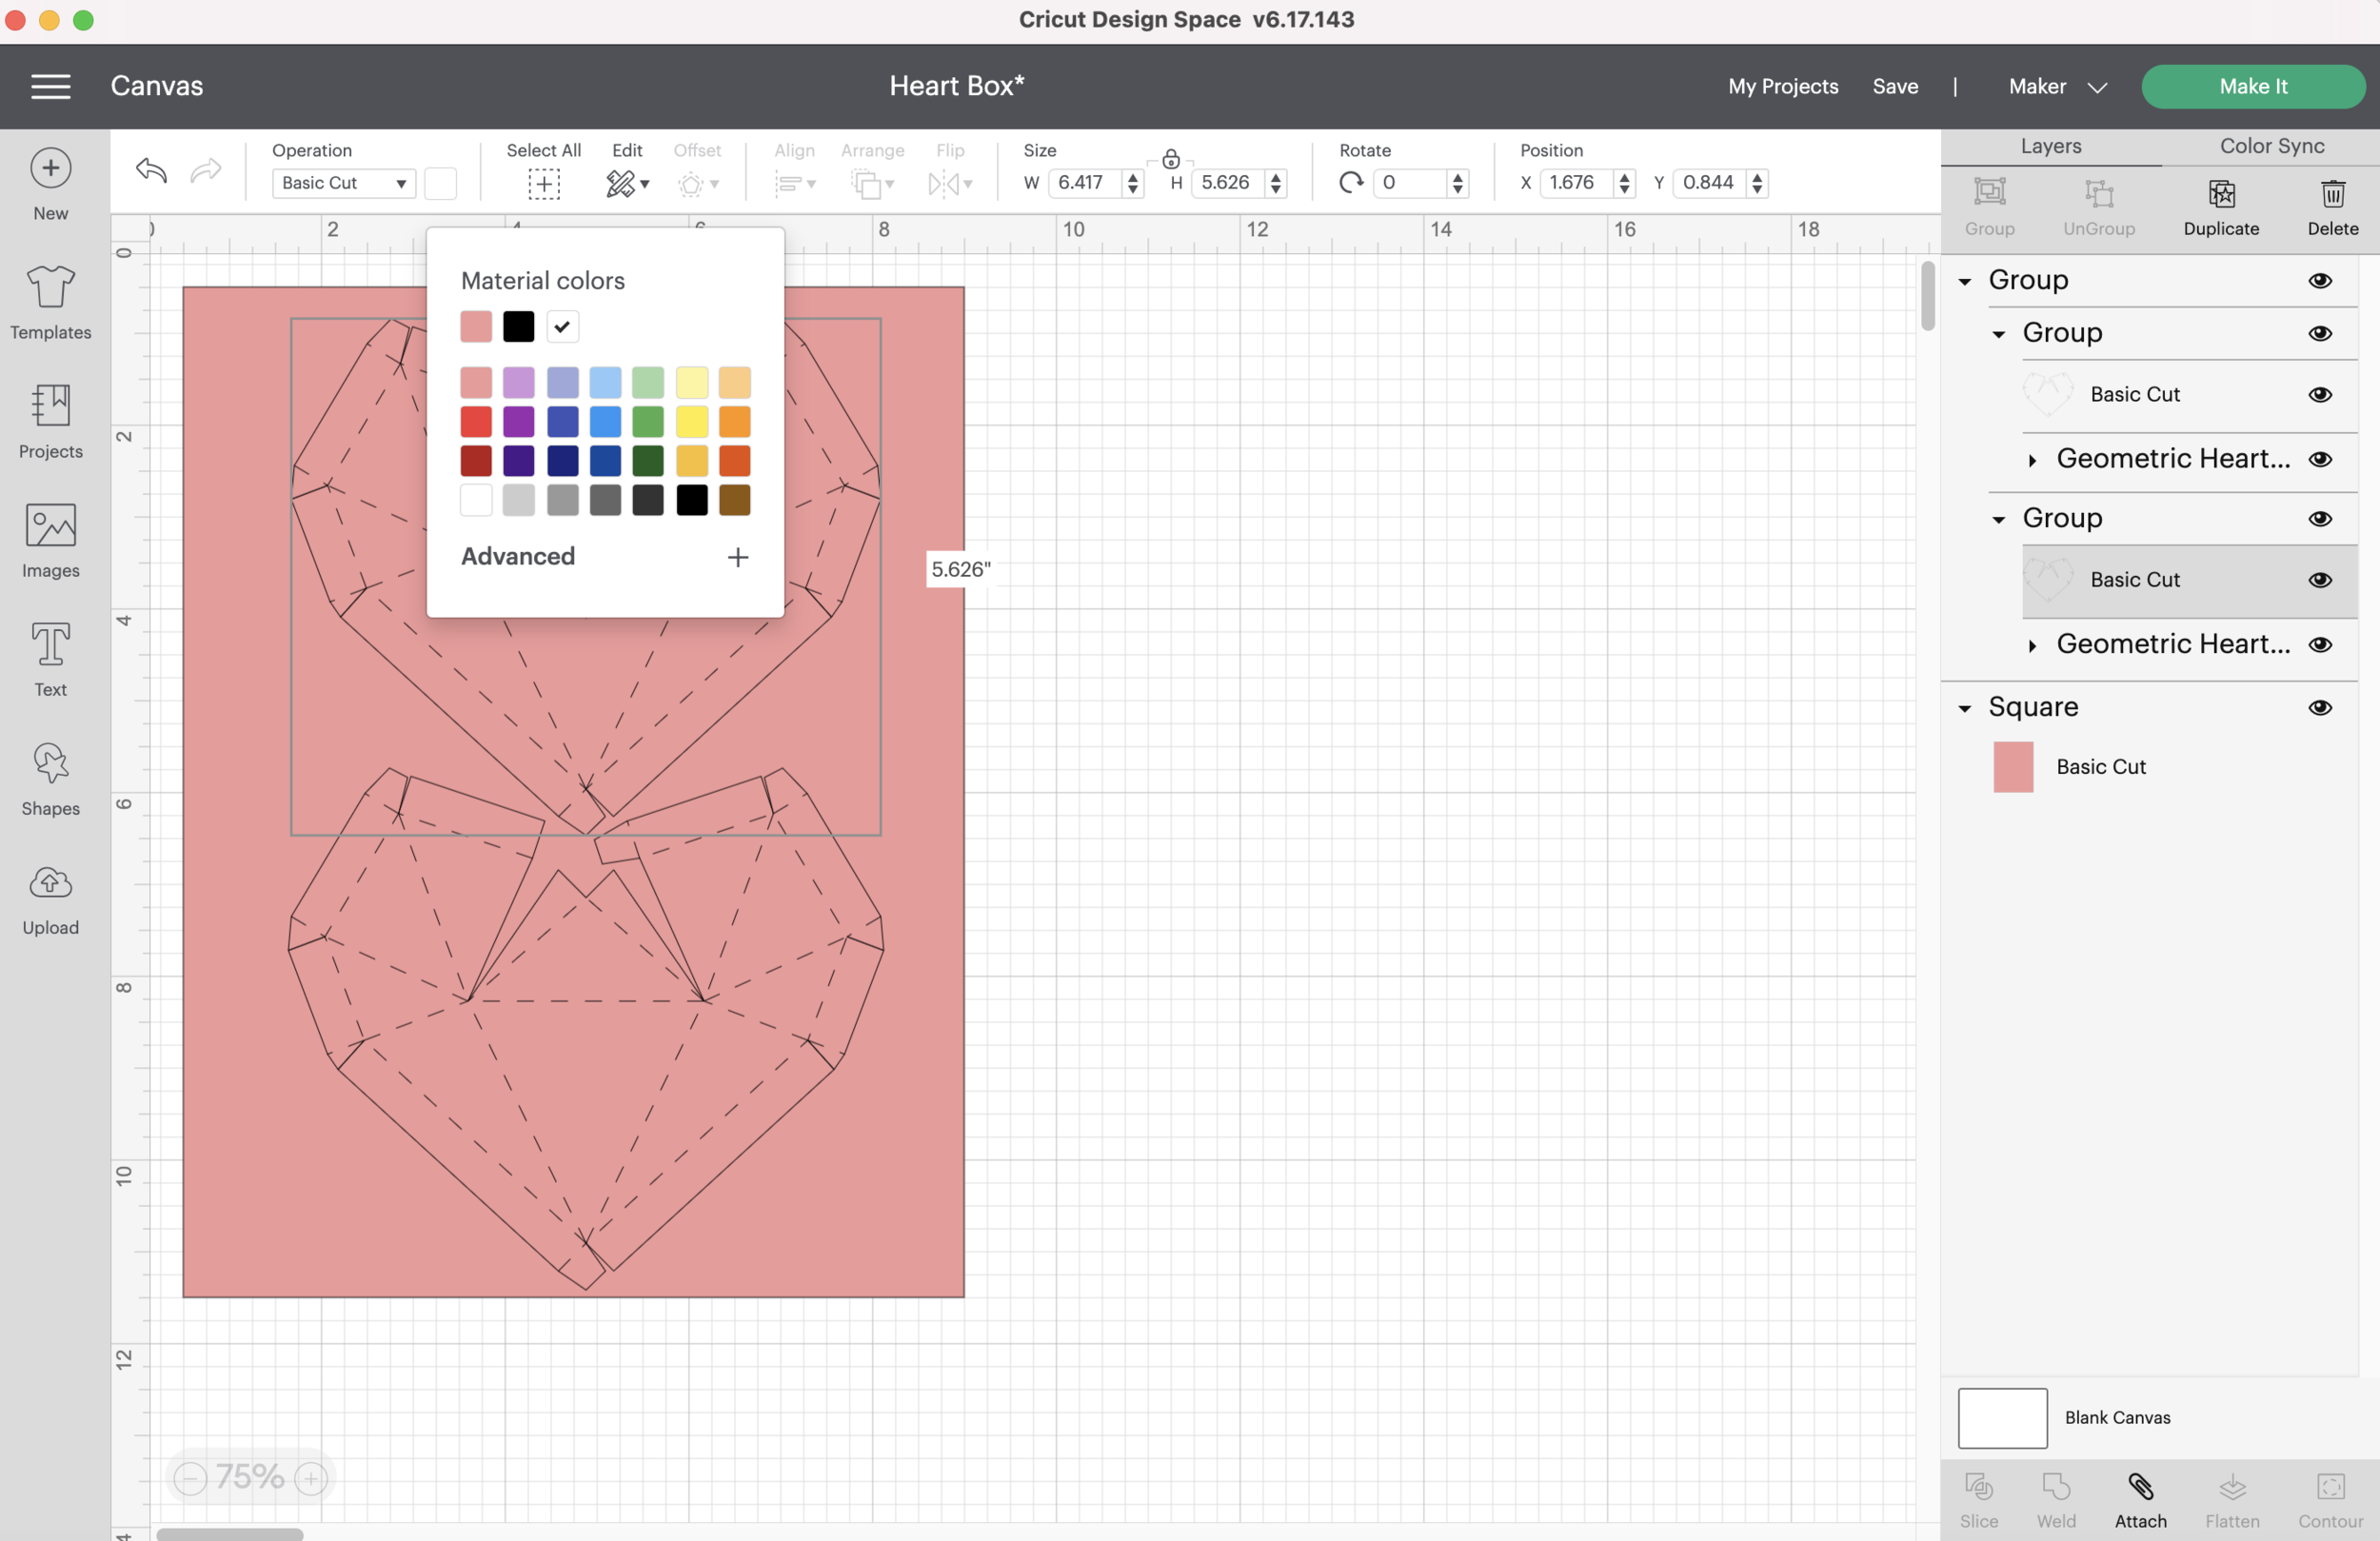
Make the material color for the hearts White so we can see them in the next step.

Low Poly Heart Box

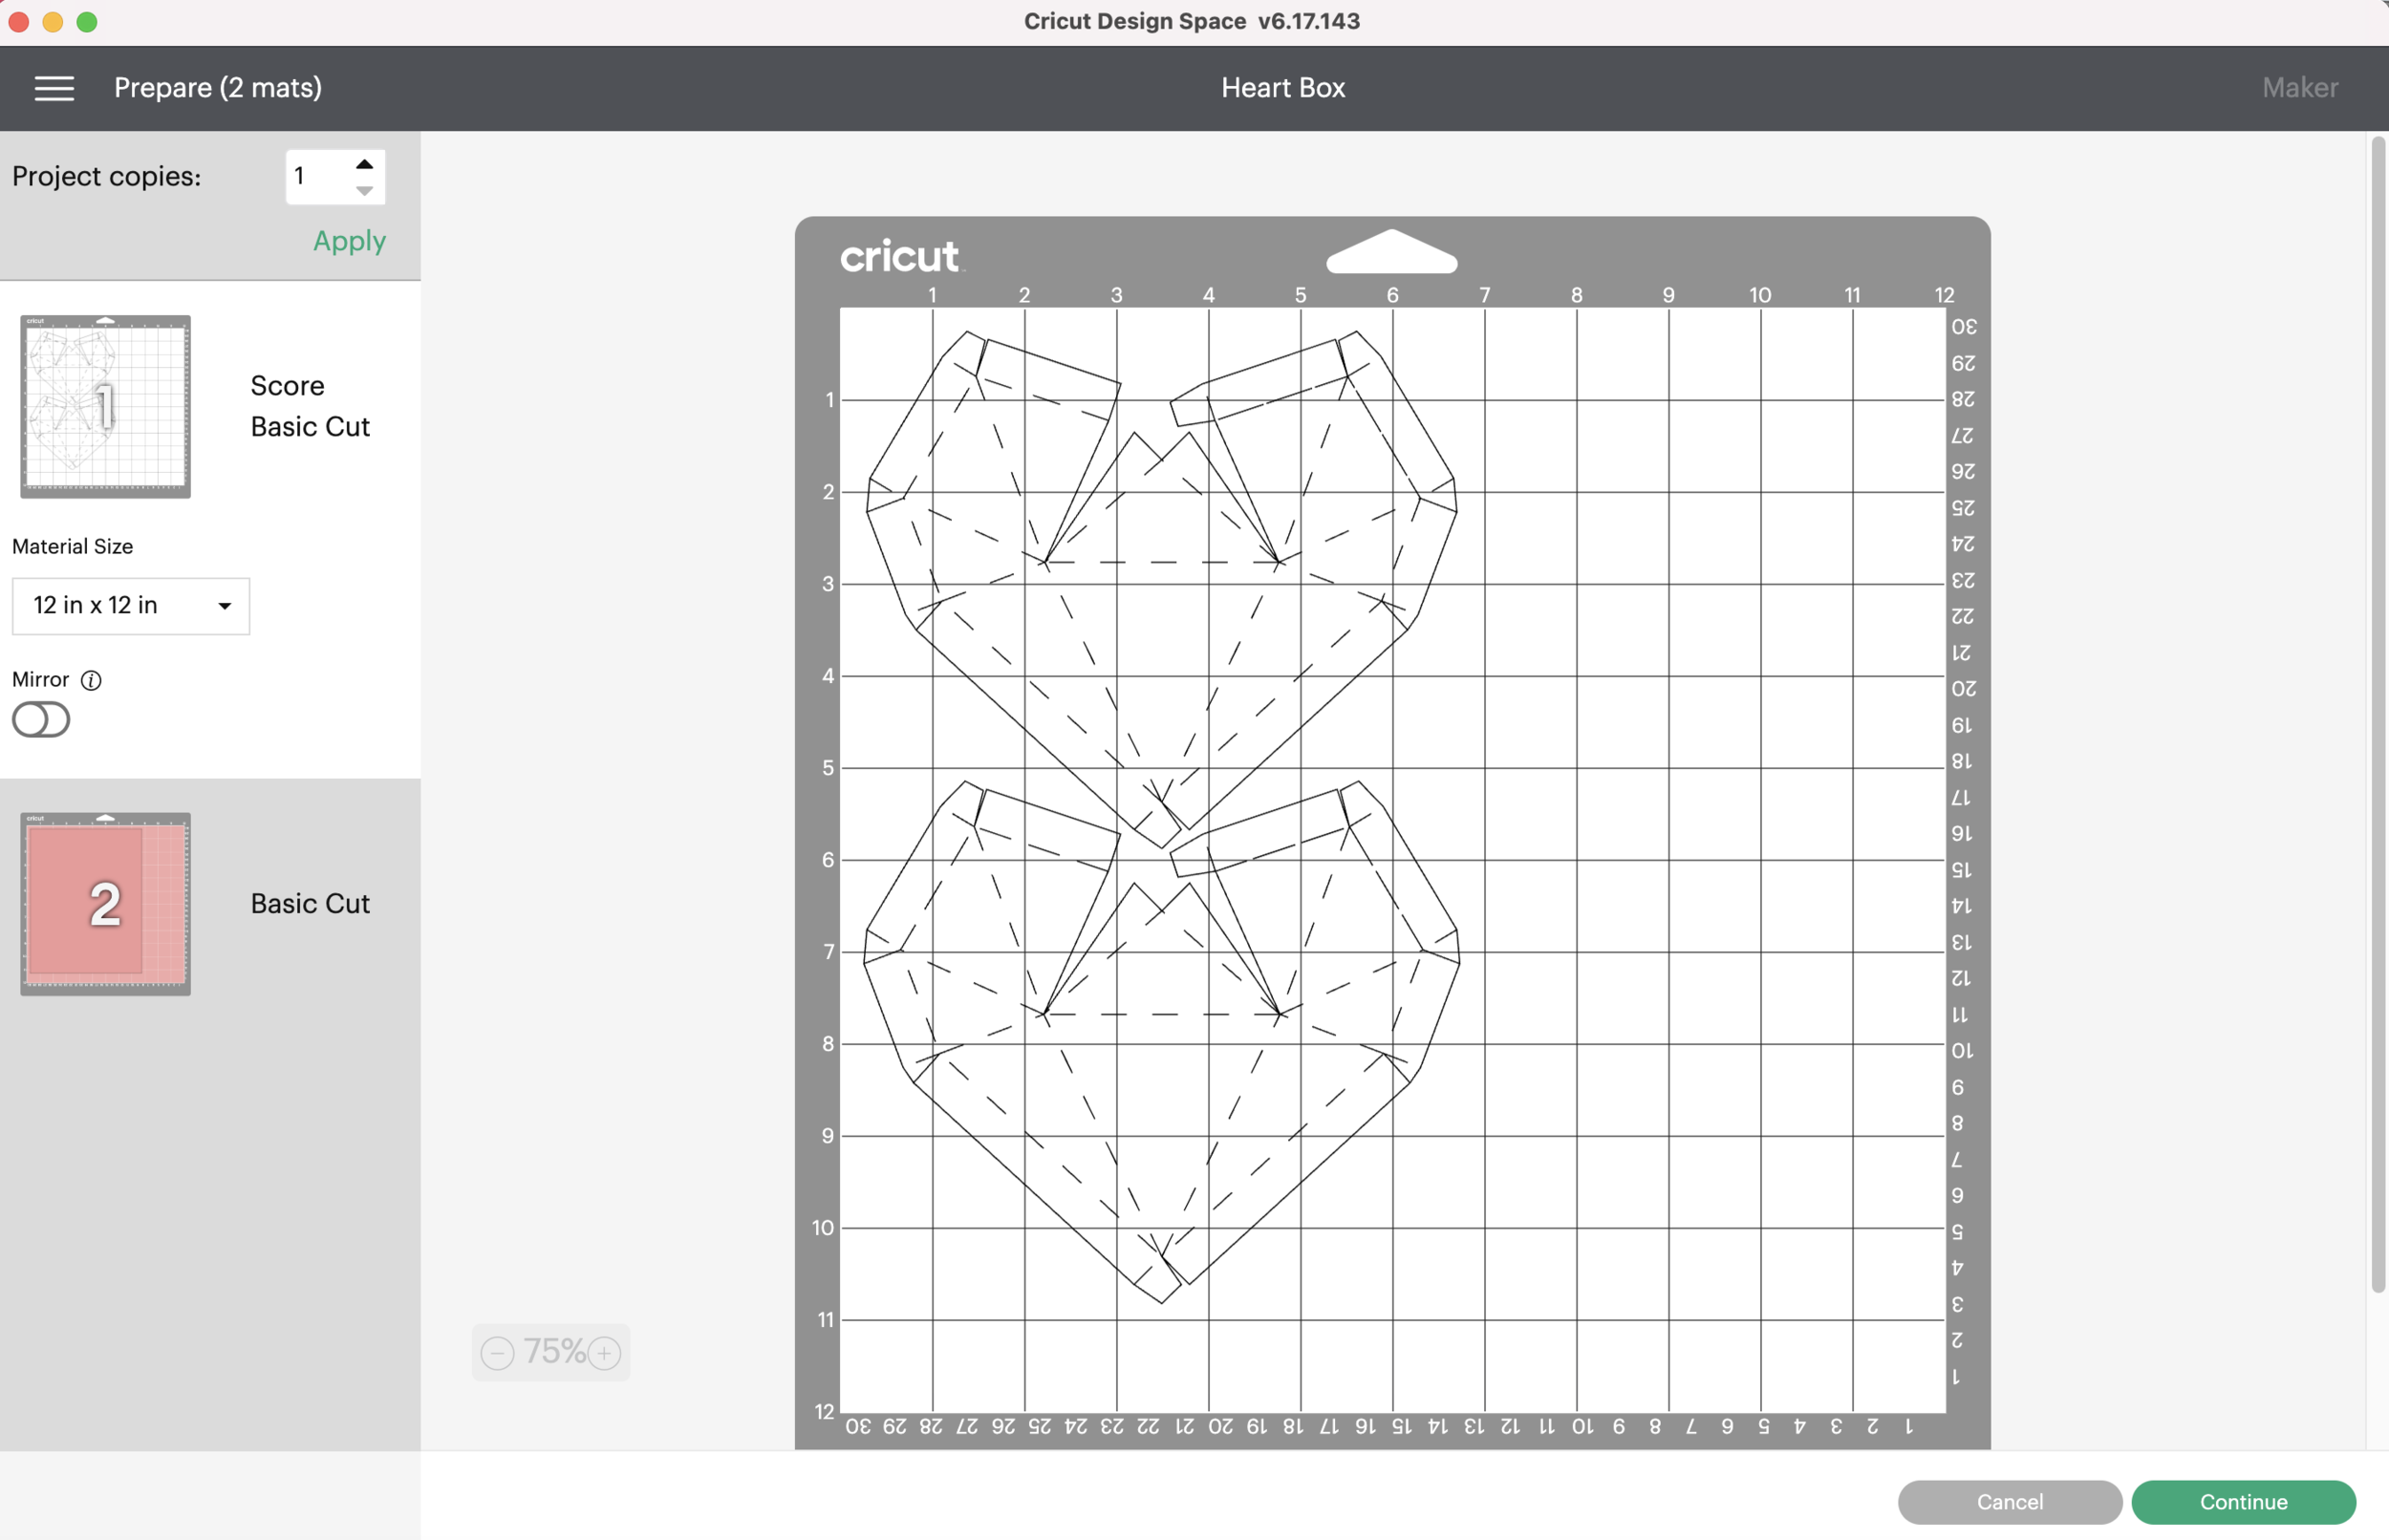
Press the Make It button, now we should have 2 mats - one with the hearts and one with the rectangle.

Low Poly Heart Box

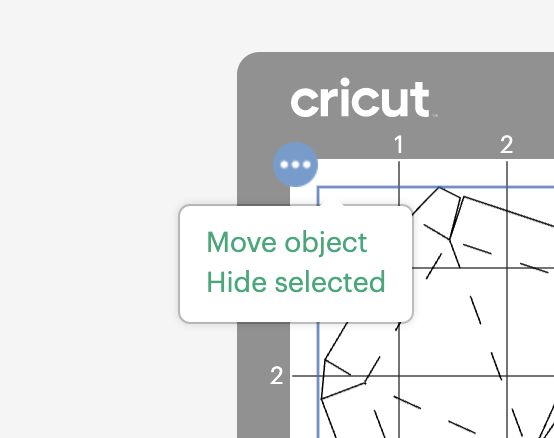
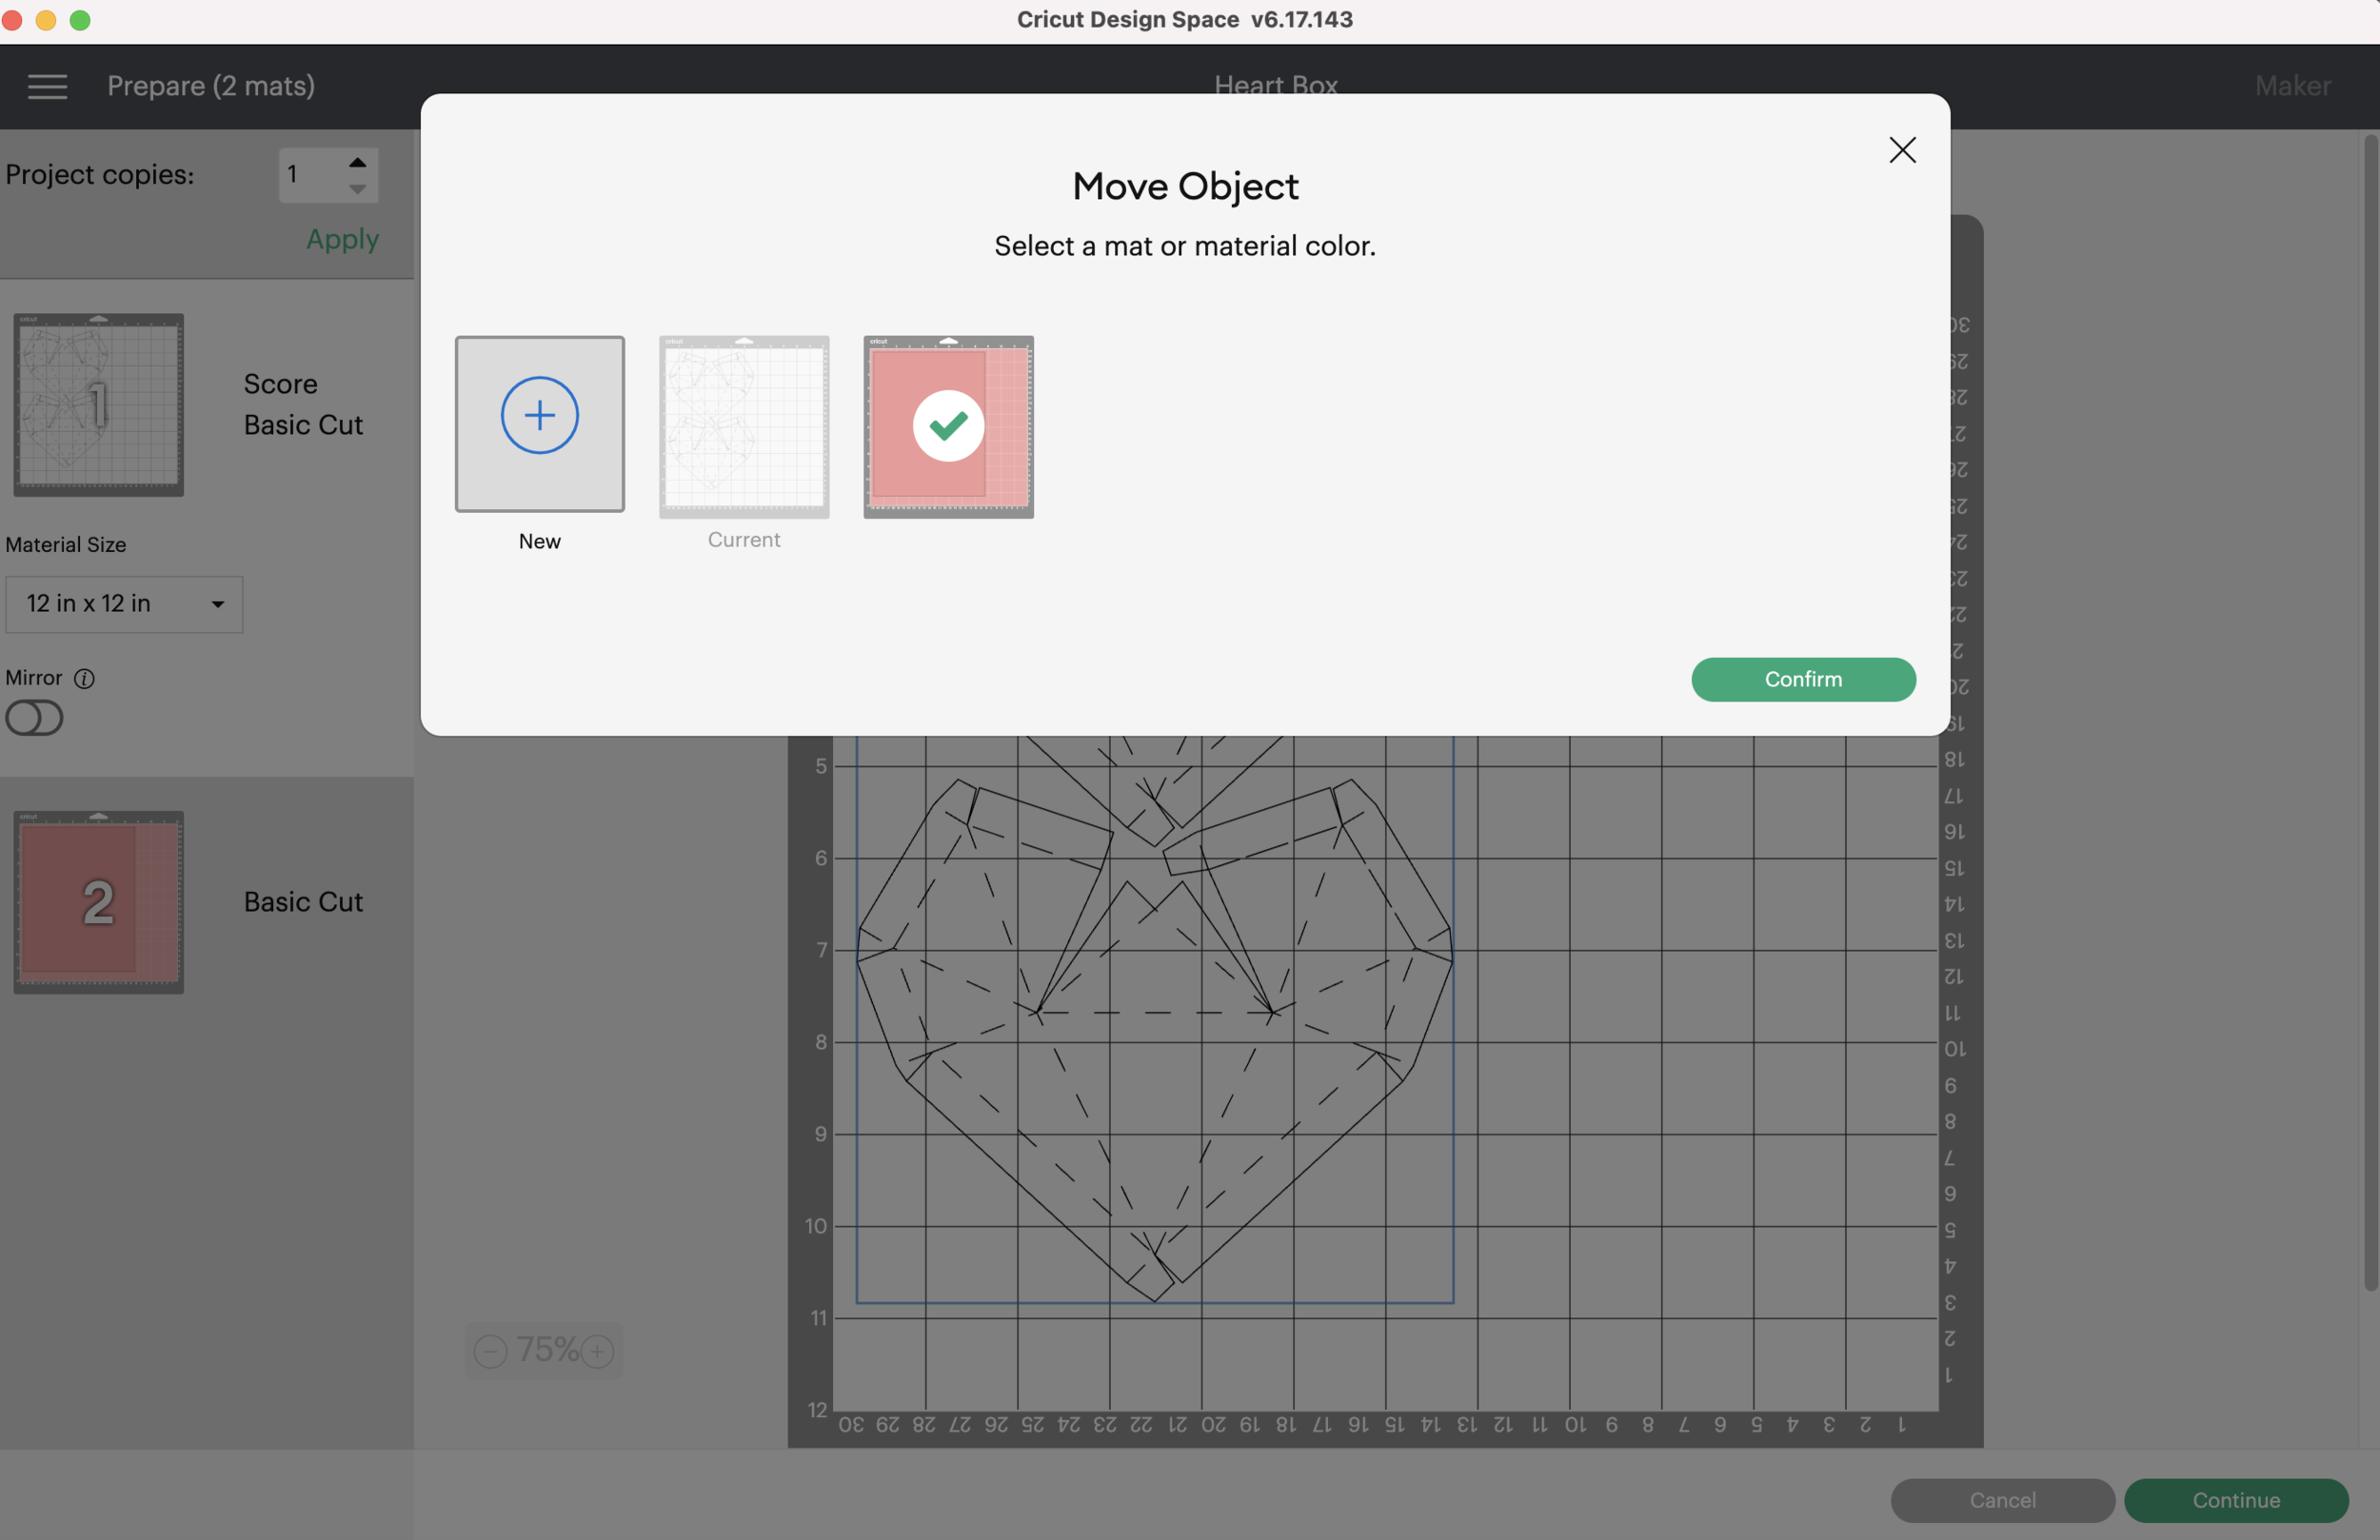
Select the mat with the hearts and click the 3 small dots. Select Move Object in the pop up box.

Low Poly Heart Box

Select the mat with the rectangle in the pop up box and click Confirm. Now your hearts and rectangle will be on the same mat, but you can move them around separately.

Low Poly Heart Box

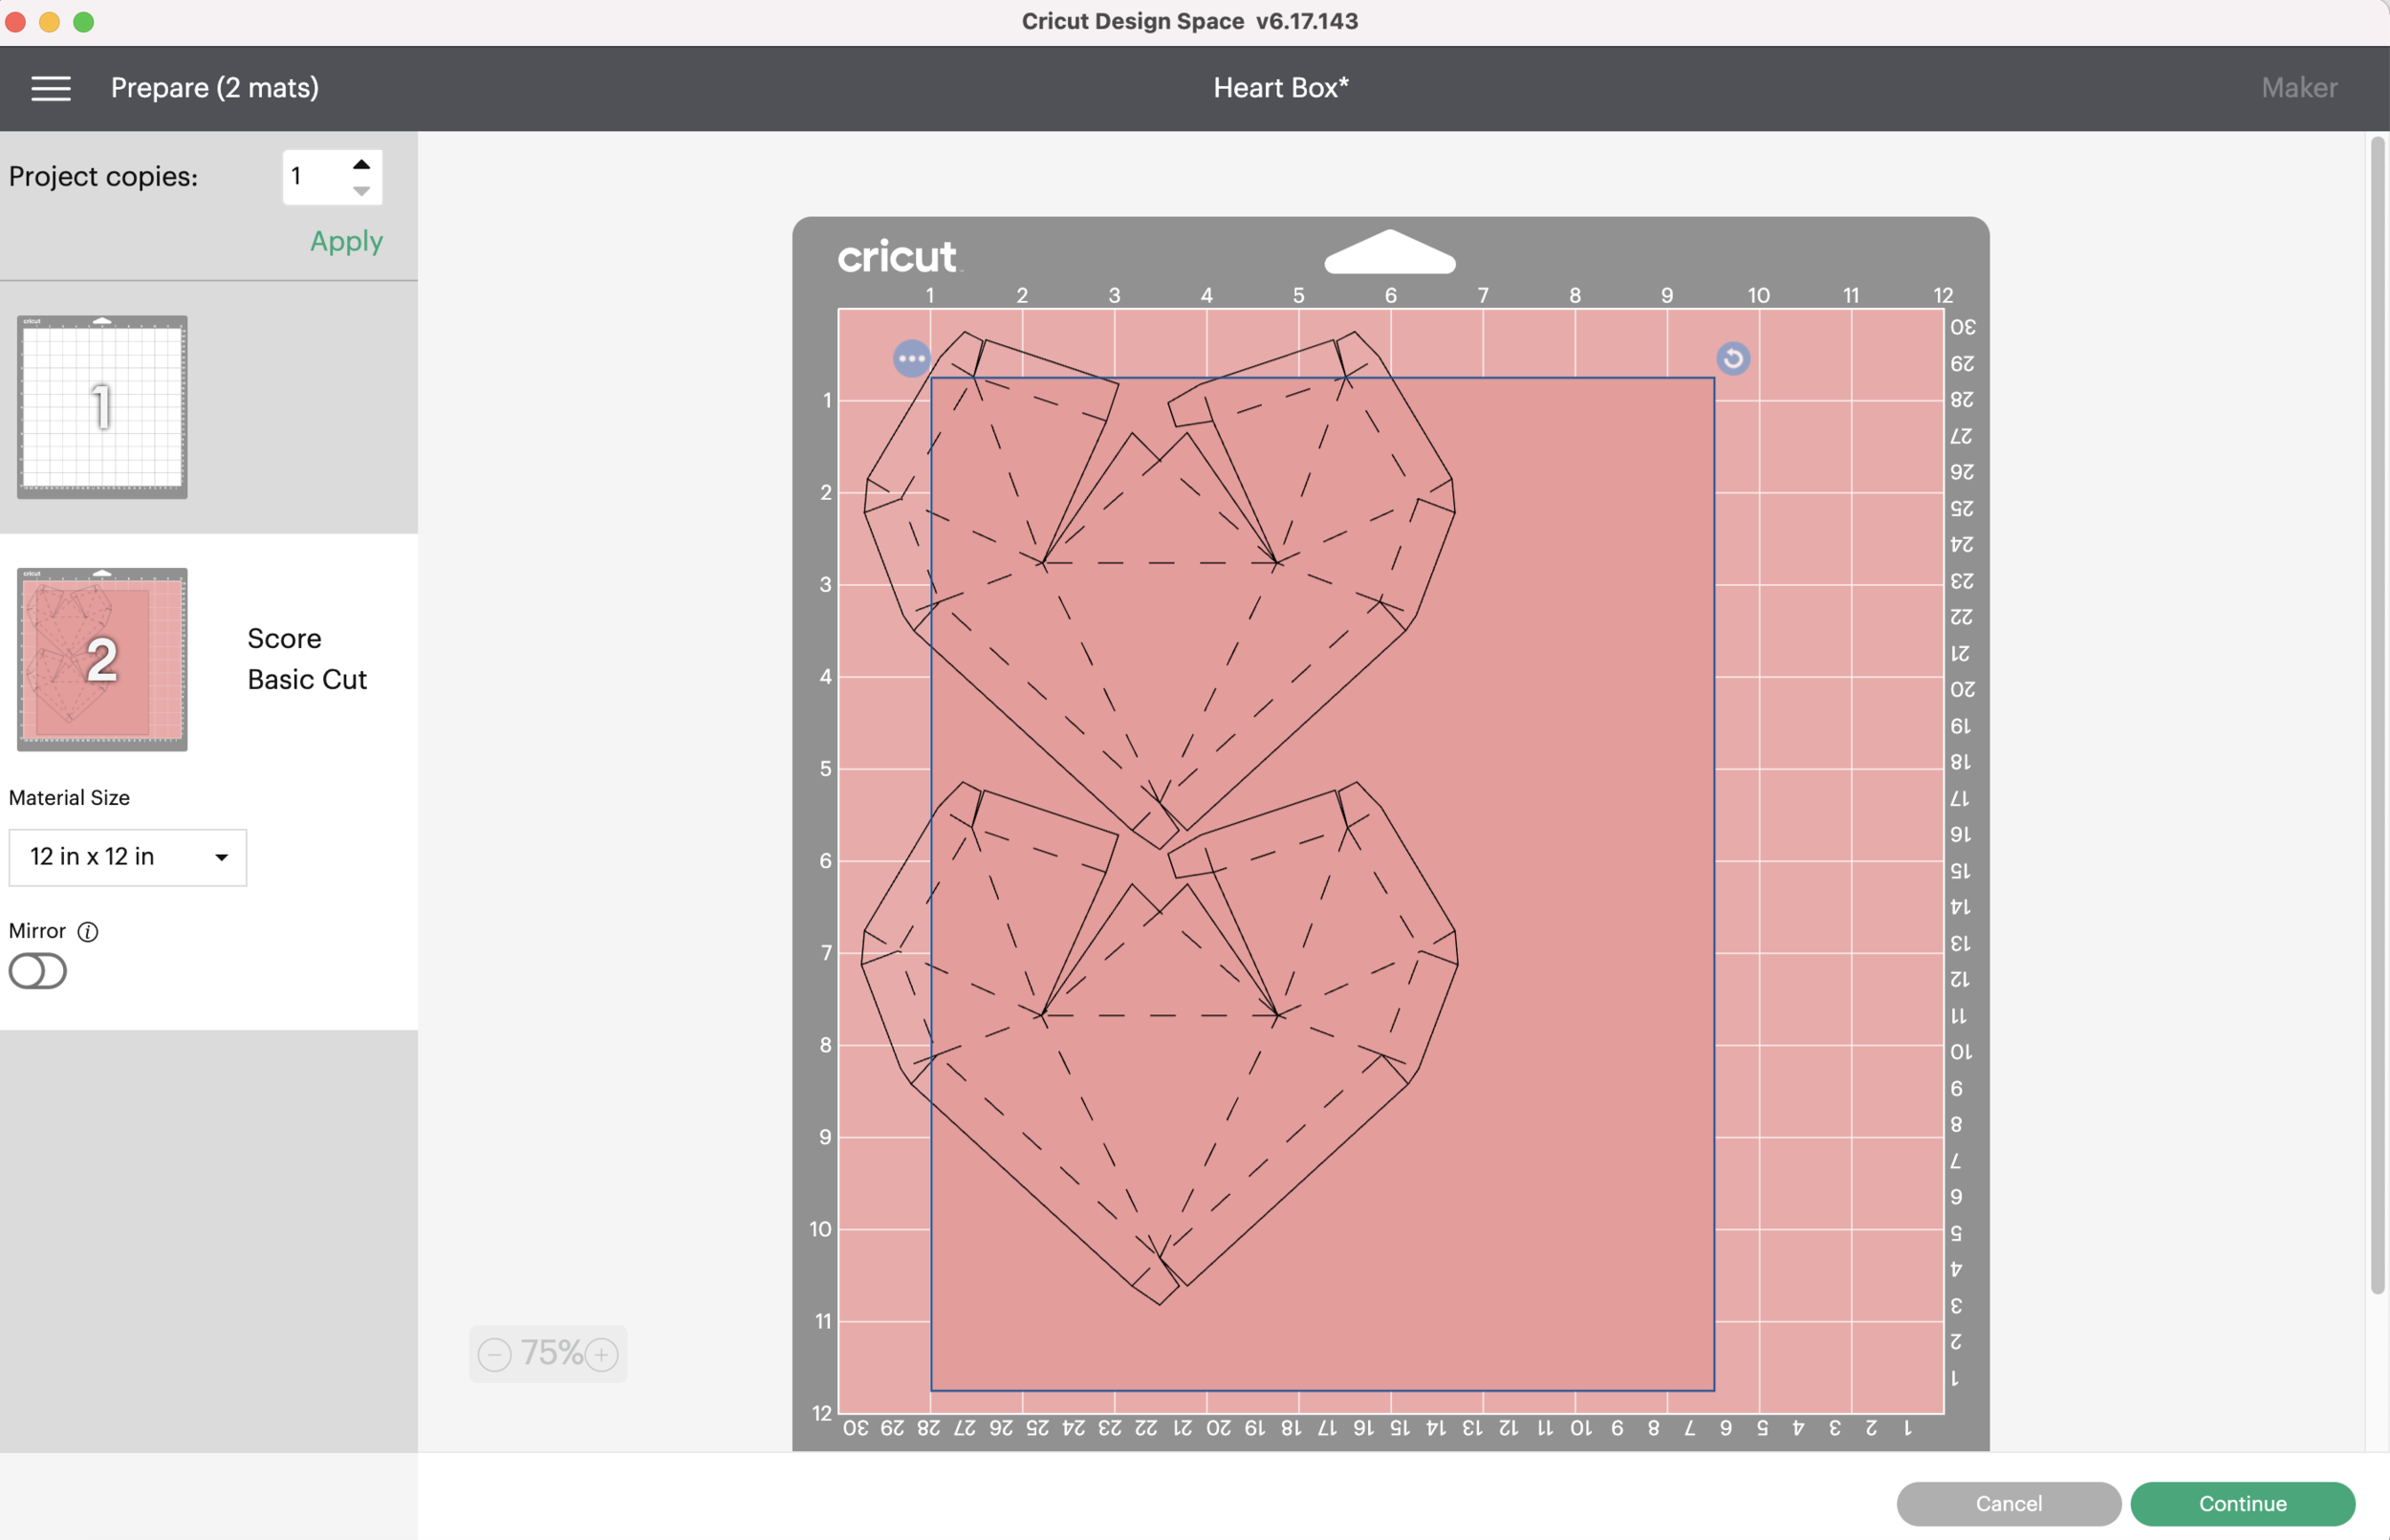
Select the rectangle and move it as close to the 1x1 position on the mat. The red border at the bottom will keep you from moving it all the way to the 1x1 position.

Low Poly Heart Box

Now select the hearts and move them so they are centered left to right on the rectangle and the bottom point of the heart is touching the bottom red border line and the bottom of the rectangle.

Low Poly Heart Box

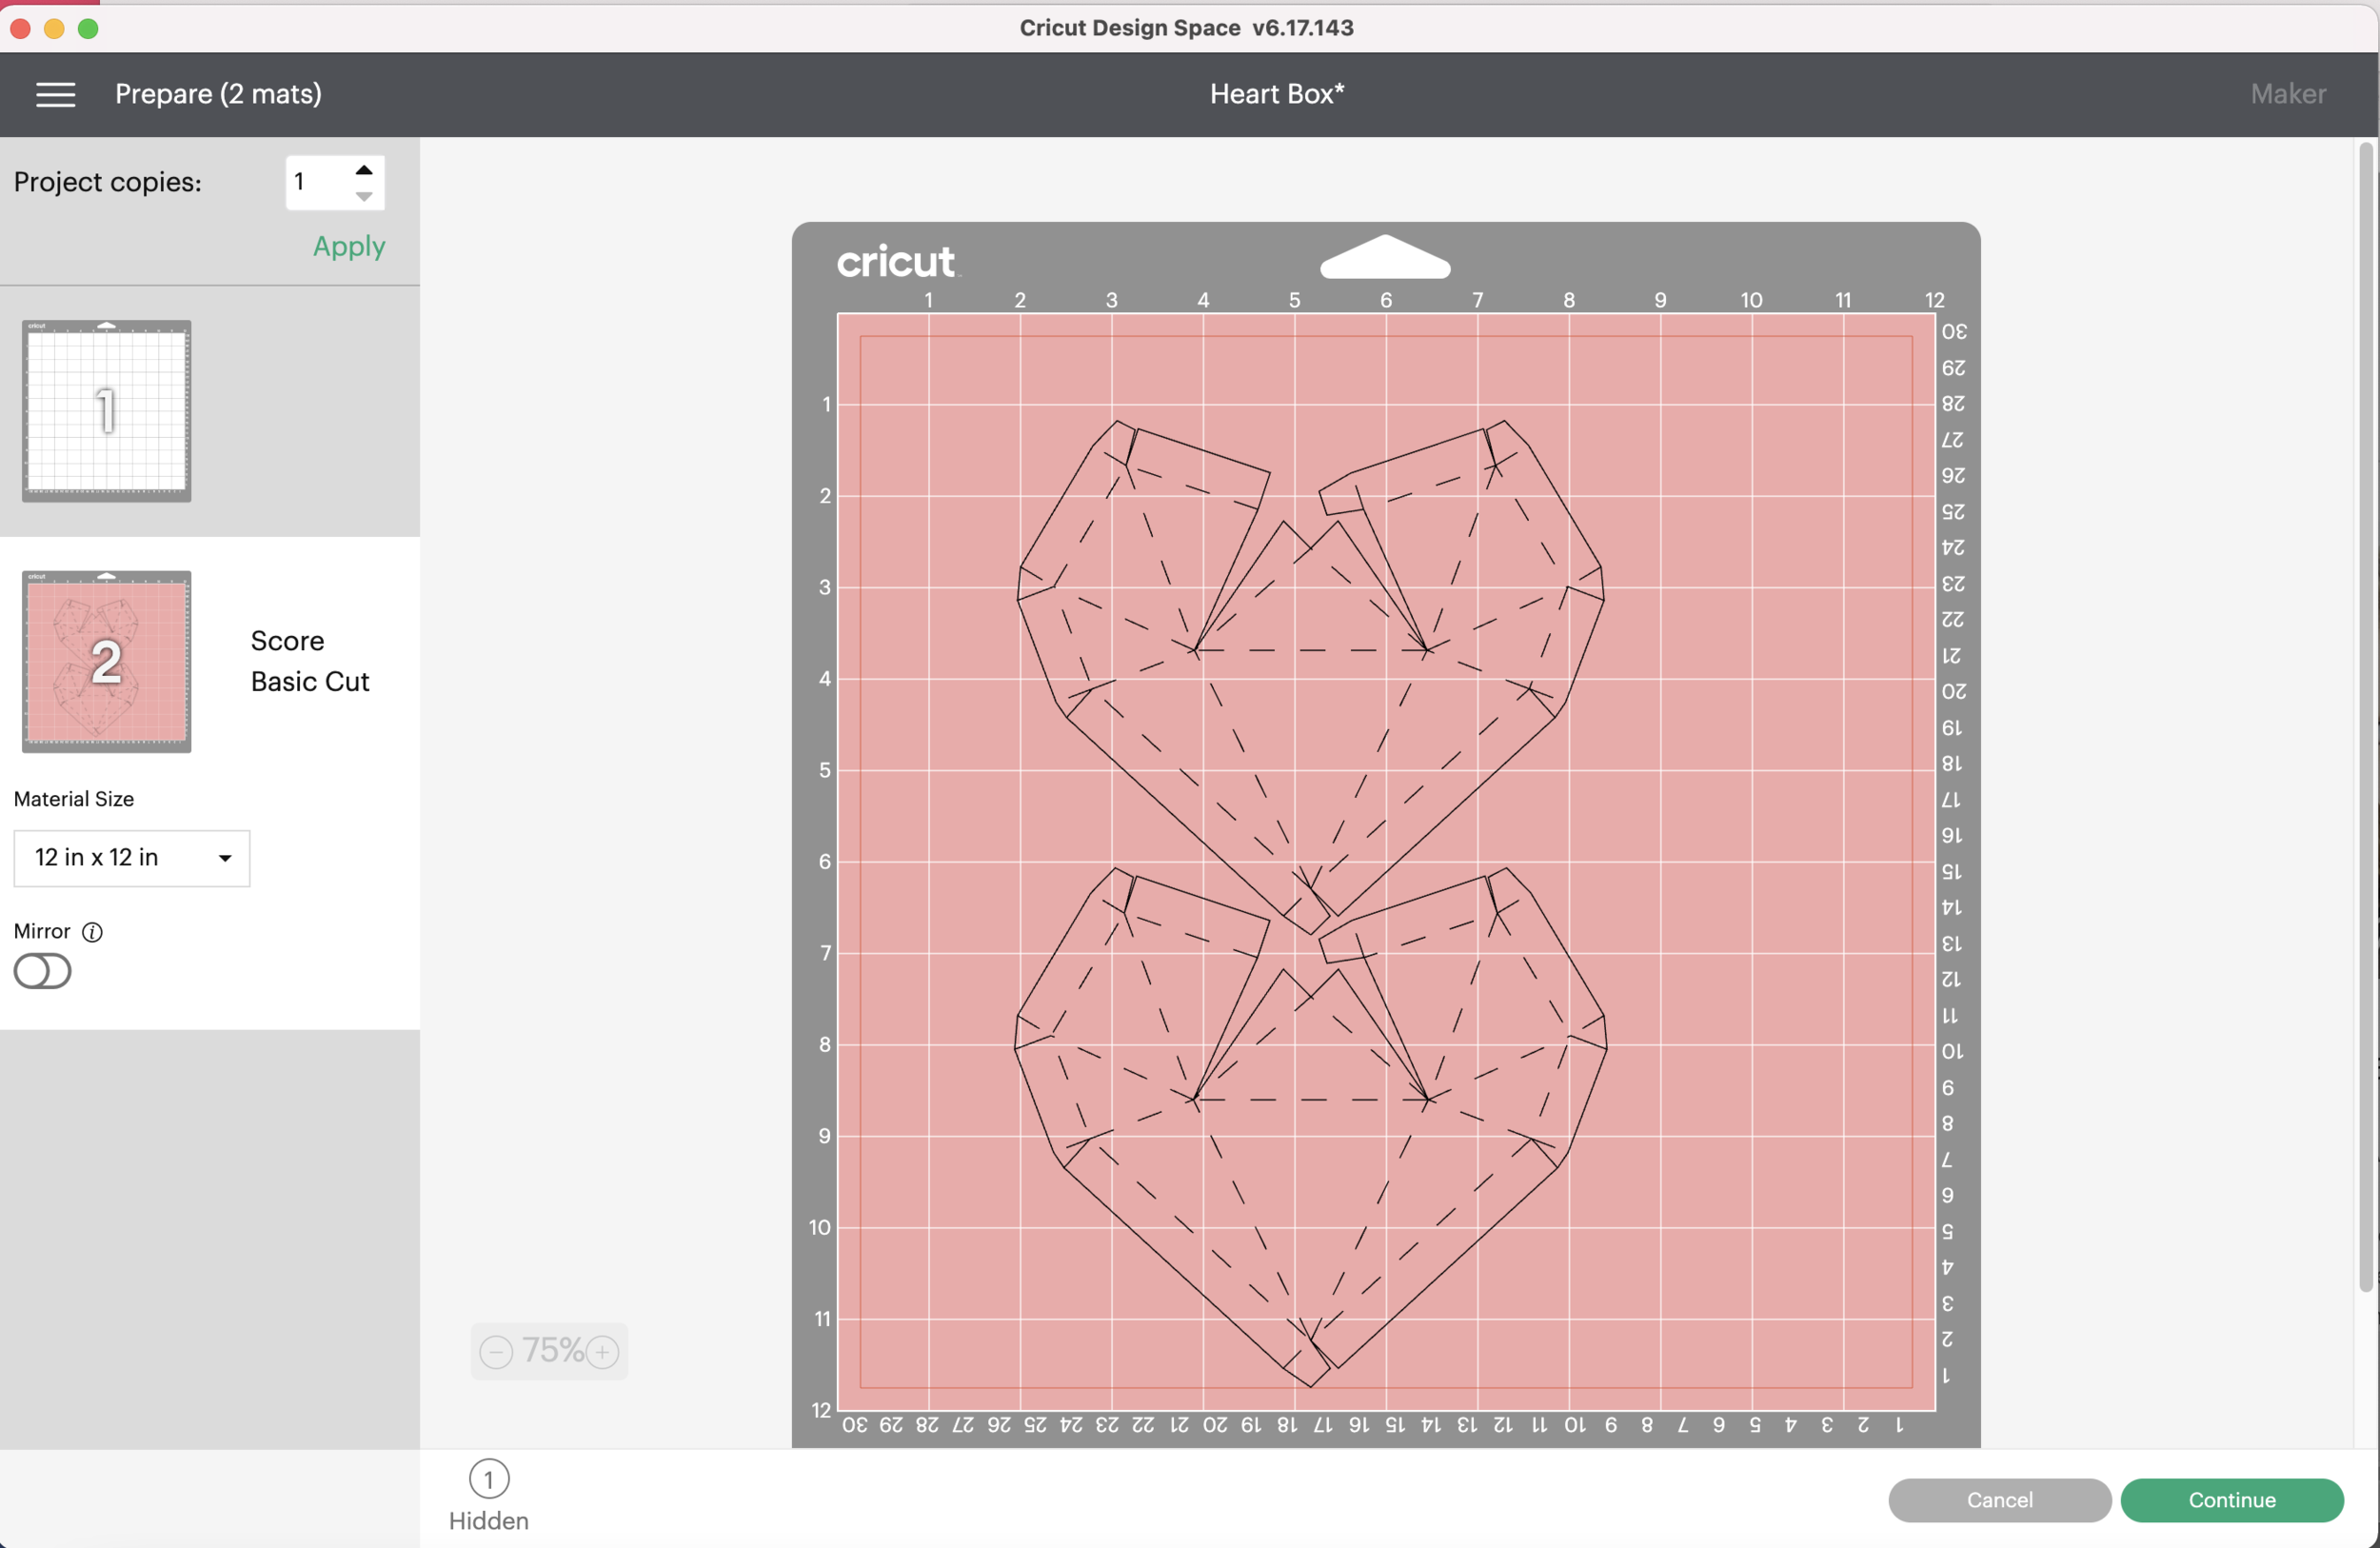
Select the rectangle again, click the 3 dots in the corner and select Hide Object from the pop up.

Low Poly Heart Box

Now we are left with just the hearts on the cutting mat and the rectangle is hidden.

Low Poly Heart Box

Place your cardstock on your Light Grip mat, the Top left corner of the cardstock should be at the 1 x1 position.

Low Poly Heart Box

Since I’m using foil cardstock, I decided to use the Foil Posterboard material setting on my machine for this project.

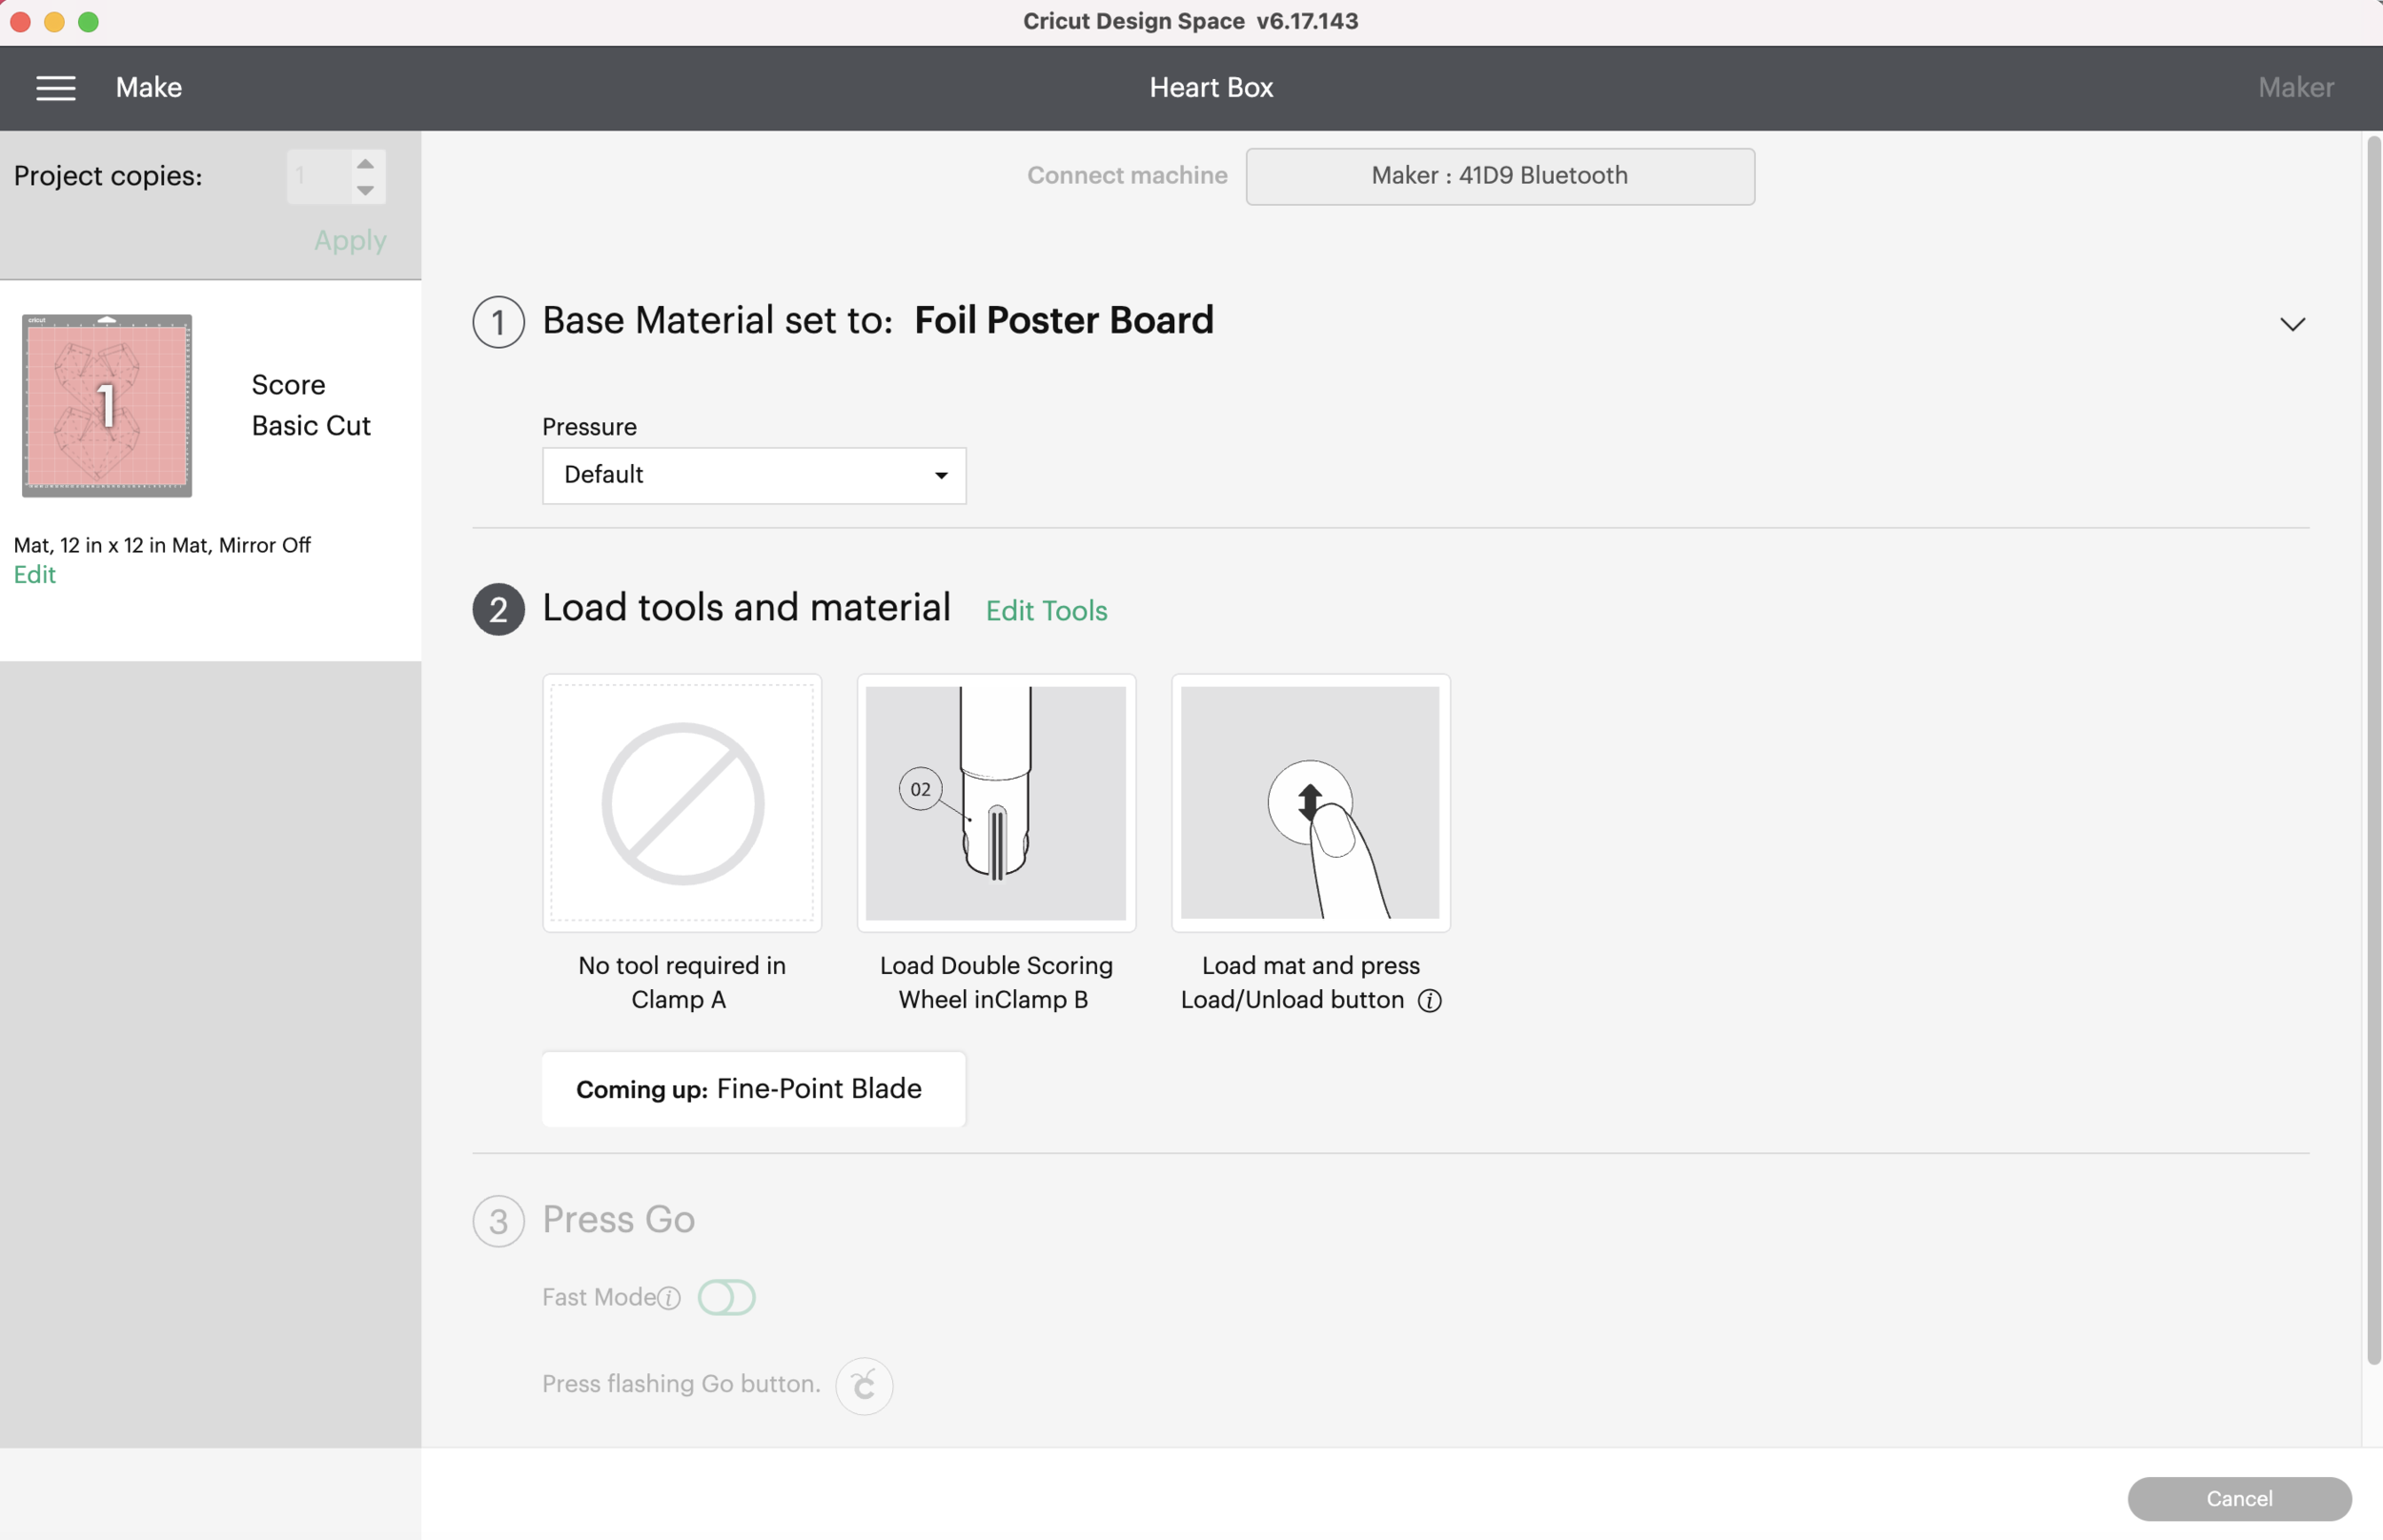
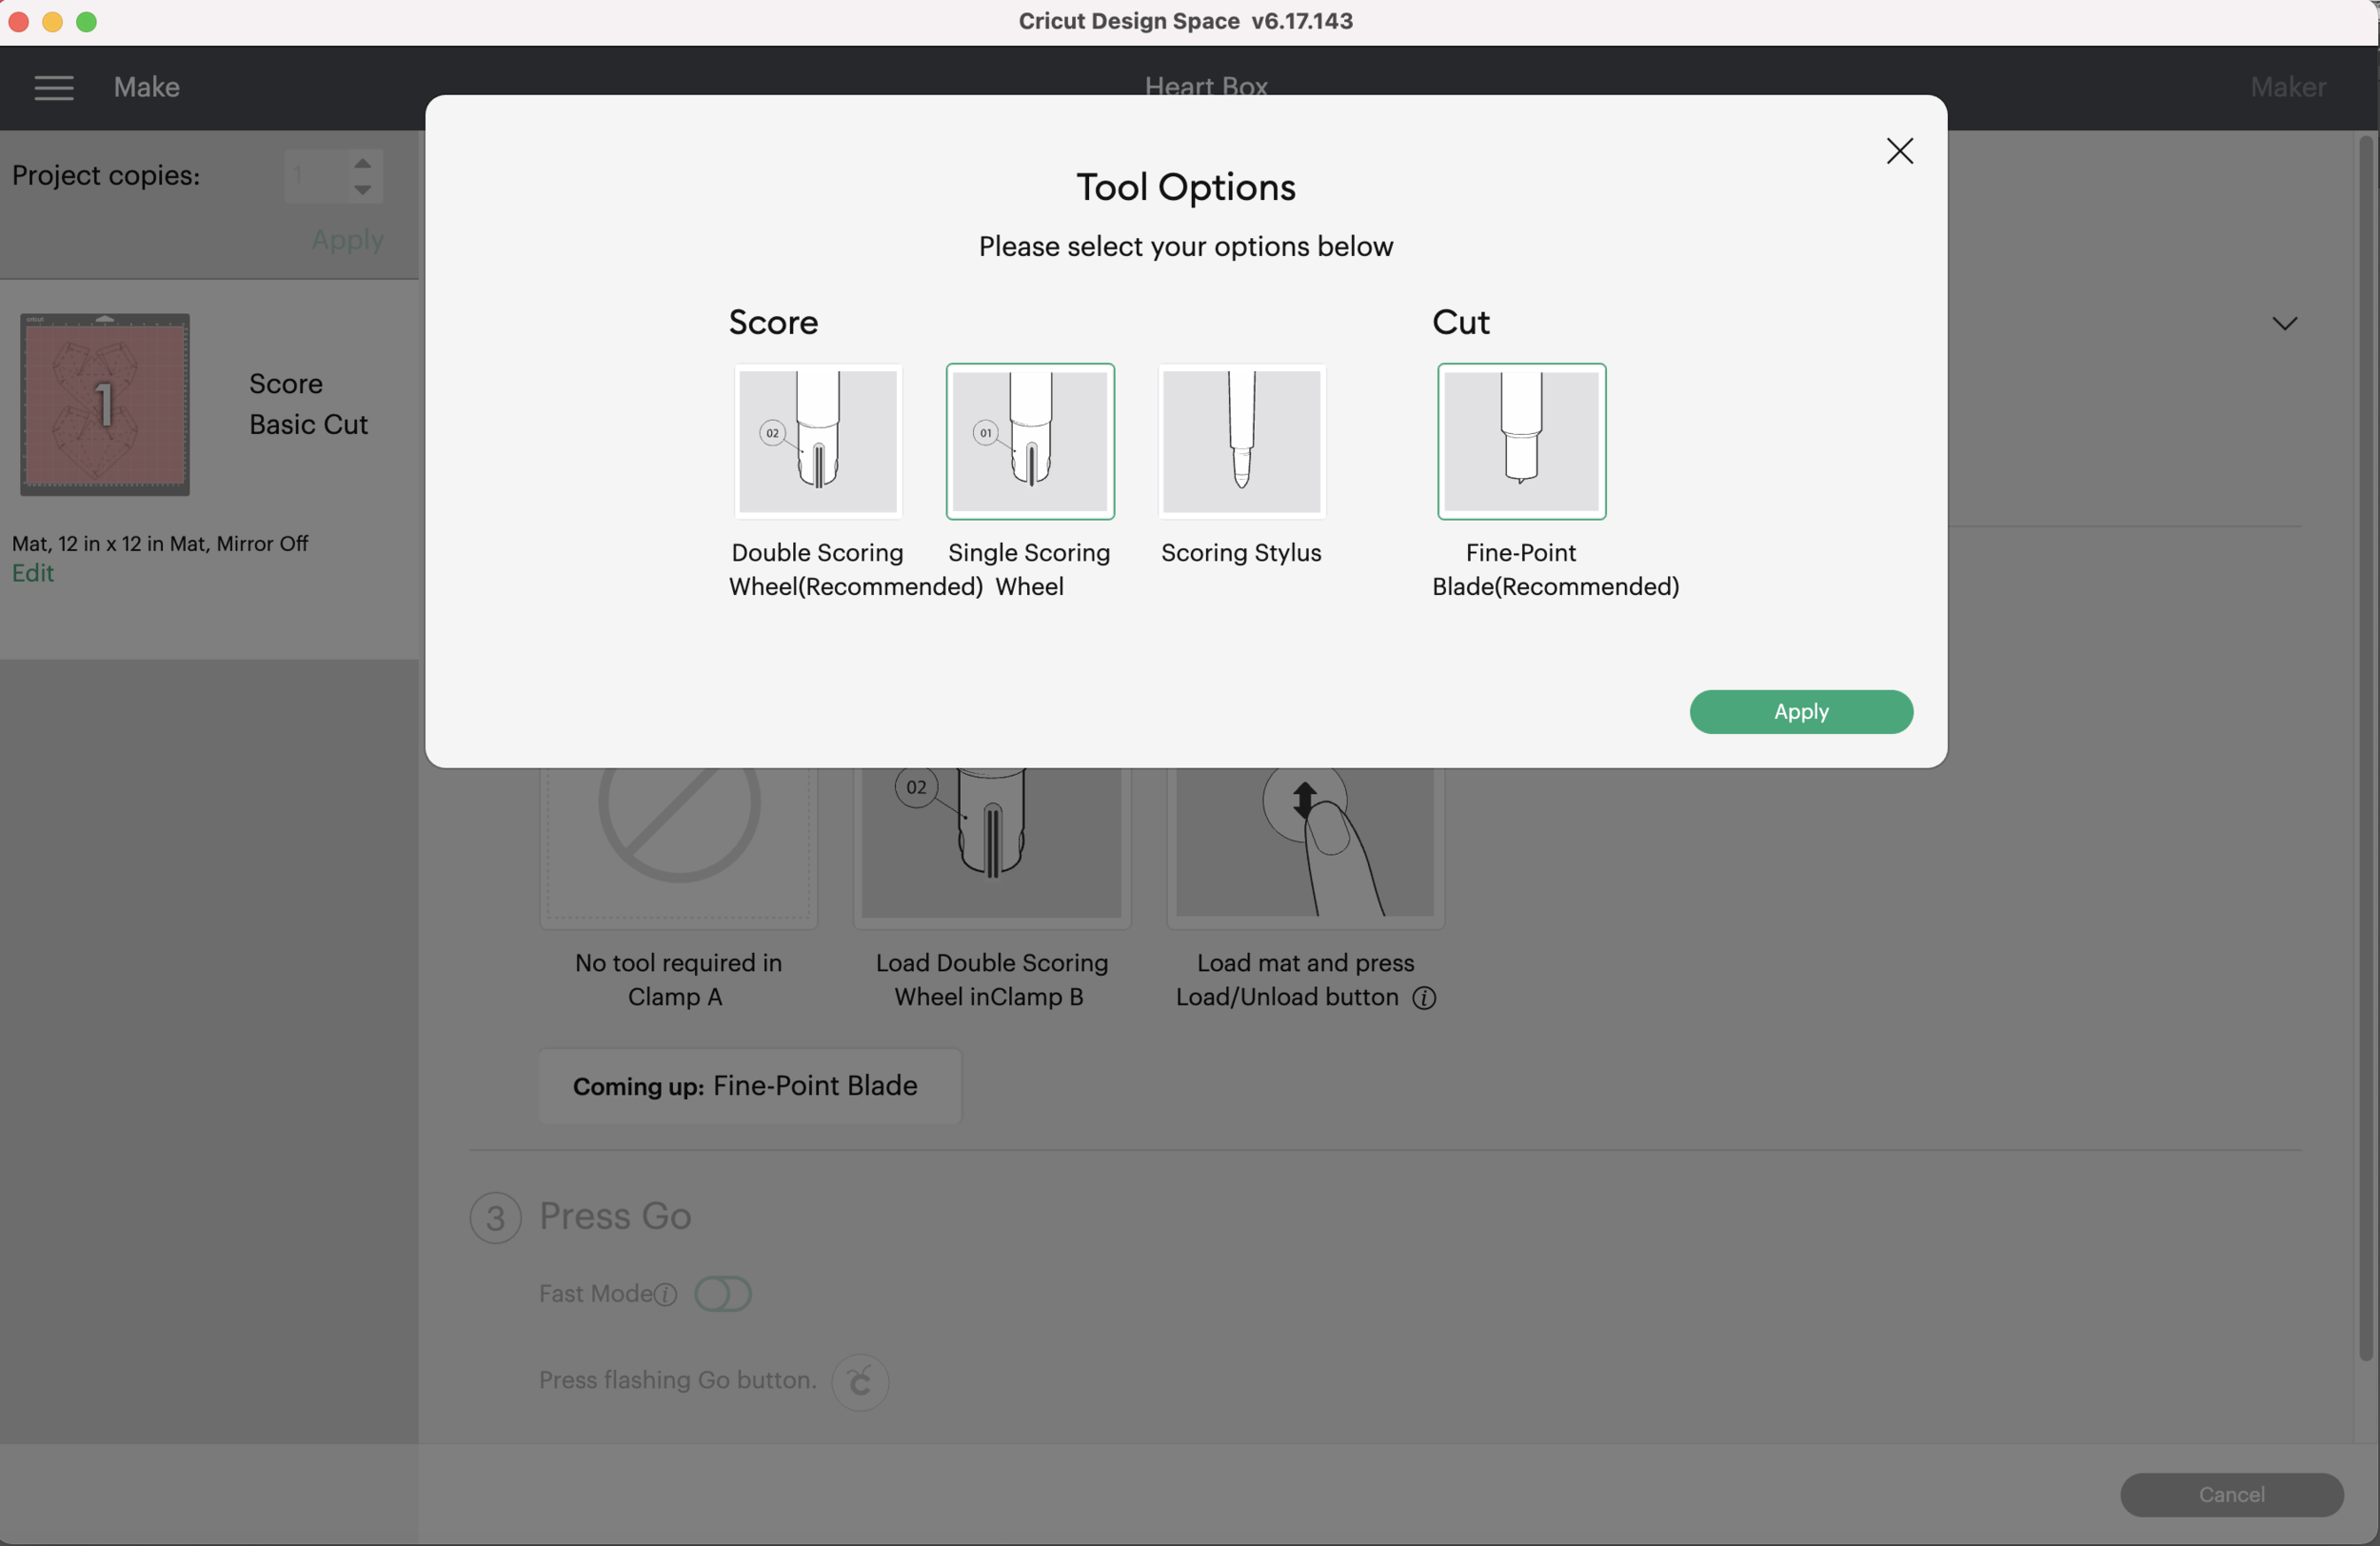
After I select my material it shows me the tools I will need. It calls for the double scoring wheel, but if you prefer to use the single scoring wheel or scoring stylus, click where it says Edit Tools in green.

Low Poly Heart Box

I’m going to use the single scoring wheel, so I select it and click apply. Now it’s time to load my mat and press go!

Low Poly Heart Box

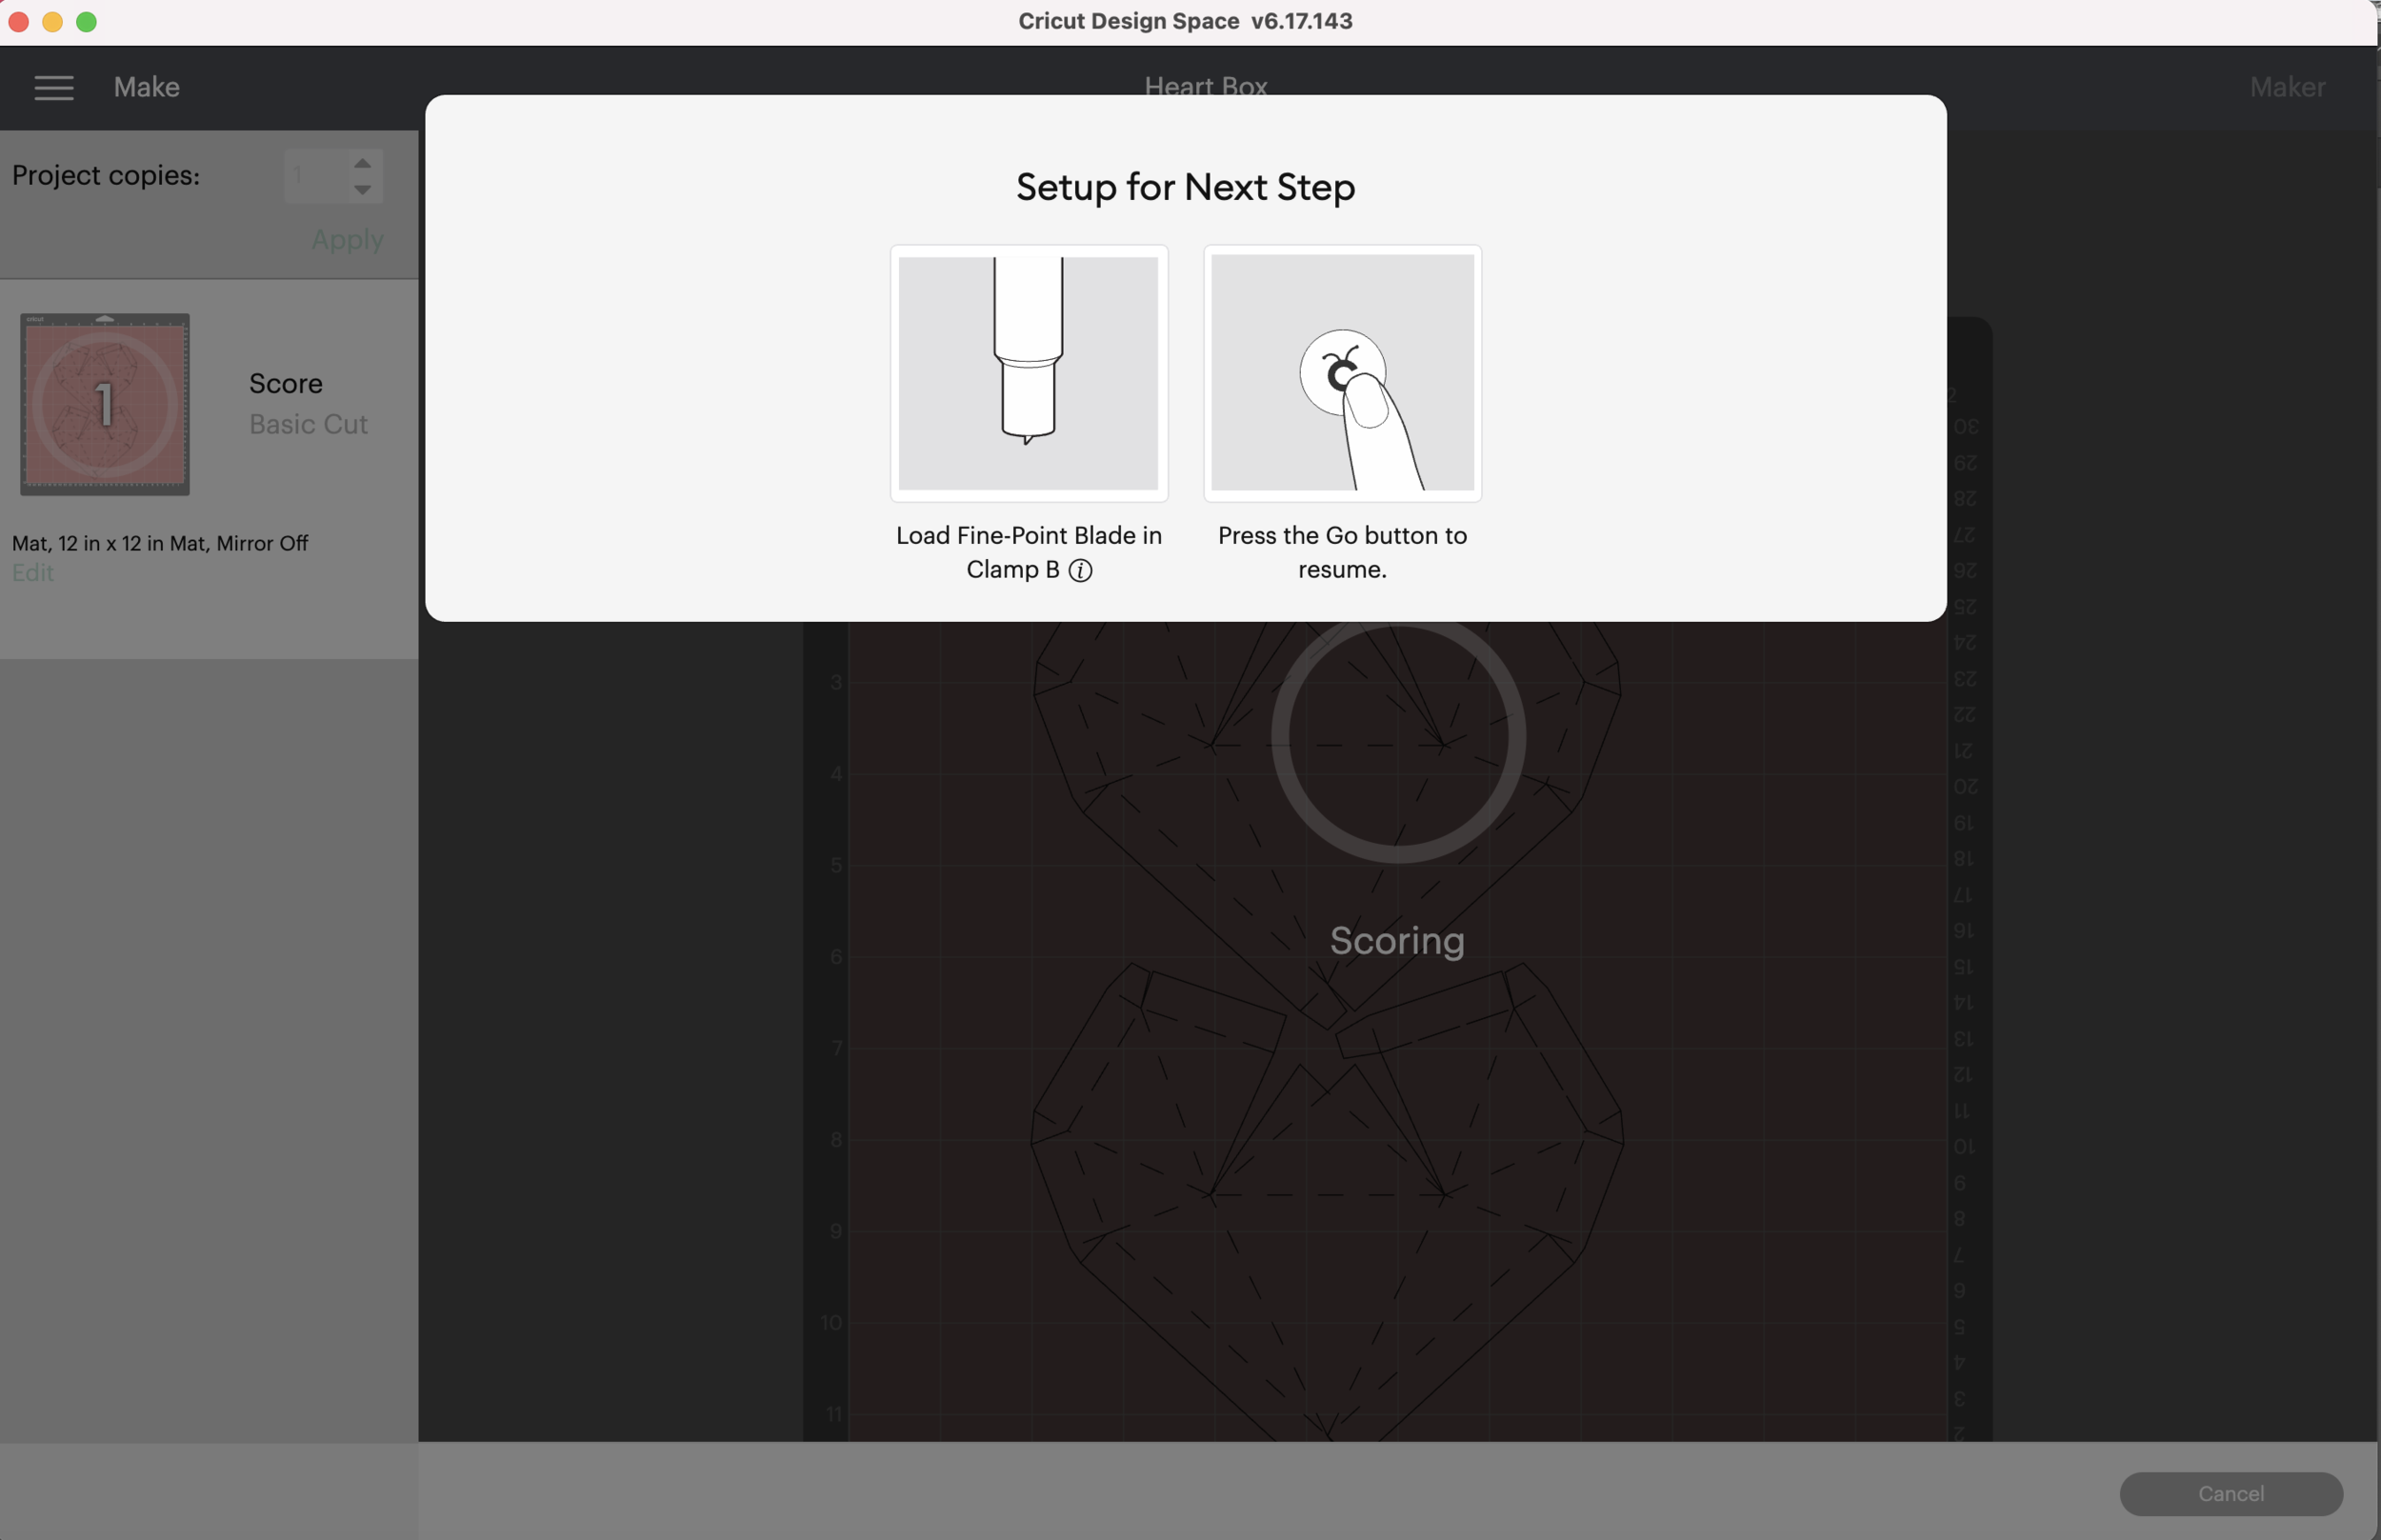
After it’s done scoring I need to switch to the fine point blade.

Low Poly Heart Box

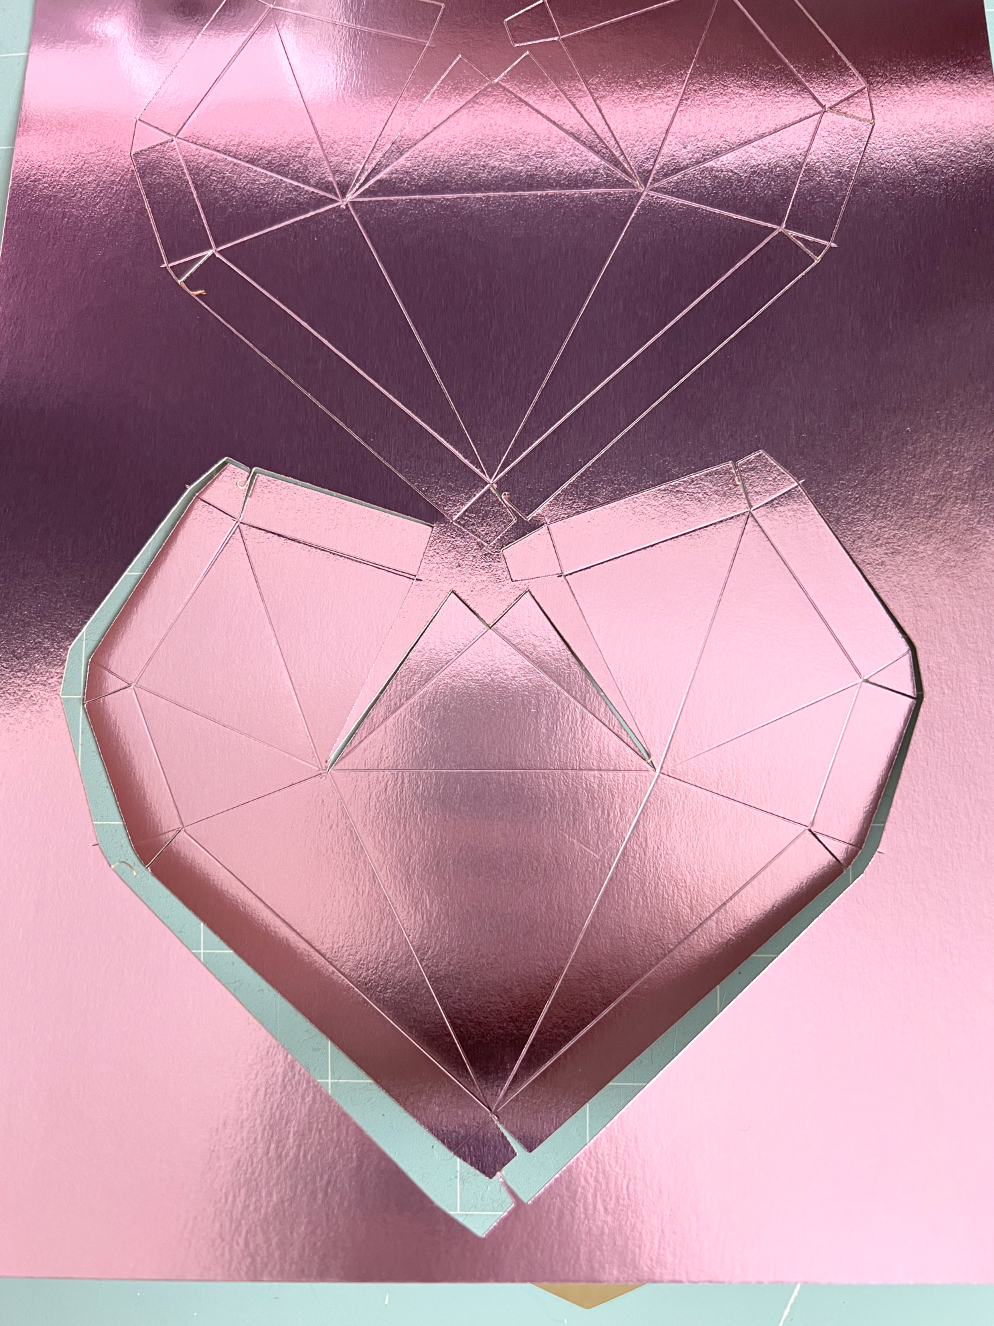
Once the machine is done cutting, before removing the mat, check to see that the blade cut all the way though your material. Mine did, so I can unload the mat. If it didn’t, press the Cricut button again on machine and it will do another round of cutting.

Low Poly Heart Box

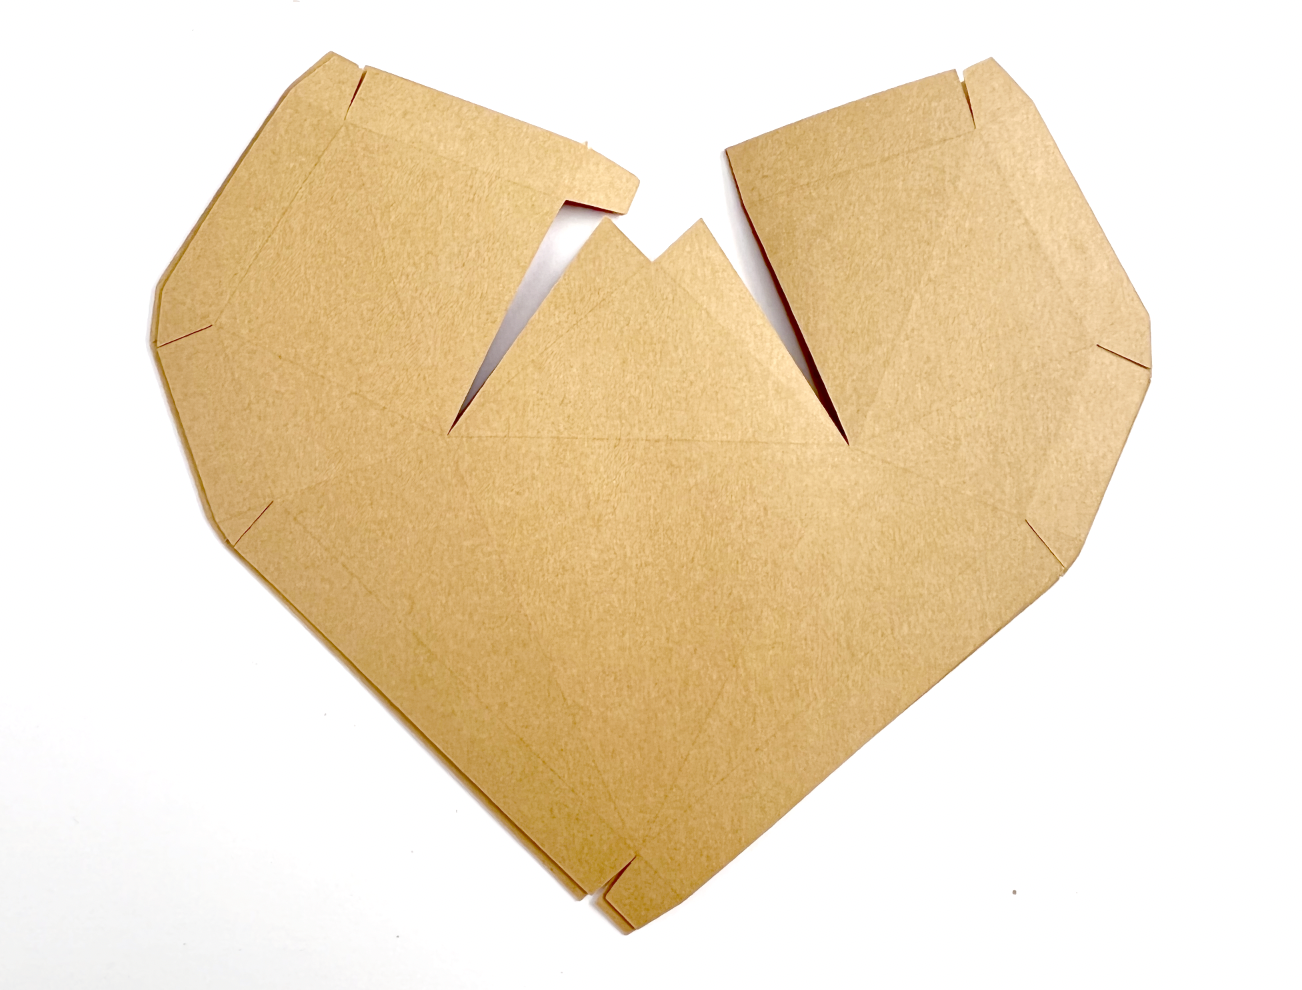
Now it’s time to assemble! It doesn’t matter if you start with the front or back heart. If you forget which piece is which, lay them on top of each other, the back heart piece is slightly smaller than the front heart heart piece.

Low Poly Heart Box

The areas in red will need tape or glue applied when assembling.

Low Poly Heart Box

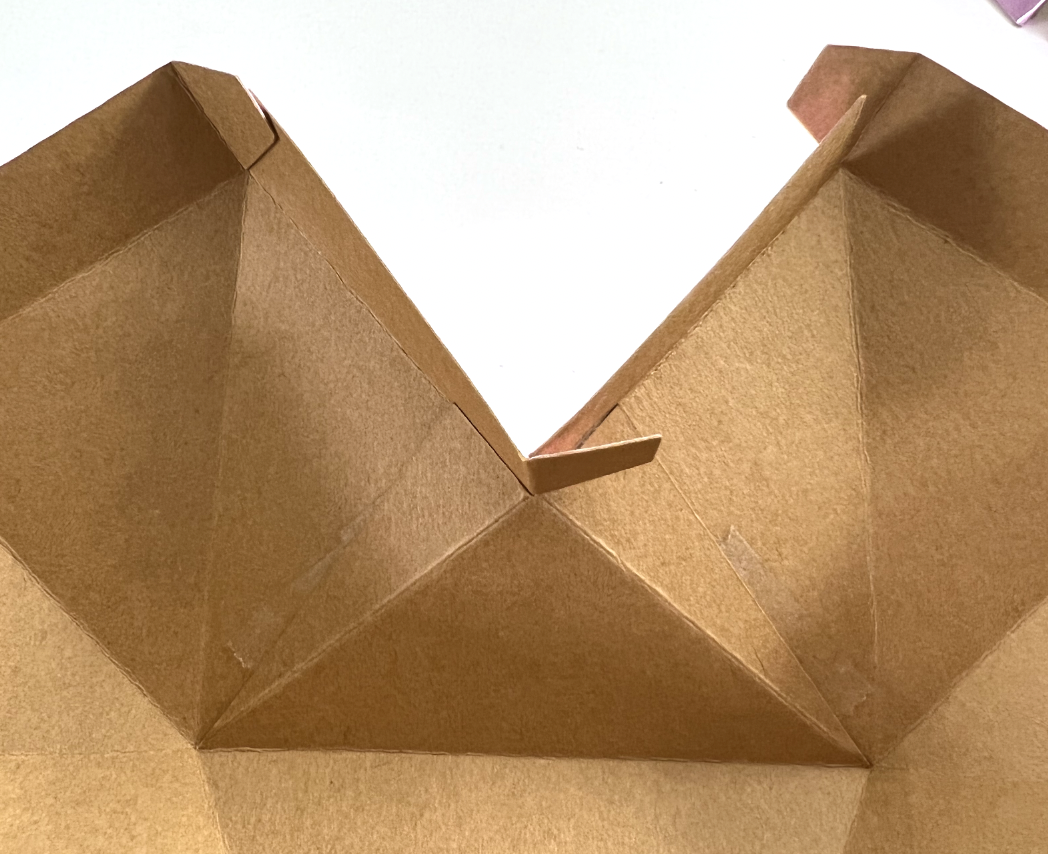
I like to fold all of my score lines before I start taping/ glueing. I’m going to start at the center of the heart, these 2 pieces in the center need to be folded in the opposite direction of all the other lines.

Low Poly Heart Box

Then I fold all my other lines.

Low Poly Heart Box

I’m going to use double sided tape to assemble this, but you can also use glue. Again, I’m going to start at the center of the heart. I apply my tape to the flap and line up the edge with my score line.

Low Poly Heart Box

I do the same thing for the other side. Then the little tab needs to be on the inside of the heart, and taped.

Low Poly Heart Box

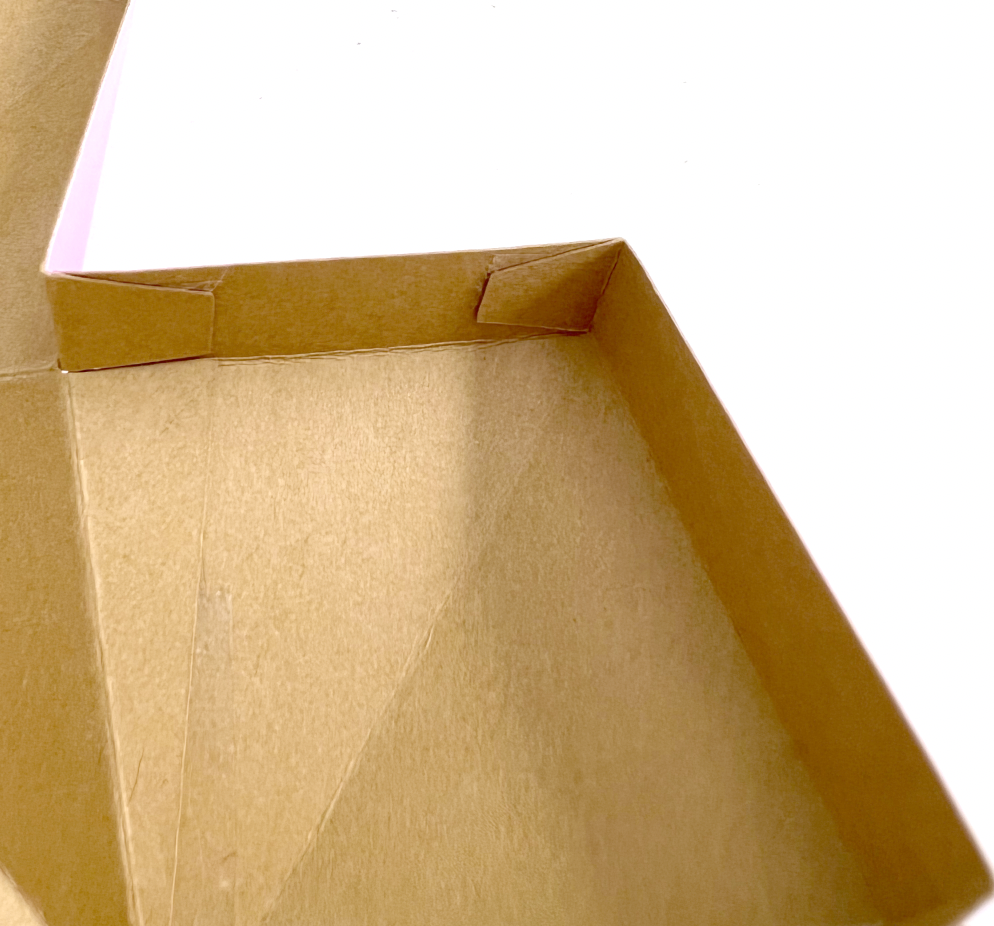
Then I move to the top of the heart, apply tape or glue to the little tab. Line up the score line to the cut edge and secure it.

Low Poly Heart Box

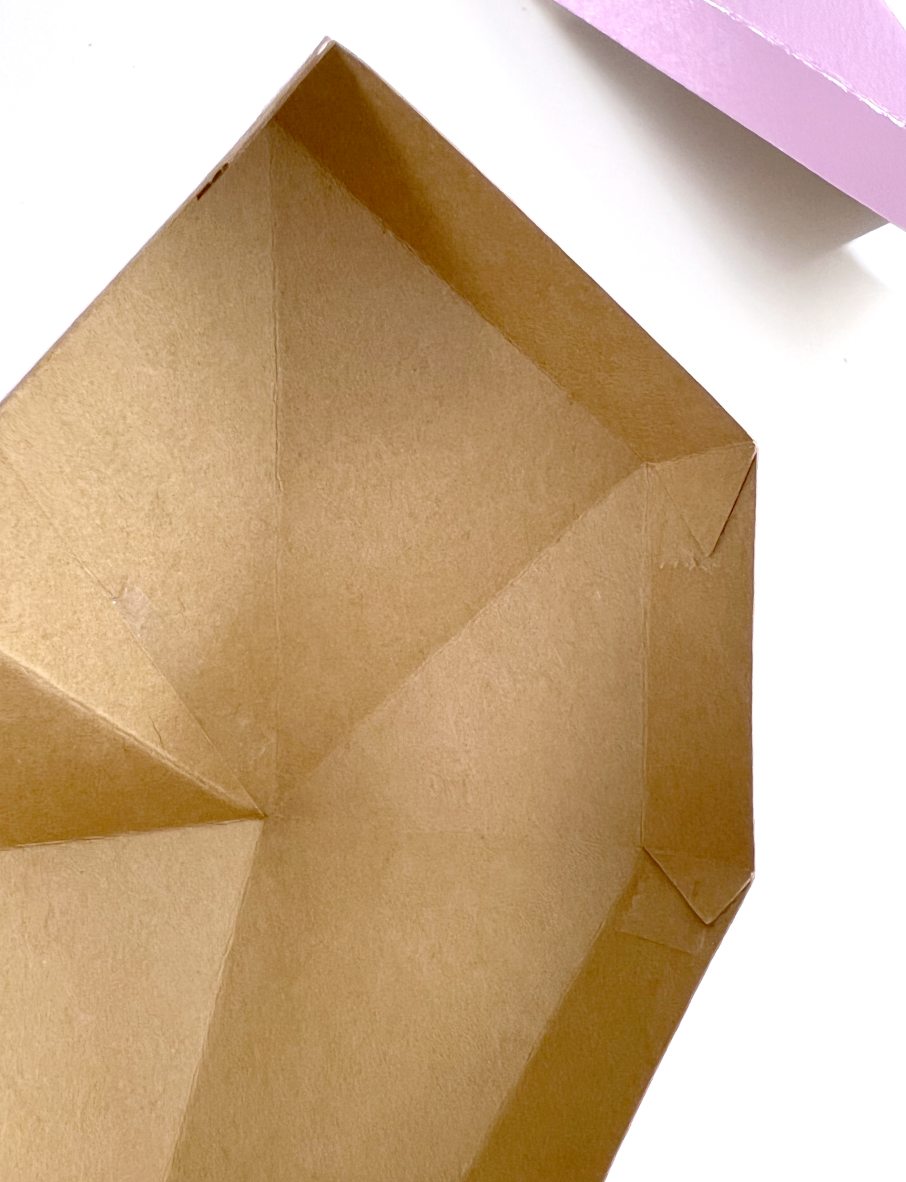
I work my way all around so all the little tabs are taped/ glued.

Low Poly Heart Box

Now one side is finished and I repeat the same process for the other heart piece.

Low Poly Heart Box

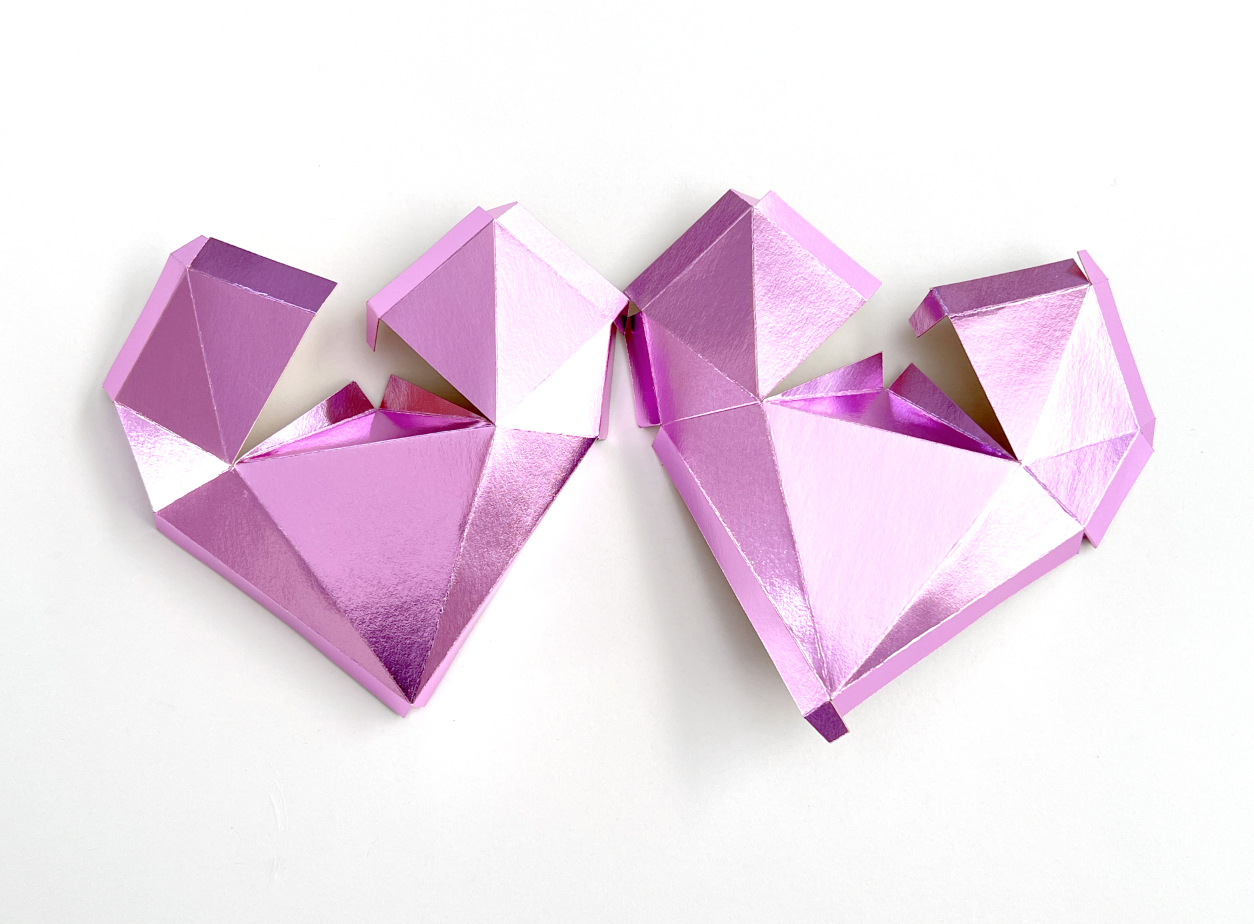
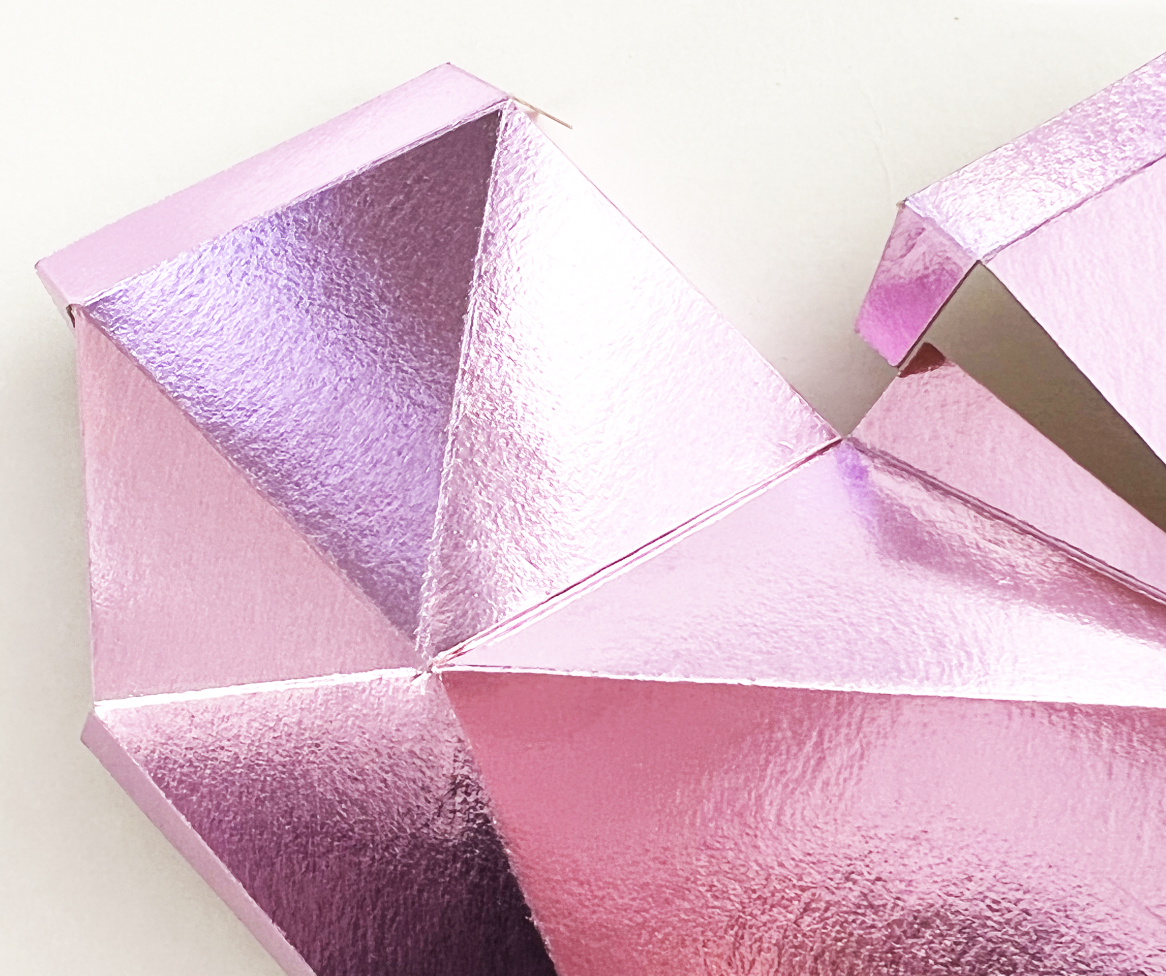
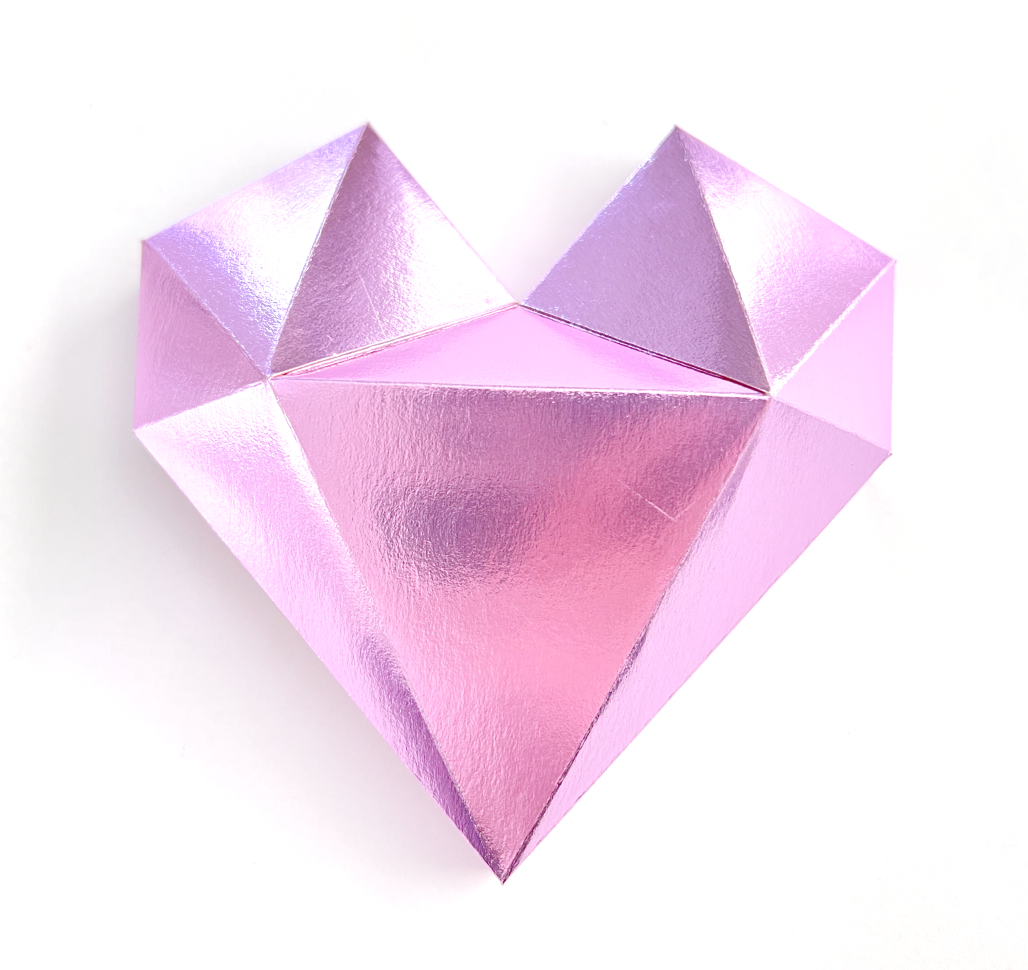
Now I put them together, the back nests inside the front. This is a view of the back.

Low Poly Heart Box

Now you have a cute little heart box! You can even cut some vinyl to add names or cute little messages to the front heart.

Low Poly Heart Box
Low Poly Heart Box

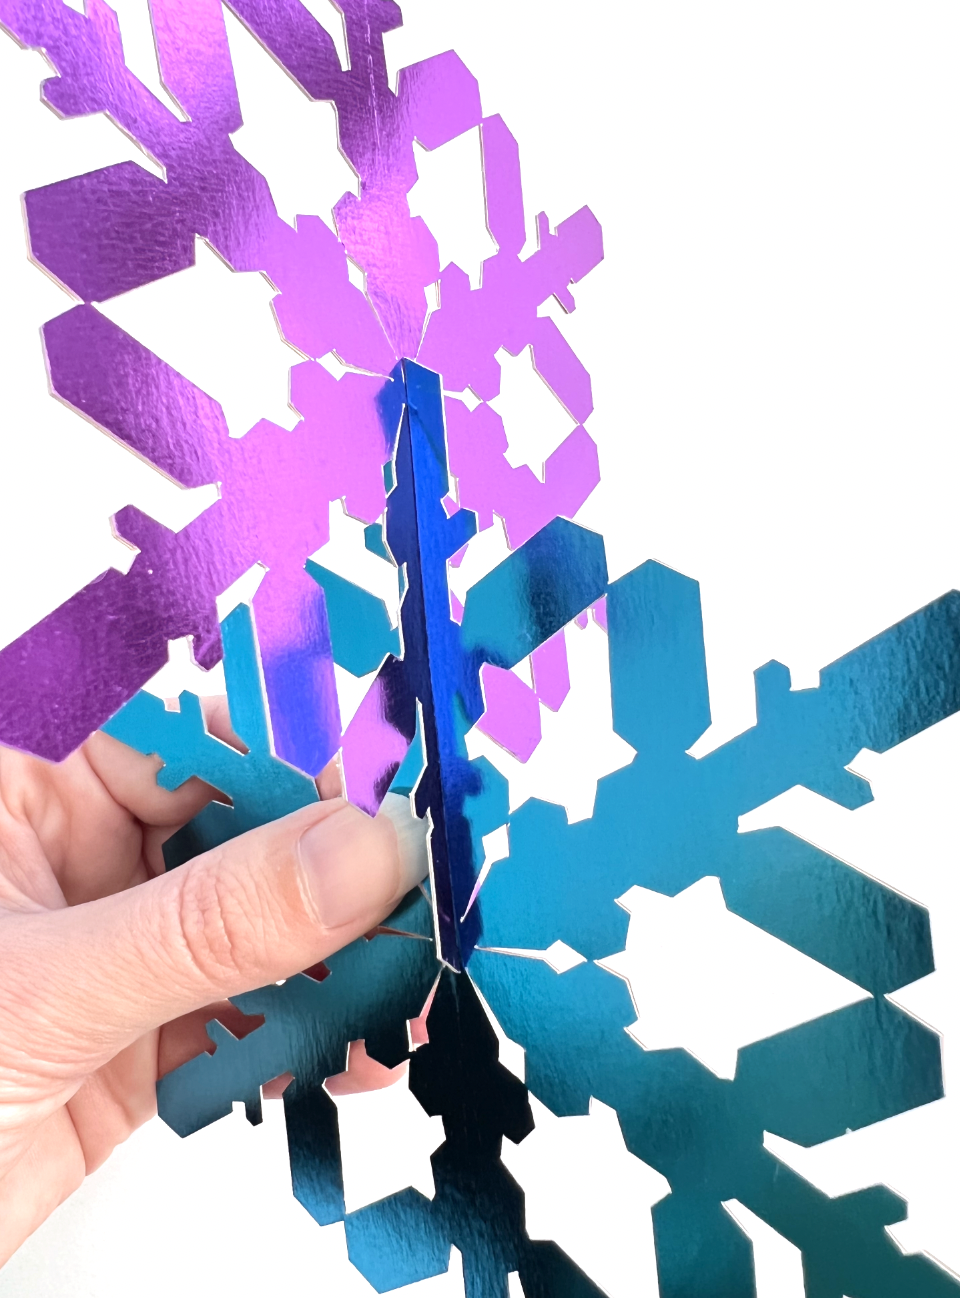
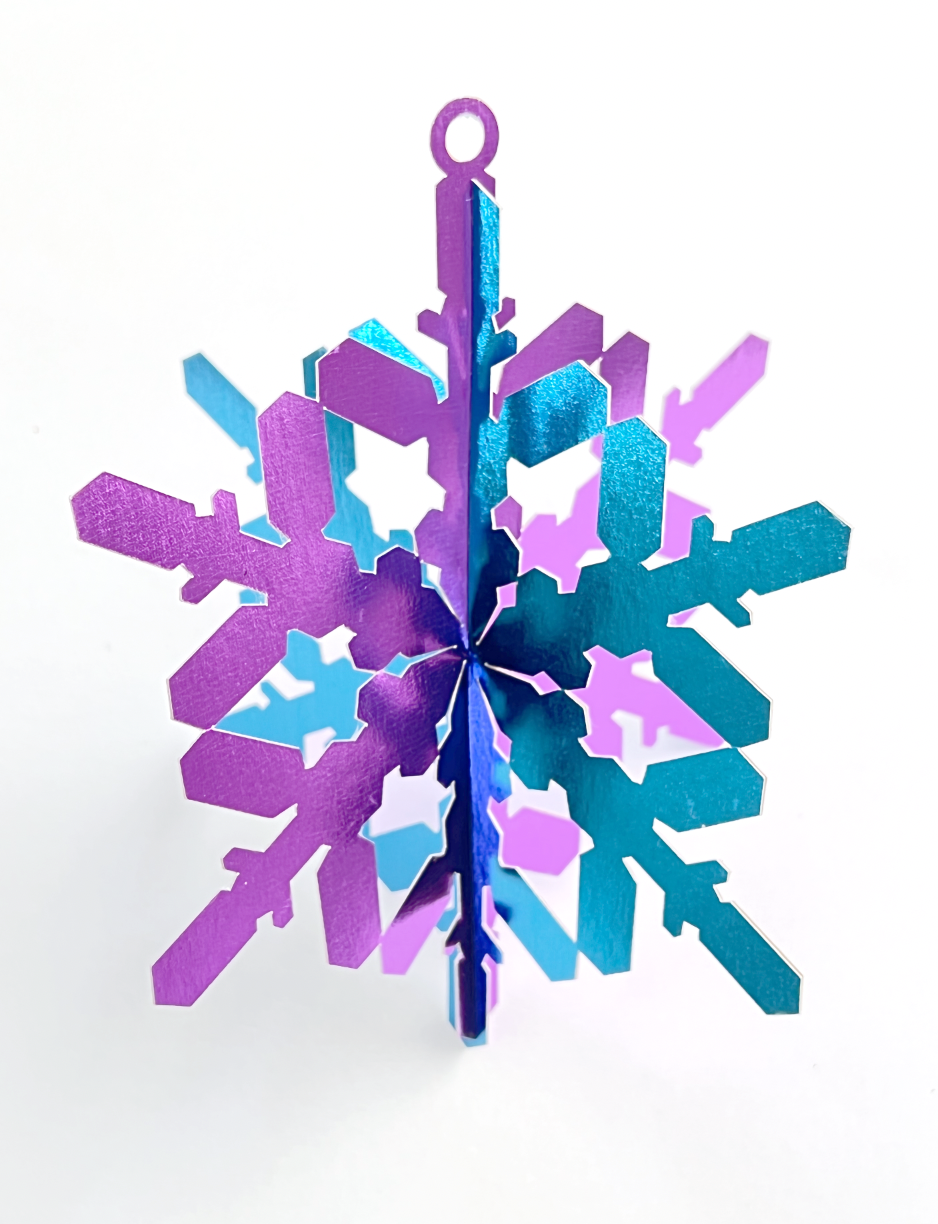
3D Cardstock Snowflakes

Hi Everyone! It’s almost the end of 2021, this year has flown by! I’ve been spending the past couple of weeks planning new projects and files to share on my website and Etsy shop. Christmas may be over, but it’s still winter in some parts of the world, so I thought I would share part of a project I’ve been working on. It’s a pretty simple one you can do on a snowy afternoon!

Supplies:

(links below may be affiliate links)

Cutting machine (I will be using my Portrait 3, but you can also use a Cricut or other cutting machine)

Light Grip cutting mat

Snowflake cut file (You can download the one I’m using here for free)

Lightweight cardstock (I’m using foil cardstock, 2 different colors)

Glue stick or tape runner

Ribbon, twine or fishing line to hang the snowflakes

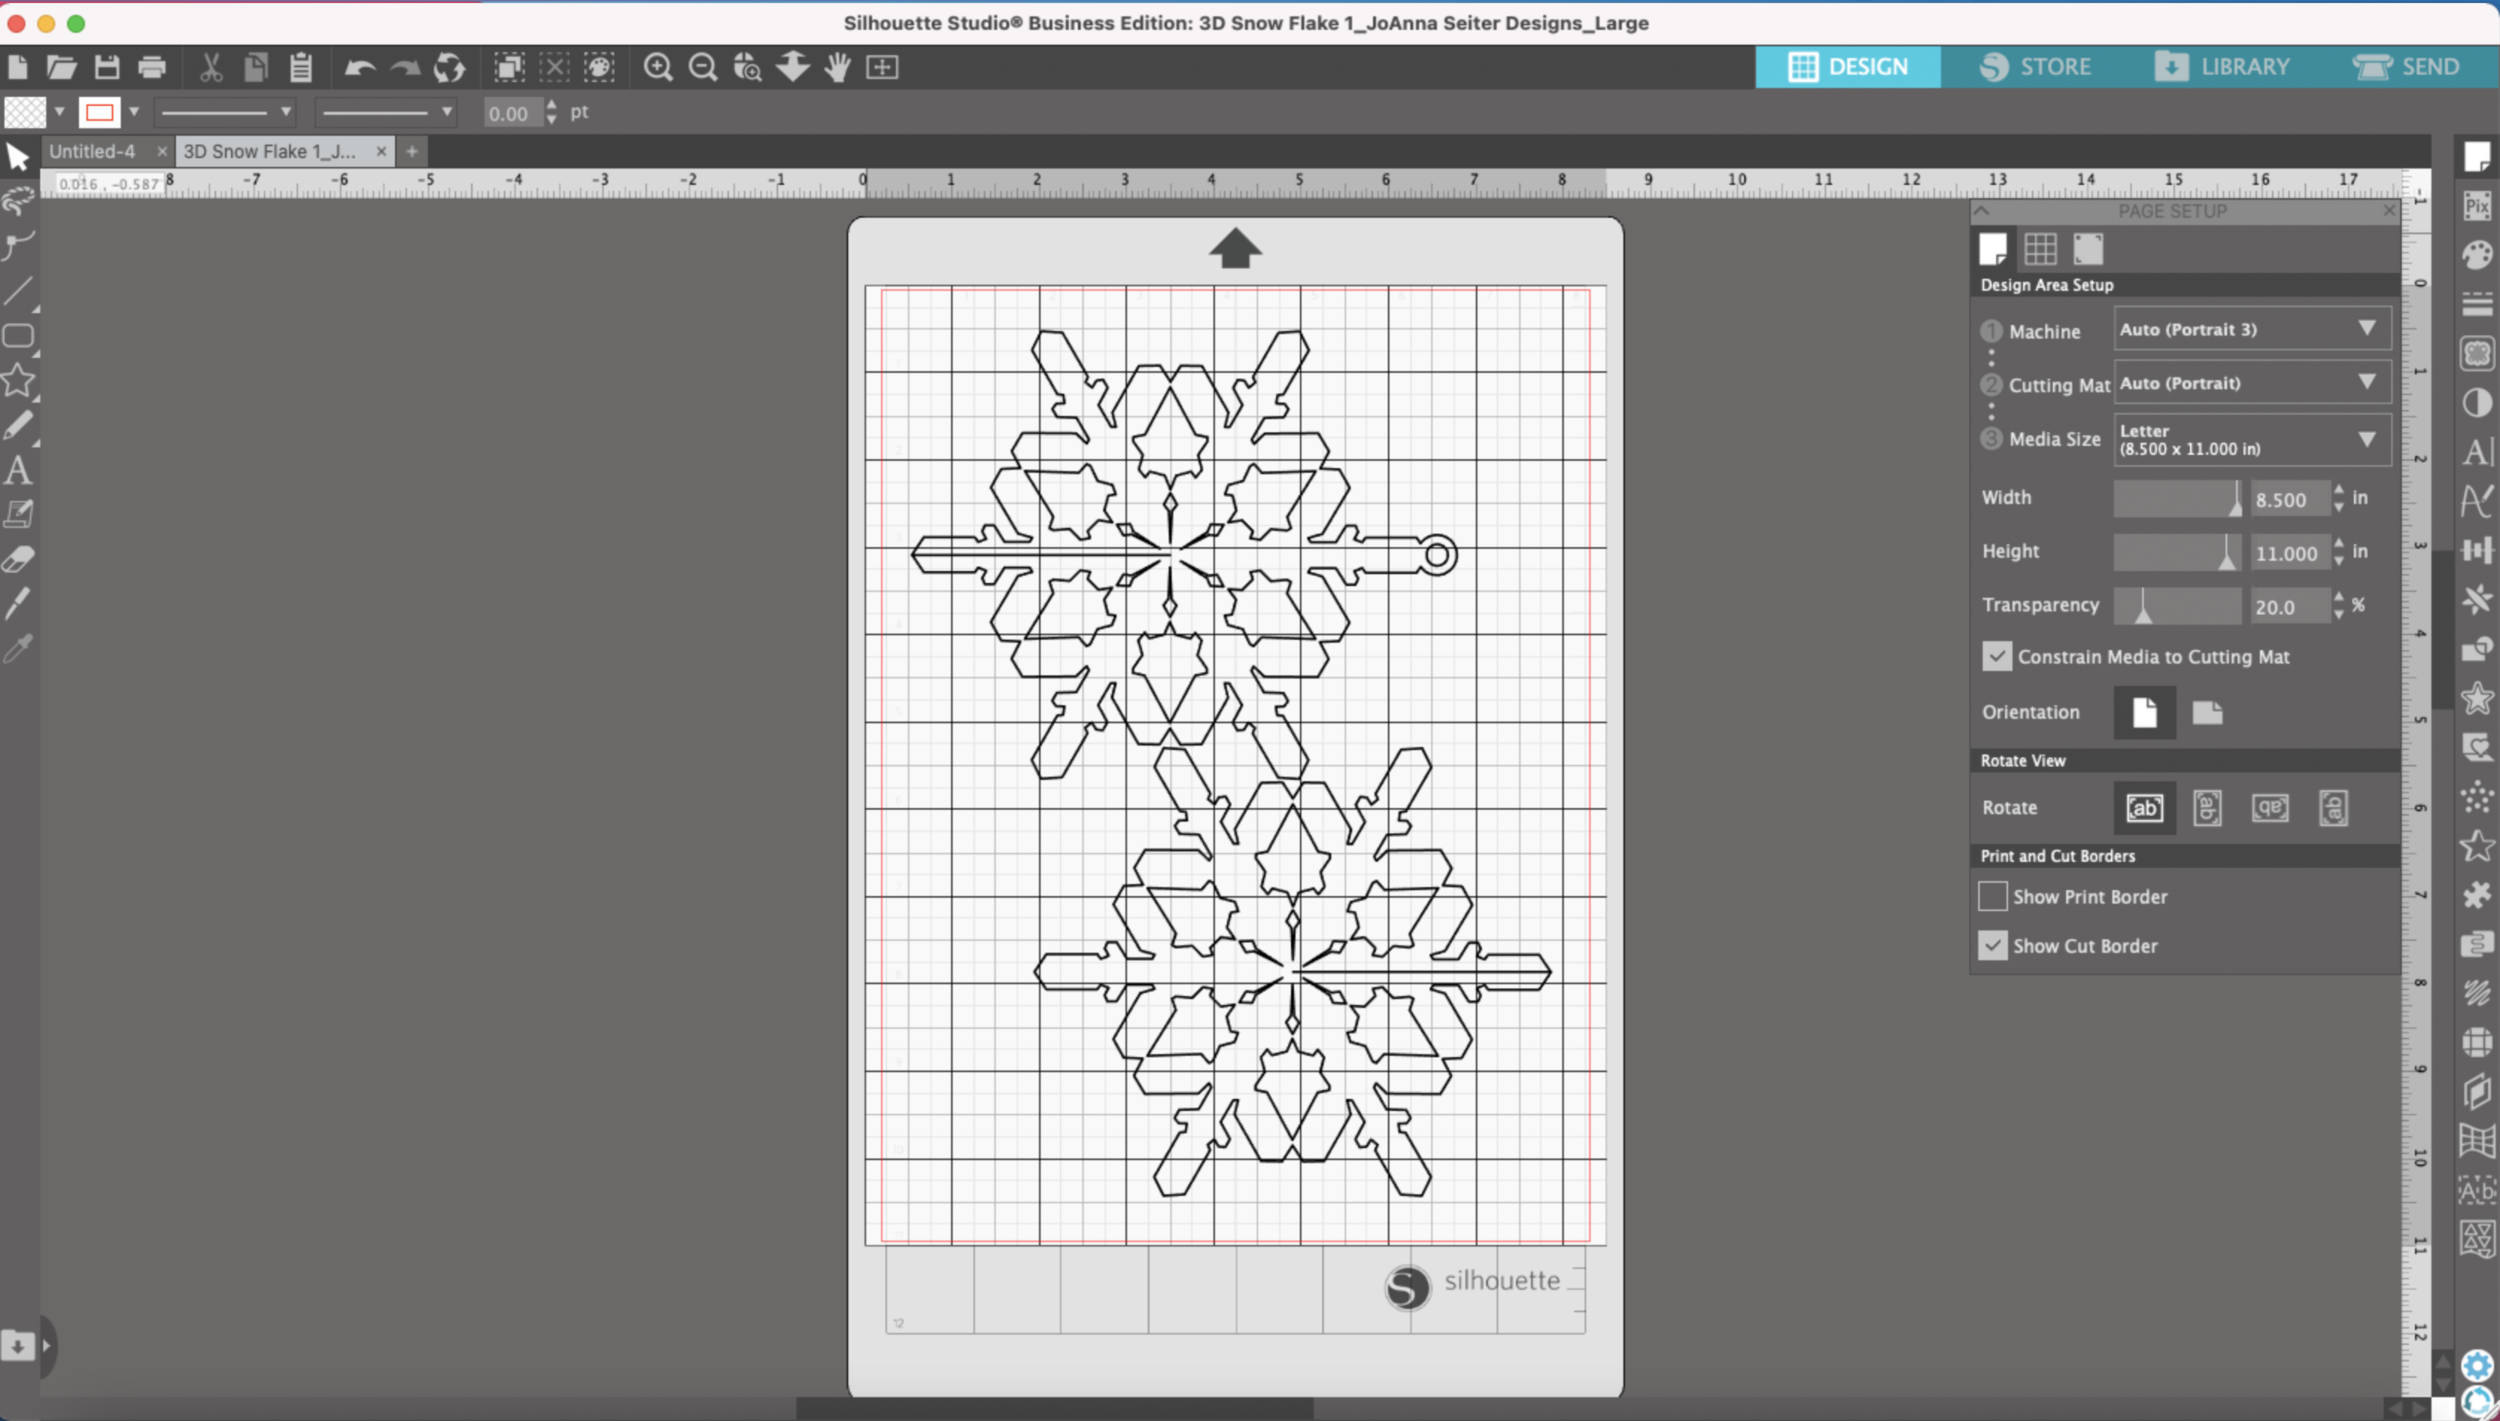
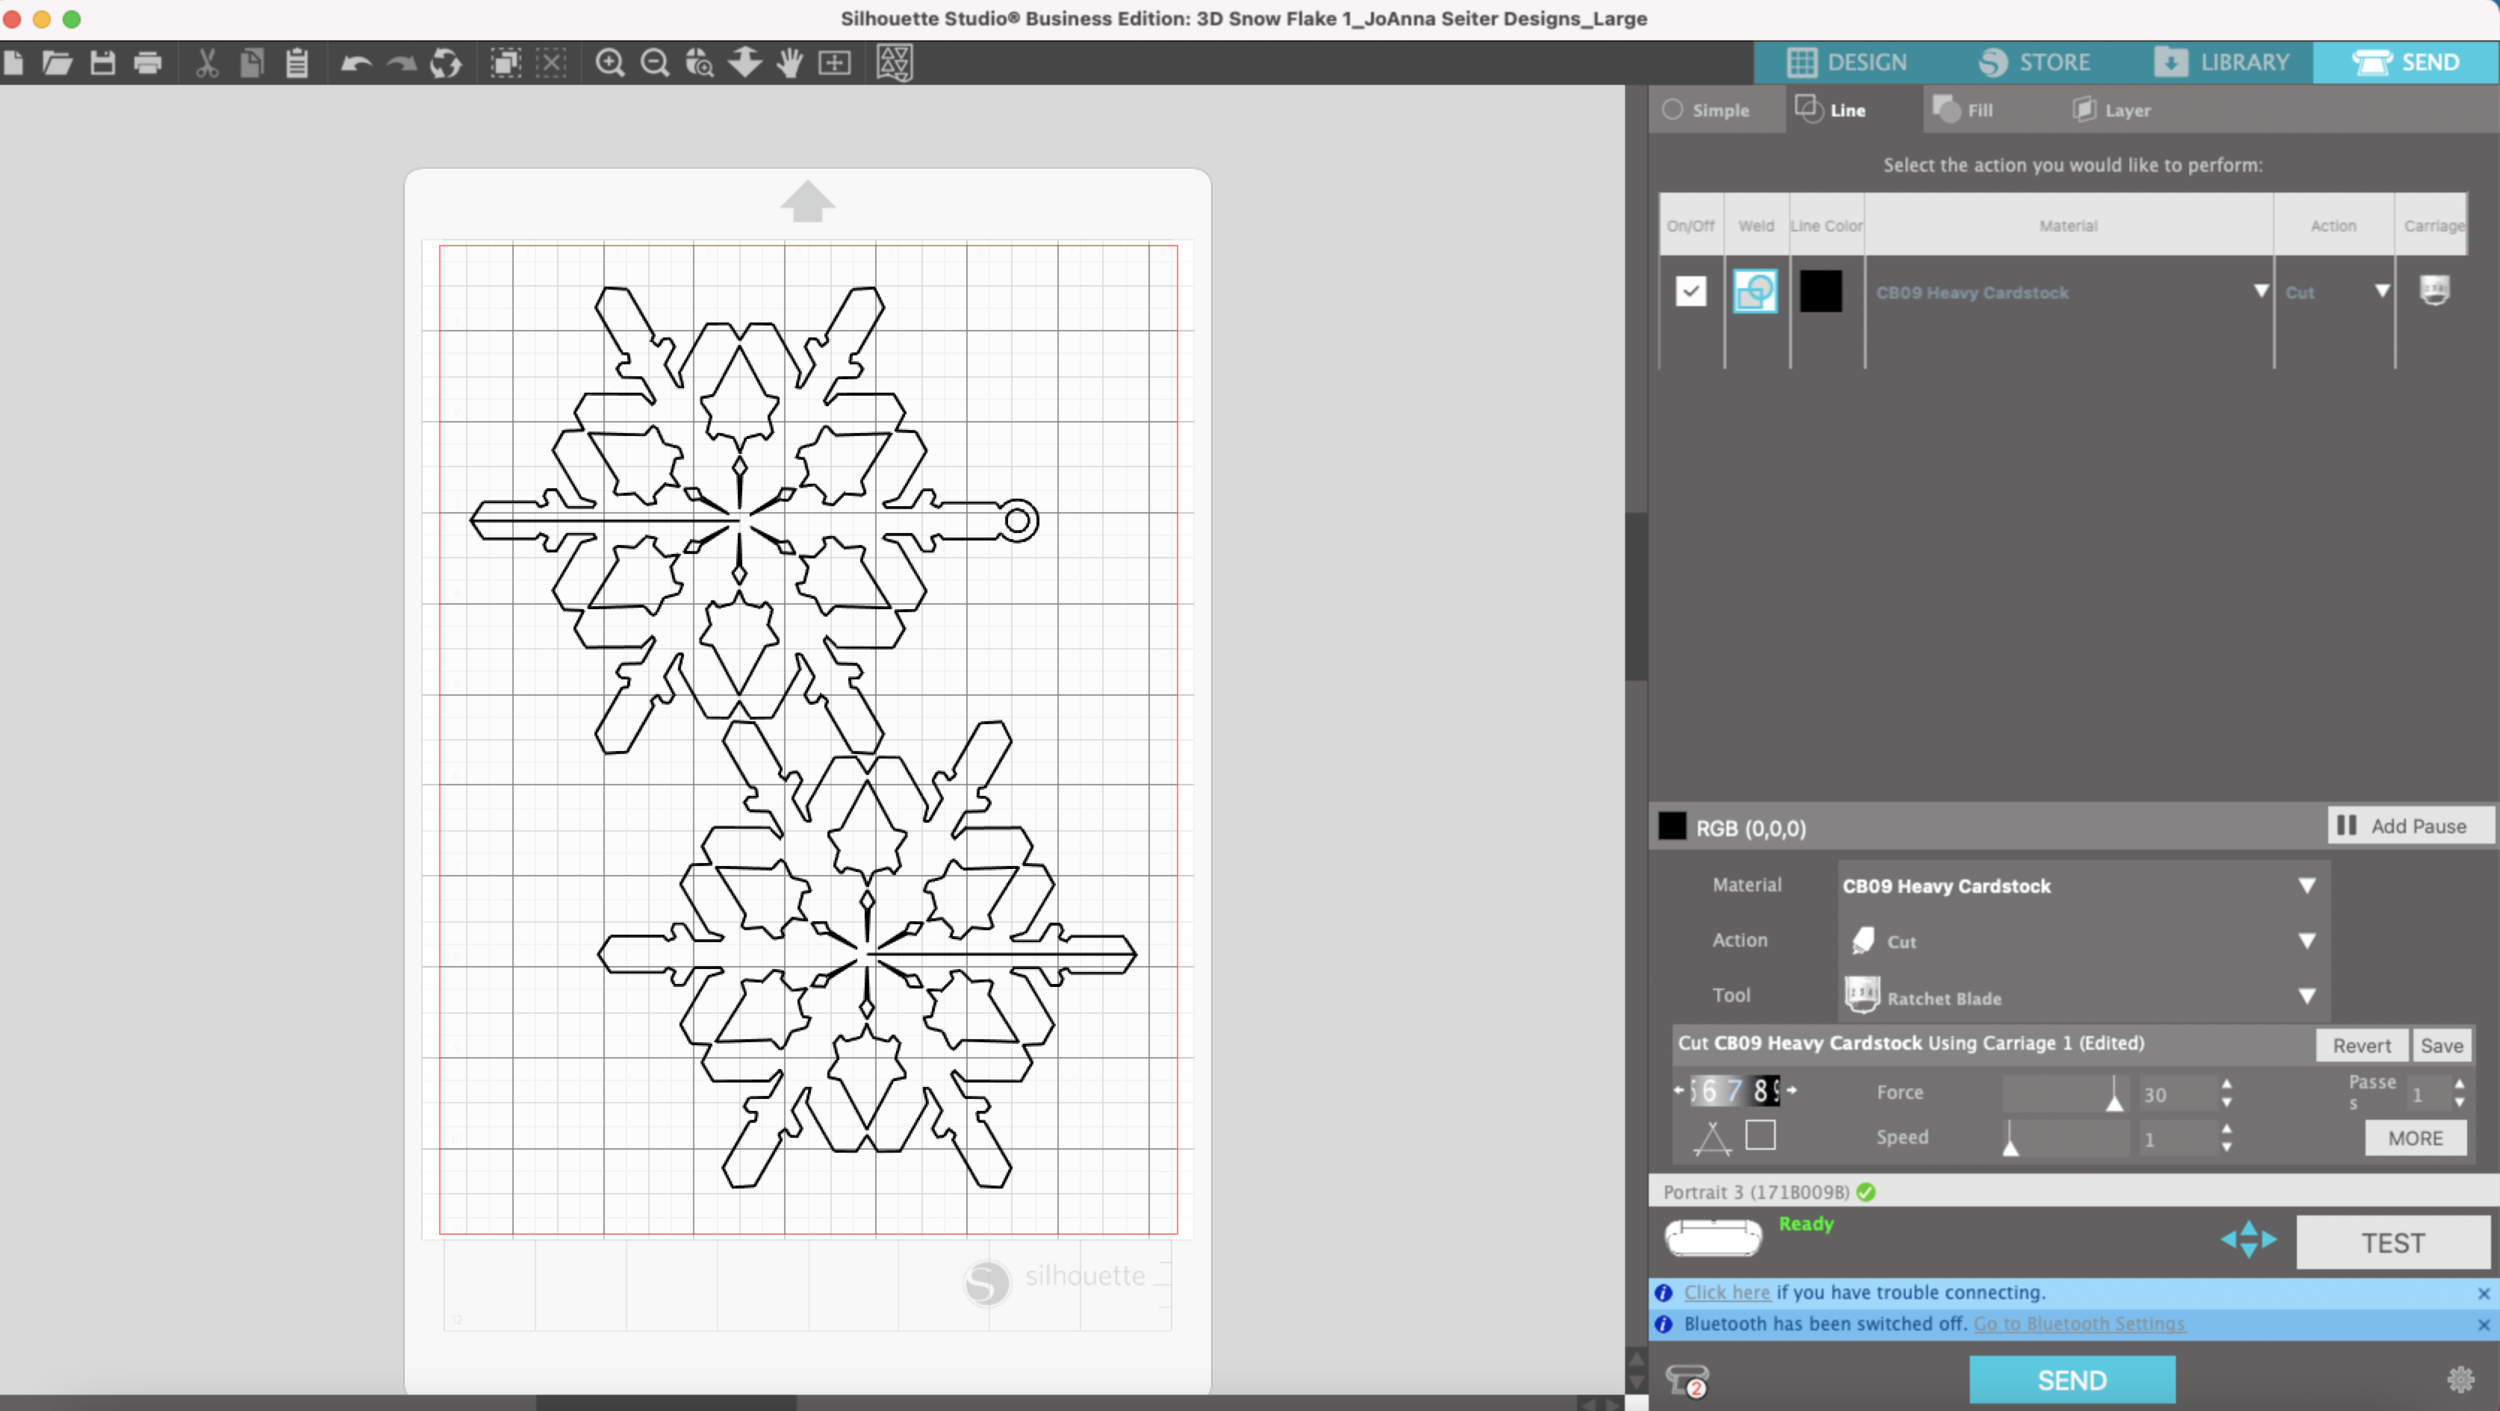
First open the SVG file in Silhouette Studio and adjust the size of the snowflake to your liking and will fit to your materials. Since I’m using two different colors of cardstock, I’m making my snowflakes pretty large.

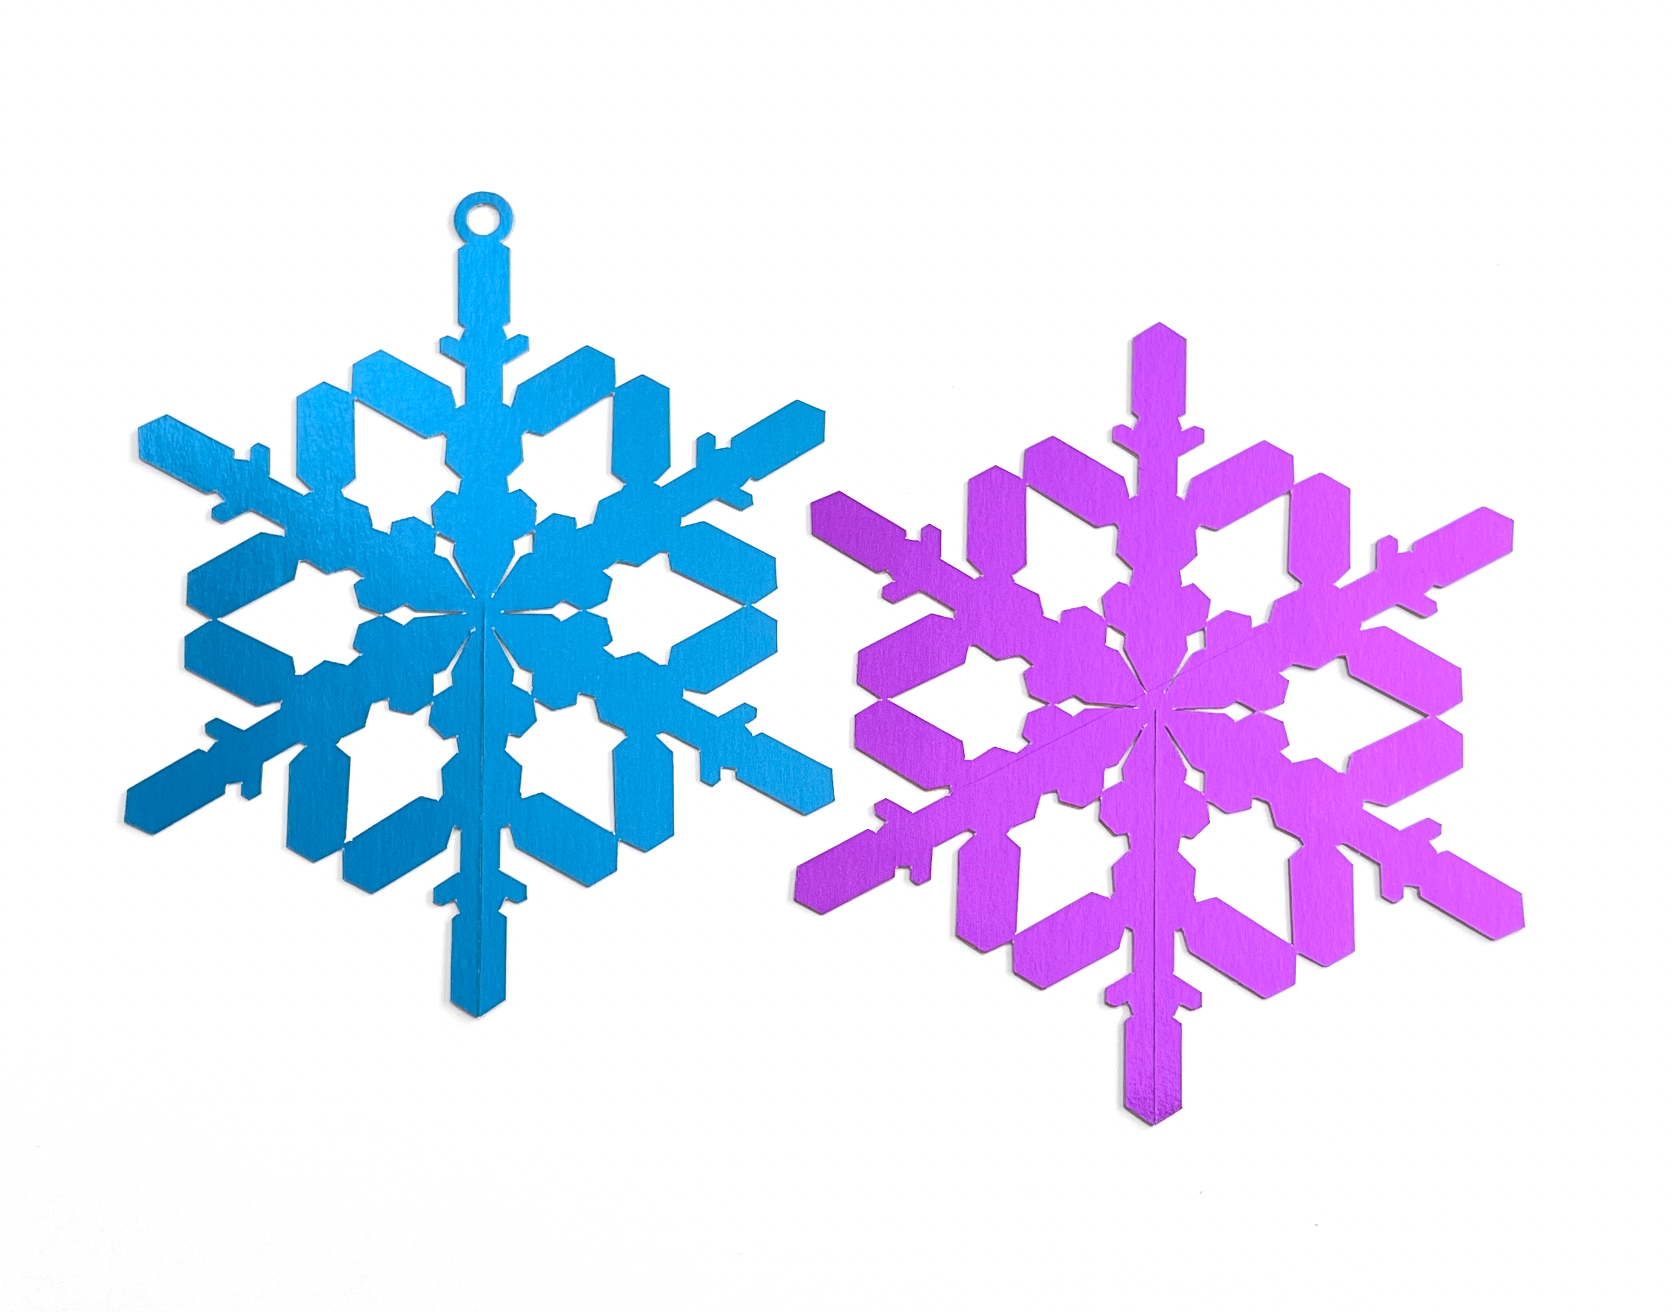
I have one snowflake with a hole added at the top for hanging and one snowflake without the hole at the top.

3D Snowflake SVG Cut file

I’m using my light grip cutting mat. I initially tried to do the matless, but the angles are a little too tight to get a nice pop out cut.

3D Snowflake SVG Cut file

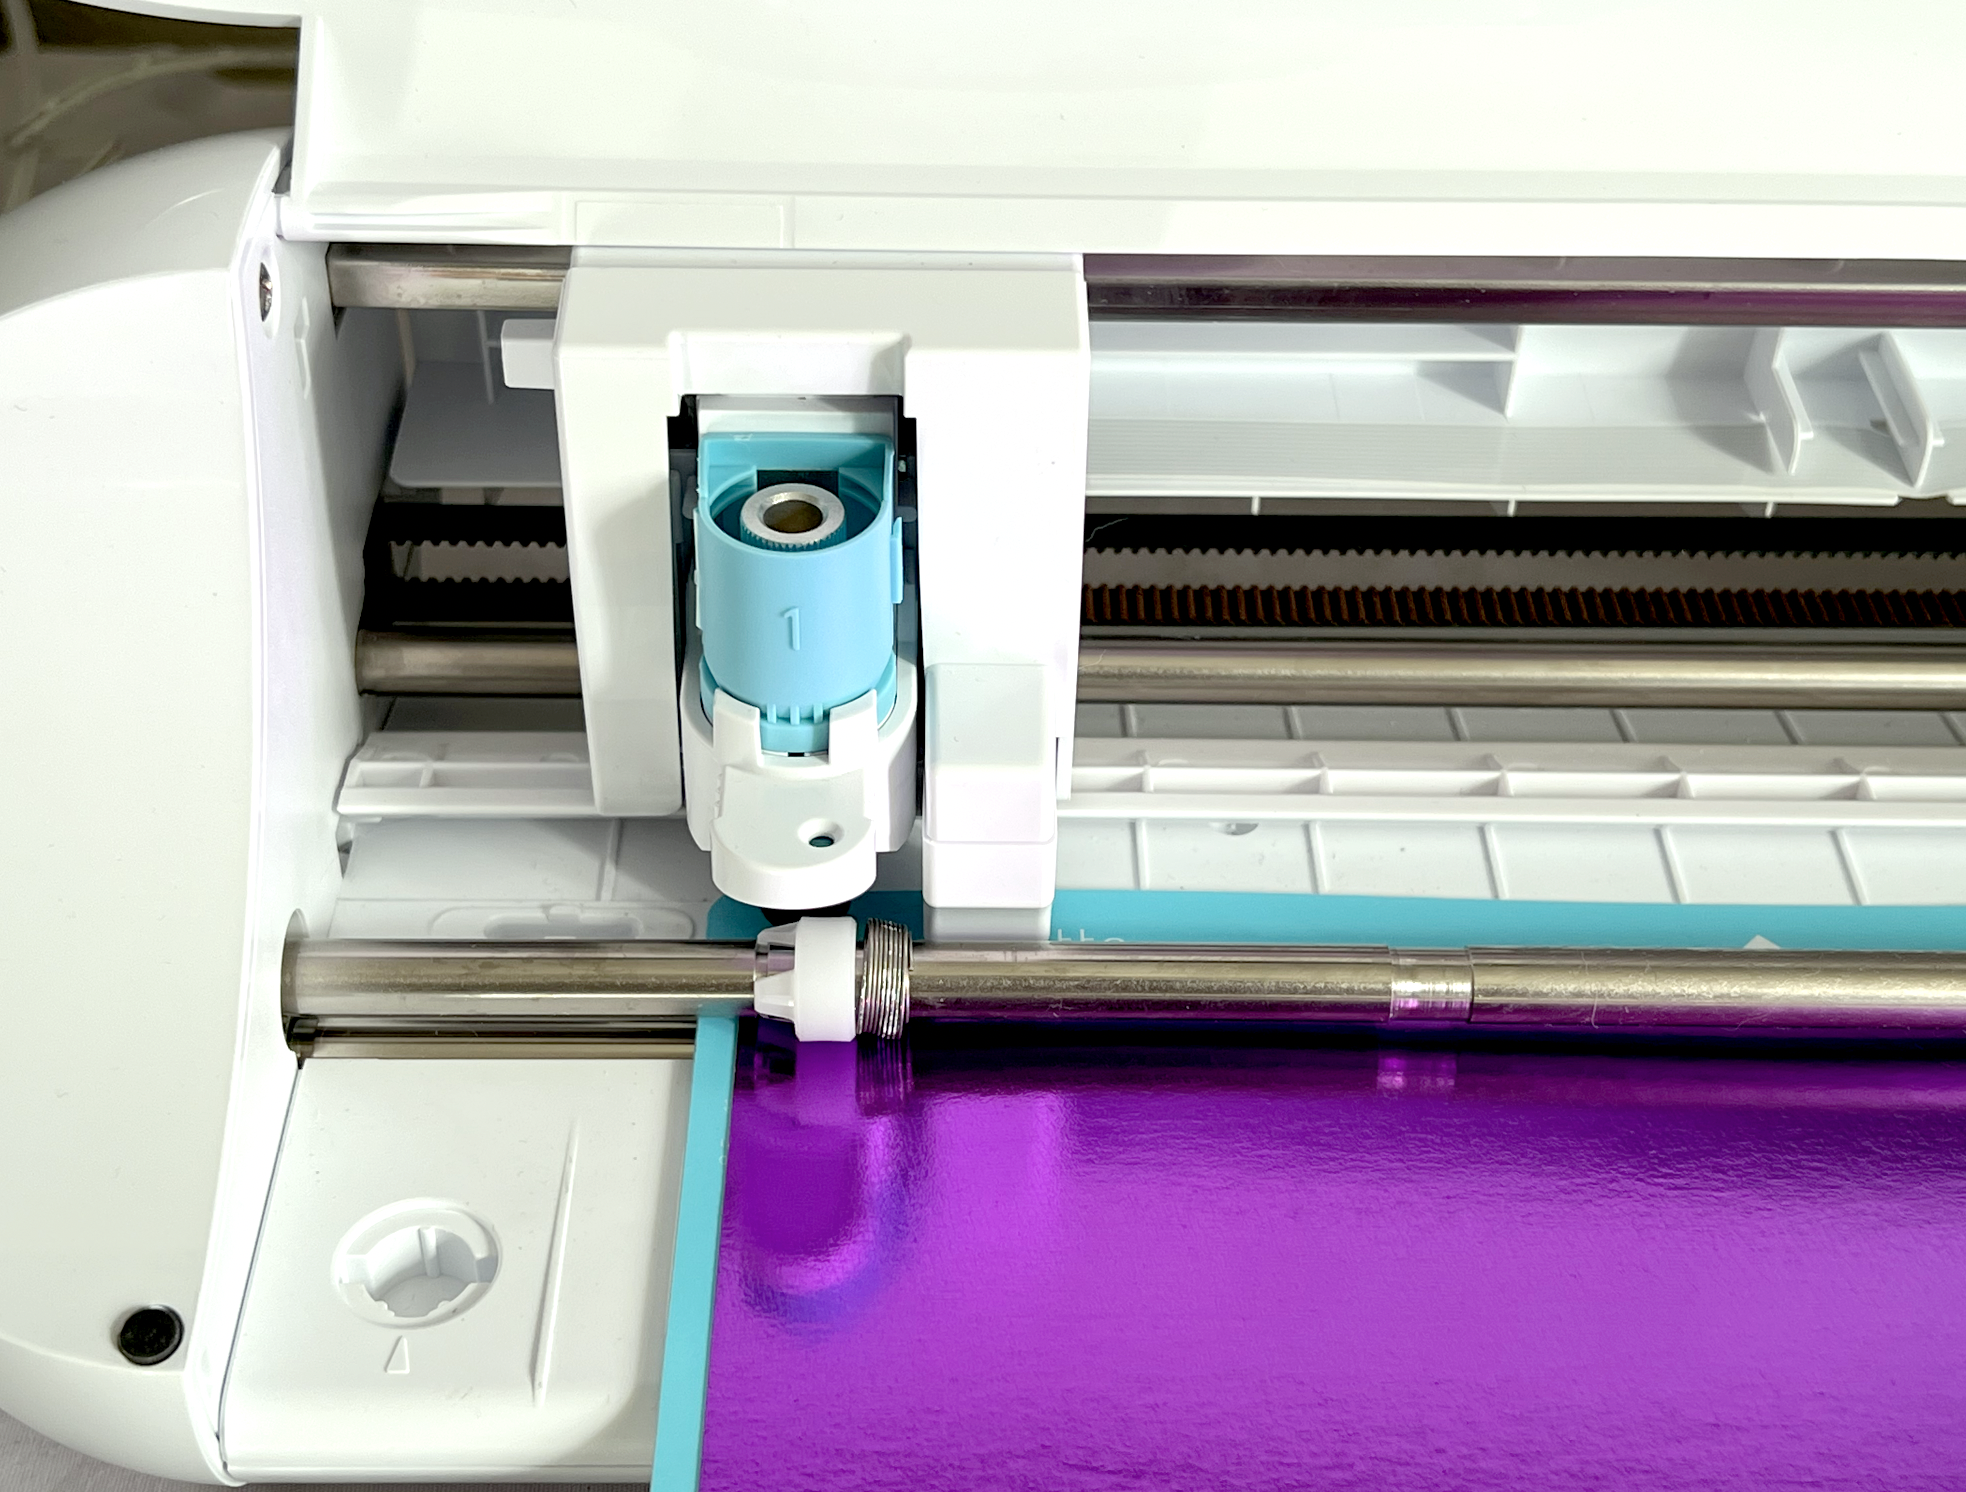
My foil cardstock feels a little heavier than my regular 65lb cardstock and the lightweight cardstock settings didn’t cut all the way through with my test cut. I got the best cut results using the Heavy Coverstock settings. The settings you see are for my CB09 blade since my auto blade is a little too dull to cut cardstock. You can use the default auto blade settings for Heavy Coverstock if you are using your auto blade.

3D Snowflake SVG Cut file

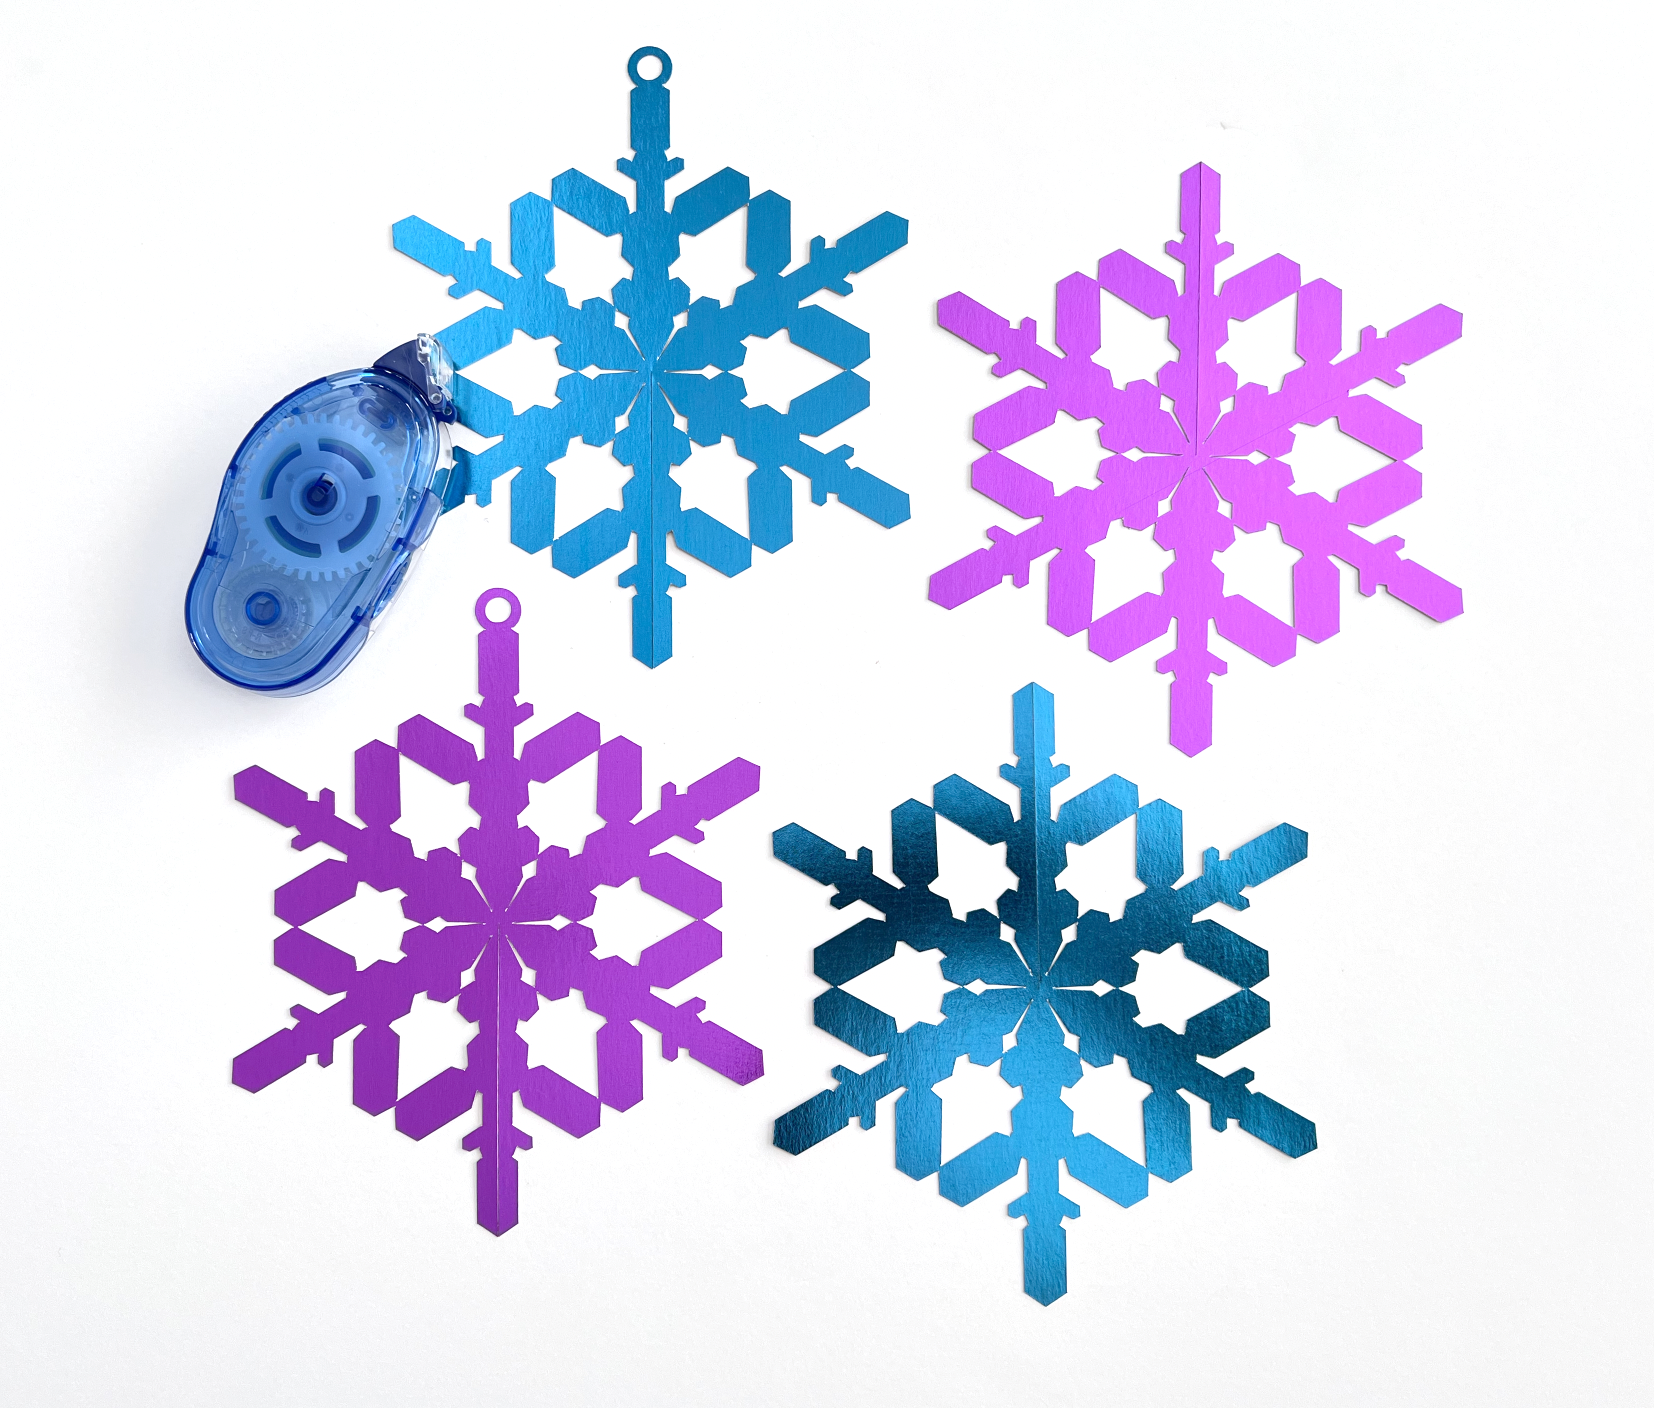
I cut one color first, then I cut the same shapes from the 2nd color.

3D Snowflake SVG Cut file

Next, I’m going to glue my pieces together, I’m using my tape runner, but you could also use a glue stick. I’m going to glue the two pieces with the hole at the top together. Then I’m going to glue the two pieces without the hole in the top together. Make sure the slit lines match up on the two pieces without the hole in the top.

3D Snowflake SVG Cut file

Then I’m going to slide the two pieces together along the slits until they meet in the middle.

3D Snowflake SVG Cut file

Now you can add ribbon, twine, or fishing line through the hole at the top to hang your snowflake!

3D Snowflake SVG Cut file

12 Gift Ideas for Someone Who Owns a Cricut or Silhouette Machine

Hi Everyone!

With the holidays getting closer, I wanted to share some gift ideas for people who already own a Cricut or Silhouette cutting machine. These are also great for someone who will be getting a machine for Christmas this year and you want to get them a few little extras.

Here are my top 12 gift ideas: (Note: Amazon links are affiliate links and I may receive a small commission if you purchase by clicking the link)

  1. Extra Cutting Mats

You can never have too many cutting mats! I like having a few of each color so If I’m making multiples of the same project I can set up additional mats while one is running on the machine. I haven’t bought any off brand mats yet, but a lot of people swear by the Nicapa brand on Amazon. But if you’re not willing to risk going with an off brand yet, check the Cricut website, Amazon, Michael’s, JoAnns, Hobby Lobby, or any other craft stores, someone usually has them on sale. For my Silhouette machine, I haven’t found an off brand mat that I like yet, but once again, check Amazon, craft stores, or Swing Design to see if there are any sales.

2. Extra Cutting Blades

A lot of people buy off brand replacement blades from Amazon and claim they last much longer than the Cricut or Silhouette brand blades. there are a lot of options, make sure you read the details and reviews to check that they will with with your machine. I haven’t tried any out yet, but I just ordered some blades that should work with Portrait 3 (with a CB09 holder and the Blue tool adapter). I’m very excited to try these once I get them!

There are also A LOT of off-brand replacement blades for Cricut at a fraction of the cost of a Cricut brand replacement. You use the same blade housing that came with your original Cricut blade. As always, read the descriptions and review to make sure the blades are compatible with your particular machine.

3. Paper Trimmer

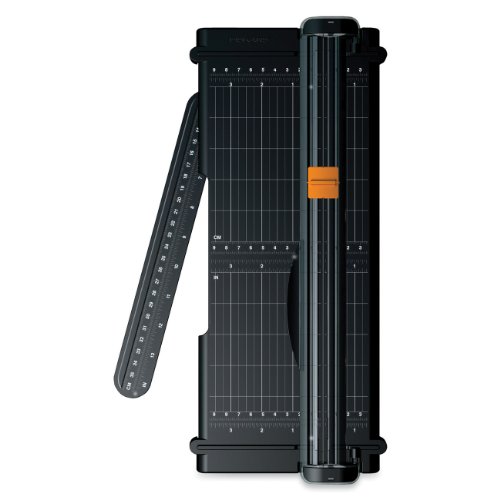
I know it seems silly to buy a paper trimmer when you have a big expensive machine to cut cut paper, but a paper trimmer really comes in handy when you need to quickly cut down a piece of paper or cardstock into smaller sizes.

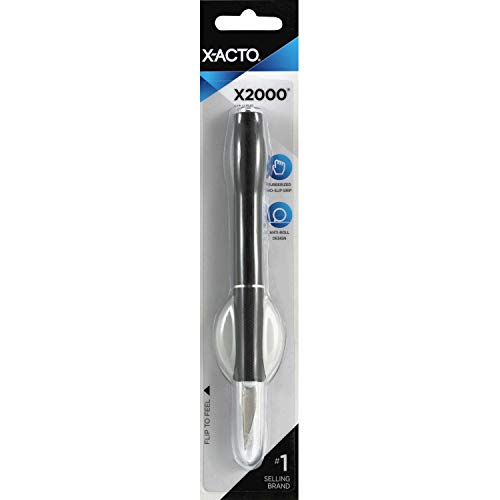
4. Craft Knife

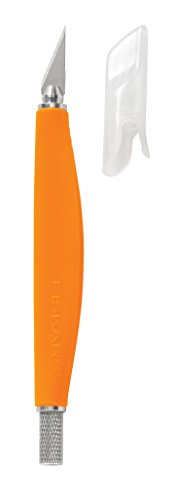
Also, it seems silly to buy a craft knife or an Xacto knife when you have a fancy machine. But this little tool can be a lifesaver when you’ve already removed your mat from the machine and there are a few areas that didn’t quite cut all the through like they should. I recommend an Xacto knife or another generic brand over the Cricut True Control Knife. You can use standard #11 blades with an Xacto or generic, Cricut has it’s own special replacement blades, of course!

5. Self Healing Cutting Mat

This a great for protecting your workspace as well as having a nice little area to assemble projects. I own several of these in a few different sizes.

6. Delicate Surface Tape

This tape is awesome! I used to use blue painters tape to help hold my projects on my mat, but sometimes it would rip the cardstock. This tape rarely tears my cardstock and it does a great job holding my foil in place when I’m using my foil quill.

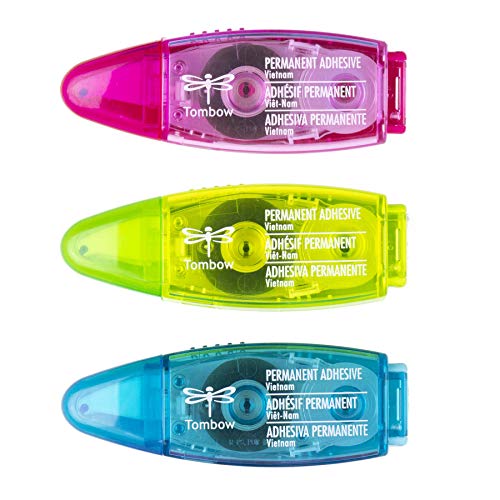
7. Tape Runner

These are super nice for assembling cards and envelopes and you don’t have to wait for glue to dry!

8. Pen or Marker Adapter

If you want to use any non-Cricut brand pens or marker with your machine, these are a must! And well worth it in my opinion. Check the details to make sure you are buying the correct one to fit your machine. These are also great for Silhouette machines, but not as necessary since they have a great adapter already.

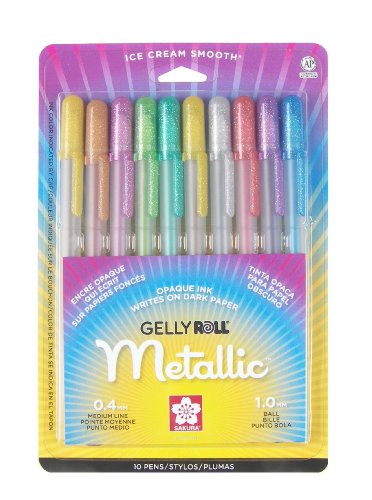
9. Sakura Gelly Roll Pens

These pens are amazing on black or dark colored cardstock! The Cricut metallic gel pens DO NOT show up very well on black or dark colored cardstock, don’t waste your money on them. In order to use these with a Cricut machine you will need a pen adapter (see above). They fit in the Silhouette pen holder too!

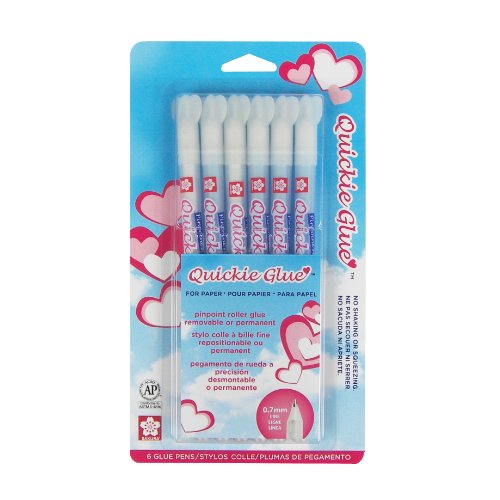
10. Glue Pens

These are a fun little accessory you can use to foil, glitter, or heat emboss. You can buy the WRMK Glue Quill kit which comes with adapters for each machine. Or you can buy just some glue pens, but you will need pen adapter for your machine.

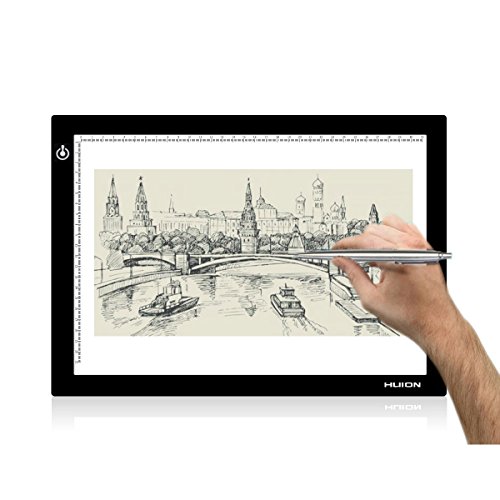
11. Light Pad

A lot people use these to help see the cut lines while they’re weeding vinyl or cardstock. It’s also great for tracing designs! This one is a fraction of the cost of the Cricut brand.

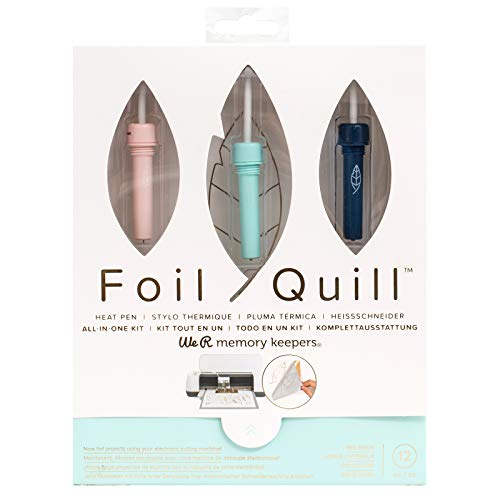
12. Foil Quill Set

I recommend this to everyone I know that has a machine, I love it! Don’t waste your money on the Cricut Foil Transfer Kit. The Foil Quill is so much more consistent and it works on way more materials. Just be aware, it will void the warranty on your machine, which is usually about a year. My Cricut machine is way out of warranty and I’ve also been using it in my Portrait 3 that I got this year without any issues. You can also check JoAnn’s, they often have deals on the Foil Quill.

That’s all for now! I hope I gave you a few ideas for gifts you could ask for or for someone you know that has a machine.

Foiling on Acrylic with Cricut and WRMK Foil Quill

Hi Everyone!

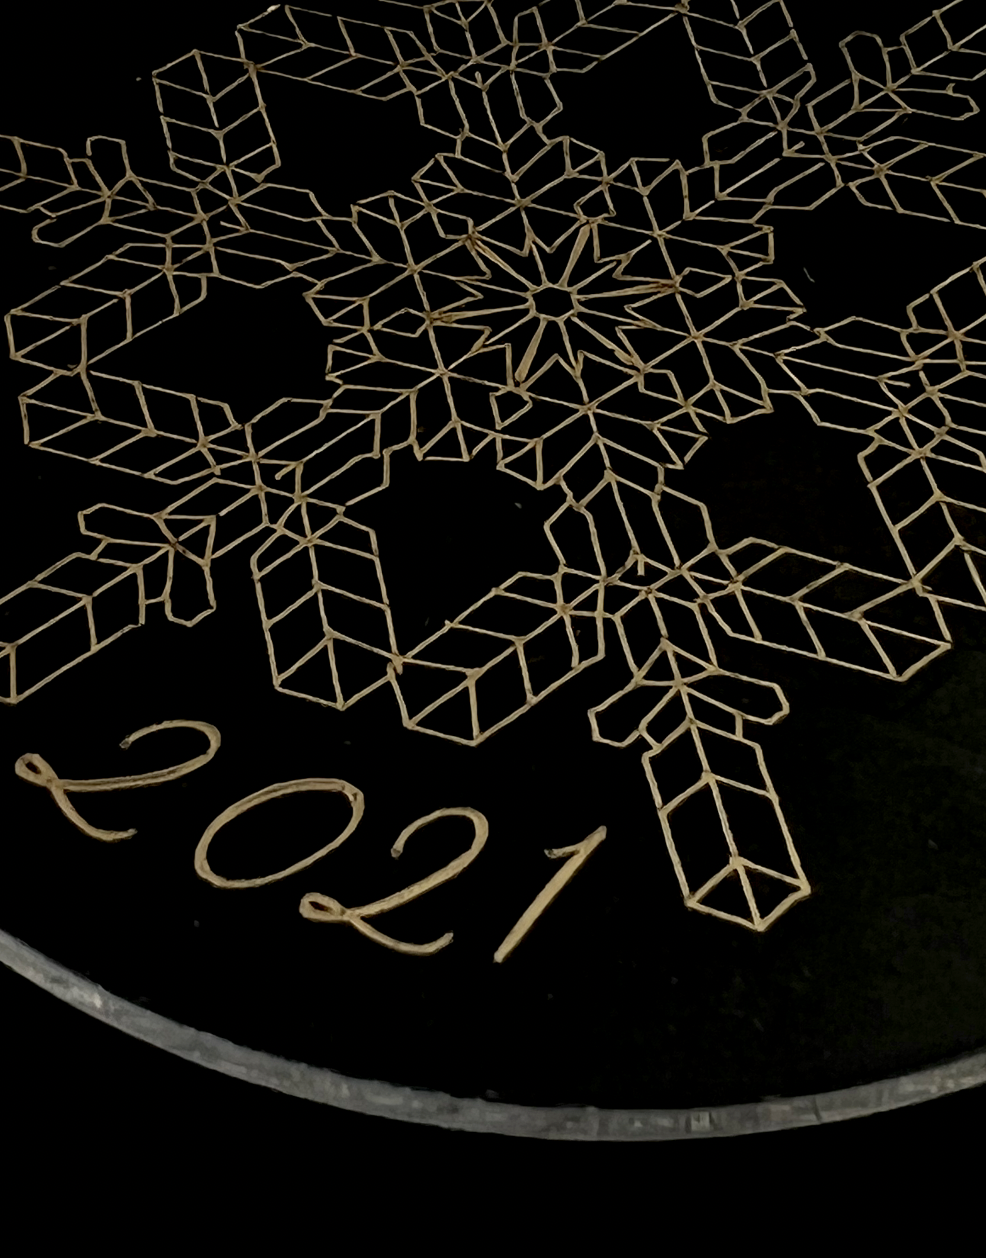
This week I’m going to make the same acrylic ornaments with foil on my Cricut Maker. It’s not quite as easy as my Portrait 3, but it is doable if you have Cricut instead of a Silhouette machine. I will be using my WRMK Foil Quill, the Cricut Foil Transfer tool does NOT work on acrylic.
Supplies:

(Links below may be affiliate links)

3 inch acrylic disc, 2mm thick

SVG Draw file (you can get my snowflake here)

WRMK Foil quill (medium tip) with C adapter

Gold heat reactive foil or other foil color of your choice

Cricut machine (I will be using my Maker)

Strong Grip Cutting Mat (the purple one)

Cricut pen (any color)

Chipboard template

Blue Painter’s tape or Washi Tape

9-12 inch length ribbon or twine for finished ornament

Let’s get started!

I exported my snowflake design that I made a few weeks ago from Silhouette Studio as an SVG so I can upload it into Cricut Design space.

Since I will be using my WRMK Foil Quill and it works as a pen in clamp A, I will be using the Cricut App on my iPad Pro. For some reason the app seems to handle detailed draw files better than the desktop version. I almost always get the “Wow that’s a big project!” yellow bar when I try to use one of my draw files in the desktop version.

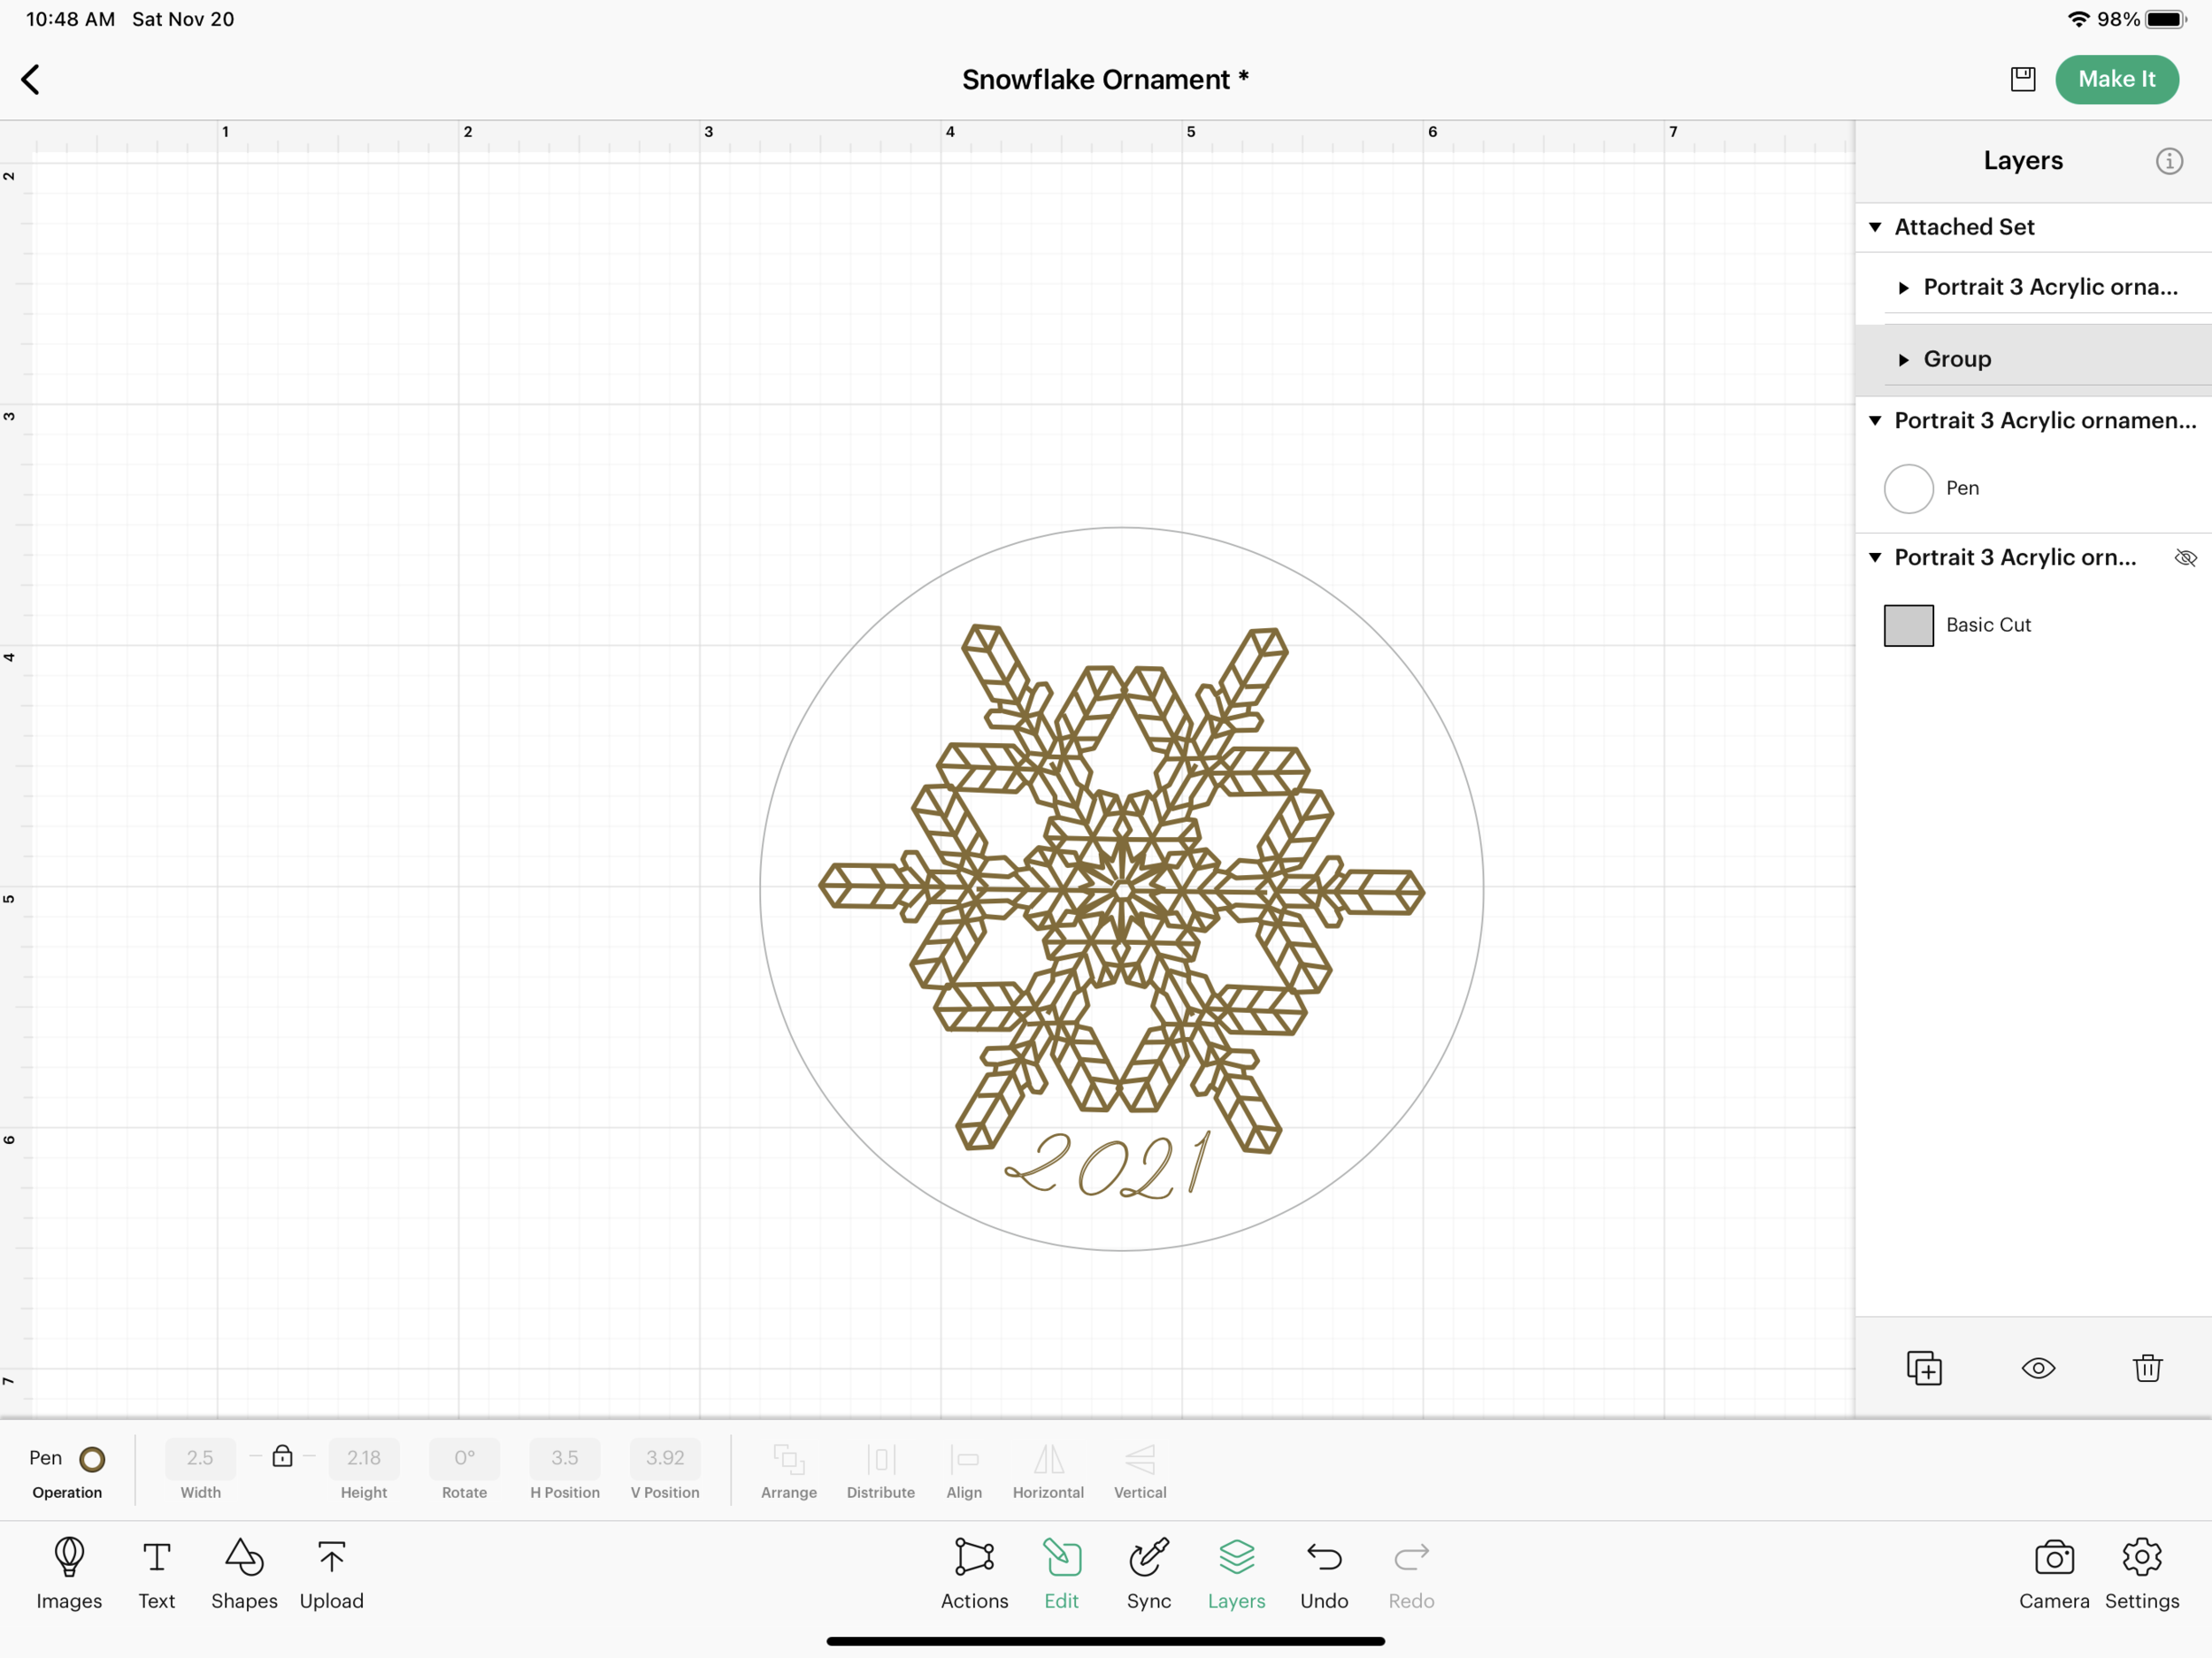
After uploading my SVG into Design Space, I change my lines from “Cut” to “Draw.” I’m going to make my snowflake and numbers gold metallic glitter, I’m going to make the circle outline silver glitter. The colors you pick don’t really matter, they just need to be 2 different colors.

Foiling on acrylic with Cricut

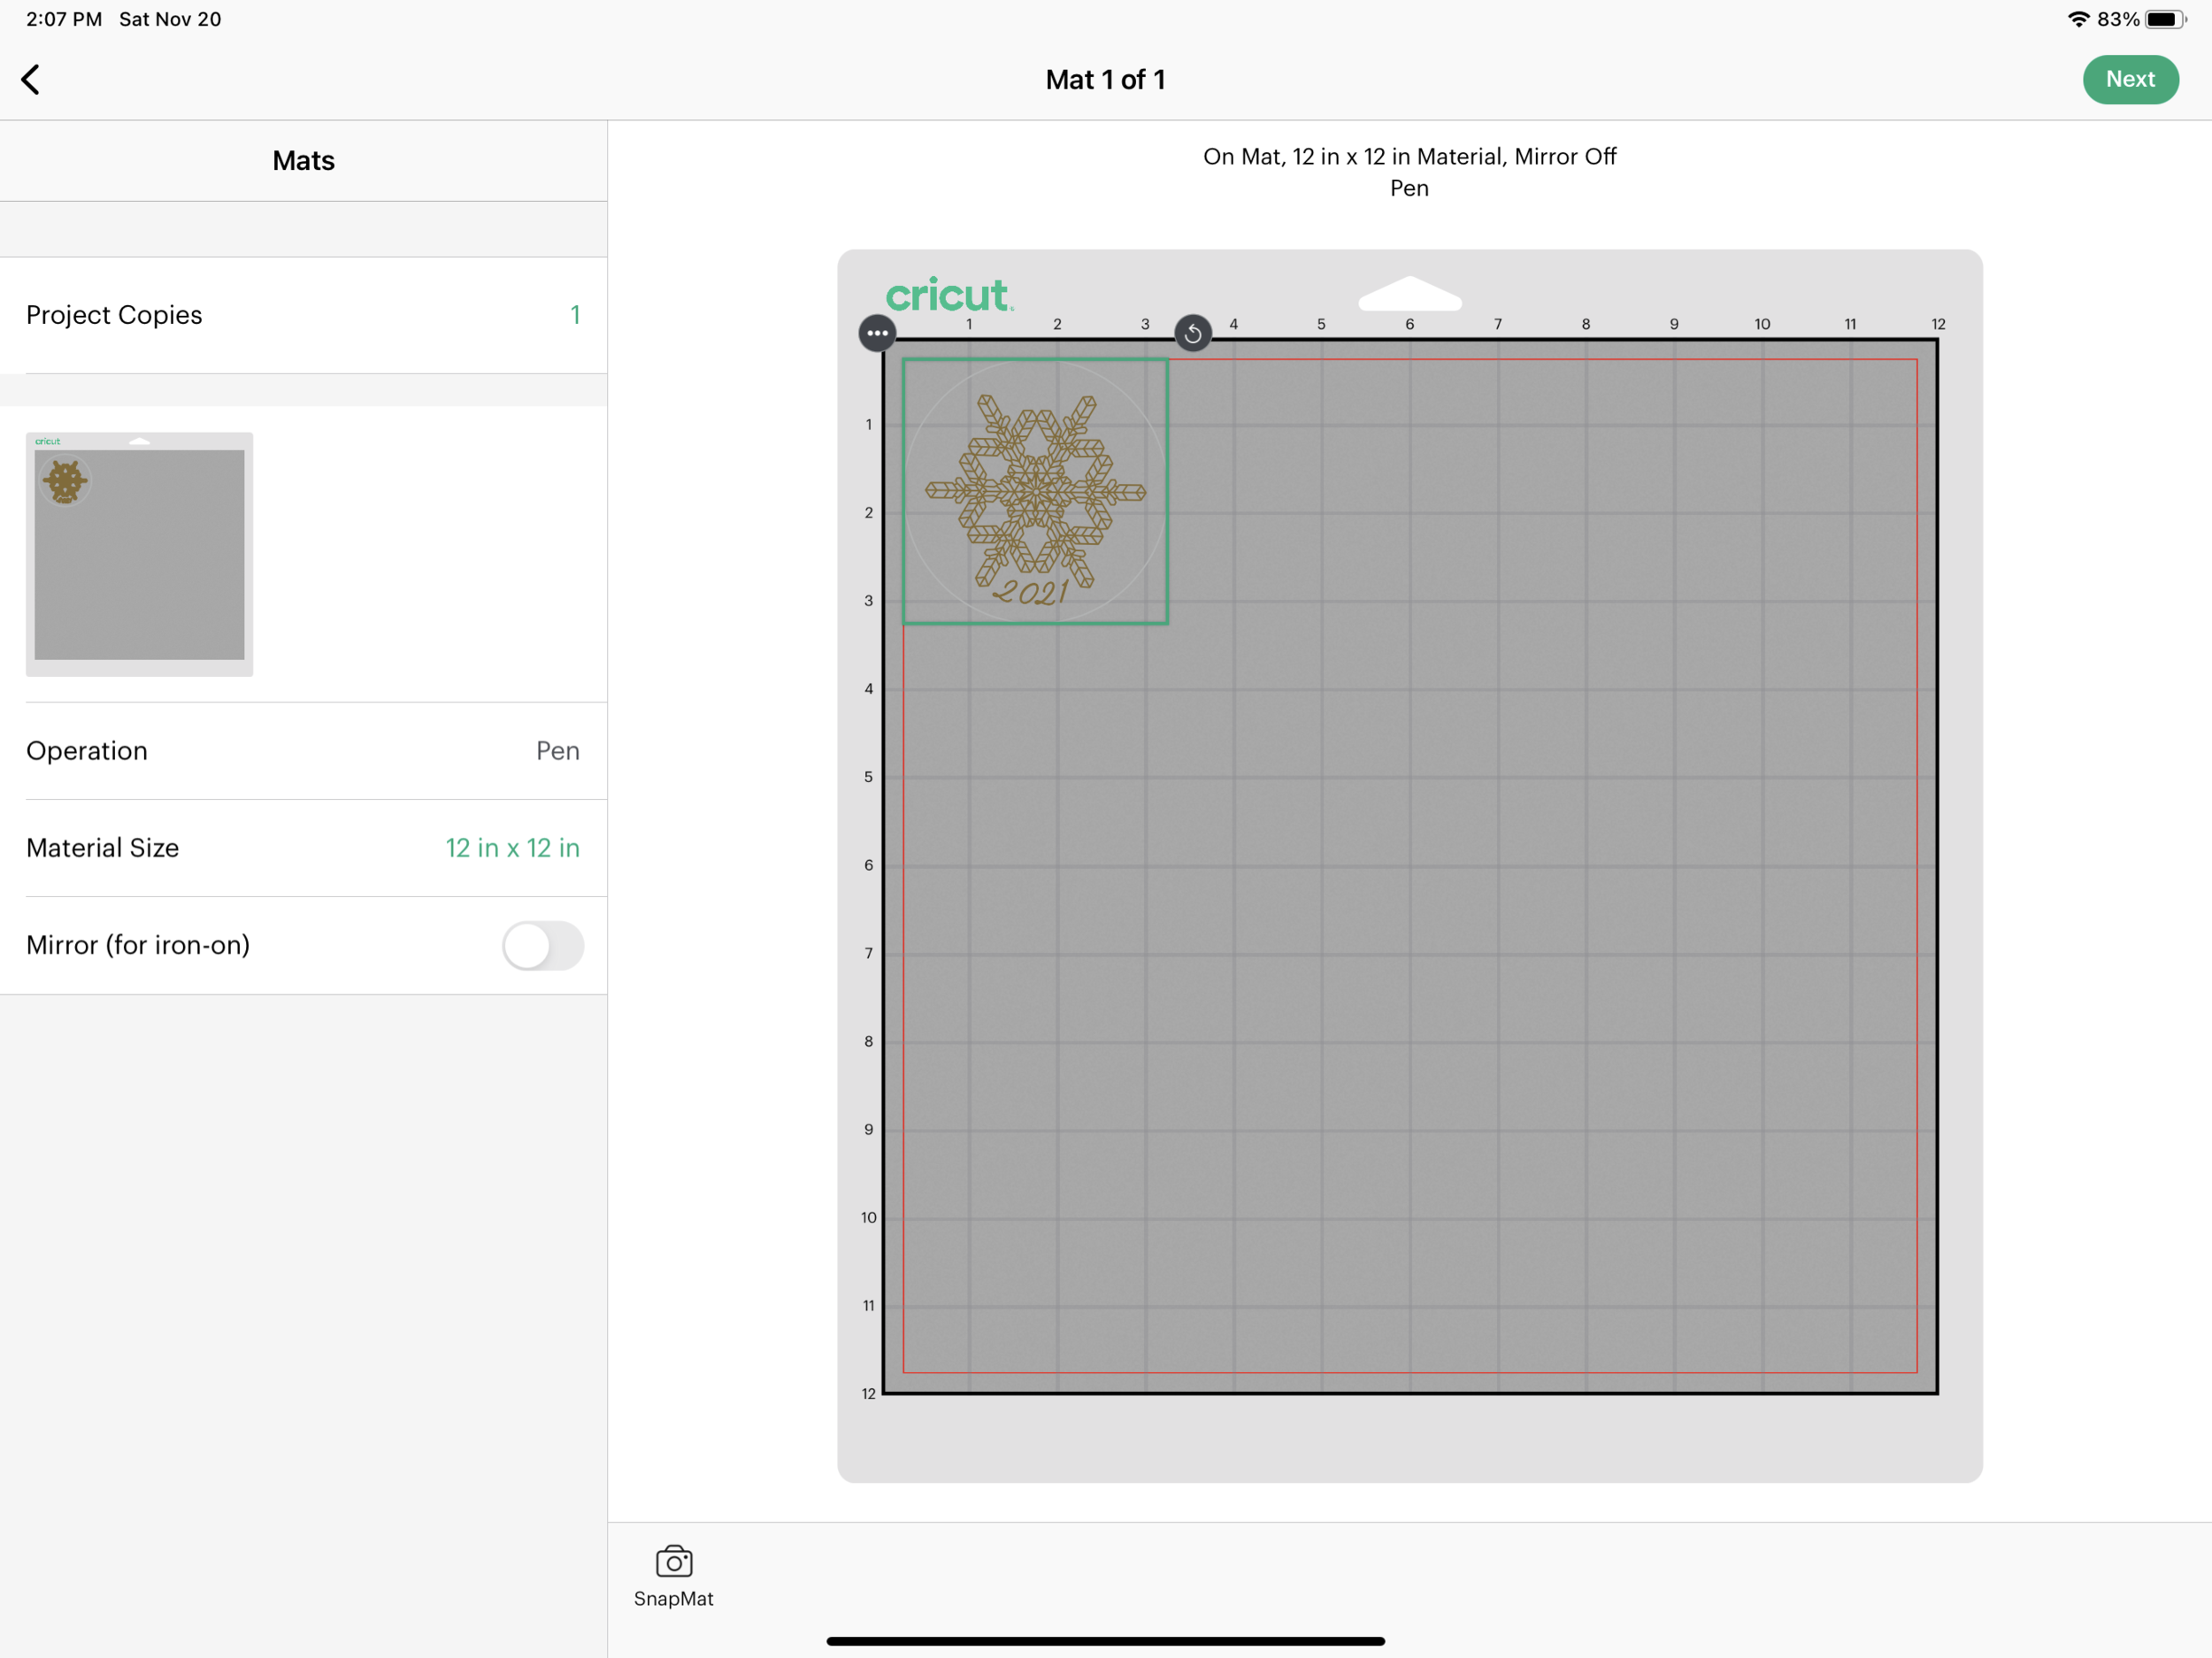
I “attach” the gold and silver lines and click on the Make It button in the upper right corner.

As usual, Cricut defaults to placing my artwork in the upper left corner, but I’m going to move it so it’s further down and closer to the middle of my mat. This will help when I need to place the template and foil later.

Foiling on acrylic with Cricut

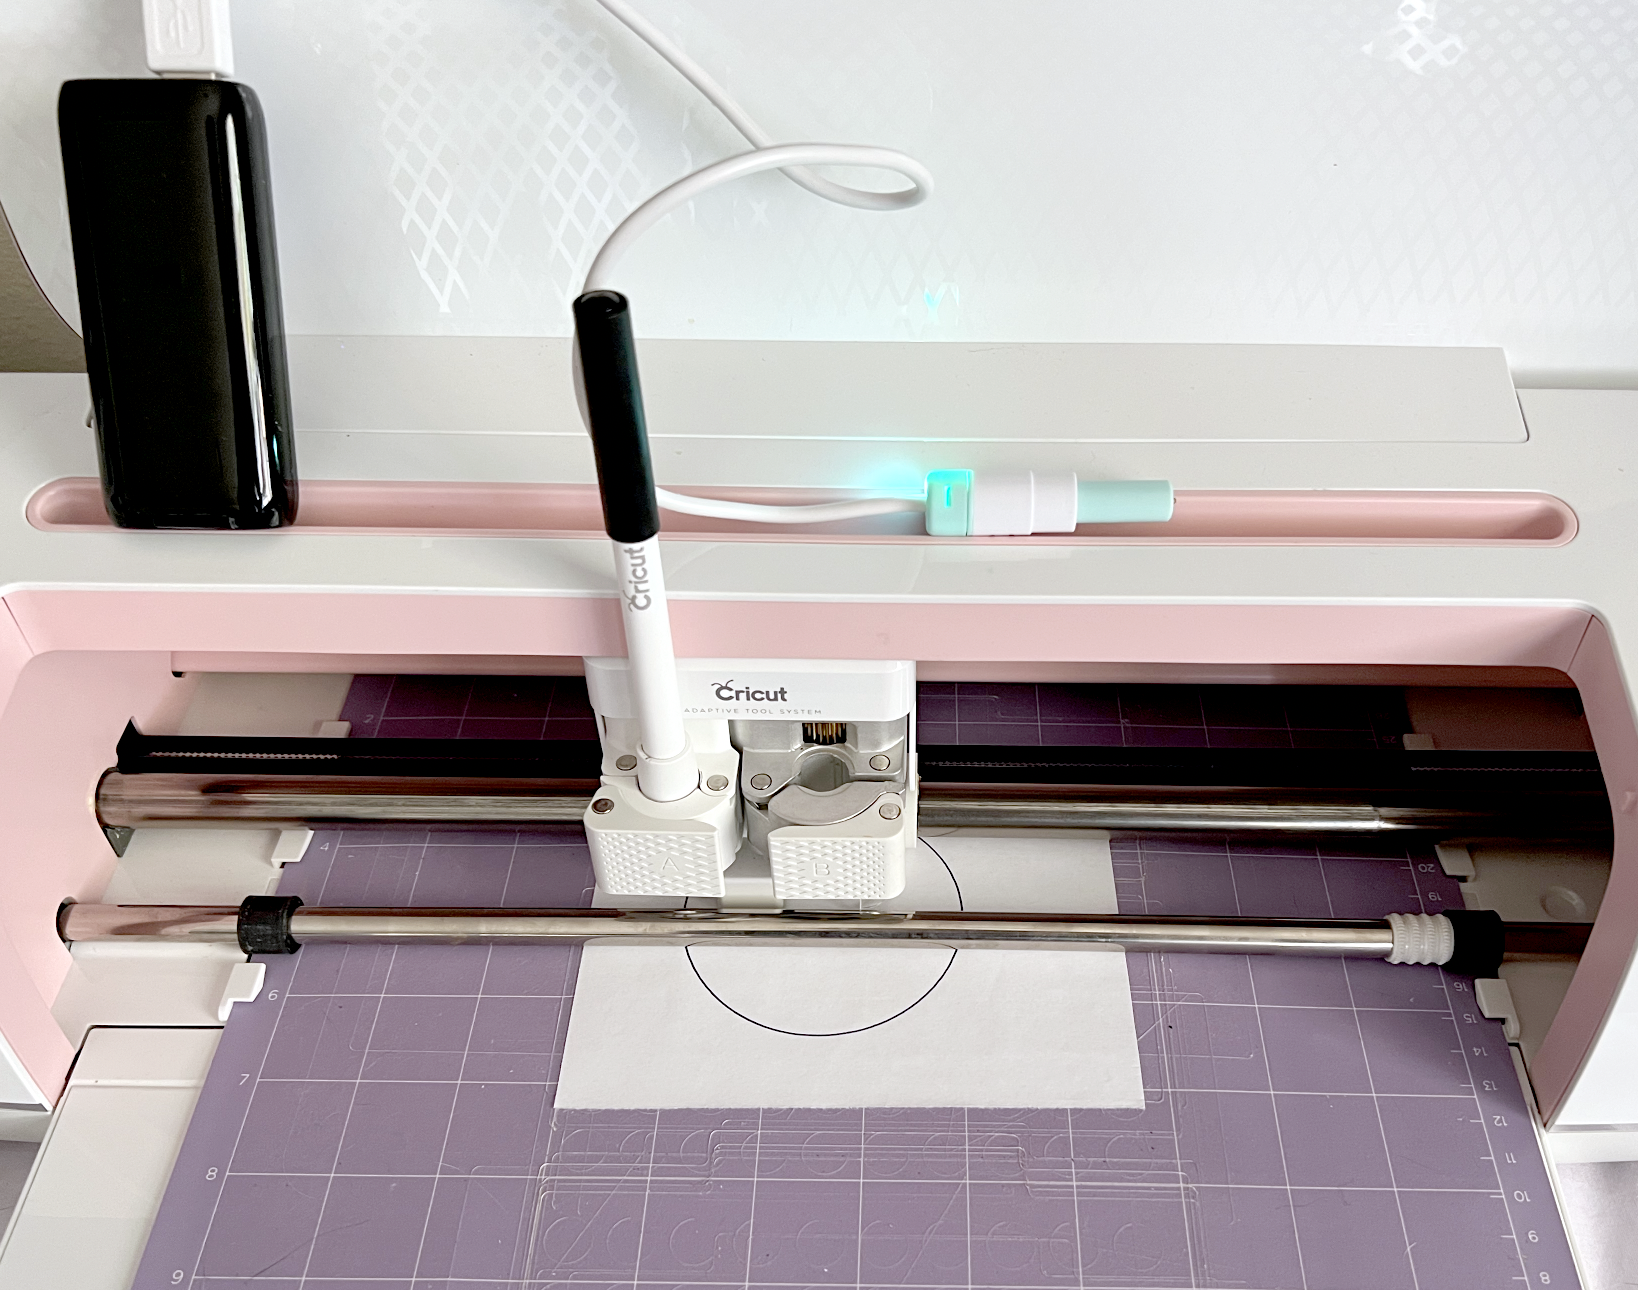
It’s also a good idea to plug in your foil quill tip while you’re setting up the template on your mat, so it has plenty of time to heat up. I’ve got mine plugged into a small battery pack.

Foiling on acrylic with Cricut

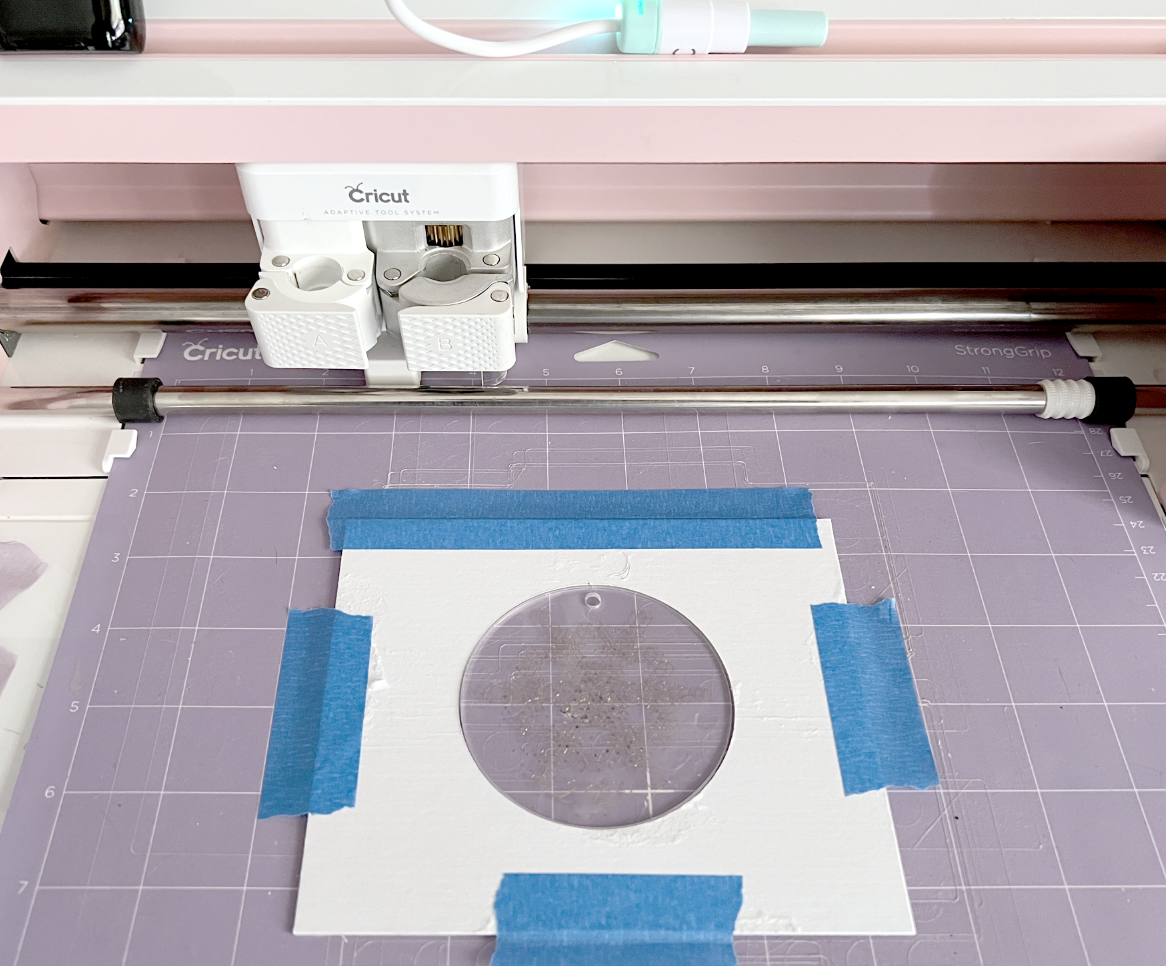
If you plan on making multiples of these all at once, using a template is a good idea. I will be using the same chipboard template from my previous posts to help keep my acrylic disc in place on my cutting mat. So before I start foiling the acrylic discs, I need to align my template on my mat.

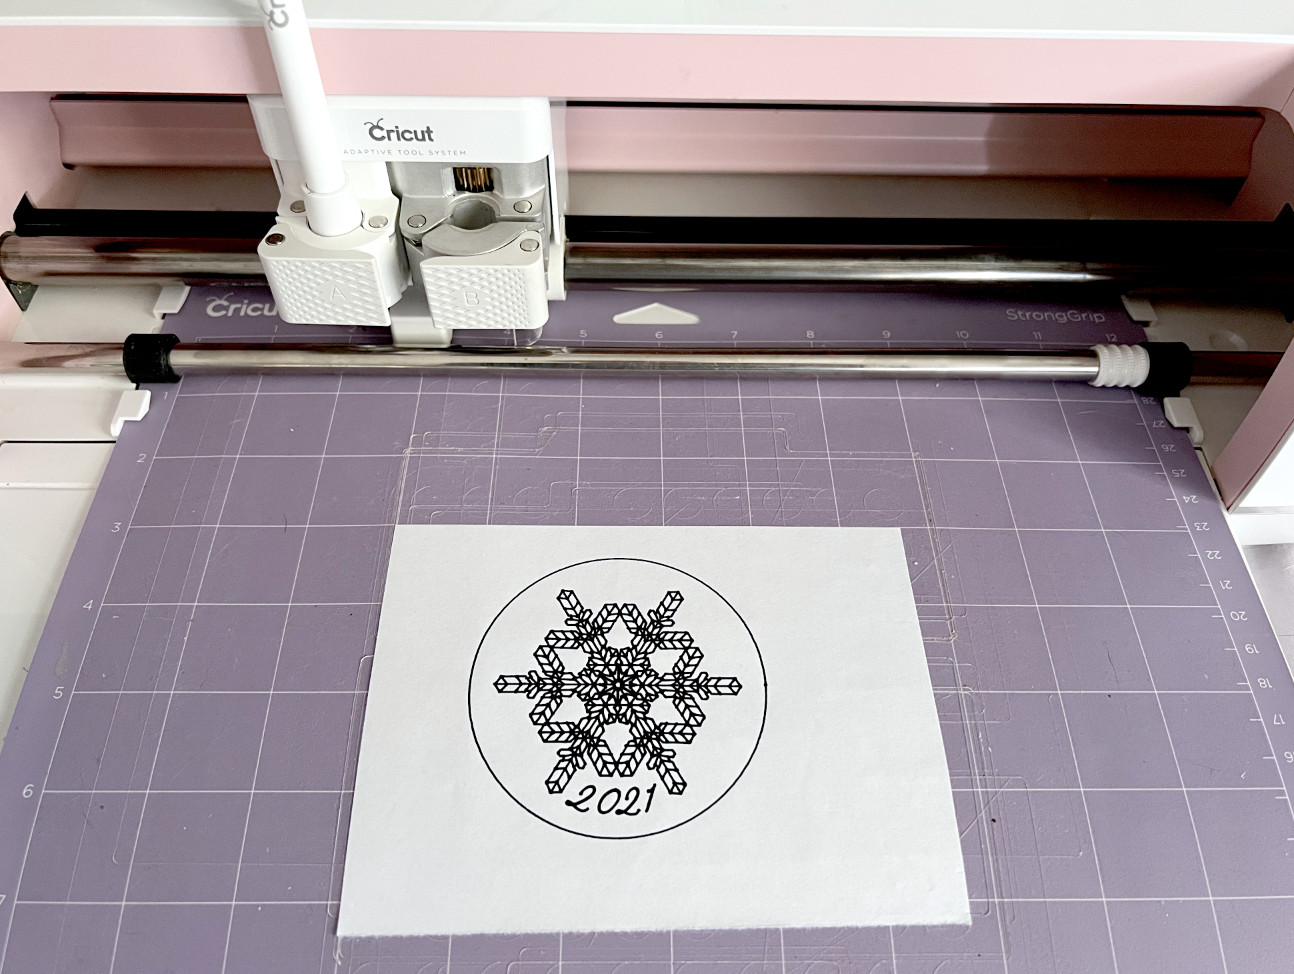
To get my template aligned, I’m going to start with a piece of plain paper that’s a little bit smaller than my overall chipboard template. I place it approximately where the artwork is located on my screen.

Foiling on acrylic with Cricut

I’m going to use just the plain black fine tip Cricut pen that cam with my machine. You can you any pen color that you wish, this is just to get the template aligned.

I select “Chipboard 2mm” for my material since this is the closest material thickness to my 2mm acrylic.
Foiling on acrylic with Cricut

I press send and it prompts me to load the Silver pen, which is the circle outline. There doesn’t seem to be any rhyme or reason to which pen color Design Space selects first. I have made this same project previously and it wanted the gold pen first.
Foiling on acrylic with Cricut

I load my mat and press the Go button on my machine. Once it’s finished with the silver pen, it prompts me for the gold pen. My mat is still halfway in the machine (this will be important later when you need to place the foil).

Foiling on acrylic with Cricut

Since I’m just using the black pen, I press the go button and the machine draws the snowflake portion. Once it’s done, DO NOT unload your mat from the machine!!!

Foiling on acrylic with Cricut

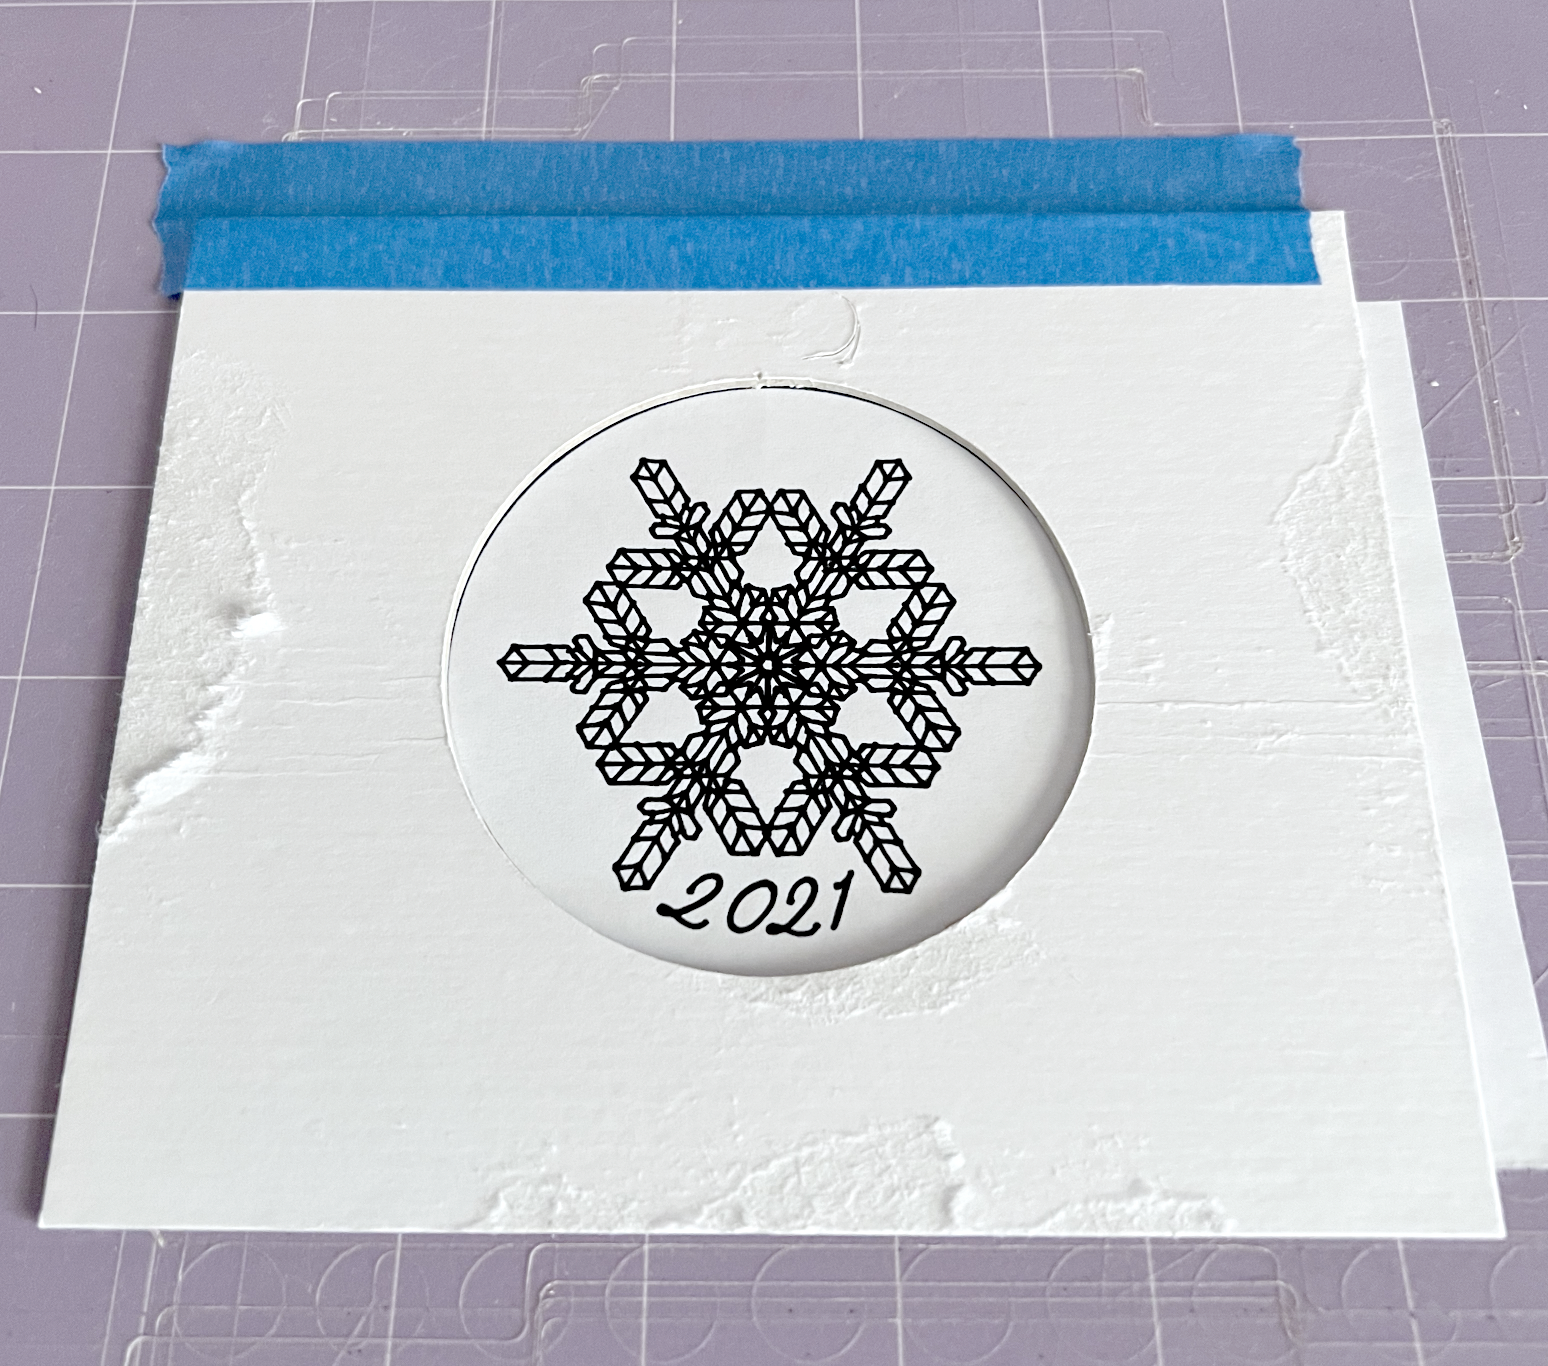
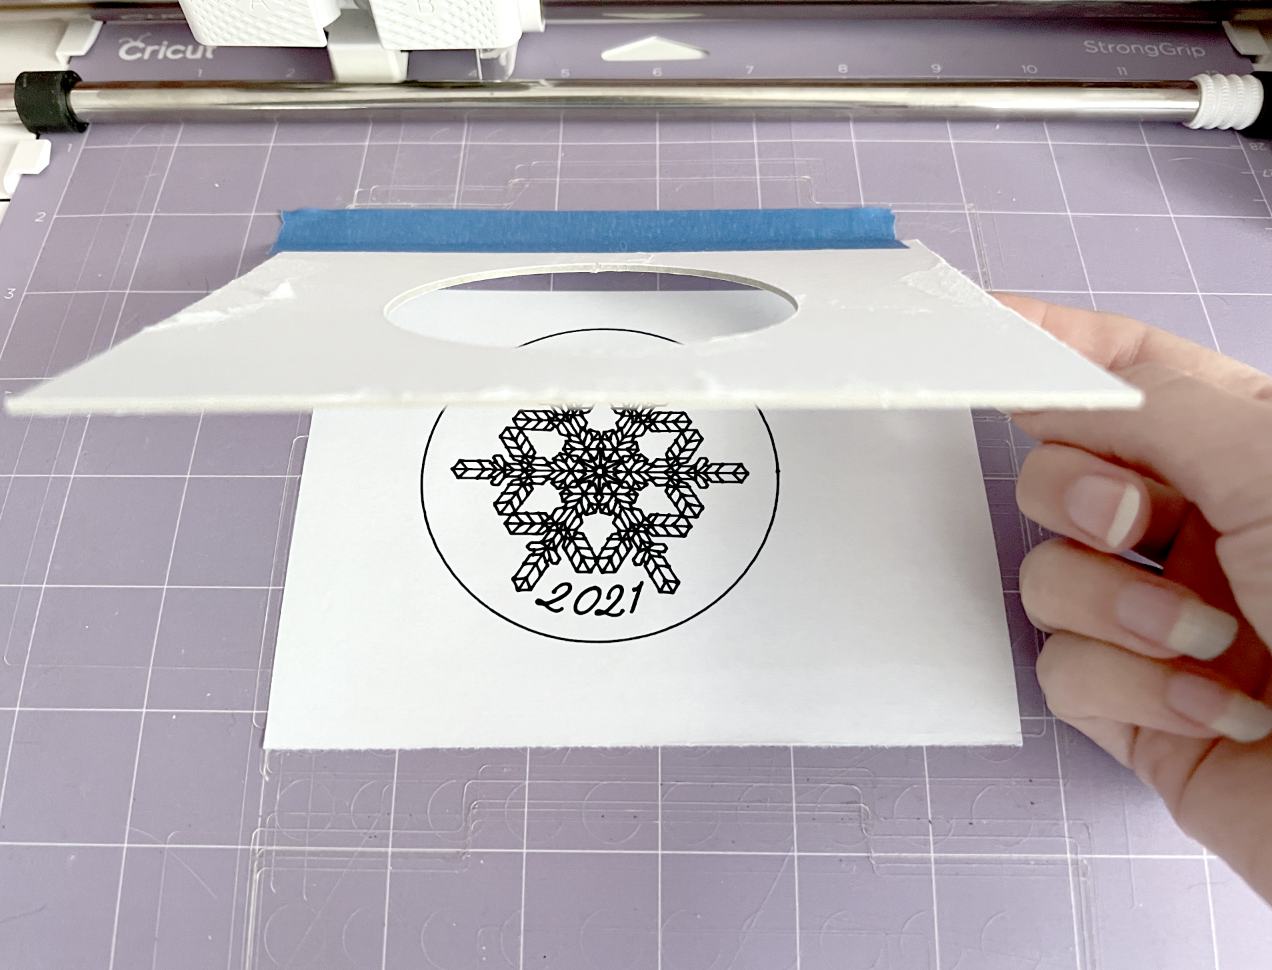
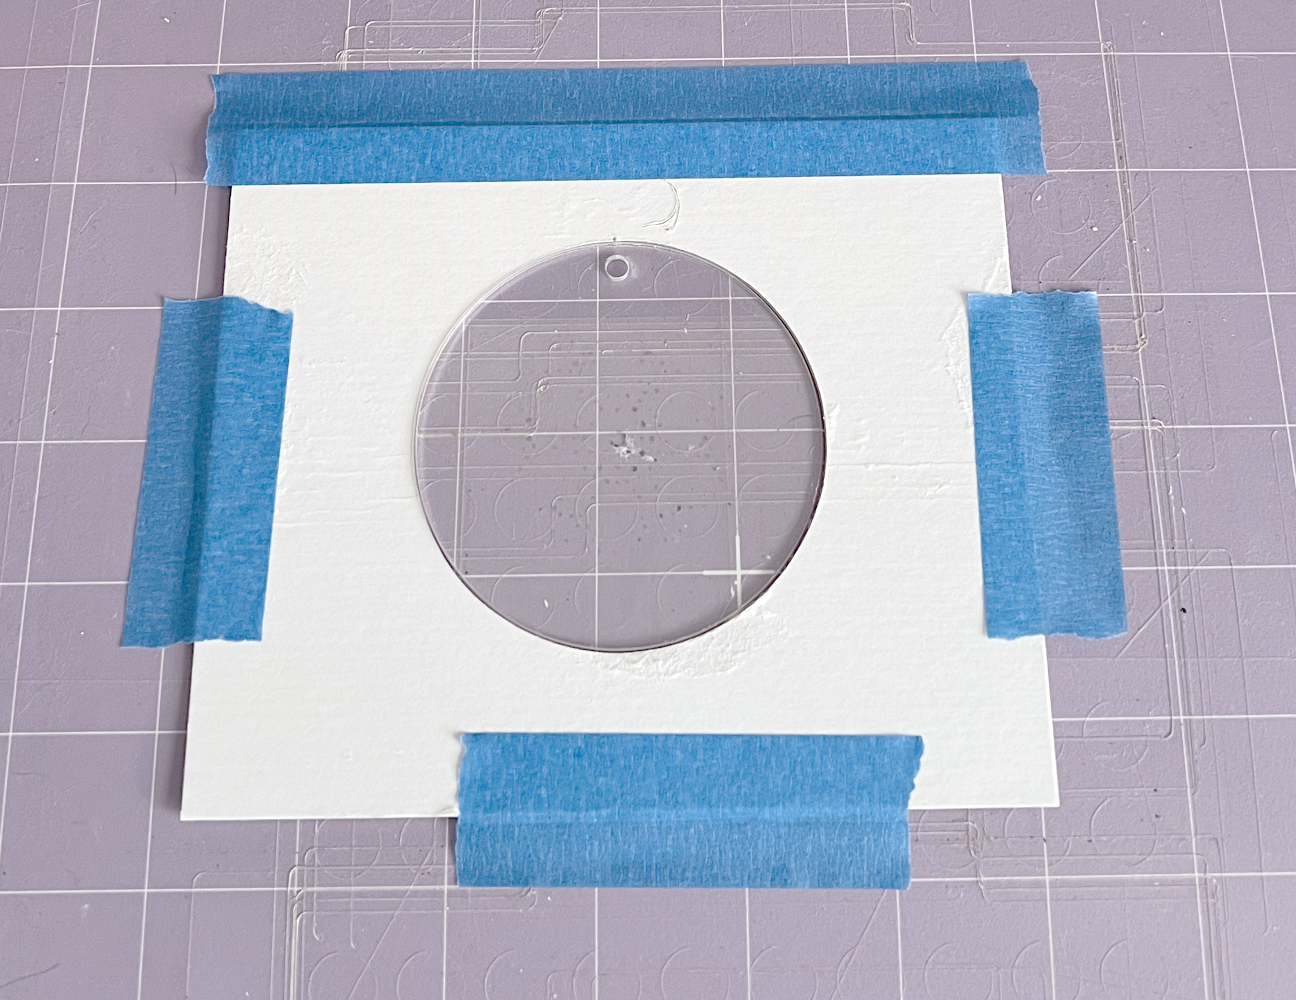
Now it’s time to actually place the chipboard template on you mat. Take your template and place it on top of the plain piece of paper, lining up the circle cut out with the circle drawn on the plain piece of paper. Place a piece of tape along the top edge of the template to make a hinge.

Foiling on acrylic with Cricut

Carefully lift up the template and remove the the plain paper from your mat.

Foiling on acrylic with Cricut

Place the template back down on your mat and tape down the other 3 sides. Now you can place the acrylic disc inside the cut out in the template. Don’t forget to remove the plastic film from the side of the acrylic that you will be foiling!!

Foiling on acrylic with Cricut

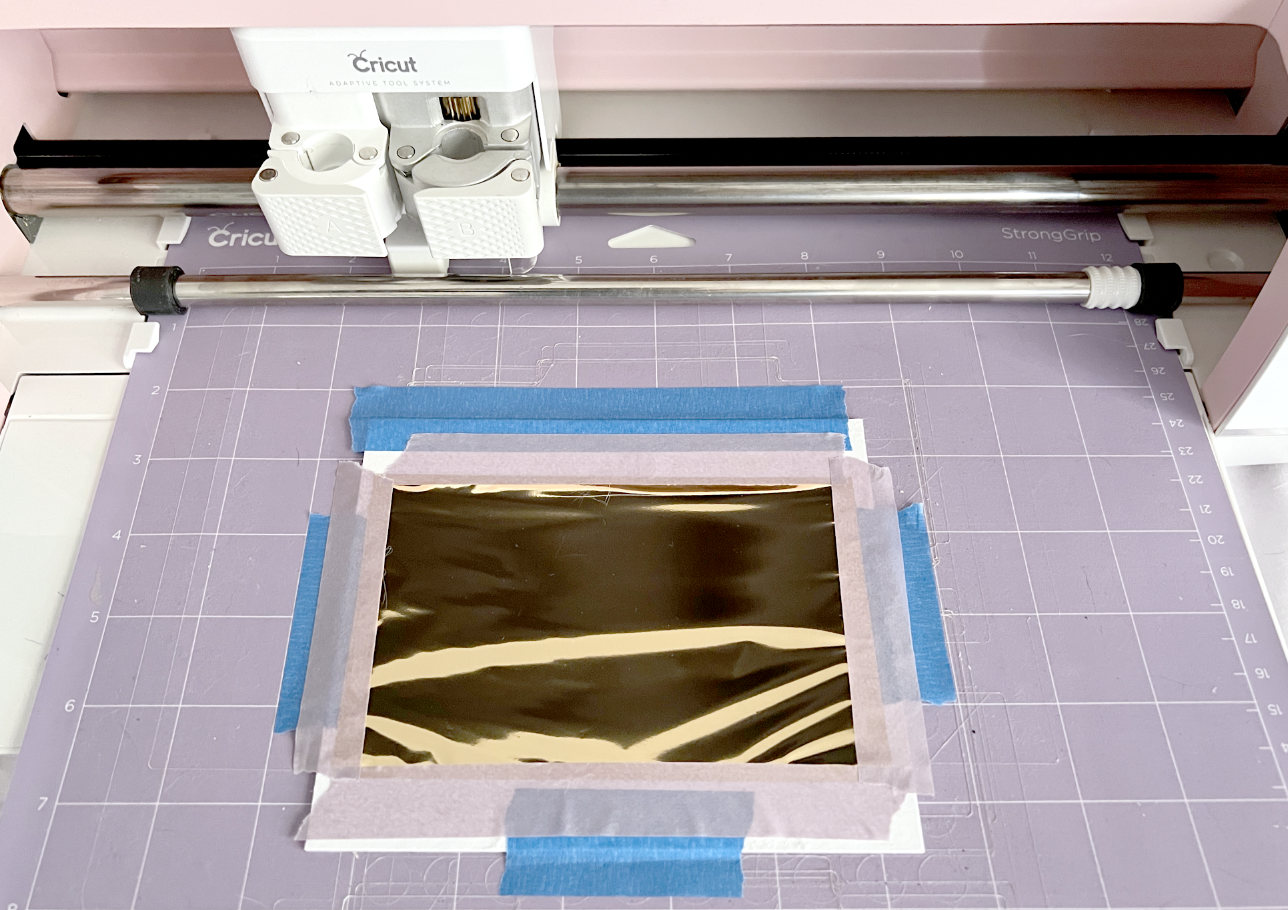
Now, I’m going to go ahead and tape my foil down over the acrylic since my machine wants to make the circle outline first and once it’s done with the circle, my mat will be stuck in the middle of my machine and I won’t be able to tape my foil down at that point. I’m not going to load my foil quill into clamp A just yet since I don’t want the circle to be foiled..

Foiling on acrylic with Cricut

I press the “Go” button on my machine and let the empty carriage go through the motions of drawing the circle. My machine stops with the mat still in the middle of the machine and prompts me to load the gold pen. This is why I placed the foil on my mat earlier.

Foiling on acrylic with Cricut

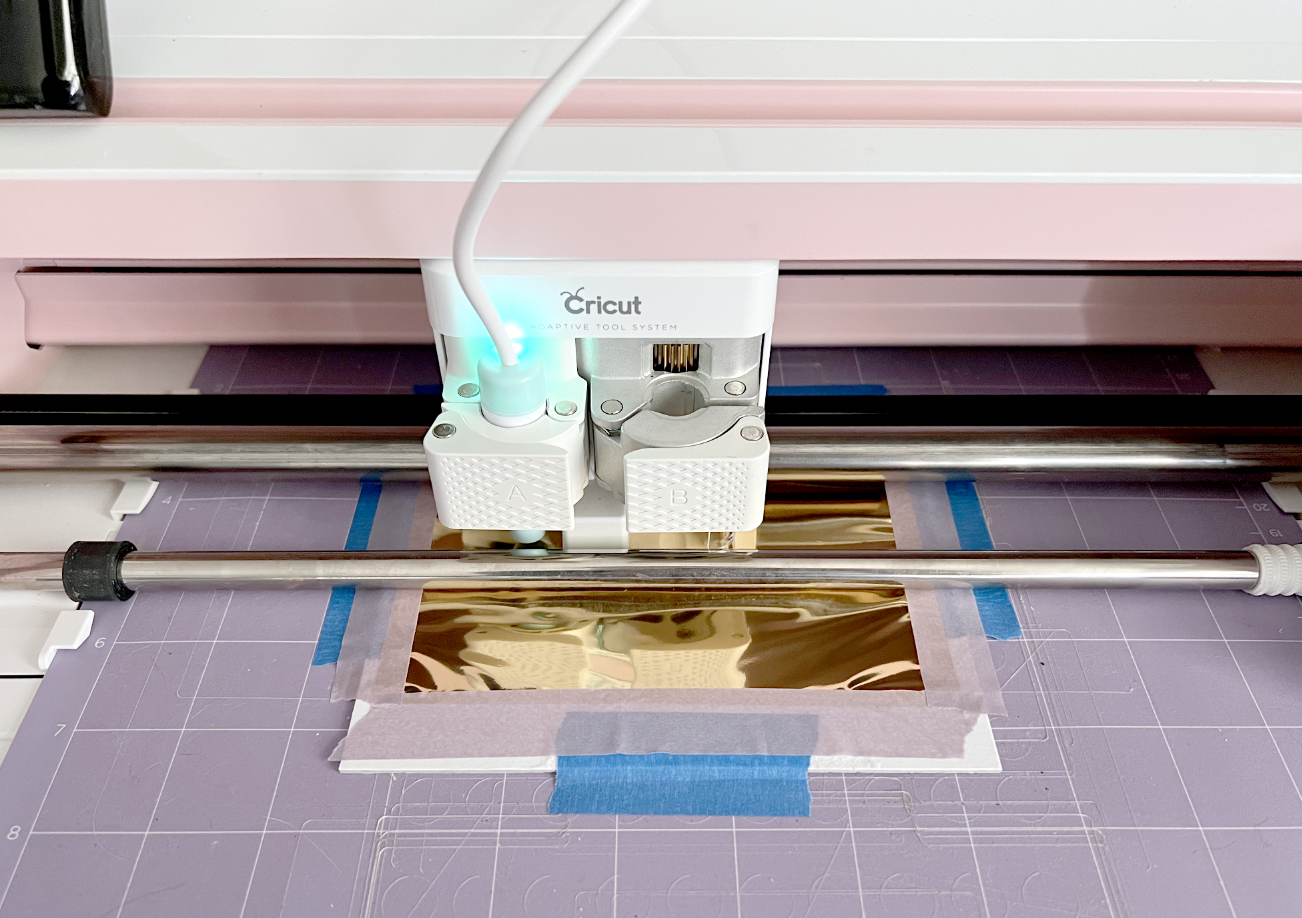
I place my foil quill in clamp A. Be careful not to touch the little metal tip, it’s hot!

Foiling on acrylic with Cricut

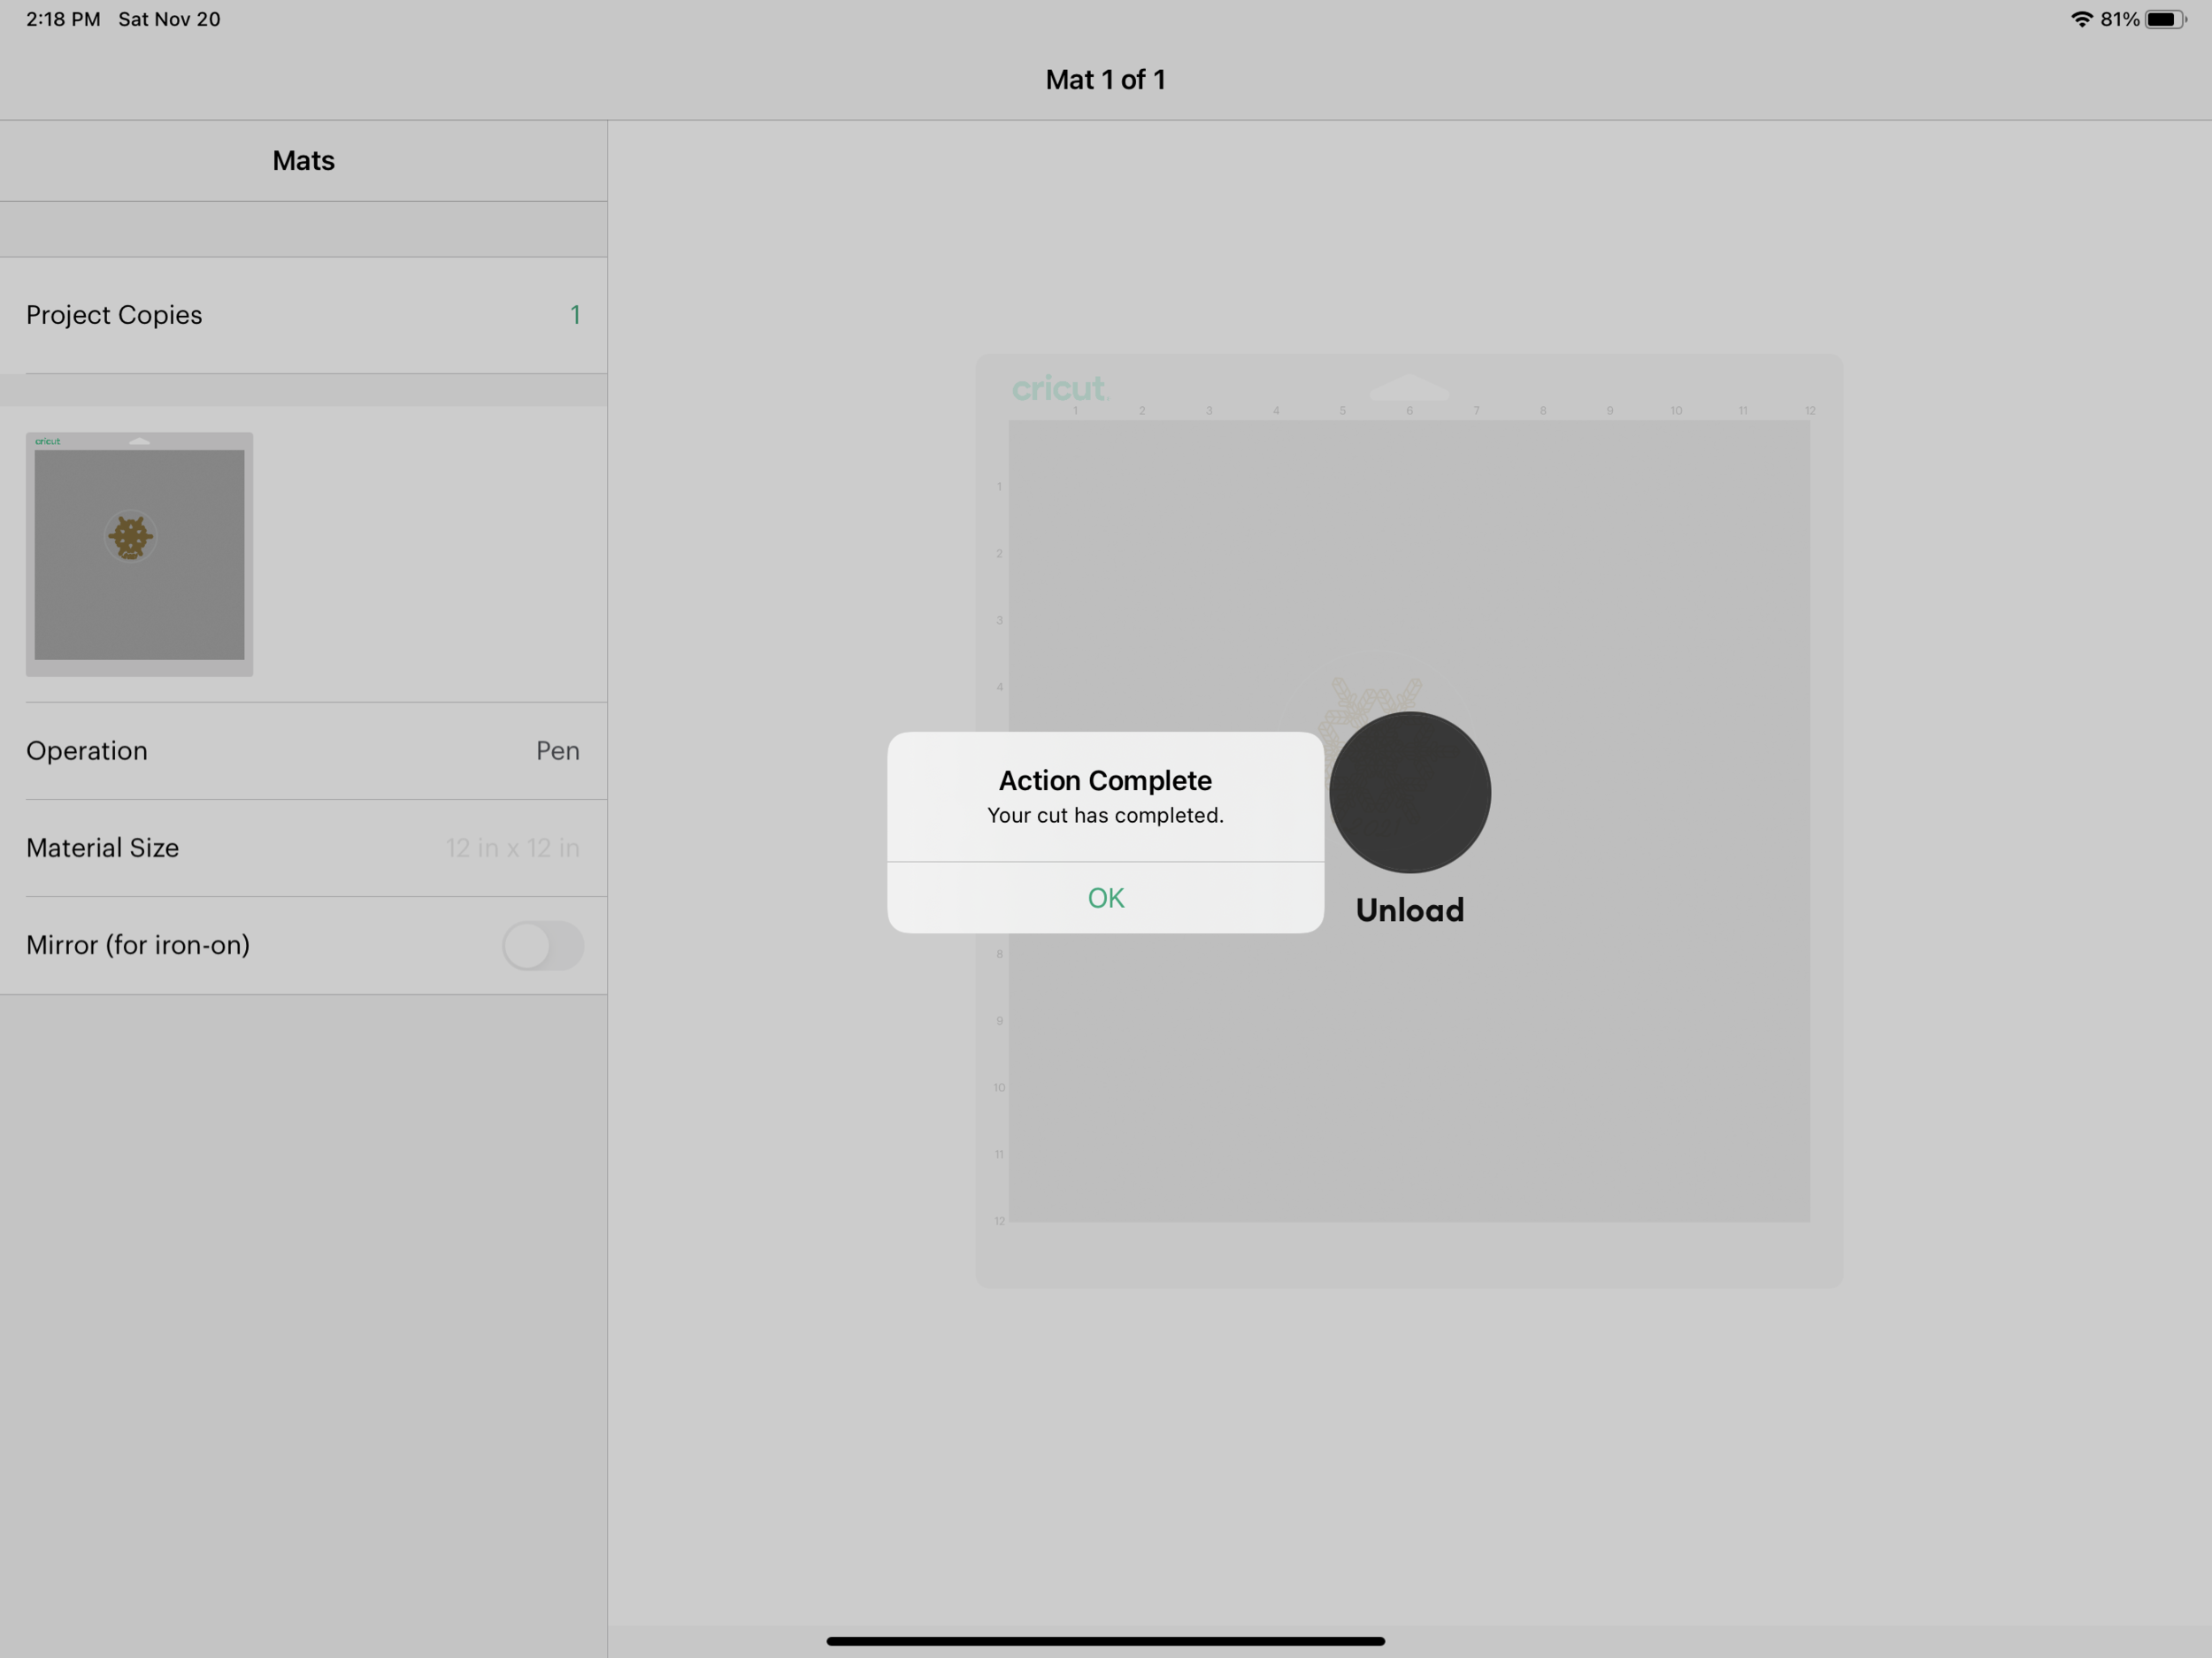
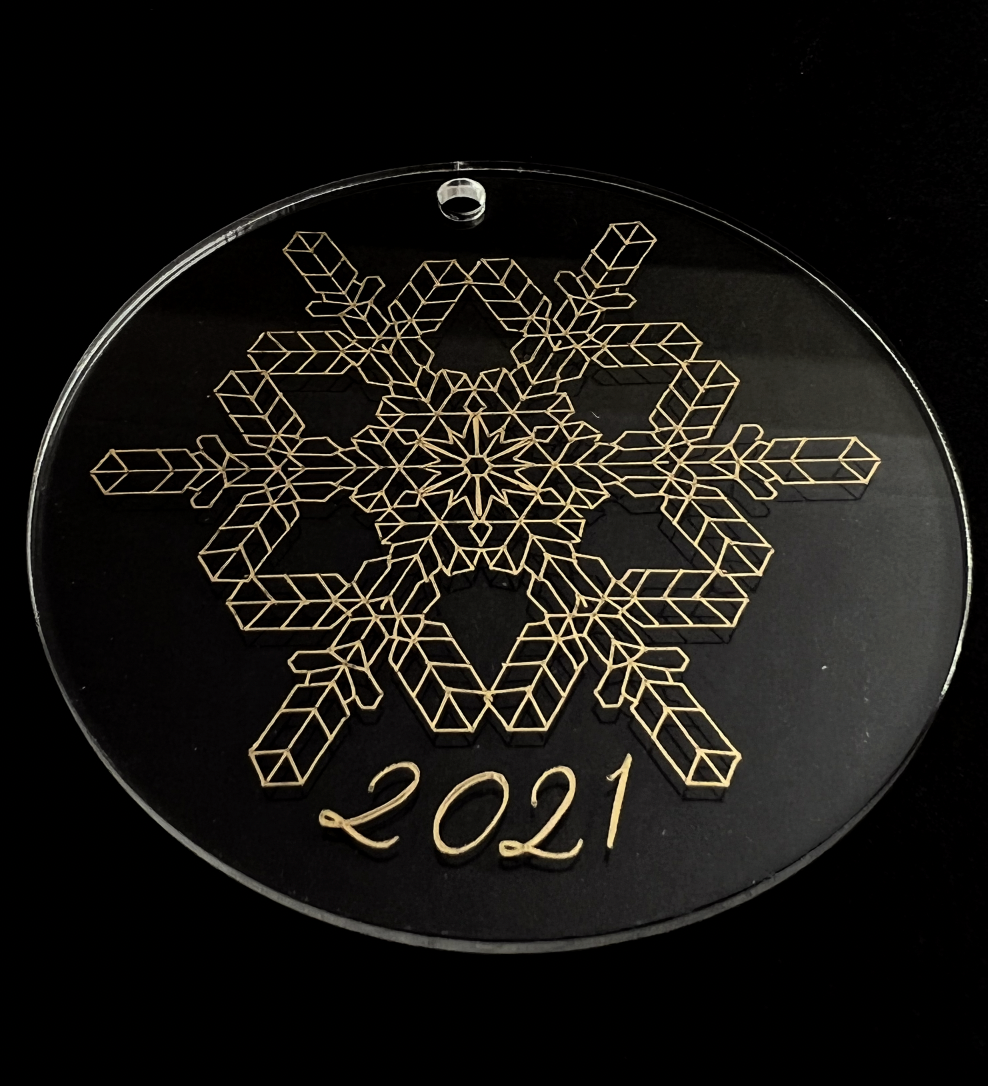
I press “Go” on my machine again and the foil quill draws the snowflake and the date. Once it’s finished, a little box will pop up in Design Space saying the action is complete, you can click OK.

Foiling on acrylic with Cricut

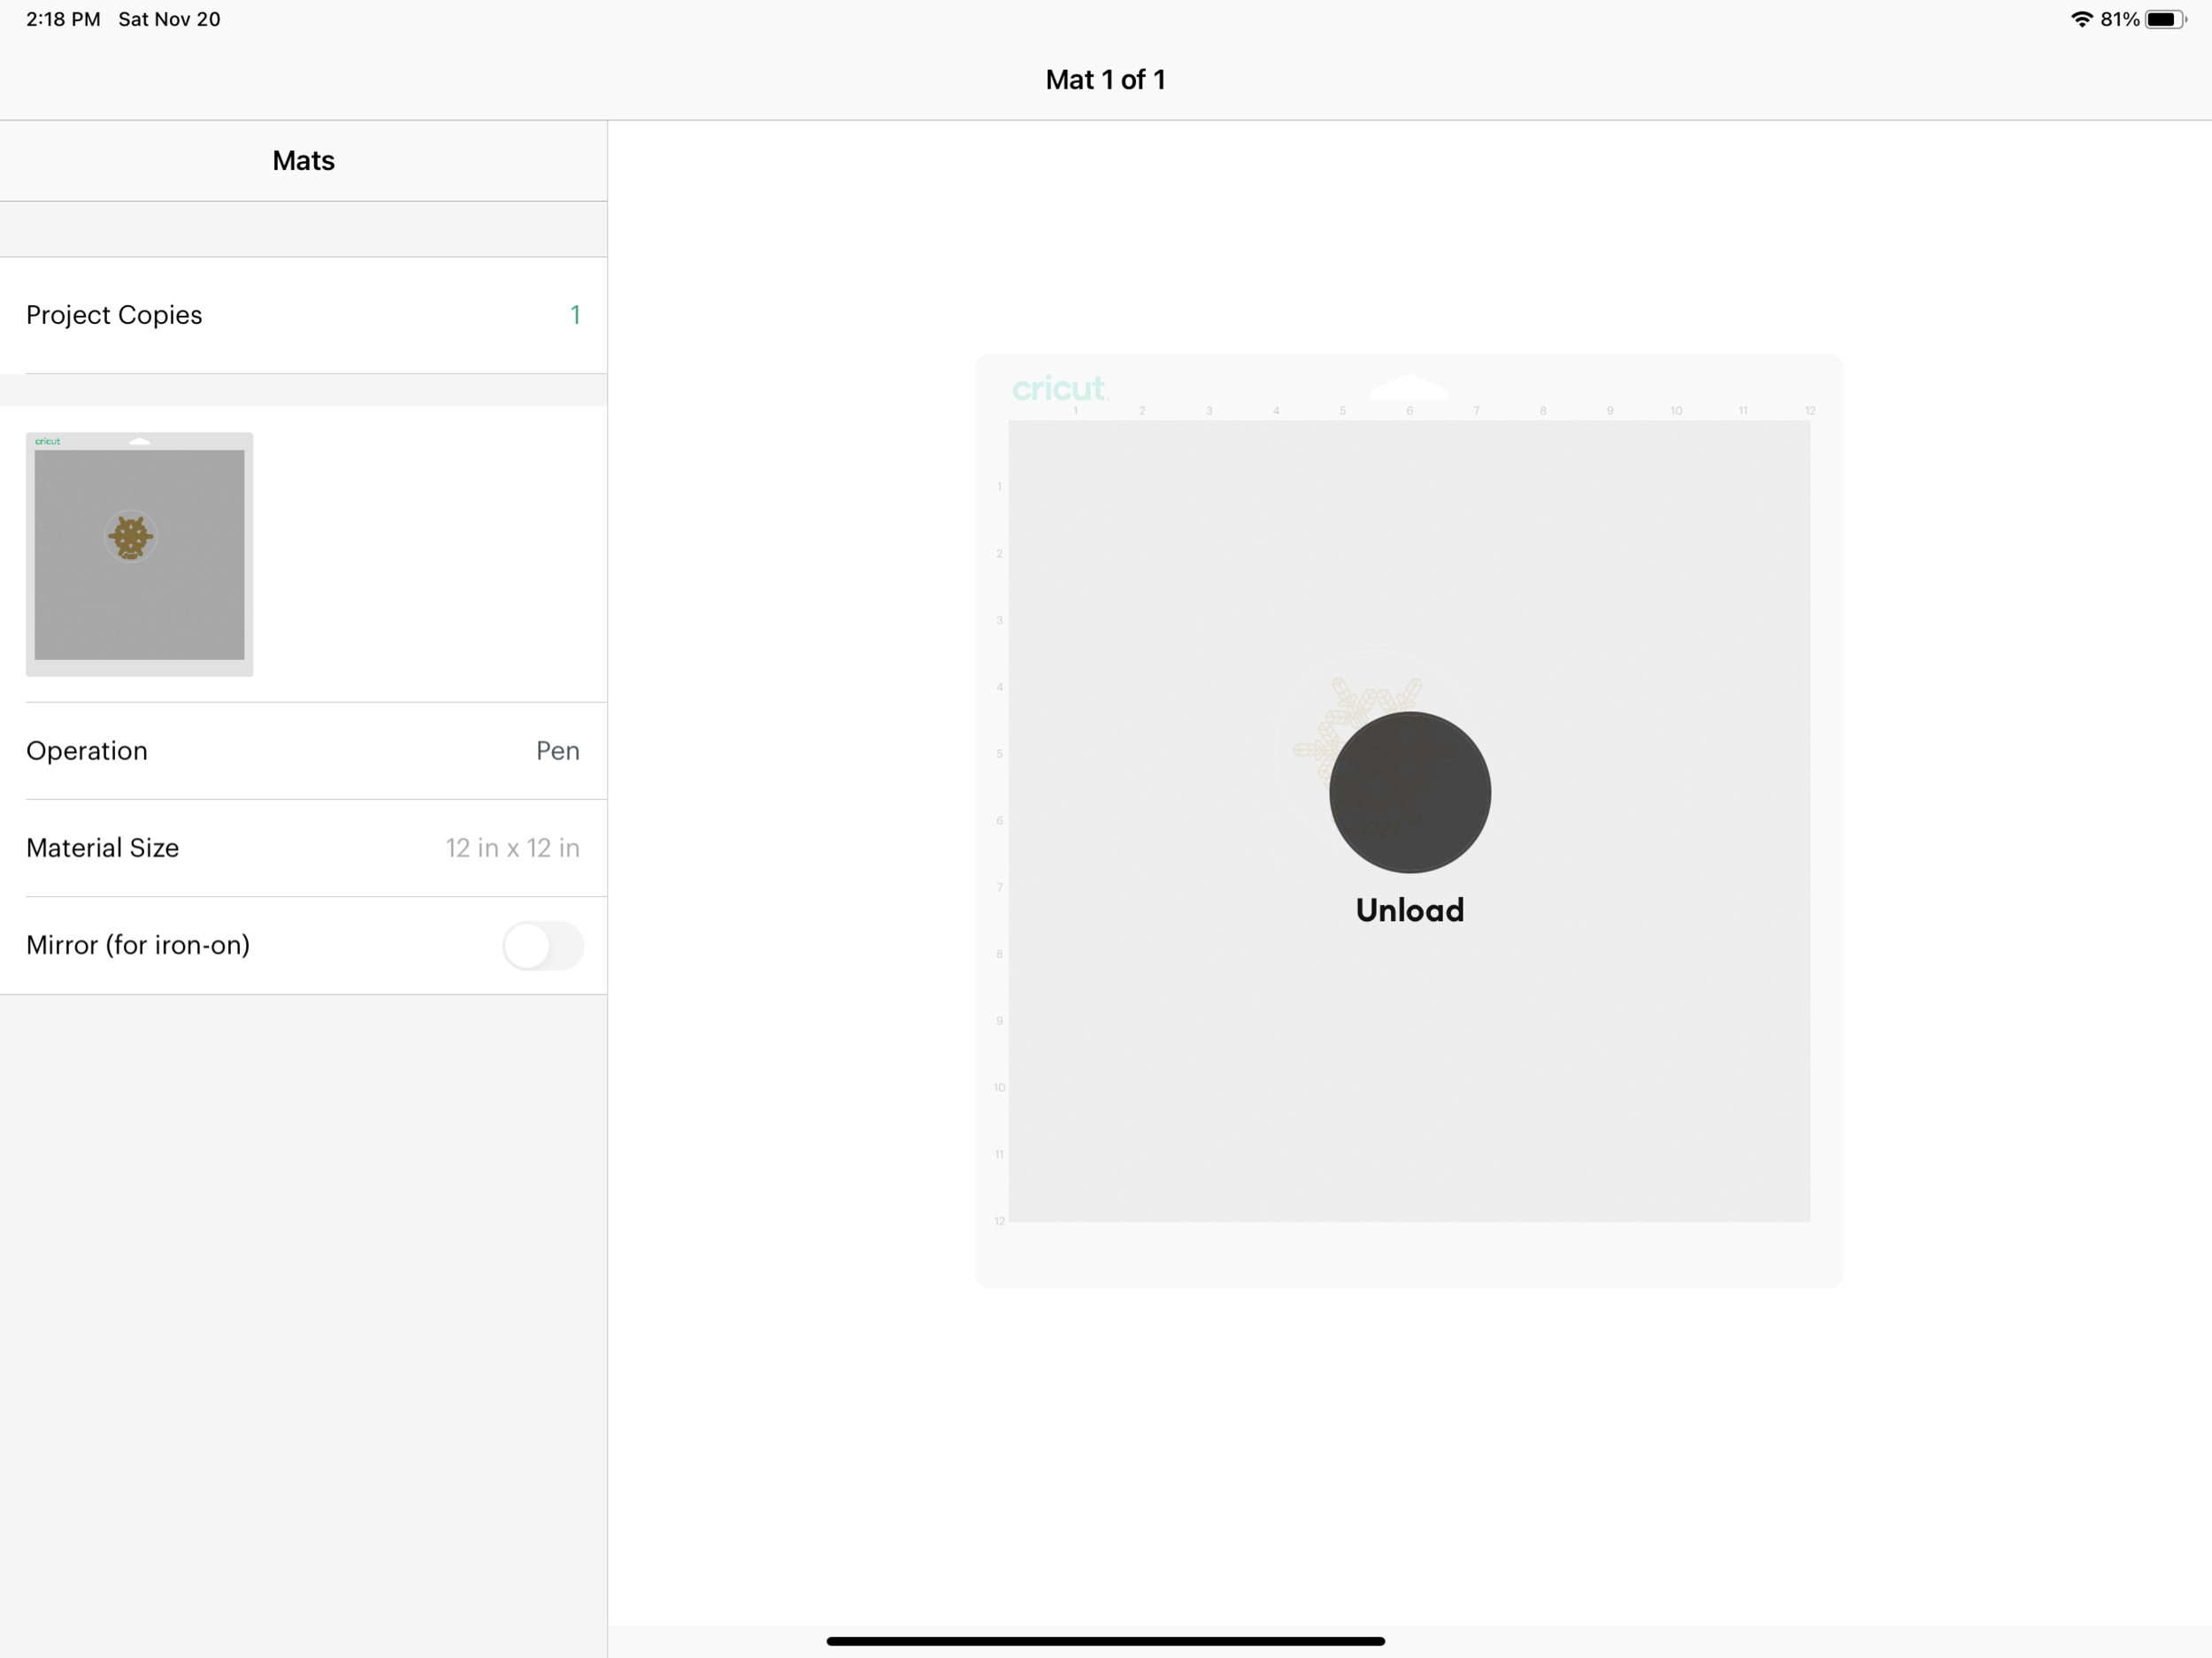
If you want to make another ornament, DO NOT unload your mat and do not exit Design Space. Just leave this screen showing.

Foiling on acrylic with Cricut

Remove the Foil Quill from clamp A and carefully remove the tape from the foil and remove the acrylic disc from the template. You can also remove the protective film from the back of the acrylic disc.

Foiling on acrylic with Cricut

Now you can place a new acrylic disc in the template, cover it with the foil. Press the “Go” button on the machine and it will start with the circle shape again.

A couple of tips:

  1. Remove the foil quill from Clamp A when your machine wants to draw the circle portion of the artwork.

  2. Don’t unload your mat from the machine! Otherwise you will need to do the whole template alignment again.

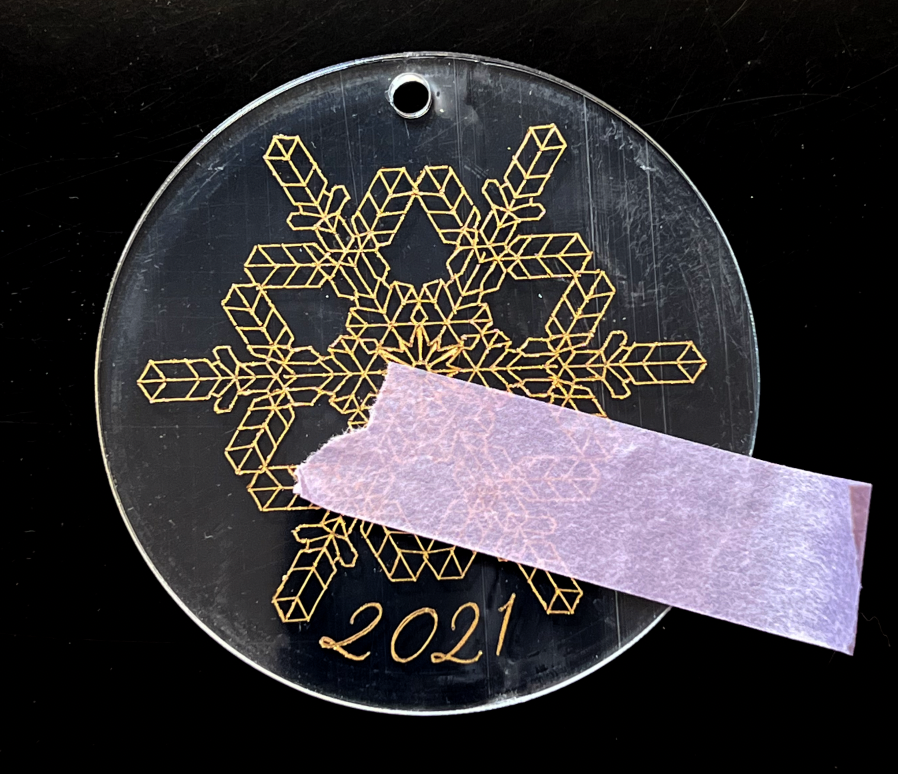
  3. You can use a piece of tape to carefully clean up the edges of the foil.

Foiling on acrylic with Cricut

Scoring with the Portrait 3 Using the Cricut Scoring Stylus

Hi Everyone!

This year I bought a Silhouette Portrait 3 machine because I wanted something smaller than my Cricut Maker that I could easily set up for quick little projects. I was also going to have to buy new mats, blades, etc anyway if I had purchased a Joy. So I decided on the Portrait 3 because it’s capable of doing so much more than the Cricut Joy.

So far, the only thing I haven’t really liked about my Portrait 3 is the scoring capability. As I mentioned in last week’s post, I don’t really like the dashed score lines or the shallow cut it uses for a solid score line.

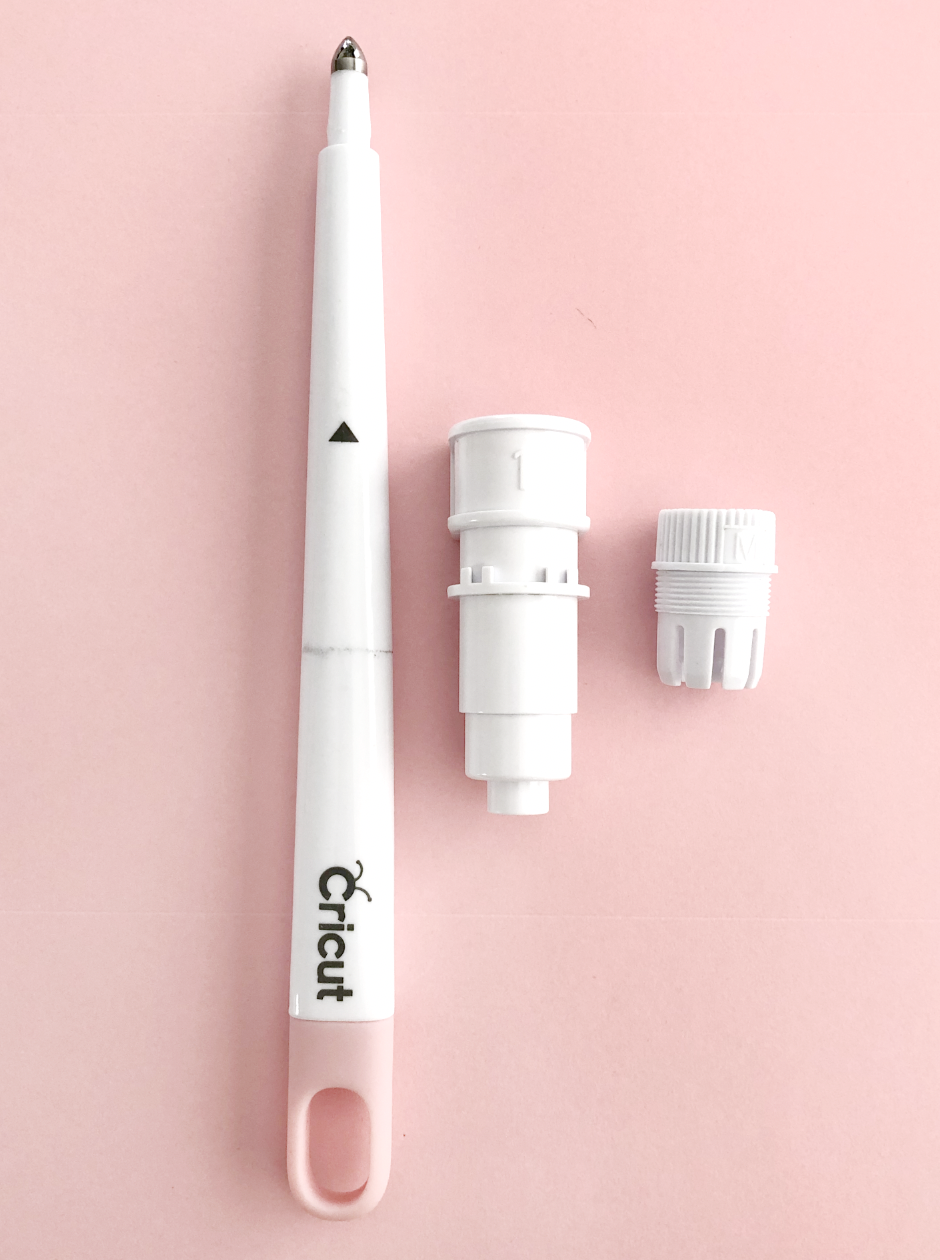
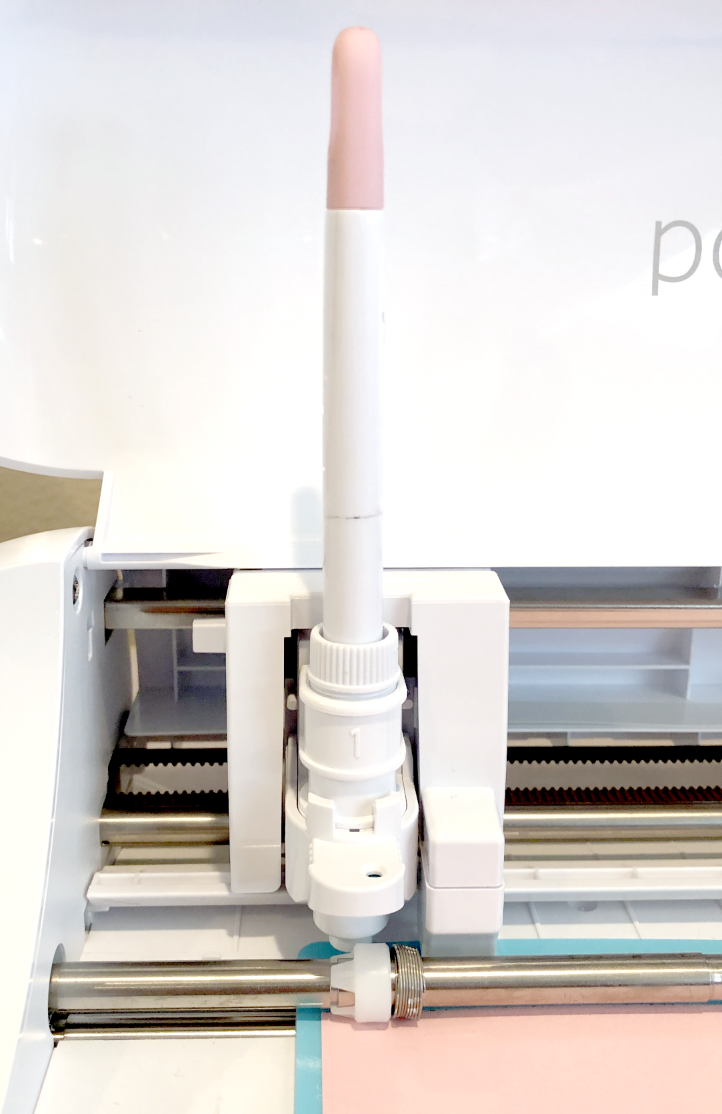
This week I’m trying out my Cricut scoring stylus with my Portrait 3.

One of the things I really like about Silhouette is all of the adapters you can use with with their machines so you can use a variety of different brands of tools.

I’m using the Silhouette pen adapter that goes with my machine (it’s the same one that’s for the Cameo 4) and the M ring that screws into it.

Cricut Scoring Stylus and Portrait 3 pen adapter

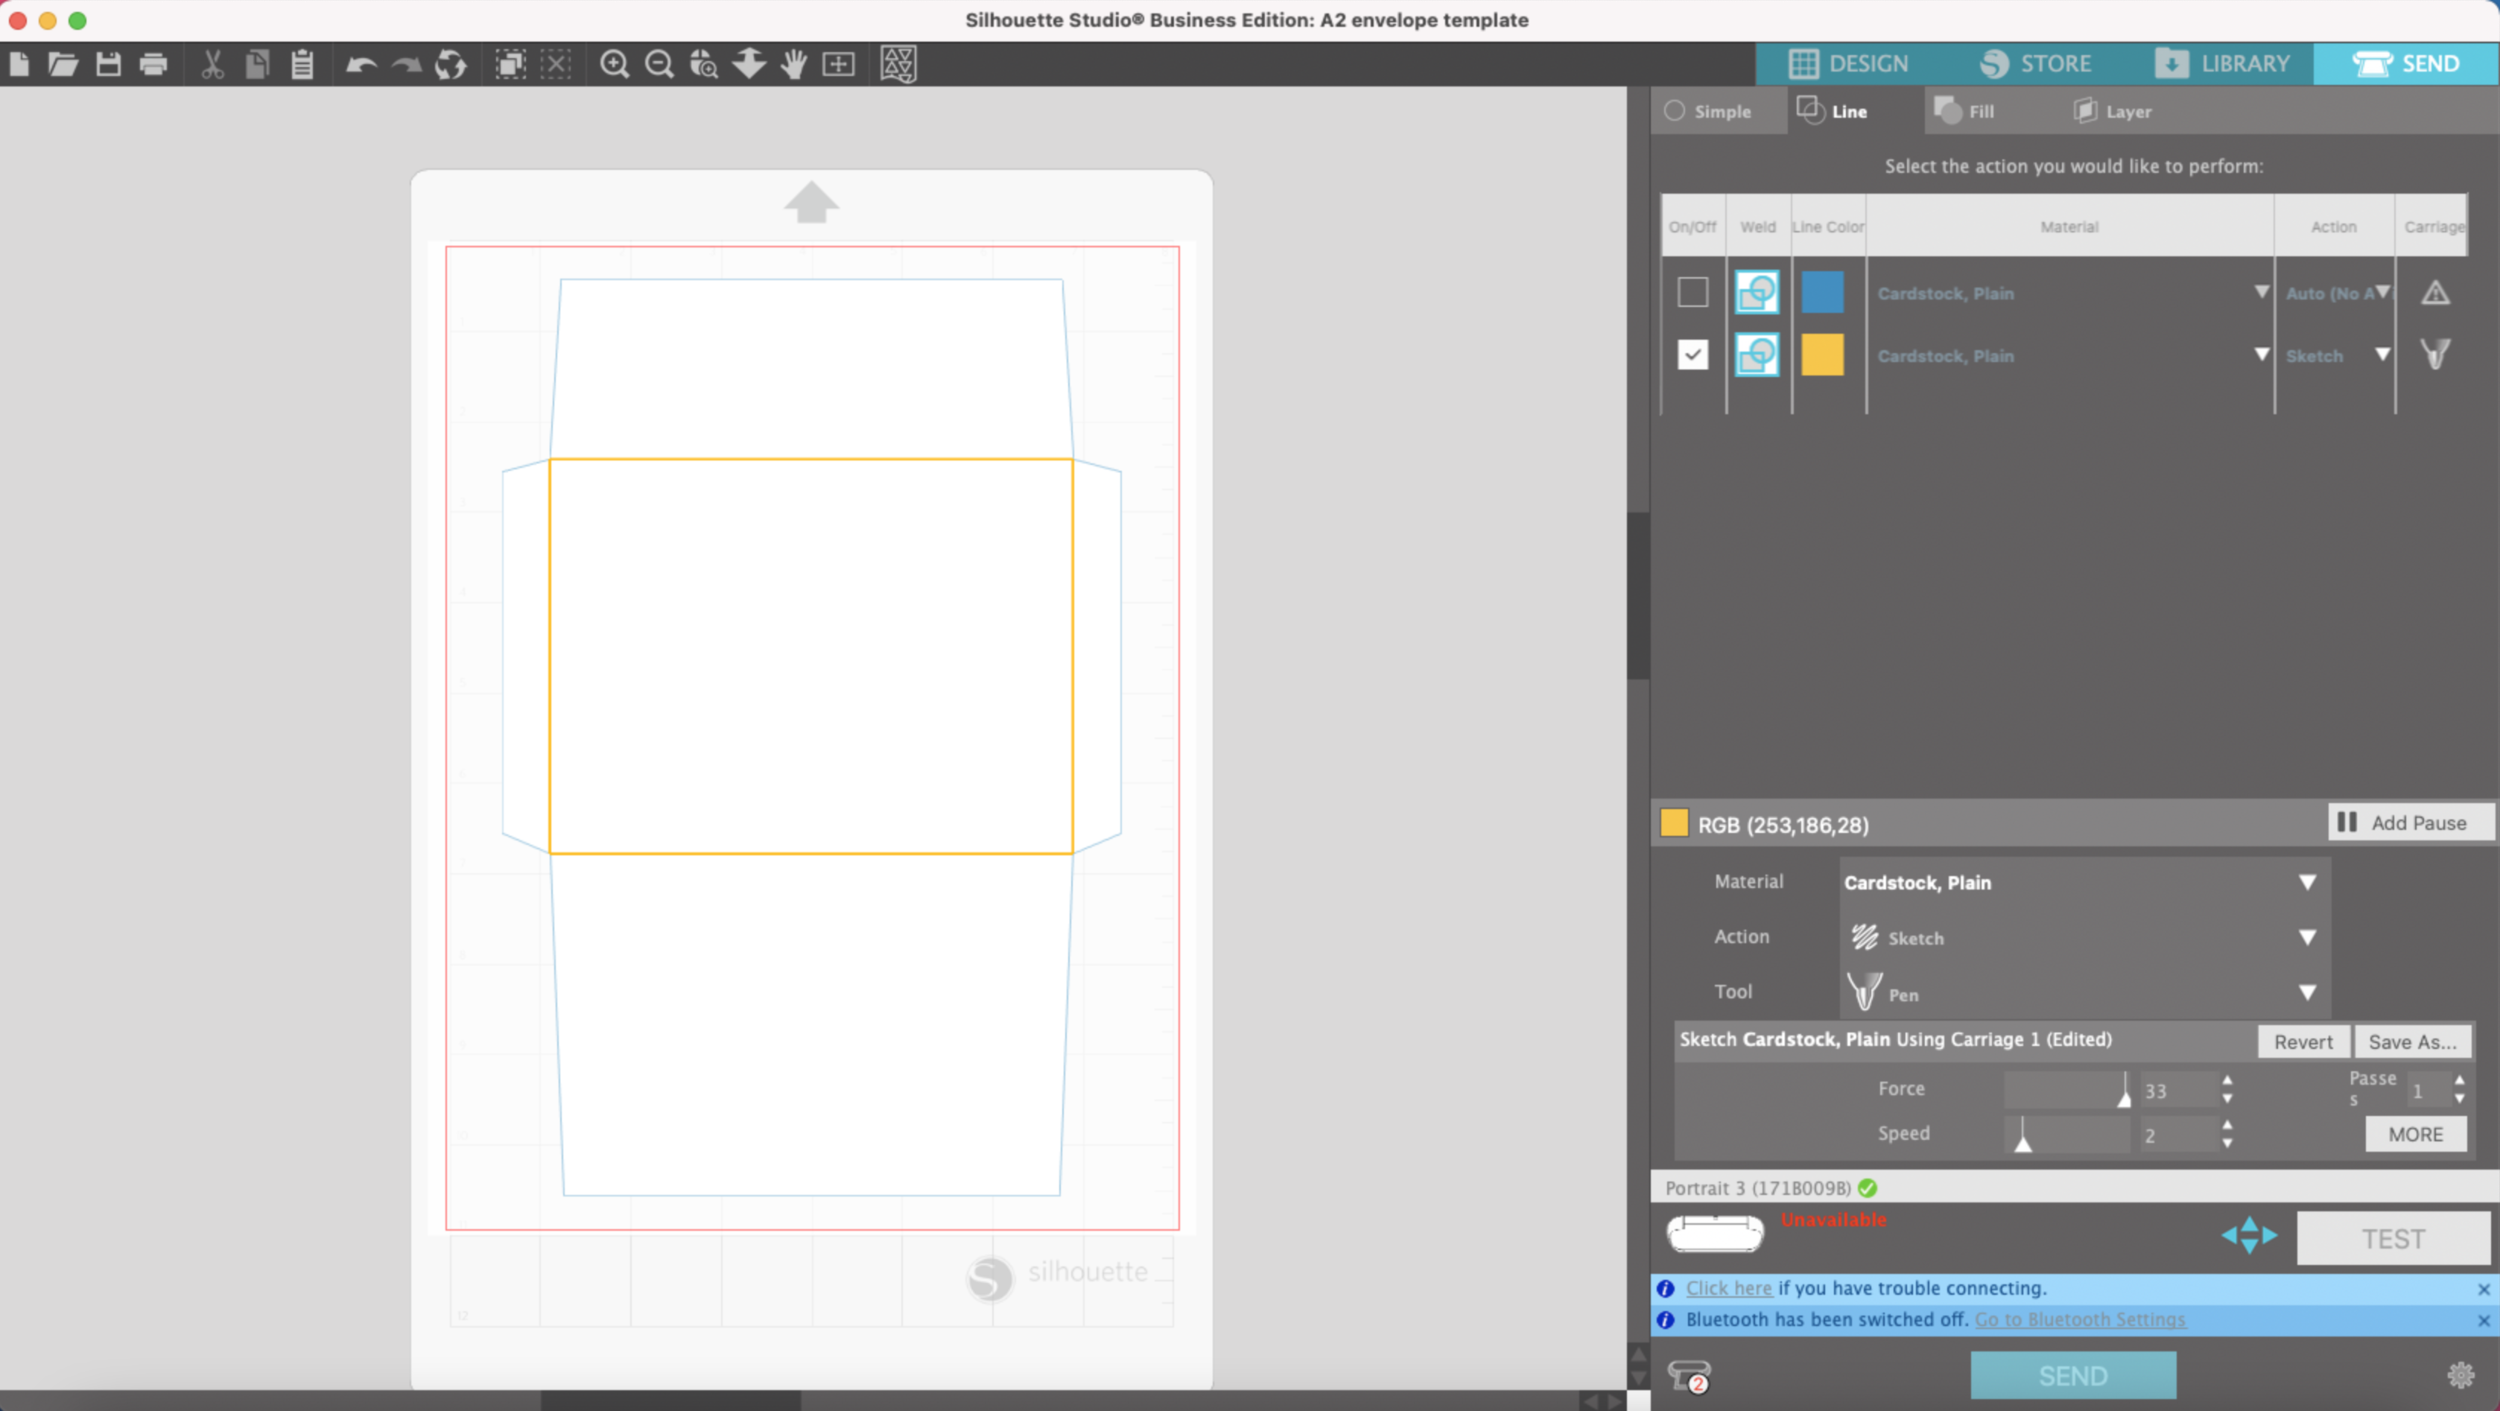
I tried out my same A2 envelope pattern with some light 65lb cardstock, the Force set at 33, Speed 2.

project set up in Silhouette Studio

It definitely scores the cardstock! Not quite as deep of a score line as my bevel quill. But if you’re like me and have both a Cricut and Silhouette machine, this is another viable option for scoring with your Silhouette machine.

Cricut scoring stylus in Portrait 3 pen adapter
using Cricut scoring stylus with Portrait 3
score lines with portrait 3

Cricut Snap Mat Feature to Cut Stickers

Hi Everyone!

Online, I see suggestions all the time for using the Cricut Snap Mat feature to cut stickers. I’m going to give it try this week! (SPOILER ALERT: This is not one of my preferred methods to cut stickers).

First things first, Snap Mat is only available on the Cricut App, not the desktop version of Design Space. I’m going be using my iPad Pro, but you can also use your phone.

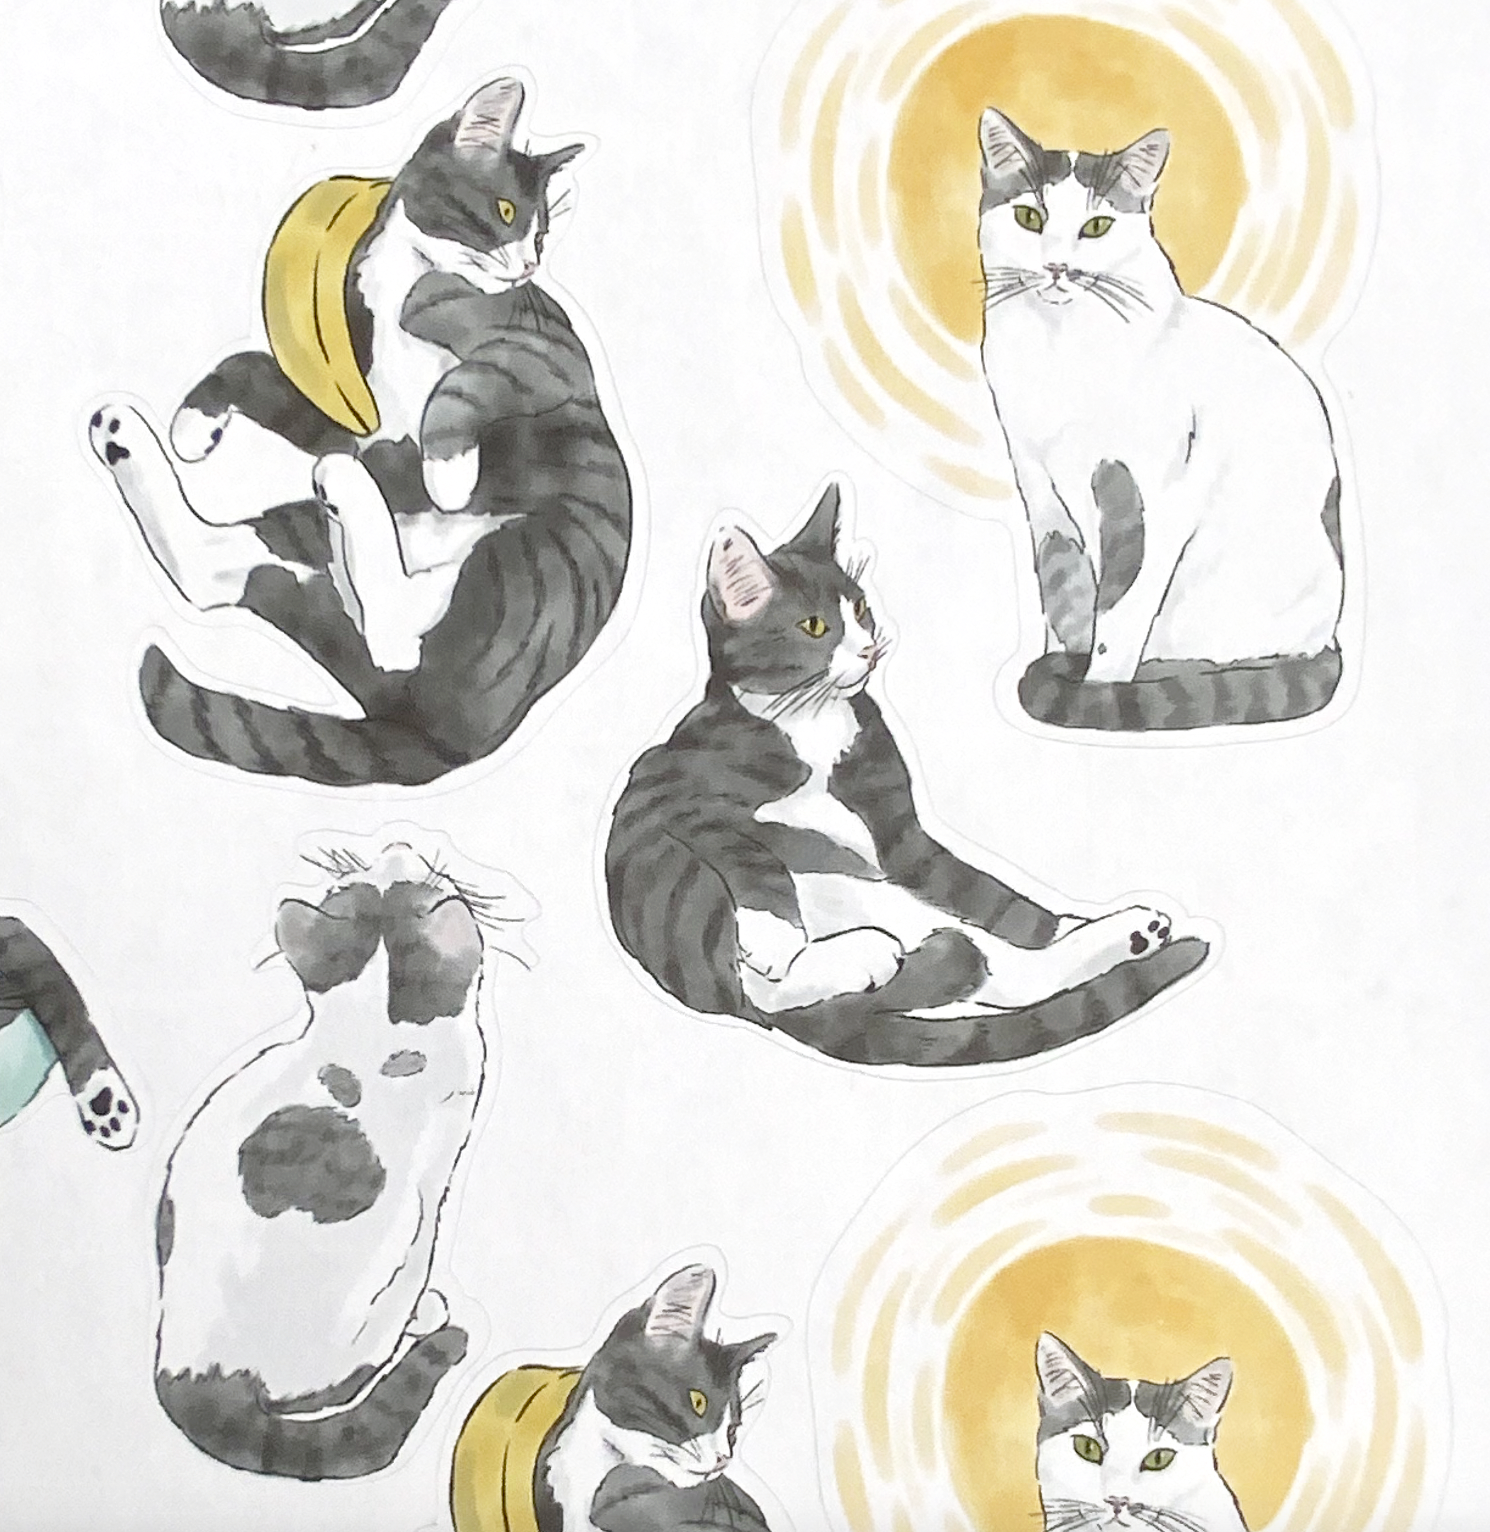
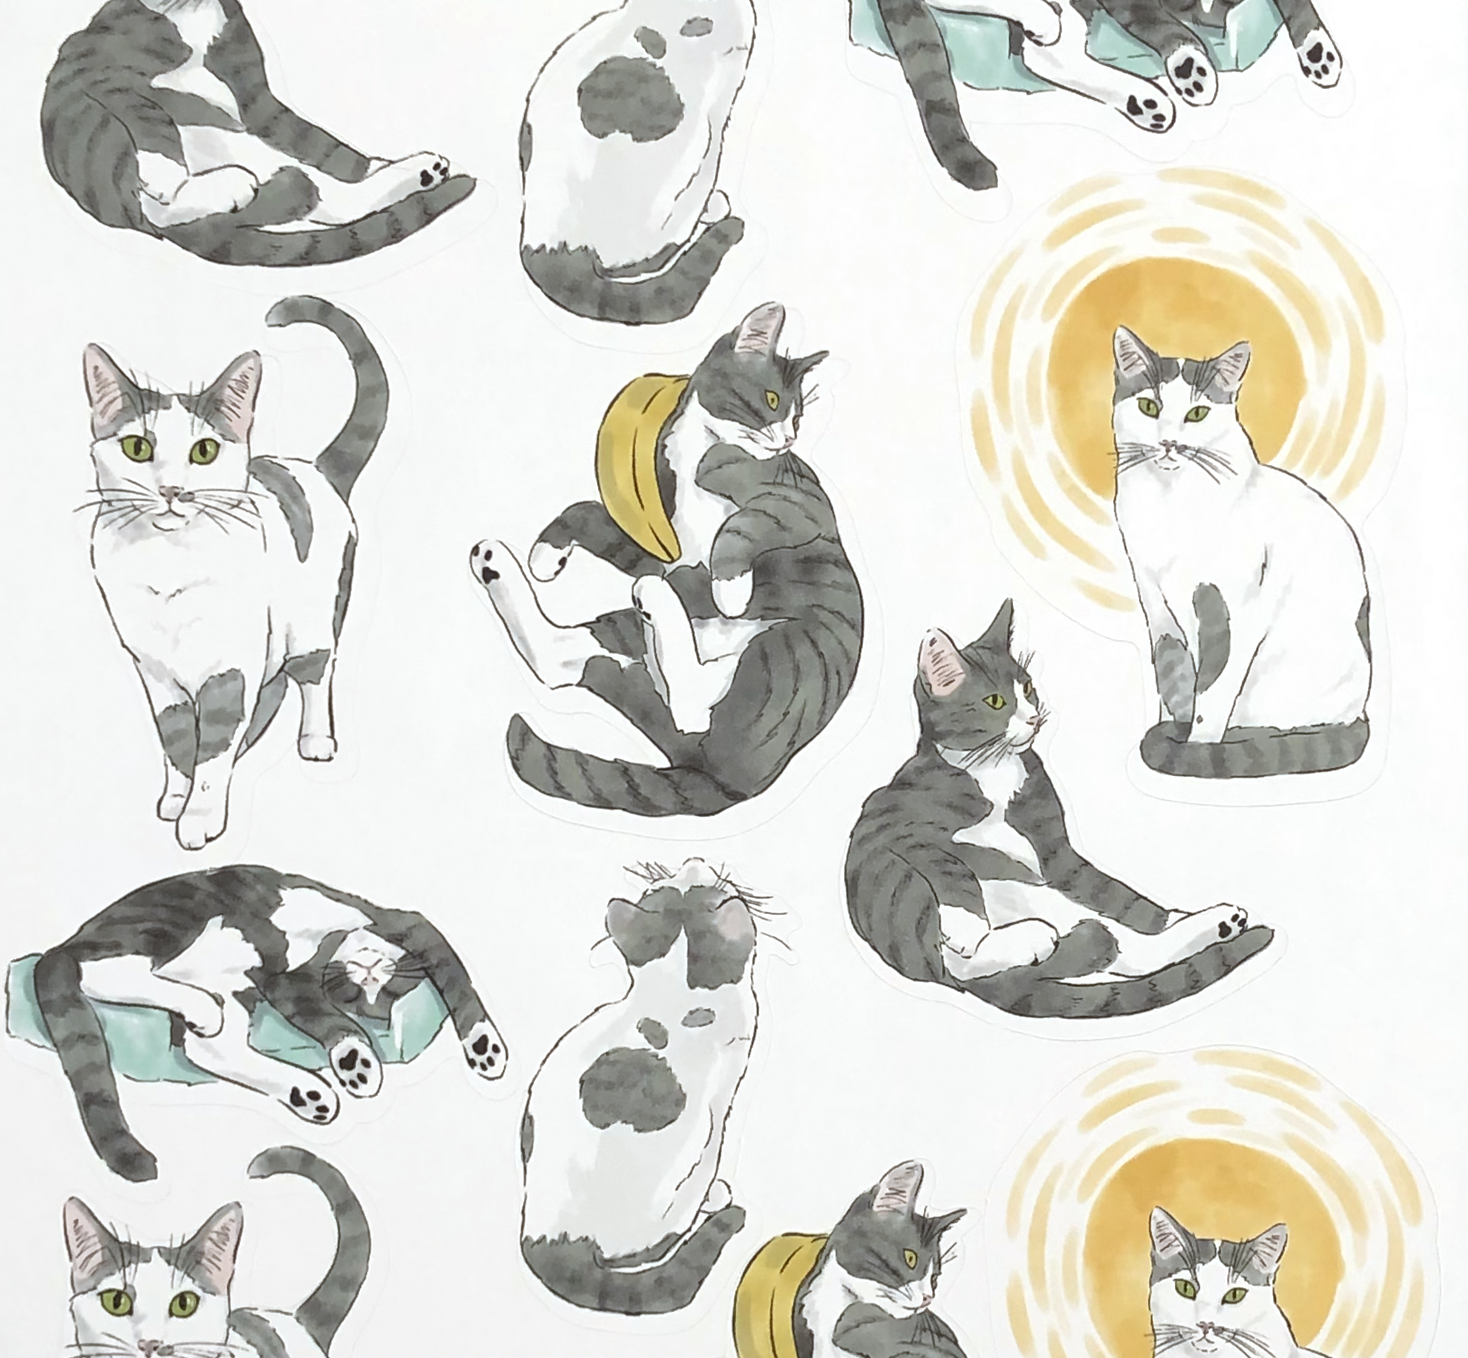
I’m going to try cutting the same kitty stickers I’ve been cutting the last few weeks so we can also compare the results.

I’m going to test this out initially on plain paper so I don’t waste my sticker paper. I’ve got a test sheet already printed on plain paper and I’m going to place it on my mat. For this feature, I should be able to place it anywhere on the mat.

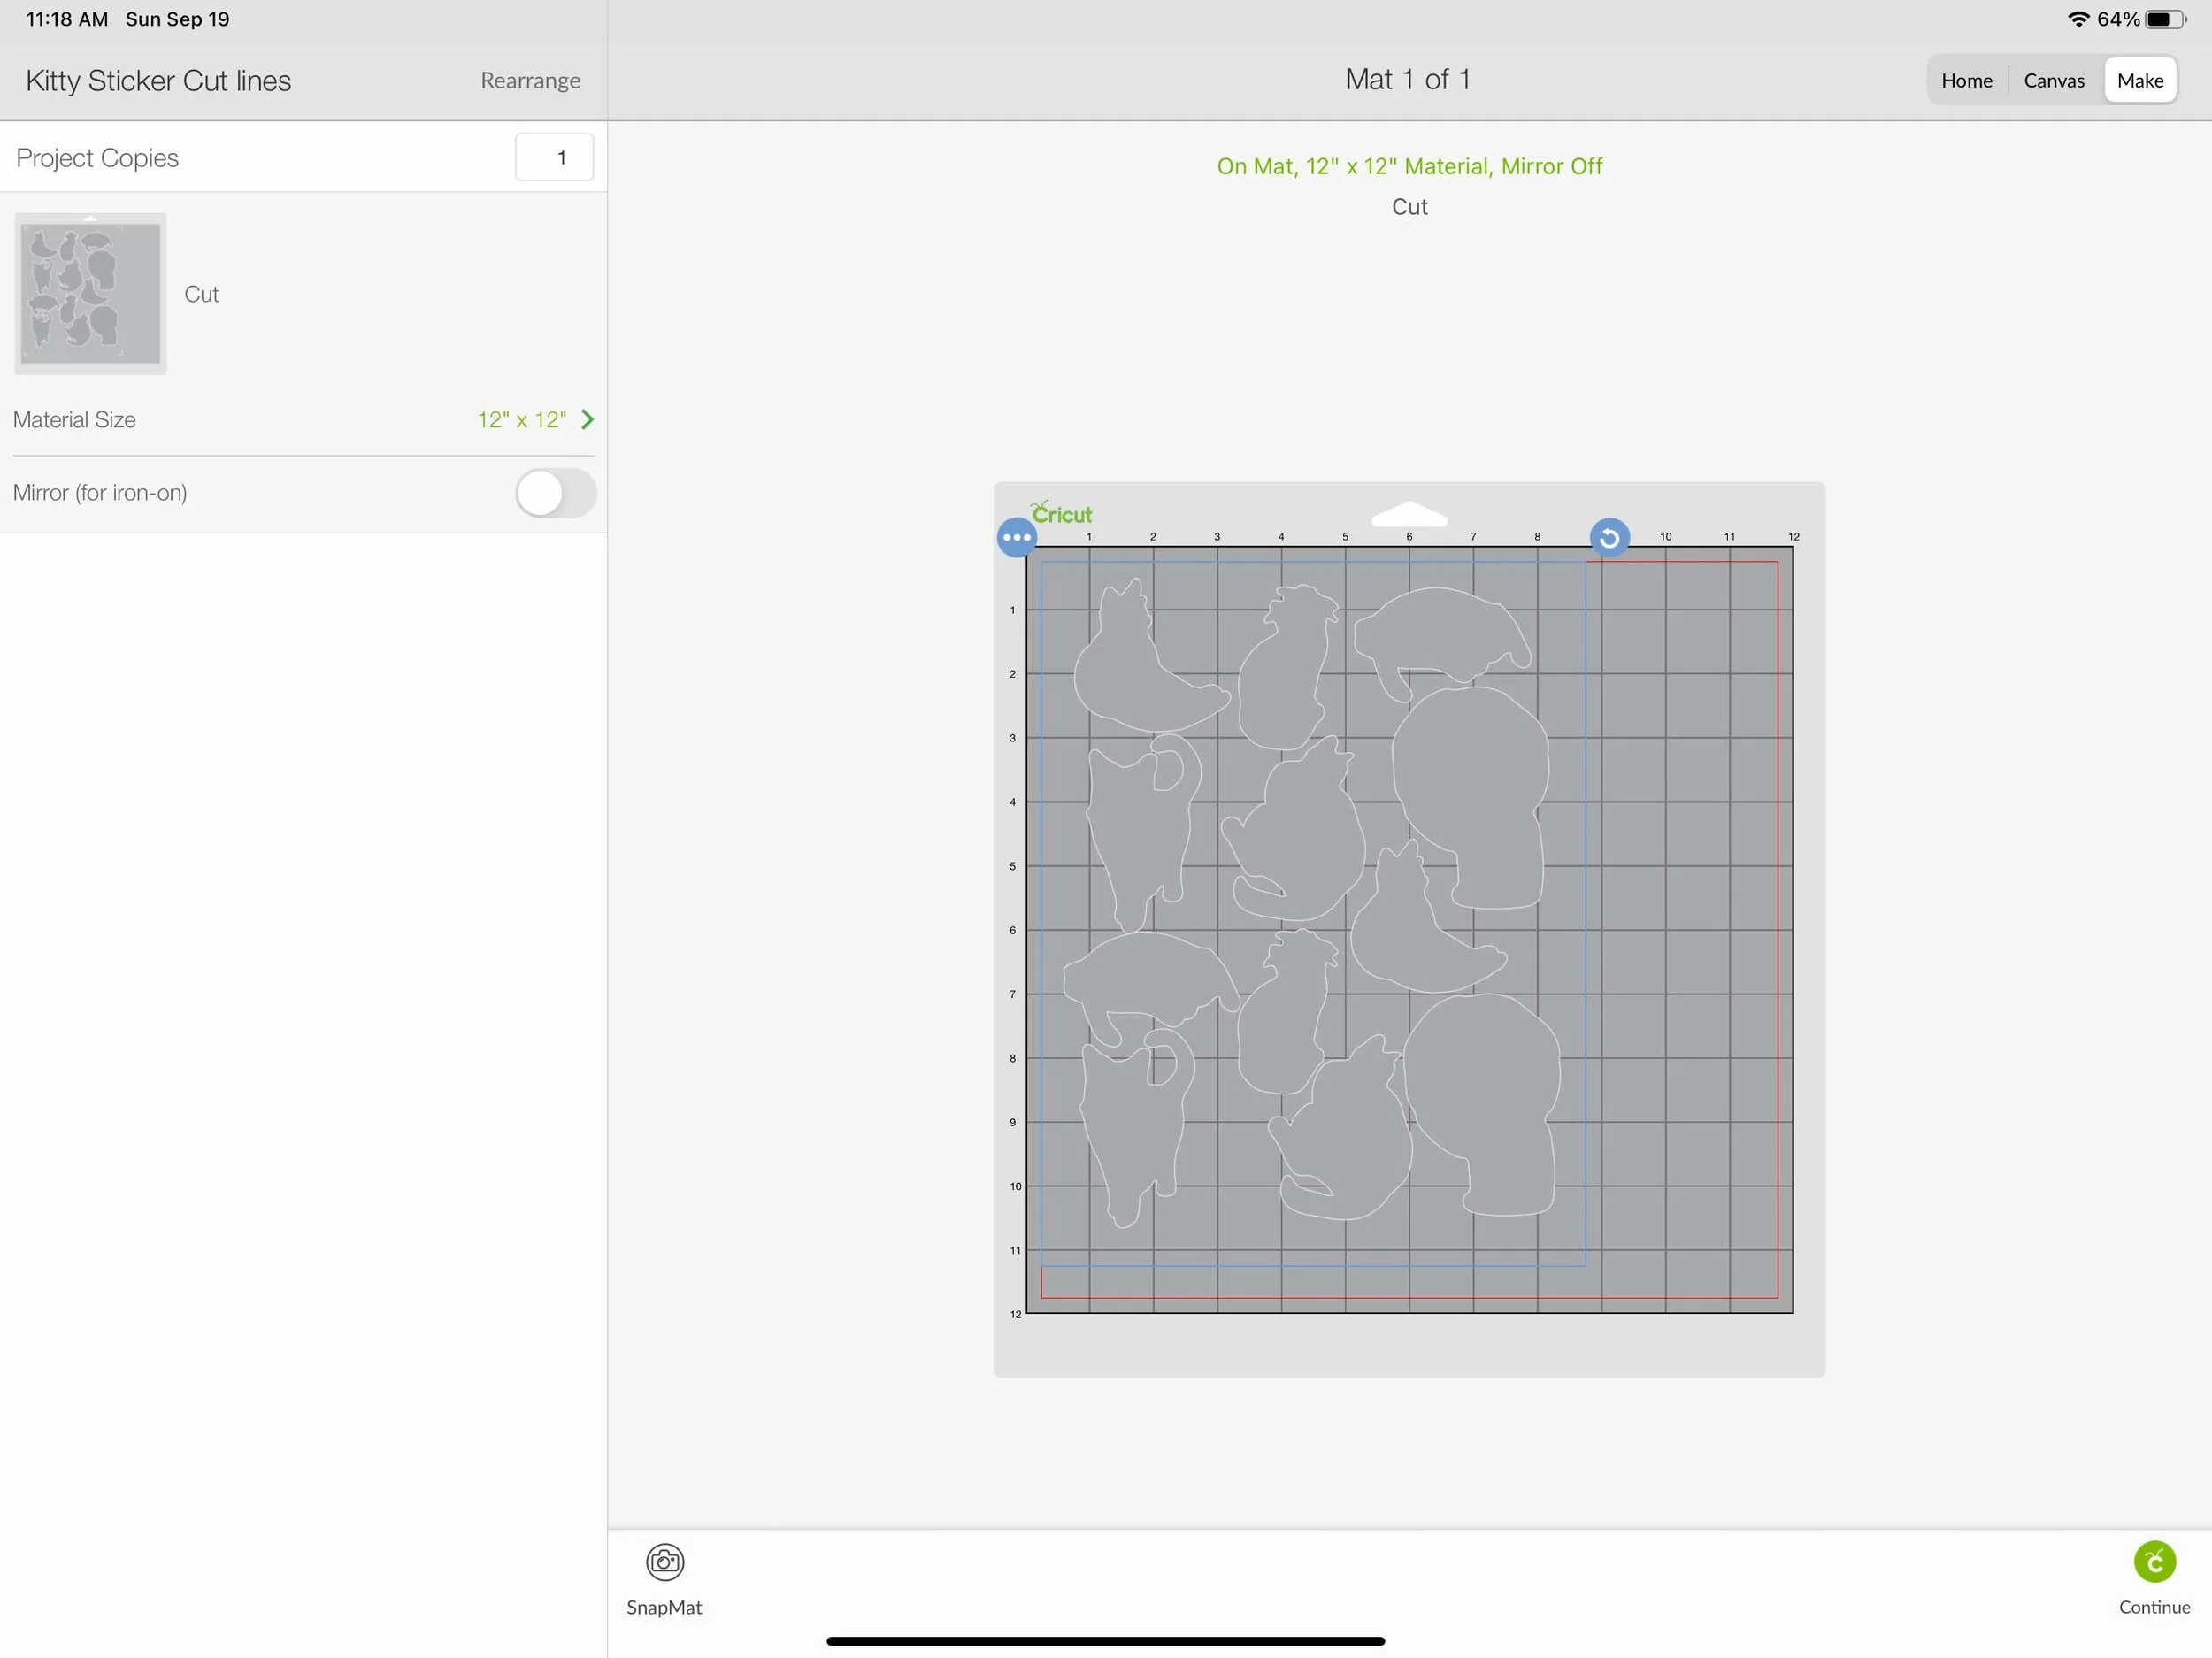
In order to access the Snap Mat feature, you need to have your cutlines already created in Design Space or uploaded into Design Space from Illustrator or other software. I’m going to open the cutlines for the kitty stickers that I already have uploaded from Illustrator and saved to Design Space.

Cutting Stickers Cricut Snap Mat

Then I’m going to tap the little green Make It in the bottom right corner.

Cutting Stickers Cricut Snap Mat

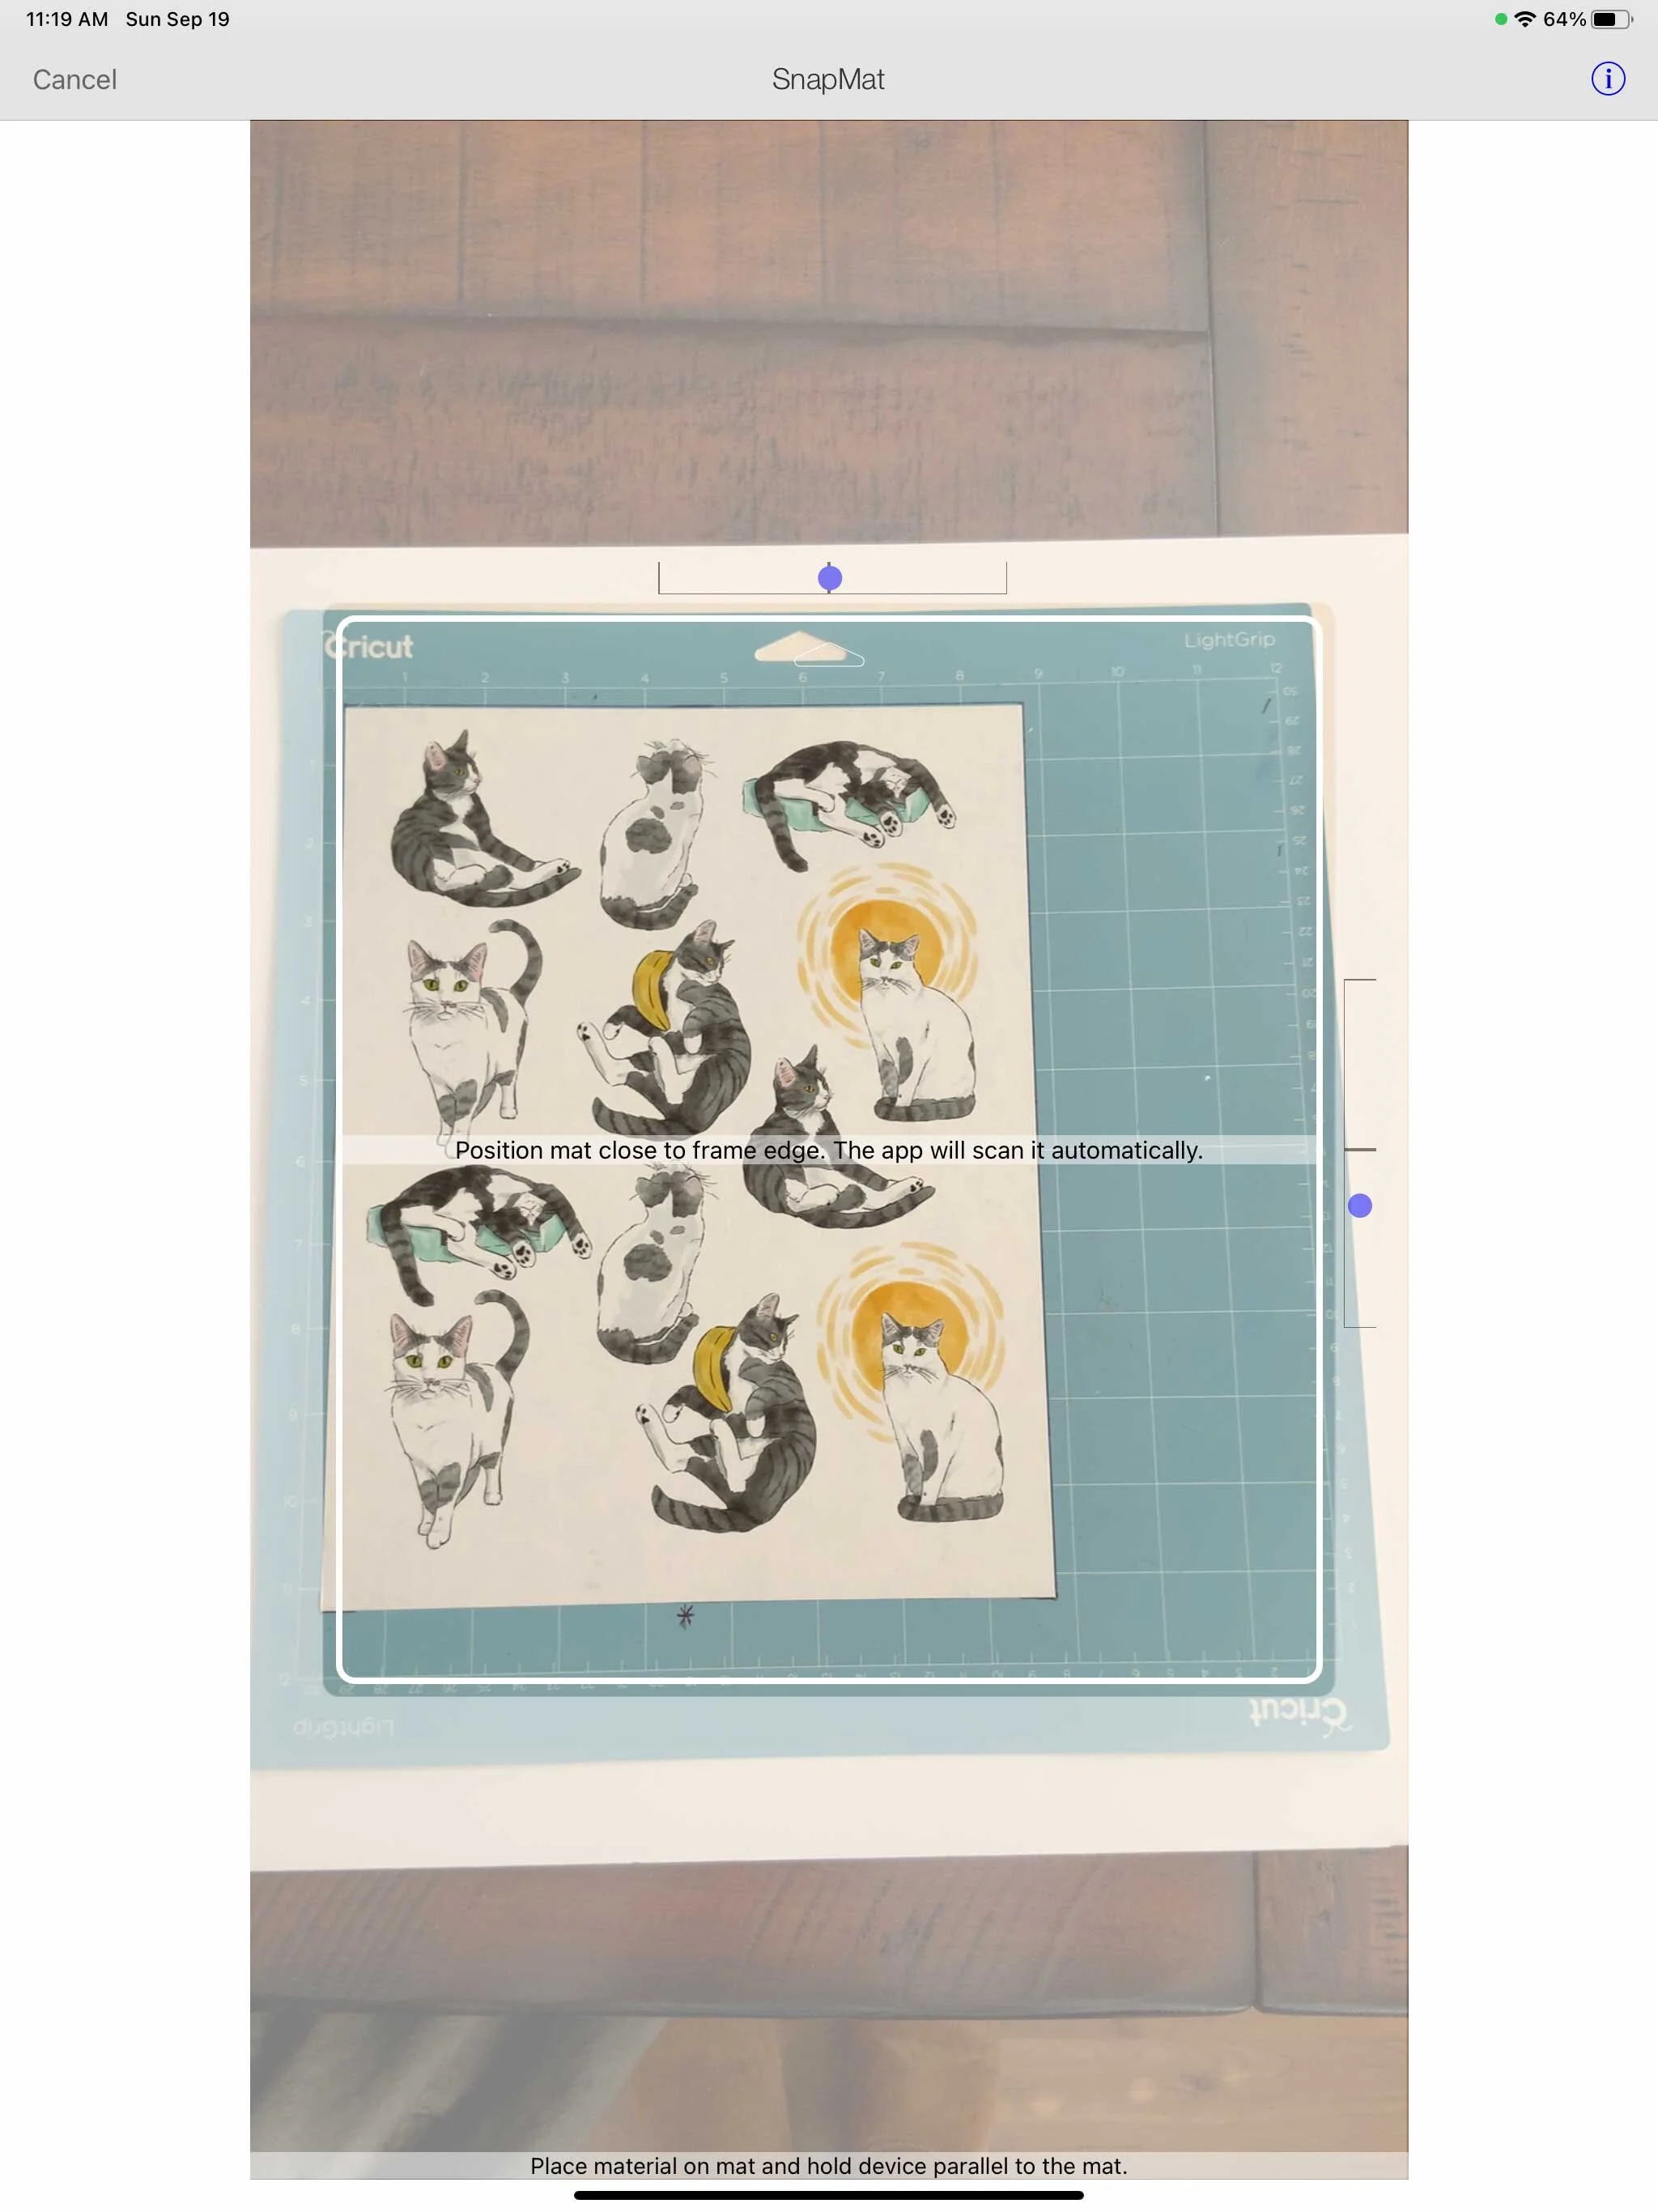
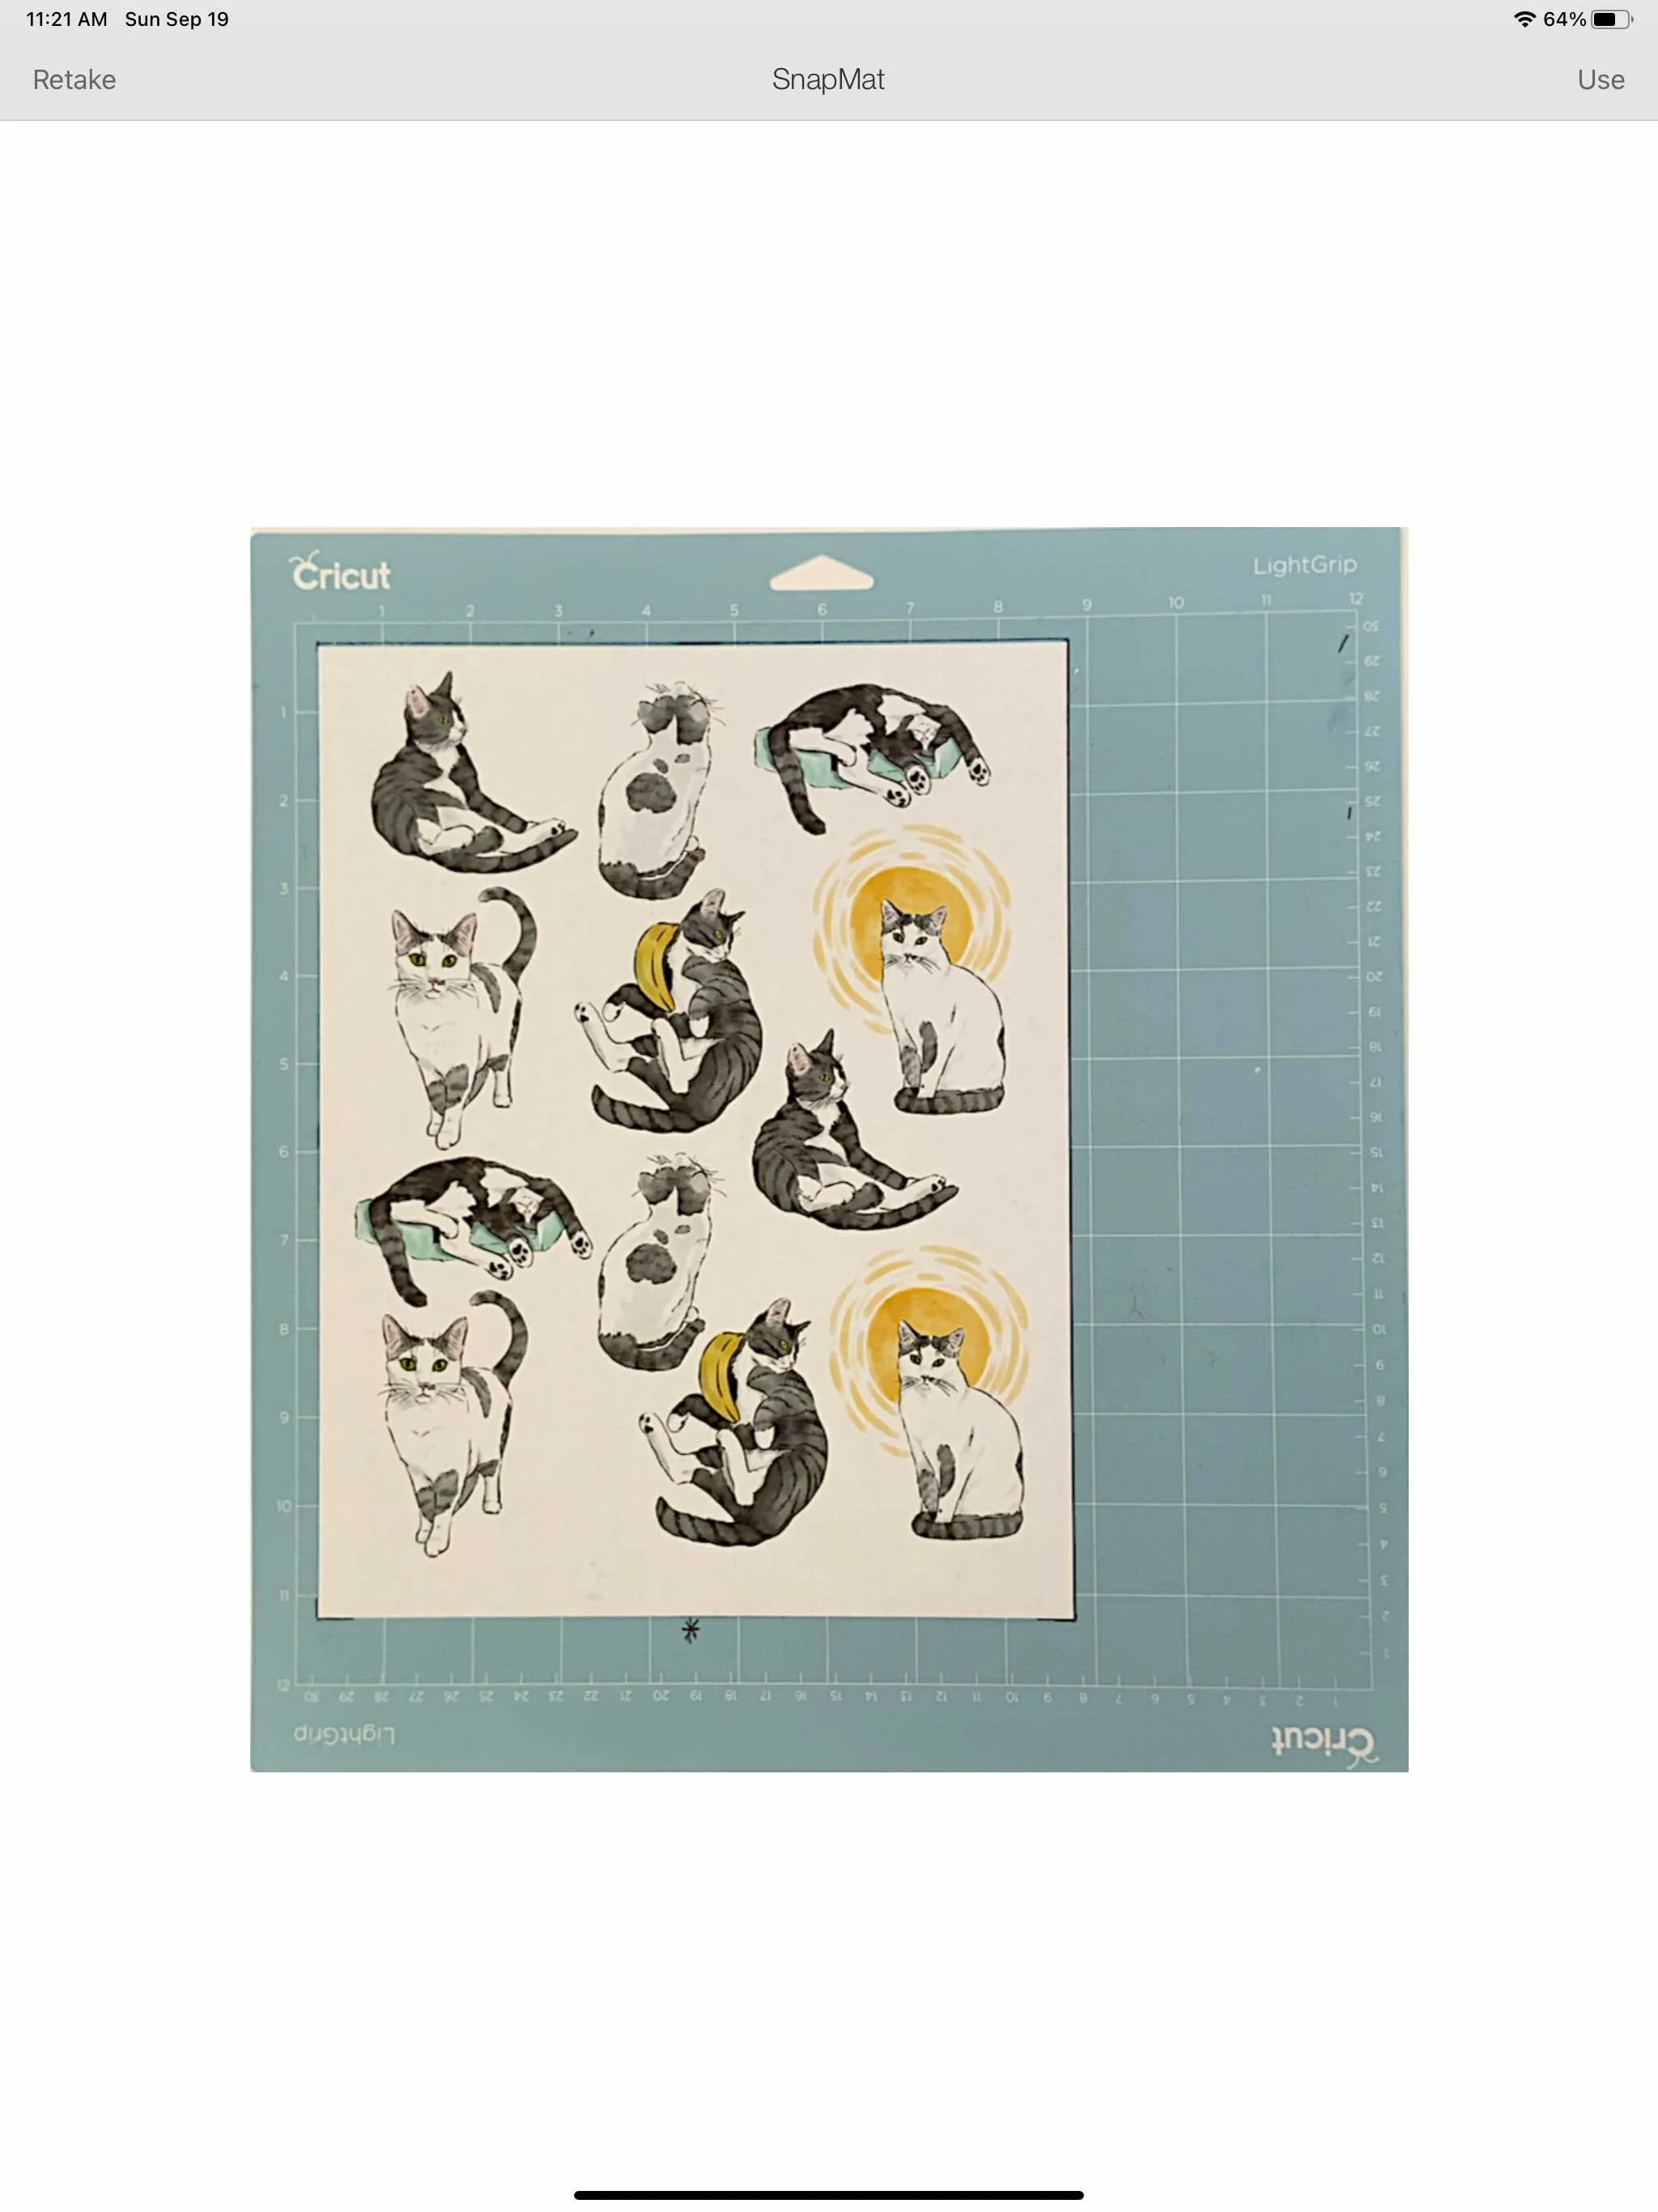
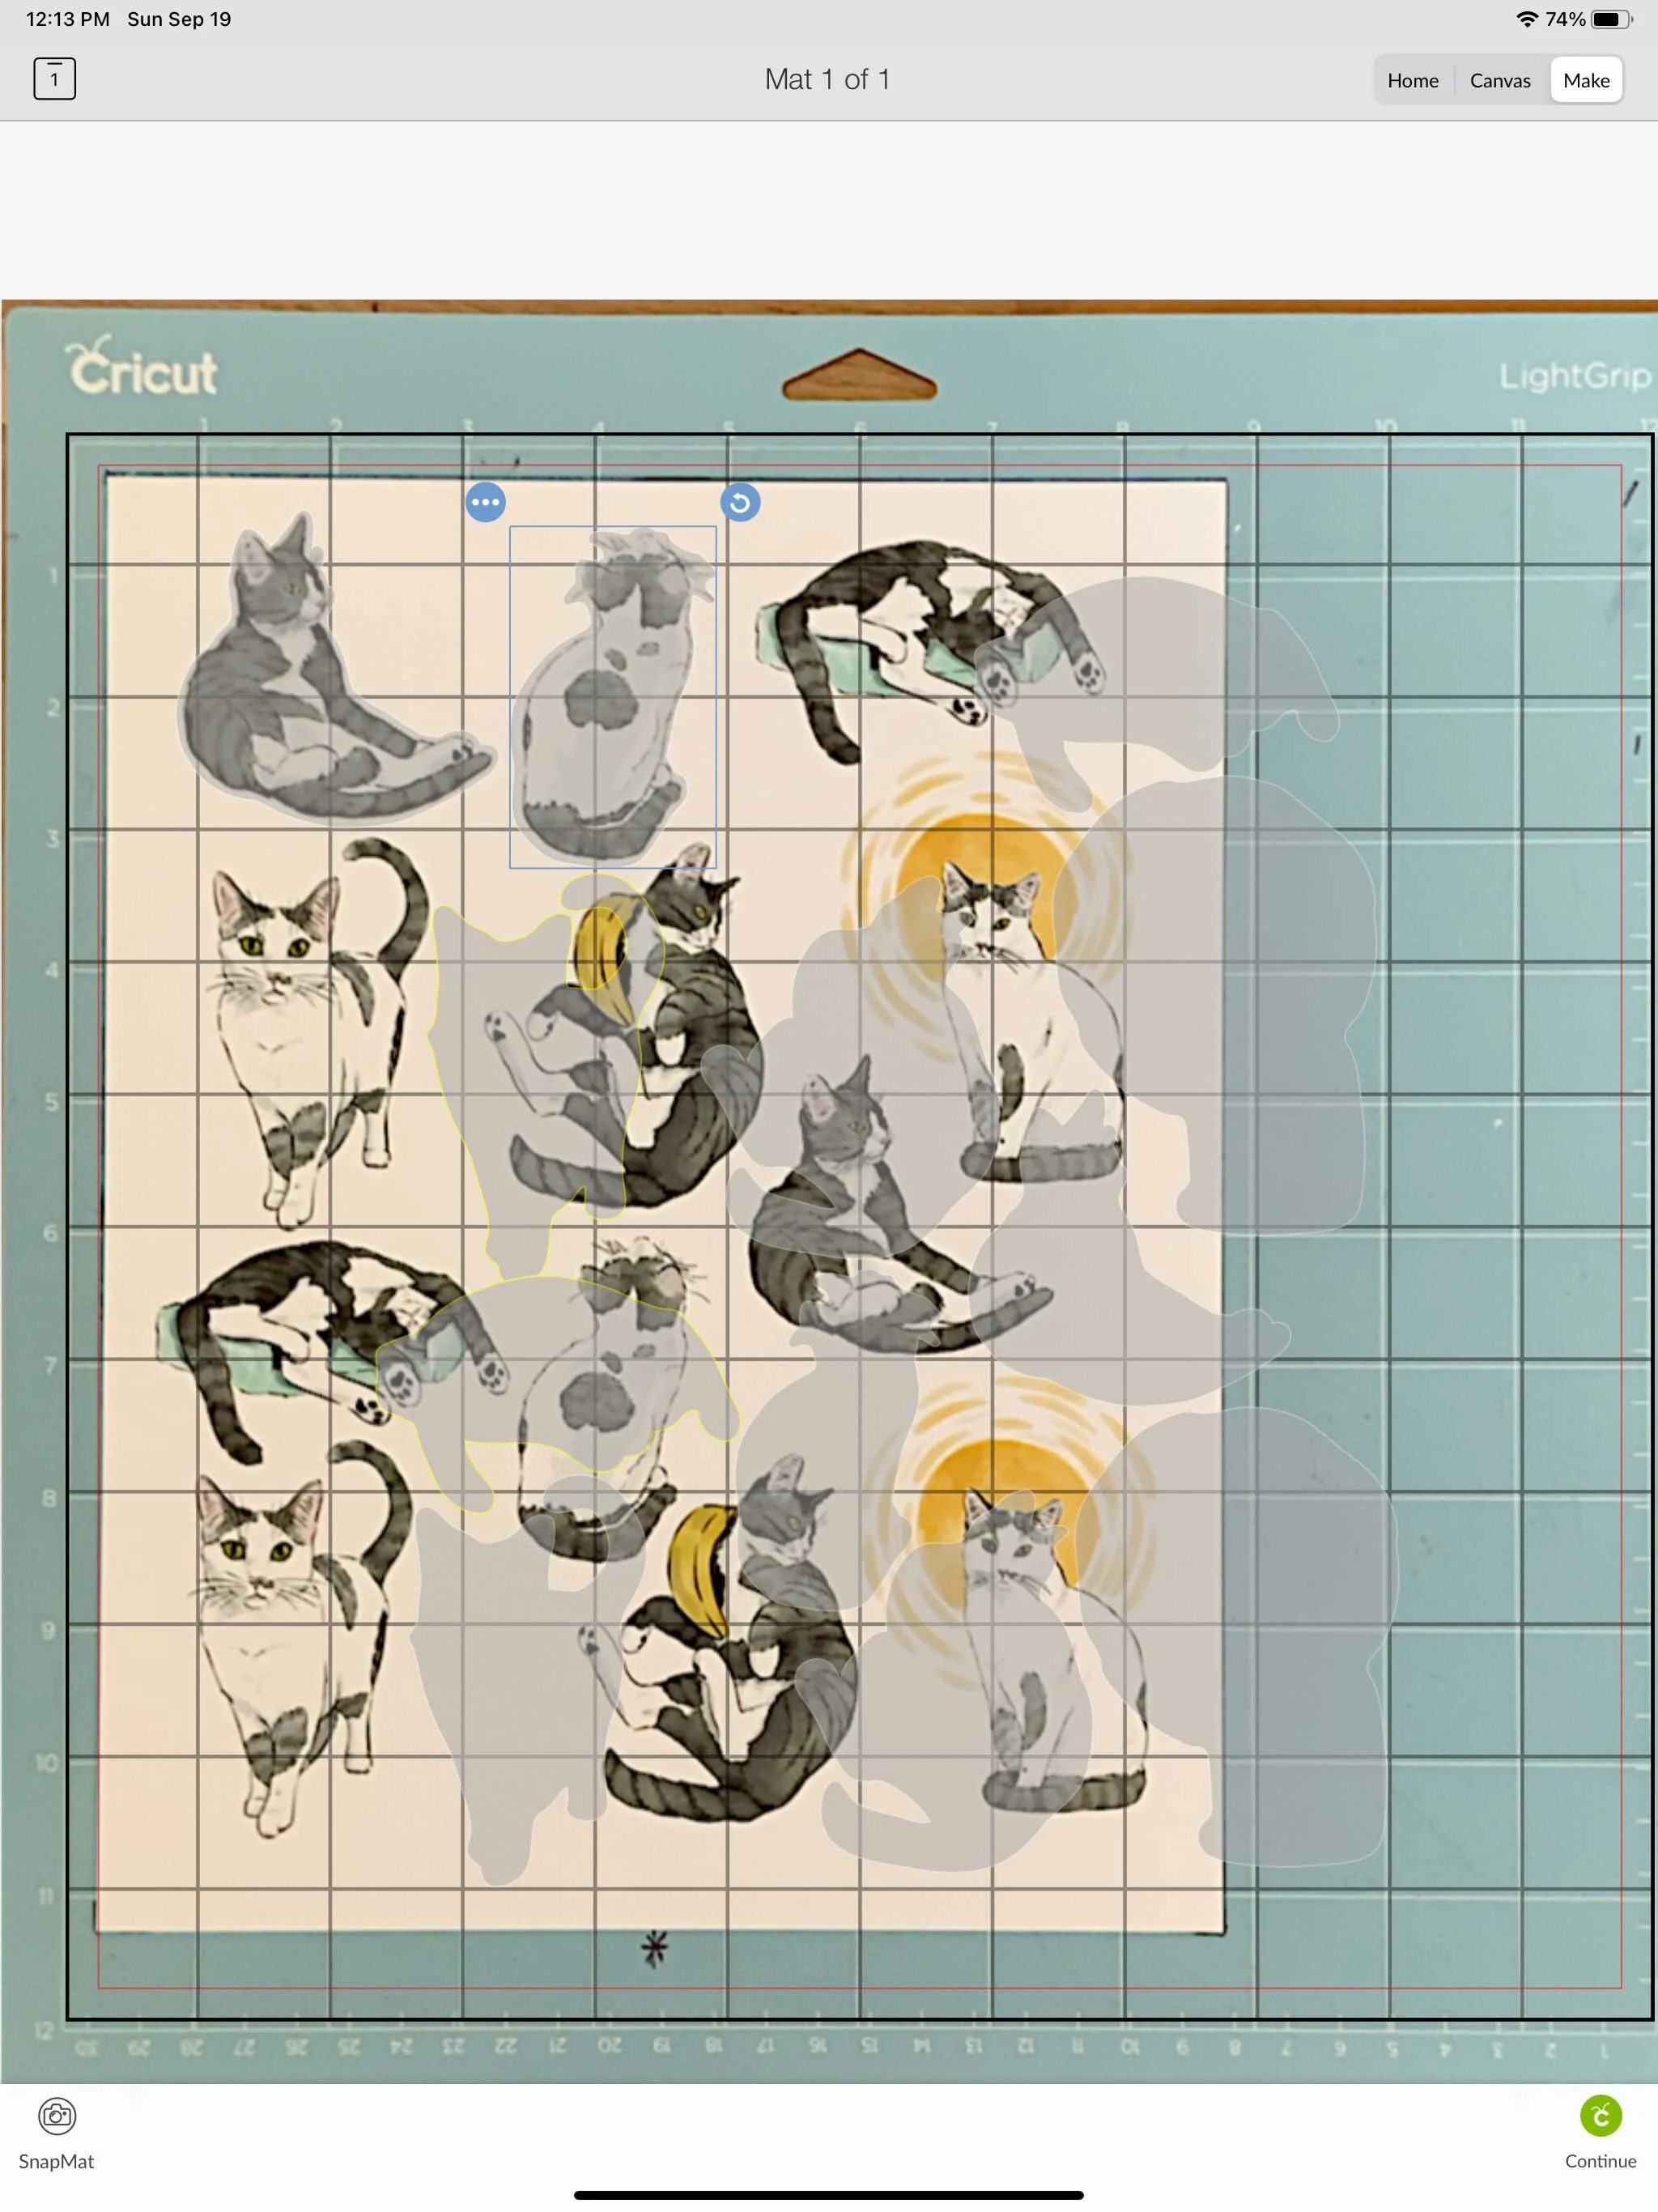
It takes me to the Make It screen, and down in the bottom left corner there is a little camera icon. Press the camera icon and it’s going to bring us into the Snap Mat feature.

I’ve got my mat with my print out already placed. I am holding my iPad above the mat and trying to get the entire mat within the frame. (It can be little difficult to do if you just finished your morning coffee, like me). It need up being easier to put my mat on the floor and stand over it with my iPad.

Cutting Stickers Cricut Snap Mat

Once the mat is in a position the program thinks will be acceptable it will take a photo and bring it up on your screen. You can decide if you want to use the photo it just took or retake it. I try to make sure my mat is pretty straight and there’s not a lot of “non-mat” area around the edges pf my photo.

Once I get one that I think will work ok, I select Use.

Cutting Stickers Cricut Snap Mat

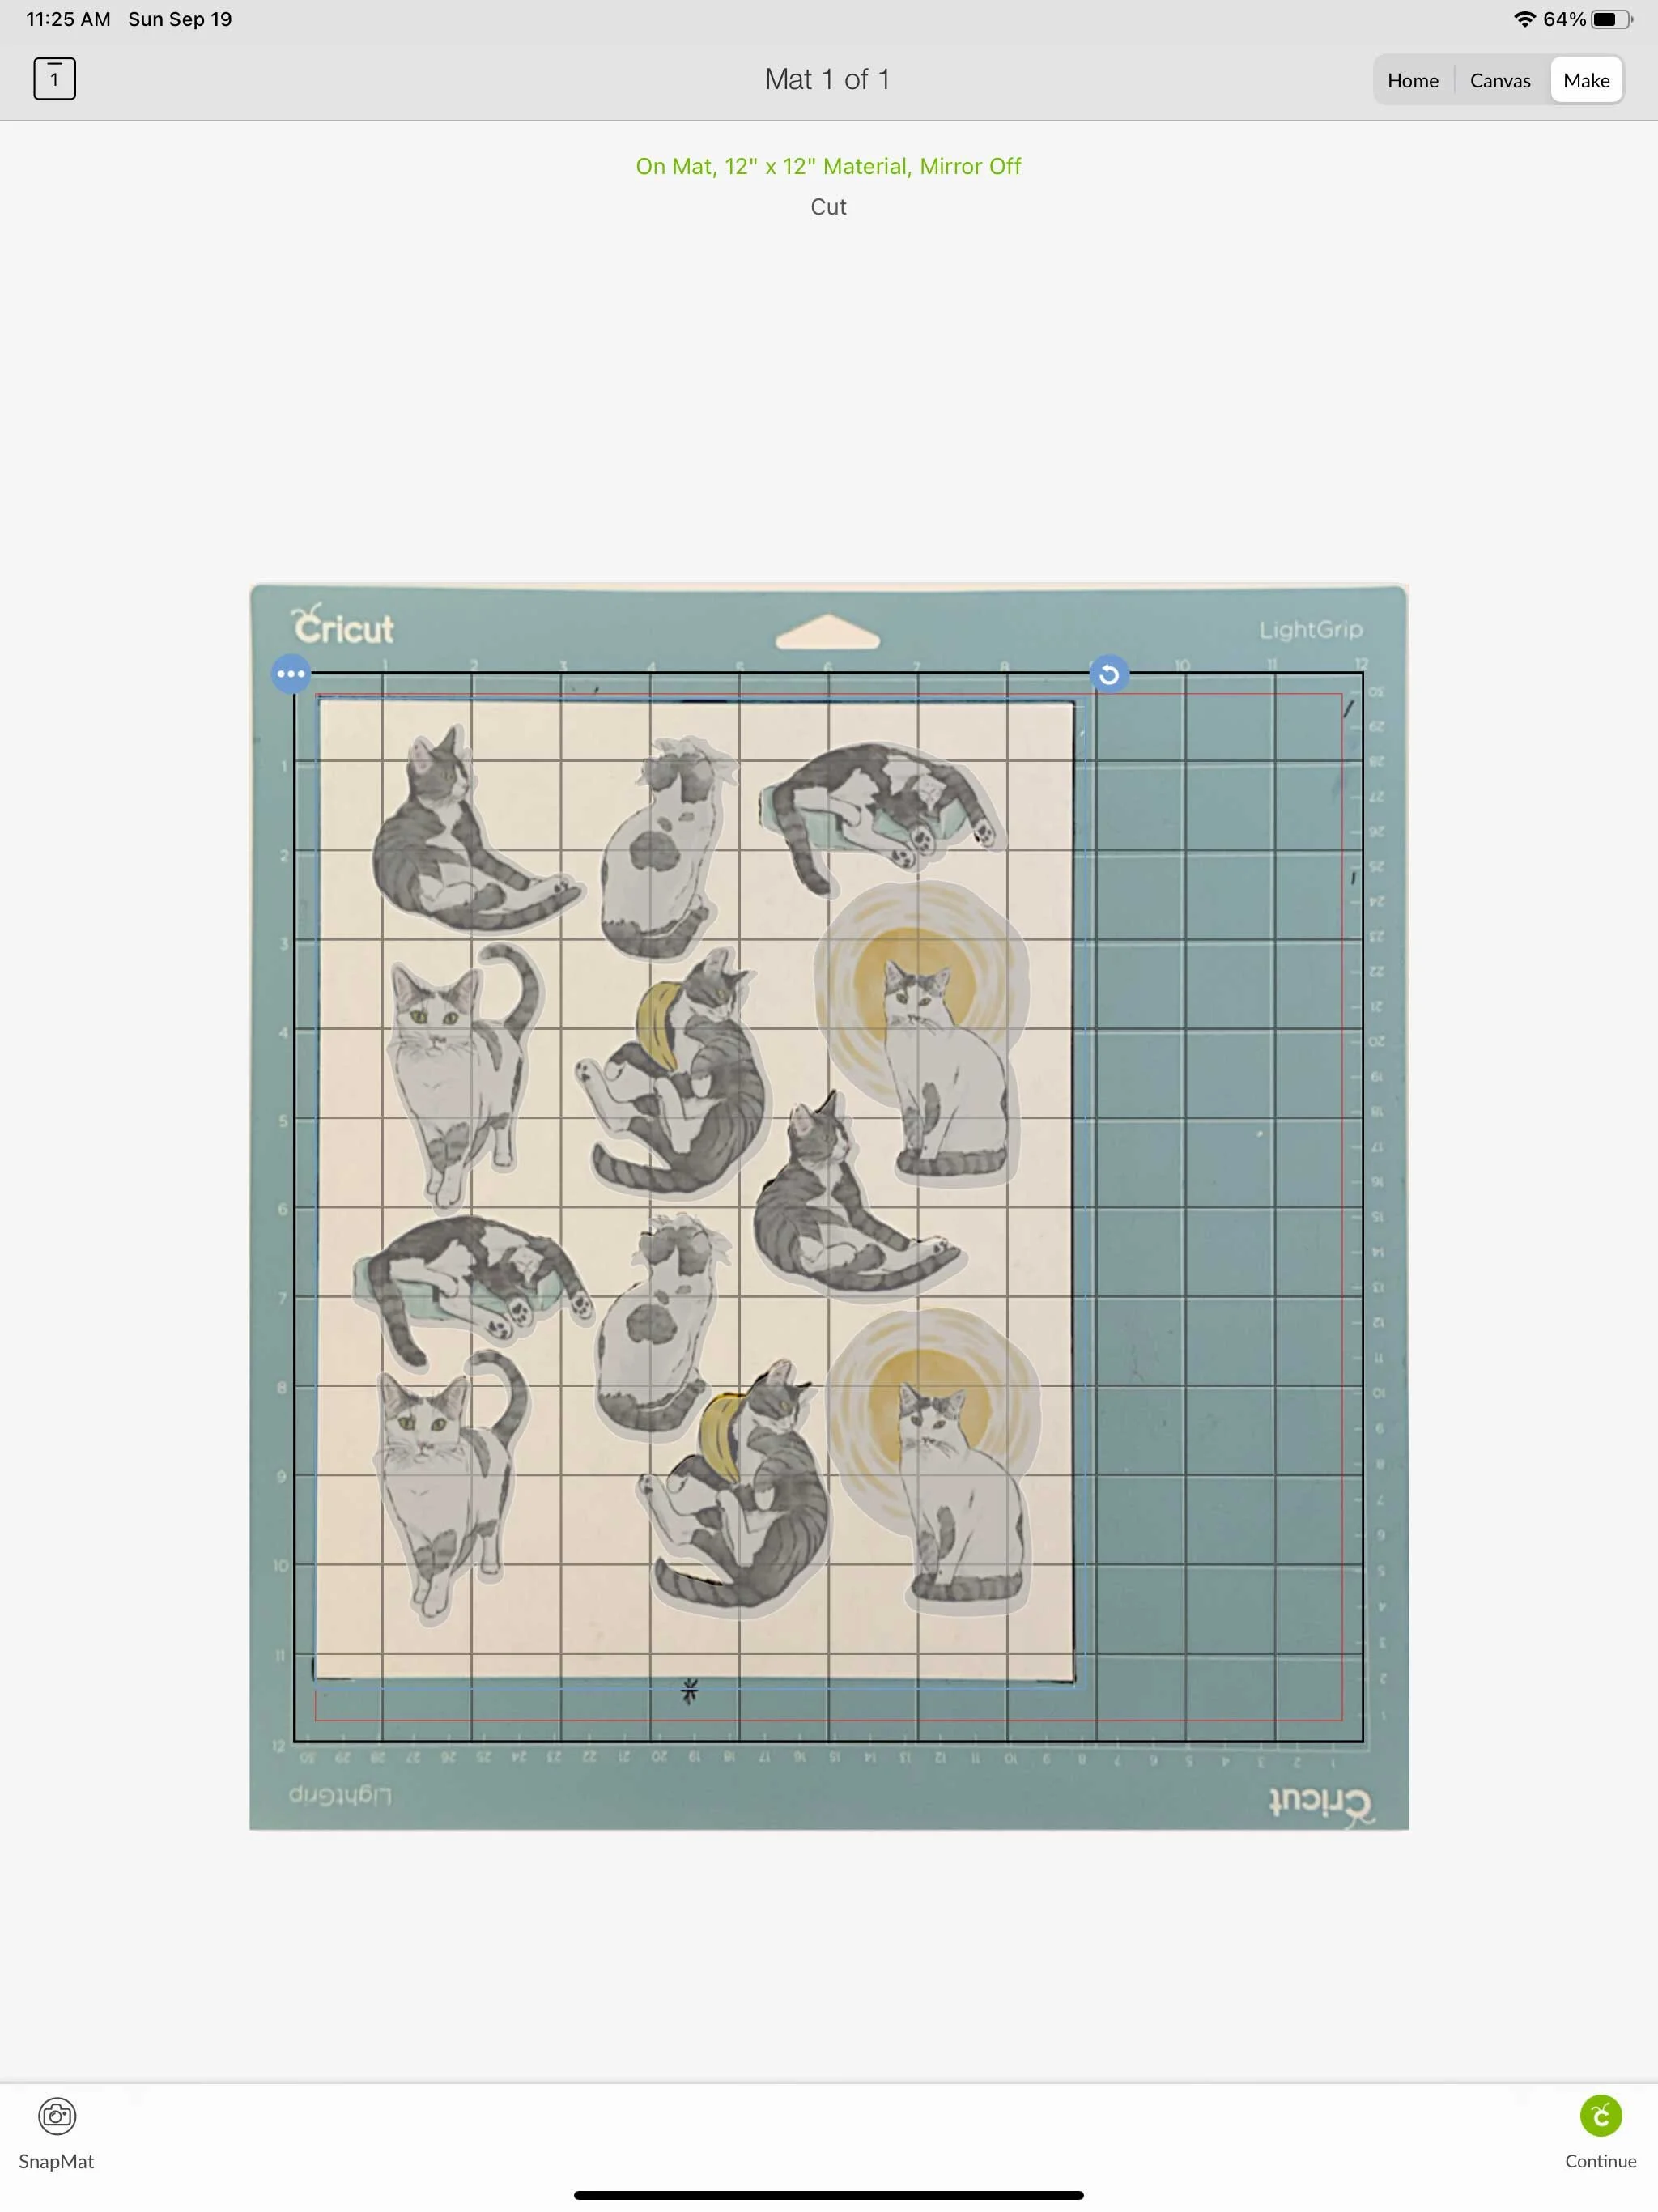
It brings me back to the Make It screen and now I need to position my cut lines. Originally I had all of my cut lines attached so it was all one big group that I could move around. I could get the lines pretty well aligned in some areas, but not in others.

Cutting Stickers Cricut Snap Mat

So I ended up going back to my canvas and unattaching all of the sticker outlines. Now I can move them around individually on the Make It screen. (Slightly tedious). I also moved my print on my mat so it’s closer to the middle and I have more space to move my cut lines around

Cutting Stickers Cricut Snap Mat

Once I get my cut lines all positioned, I press make it and send to my machine.

Cutting Stickers Cricut Snap Mat

I am loading my mat how I showed you in Part One of cutting full sticker sheets - mat all the way against the left bracket, and push up against the black rubber rollers. I don’t know if it really affects this method, but I try to always load my mat this way, just out of habit.

I press go, and once the machine is done cutting I check my cut. Not super perfect, but it still looks pretty good. Much better than the last time I tried to use this feature.

Cutting Stickers Cricut Snap Mat

Now, I’m going to try with my sticker paper. I place my sticker sheet on my mat.

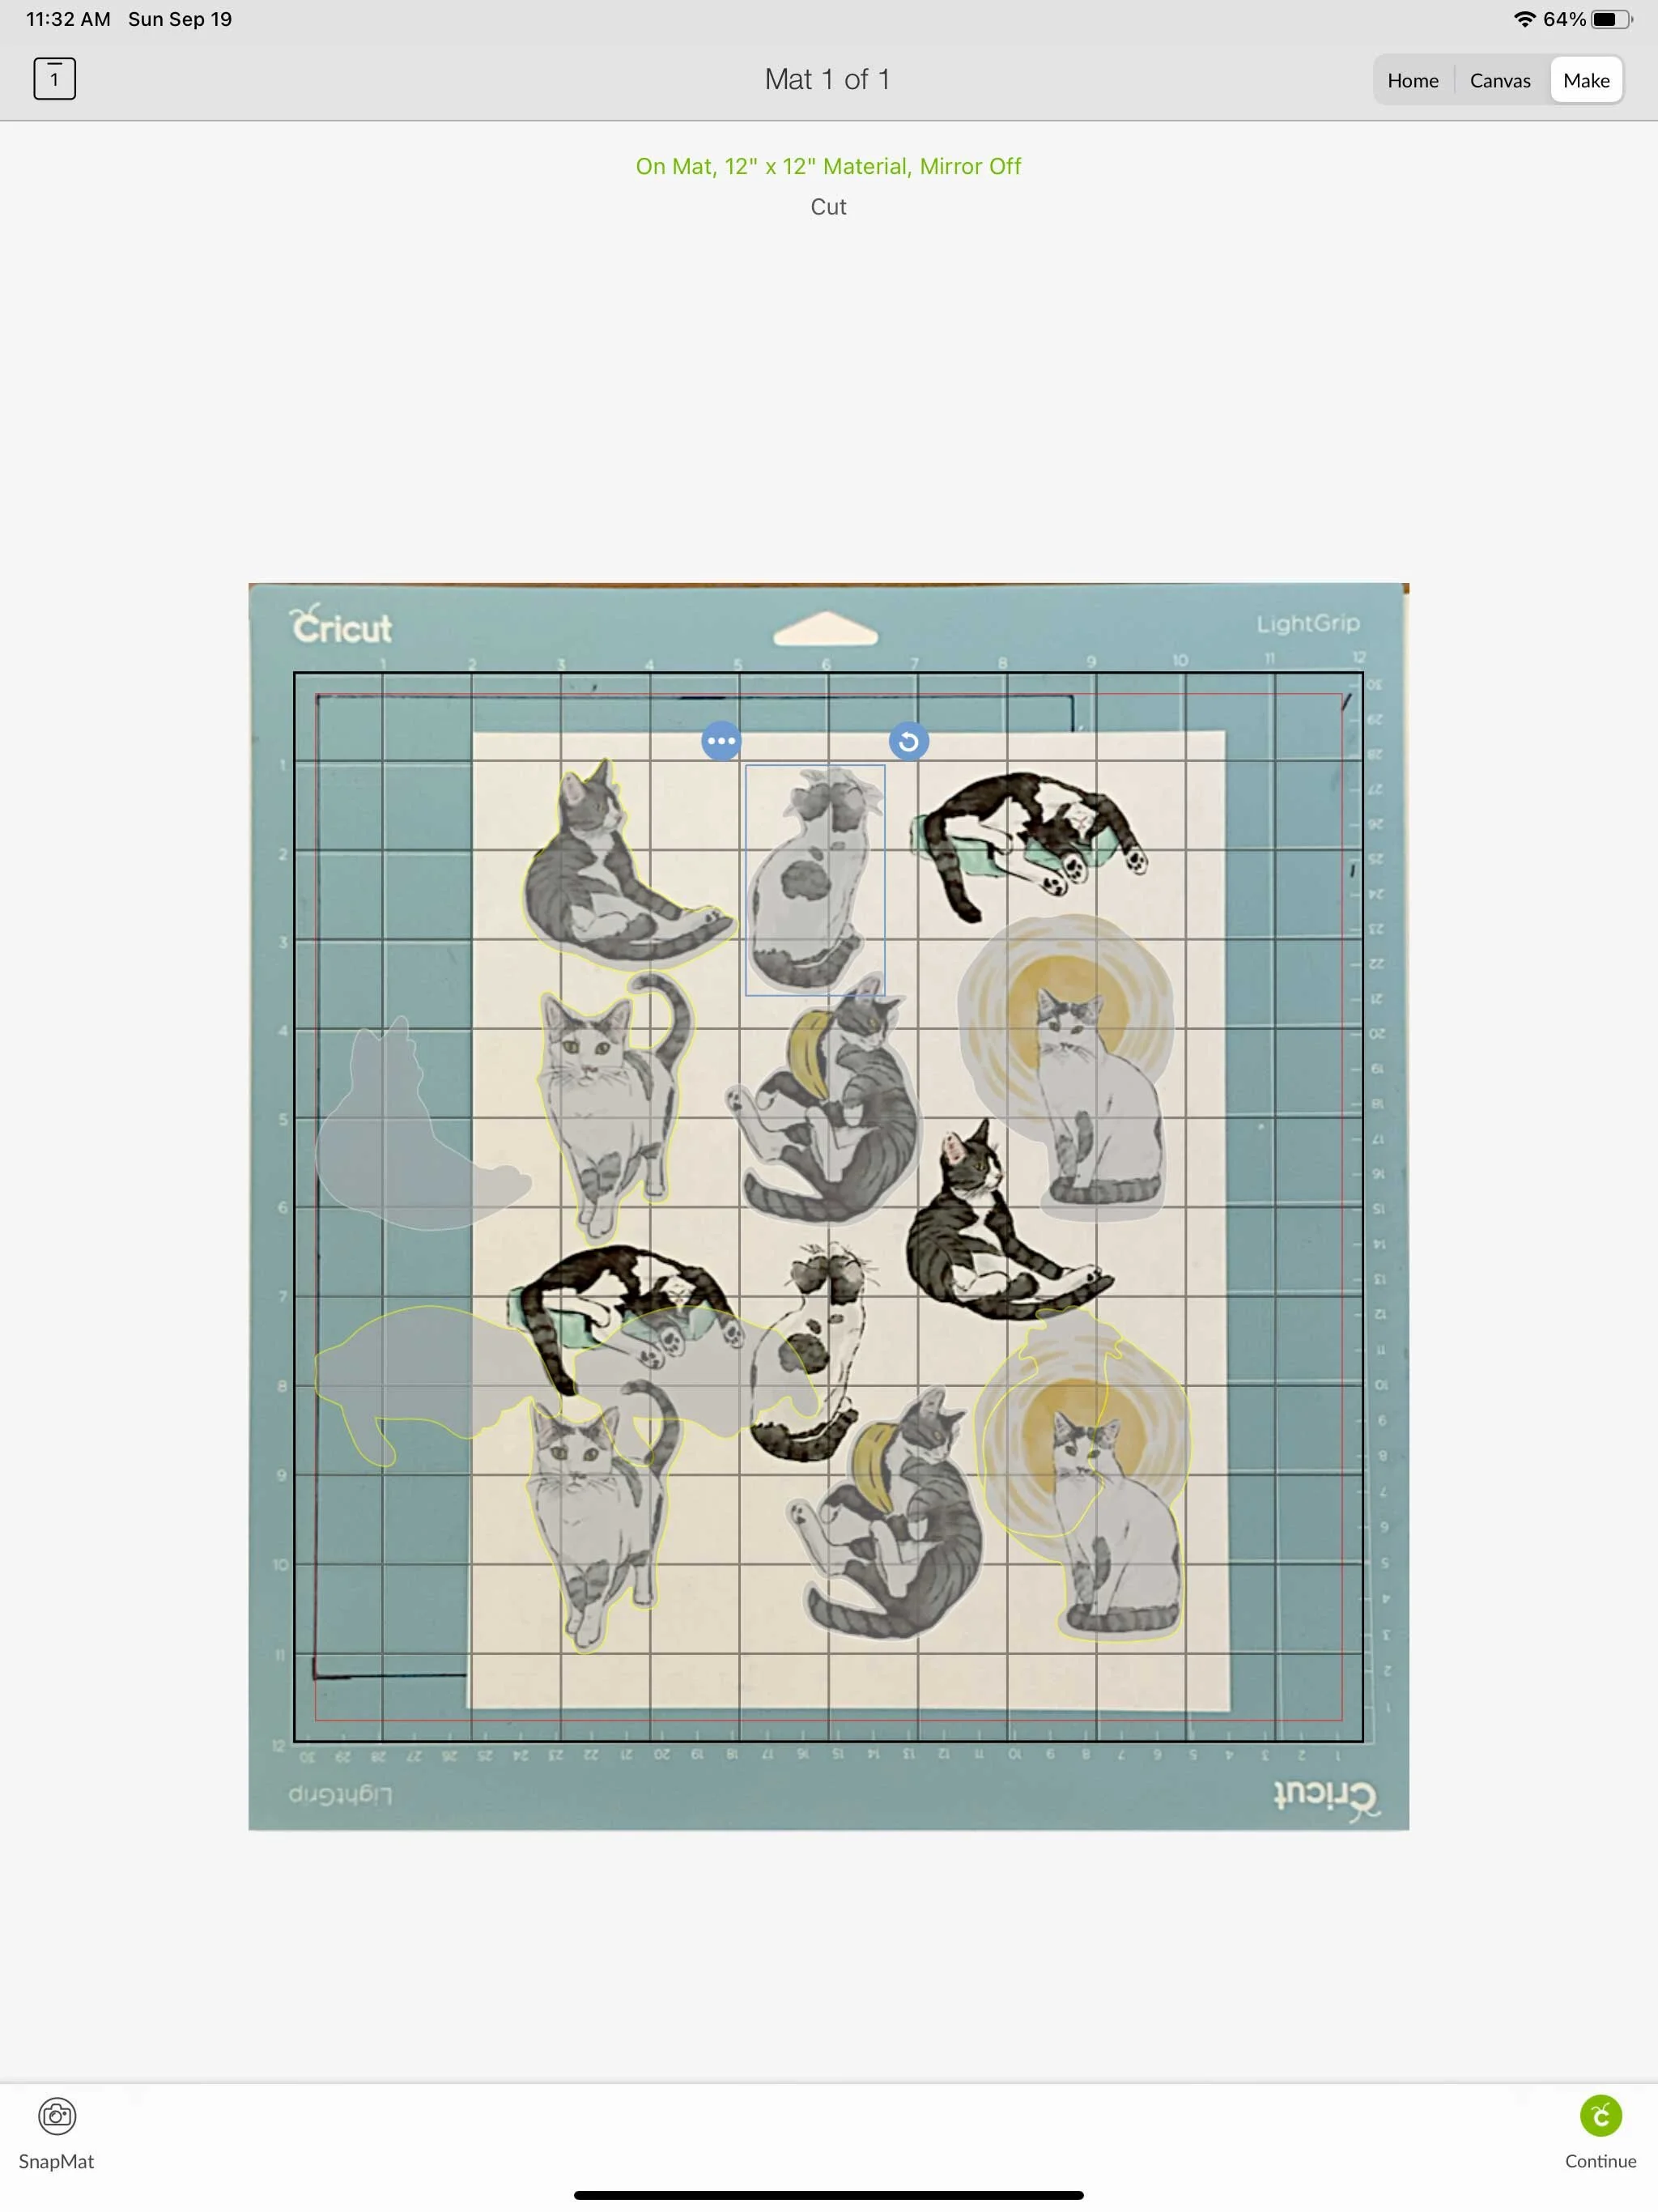
I have to use the Snap Mat button take another photo of my mat because my placement is most likely not the same as my test cut.

Cutting Stickers Cricut Snap Mat

I need to move my cut lines around to match the new photo. Once they’re in place, I press Continue.

I’m going to do these as a kiss cut, so I select Washi Sheet as my Material. I load my mat into my machine and I press GO!

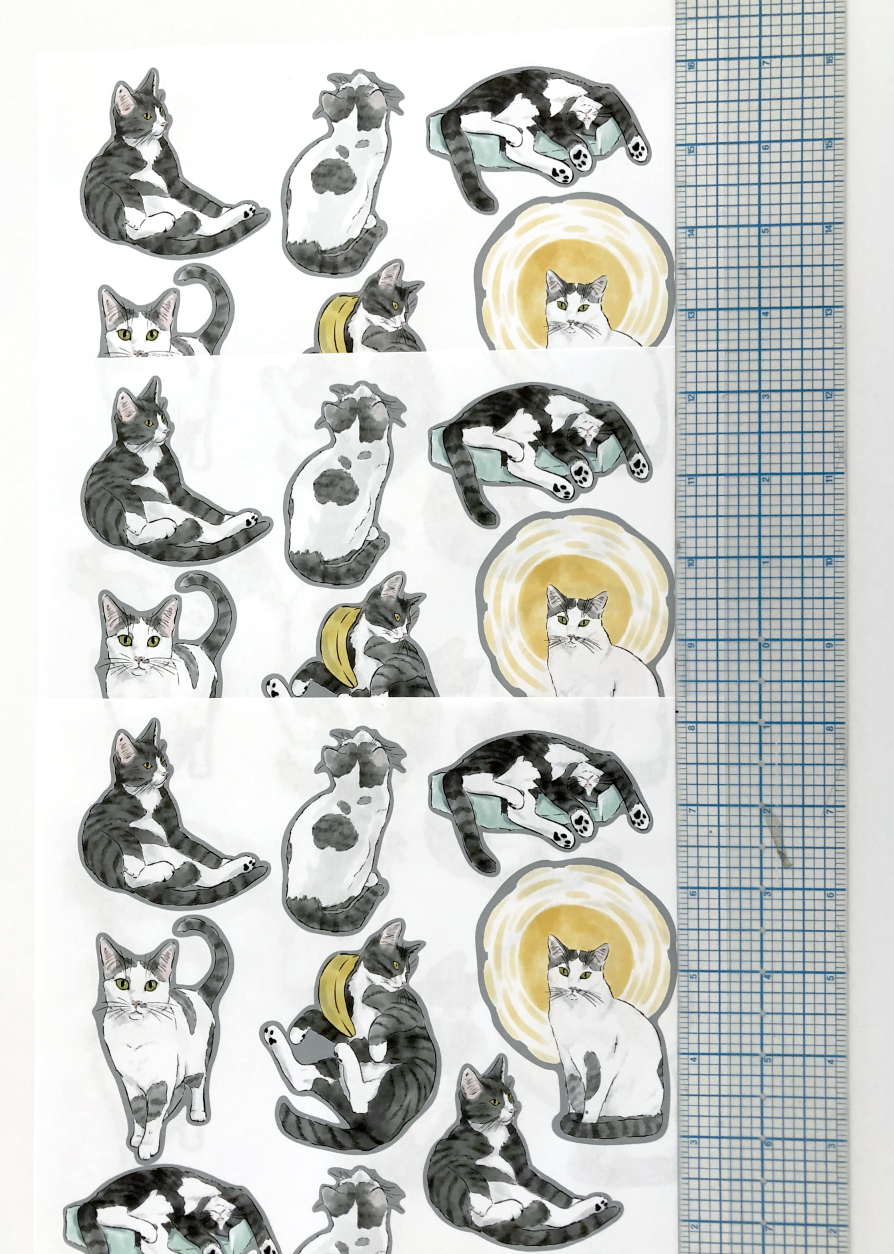
Uh Oh! Something’s not right and my cut lines are shifted too far down from my artwork.

Cutting Stickers Cricut Snap Mat

I’m going to try another sticker sheet to see if I can get better results. I load another sticker sheet onto my mat. Go through all the Snap Mat steps again. Load my machine and press go.

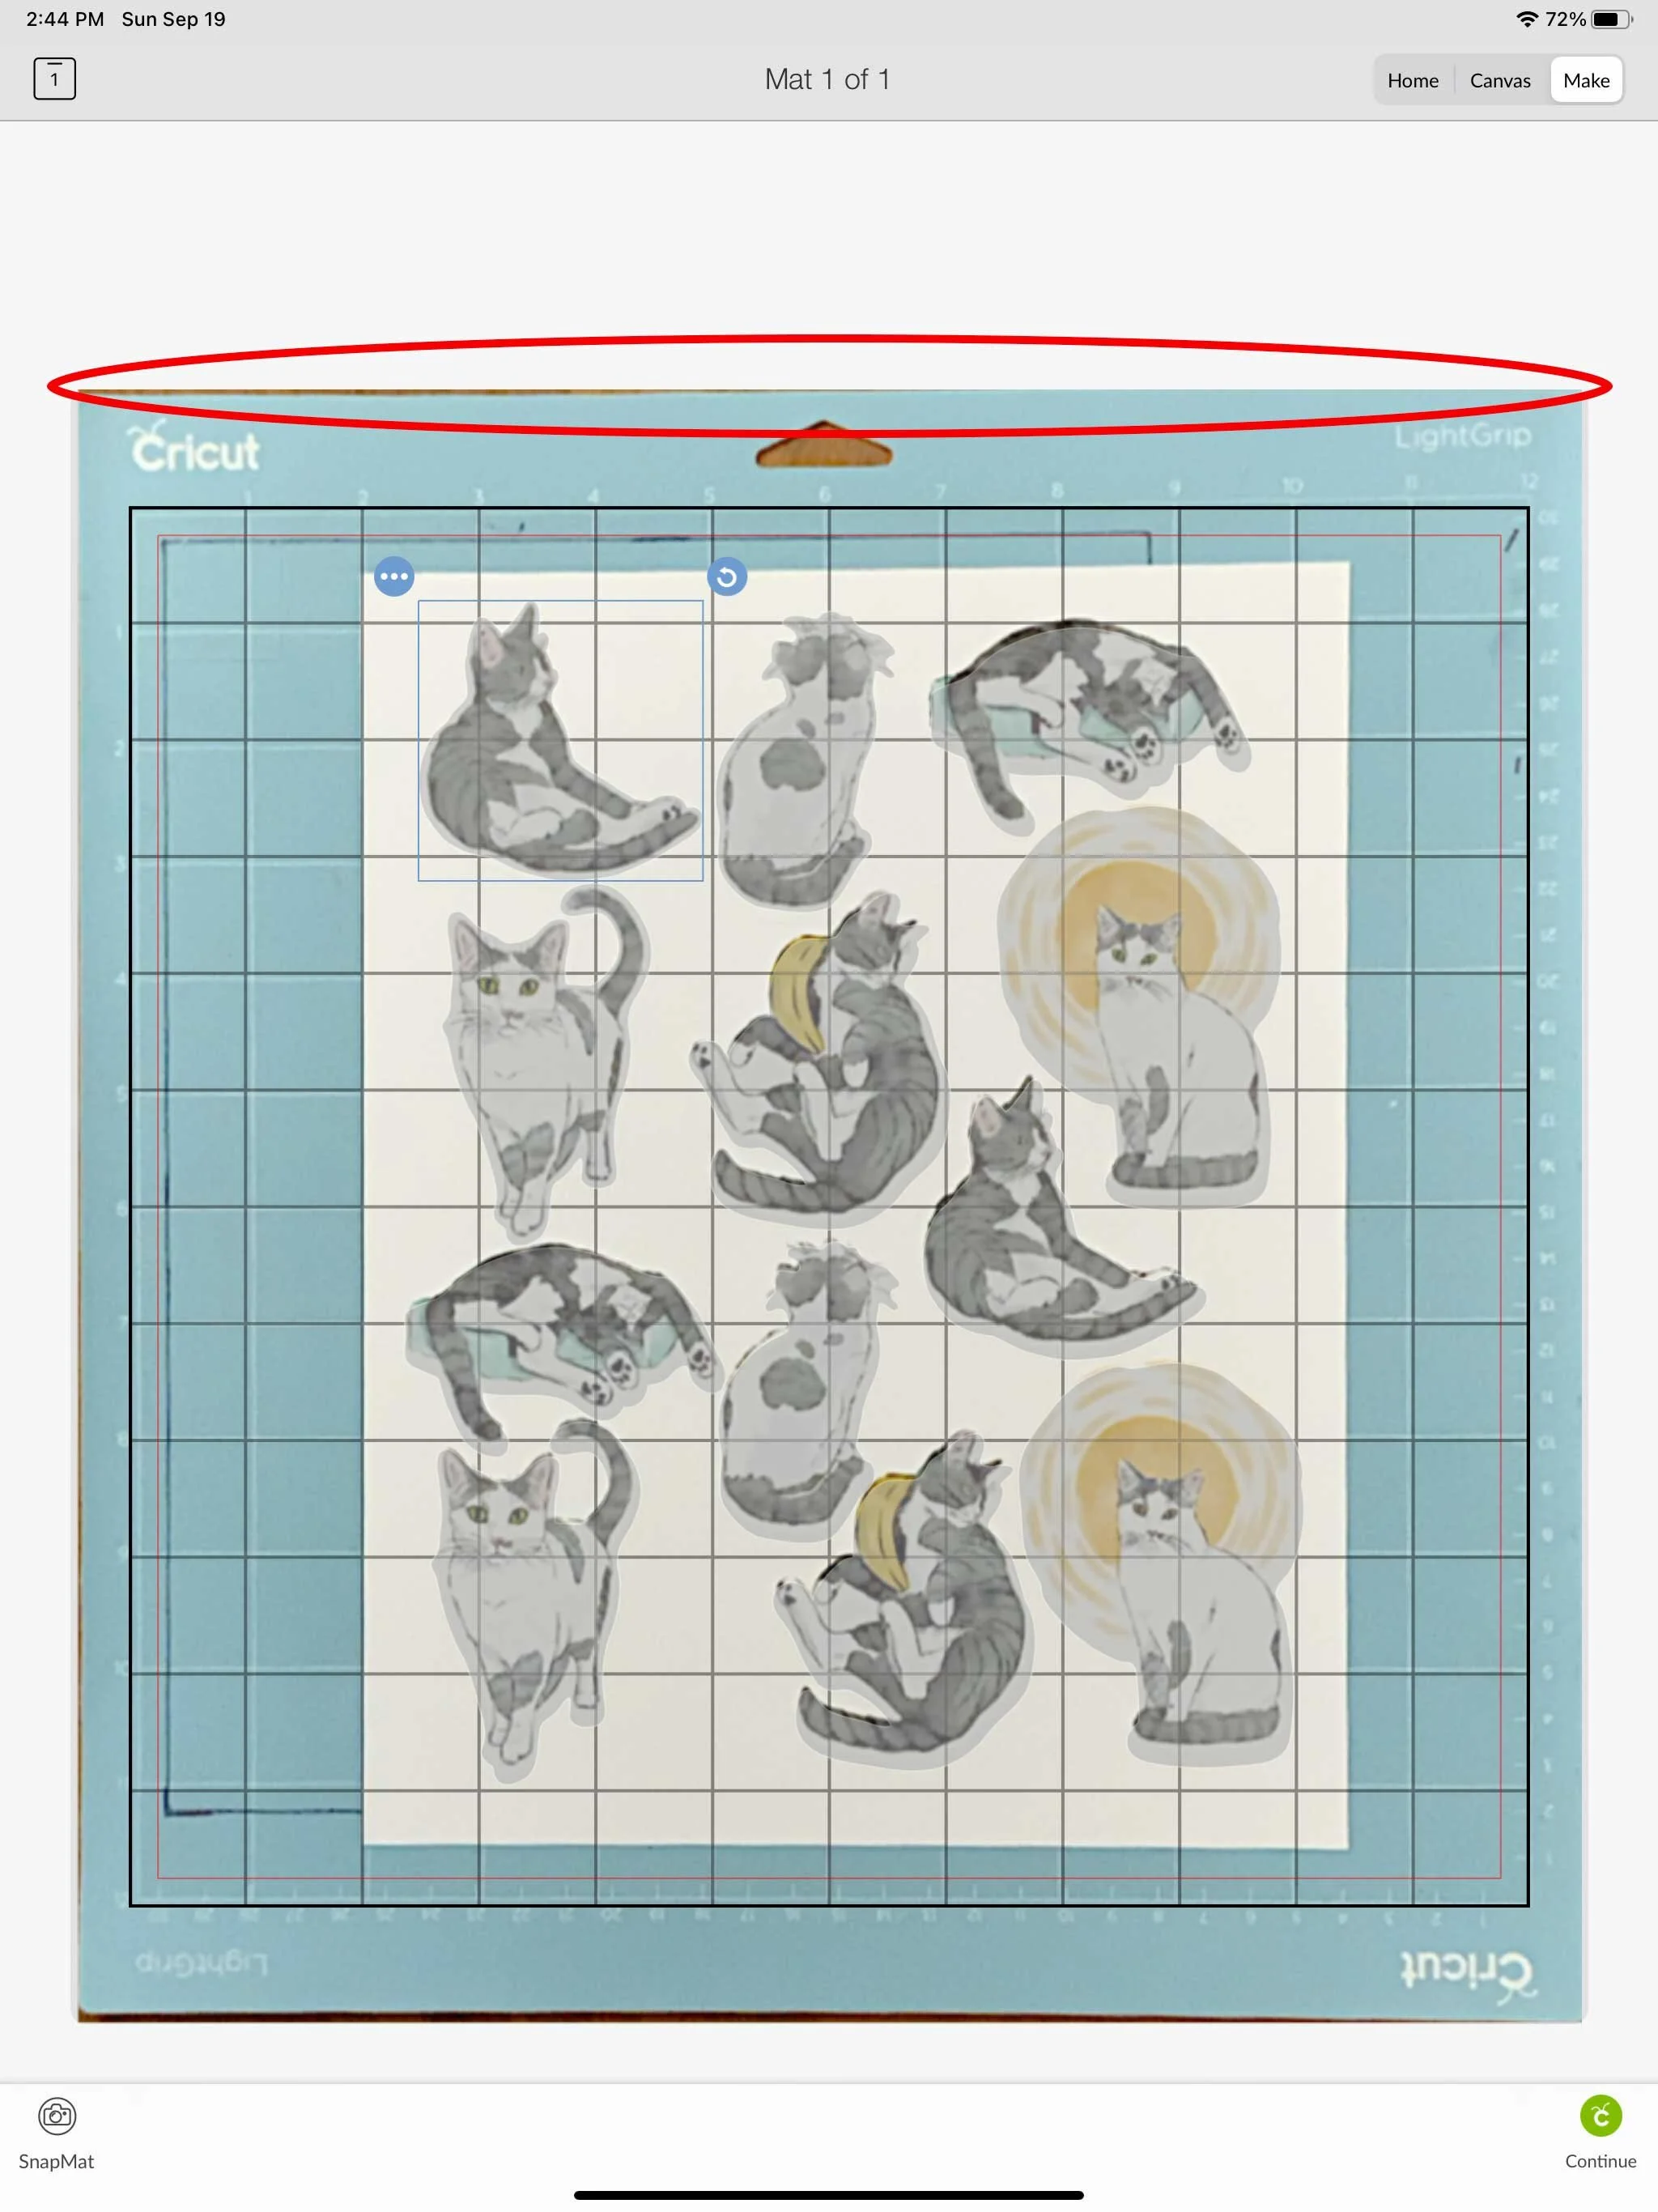
My cut is still too far down. I’m thinking I have too much of my floor showing at the top of the mat when I am taking the photo of my mat. I’m going try again, but I’m going to leave the same sticker sheet on my mat for now.

Cutting Stickers Cricut Snap Mat

I do another photo of my mat with the snap mat feature, I’m trying to get as little floor showing at the top of the mat as possible. It’s a little tricky to do since the program automatically takes the photo, so I have to retake it several times before I get one that I want to try to use.

Cutting Stickers Cricut Snap Mat

I load my mat into my machine and cut the sticker sheet again. The results were better this time, but still not super great.

Overall, I would not use this method if you are trying to mass produce stickers. It can be pretty tedious, and it’s not a super accurate or consistent method. I would only potentially use the Snap Mat feature if I was trying to use up scraps of materials and I don’t need super precise alignment. It’s also very time consuming to have to reposition the cut lines for every sticker sheet you want to cut

Cutting Full Sticker Sheets with Your Cricut - Part 3 - Final Cutting

Hi Everyone!

This week we’re going to take everything we’ve practiced so far and cut our final sticker sheets!

I’m using matte sticker paper from Online Labels. I’m printing them on the same Epson SureColor P600 printer that I used for my test prints.

I’m going to print one sheet initially to compare with one of my test prints from last week. I’m checking to make sure my stickers are printed in the same place on my sticker paper as the plain paper.

I am printing directly from Illustrator, but this time I’m hiding the cut lines layer, so the grey offset will not print on my actual stickers.

Printing stickers from Illustrator

Remember, make sure your print dialog box says DO NOT SCALE the artwork.

Printing stickers from Illustrator

My sticker paper is just a hair longer than my plain paper, the excess length is at the bottom of my print. So I have to keep that in mind when I’m placing the sticker sheet on the mat.

Printing stickers from Illustrator

I’m going to carefully place my sticker sheet within the black lines on my mat, the longer bottom edge will slightly overlap the bottom black line.

Cutting stickers with Cricut machine

I’m using the same cut lines that I already uploaded to Design Space for my test cut.

Cutting stickers with Cricut machine

For this sticker sheet I’m going to do a Kiss Cut. So far I have found the Washi Sheet material setting works best for kiss cuts for this particular brand of sticker paper. I have to click on Browse All Materials to find the Washi Sheet material, unfortunately I keep getting an error when I try to save it to my favorites, so I have to search for it every time.

Cutting stickers with Cricut machine

I load my mat like we practiced in Part 1 and press the Go button.

I check my cuts, everything looks good. So now I’m going to print and cut a few more! If you want die-cut stickers, try the regular sticker paper setting or the light cardstock setting. You may need to do 2 passes to cut all the way through the backing paper.

Cutting stickers with Cricut machine

This process is very tedious when you’re first starting, so don’t expect perfect results right away. But once you learn all the little nuances of your Cricut machine and your printer you won’t need to rely on the Print & Cut feature and you can cut full sheets of stickers!

Cutting Full Sticker Sheets with Your Cricut - Part 2 - Test Printing

Hi Everyone!

This week is another important step when creating full sticker sheets to cut on your Cricut Machine.

I always print a few test sheets on plain paper before I cut the actual sticker paper. Once you learn all the little nuances of your machine, you will probably be able to skip this step. But when you are just beginning to using this method, it’s best to practice, practice, practice before jumping into using your expensive sticker paper.

I already set up my artwork in Adobe Illustrator with my offset cutlines. If you need some guidance on creating offsets in Illustrator, you can check out my previous posts here and here.

Kitty Sticker artwork in illustrator

When I set up my art files in Illustrator I have 2 separate layers. First, the ARTWORK layer that we will use to print our stickers directly from Illustrator. Second, the CUTLINE layer that we will export as an SVG and import into Cricut Design Space.

Layers in Illustrator

Very Important: My cut layer contains a bracket in each corner of the 8.5” x 11” artboard. This is going to help us line up the cut lines in Design Space. Make sure you include these brackets when you set up your file!

Kitty Sticker artwork in Illustrator

For my test print, I’m actually going to print the grey cutlines with the artwork so I can really see how far off my machine cuts and make the appropriate adjustments.

I’m using an Epson SureColor P600 printer, but you can use any inkjet printer for this method. I do not recommend using a laser printer for this method. Since laser printers use heat, you will run into shrinkage issues with your paper and your cuts will be off unless you calculate the proper shrinkage. The shrinkage is very minimal, but it is noticeable.

I’m going to print 3 copies of my artwork on plain paper so I have a couple of extra to practice.

Your print dialog box will probably look different , but make sure the image is NOT SCALED when printing.

Print settings

Check your printouts carefully to make sure they are straight and the artwork is is the same position on all 3 printouts. If the artwork is shifted, at all, in any of the printouts you will need to test and/ or adjust your printer to make sure you are getting the same print placement everytime.

Checking print placement

After checking your print outs, carefully place one of the printouts inside the rectangle on the mat that we prepped in last weeks post. Take your time when doing this to make sure your paper is properly aligned within the rectangle.

Test Print placed on mat

Now we’re going to open our cut lines only in Design Space. I exported that layer as a separate SVG from Illustrator and imported it into Design Space.

Check that the dimension of the imported artwork are 8.5” x 11” like our file in Illustrator. Those very important brackets that you put in the corners on the artboard in Illustrator help ensure that the dimensions remain 8.5” x 11.

Cut Lines in Design Space

ATTACH all of your elements, and the press MAKE IT.

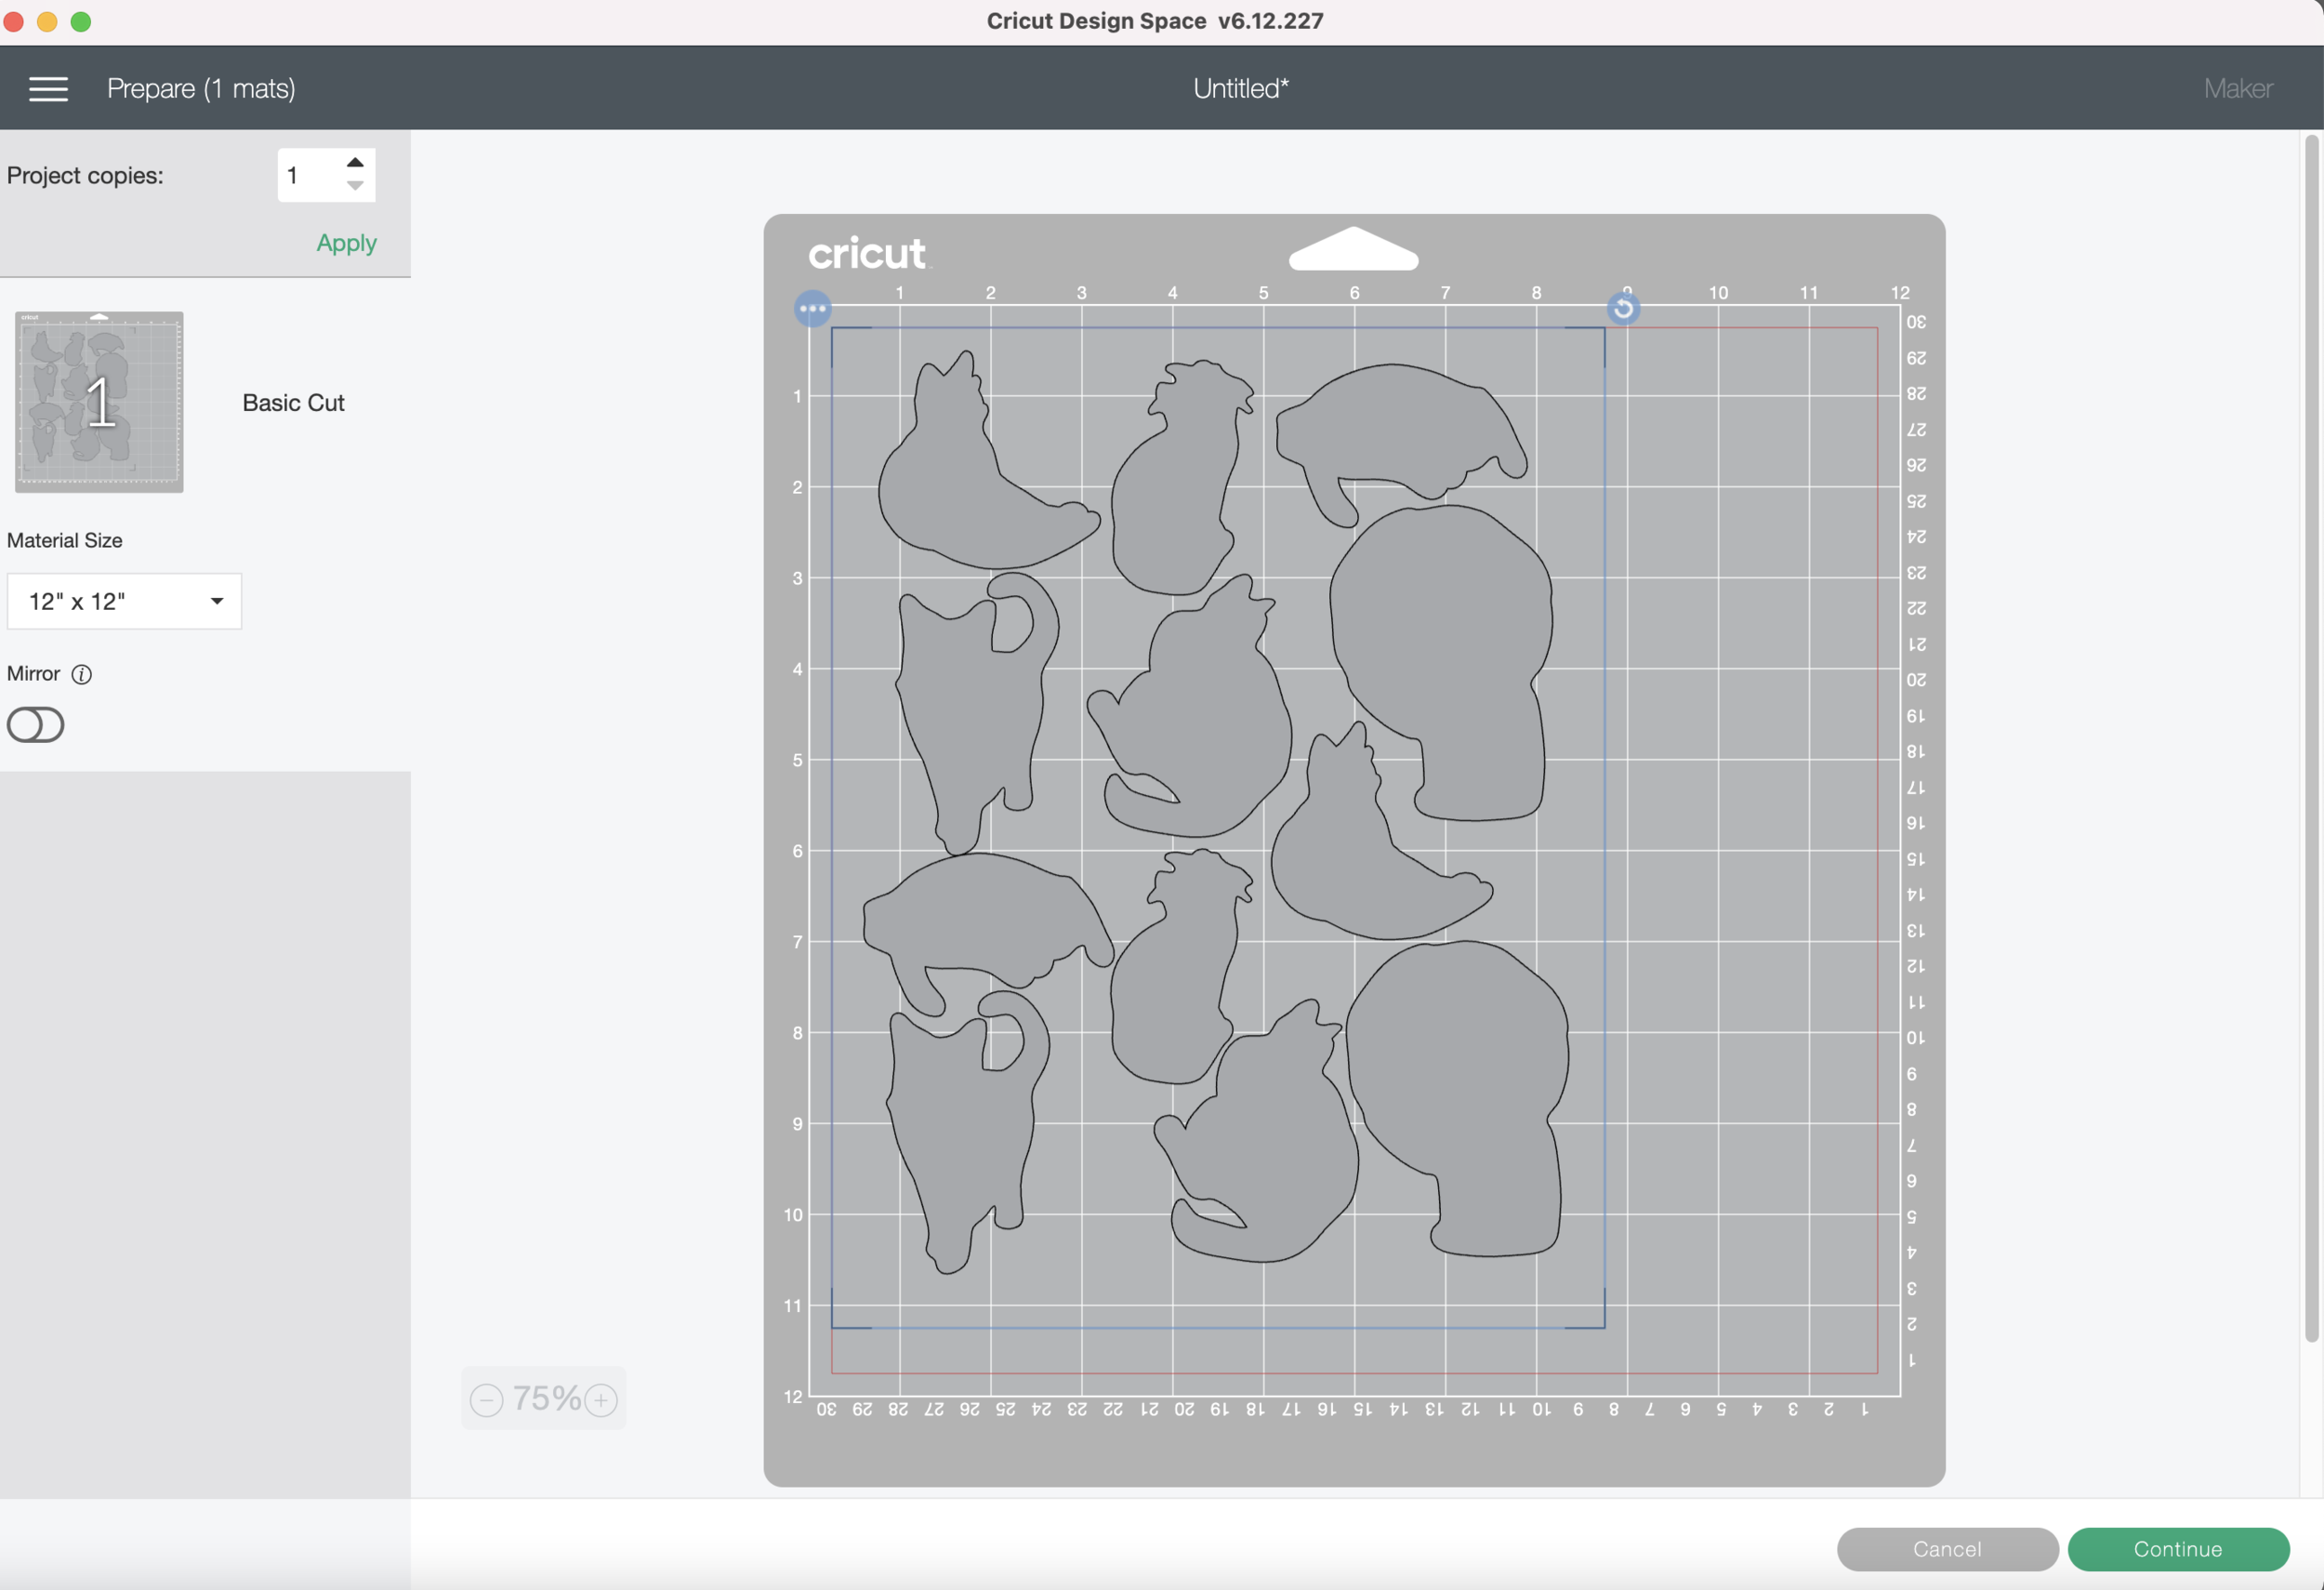
Those very important corner brackets are also going to help keep your artwork in the proper place in the upper left corner of the mat, but not beyond those red border lines in Design Space.

Cut lines in Design Space

I select Copy Paper and Default pressure for my material settings.

Now I carefully load my mat into the machine like we practiced last week, and press GO!!

After the machine is done cutting, load your mat and let’s check the results!

So on my first attempt, my paper is placed just a hair too high up on the mat. So for my next try I’m going to try to do a better job aligning the bottom edge of my paper to the bottom line that’s drawn on the mat.

First Cut Attempt

My 2nd attempt is much better! Remember it’s never going to be absolutely perfect, there are so many variables that go into this process and there will always be some level of human error. But it’s up to you how much time and effort you want to spend trying to perfect your cuts. Also, the more you do it, the better you’re going to become.

2nd Cut Attempt

Since the offset on my actual stickers will be white, I’m ok with my second attempt. I’m really going to focus on lining up my paper along the bottom line on my mat for my future cuts.

2nd cut attempt

If you are doing a colored offset, make sure you add some bleed around the edges so if it cuts slightly off there won’t be any white showing. Also, a wider offset will make a slightly off cut less noticeable.

Next week we’ll print on the actual sticker paper and cut some stickers!

Cutting Full Sticker Sheets with Your Cricut - Part 1 - Prepping your mat

Hi Everyone!

This week I wanted to start sharing how I cut full sticker sheets with my Cricut. I’m going to demo on my Cricut Maker, but you should be able to do this method on any of Explore or Explore Air machines as well.

I’m going to break this up into a few posts since it is a bit of a tedious process in the beginning. But once you get everything set up it should be pretty easy.

Today we’re going to start with prepping your mat. You don’t need to use a brand new mat, but it needs to be sticky enough that the paper staying in place while the machine is cutting. I will be using a blue mat since it’s not as sticky as the others, but you could also use an older green mat that’s not as sticky anymore.

Before we even print anything to cut, we need to practice loading our mat the SAME WAY EVERYTIME. This is probably the most important part of getting your stickers to cut in the right place eveytime. It’s best to practice, practice, practice before we waste any of our precious sticker paper.

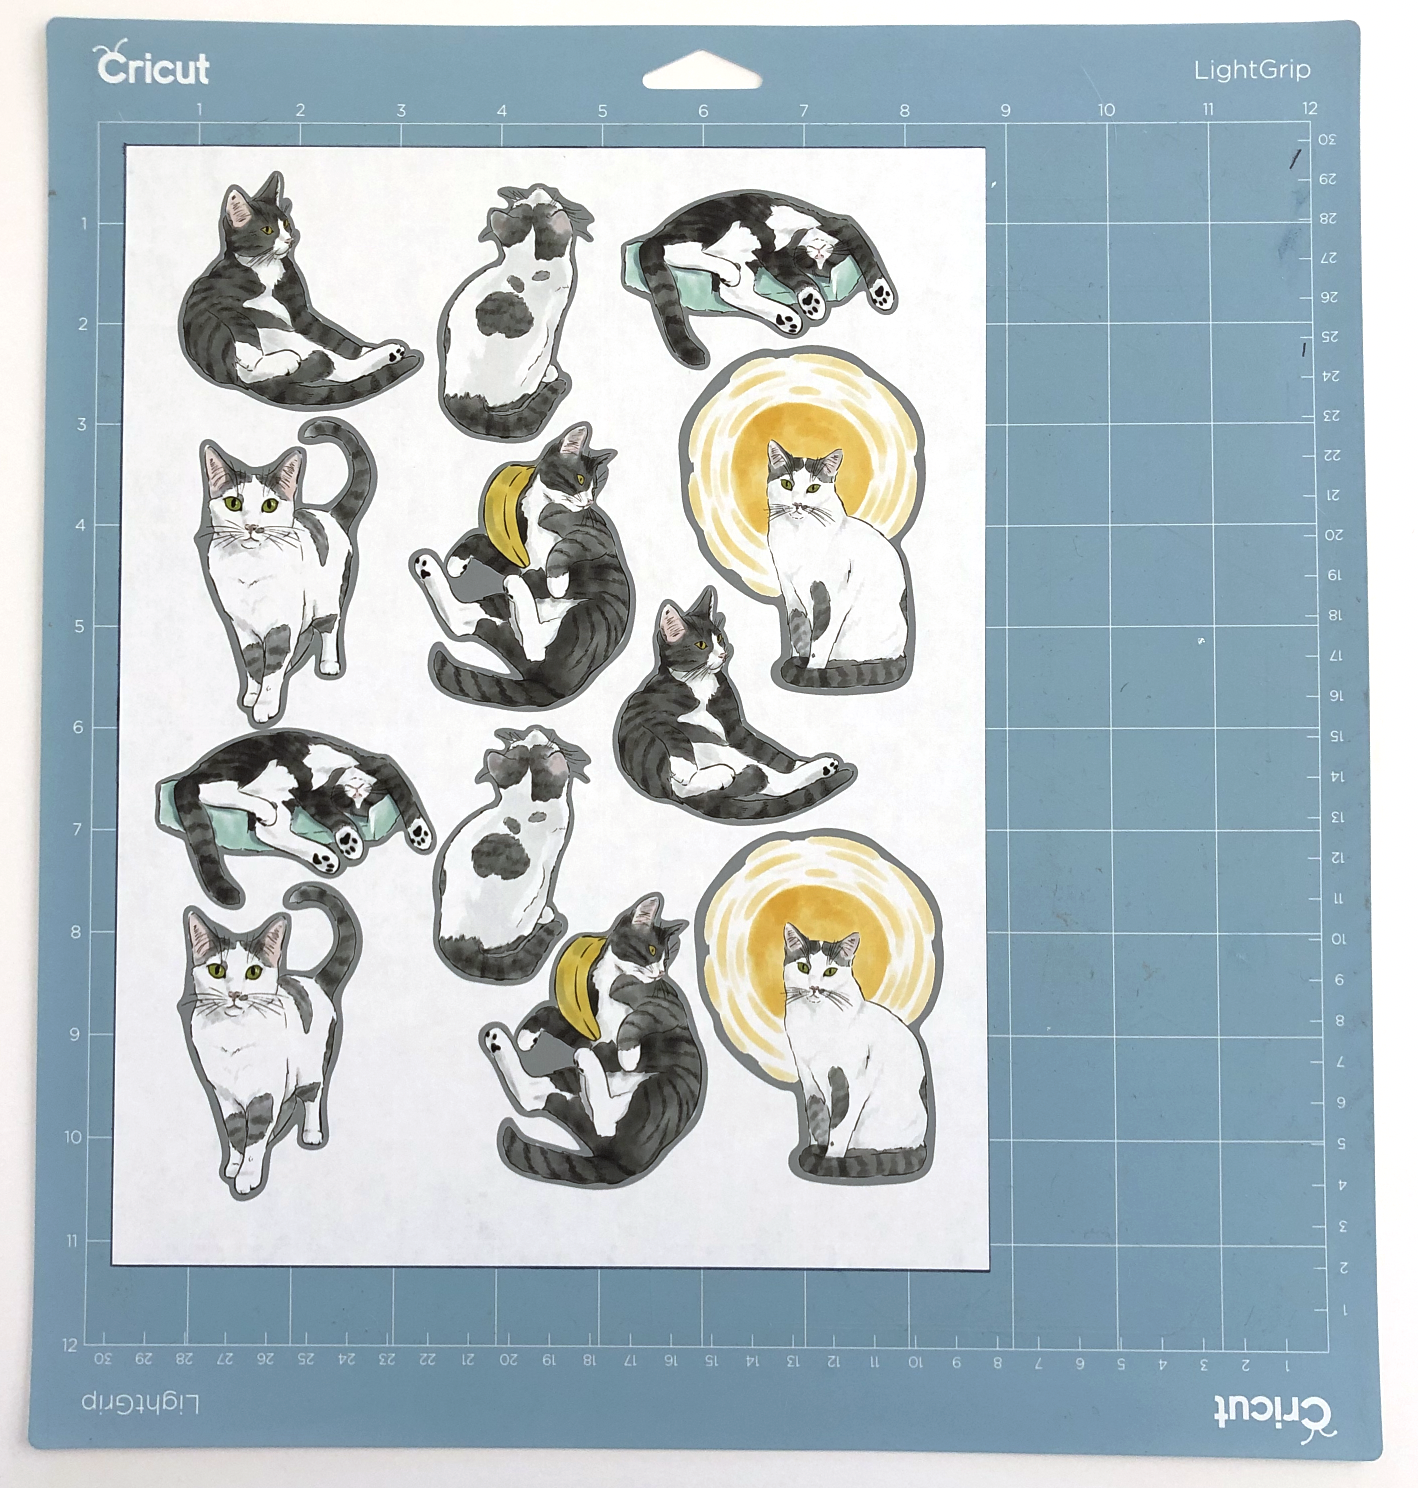
I have a scrap piece of cardstock on my mat the upper left corner. For now, we’re just practicing loading and unloading our mat consistently, so you can also use just a plain piece of paper.

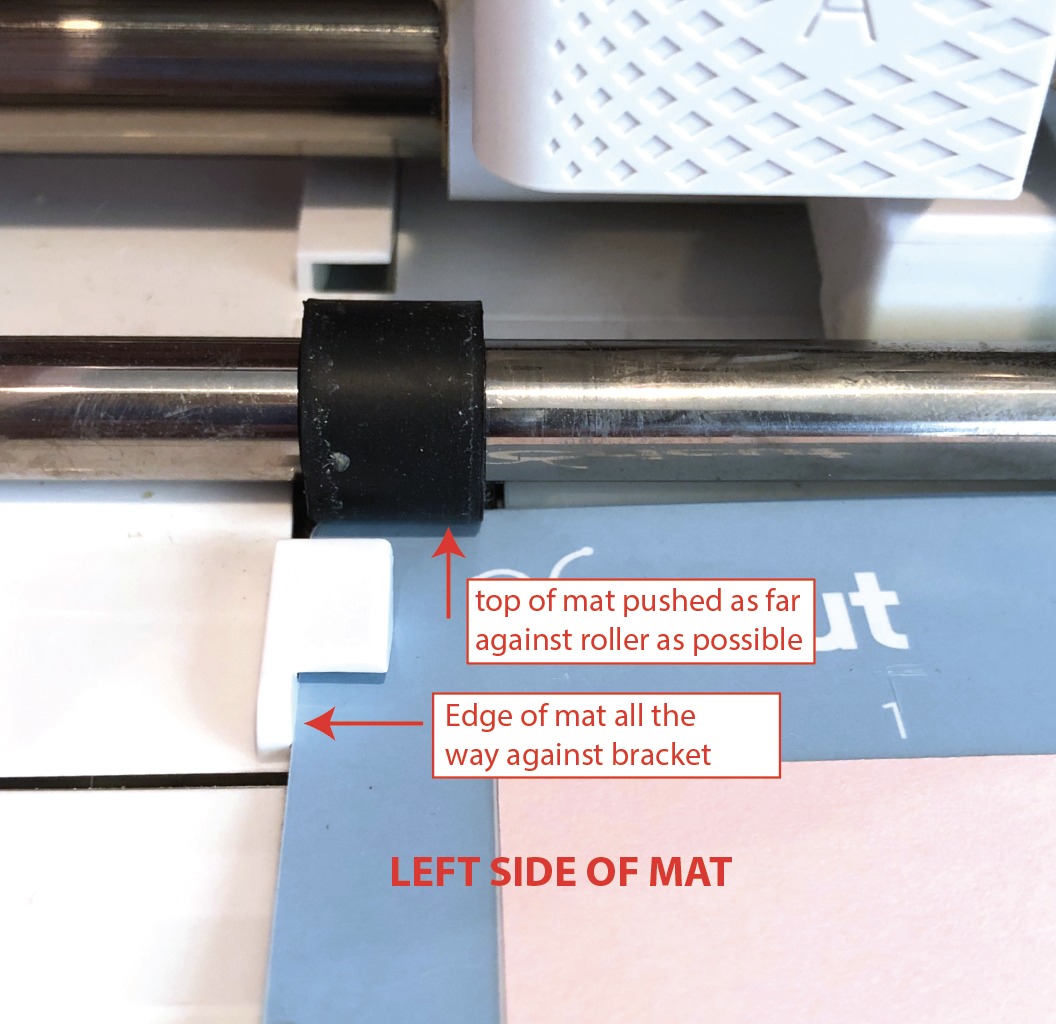
The easiest, most consistent method that works for me is having my mat pushed all the way against the left little bracket and up against the black roller as far as it will go, without forcing it. The right side will have a small gap where it doesn’t touch the bracket, but the mat will still need to be pushed as far against the black roller as it will go, without forcing it.

Screen Shot 2021-08-29 at 8.30.04 PM.png

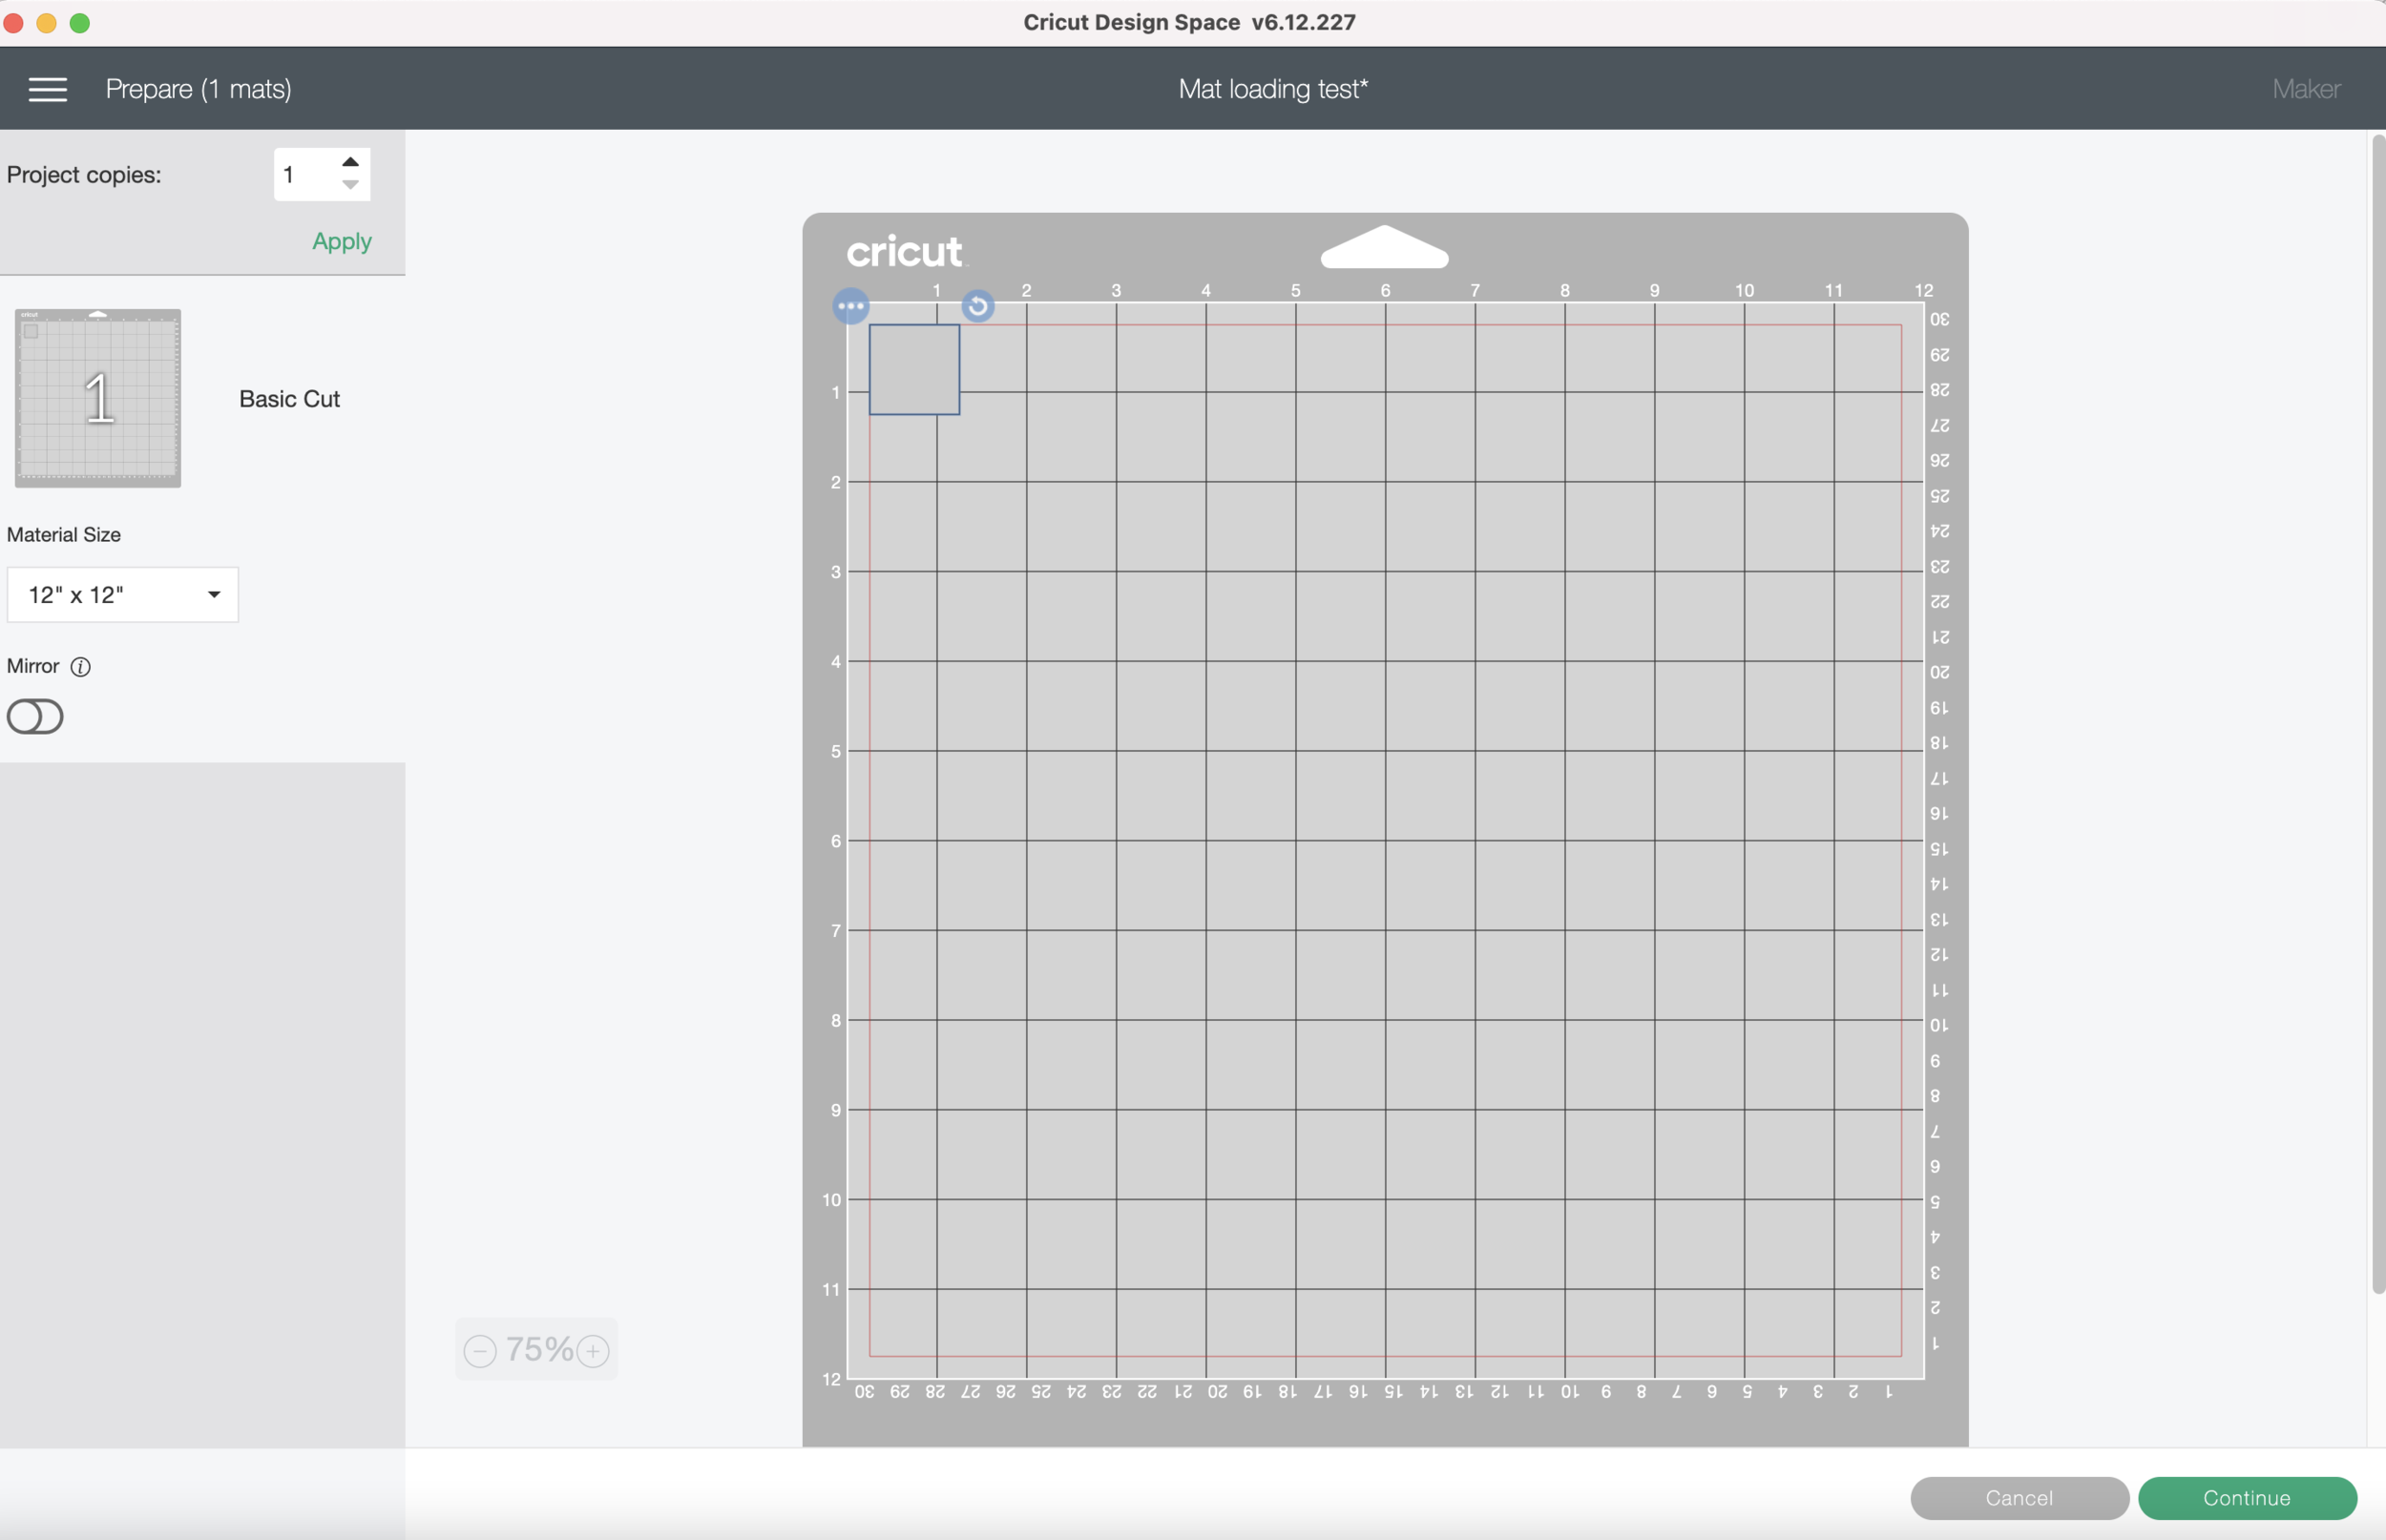
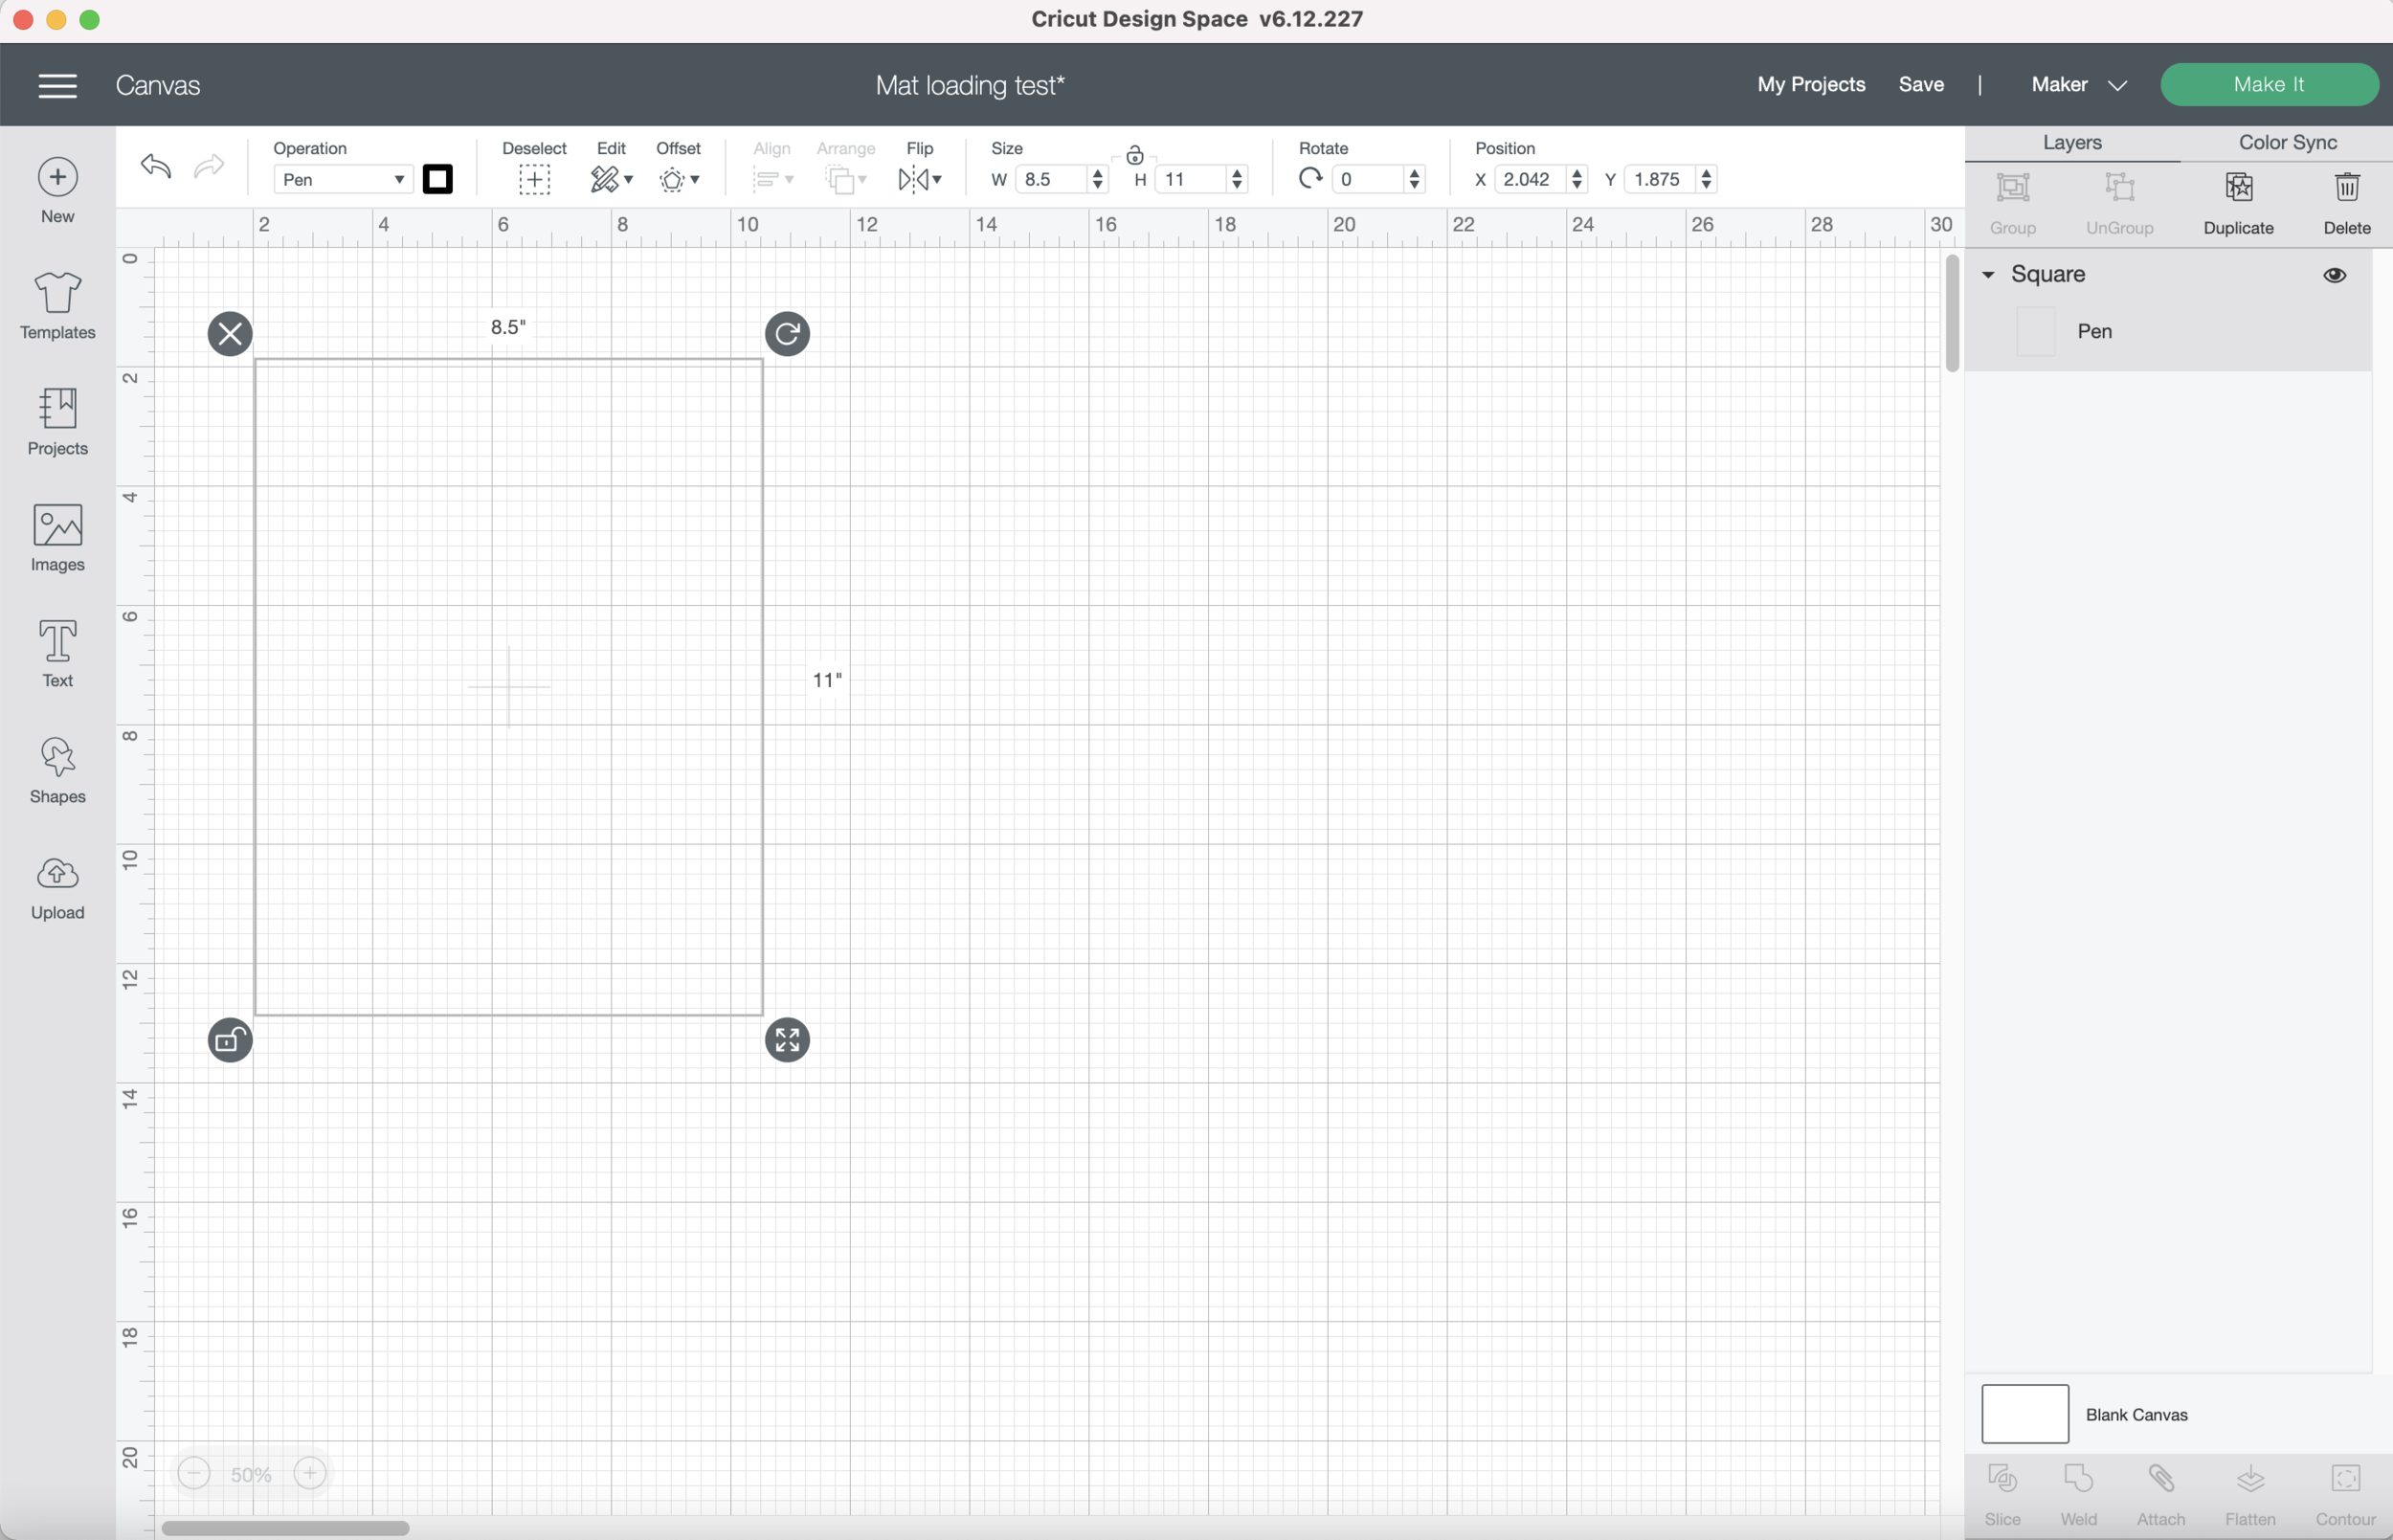
In Cricut Design Space, I made a simple 1” x 1” square to cut from my scrap cardstock. You can use whatever shape you want, this is just to test that I am loading my mat the same way every time.

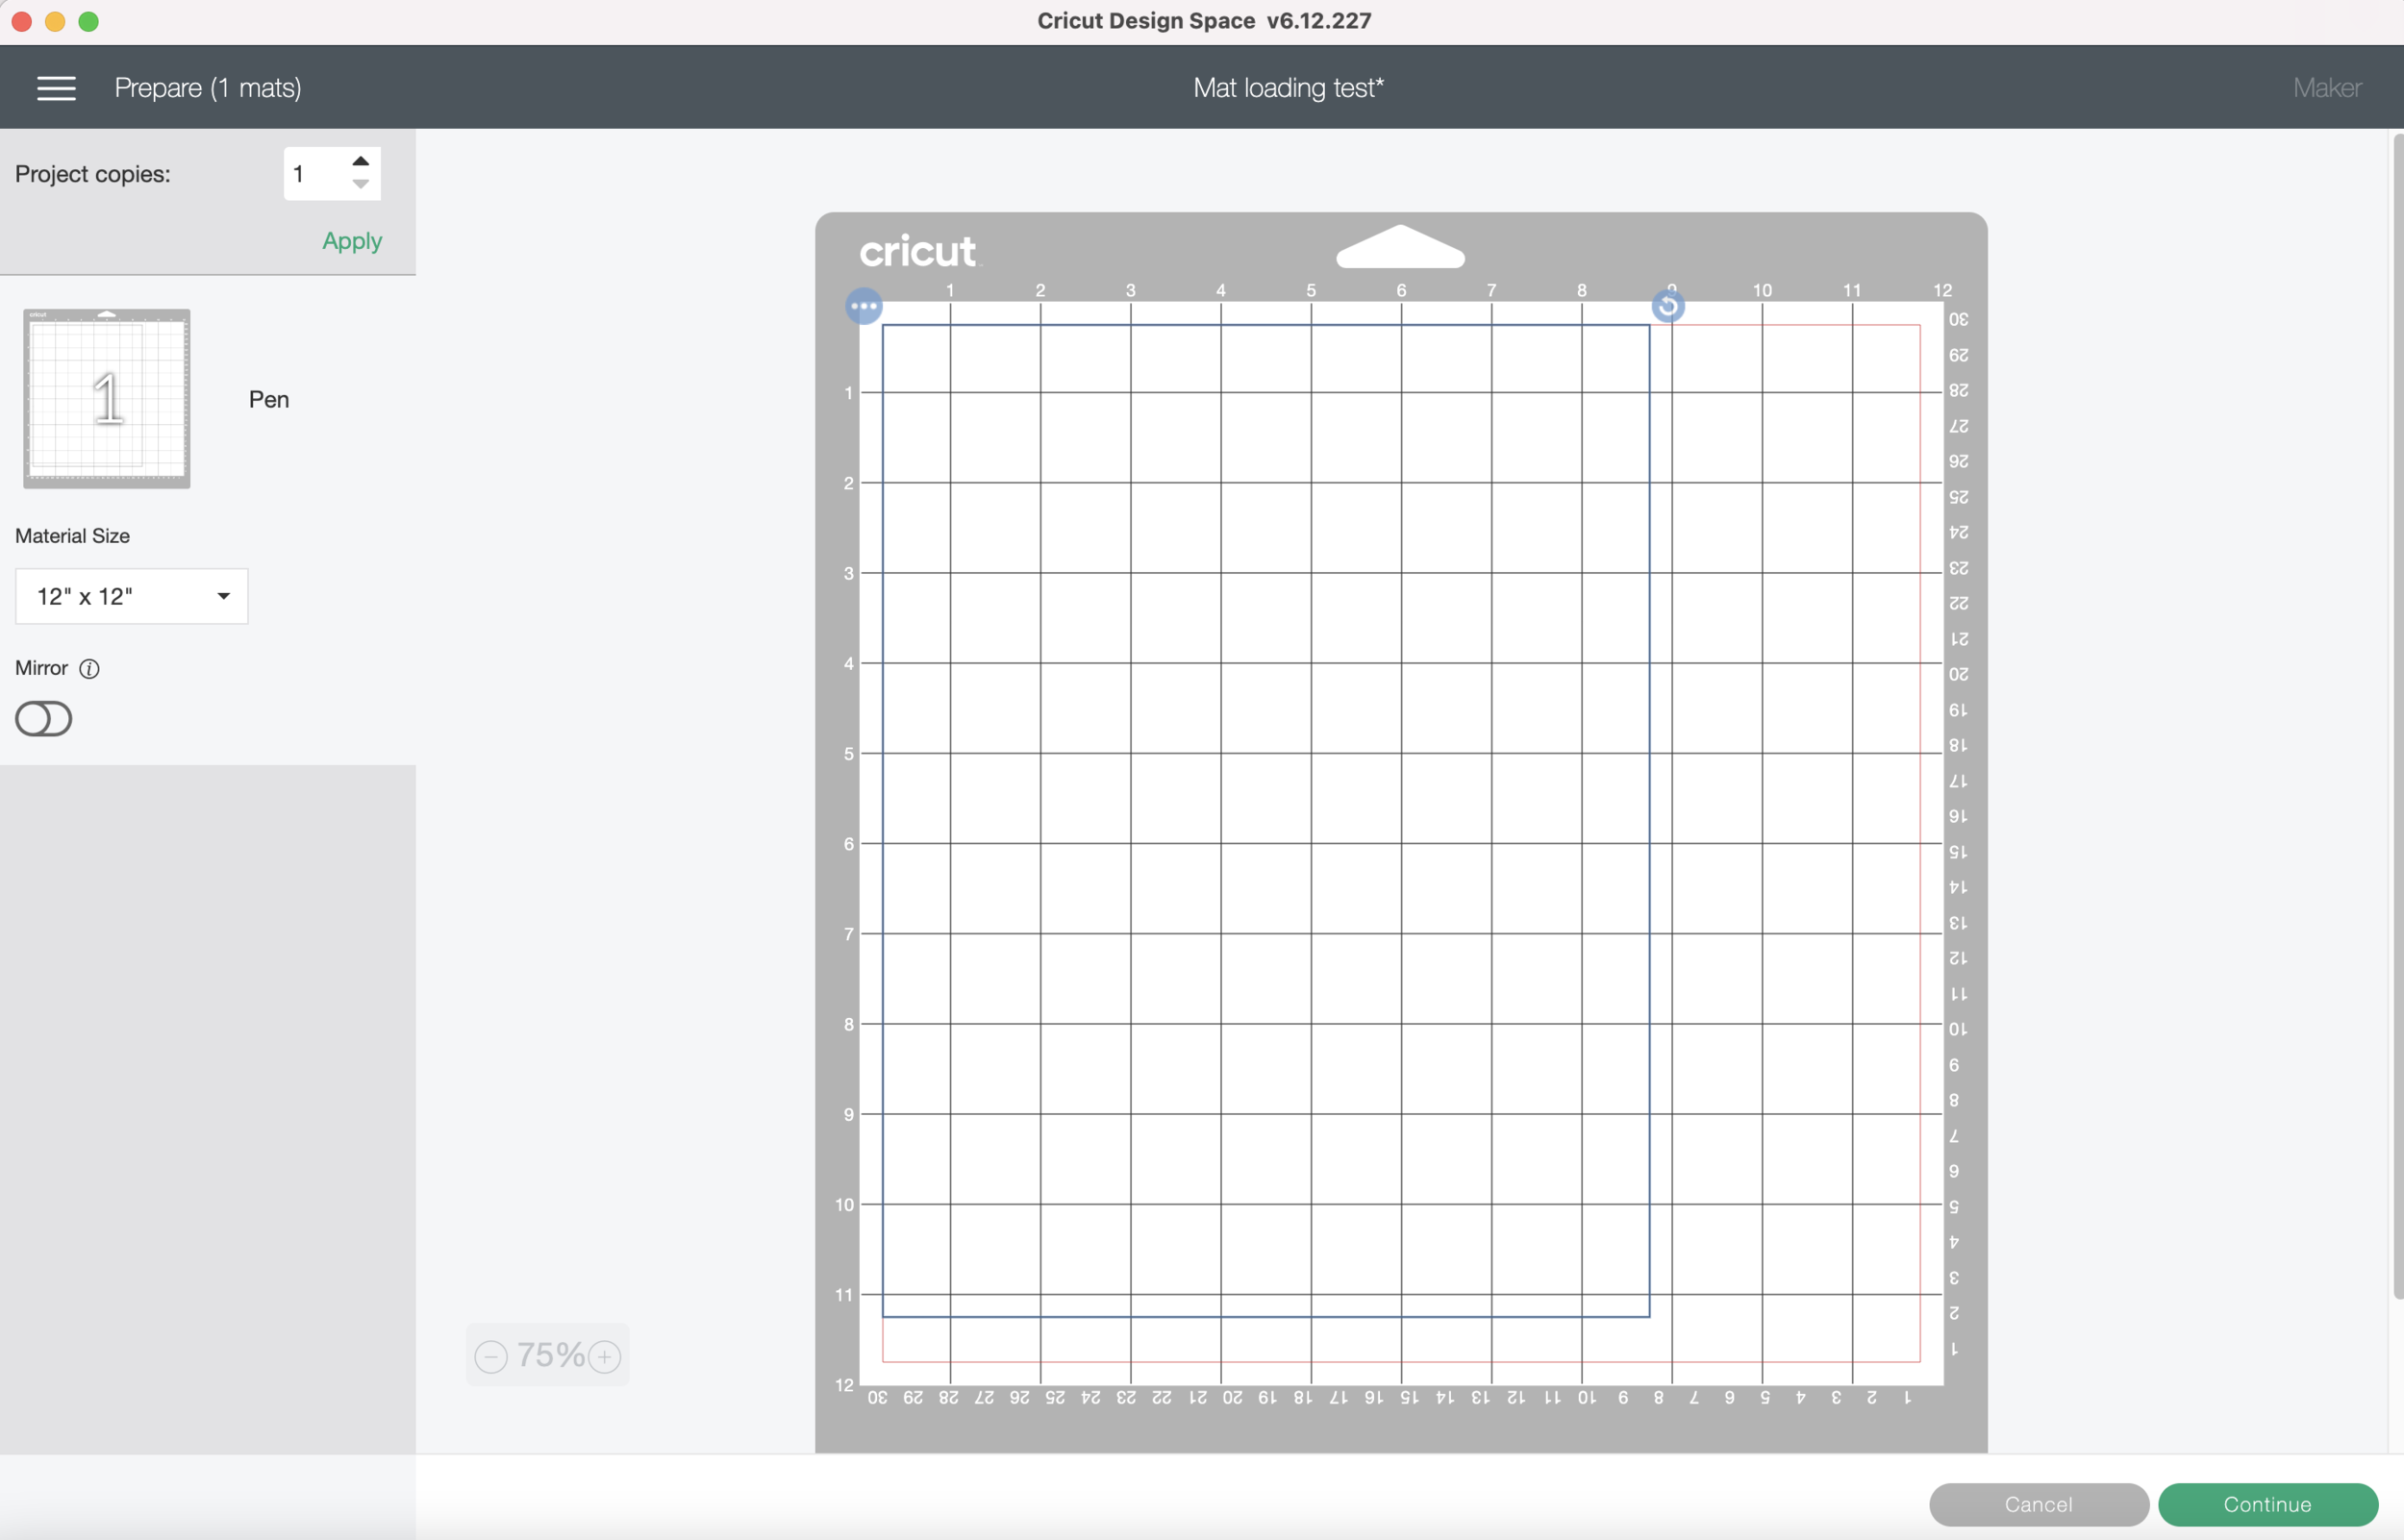
I click “Make it” and Design Space automatically puts my square in the upper left corner. But notice that it’s not completely in the left corner, there’s a red bounding box about a 1/4” inch inside the edges of the grid that I cannot move any elements outside of the red lines. This will be important later when we are setting up our sticker sheets for cutting.

Screen Shot 2021-08-28 at 12.33.18 PM.png

Now I’m going to practice loading my mat - all the way against the left little bracket and up against the black rollers as far as it will go, without forcing it. (See photos above)

I press Go on my machine and let it cut out the square. After it’s done cutting, I’m going to unload my mat.

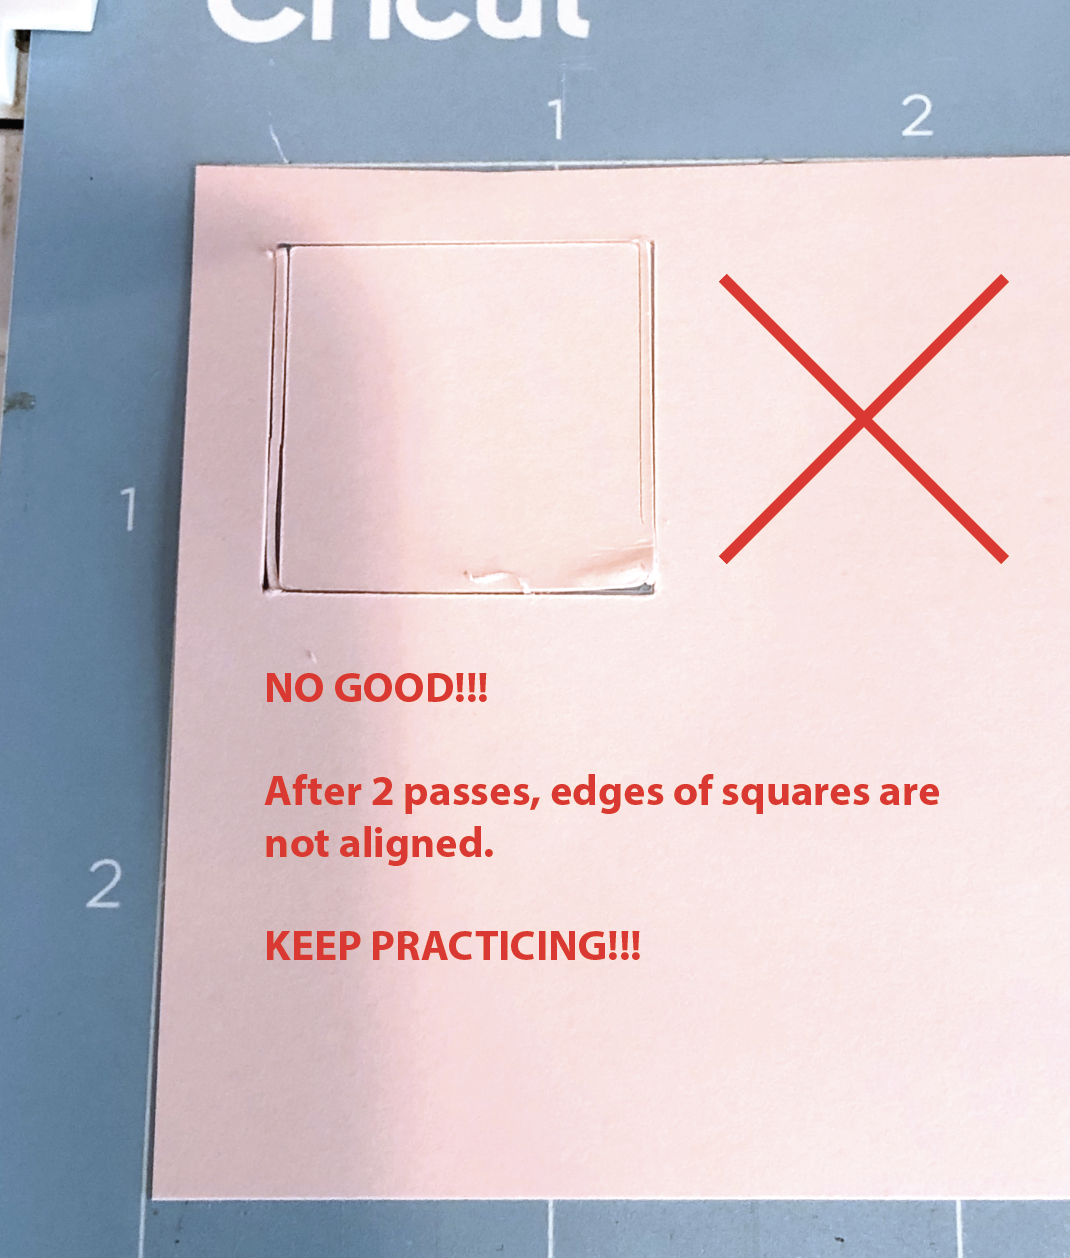
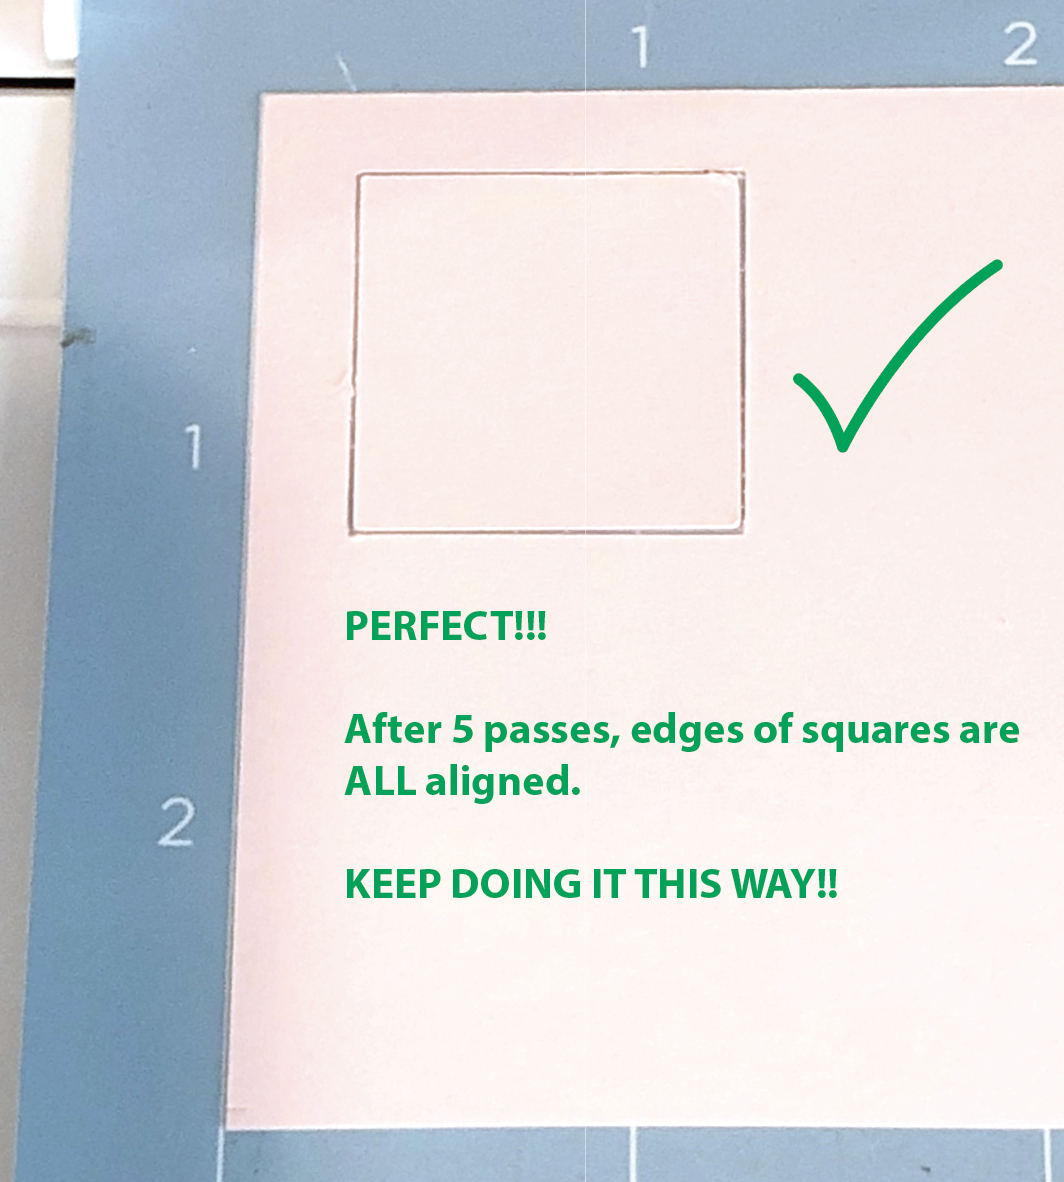
I’m going to leave the already cut cardstock on my mat and send it through my machine again, loading it the EXACT same way I did for the first cut.

If you are loading your machine exactly the same way, the cut lines should be directly on top of the first set of cut lines. If you shifted the placement of your mat, the 2nd set of cut lines will be off.

Keep practicing loading & unloading your mat so all of the cut lines are aligned.

Screen Shot 2021-08-29 at 8.41.58 PM.png

Once you’ve mastered loading your mat, we’re going to mark our mat so we know where to place the sticker paper. You’ve probably seen people use tape or cardstock to mark their mats, I’m not going to use either of those. I’m going to use a fine tip pen to draw directly on my mat, so I will still be able use my full mat for other projects.

The sticker paper I use is 8.5” x 11”. If you are using A4 your paper size will be 210mm x 297mm (8.27” x 11.69”) so you can sub those measurements for the 8.5”x11” measurements.

In Design Space, I’m going to create an 8.5” x 11” rectangle (8.27” x 11.69” or 210mm x 297mm if you are using A4 paper). I’m going to change the operation from “Cut” to “Draw” so I can use my fine tip pen.

Screen Shot 2021-08-29 at 3.19.56 PM.png

I’m going to press “Make it” and again, Design Space automatically puts my rectangle in the upper left corner, but there’s still that roughly 1/4” border around my mat. I’m going to keep the placement of the rectangle as it is.

My machine draws an 8.5” x 11” rectangle directly on my mat, and now we have a guide for where to place our sticker paper on the mat. Let the pen dry for a few hours or overnight, especially if you are using the Cricut brand fine tip pen, it smudges pretty easily.

Screen Shot 2021-08-29 at 8.50.04 PM.png

Next week, I’m going to do a test print to check the placement of my cut lines before I actually cut the sticker paper.

My Top 5 Tips for Using the Cricut Foil Transfer Tool

Links in the article below may be affiliate links.

Hi Everyone! I know it can be difficult getting the results you want with the Cricut Foil Transfer tool. I still struggle with it sometimes, especially on new projects. Here are some of my top tips for working with the foil transfer tool…

Choose a cardstock that is smooth, but not super smooth

Not all cardstocks are created equal. I have my favorite black cardstock, that after some testing, takes the foil beautifully and another black cardstock that ends up very patchy and the foil rubs off.

I also have a multi color pack of 65lb Recollections cardstock that I purchased from Michael’s. Although the cardstocks should all the the same quality, I’ve noticed that the surfaces of some of the colors are slightly smoother than the others. The darker colors especially seem to be smoother and the foil doesn’t always stick well (see photo of blue cardstock below). The foil sticks great to some of the lighter colors that aren’t quite as smooth (see photo of light grey cardstock below).

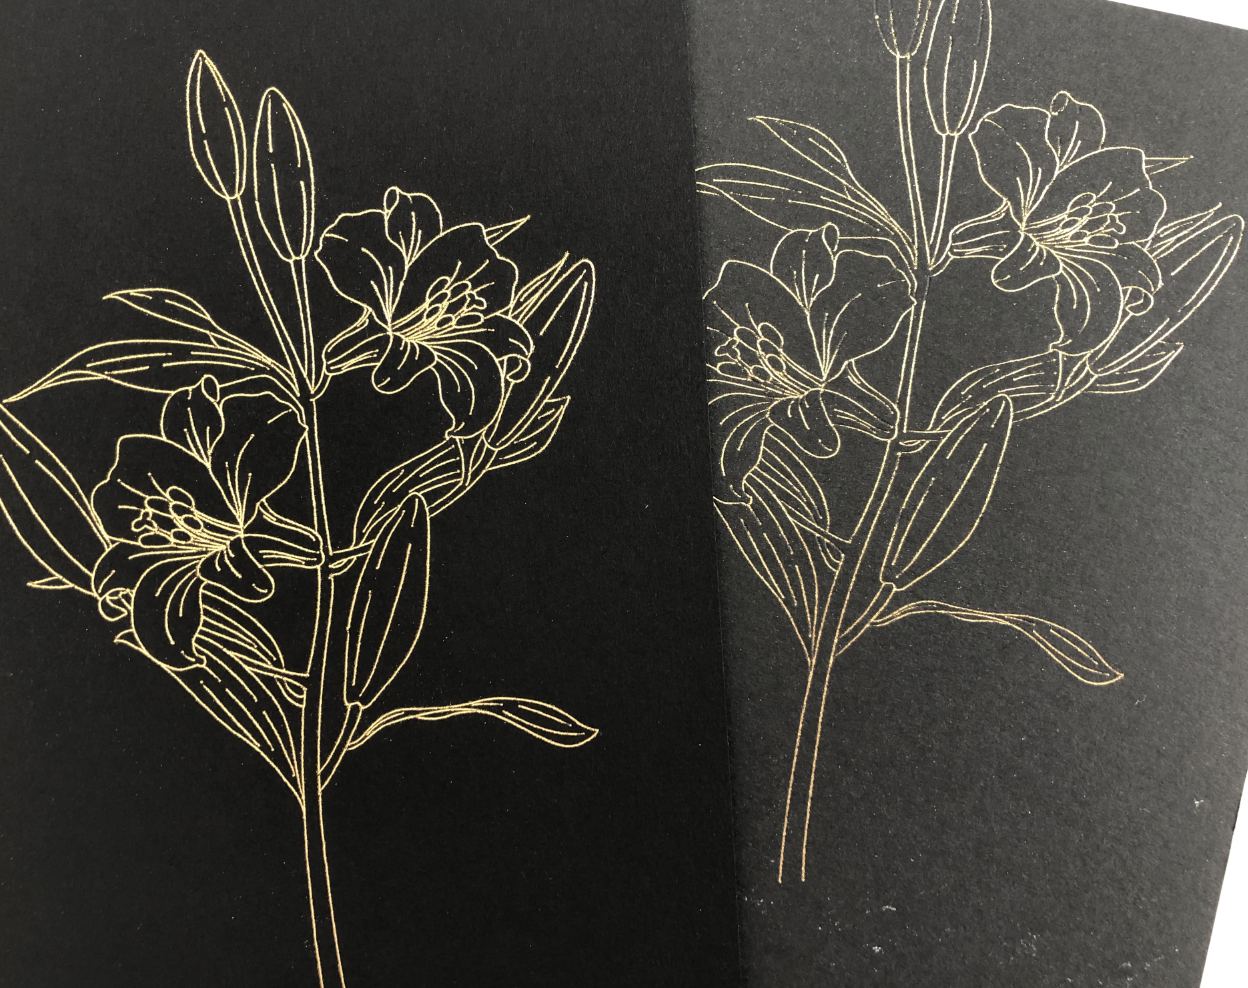
(L) My favorite black cardstock that foils beautifully, (R) Black cardstock that is smoother, but the foil does NOT transfer well.

(L) My favorite black cardstock that foils beautifully, (R) Black cardstock that is smoother, but the foil does NOT transfer well.

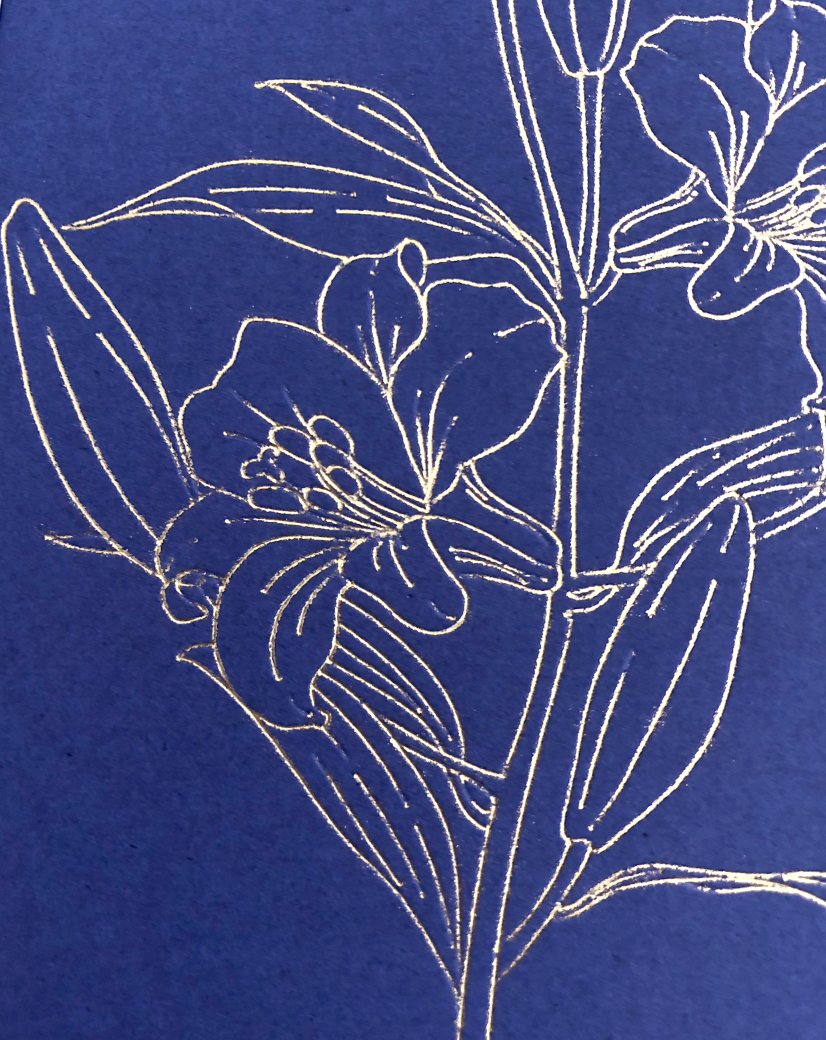
65lb blue cardstock from Recollections multicolor pack, Medium Foil transfer tip, Settings: Light cardstock & less pressure

65lb blue cardstock from Recollections multicolor pack, Medium Foil transfer tip, Settings: Light cardstock & less pressure

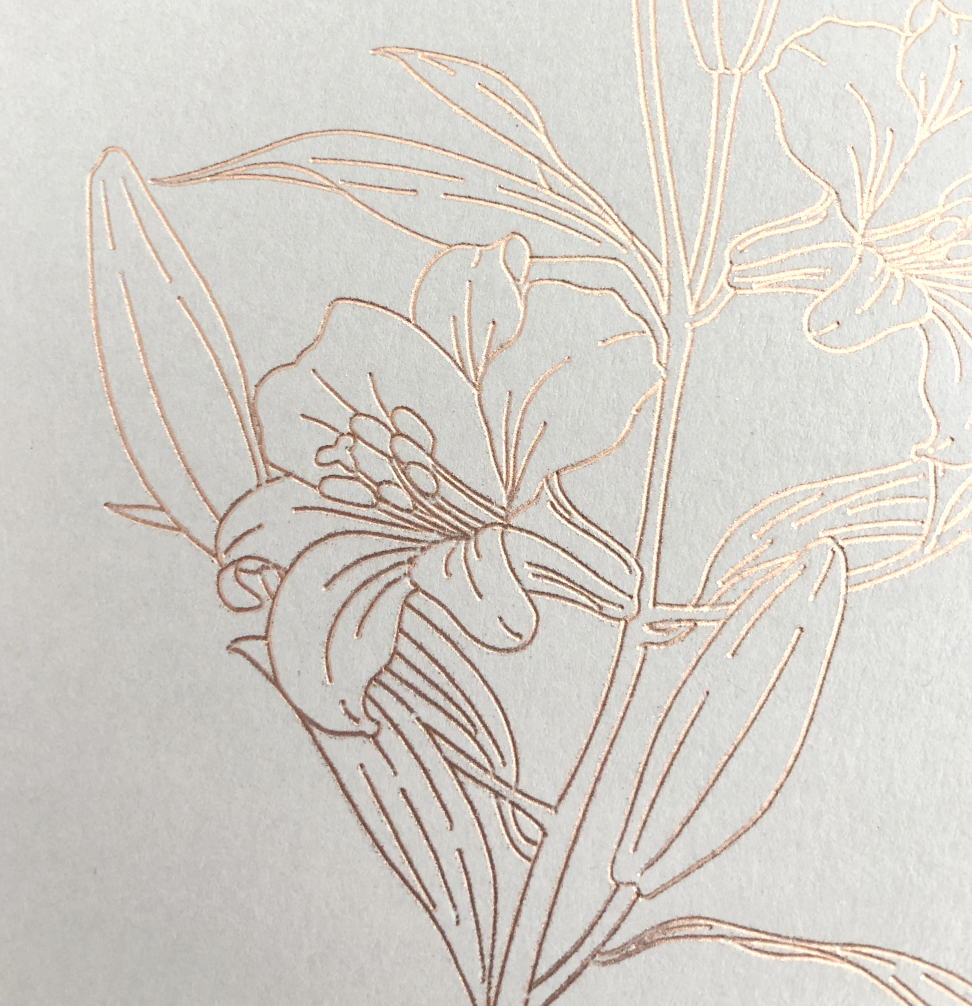
65lb light grey cardstock from the same Recollections multicolor pack, Medium Foil transfer tip, Settings: Light cardstock & less pressure

65lb light grey cardstock from the same Recollections multicolor pack, Medium Foil transfer tip, Settings: Light cardstock & less pressure

Use Masking Tape, Blue Painters Tape or Washi Tape

The tape that comes with the foil transfer sheets is designed to NOT stick to the mat. Depending on my design, sometimes my foil sheet goes right to the edge of my cardstock and I need my tape to stick to the mat. I prefer to use masking tape, blue painter’s tape or Washi tape. These tapes all stick well to the mat, and I can usually reuse them a few times.

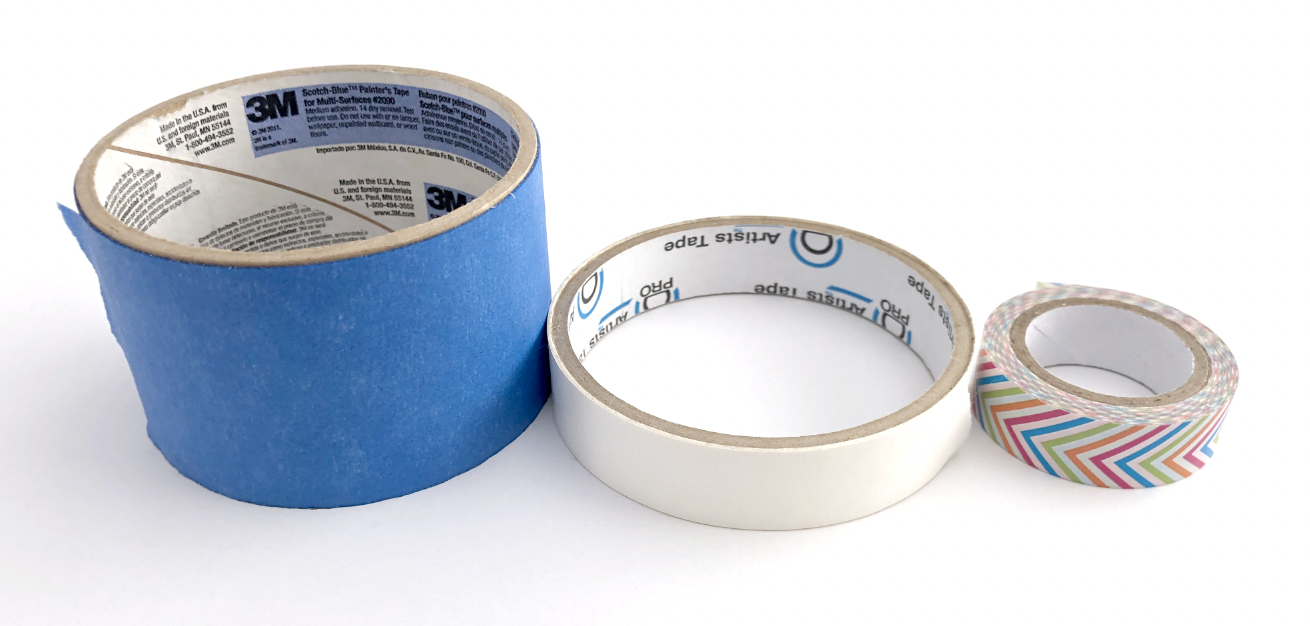
(L) Blue painter’s tape, (C) masking tape, (R) Washi tape

(L) Blue painter’s tape, (C) masking tape, (R) Washi tape

Tape the foil sheet as flat and tight as possible

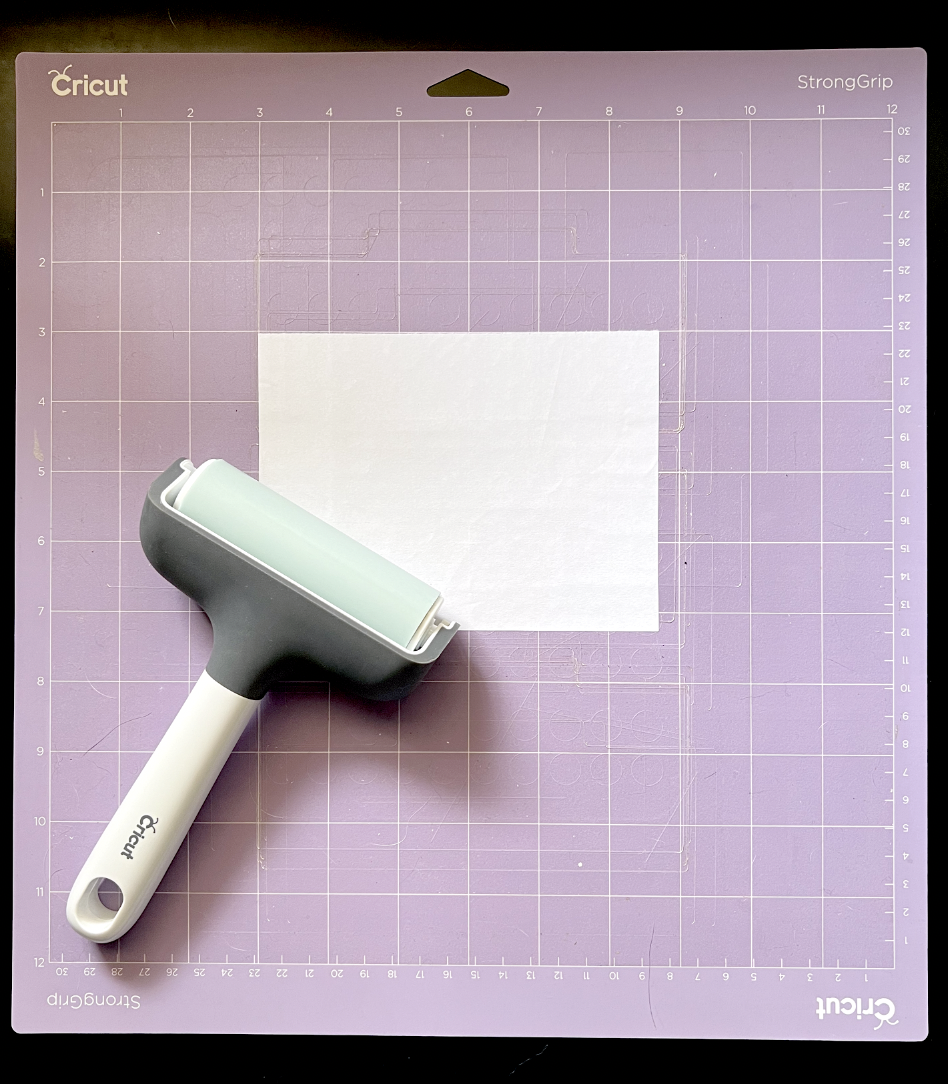
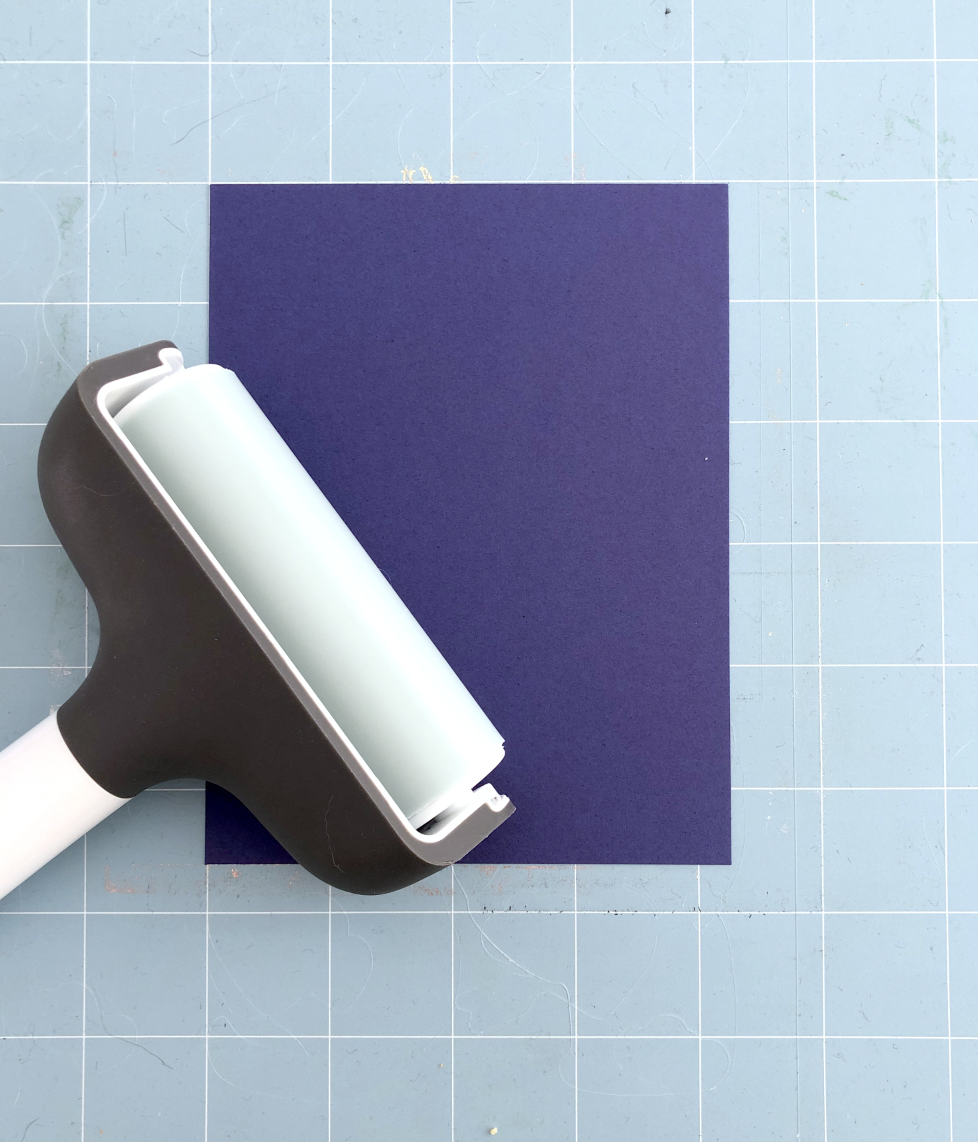
Before taping down your foil, use a brayer to fully adhere your cardstock or whatever material you are using to the mat.

Cricut Foil Transfer tool tips

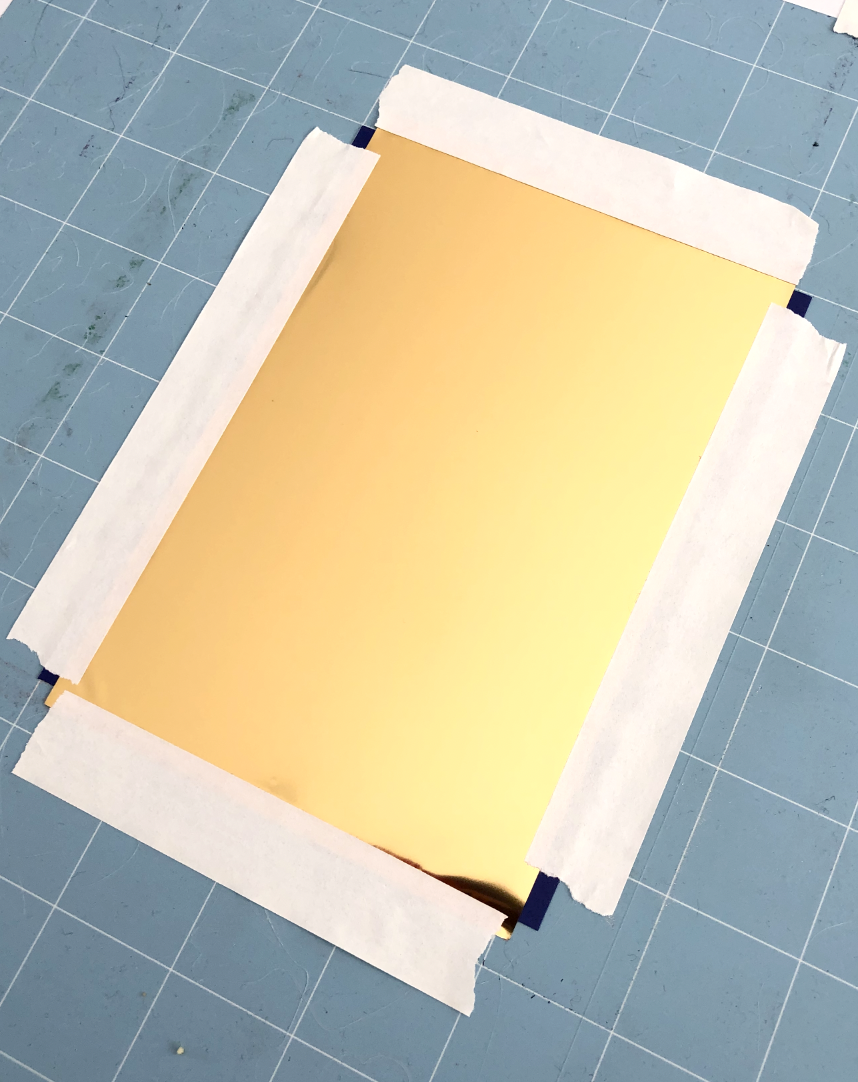
Then lay the foil over the cardstock and tape it on all four sides as tight and flat as possible. As the transfer tool moves around it stretches the foil transfer sheet, so it’s best to start out with no wrinkles and get it as tight as possible in the beginning.

Tape all four sides so the foil is flat and taut.

Tape all four sides so the foil is flat and taut.

Always test your materials that you will be foiling

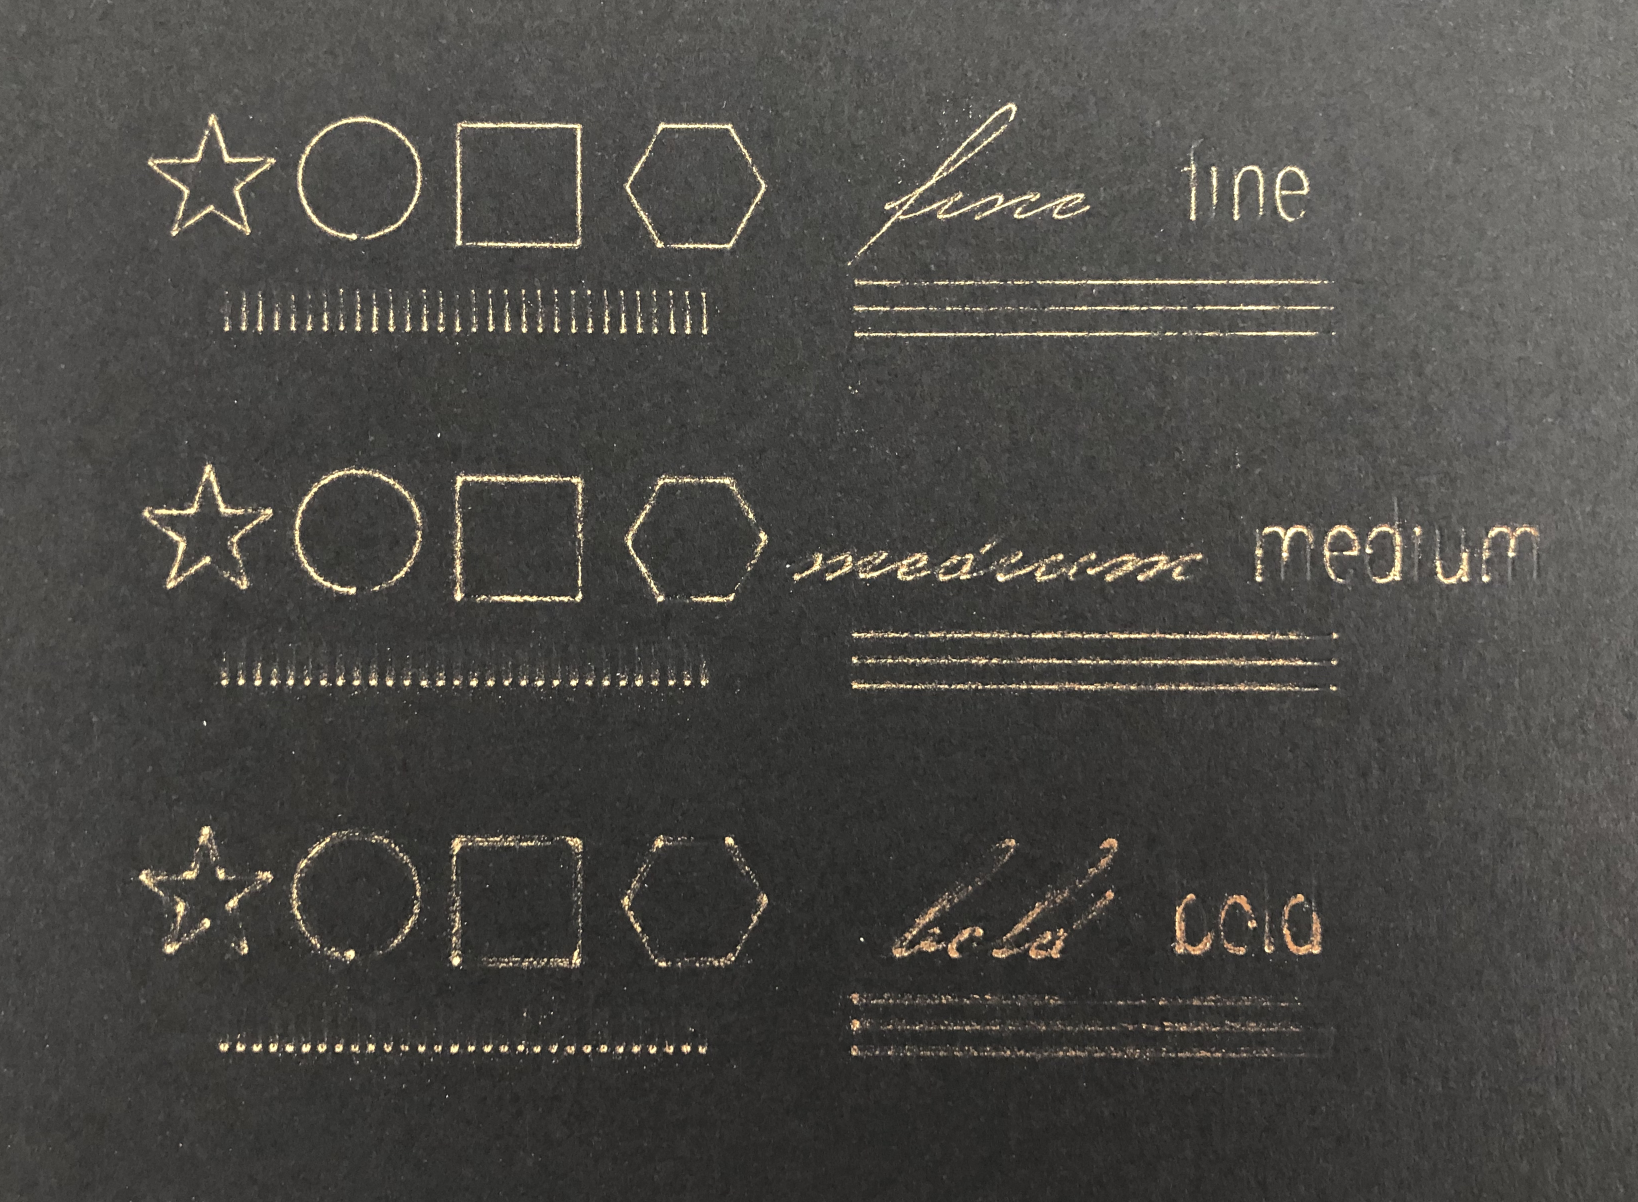
If you’re not sure the foil will stick to the materials you plan to use for your project, do a small test first. Also, you may need to do a small test to figure out the optimal pressure settings for your material. The default material settings can give you a jumping off point, but they don’t always produce the best results. I find I usually get the best results with the fine or medium tips. I haven’t been satisfied with any results from the bold tip.

Testing different tip sizes and pressure settings on black cardstock, no good results on this test.

Testing different tip sizes and pressure settings on black cardstock, no good results on this test.

Use Less Pressure

It kind of sounds counterintuitive, but I typically have better success when I select “Less Pressure” when I’m foiling. If it’s too much pressure, the foil does not stick completely, I’m usually left with an empty thin line from the tip of the transfer tool, or it just doesn’t stick in certain parts of the design.

For my heavier cardstocks (100lb-110lb) I’ve been getting good results with 20lb Copy Paper, Default Pressure settings.

For my 65lb Recollections cardstock I typically use the 65lb Lightweight Cardstock, Less Pressure settings, or the 20lb Copy Paper, Default Pressure settings.

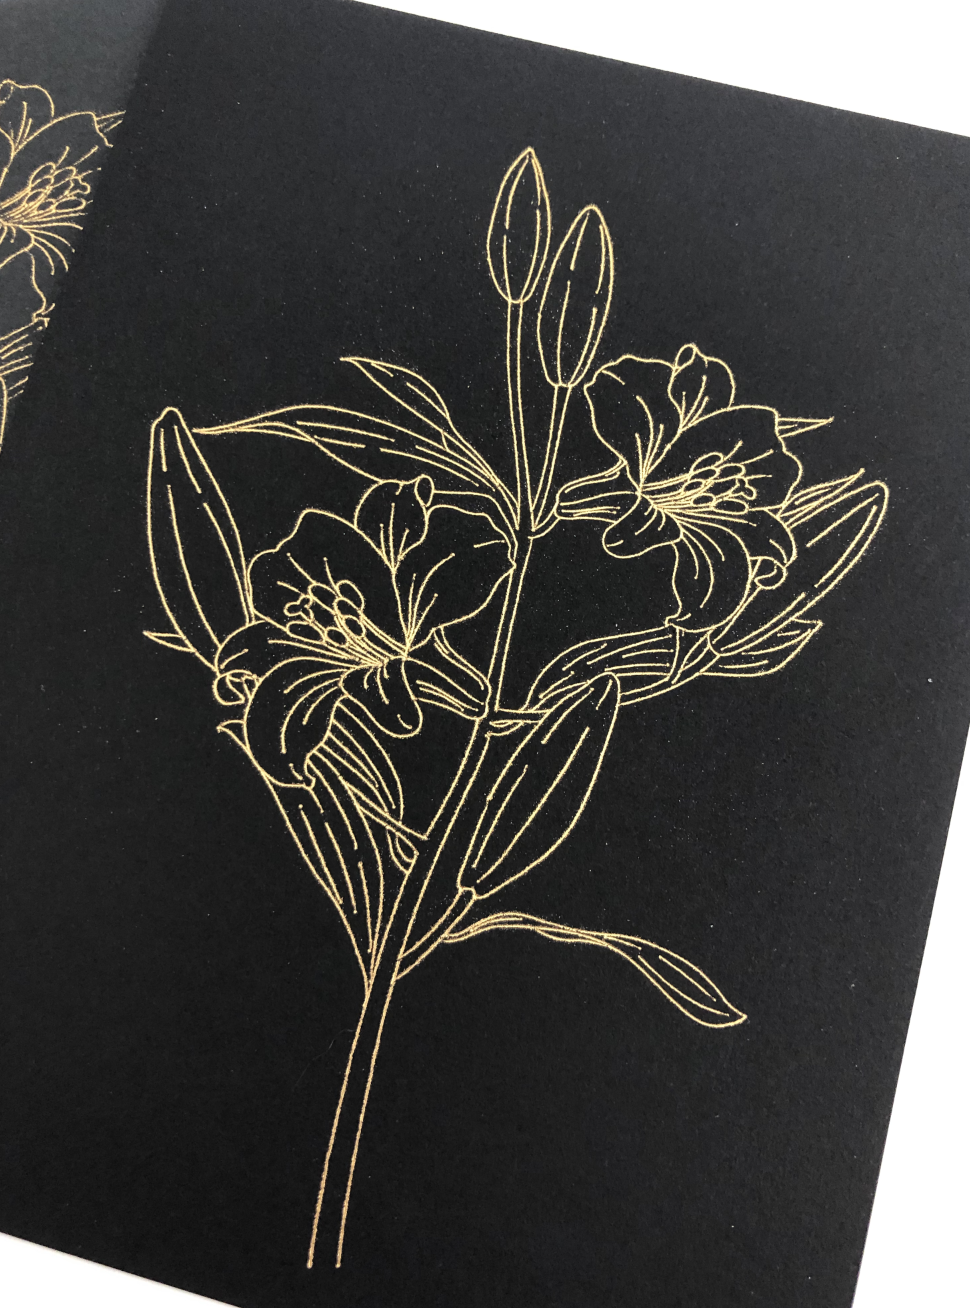
Beautiful results on black heavy cardstock using settings: 20lb copy paper, default pressure.

Beautiful results on black heavy cardstock using settings: 20lb copy paper, default pressure.

Another Cricut Foil Transfer Sheet Alternative

Links in the article below may be affiliate links.

Hi Everyone! I was browsing the Michael’s website for more foil colors for the Cricut Foil Transfer tool and I came across some foil transfer sheets from Recollections. The foil transfer sheets are described as no heat or tools needed. The packaging instructions instructions recommend using a double sided sticker or adhesive with the foil. There is no mention of them being pressure sensitive, but one of the reviewers mentioned that they work with her Cricut Maker. So I found some at my local store and decided to give them a try.

I bought the gold sheets and the holographic sheets to try initially. You get 5 sheets that are 5.5” x 5.5” squares, so slightly different dimensions than the smaller Cricut sheets and really great if you plan to make square cards. Another bonus, you can use your Michael’s coupons!

I tried one of my new celestial designs with the gold foil on my favorite black cardstock.

I tested all three tips for the foil transfer tool, and they all worked pretty well with this foil. There are still the little spots where it didn’t stick to the cardstock all way. It’s also a little dusty when you remove the foil sheet, but you can carefully lift the foil dust away with some Washi tape or blue painters tape. Overall, the results were pretty similar to the Cricut brand foil.

Recollections Gold Foil Transfer Sheet (L) Bold Tip, (C) Medium Tip, (R) Fine Tip

Recollections Gold Foil Transfer Sheet (L) Bold Tip, (C) Medium Tip, (R) Fine Tip

Next, I tried the holographic foil. It did not transfer as well as the gold foil and it just looks silver, not holographic. Overall, this one was a bit disappointing.
Recollections Holographic Foil Transfer Sheet (L) Medium Tip, (R) Fine Tip

Recollections Holographic Foil Transfer Sheet (L) Medium Tip, (R) Fine Tip

Since the gold worked pretty well, I’m interested to try some of the other colors like rose gold and the multicolor pack. I also plan to test this foil with the WRMK foil quill and my Silhouette Portrait 3 machine.

Screen Shot 2021-07-05 at 5.18.55 PM.png


Spellbinders Glimmer Foil with the WRMK Foil Quill

Links in the article below may be affiliate links.

Hi Everyone! Last week I tried out the Spellbinders Glimmer foils with the Cricut Foil Transfer tool and my Cricut Maker, and I got some pretty decent results. This week I want to try the foils with my WRMK Foil Quills since they are actually intended to be hot foils. So here we go!

I am most excited to try the holographic foils. They transferred okay with the Cricut Foil Transfer tool, but the holographic effects were kind of lost.

I started out with the gold glittery foil on my heavy white cardstock with the medium foil quill. There are some little spots where the foil didn't transfer completely, especially in my filled shapes. But you can see the glittery effect much more that you could with the foil transfer tool.

Spellbinders Holographic Foil with Foil Quill

I tried it out again on black cardstock with some different single line drawings. Again, some spots where it didn’t completely. The holographic effect was also not as noticeable on the black cardstock. So overall, the gold holographic glitter didn’t do great on cardstock.

Spellbinders Holographic Foil with Foil Quill

Next I tried the silver holographic foil on black cardstock. Also, some spots where it didn’t transfer completely, especially in the filled shapes. But you can see the iridescent effect, especially when you hold the card at an angle. It’s really difficult to capture in a photo, but the iridescence is there!

Spellbinders Holographic Foil with Foil Quill

Then I tried the regular metallics. First, the copper on black cardstock, still with the medium tip. It transferred BEAUTIFULLY!!

Screen Shot 2021-06-13 at 10.54.11 AM.png

After that I tried the gold on my heavy white cardstock. It also worked beautifully!

Screen Shot 2021-06-13 at 10.56.19 AM.png

I decided to give the holographic foils one last shot on some glossy clear sticker paper. First, I tried the gold holographic glitter with the medium tip. It transferred REALLY well to the sticker paper, and you can see sparkly holgraphic effect. (again, super difficult to photograph, but it looks really good in person).

Spellbinders Holographic Foil with Foil Quill

Finally, my personal favorite, the silver holographic foil on the clear sticker paper. It is so pretty and transferred perfectly.

Spellbinders Holographic Foil with Foil Quill

Overall, the holographic foils didn’t work great on cardstock, but they are gorgeous on my clear sticker paper. The regular metallics worked really well on cardstock, I didn’t test them on the sticker paper, but I imagine they would work great on that as well.

I’m really excited to try these foils with my Silhouette Portrait 3 machine where I can actually adjust the speed and pressure for the foil quill. I will post about that next week!