
Hi Everyone!
This week is another important step when creating full sticker sheets to cut on your Cricut Machine.
I always print a few test sheets on plain paper before I cut the actual sticker paper. Once you learn all the little nuances of your machine, you will probably be able to skip this step. But when you are just beginning to using this method, it’s best to practice, practice, practice before jumping into using your expensive sticker paper.
I already set up my artwork in Adobe Illustrator with my offset cutlines. If you need some guidance on creating offsets in Illustrator, you can check out my previous posts here and here.

When I set up my art files in Illustrator I have 2 separate layers. First, the ARTWORK layer that we will use to print our stickers directly from Illustrator. Second, the CUTLINE layer that we will export as an SVG and import into Cricut Design Space.

Very Important: My cut layer contains a bracket in each corner of the 8.5” x 11” artboard. This is going to help us line up the cut lines in Design Space. Make sure you include these brackets when you set up your file!

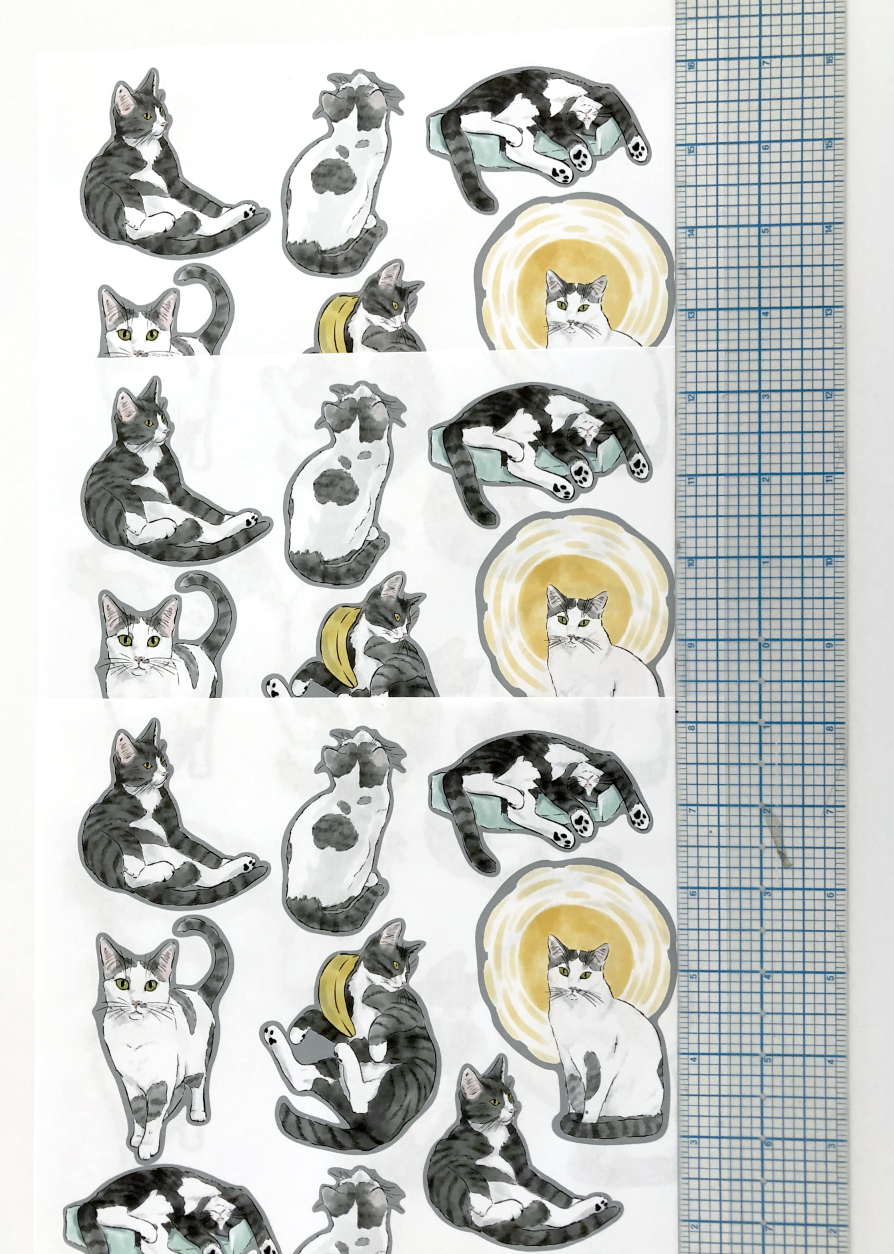
For my test print, I’m actually going to print the grey cutlines with the artwork so I can really see how far off my machine cuts and make the appropriate adjustments.
I’m using an Epson SureColor P600 printer, but you can use any inkjet printer for this method. I do not recommend using a laser printer for this method. Since laser printers use heat, you will run into shrinkage issues with your paper and your cuts will be off unless you calculate the proper shrinkage. The shrinkage is very minimal, but it is noticeable.
I’m going to print 3 copies of my artwork on plain paper so I have a couple of extra to practice.
Your print dialog box will probably look different , but make sure the image is NOT SCALED when printing.

Check your printouts carefully to make sure they are straight and the artwork is is the same position on all 3 printouts. If the artwork is shifted, at all, in any of the printouts you will need to test and/ or adjust your printer to make sure you are getting the same print placement everytime.
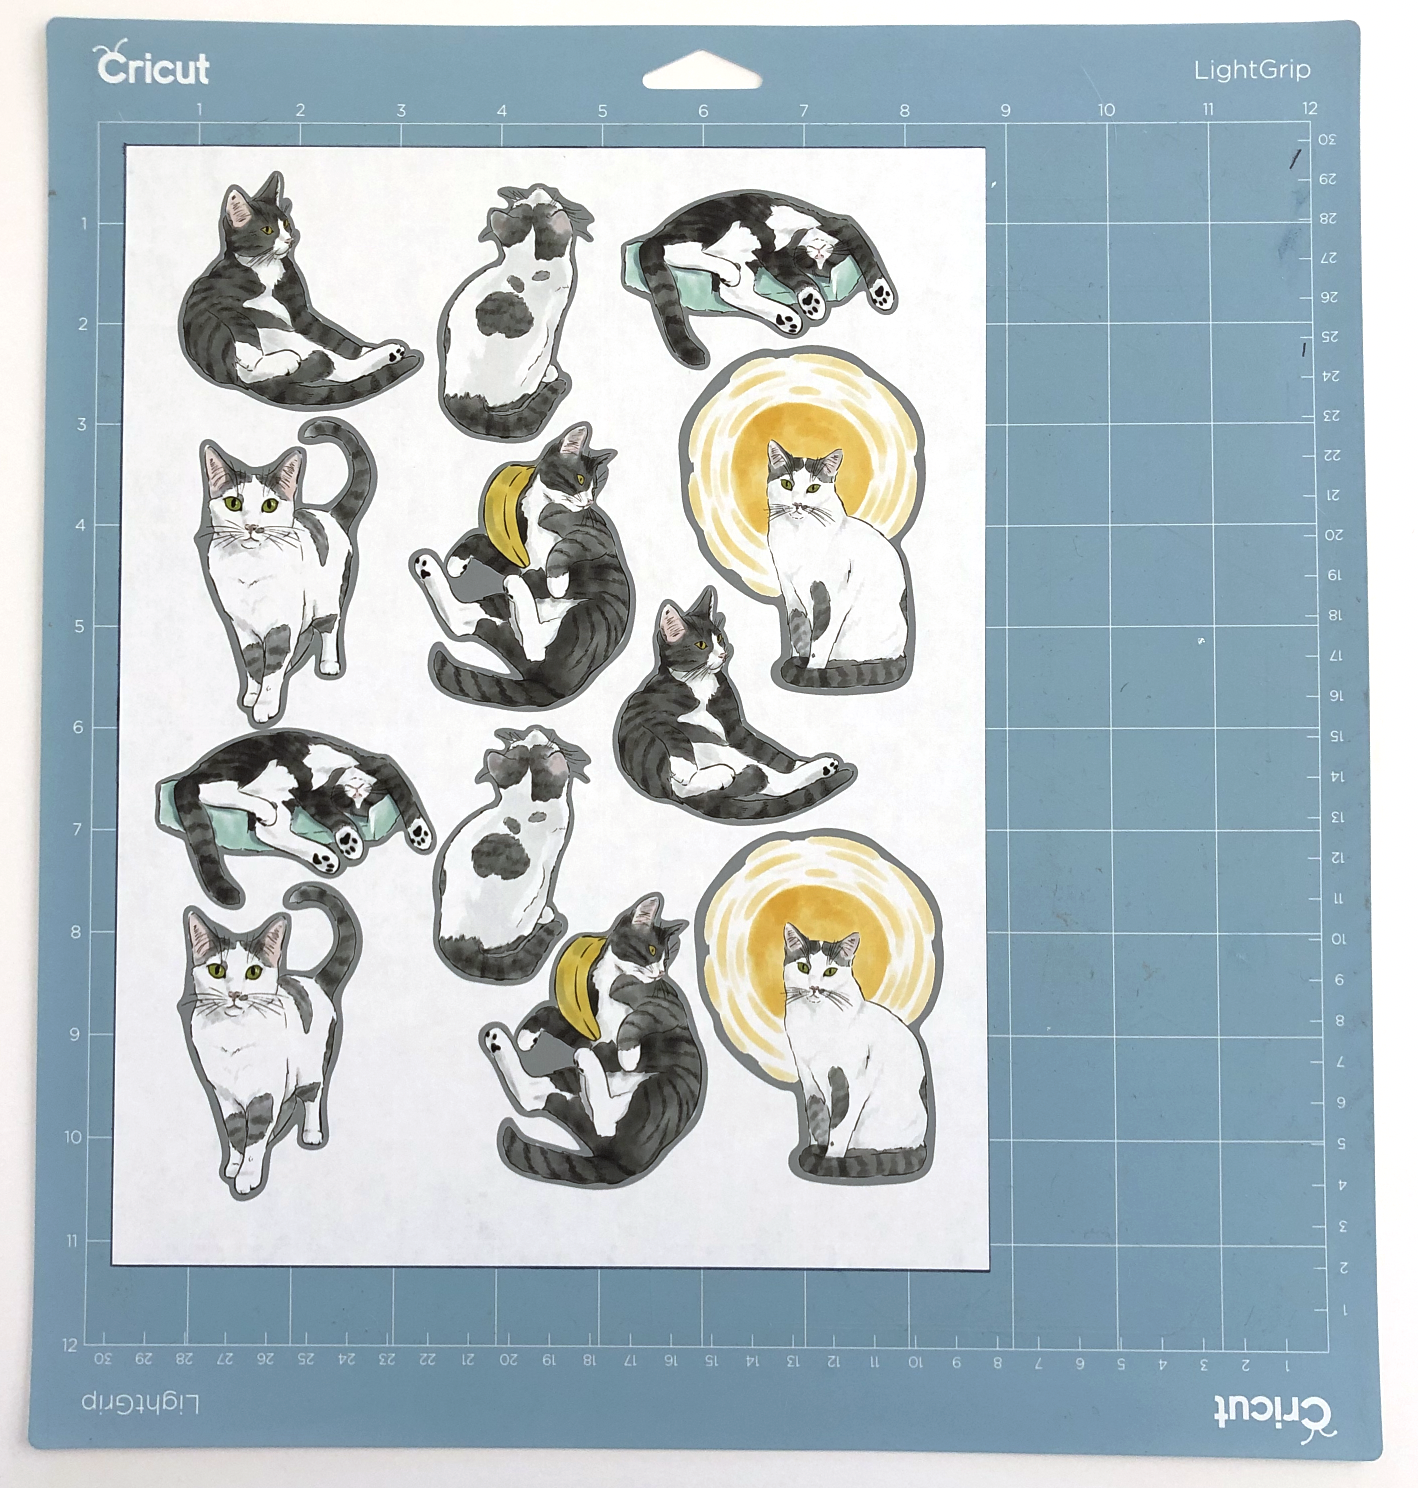
After checking your print outs, carefully place one of the printouts inside the rectangle on the mat that we prepped in last weeks post. Take your time when doing this to make sure your paper is properly aligned within the rectangle.
Now we’re going to open our cut lines only in Design Space. I exported that layer as a separate SVG from Illustrator and imported it into Design Space.
Check that the dimension of the imported artwork are 8.5” x 11” like our file in Illustrator. Those very important brackets that you put in the corners on the artboard in Illustrator help ensure that the dimensions remain 8.5” x 11.

ATTACH all of your elements, and the press MAKE IT.
Those very important corner brackets are also going to help keep your artwork in the proper place in the upper left corner of the mat, but not beyond those red border lines in Design Space.
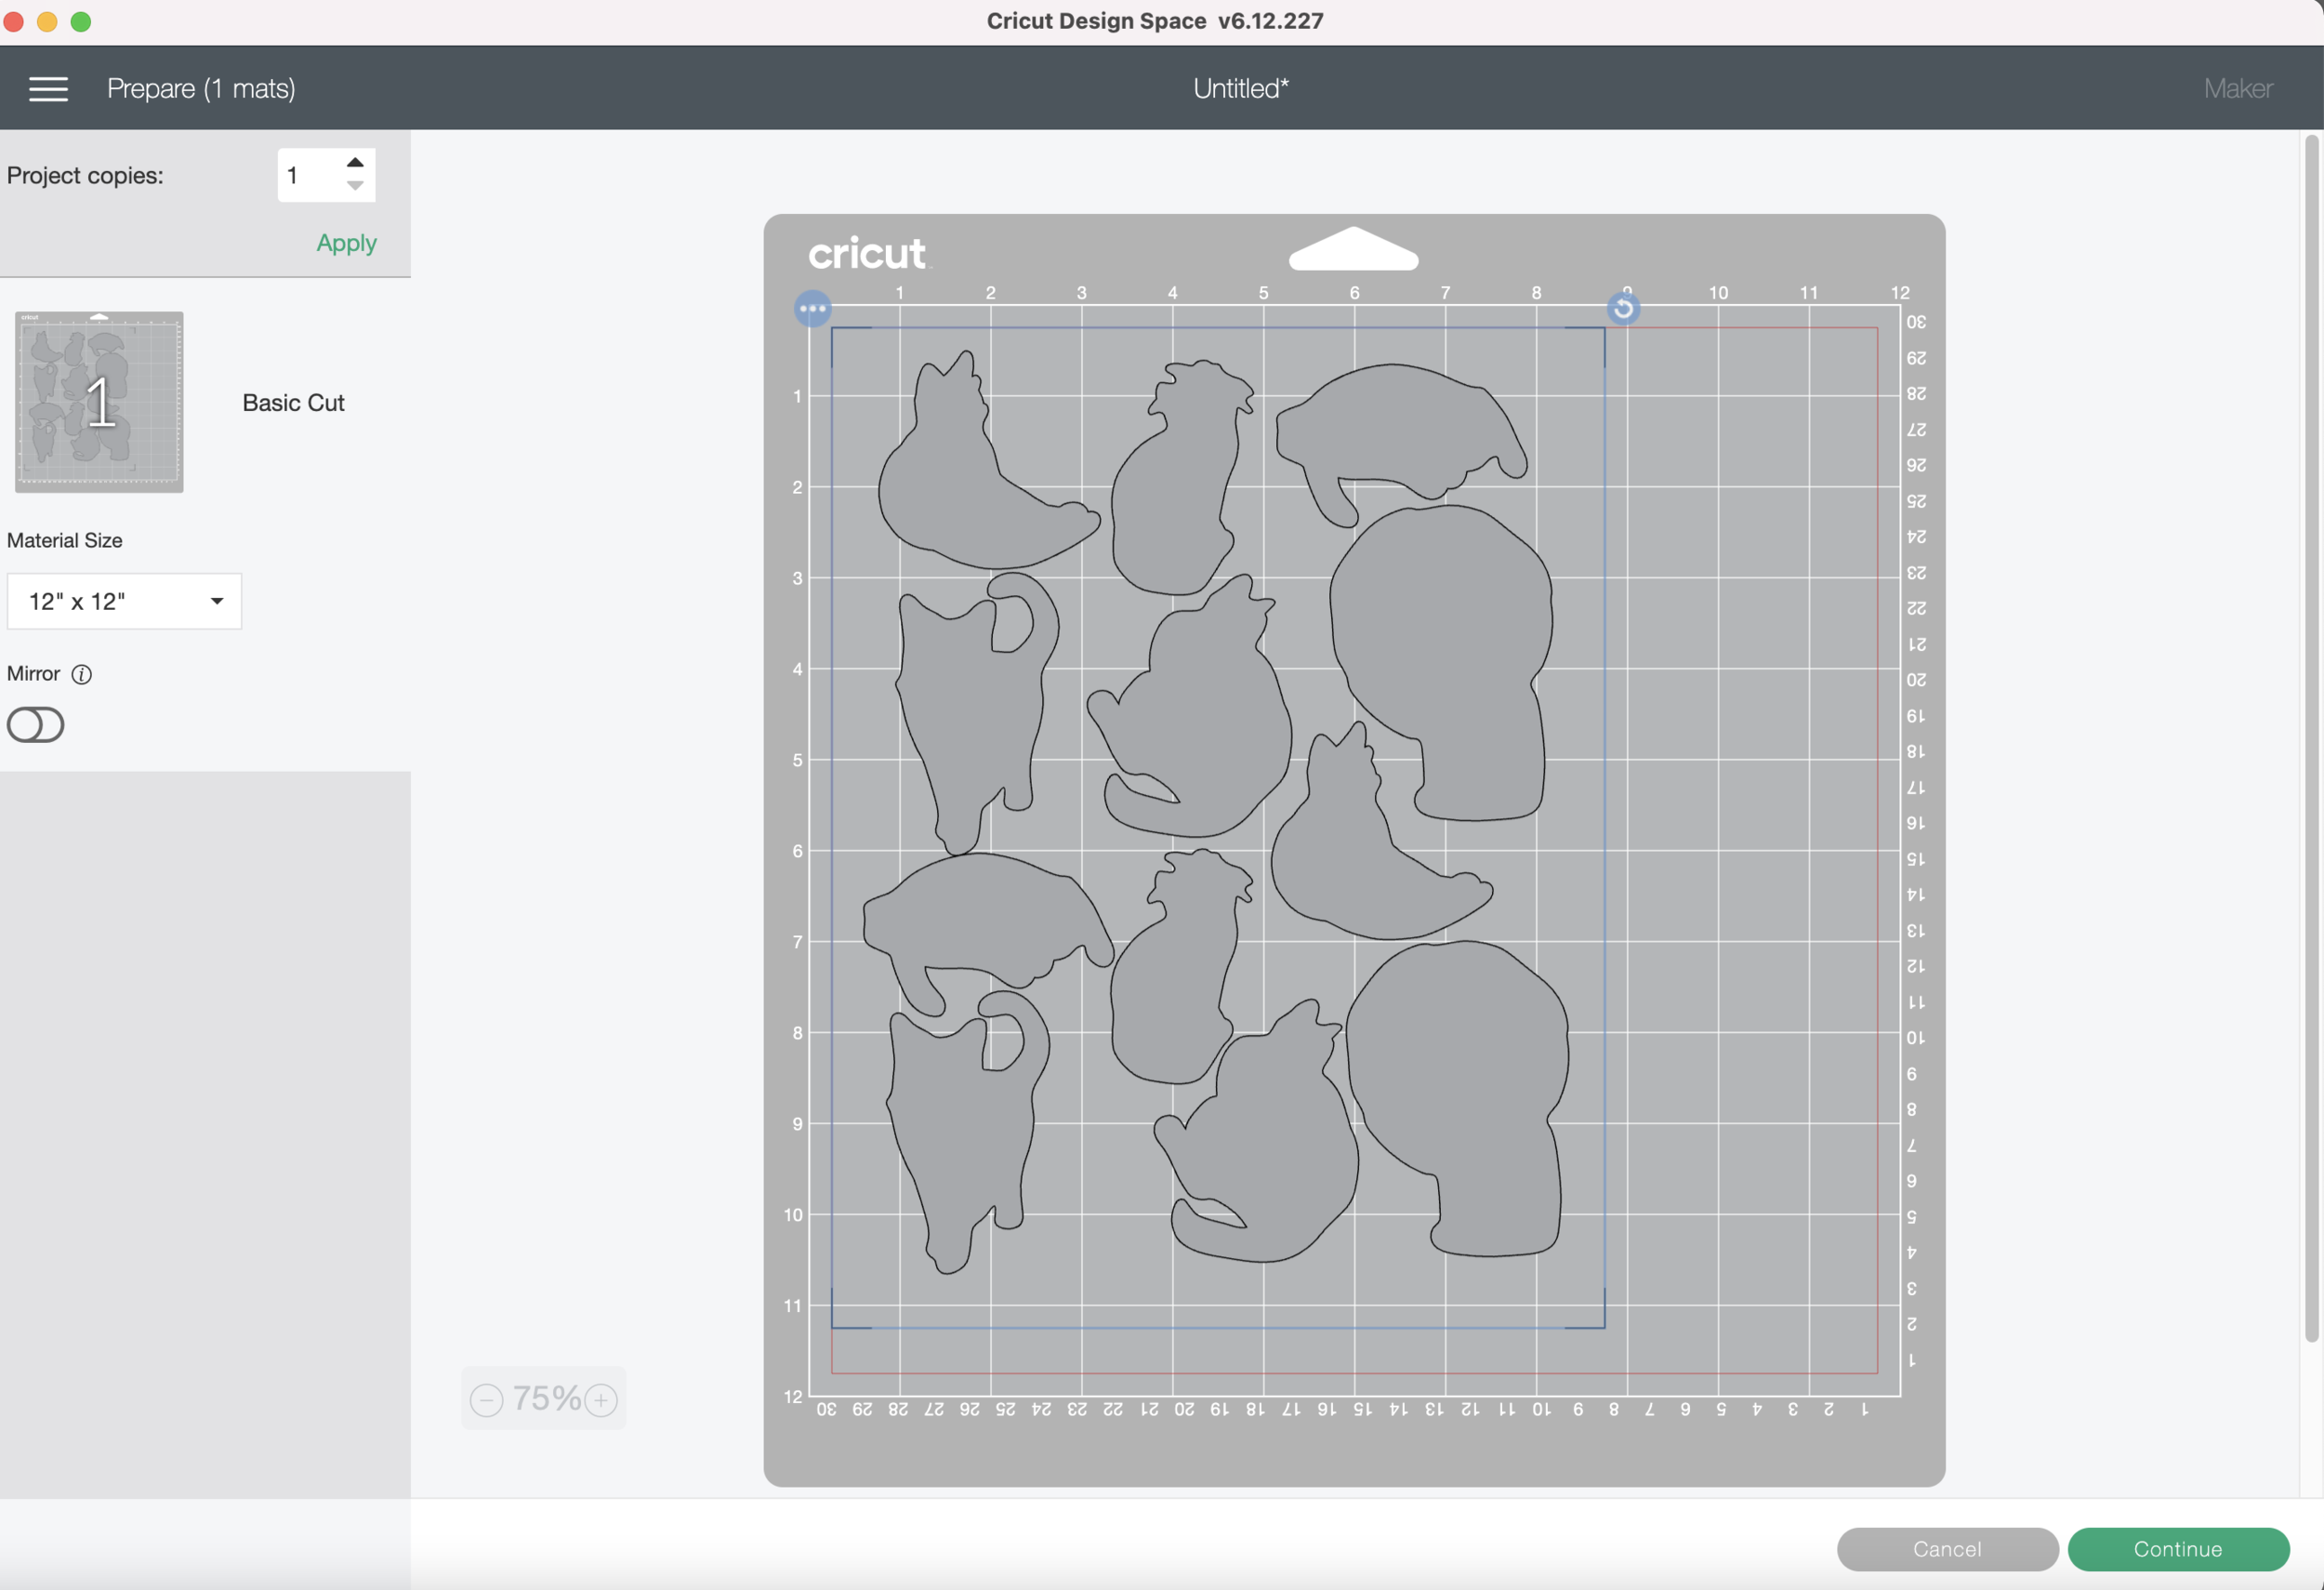
I select Copy Paper and Default pressure for my material settings.
Now I carefully load my mat into the machine like we practiced last week, and press GO!!
After the machine is done cutting, load your mat and let’s check the results!
So on my first attempt, my paper is placed just a hair too high up on the mat. So for my next try I’m going to try to do a better job aligning the bottom edge of my paper to the bottom line that’s drawn on the mat.

My 2nd attempt is much better! Remember it’s never going to be absolutely perfect, there are so many variables that go into this process and there will always be some level of human error. But it’s up to you how much time and effort you want to spend trying to perfect your cuts. Also, the more you do it, the better you’re going to become.

Since the offset on my actual stickers will be white, I’m ok with my second attempt. I’m really going to focus on lining up my paper along the bottom line on my mat for my future cuts.

If you are doing a colored offset, make sure you add some bleed around the edges so if it cuts slightly off there won’t be any white showing. Also, a wider offset will make a slightly off cut less noticeable.
Next week we’ll print on the actual sticker paper and cut some stickers!