Hi Everyone!
This week I’m going to share a fun little project you can make with your WRMK Foil quill, black shrink plastic, and a single line SVG file.
Supplies:
(Links to items below may be affiliate links)
Single line SVG file (I will be using one from my Celestial collection)
WRMK Medium tip Foil quill (the mint one)
Silhouette or Cricut machine that is compatible with the WRMK Foil Quill (I will be using my Portrait 3)
Deep cut blade (I will be using my CB09 holder with a 60 degree blade)
Heat gun or toaster oven
Let’s get started!
I’ve got my Single line SVG file opened in Silhouette Studio. I want to make this into a round pin that will end up being approximately 1 inch in diameter.
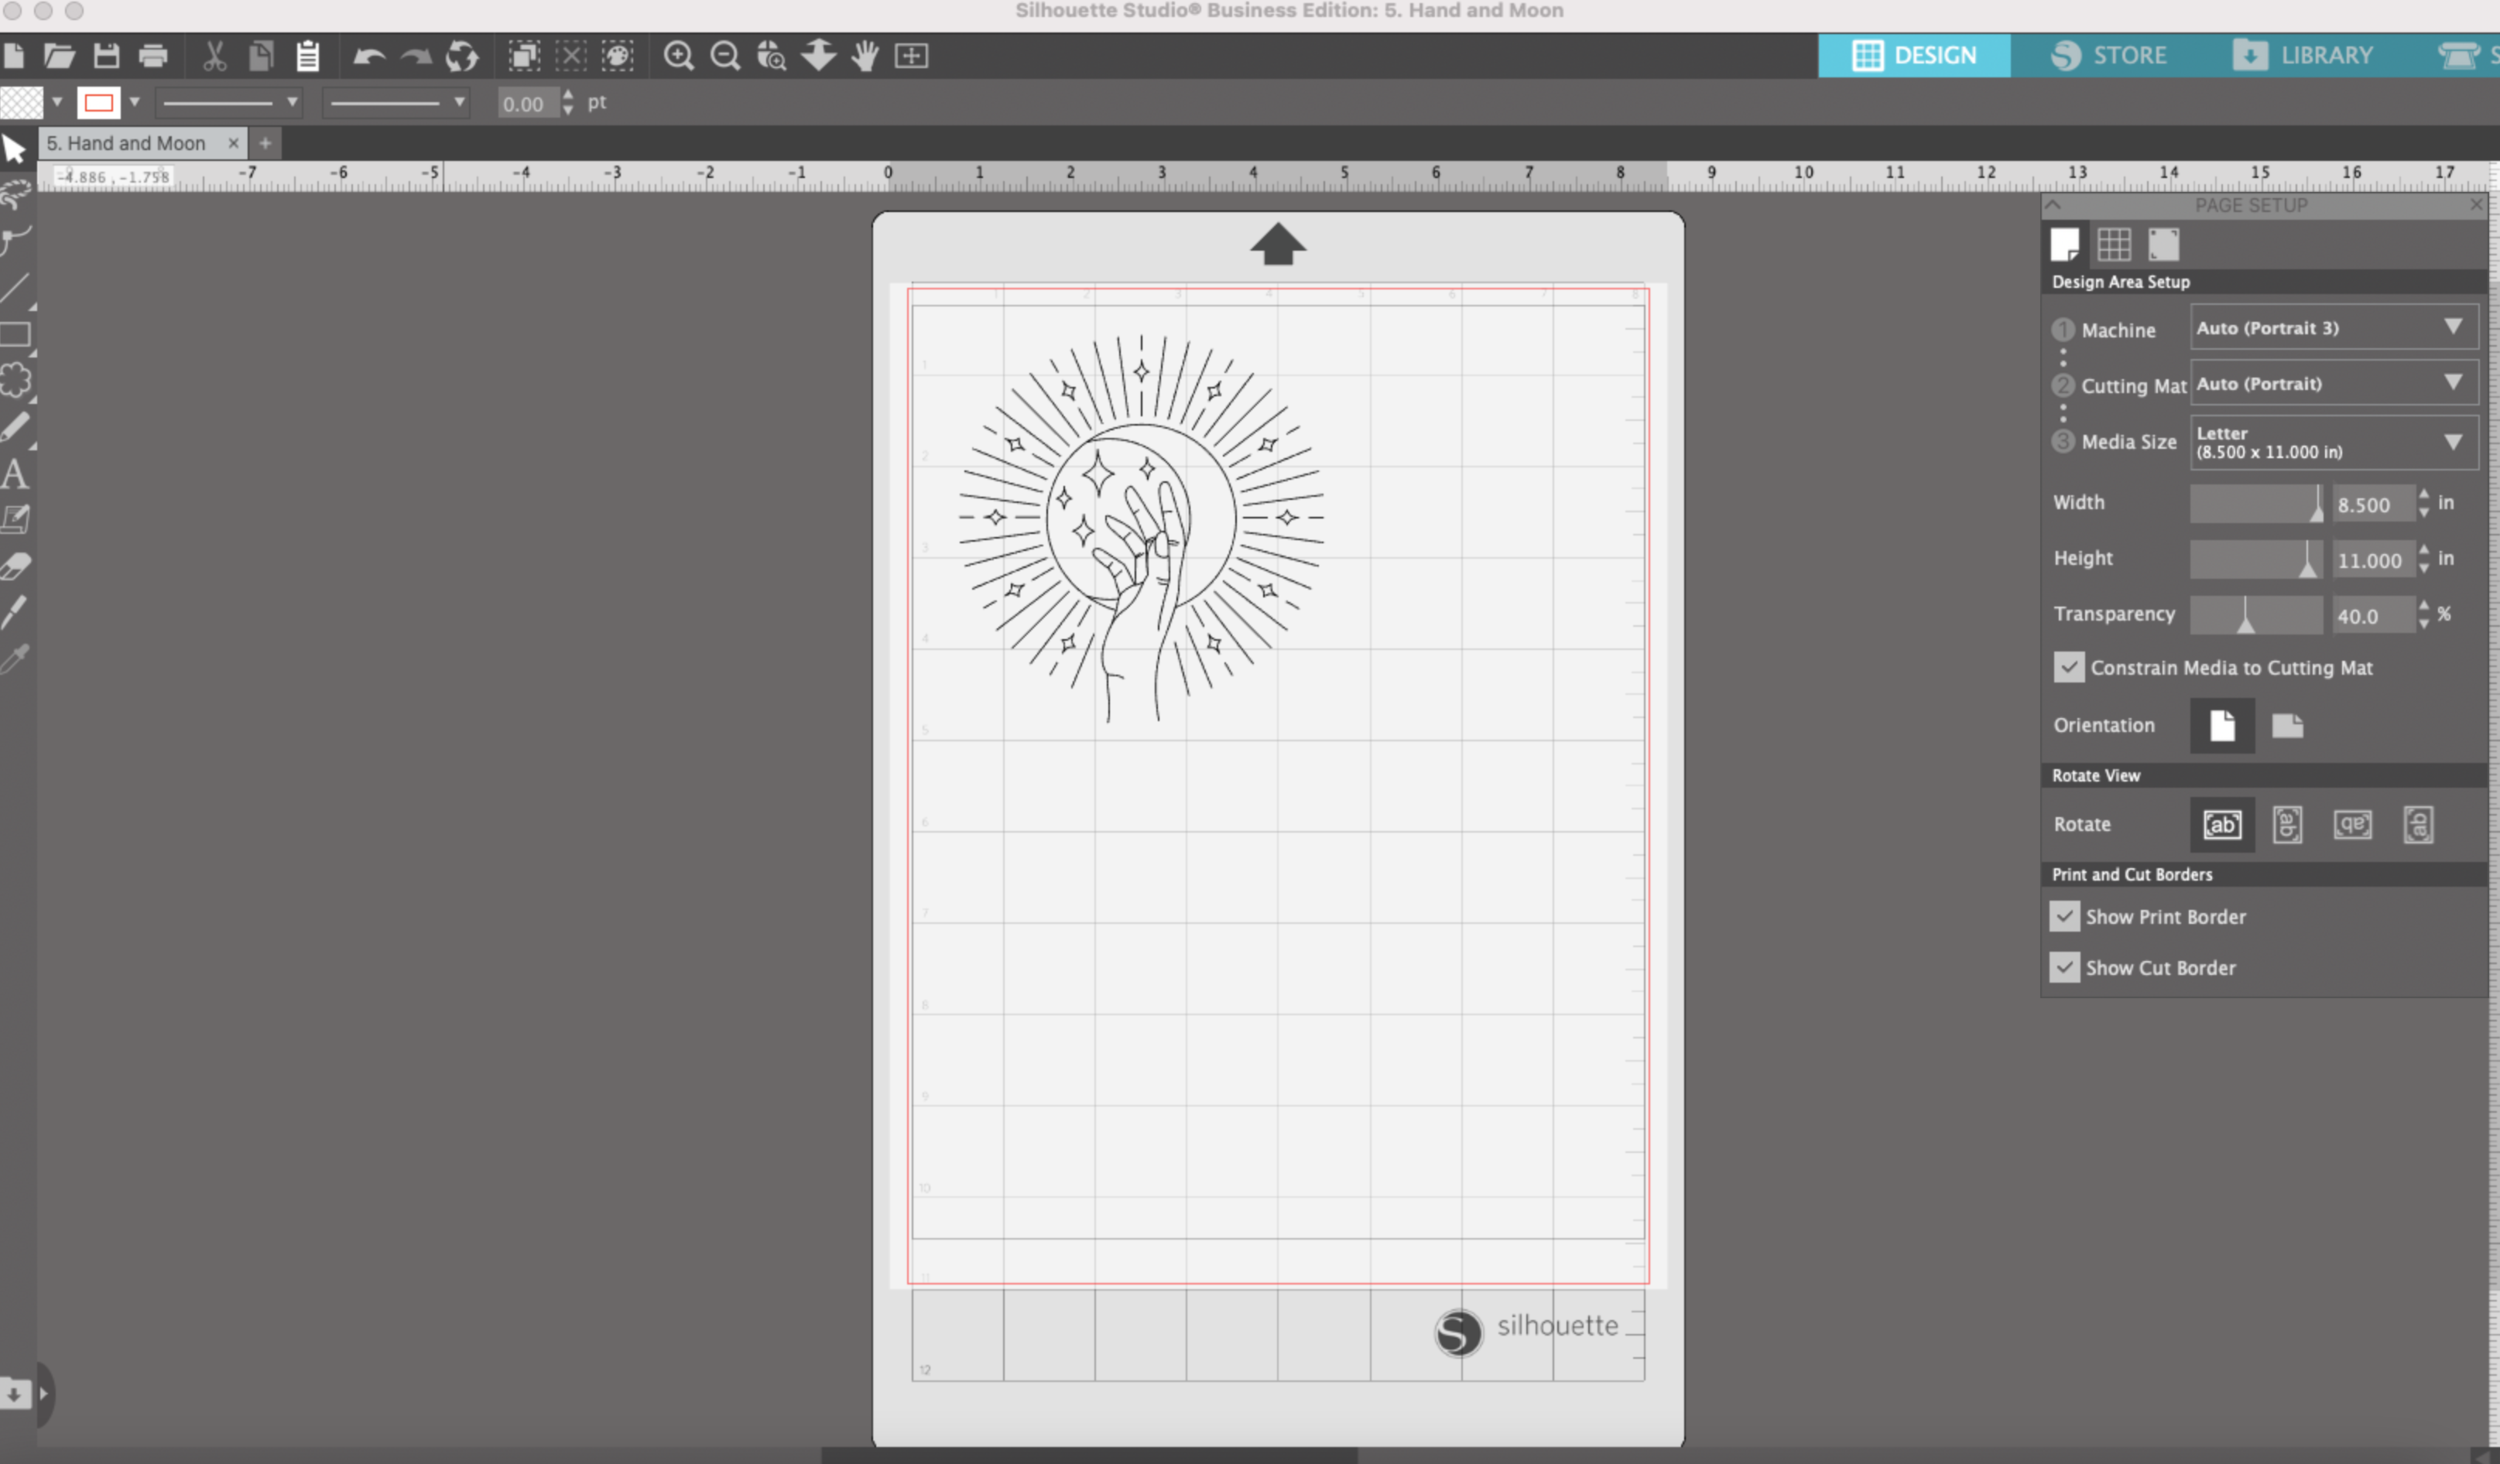
I will draw a 2” circle since my shrink plastic will shrink about 50 percent.
Now I need to scale down my art to fit inside the circle.
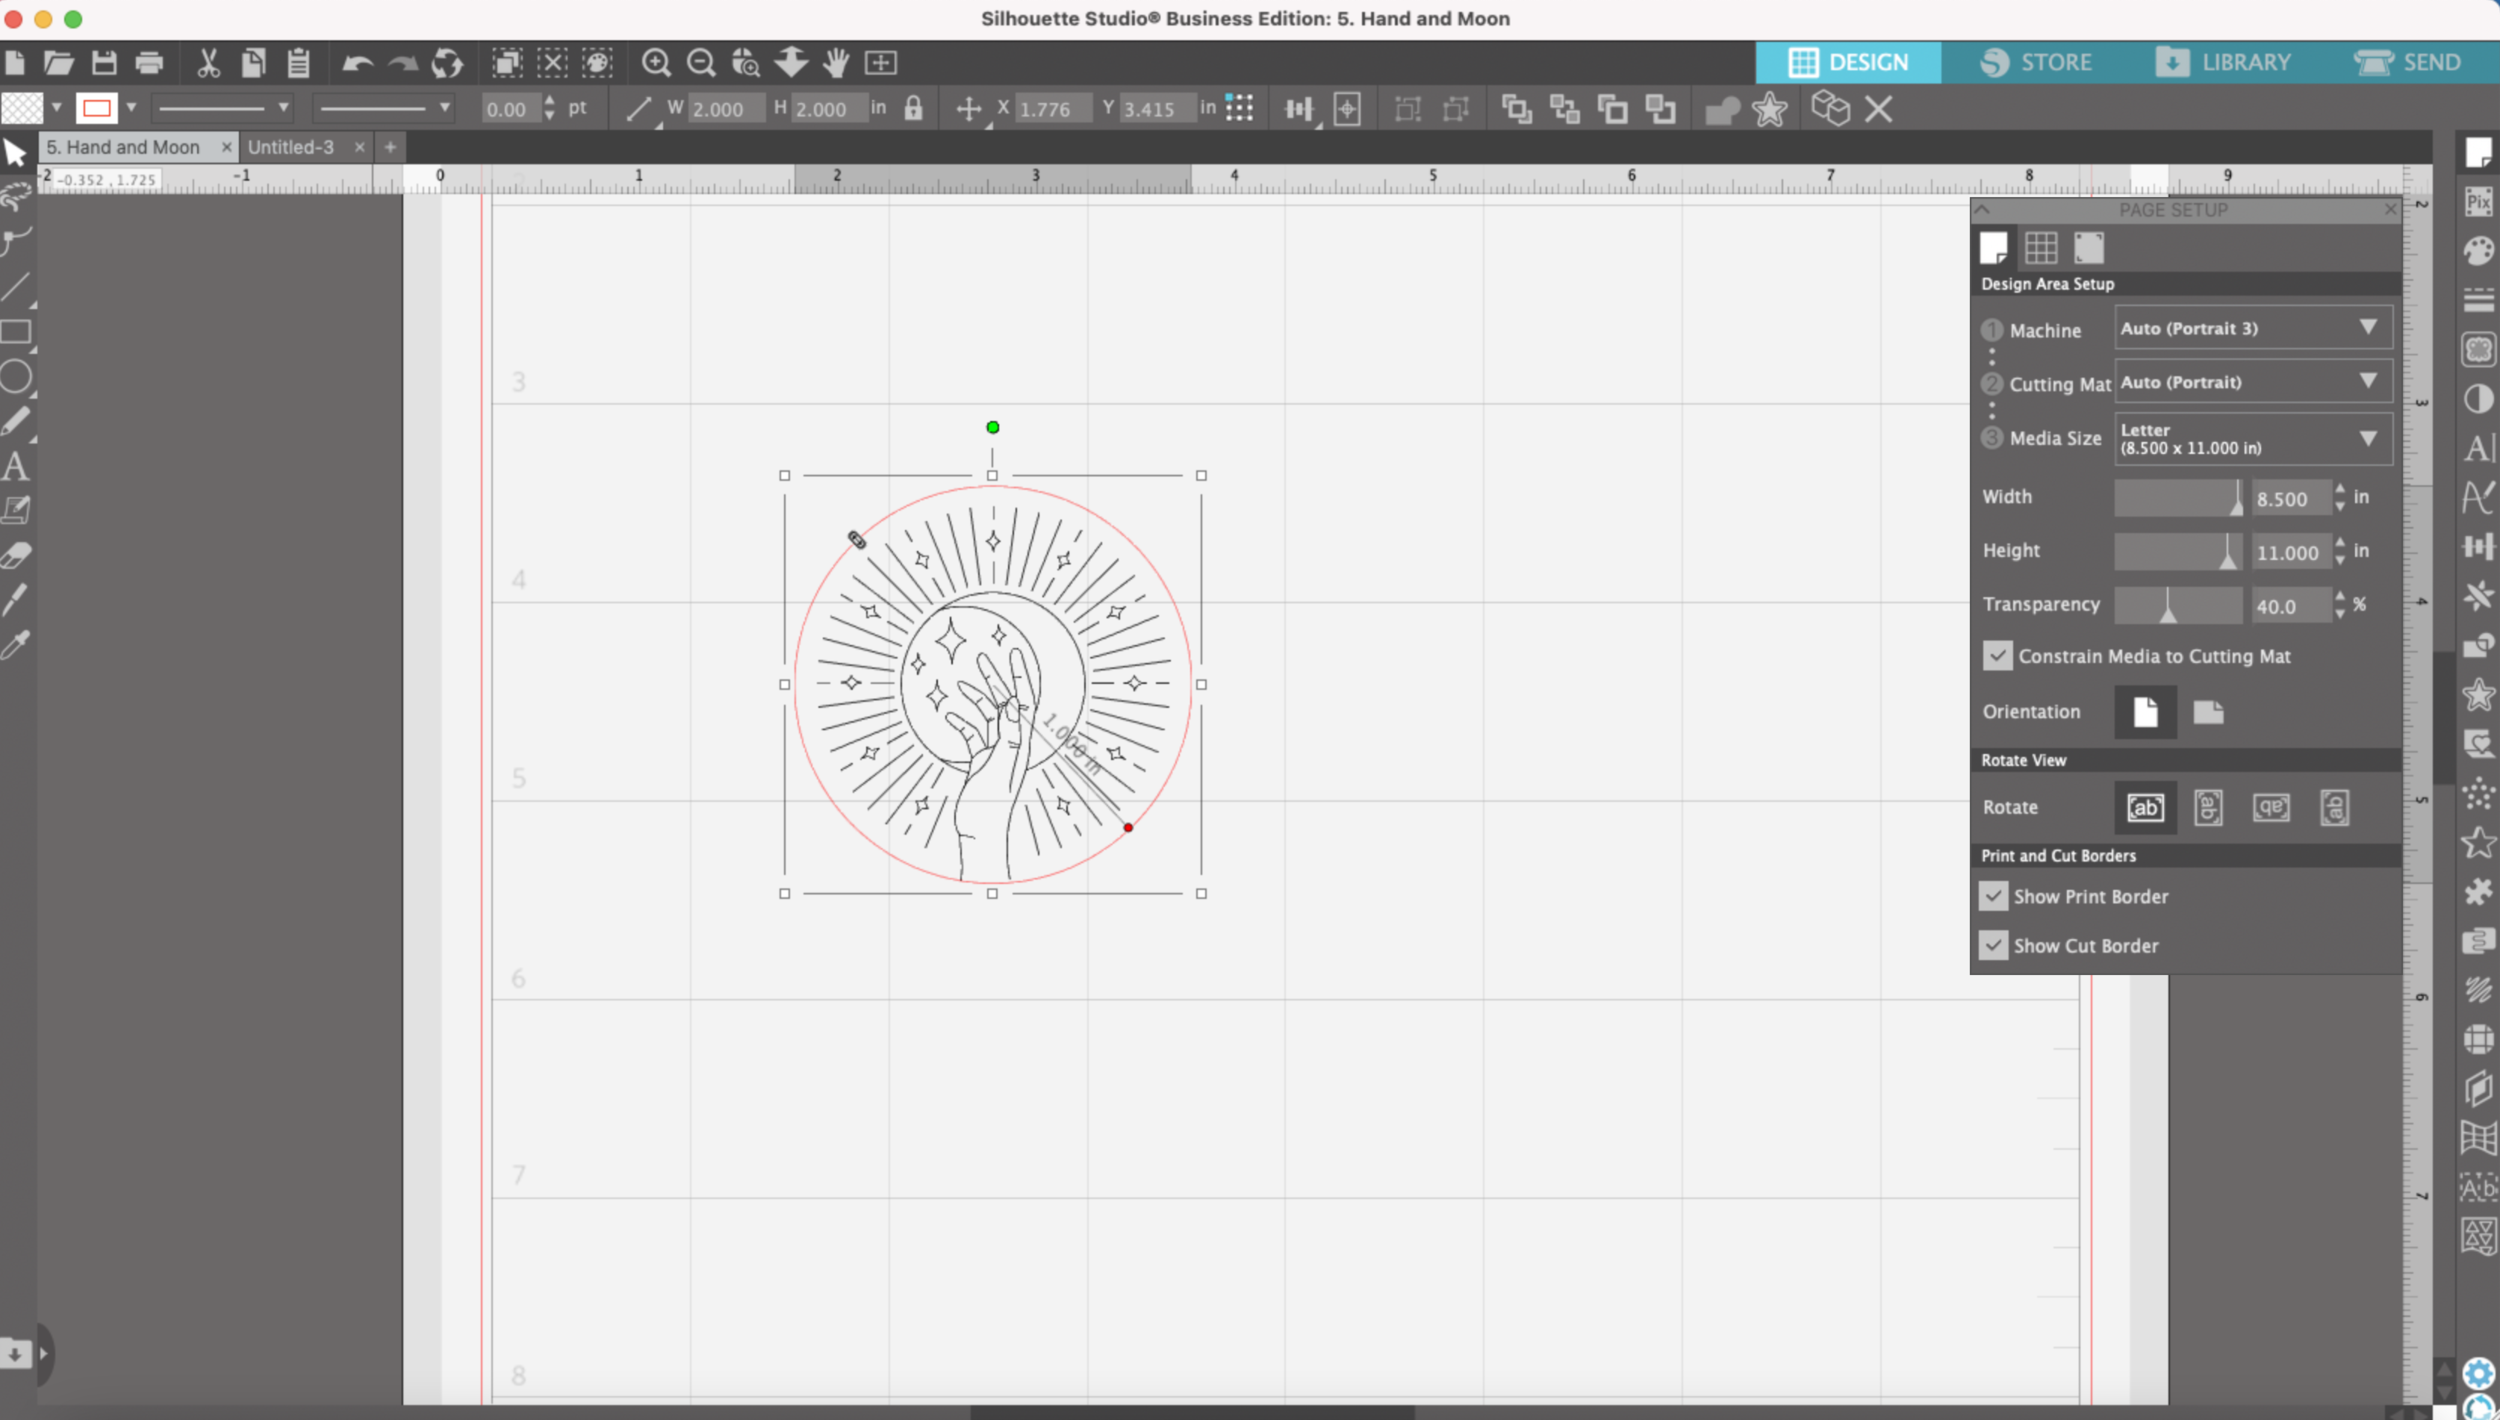
I’m going to draw and cut this by line color, so I will be keep my artwork in black and the circle in red.
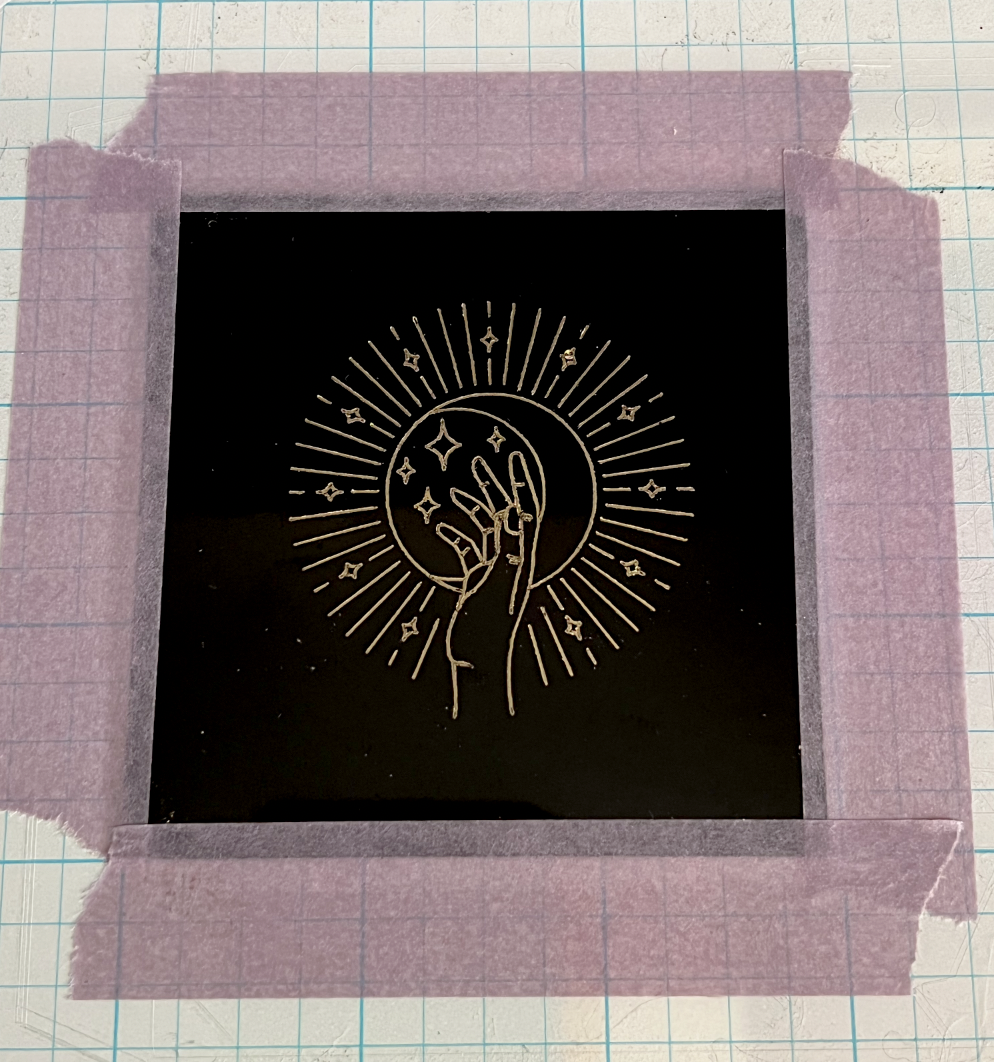
I cut down my black shrink plastic sheet to a 2.75 x 2.75 inch square. I also cut down my foil to a smaller square.
We’re going to do the foiling first. I’m going to place my back shrink plastic a little further down on the mat so it’s easier to remove the foil once it’s done.

Make sure everything is taped down well to your mat so nothing shifts while foiling and cutting.
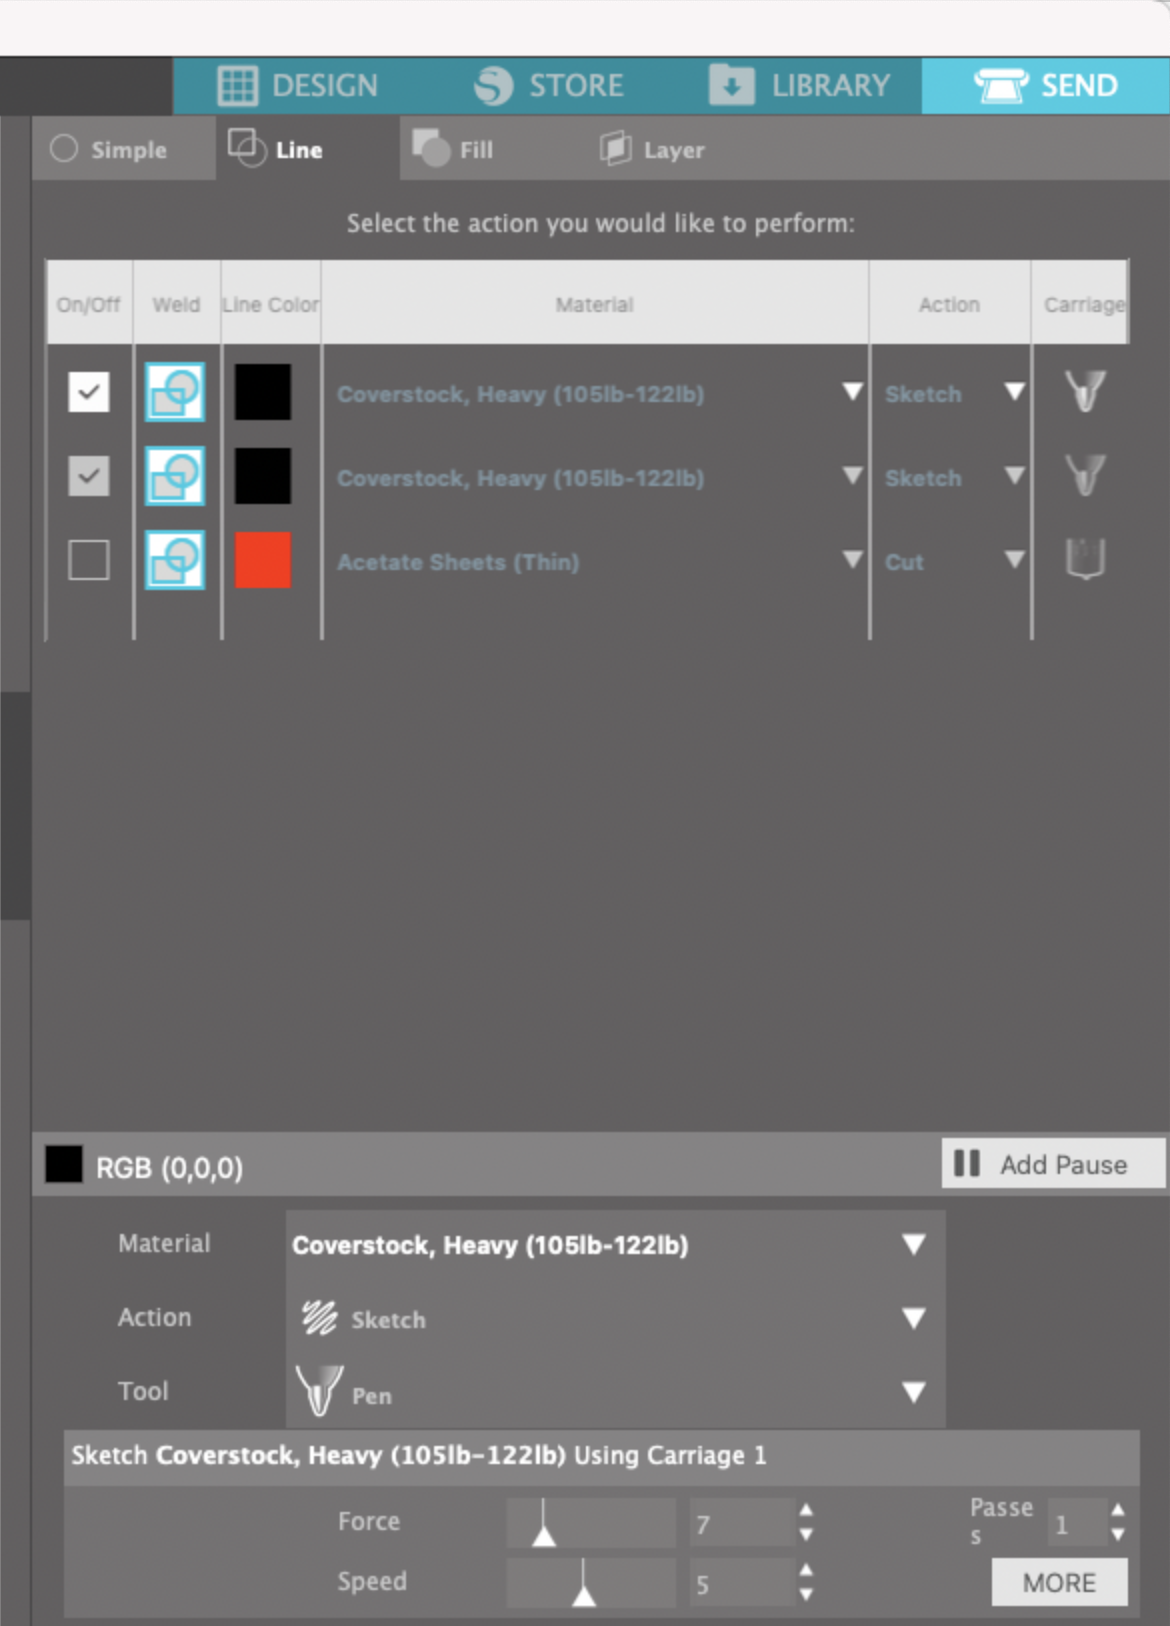
I’m using the Medium foiling tip. My Material is set to Coverstock, Heavy. The action is set to Sketch, tool is set to Pen. The force is set to 7 and speed is 5.
After it’s done foiling, do NOT remove the mat! Carefully remove the foil.
Now it’s time to cut. I’m using my CB09 blade holder with a 60 degree blade. I selected Acetate for the material. Tool is the Deep Cut blade, depth is 10, force is 33, speed is 3. Number of Passes is set to 10 which is the most Silhouette Studio will allow.
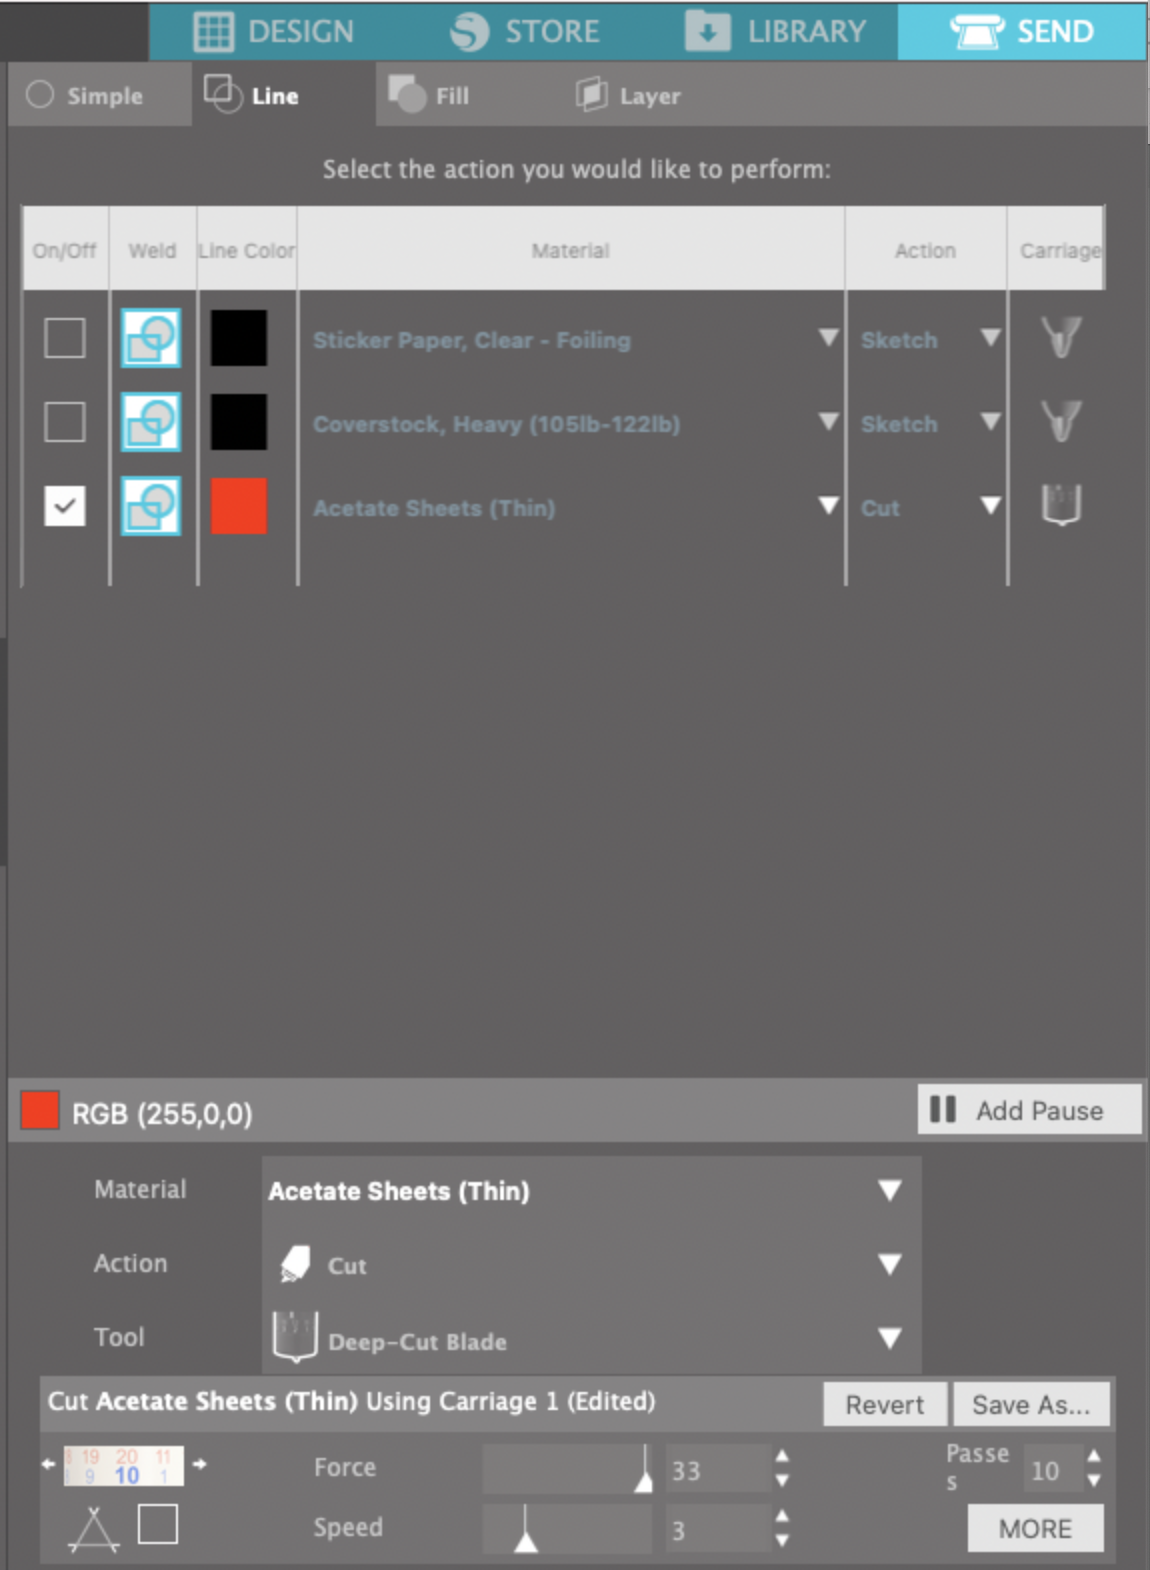
After the first 10 passes, do not remove the mat from the machine. Carefully dust of any little plastic particles and send it through again for another 10 passes.
Once it’s done with the 2nd set of ten passes, do NOT remove the mat. Dust off any little plastic particles again. You can carefully lift a corner of the shrink plastic off the mat to see if it’s close to be cut through. Just make sure you don’t accidentally shift the placement on the mat.
I typically have to make 30-40 total passes, even then it’s not always cut all the way through, but it’s enough I can carefully pop it out.
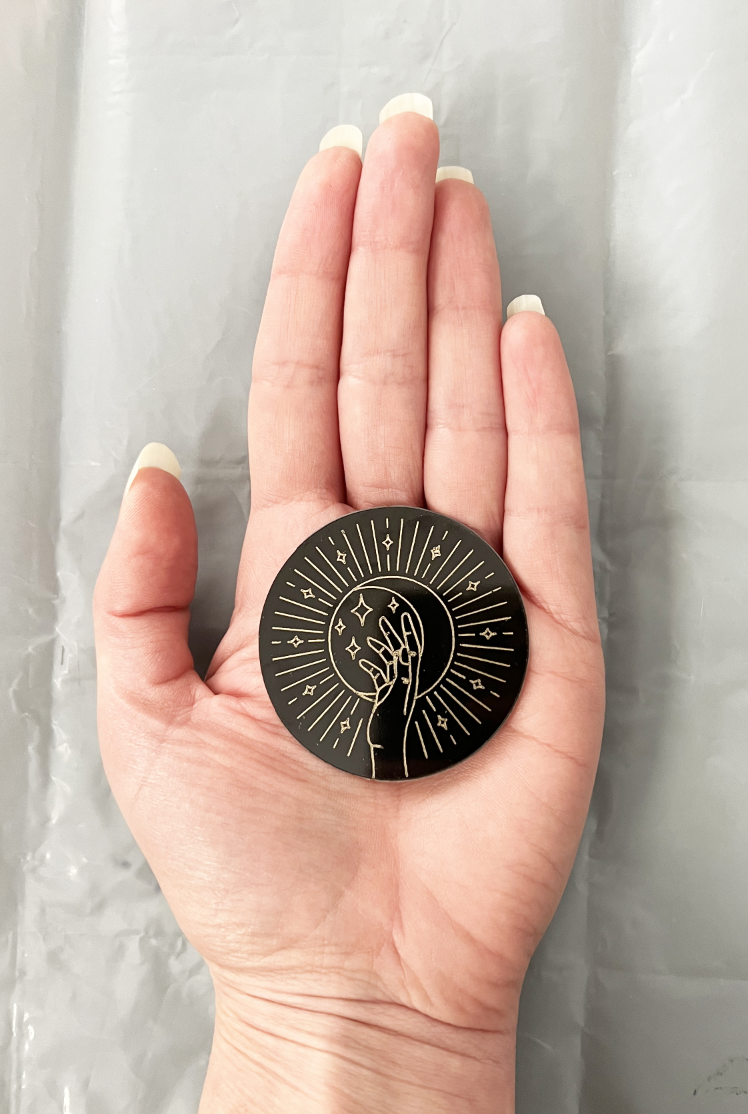
Here it is before shrinking so you can get an idea of the size difference.
Now it’s time to shrink it! I’m going to be using my heat gun and little metal spatula on some teflon sheeting. But you can also follow the instructions that come with your shrink plastic and do it in a toaster oven.

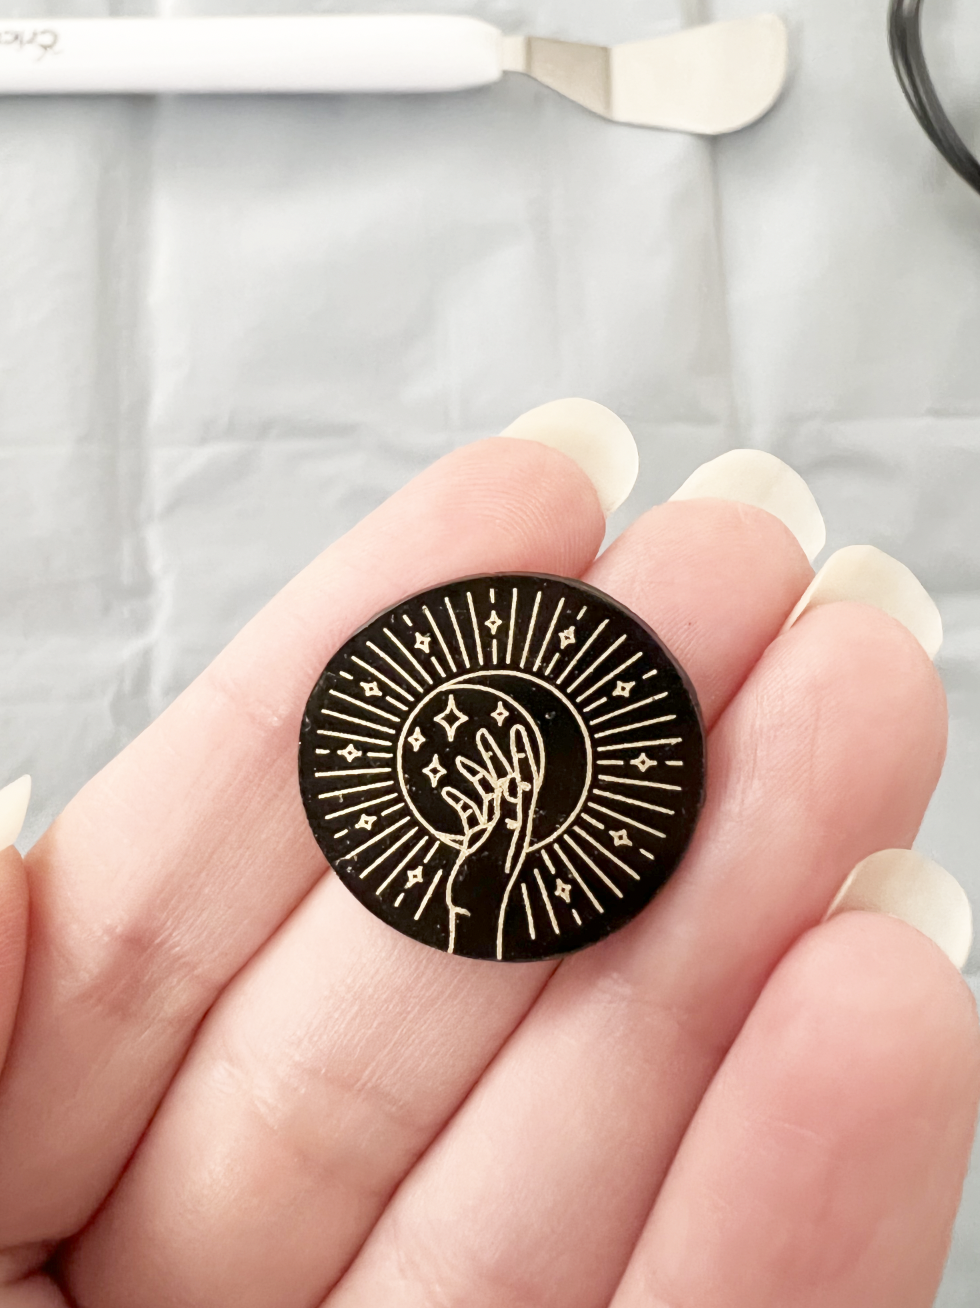
Once it’s done shrinking, while the plastic is still warm, you can use a metal spatula or other flat object to help flatten your piece.
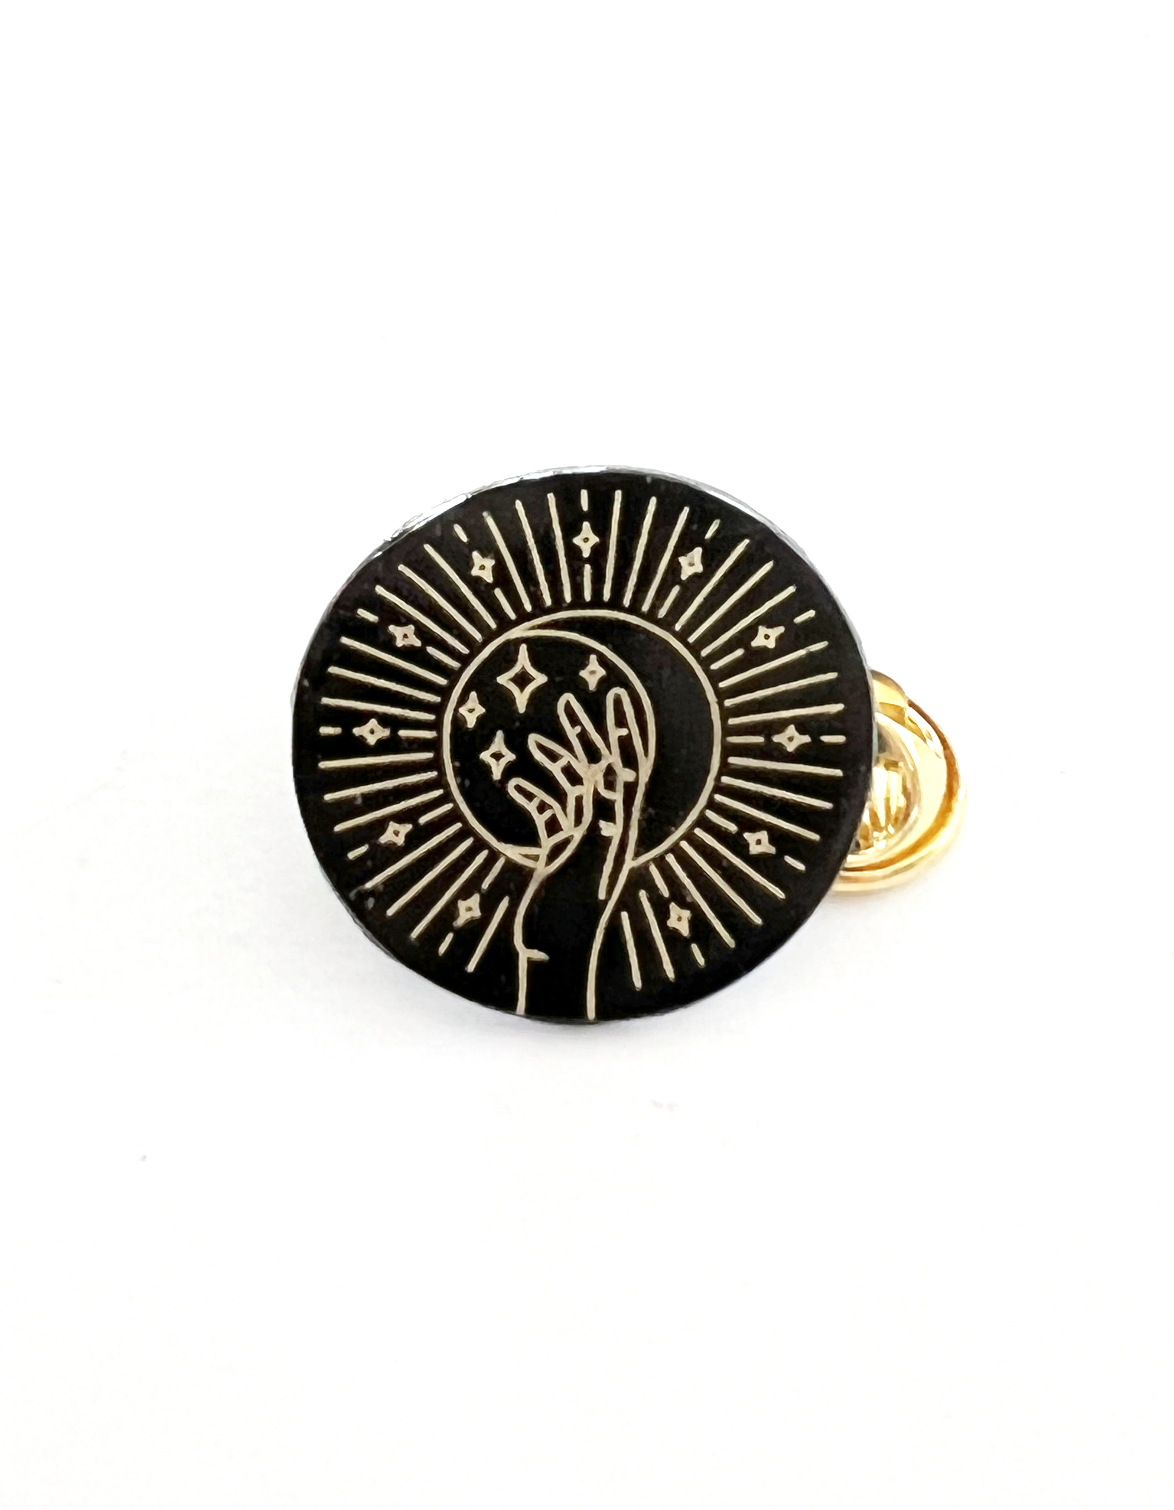
The shrink plastic doesn't shrink perfectly even, so my circle is now a little lopsided, but it’s not too bad. I love how the gold foil keeps all the little details and still adds a little bit of shine. I haven’t noticed the gold foil scratching off, so it’s up to you if you want to apply some sort of sealer on top.
I’m going to glue my pin onto the back ,and now it’s finished and ready to go on a jacket, a bag, a hat, or anywhere else you like to add pins!