Hi Everyone!
This week I’m going to make the same acrylic ornaments with foil on my Cricut Maker. It’s not quite as easy as my Portrait 3, but it is doable if you have Cricut instead of a Silhouette machine. I will be using my WRMK Foil Quill, the Cricut Foil Transfer tool does NOT work on acrylic.
Supplies:
(Links below may be affiliate links)
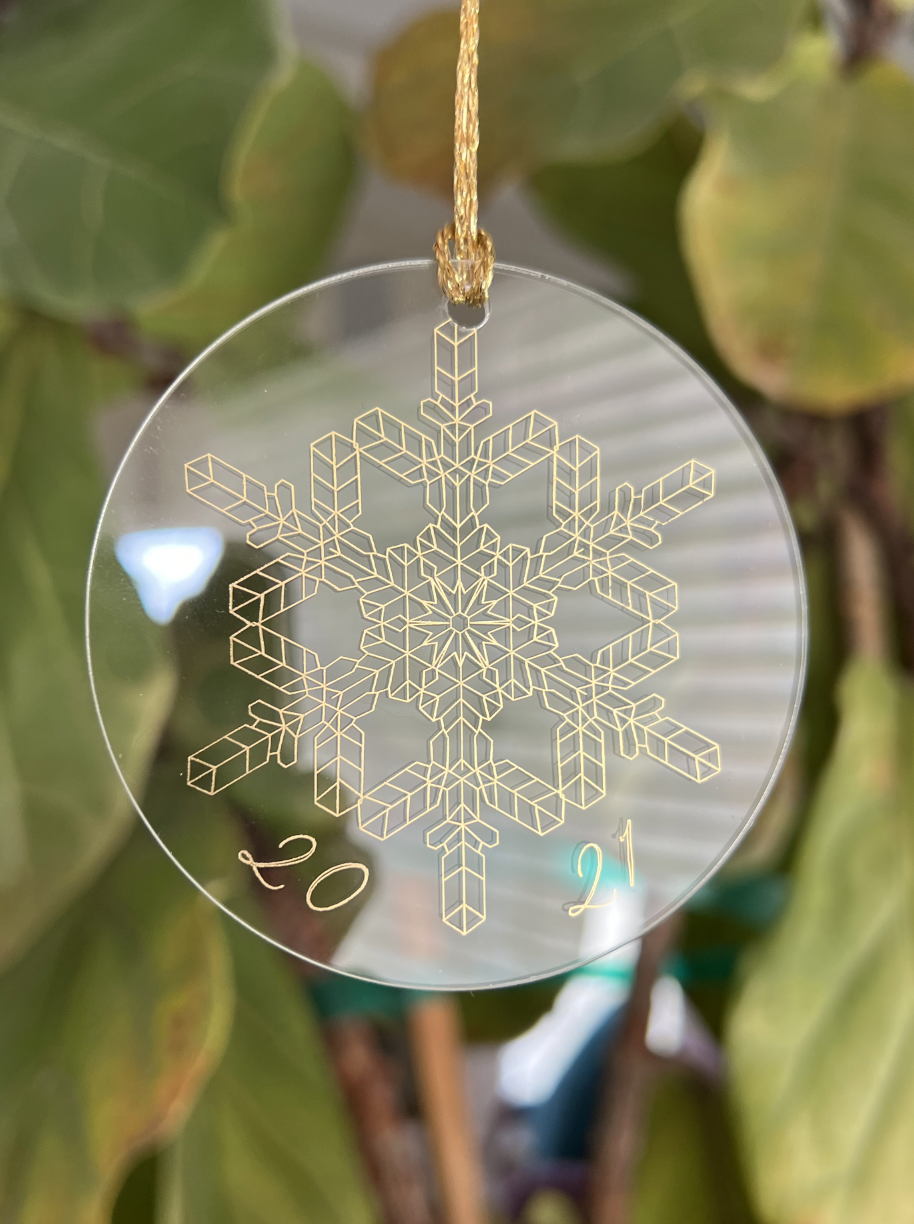
3 inch acrylic disc, 2mm thick
SVG Draw file (you can get my snowflake here)
WRMK Foil quill (medium tip) with C adapter
Gold heat reactive foil or other foil color of your choice
Cricut machine (I will be using my Maker)
Strong Grip Cutting Mat (the purple one)
Cricut pen (any color)
Chipboard template
Blue Painter’s tape or Washi Tape
9-12 inch length ribbon or twine for finished ornament
Let’s get started!
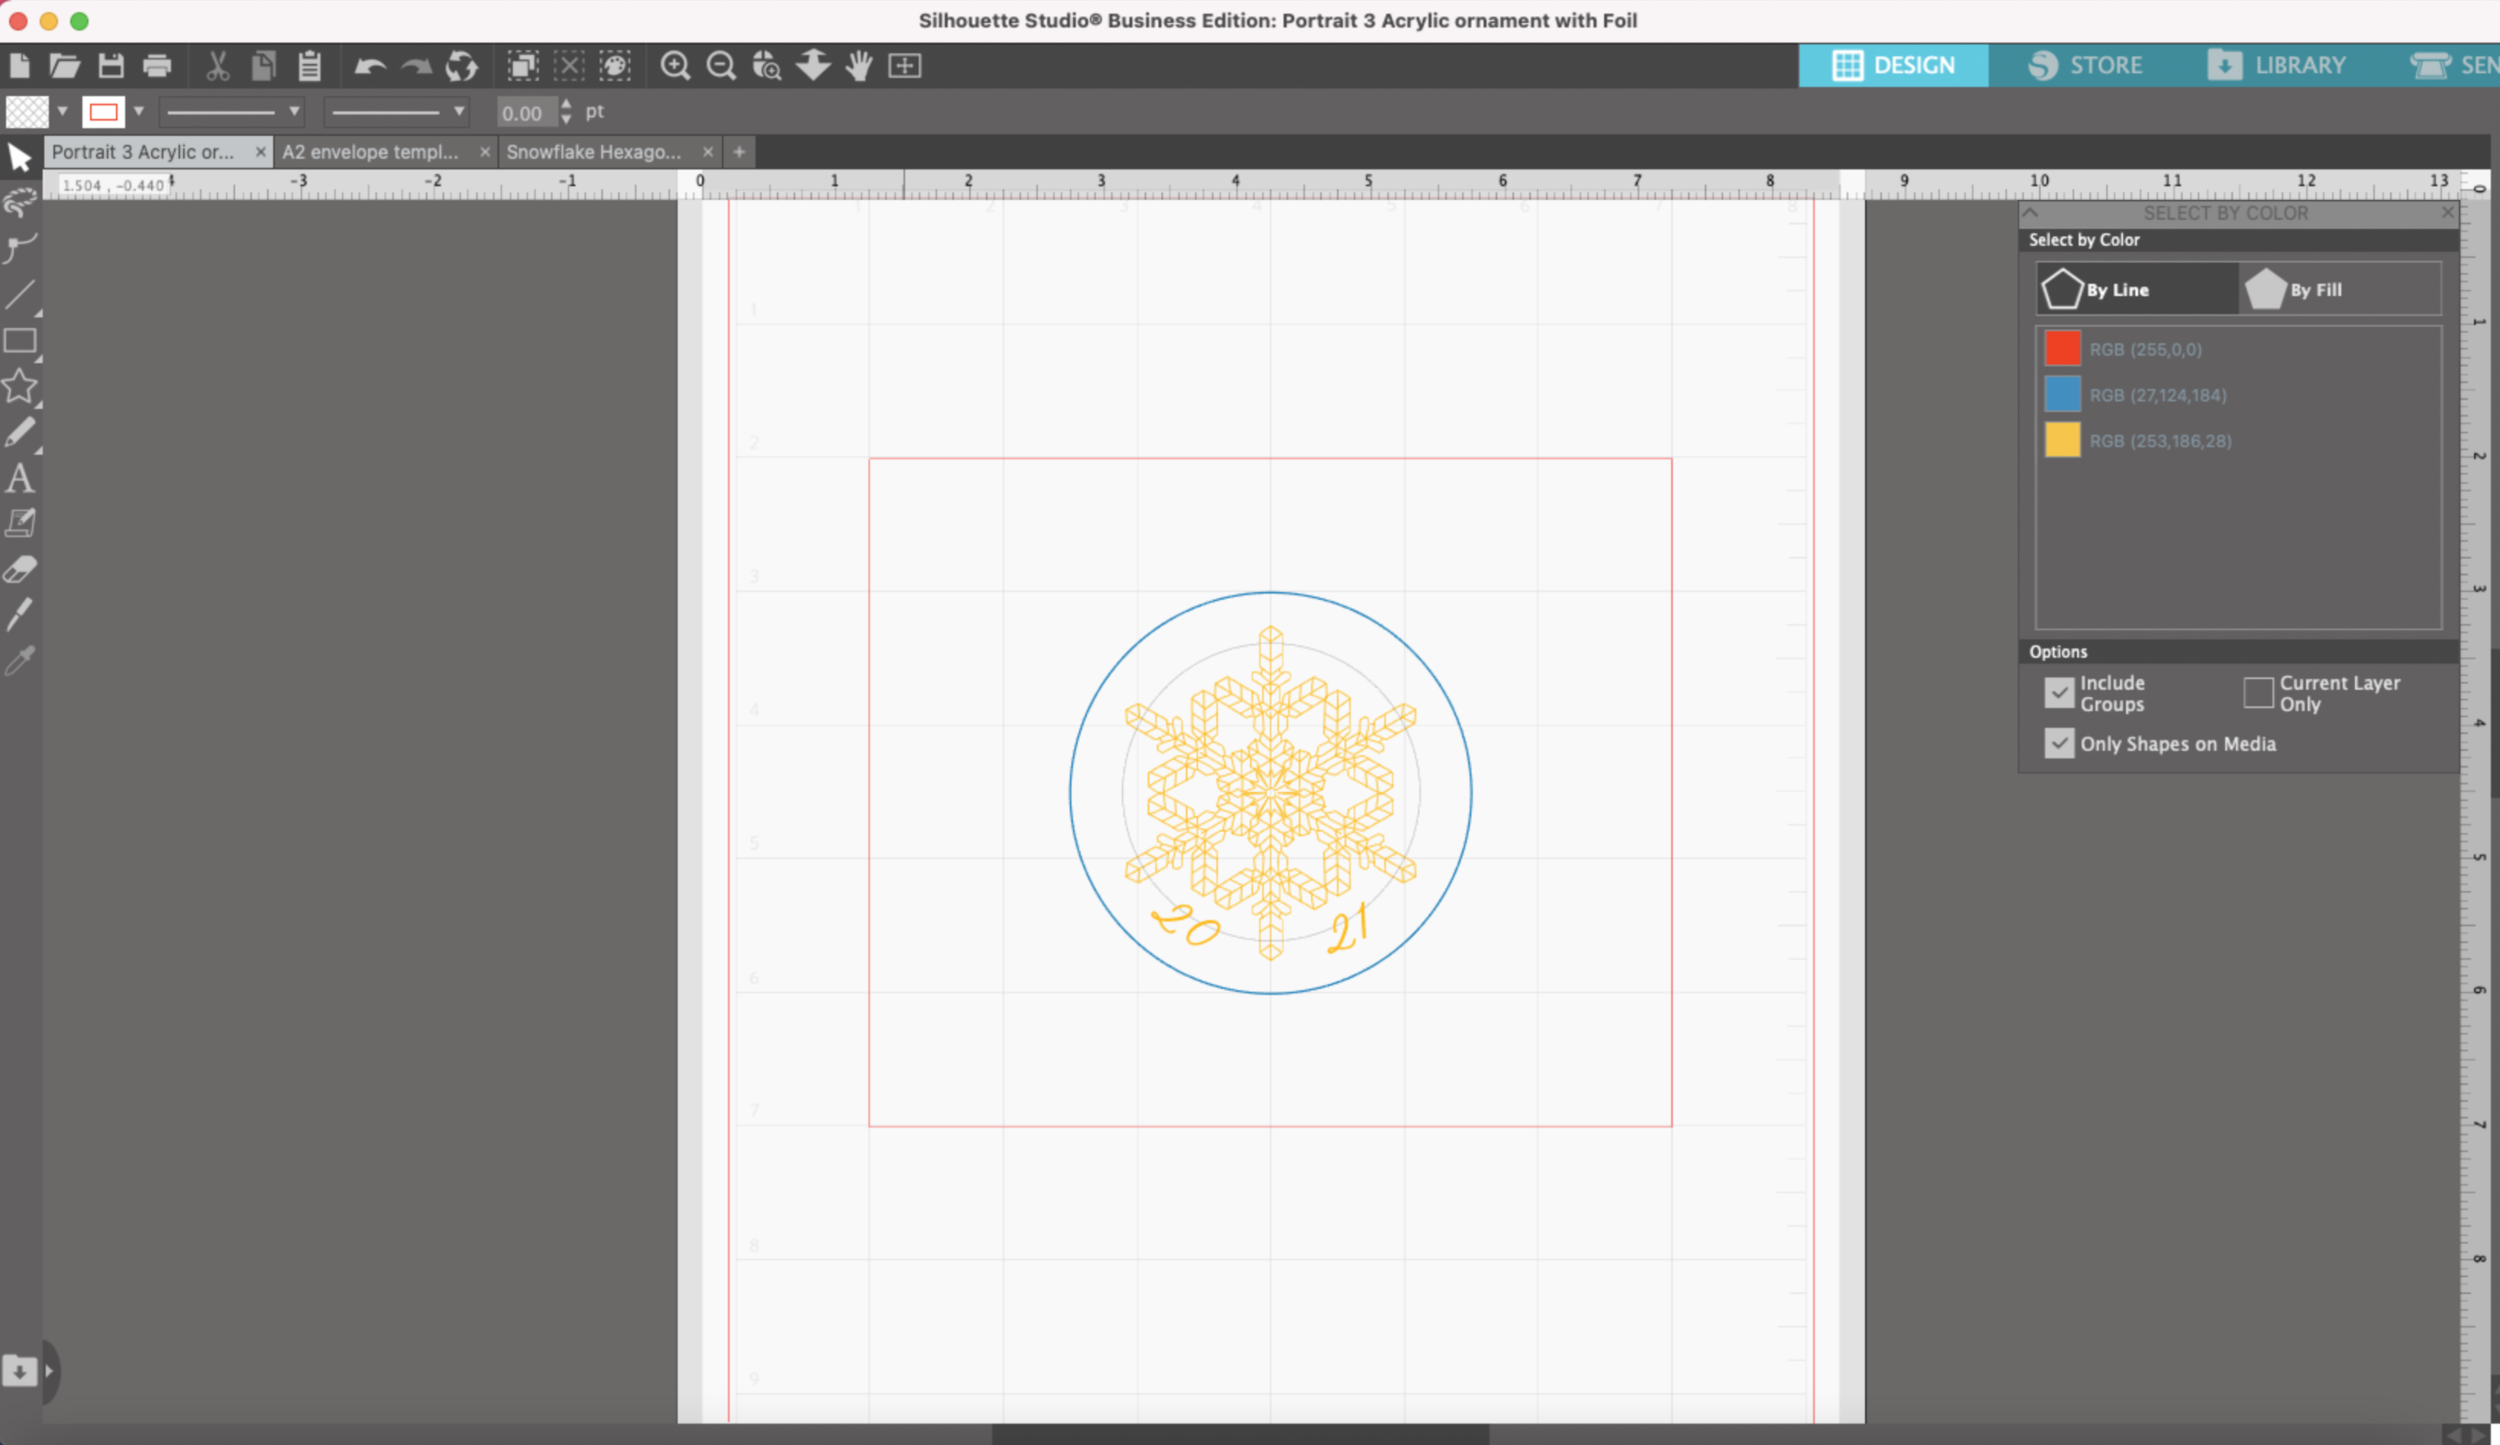
I exported my snowflake design that I made a few weeks ago from Silhouette Studio as an SVG so I can upload it into Cricut Design space.
Since I will be using my WRMK Foil Quill and it works as a pen in clamp A, I will be using the Cricut App on my iPad Pro. For some reason the app seems to handle detailed draw files better than the desktop version. I almost always get the “Wow that’s a big project!” yellow bar when I try to use one of my draw files in the desktop version.
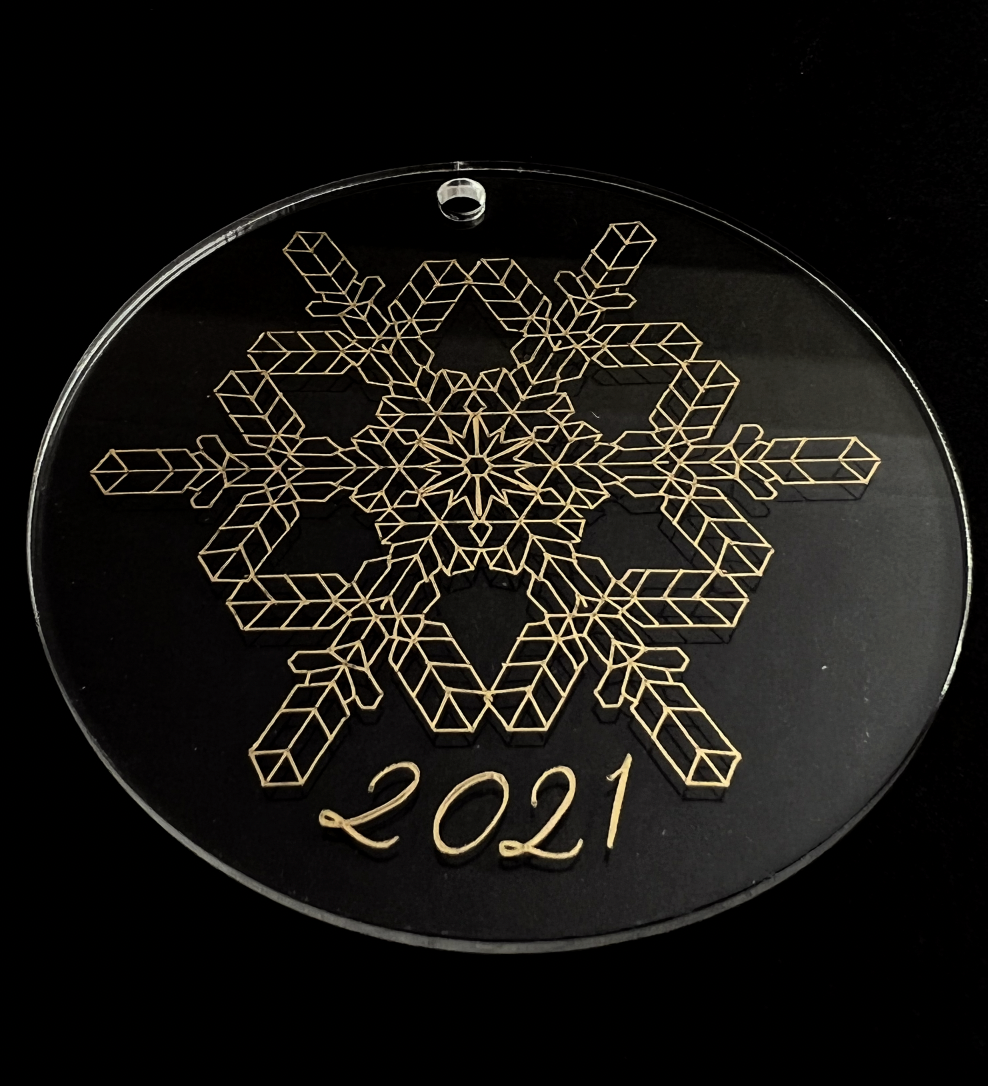
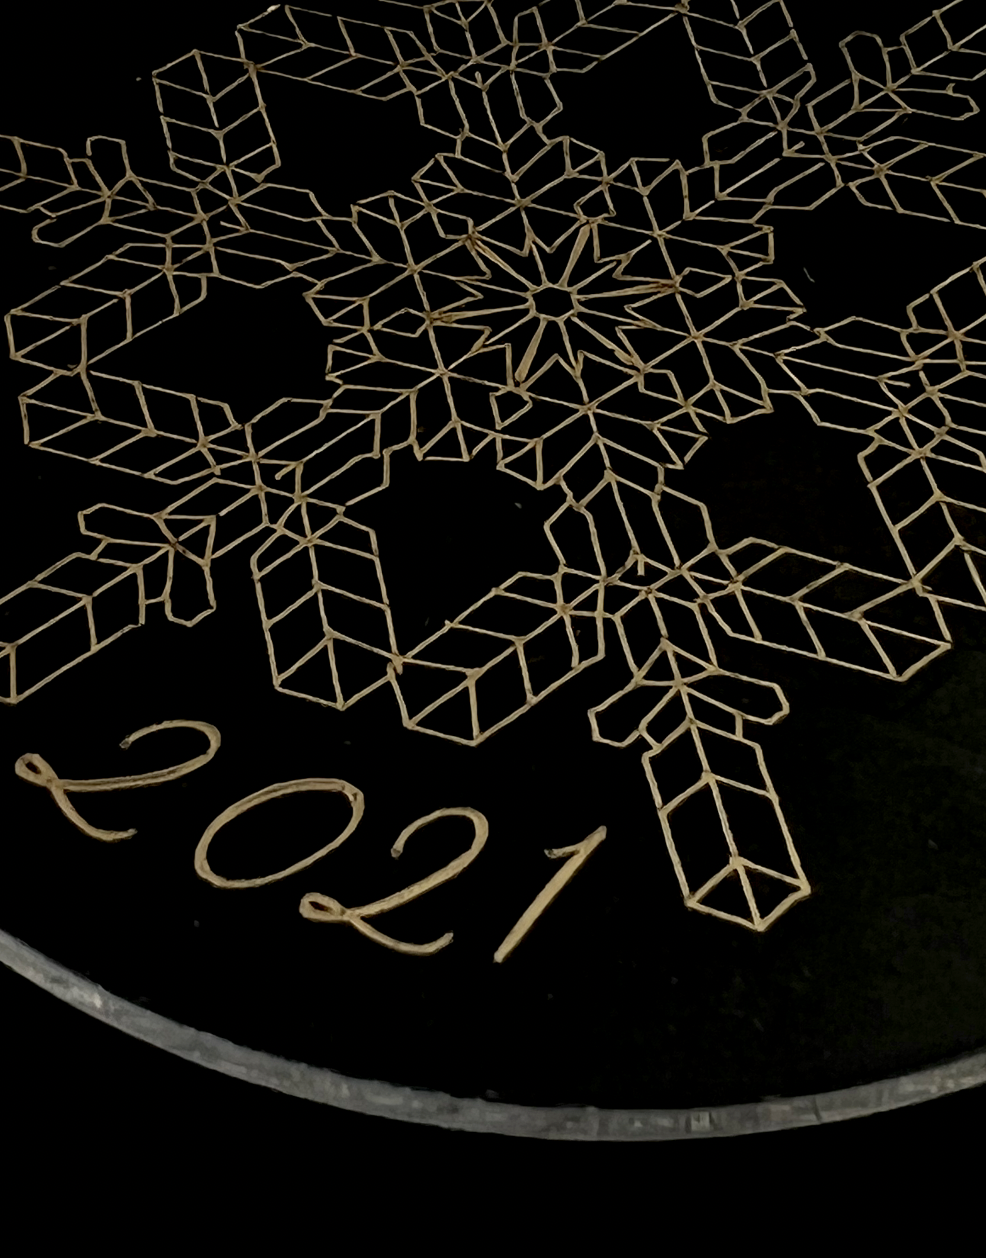
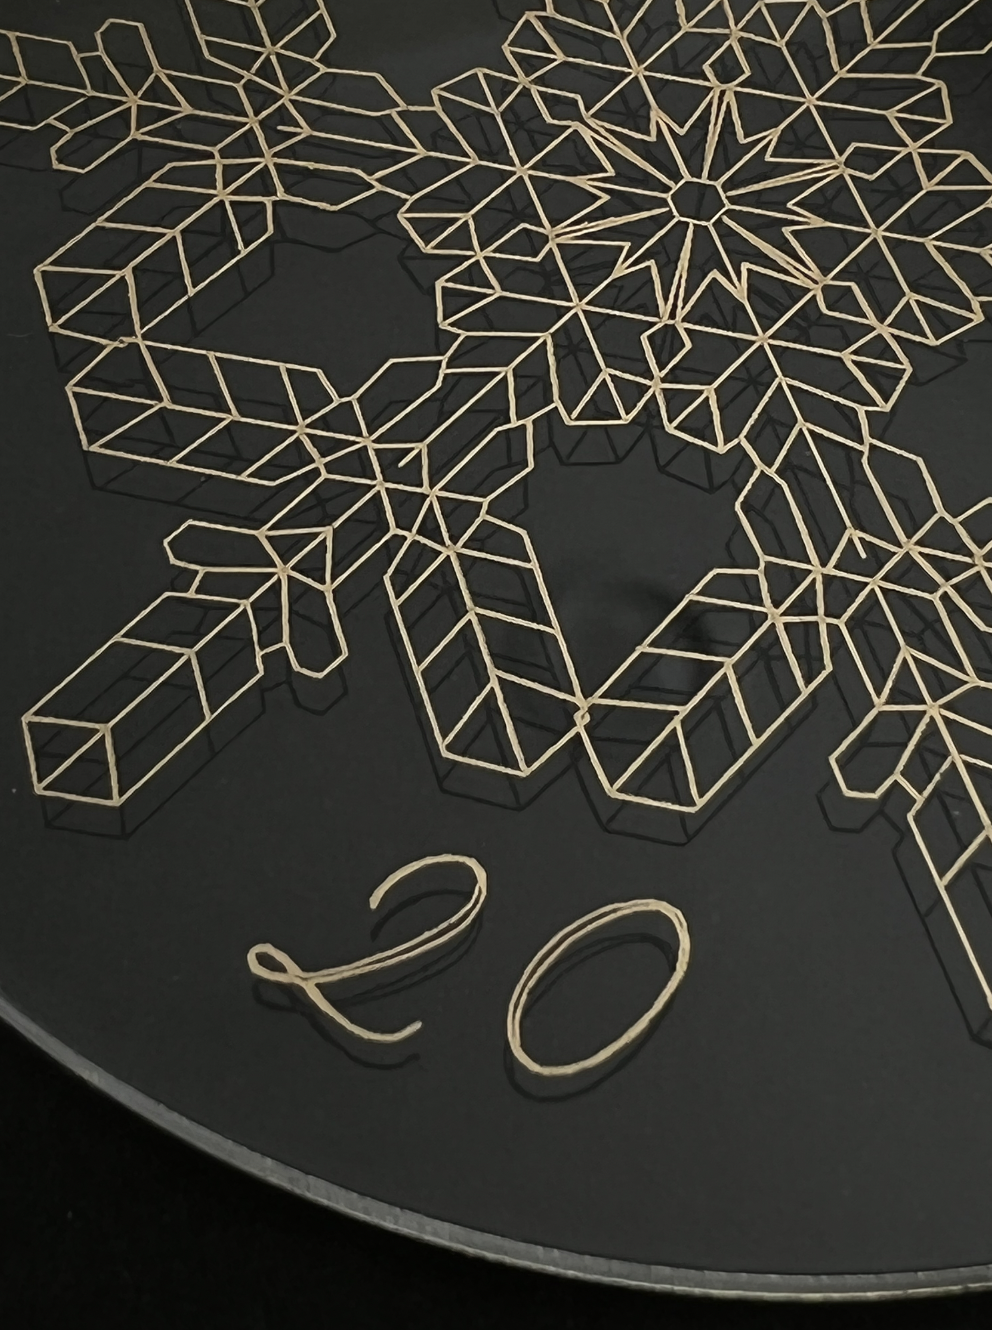
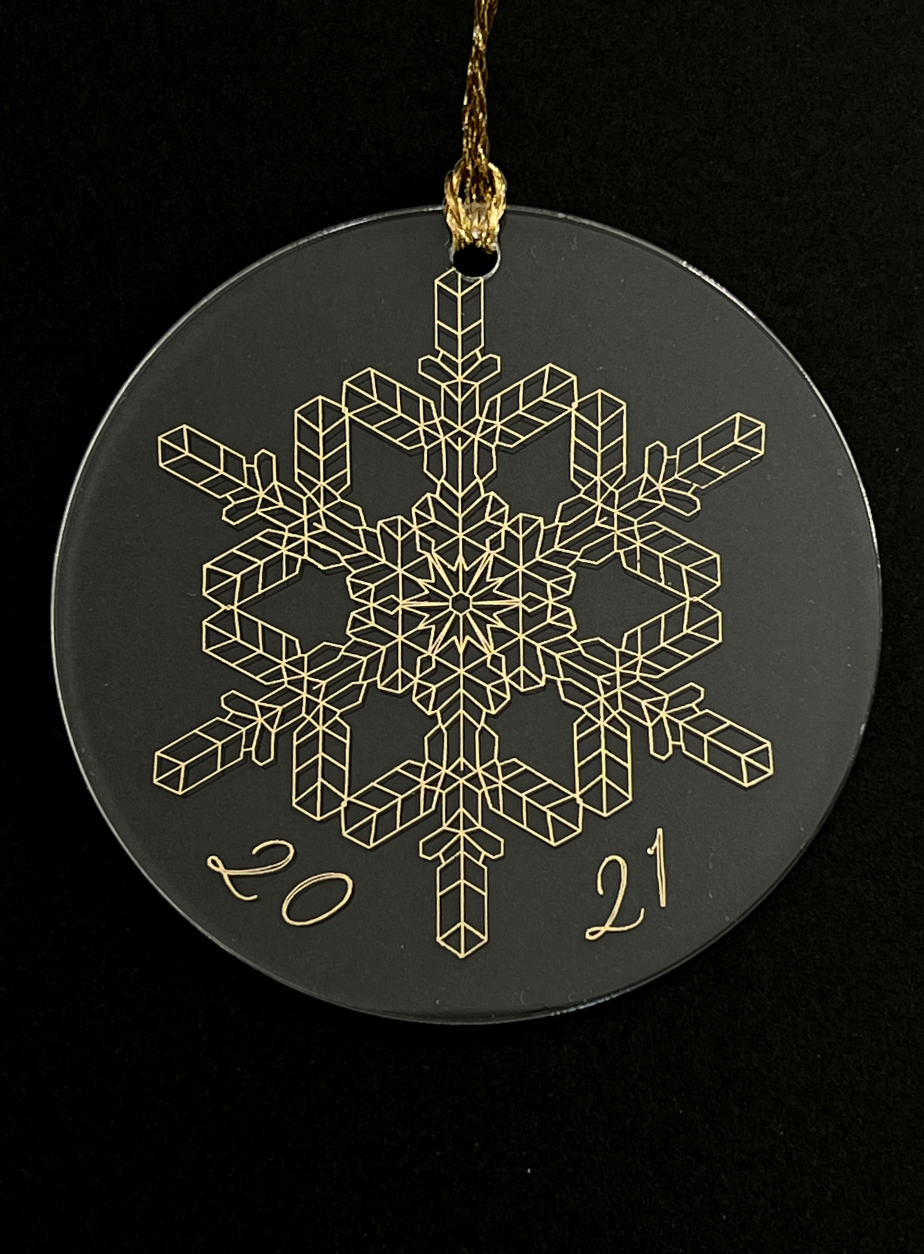
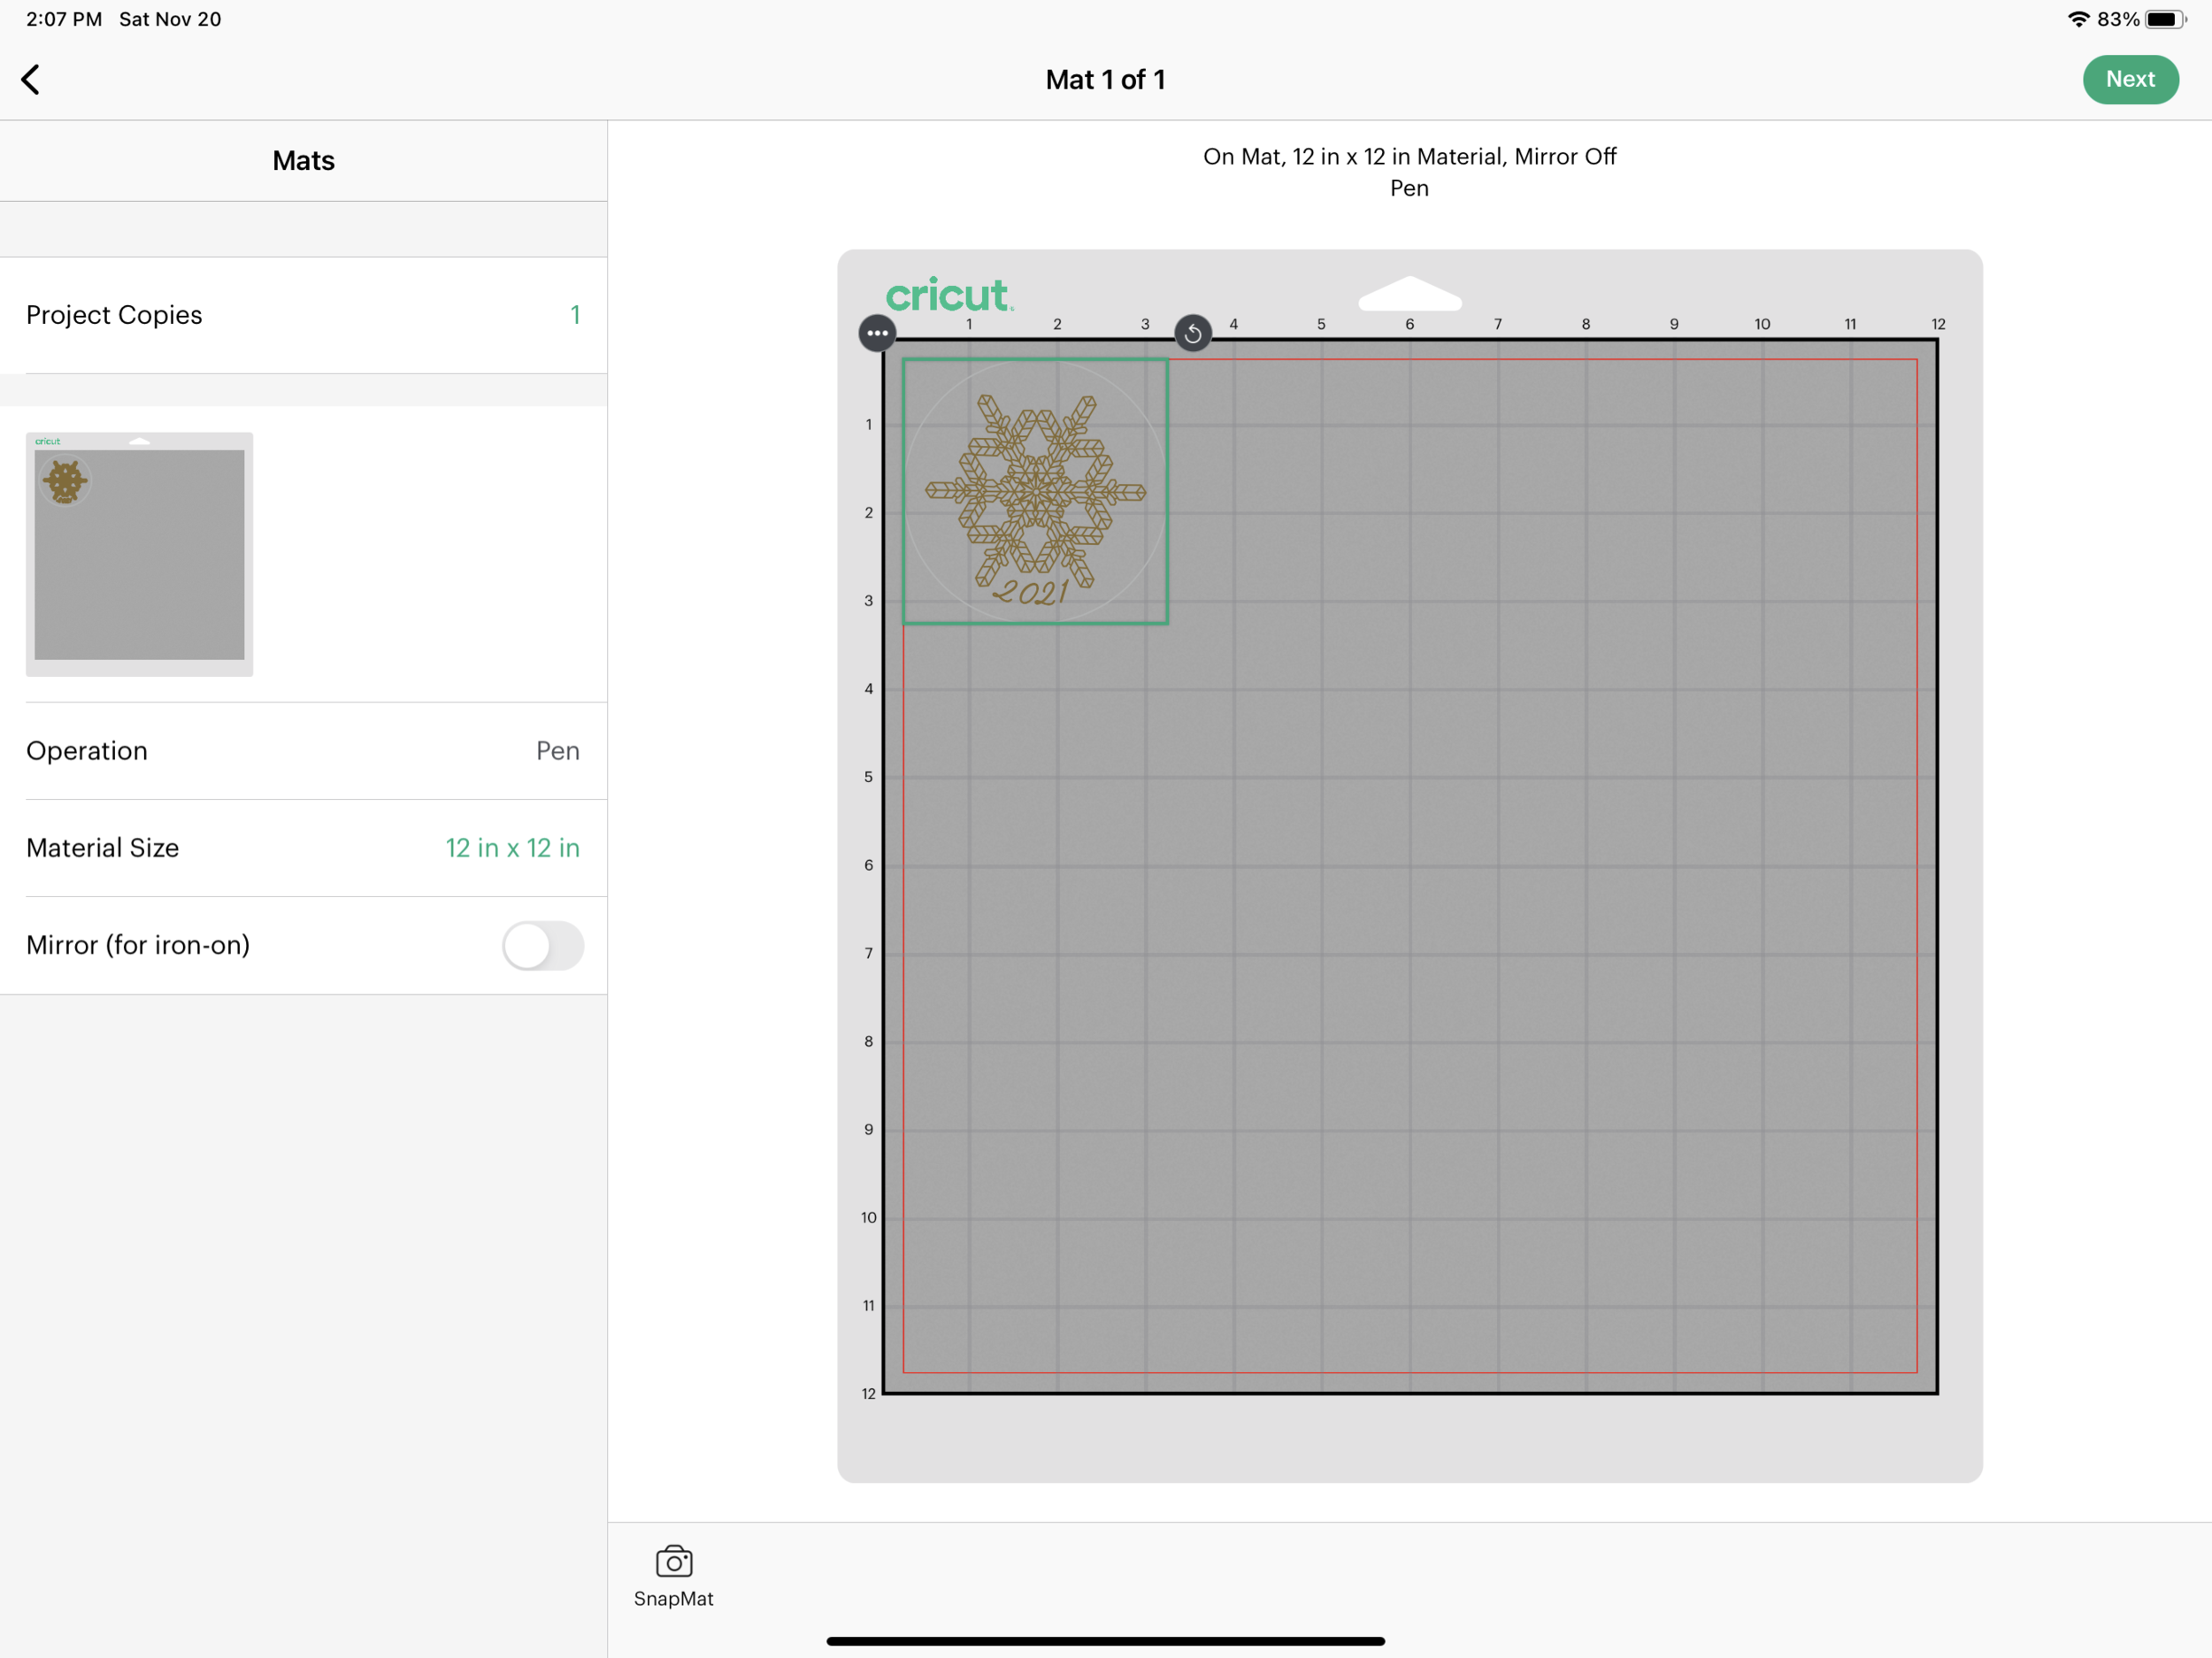
After uploading my SVG into Design Space, I change my lines from “Cut” to “Draw.” I’m going to make my snowflake and numbers gold metallic glitter, I’m going to make the circle outline silver glitter. The colors you pick don’t really matter, they just need to be 2 different colors.
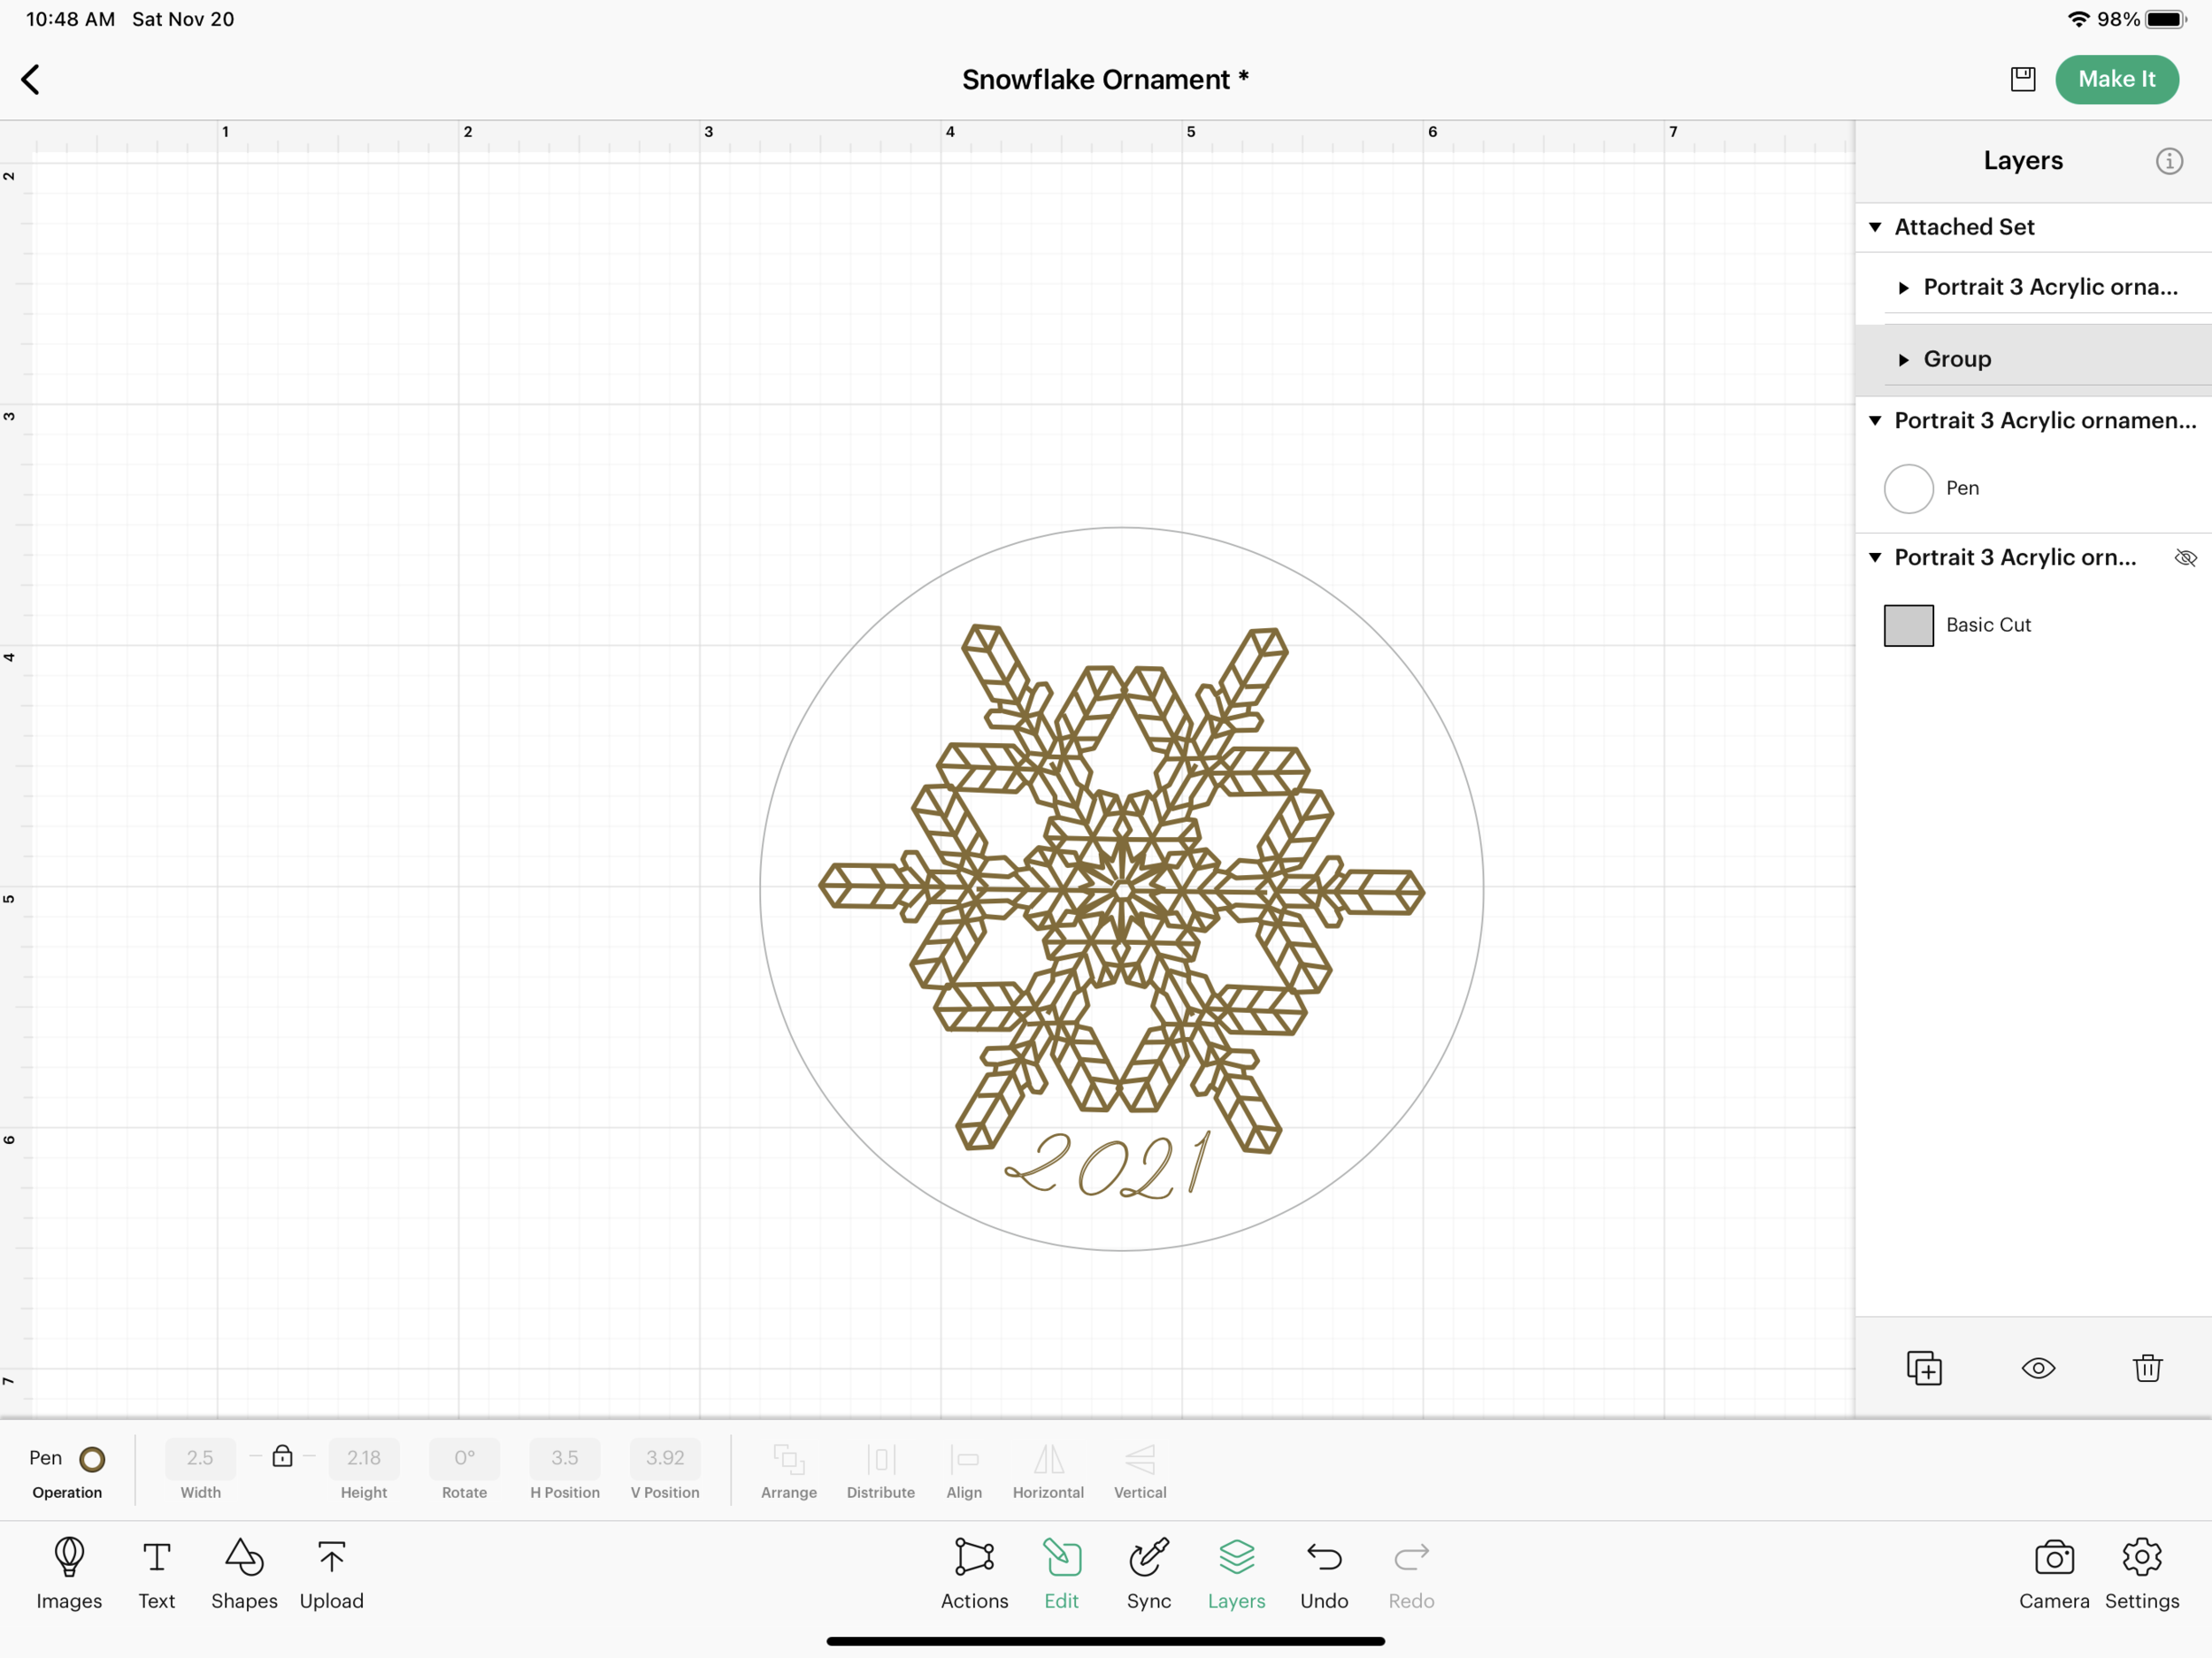
I “attach” the gold and silver lines and click on the Make It button in the upper right corner.
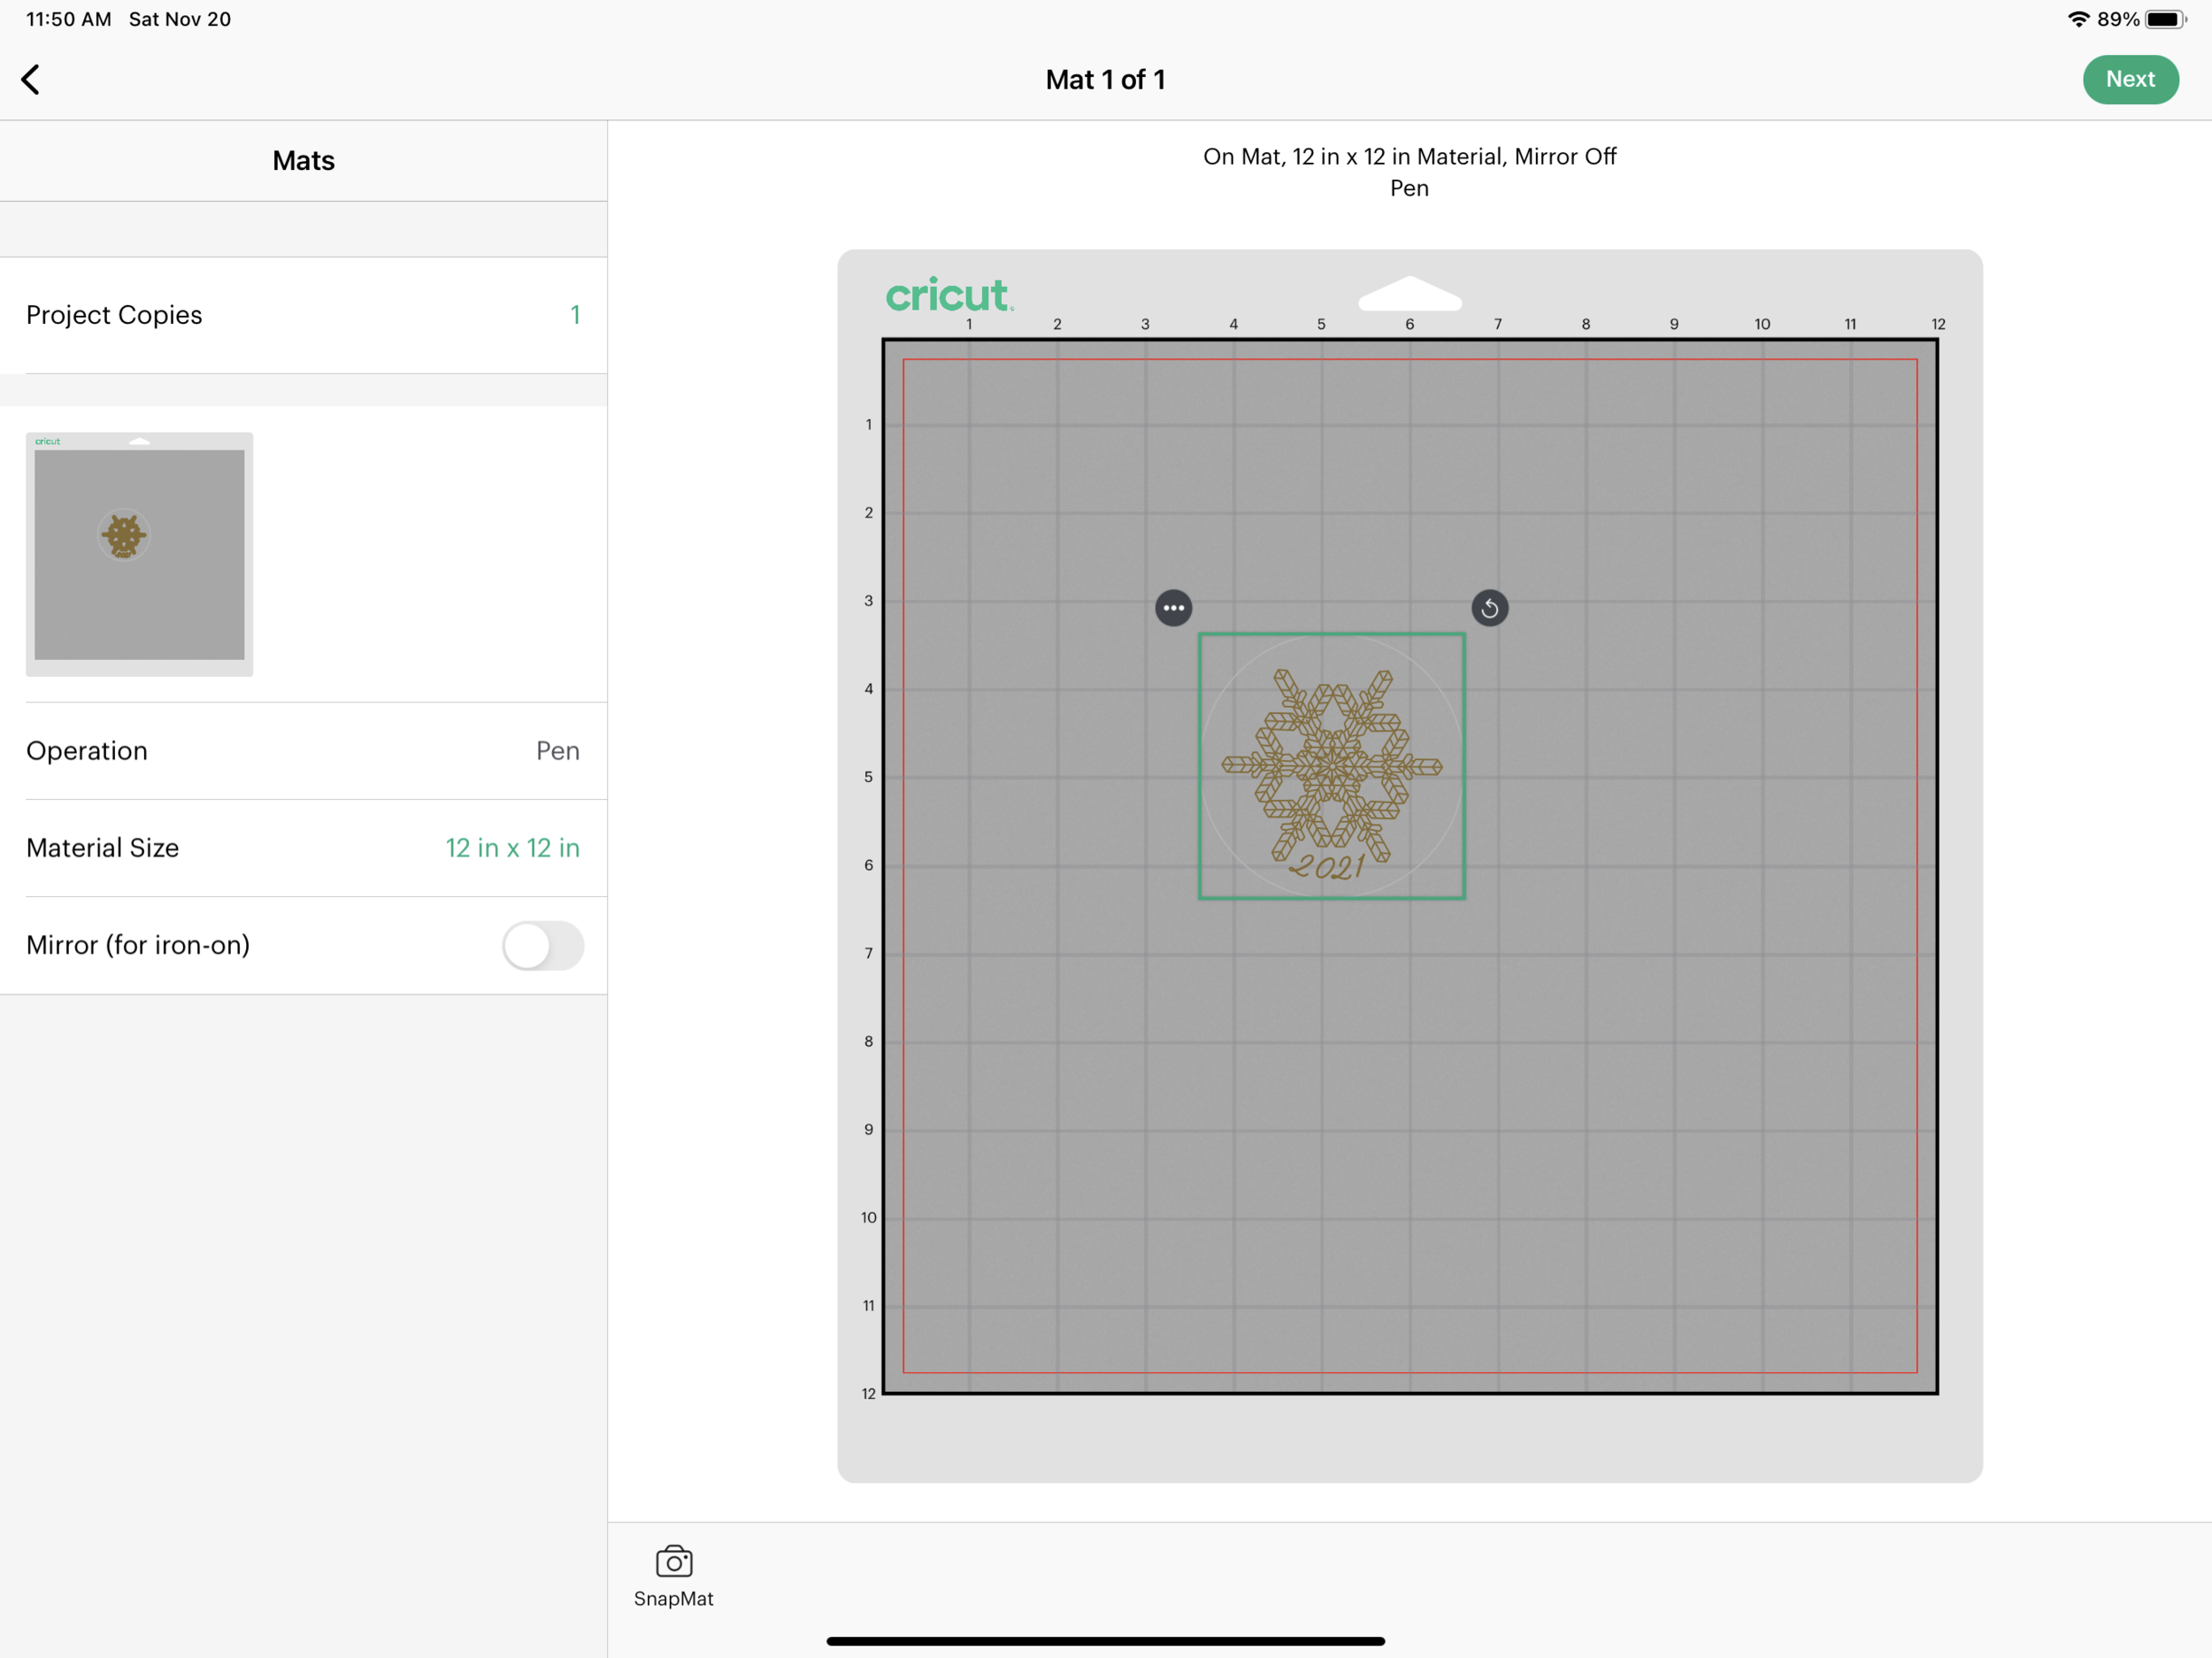
As usual, Cricut defaults to placing my artwork in the upper left corner, but I’m going to move it so it’s further down and closer to the middle of my mat. This will help when I need to place the template and foil later.
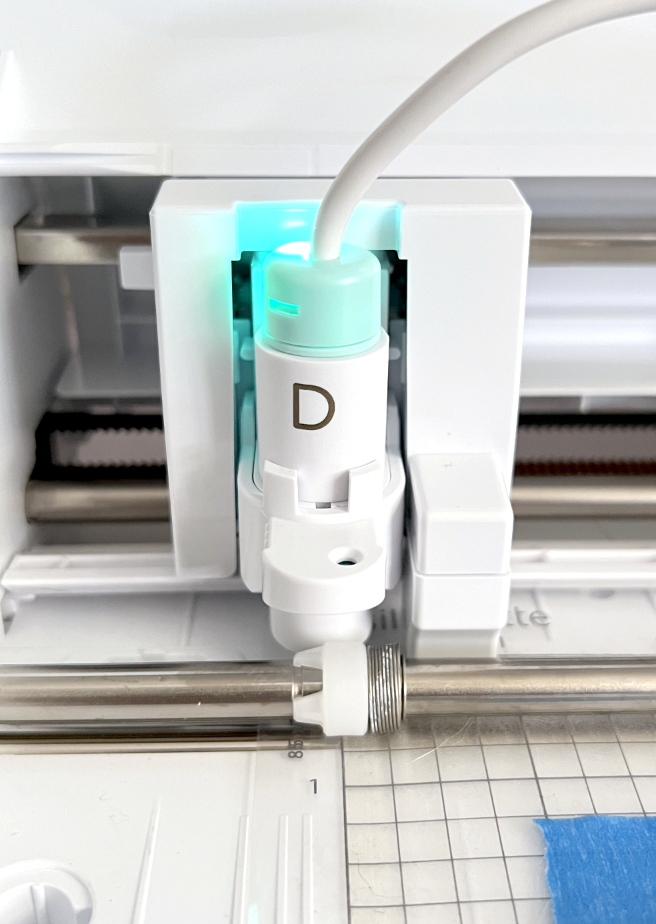
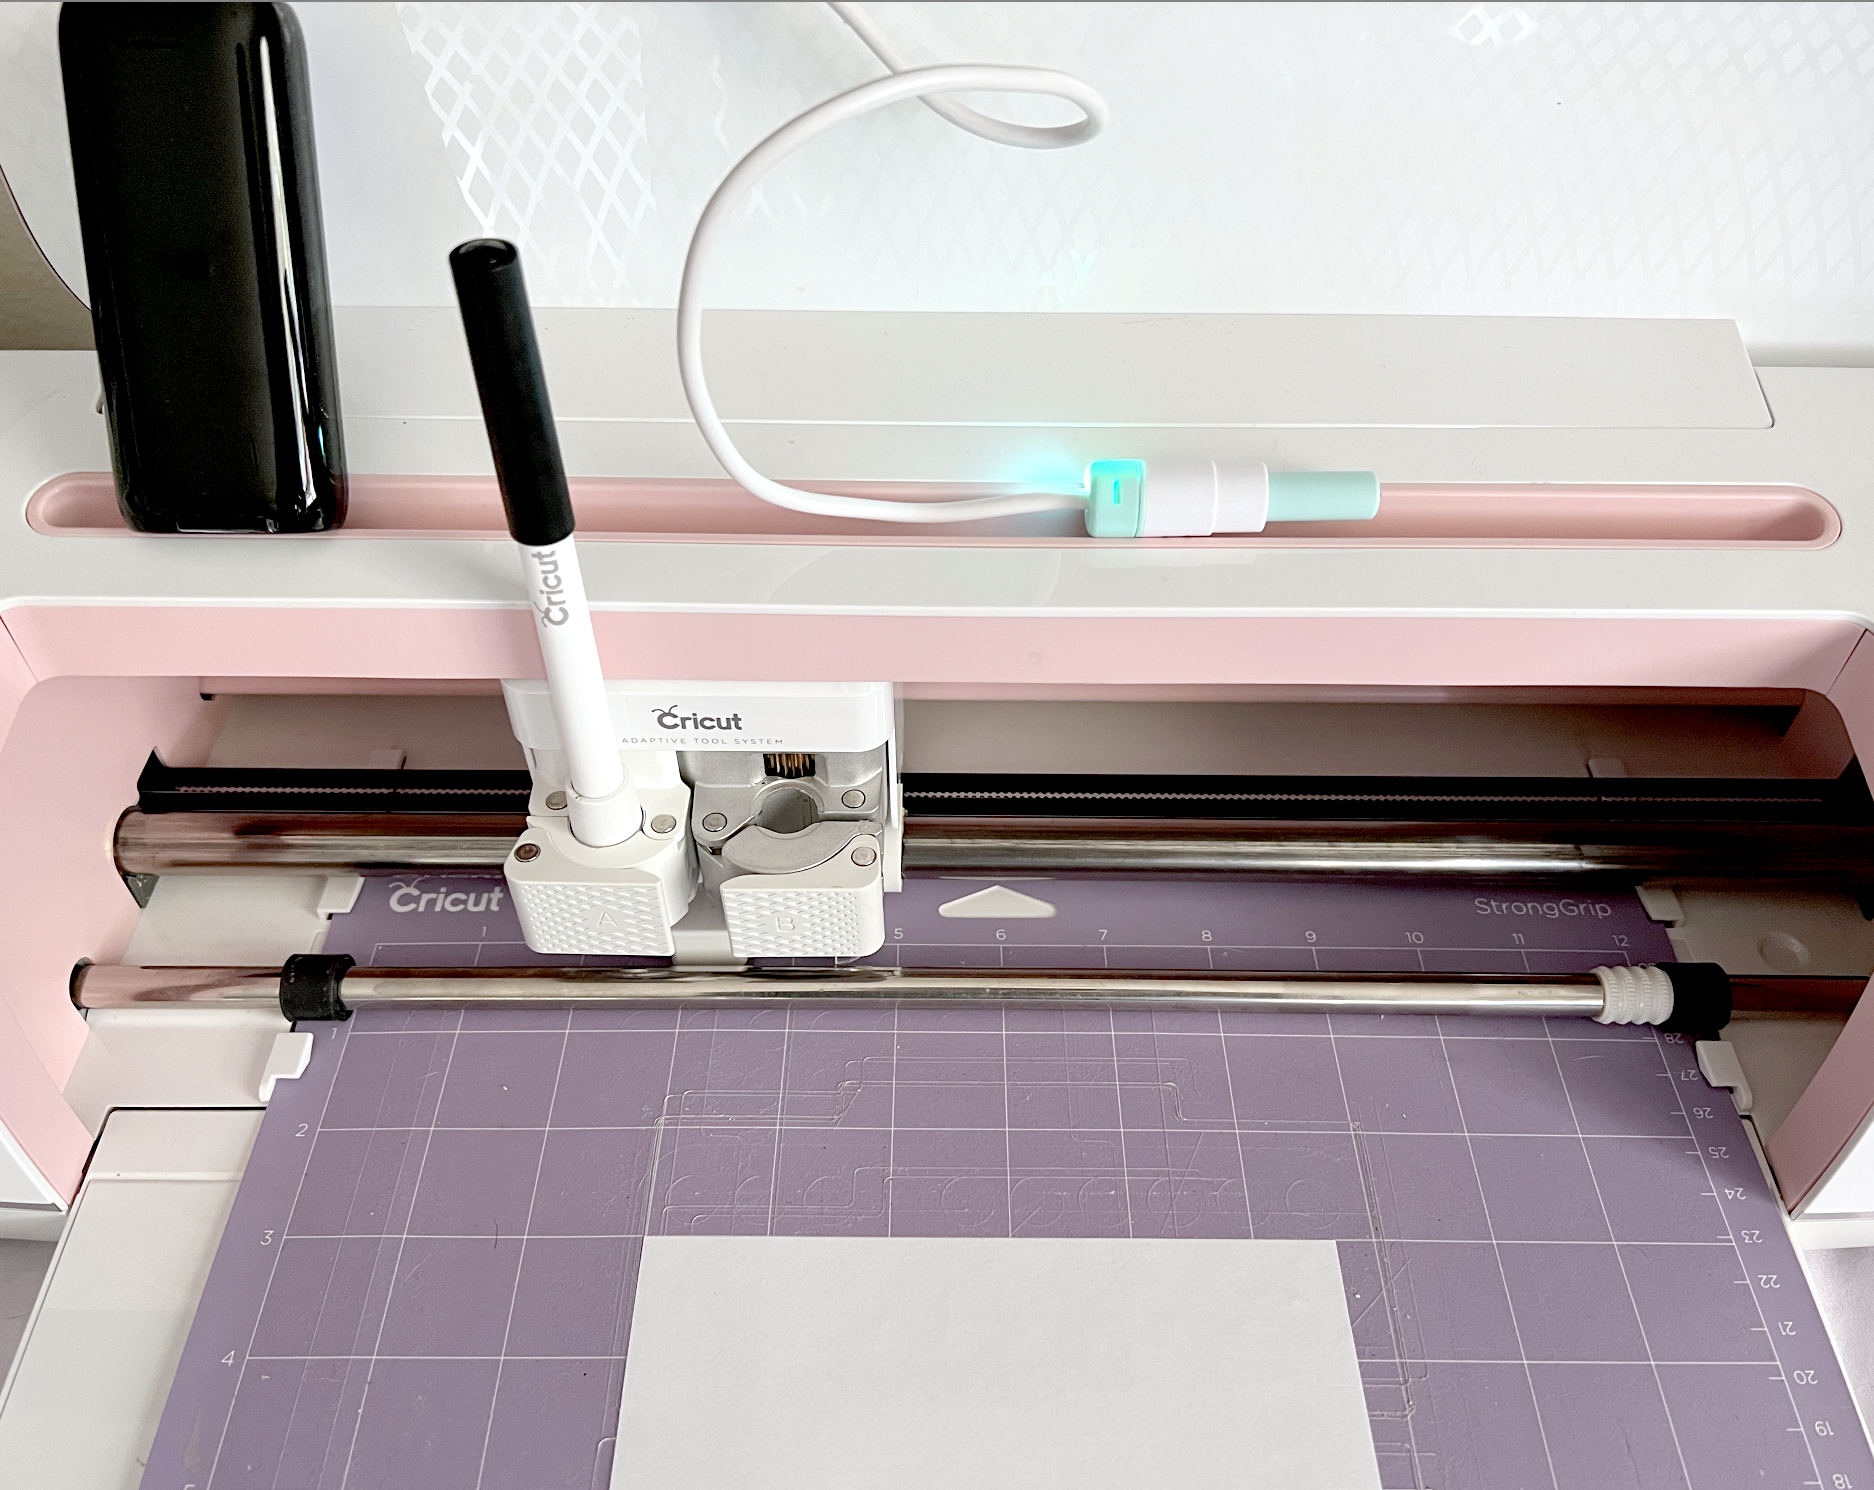
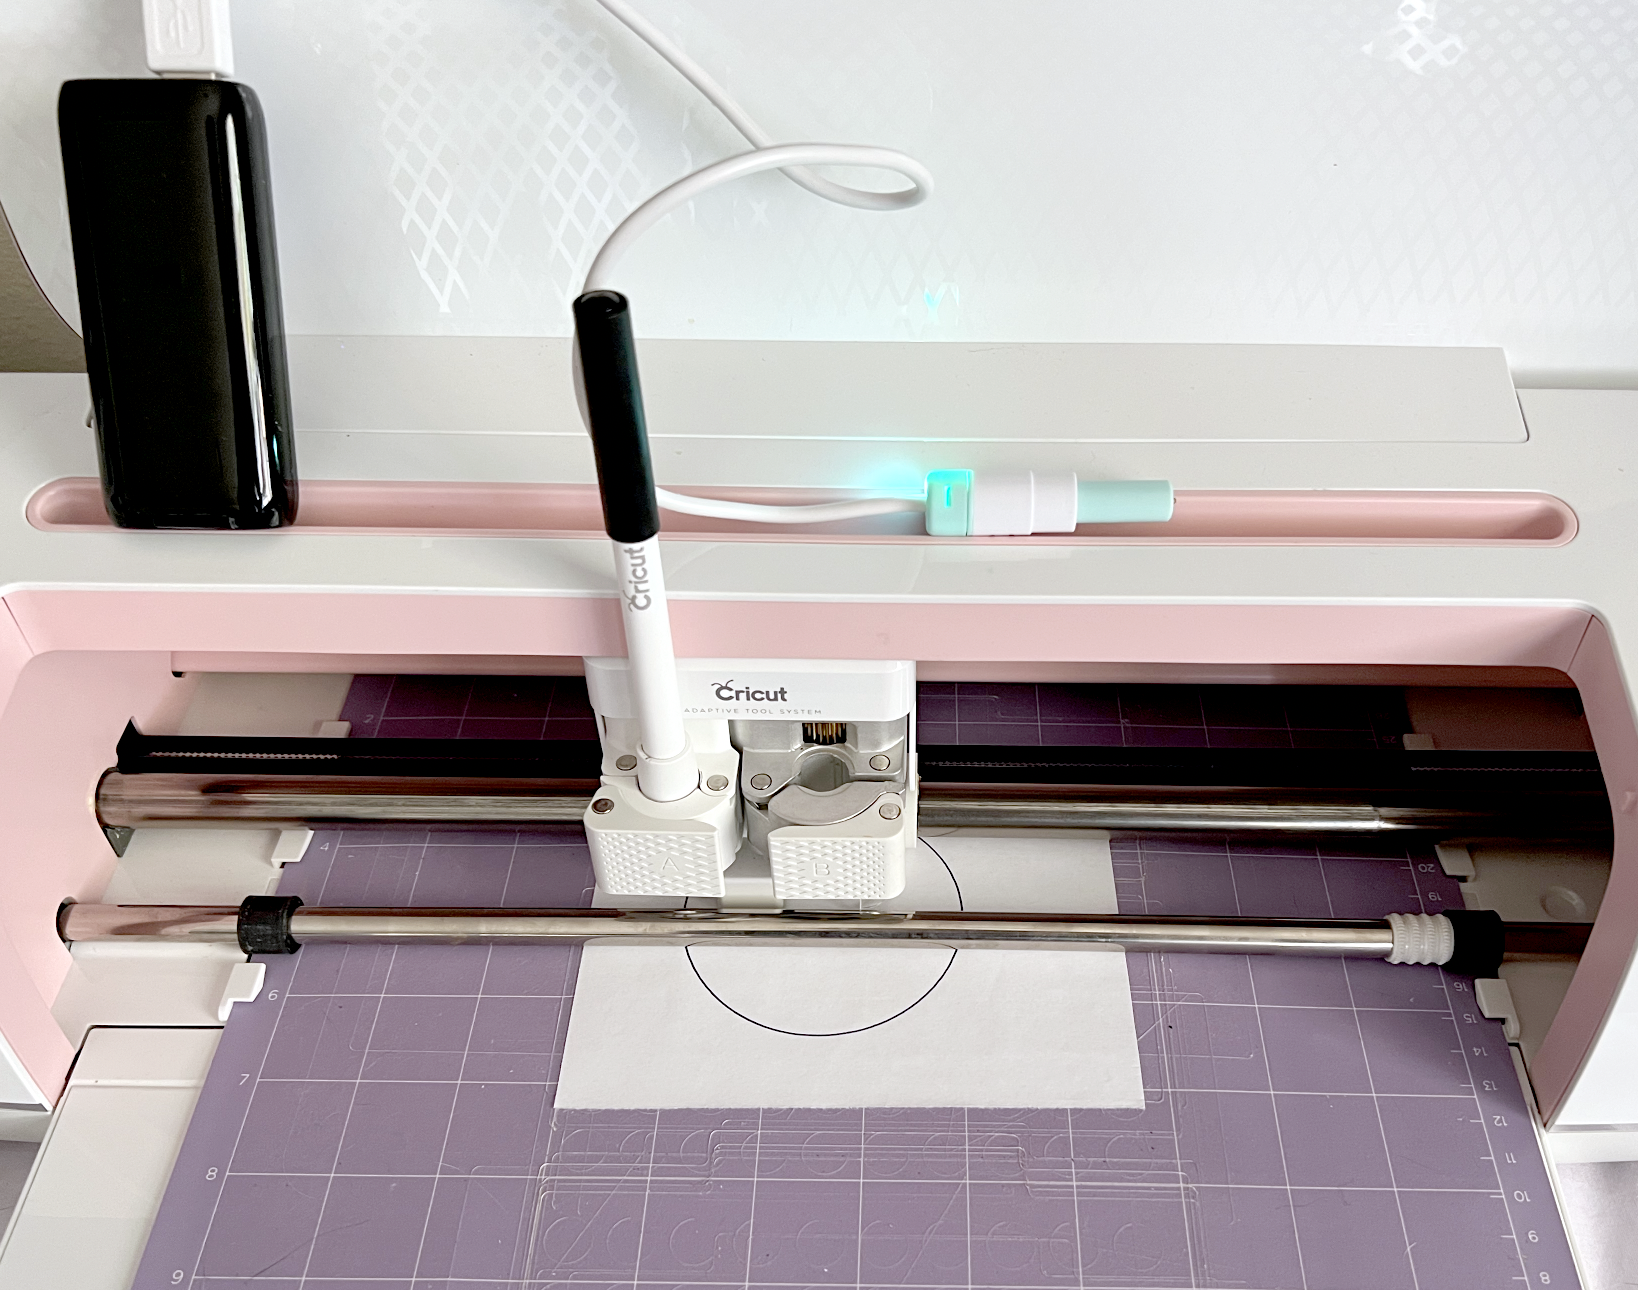
It’s also a good idea to plug in your foil quill tip while you’re setting up the template on your mat, so it has plenty of time to heat up. I’ve got mine plugged into a small battery pack.
If you plan on making multiples of these all at once, using a template is a good idea. I will be using the same chipboard template from my previous posts to help keep my acrylic disc in place on my cutting mat. So before I start foiling the acrylic discs, I need to align my template on my mat.
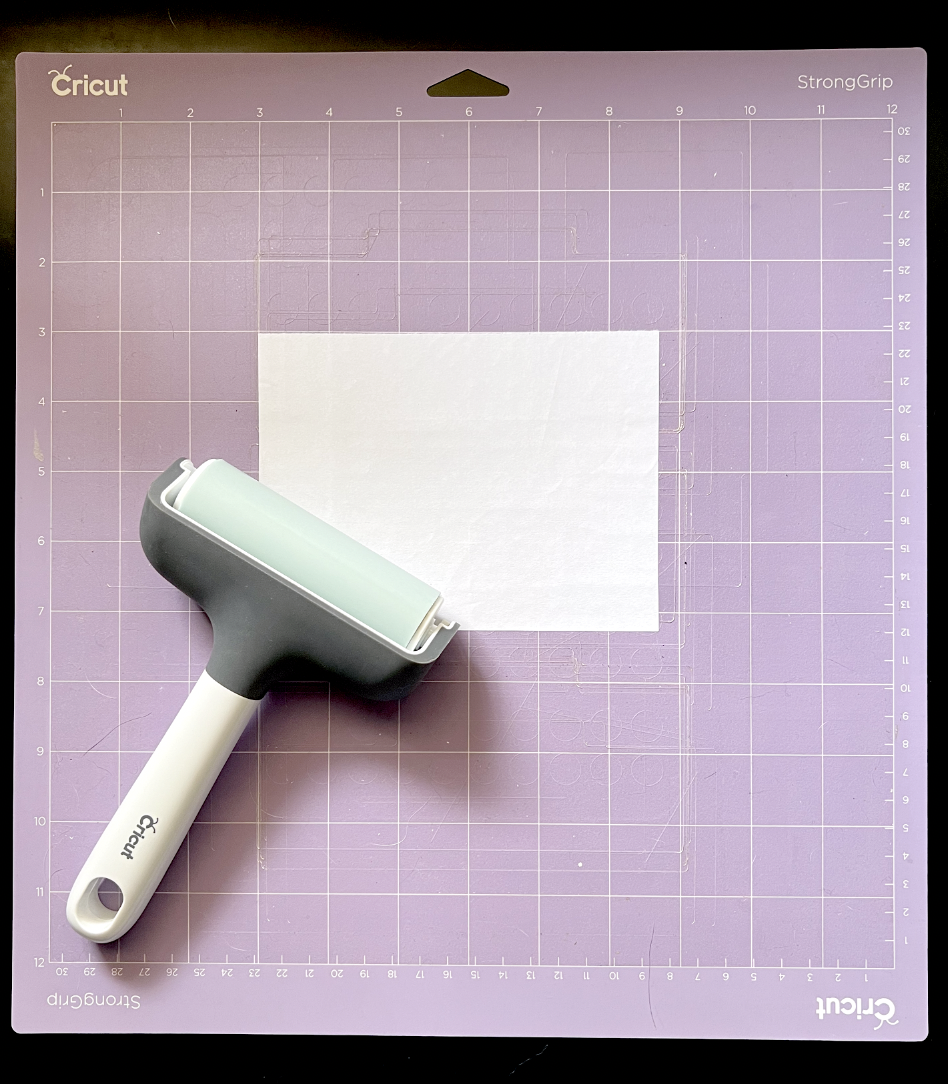
To get my template aligned, I’m going to start with a piece of plain paper that’s a little bit smaller than my overall chipboard template. I place it approximately where the artwork is located on my screen.
I’m going to use just the plain black fine tip Cricut pen that cam with my machine. You can you any pen color that you wish, this is just to get the template aligned.
I select “Chipboard 2mm” for my material since this is the closest material thickness to my 2mm acrylic.
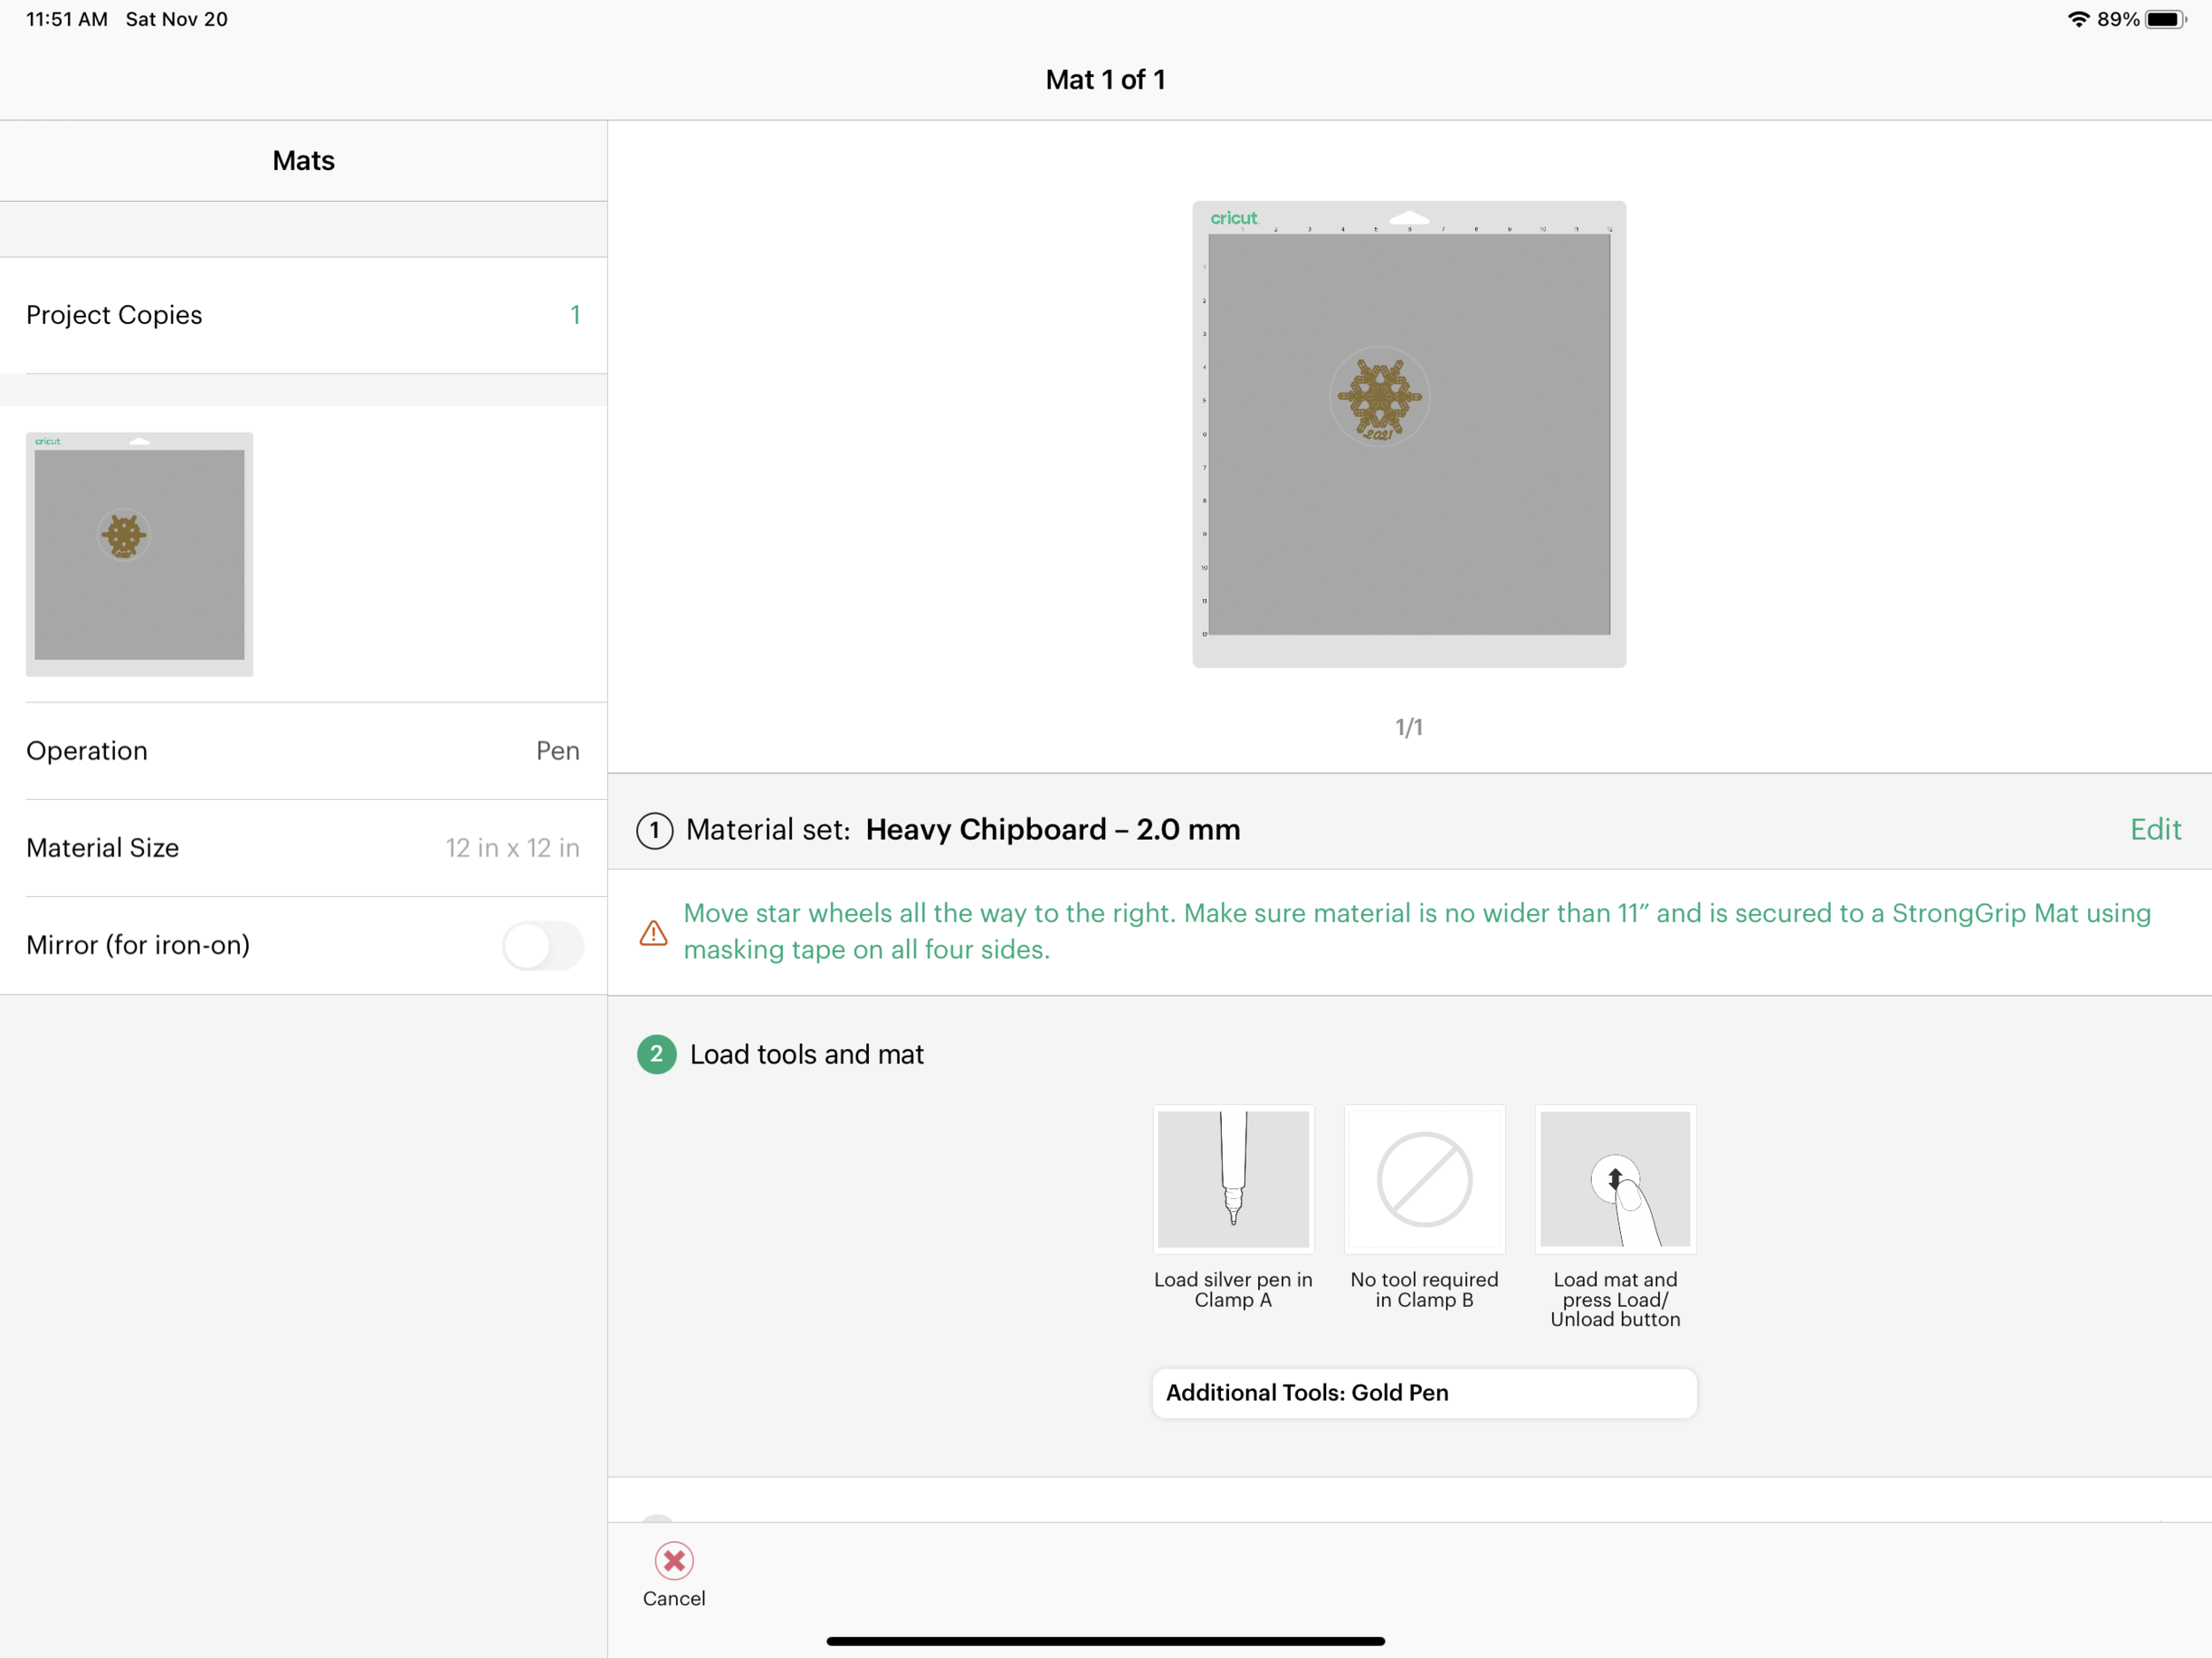
I press send and it prompts me to load the Silver pen, which is the circle outline. There doesn’t seem to be any rhyme or reason to which pen color Design Space selects first. I have made this same project previously and it wanted the gold pen first.
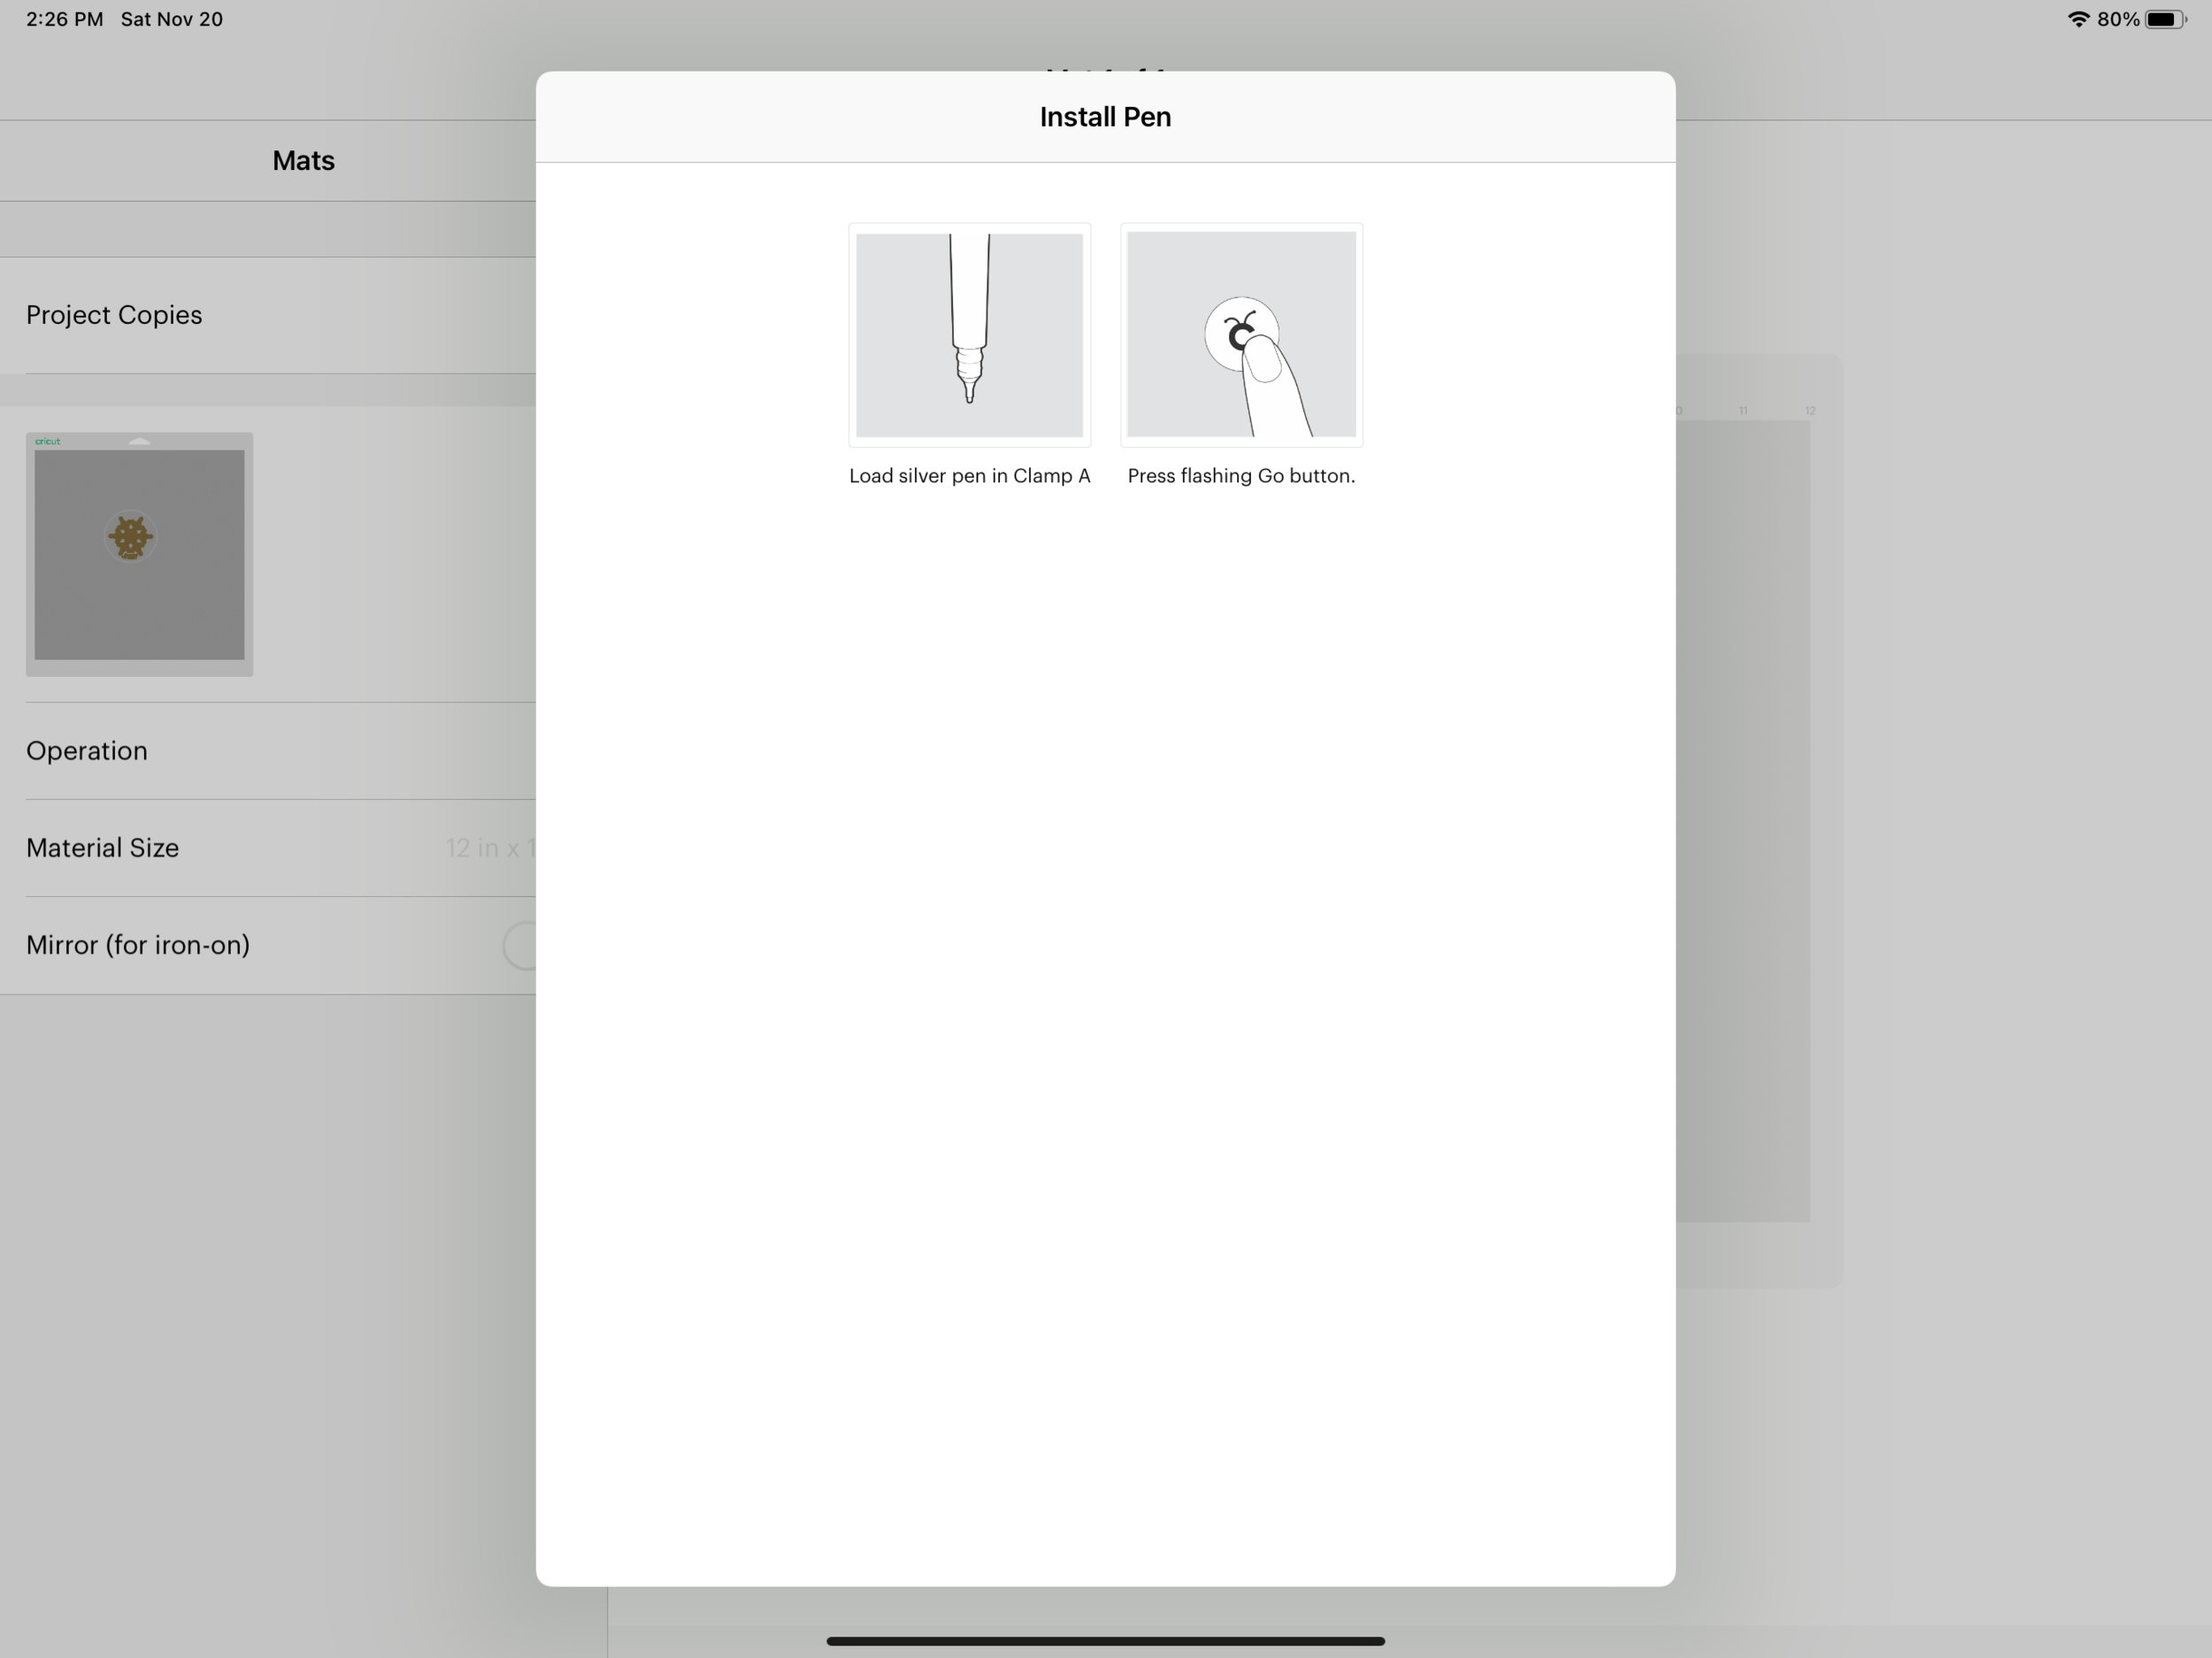
I load my mat and press the Go button on my machine. Once it’s finished with the silver pen, it prompts me for the gold pen. My mat is still halfway in the machine (this will be important later when you need to place the foil).
Since I’m just using the black pen, I press the go button and the machine draws the snowflake portion. Once it’s done, DO NOT unload your mat from the machine!!!
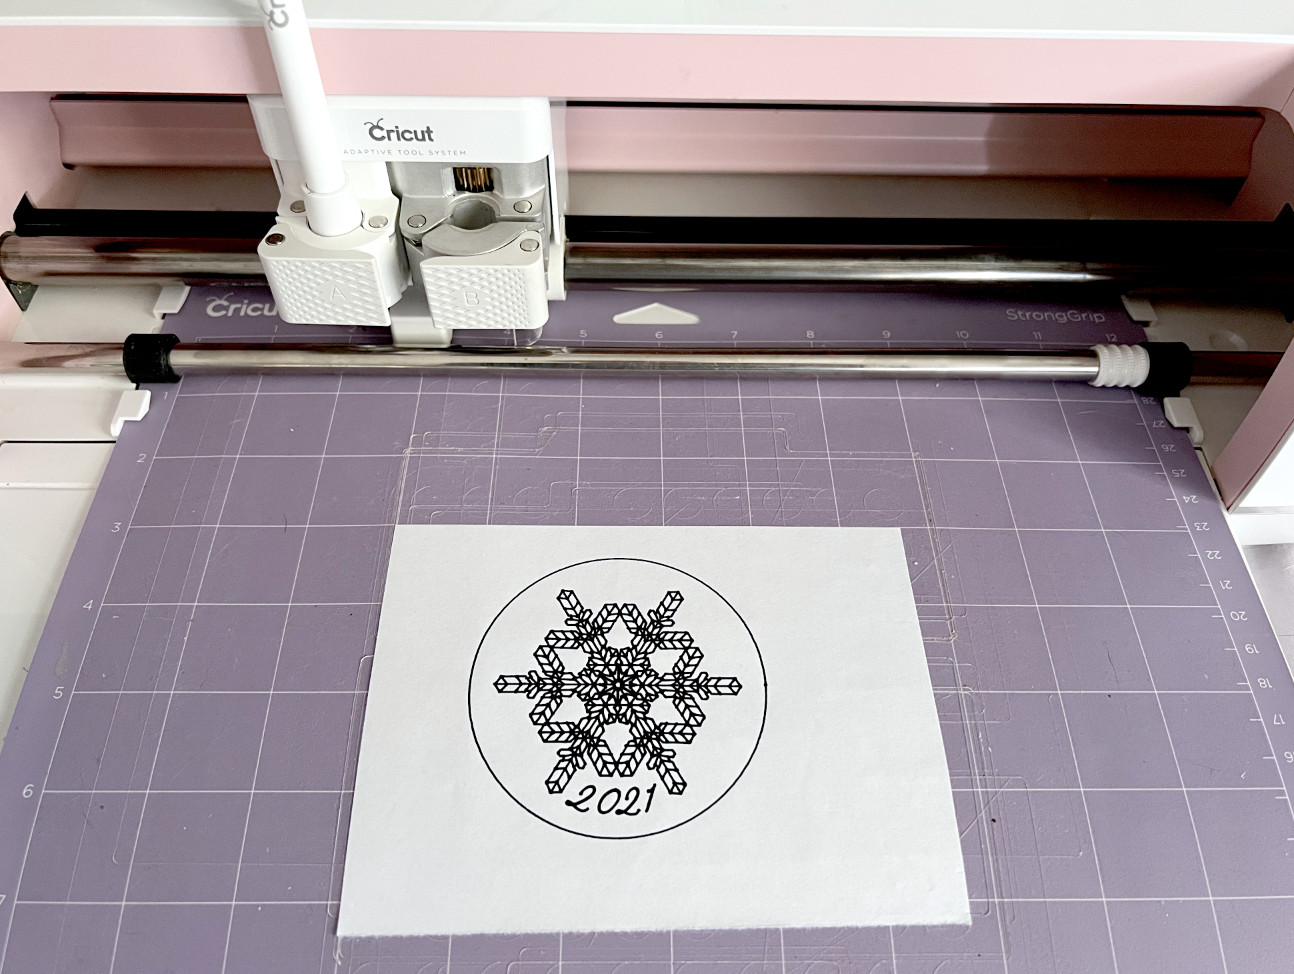
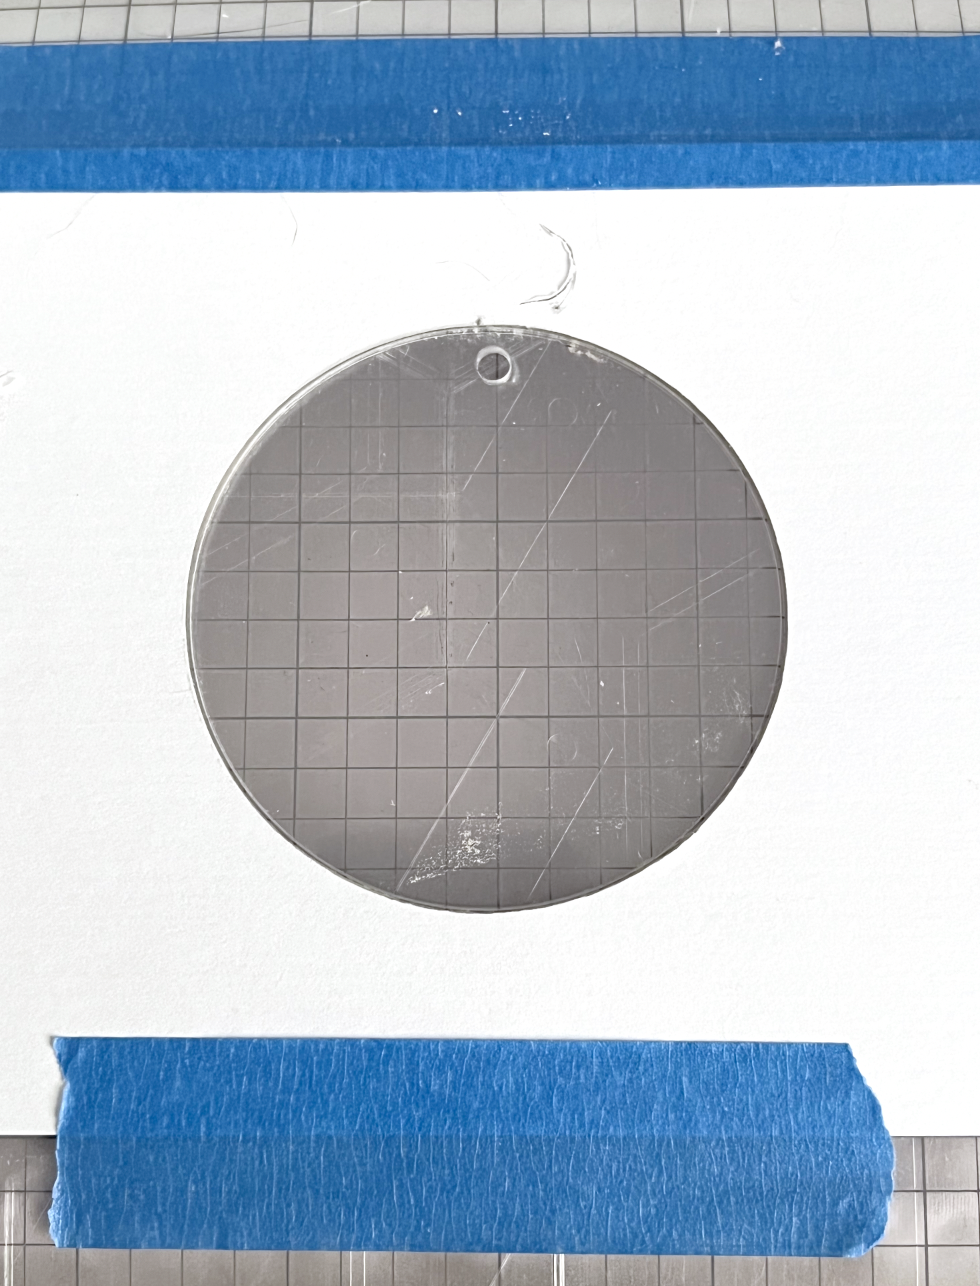
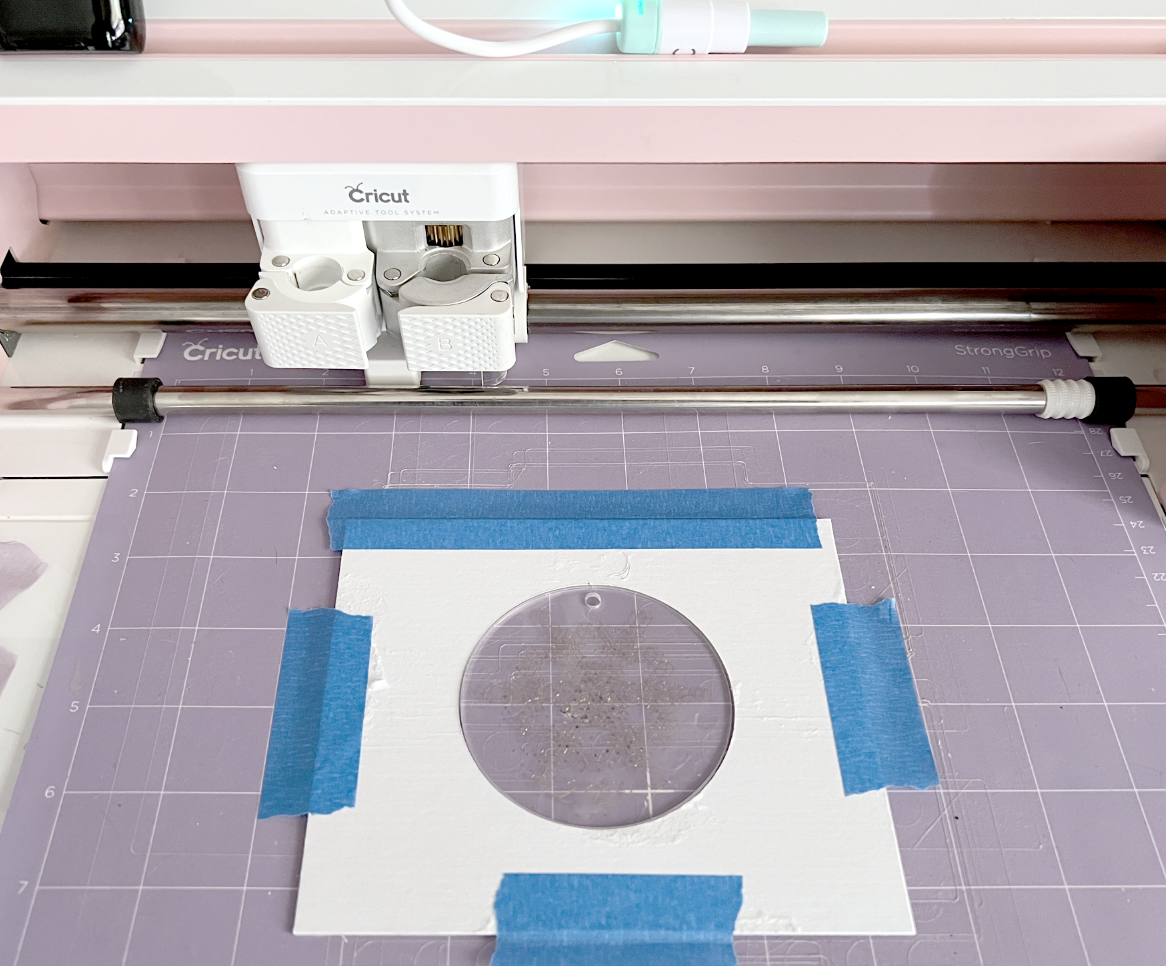
Now it’s time to actually place the chipboard template on you mat. Take your template and place it on top of the plain piece of paper, lining up the circle cut out with the circle drawn on the plain piece of paper. Place a piece of tape along the top edge of the template to make a hinge.
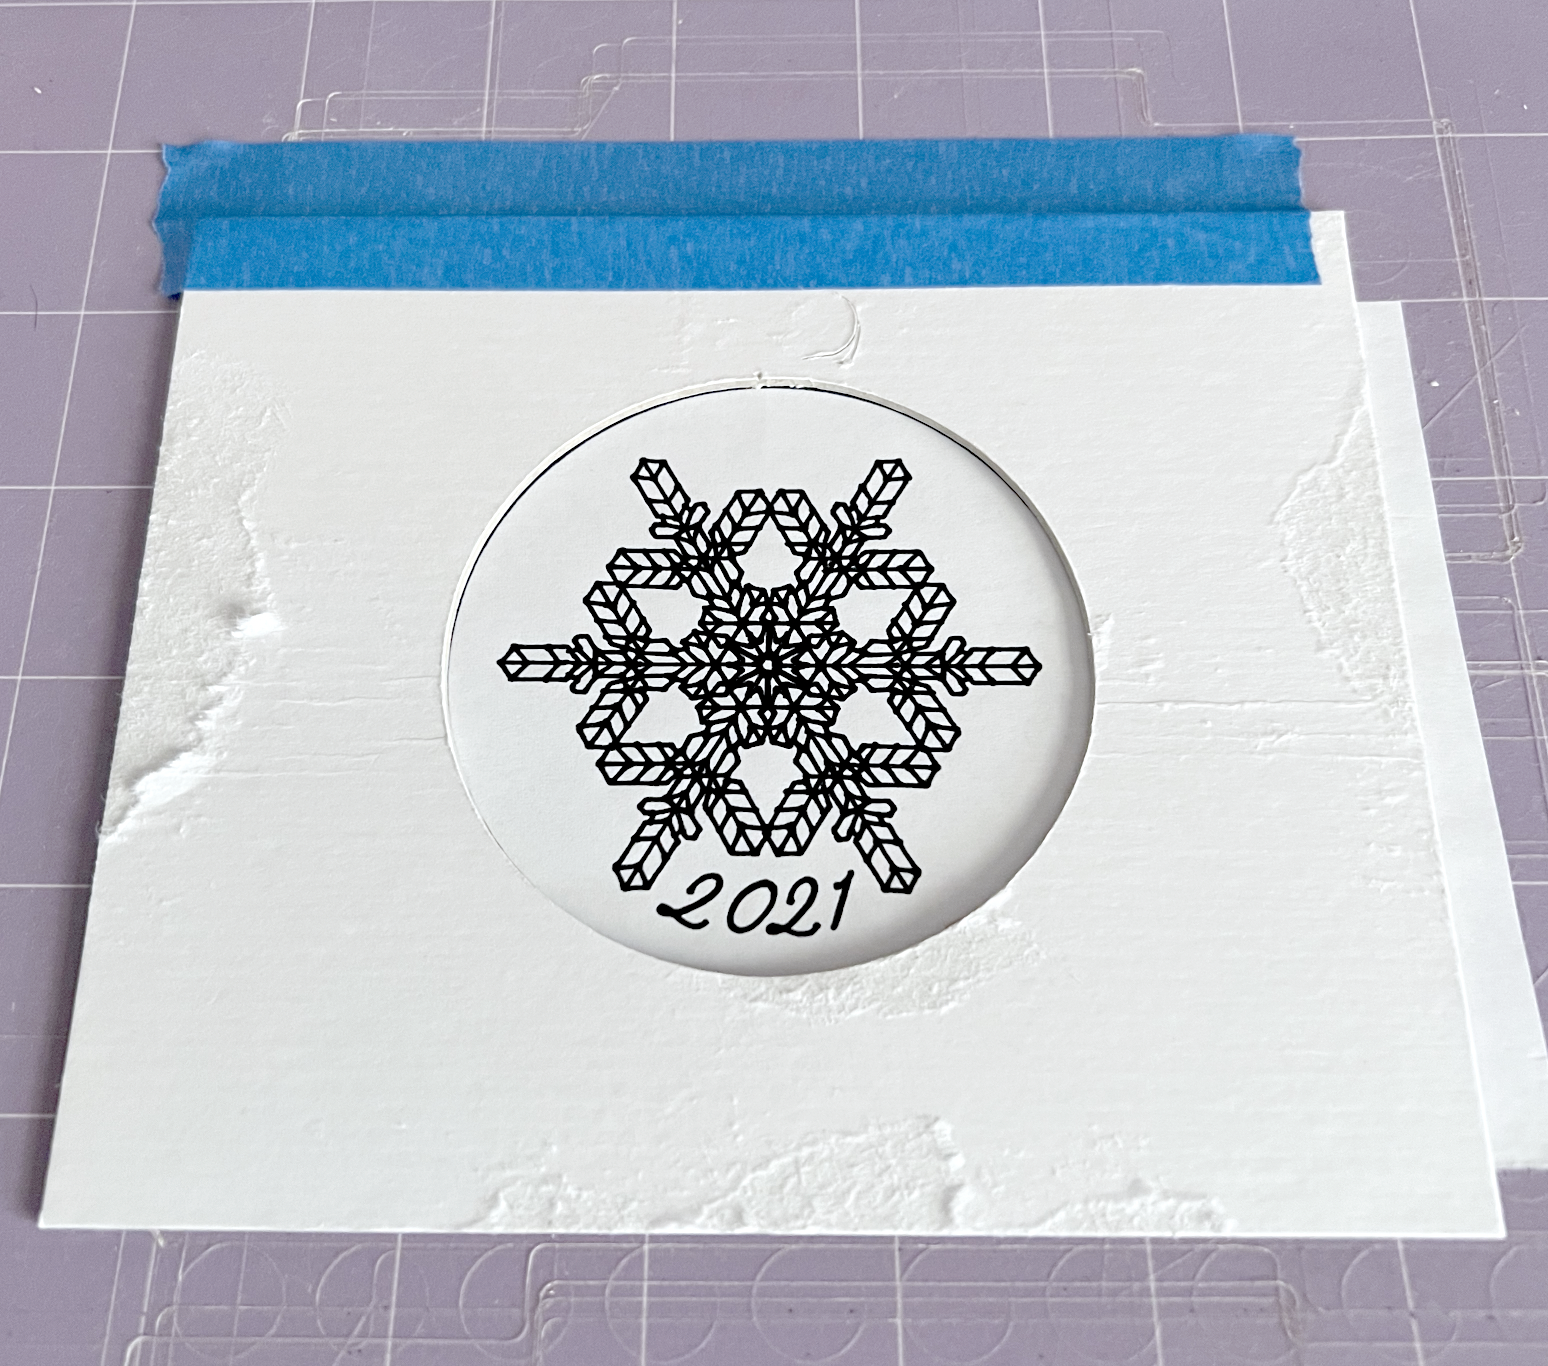
Carefully lift up the template and remove the the plain paper from your mat.

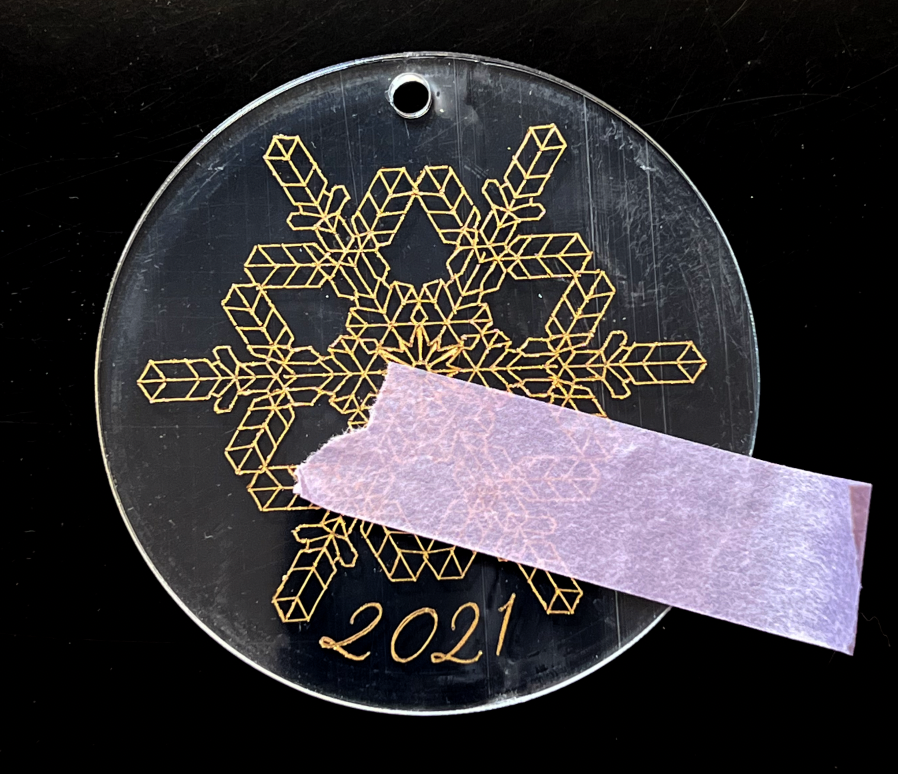
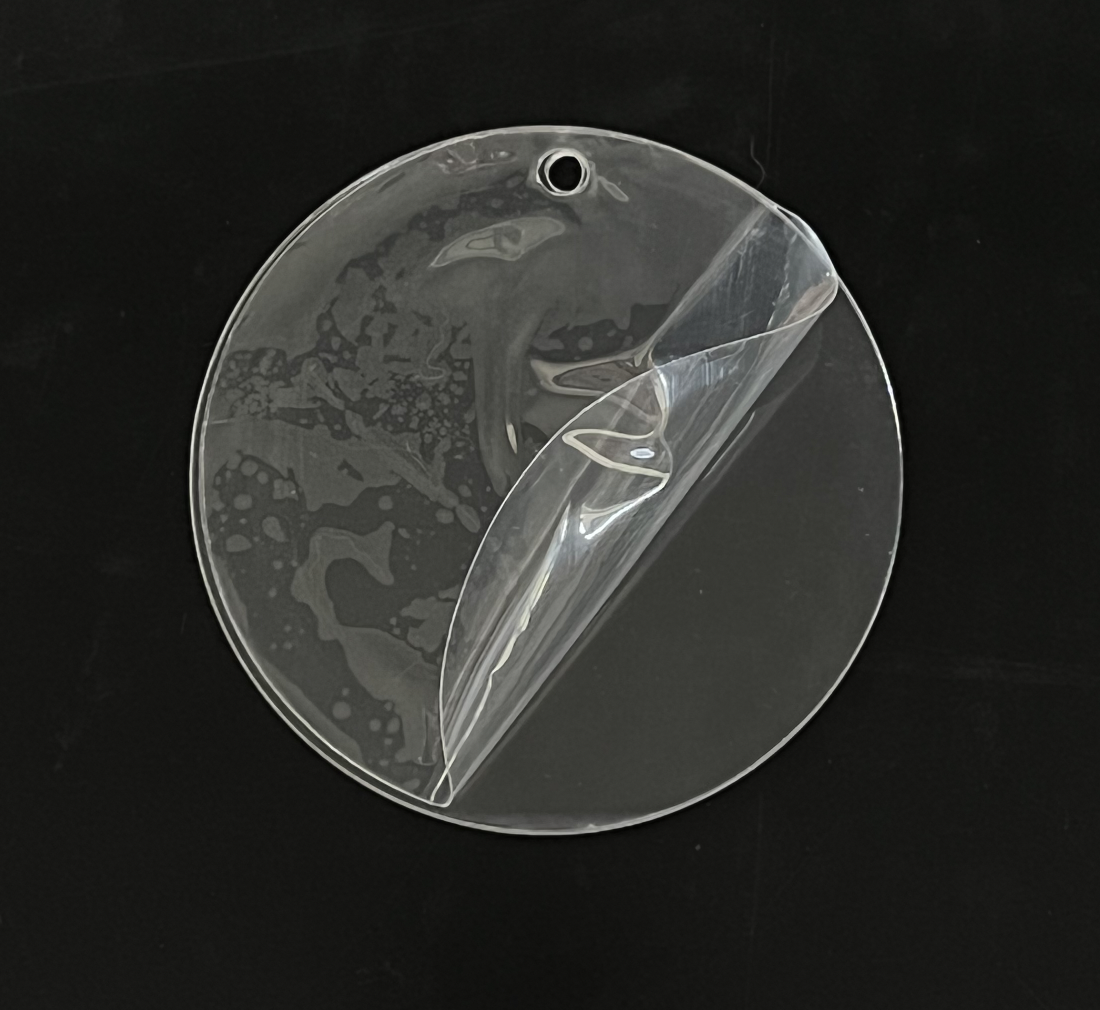
Place the template back down on your mat and tape down the other 3 sides. Now you can place the acrylic disc inside the cut out in the template. Don’t forget to remove the plastic film from the side of the acrylic that you will be foiling!!
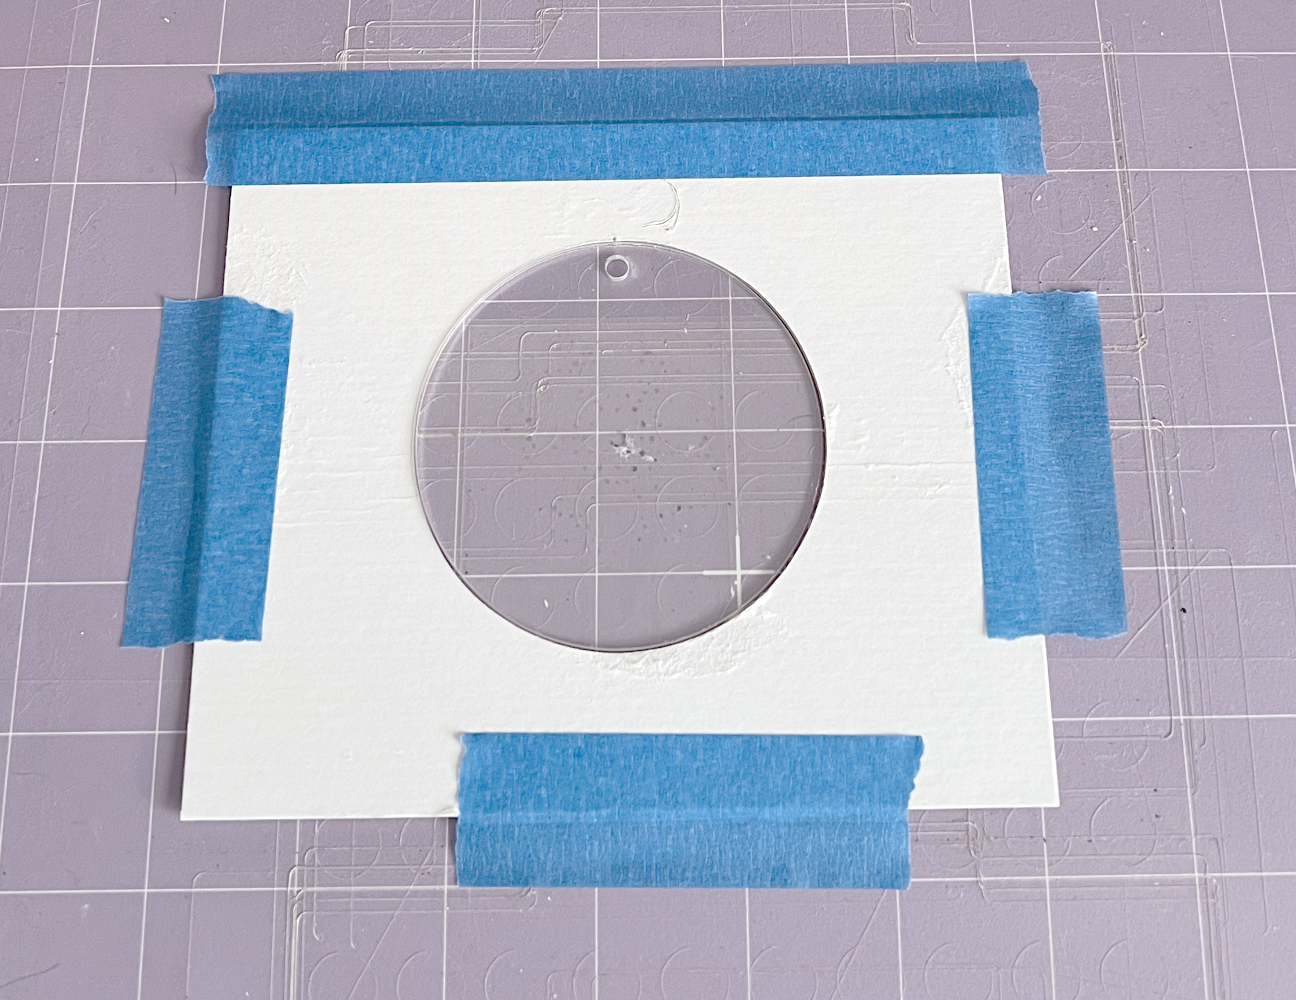
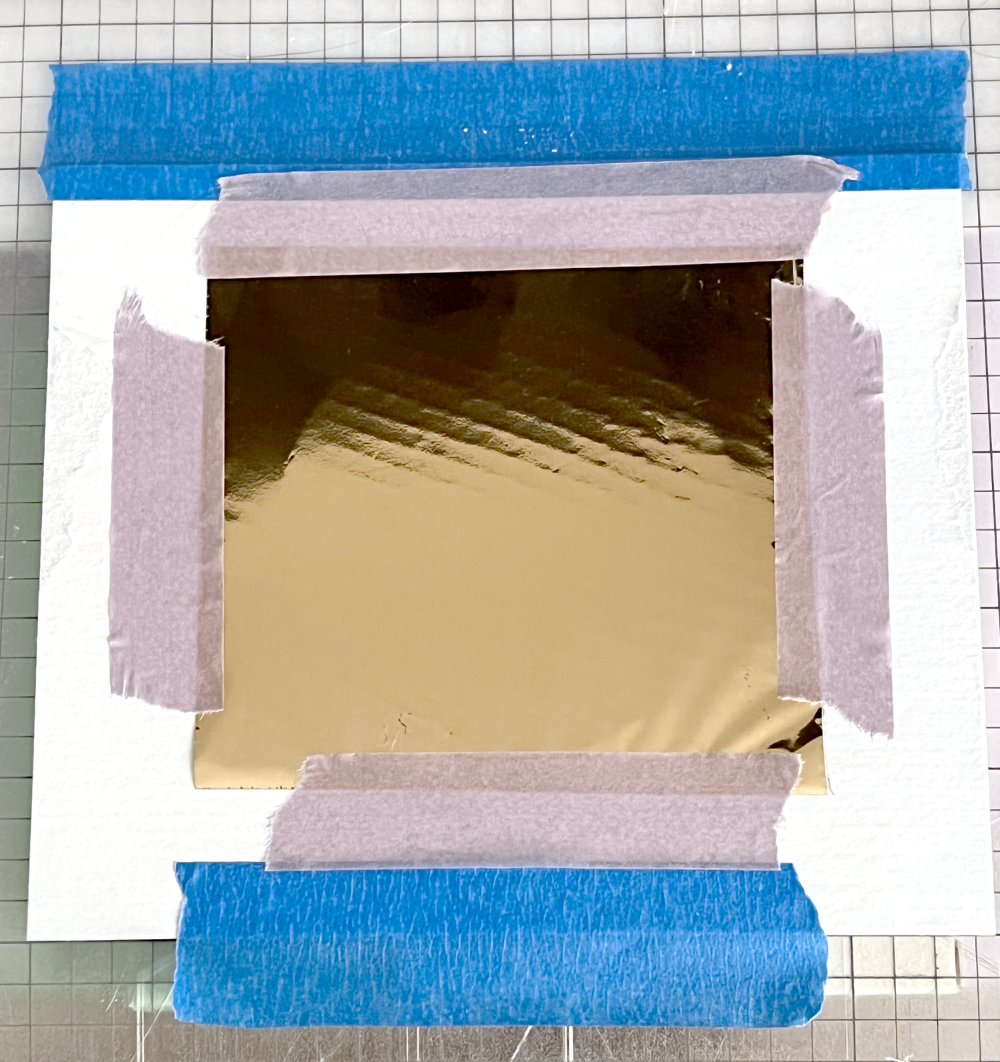
Now, I’m going to go ahead and tape my foil down over the acrylic since my machine wants to make the circle outline first and once it’s done with the circle, my mat will be stuck in the middle of my machine and I won’t be able to tape my foil down at that point. I’m not going to load my foil quill into clamp A just yet since I don’t want the circle to be foiled..
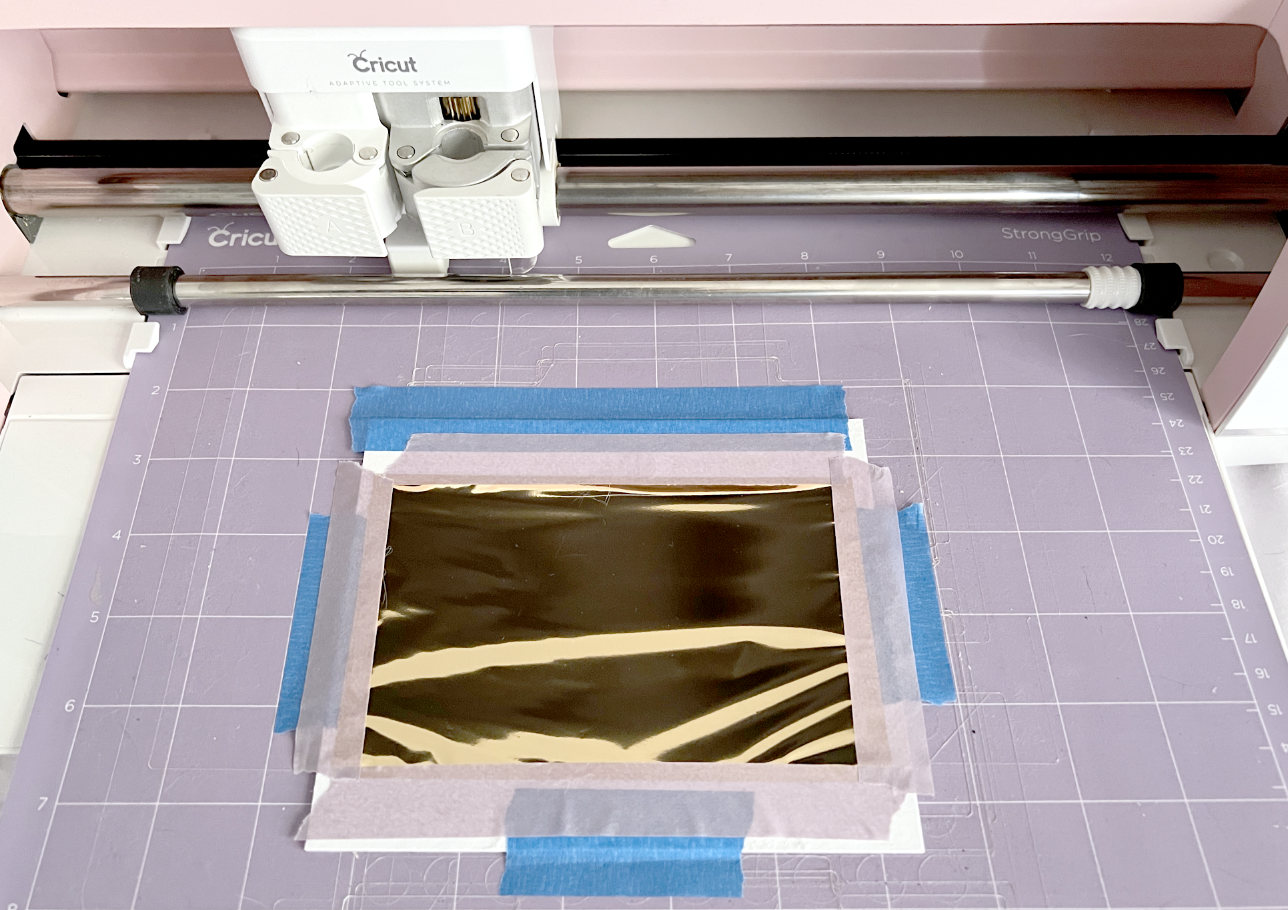
I press the “Go” button on my machine and let the empty carriage go through the motions of drawing the circle. My machine stops with the mat still in the middle of the machine and prompts me to load the gold pen. This is why I placed the foil on my mat earlier.

I place my foil quill in clamp A. Be careful not to touch the little metal tip, it’s hot!
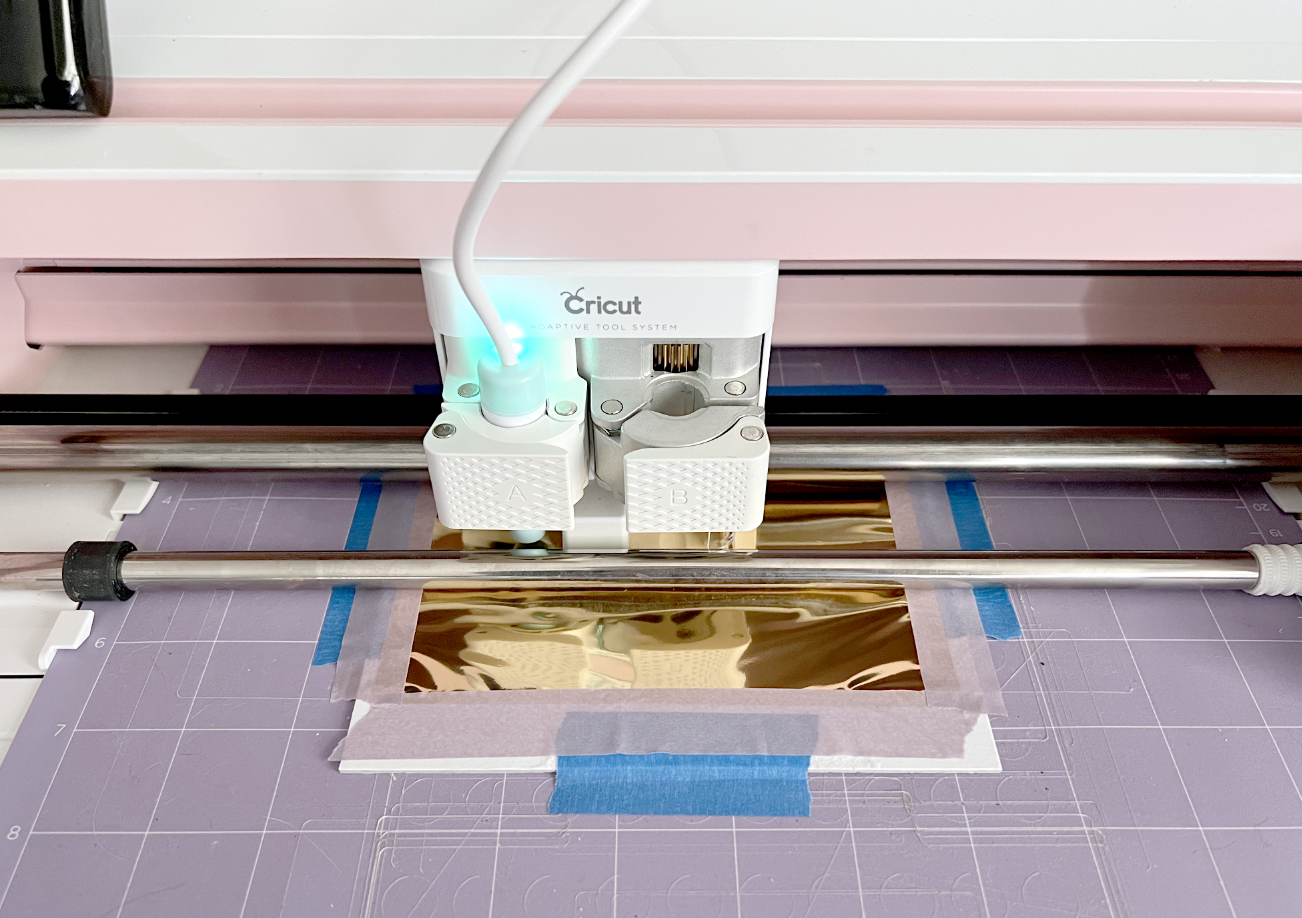
I press “Go” on my machine again and the foil quill draws the snowflake and the date. Once it’s finished, a little box will pop up in Design Space saying the action is complete, you can click OK.
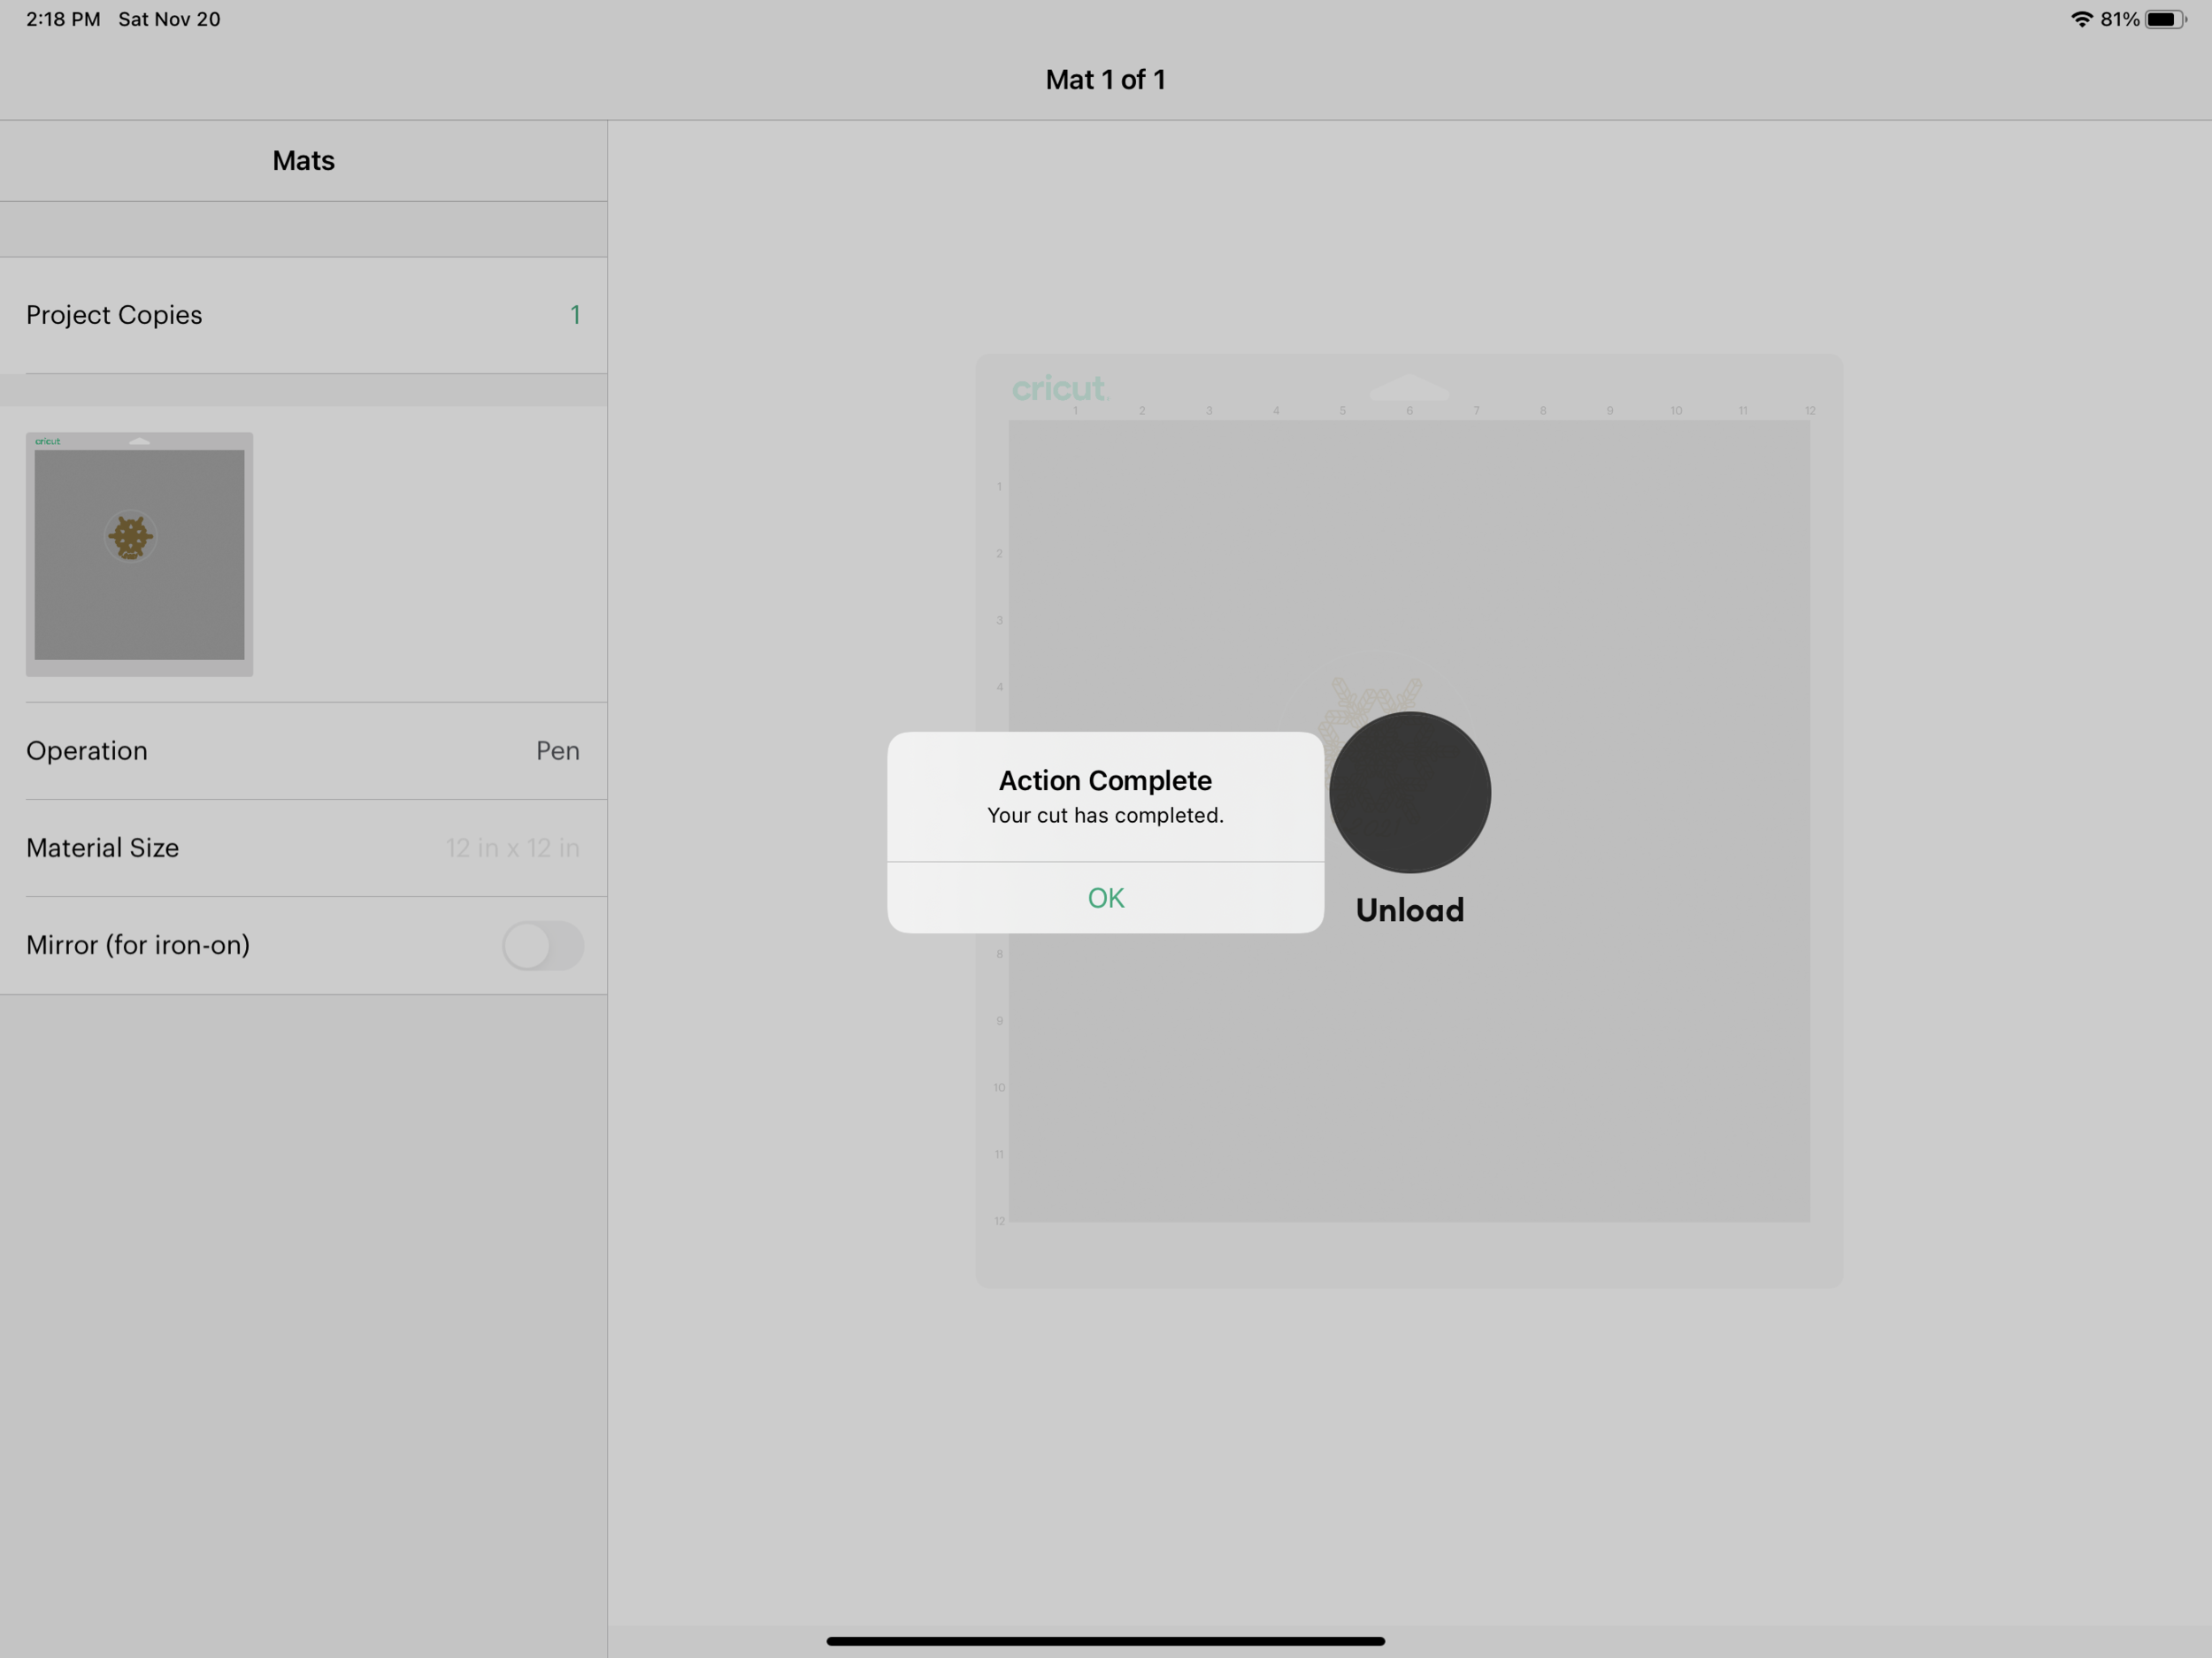
If you want to make another ornament, DO NOT unload your mat and do not exit Design Space. Just leave this screen showing.

Remove the Foil Quill from clamp A and carefully remove the tape from the foil and remove the acrylic disc from the template. You can also remove the protective film from the back of the acrylic disc.
Now you can place a new acrylic disc in the template, cover it with the foil. Press the “Go” button on the machine and it will start with the circle shape again.
A couple of tips:
Remove the foil quill from Clamp A when your machine wants to draw the circle portion of the artwork.
Don’t unload your mat from the machine! Otherwise you will need to do the whole template alignment again.
You can use a piece of tape to carefully clean up the edges of the foil.