Cricut Tutorial

Creating Your Own Single Line SVG File - Part Three

Hi Everyone!

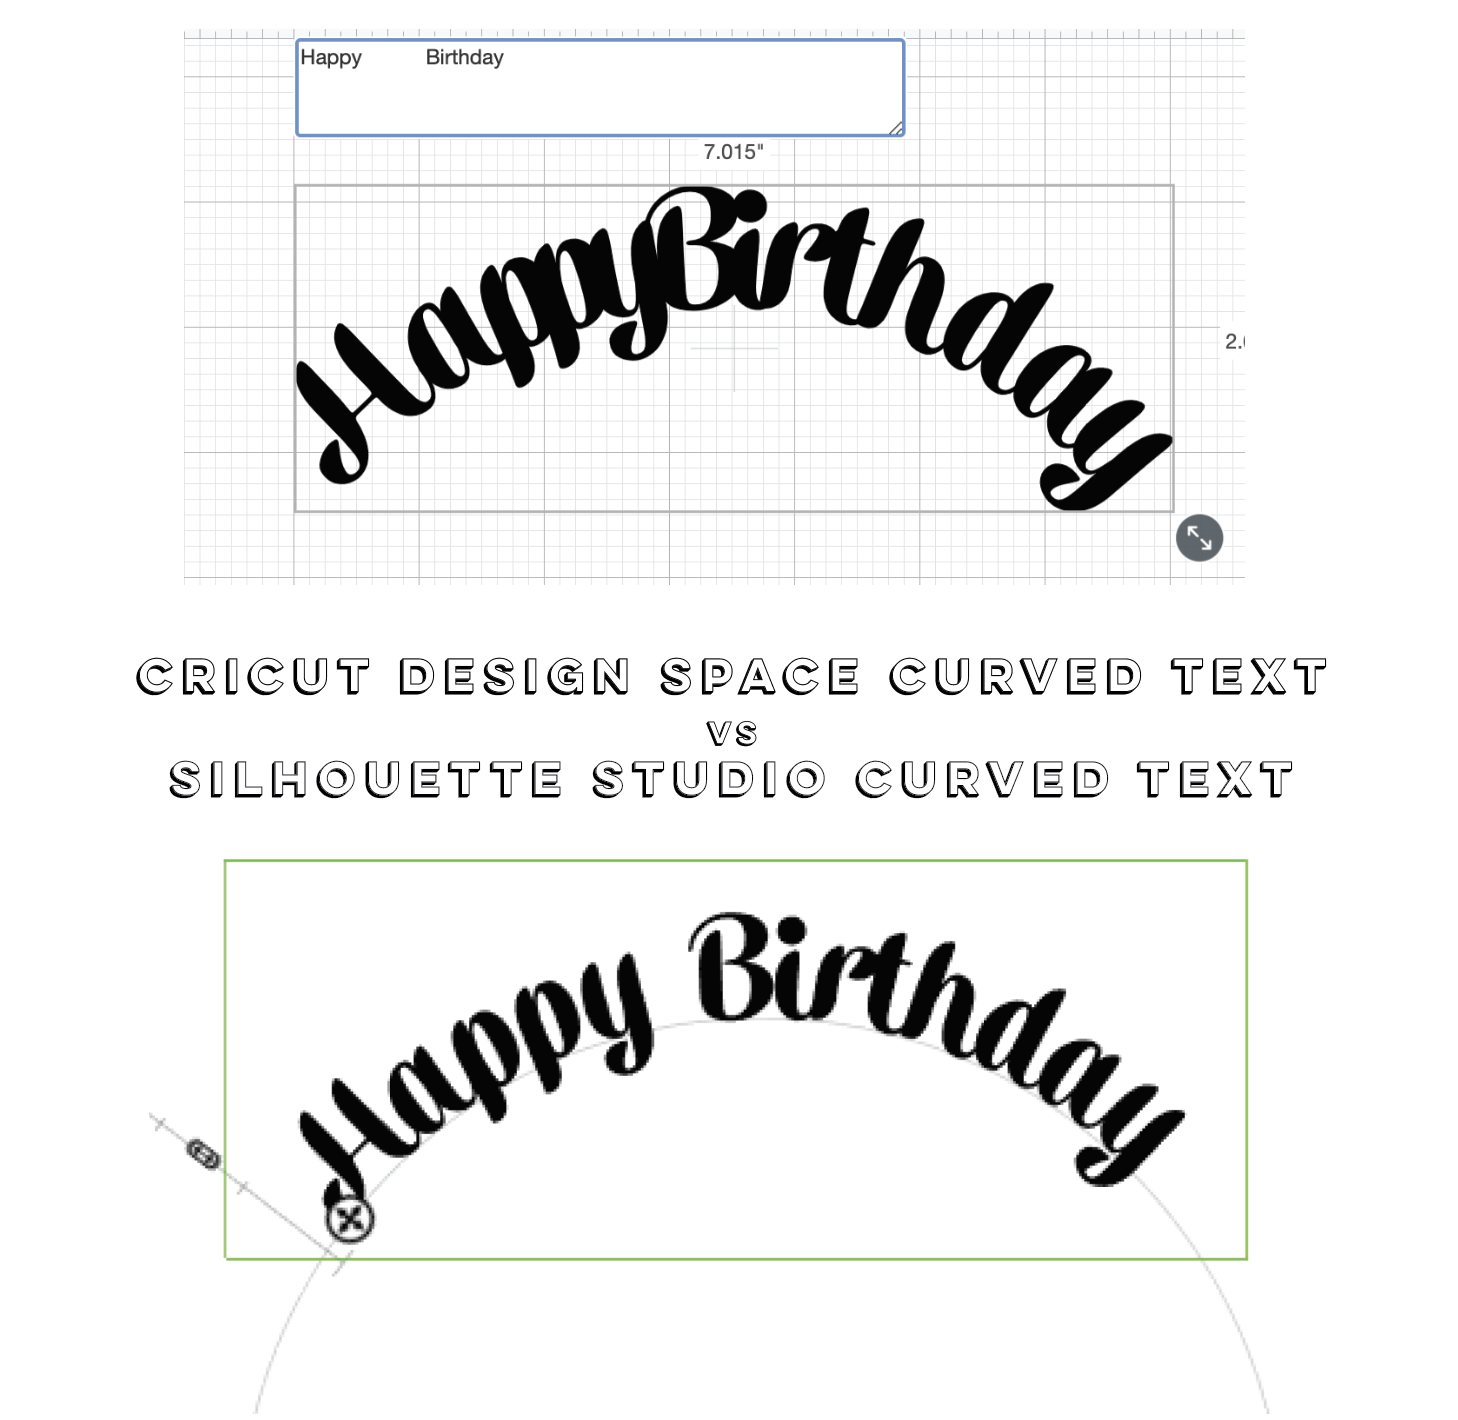
This week I’m going to test the single line SVG file that I created in the Illustrator app last week. I’m going to do this all on my iPad, so I’m going to test it with the Cricut app.

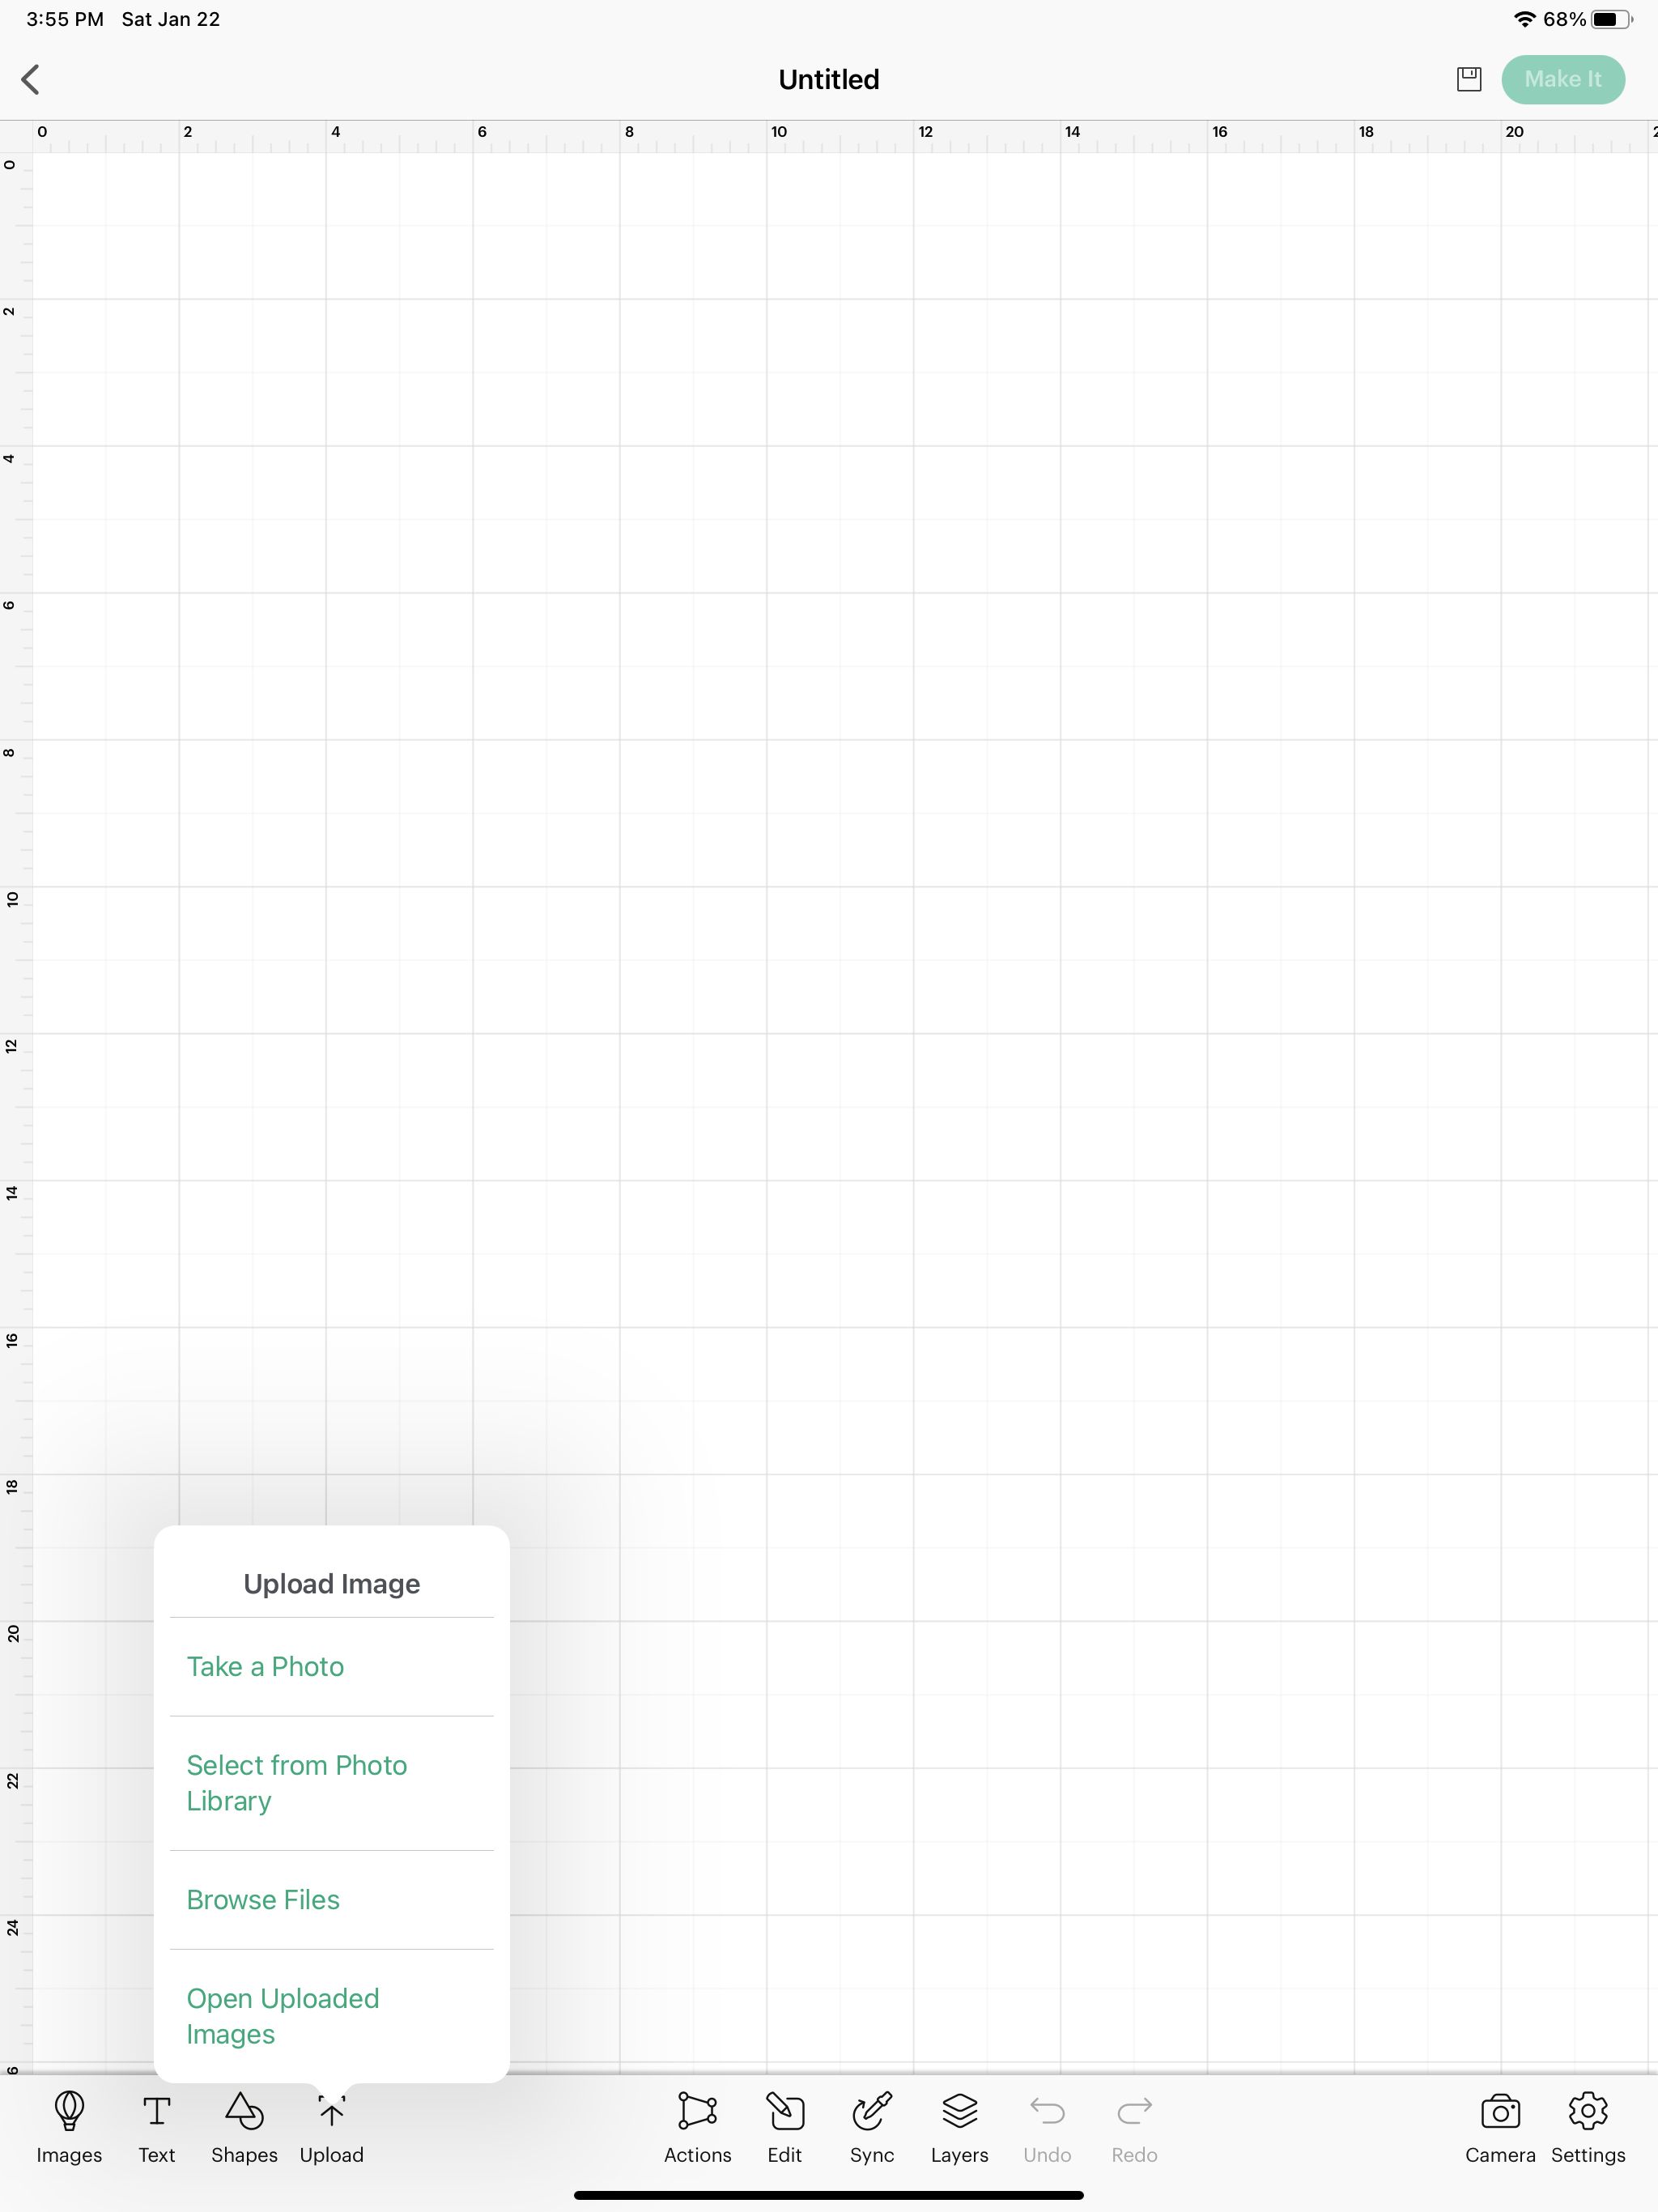
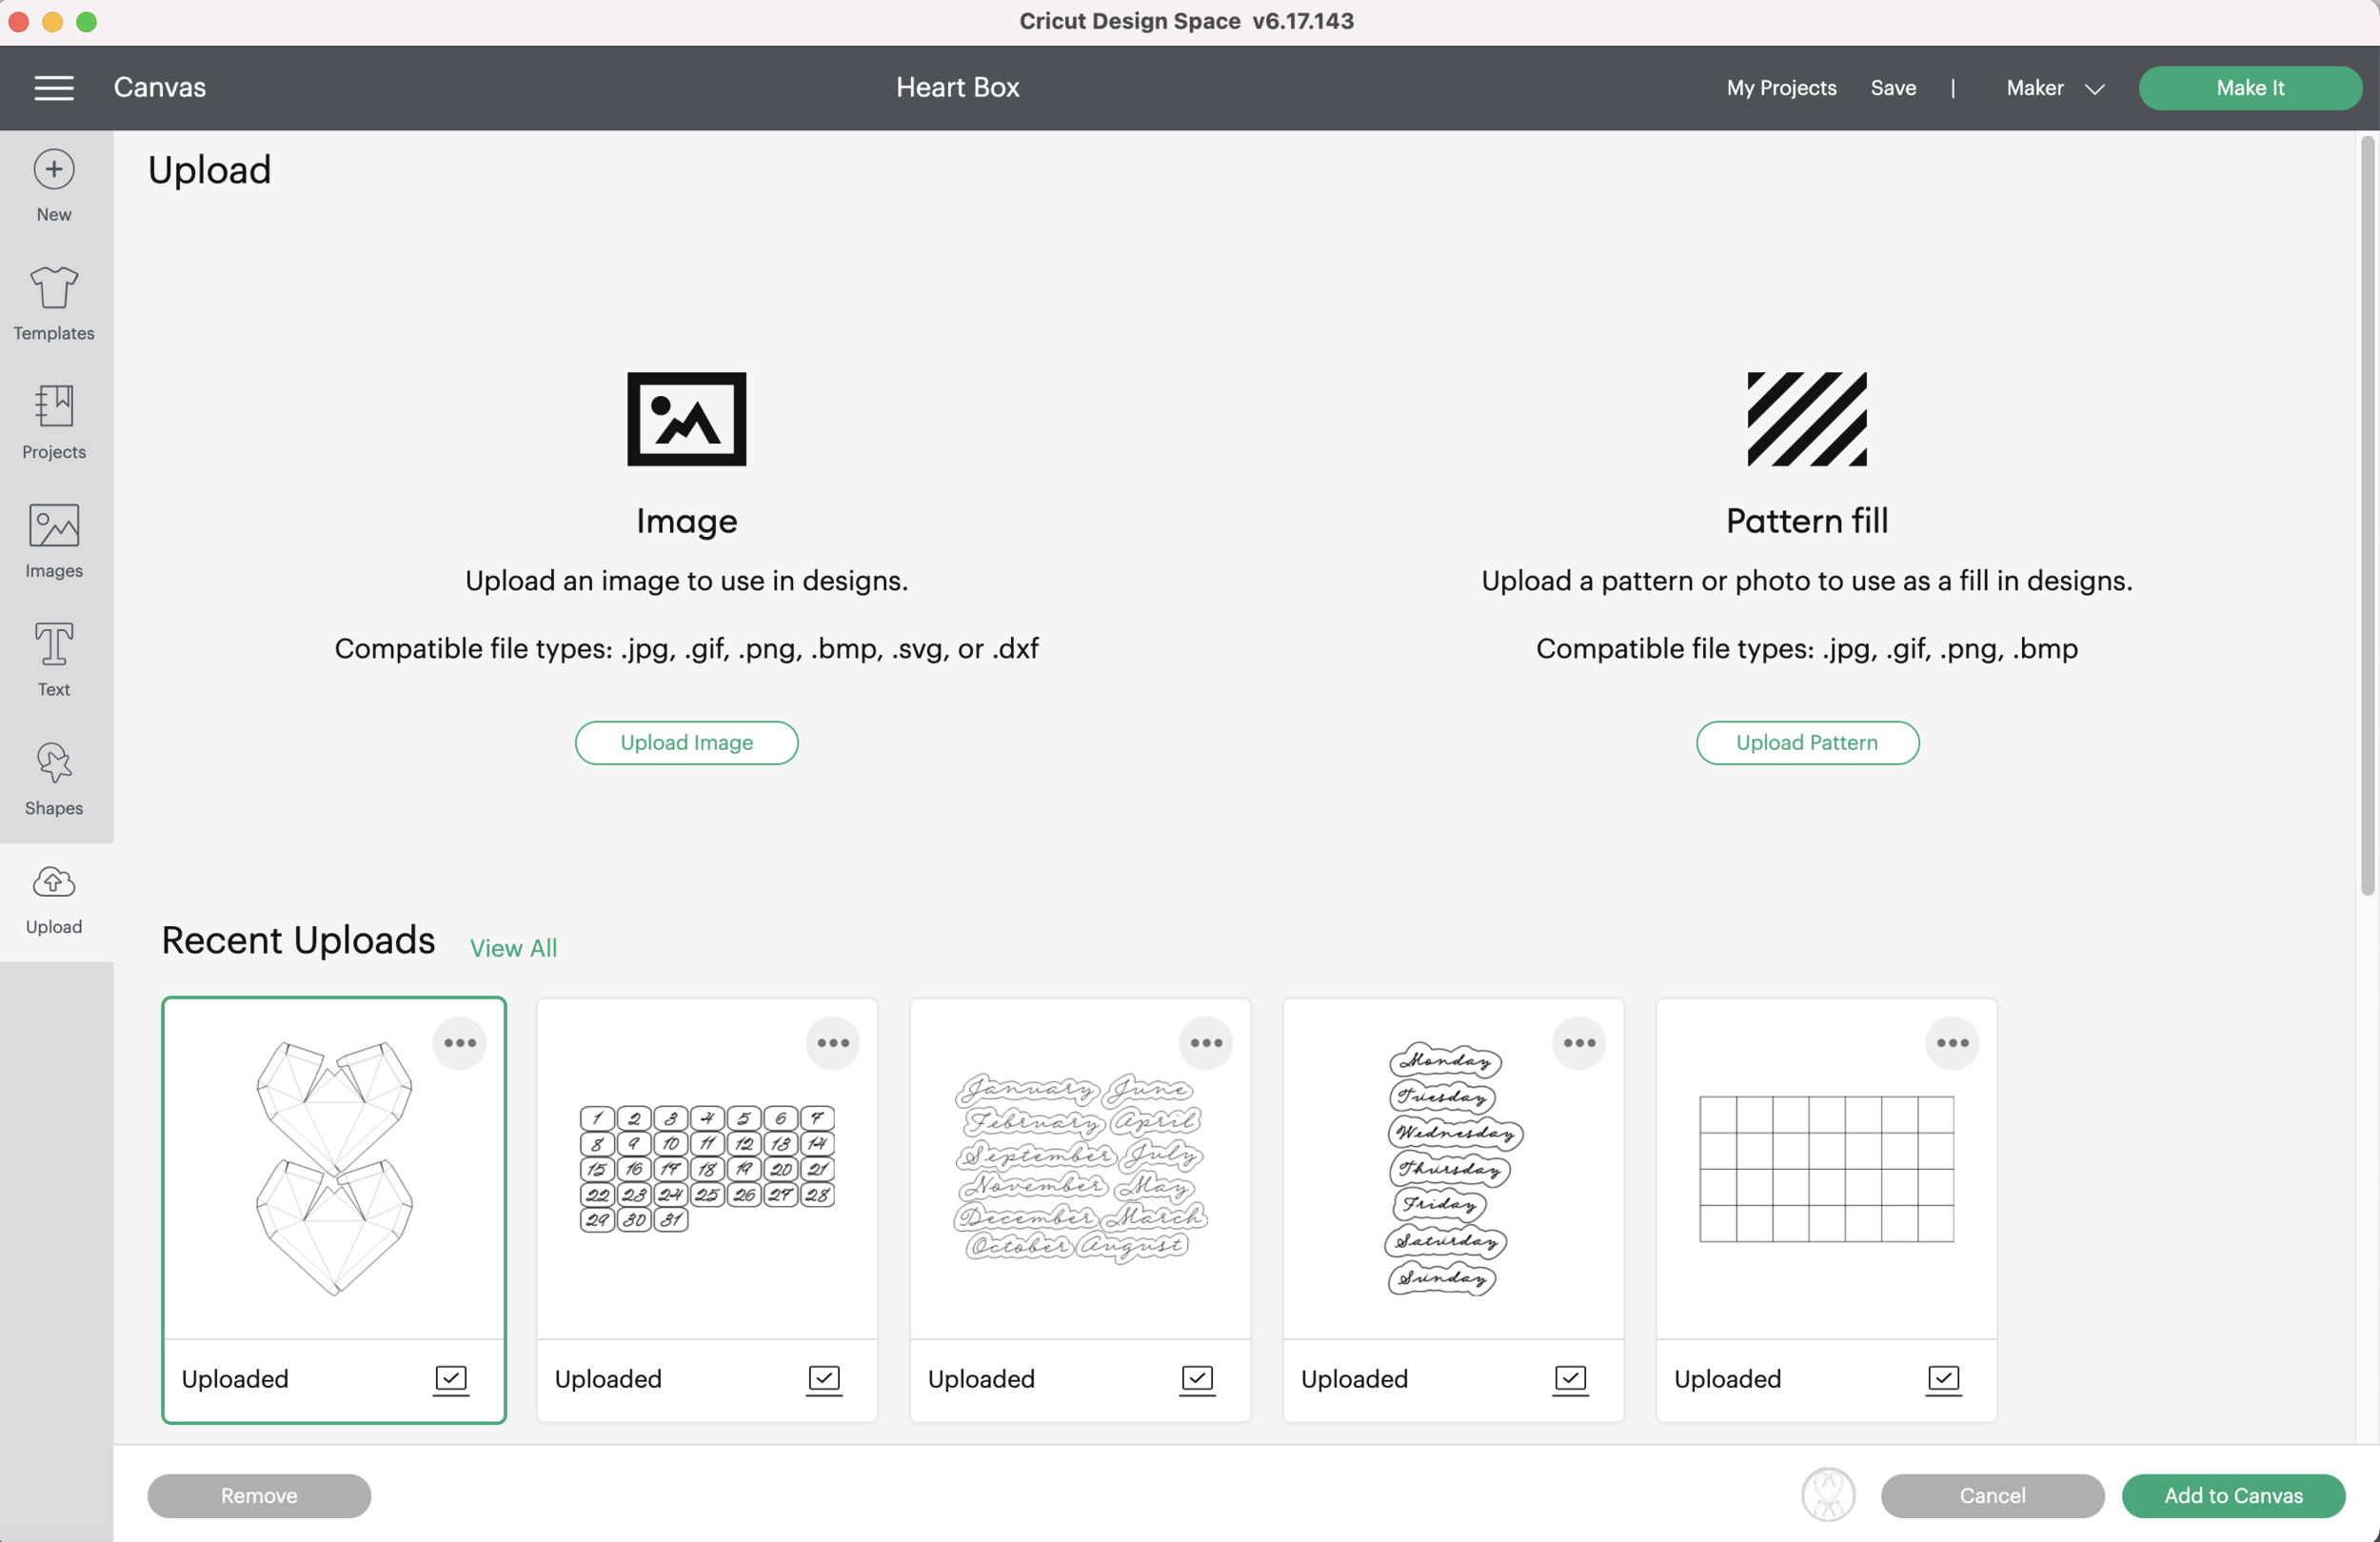
First, I’m going to open the Cricut app and start a new project. Then, down at the bottom of the screen, I’m going to select UPLOAD and BROWSE FILES.

Testing Single Line SVG file in Cricut Design Space

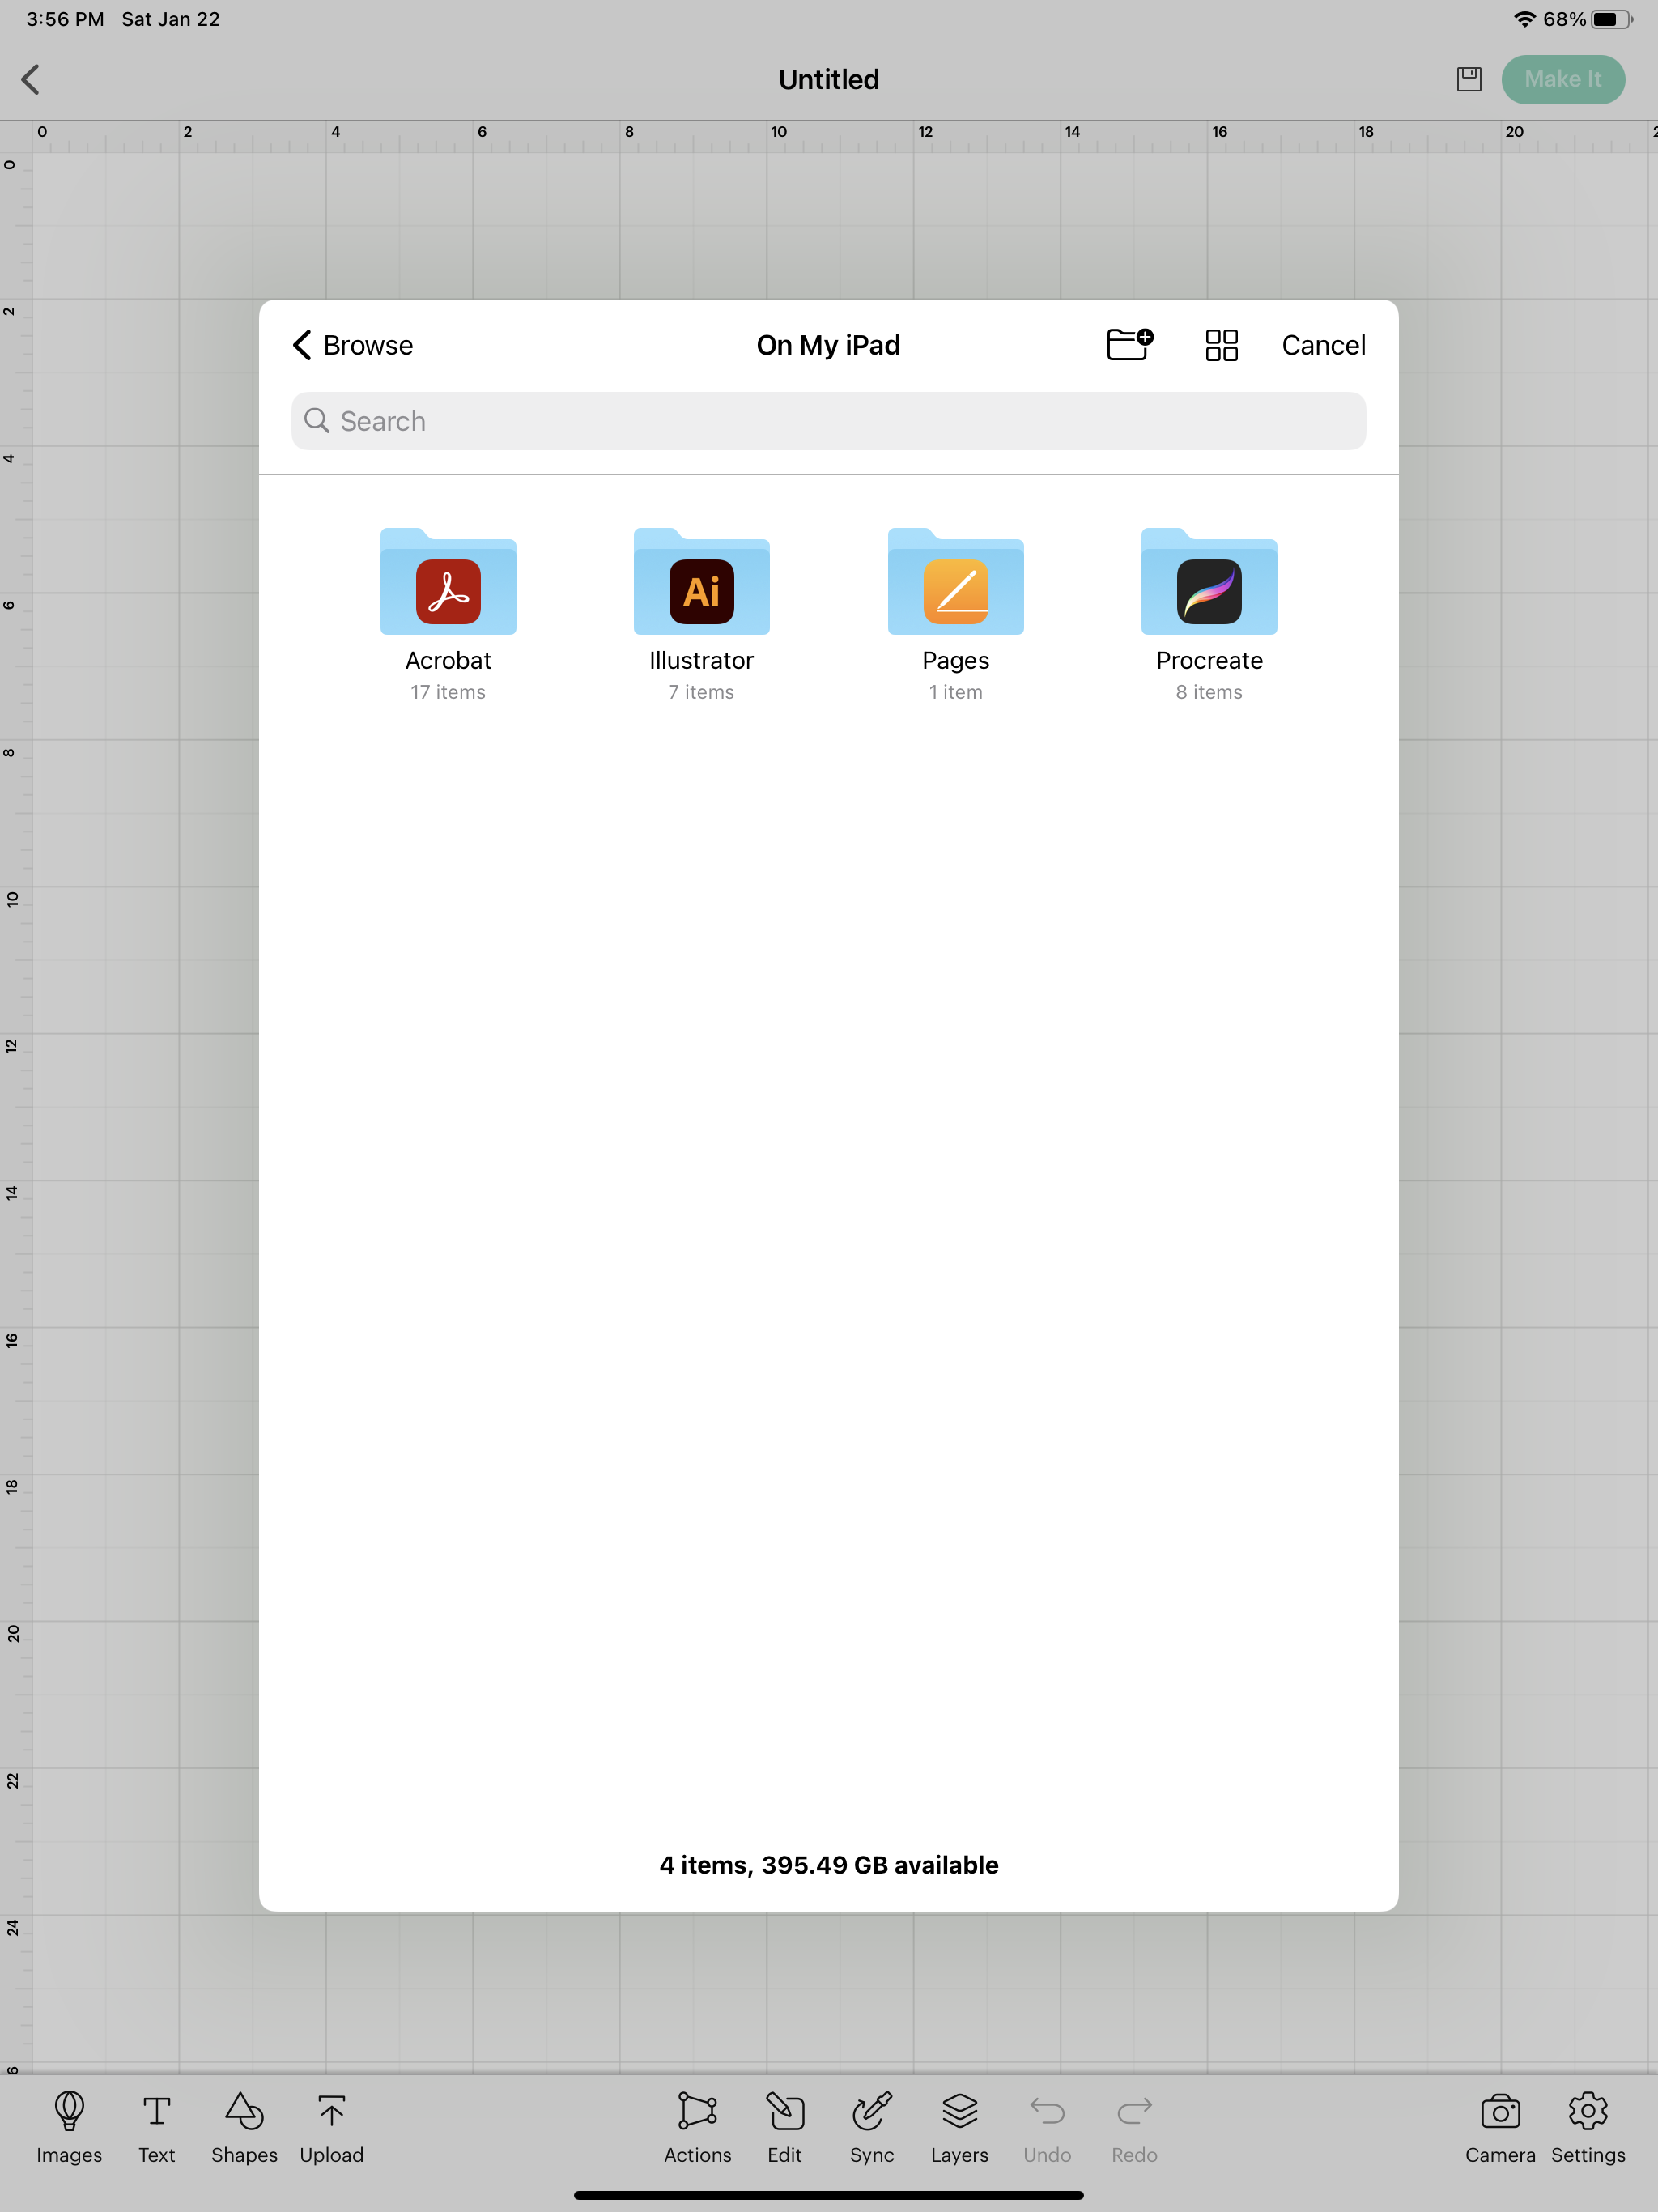
In last week’s tutorial, I saved my design on my iPad as an SVG file. Now. I need to locate that file on my iPad. I saved mine in my Illustrator folder.

Testing Single Line SVG file in Cricut Design Space

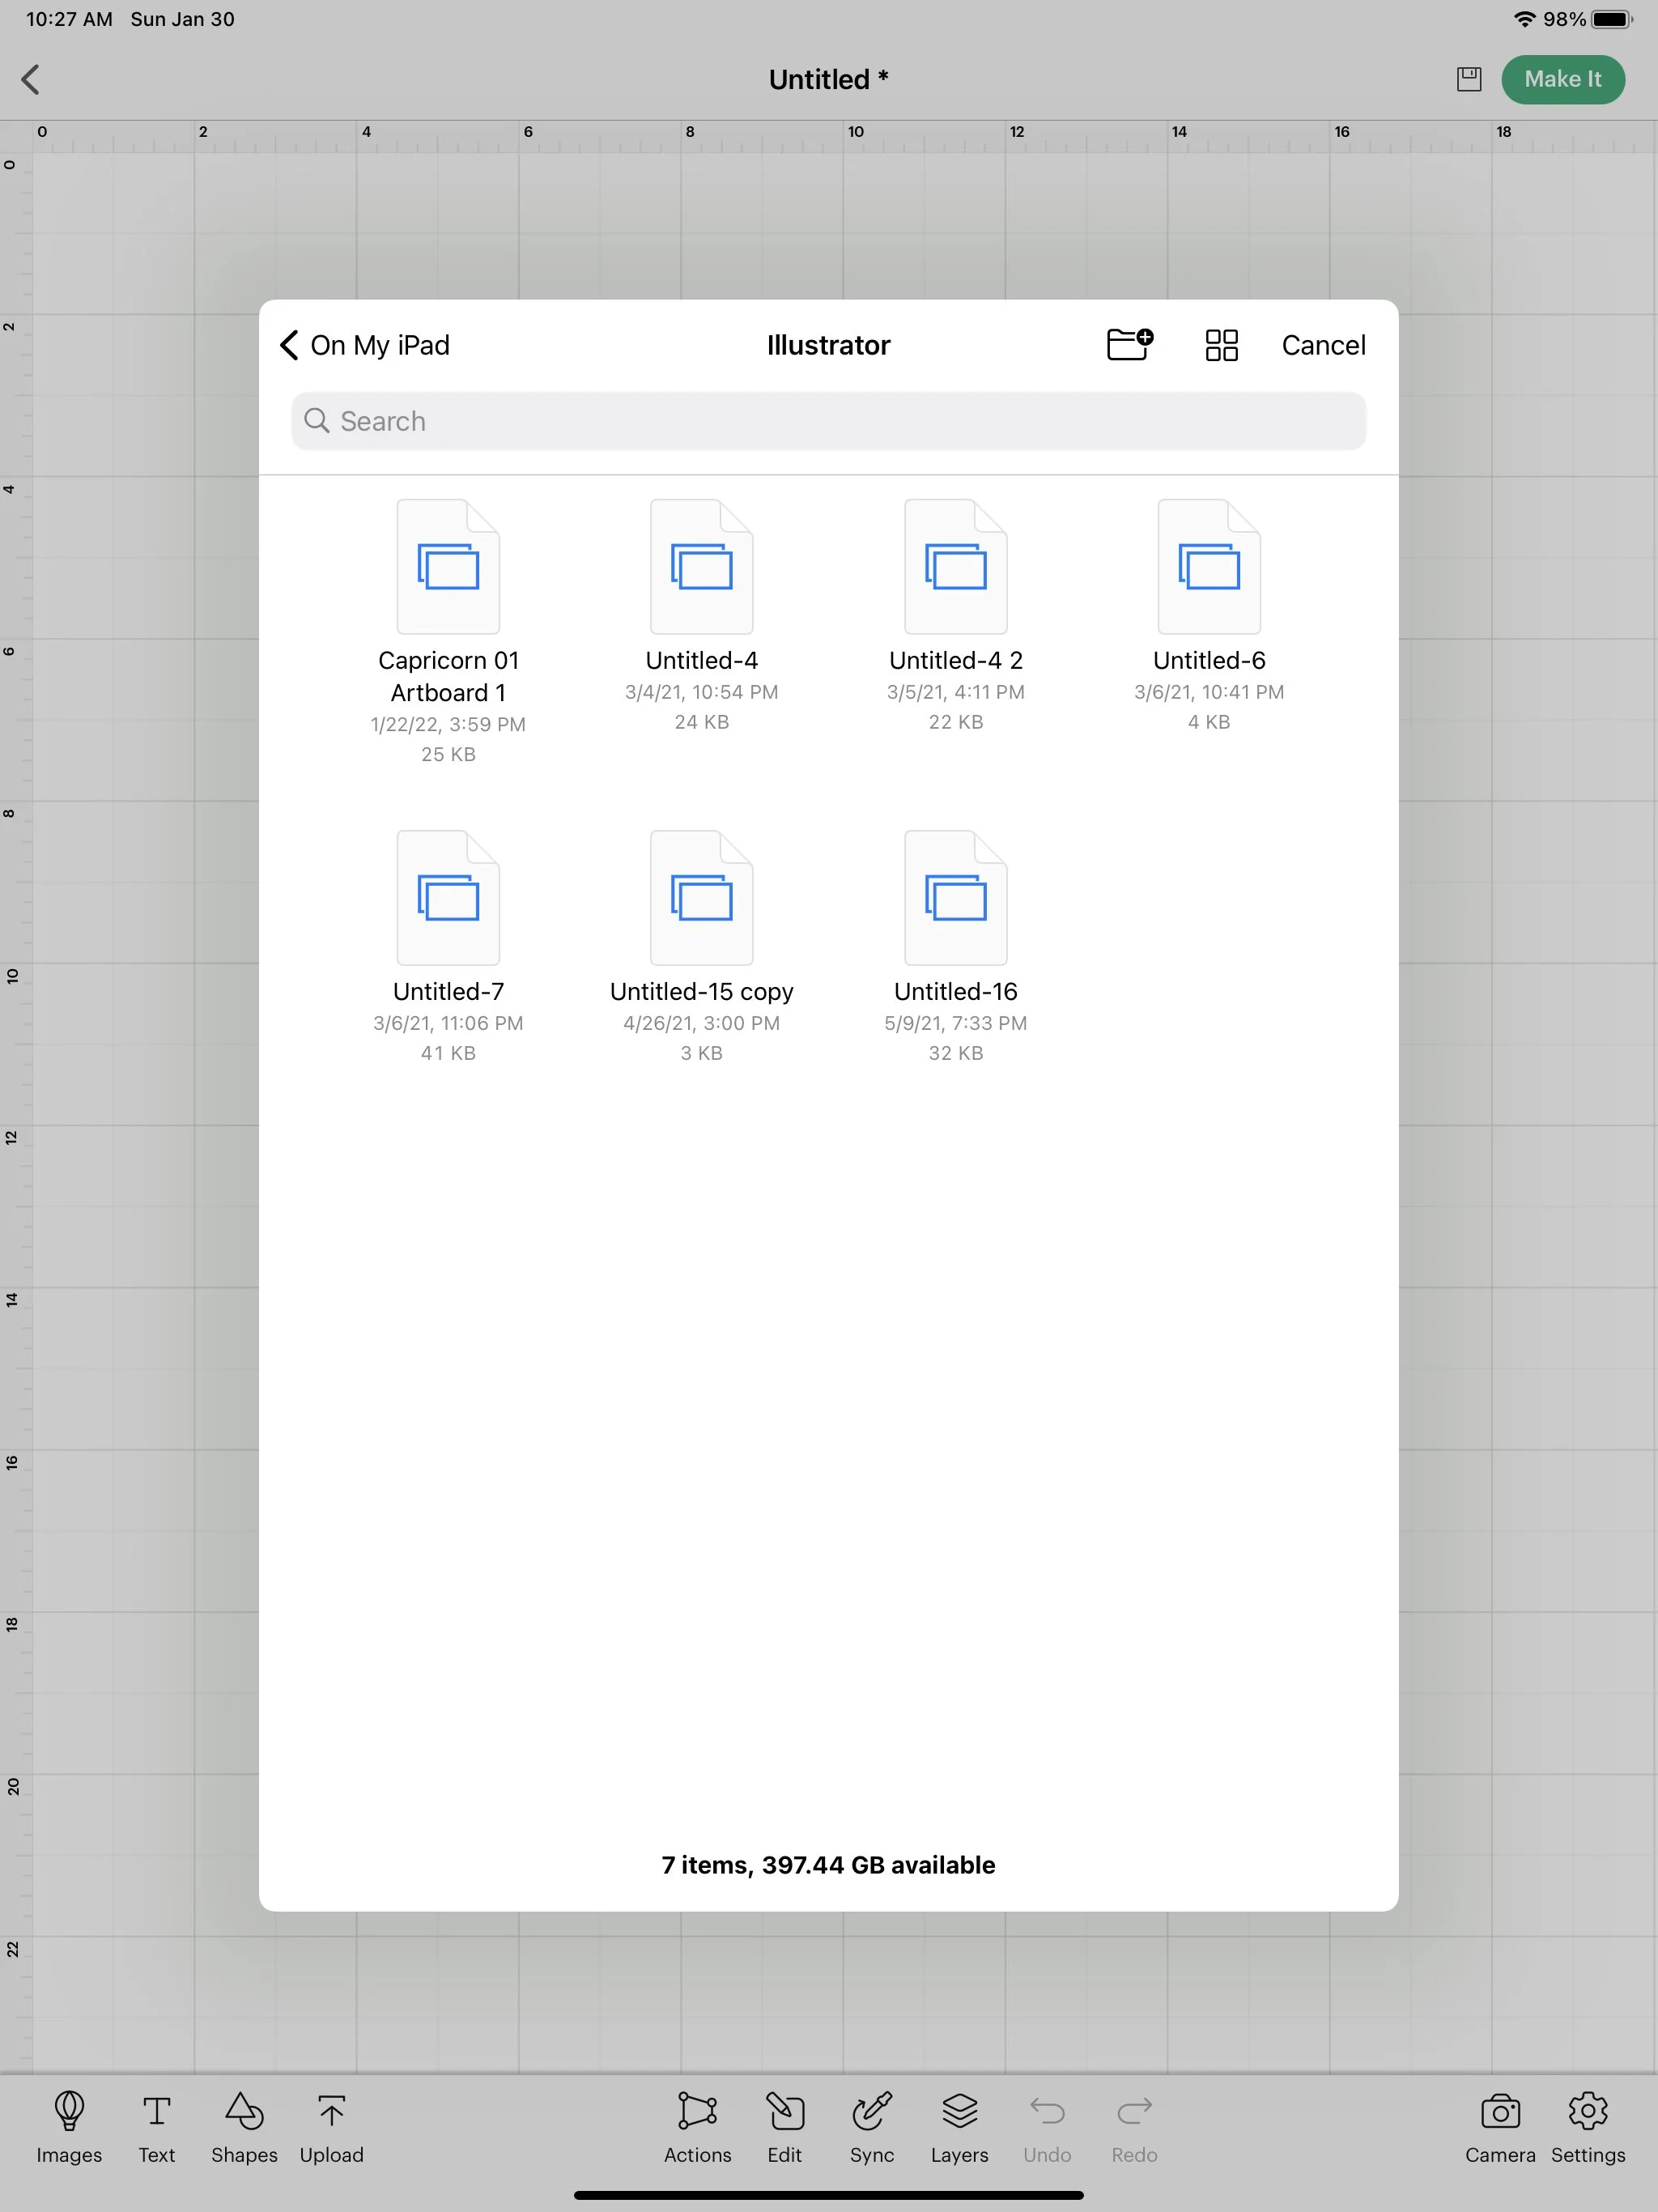
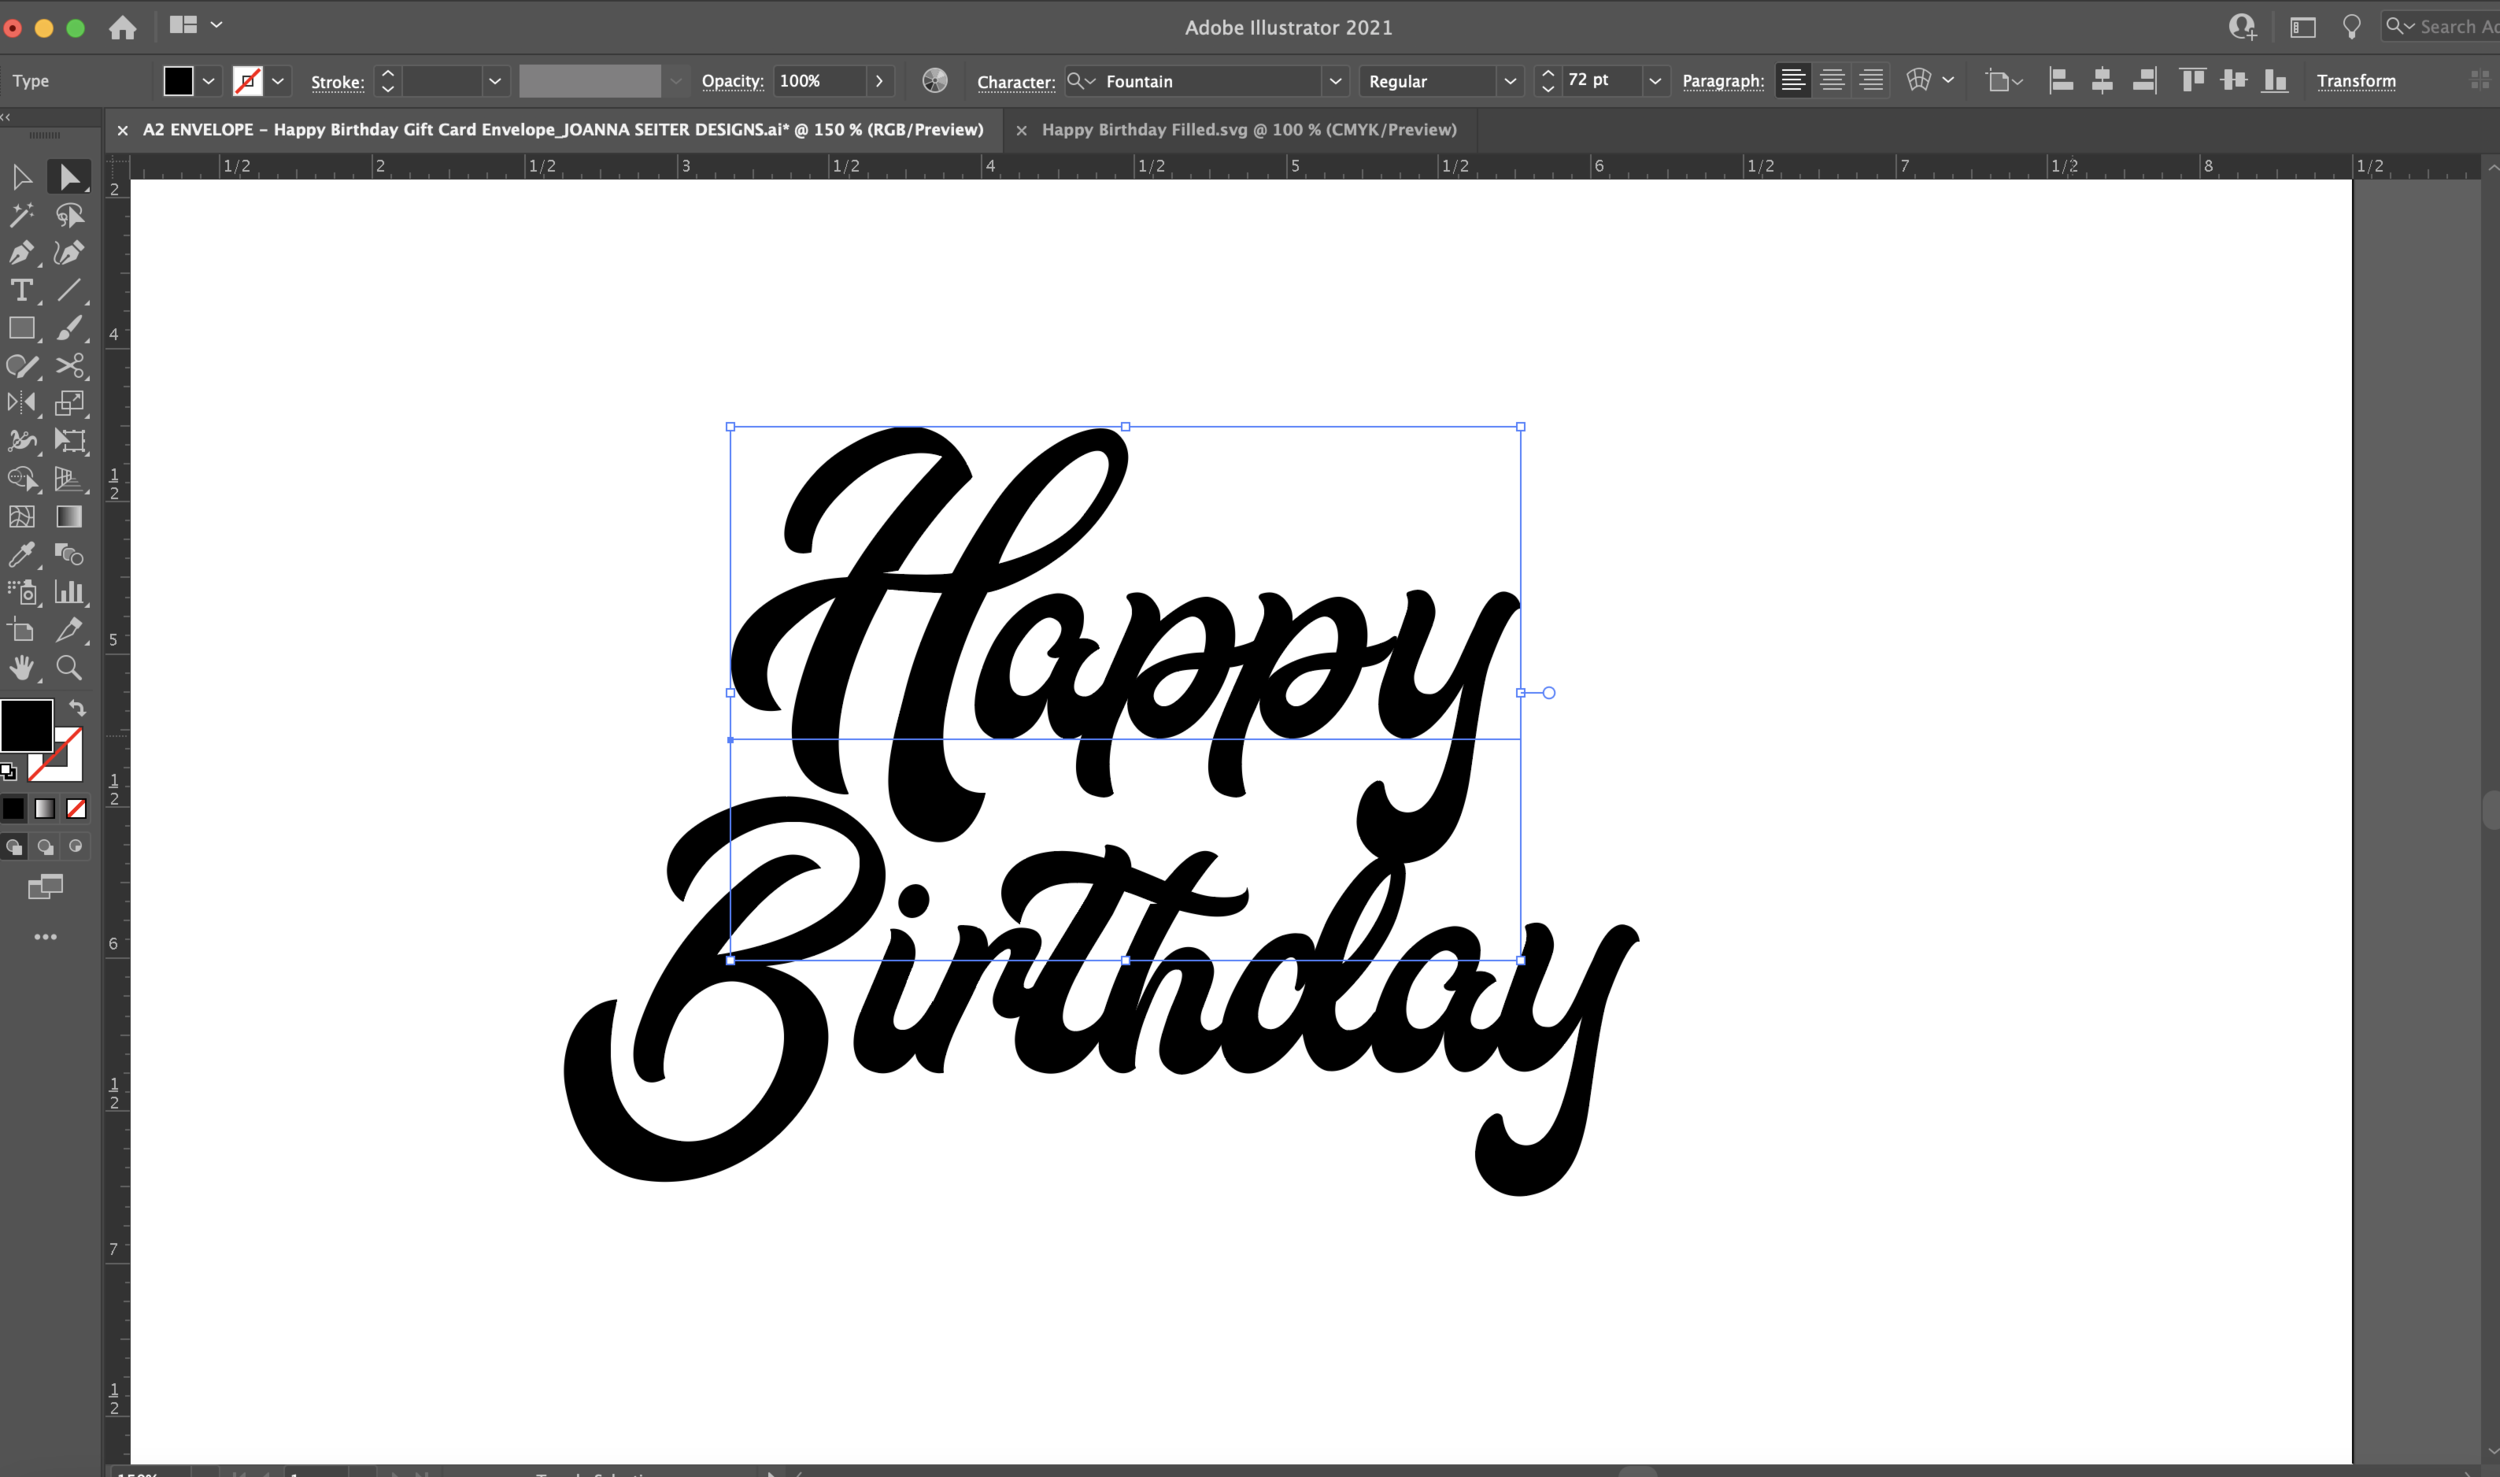
Inside the Illustrator folder I select my Capricorn file.

Testing Single Line SVG file in Cricut Design Space

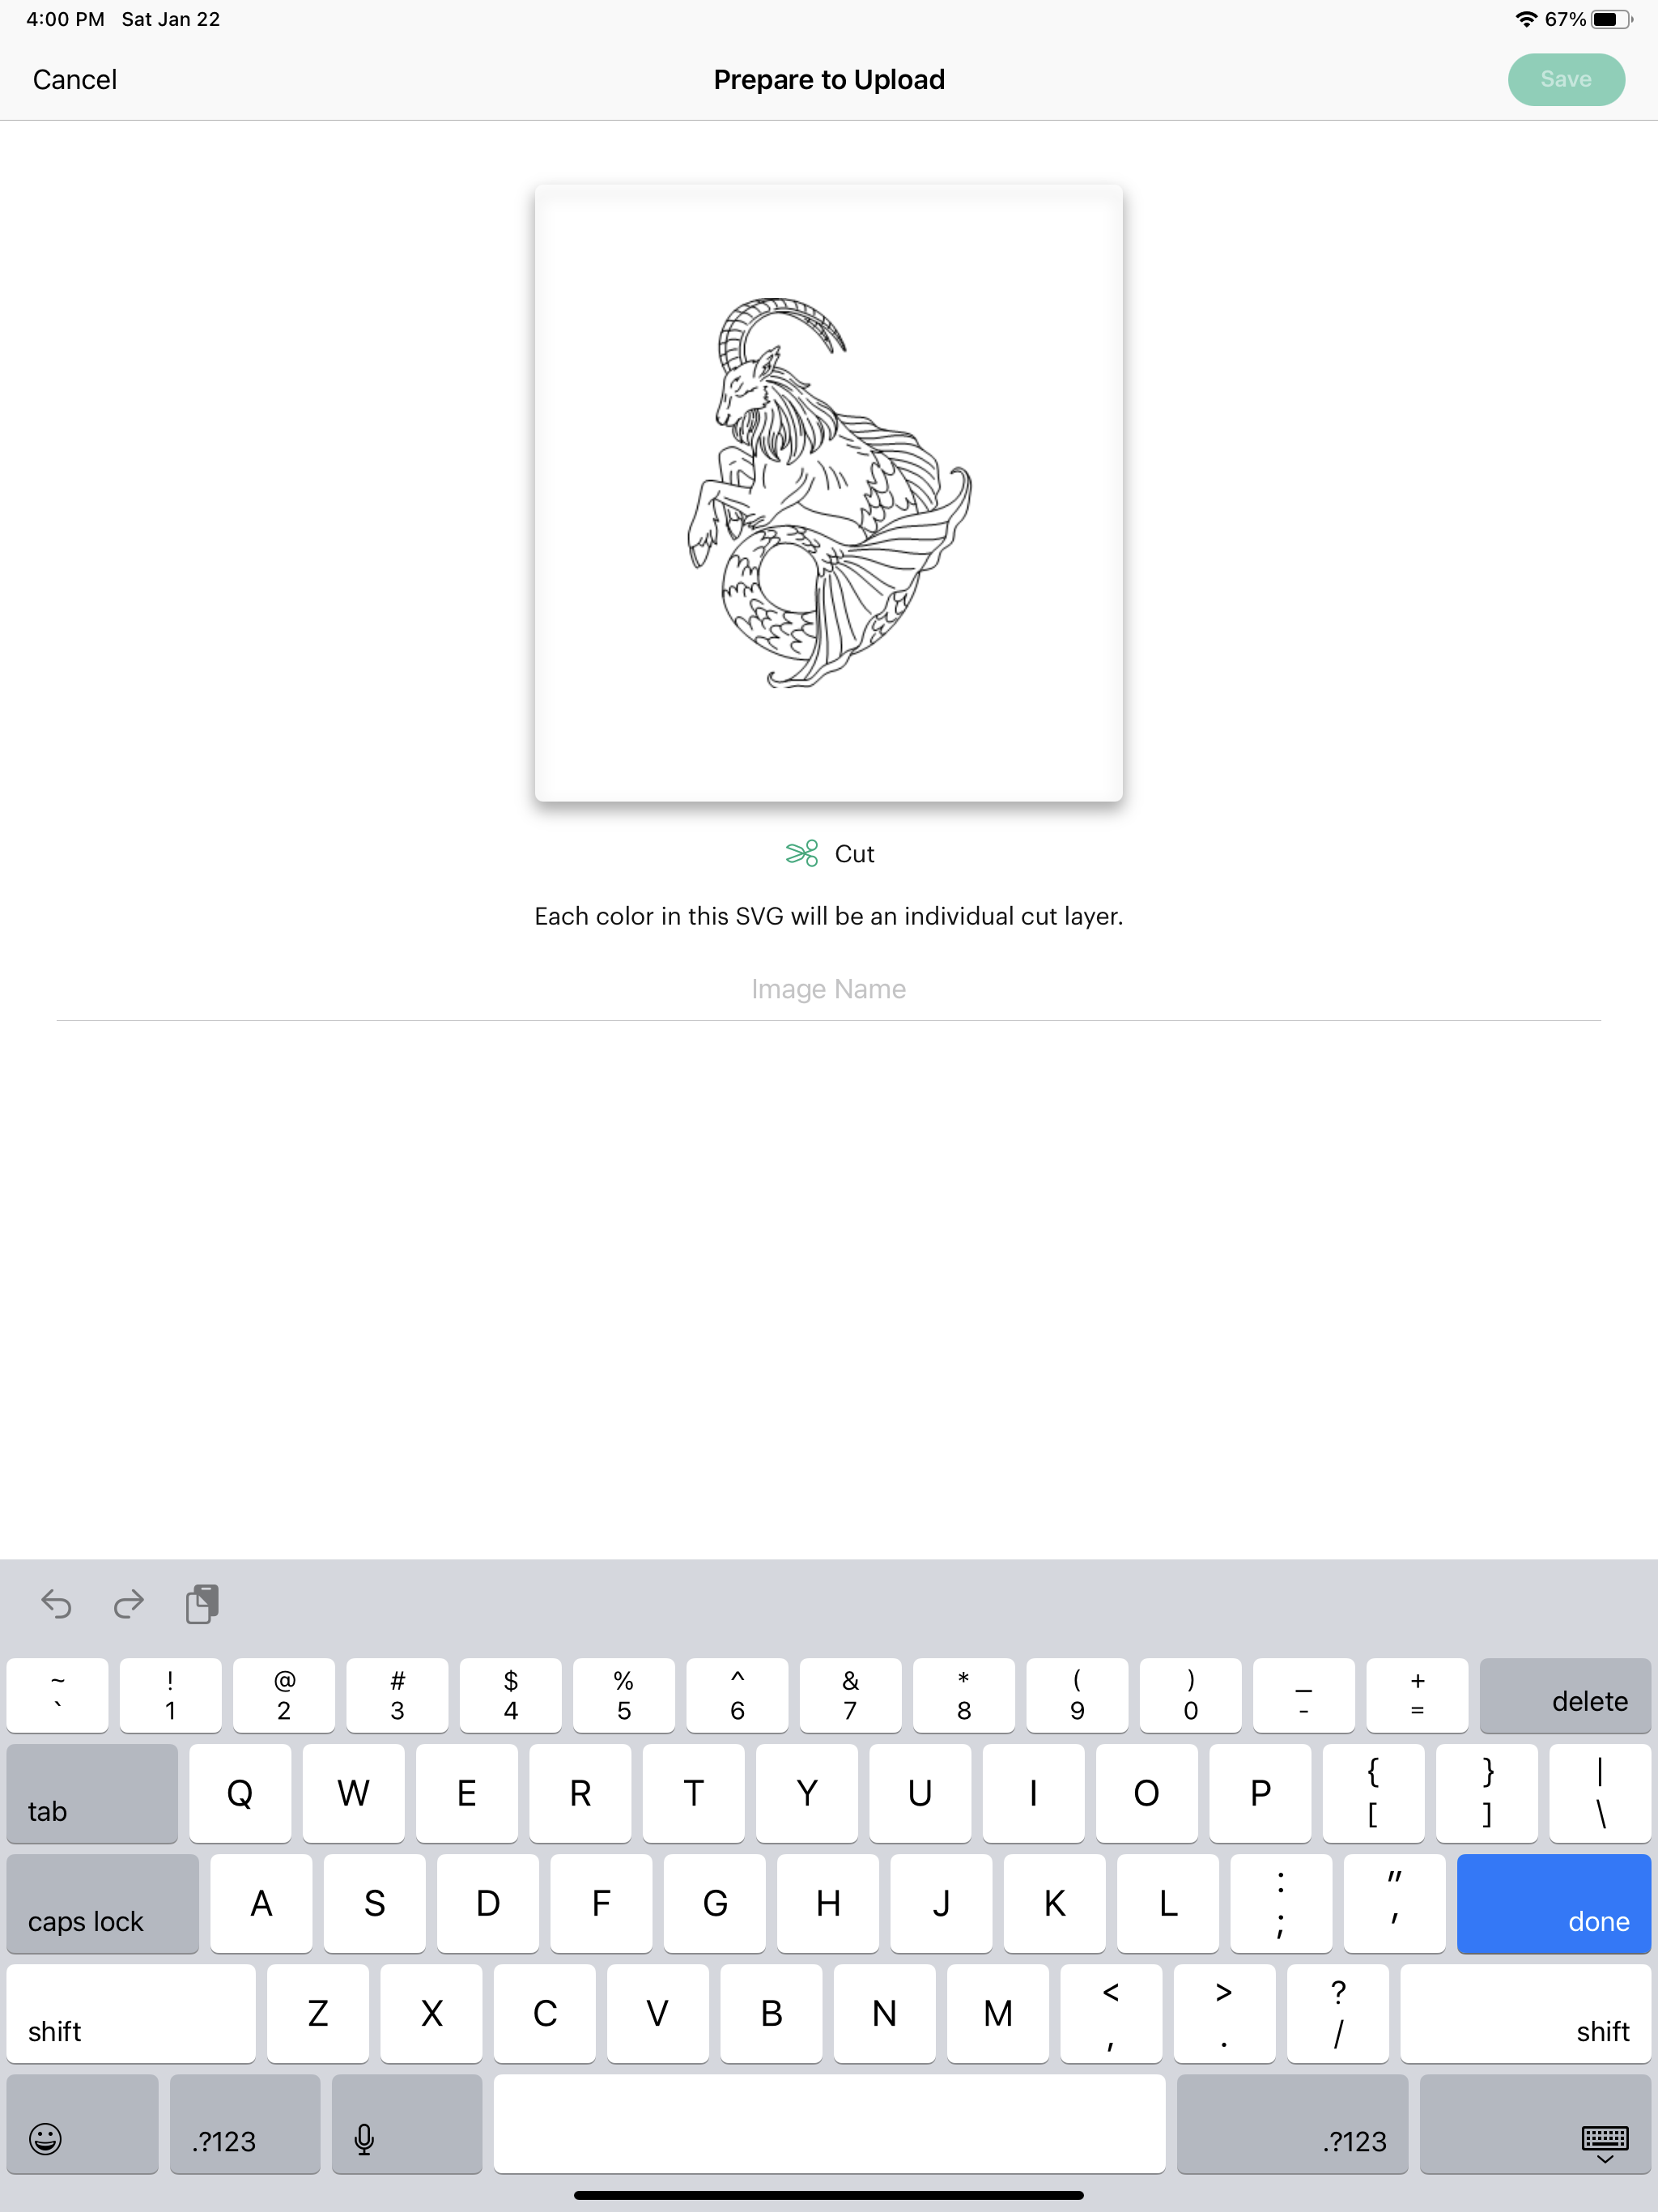
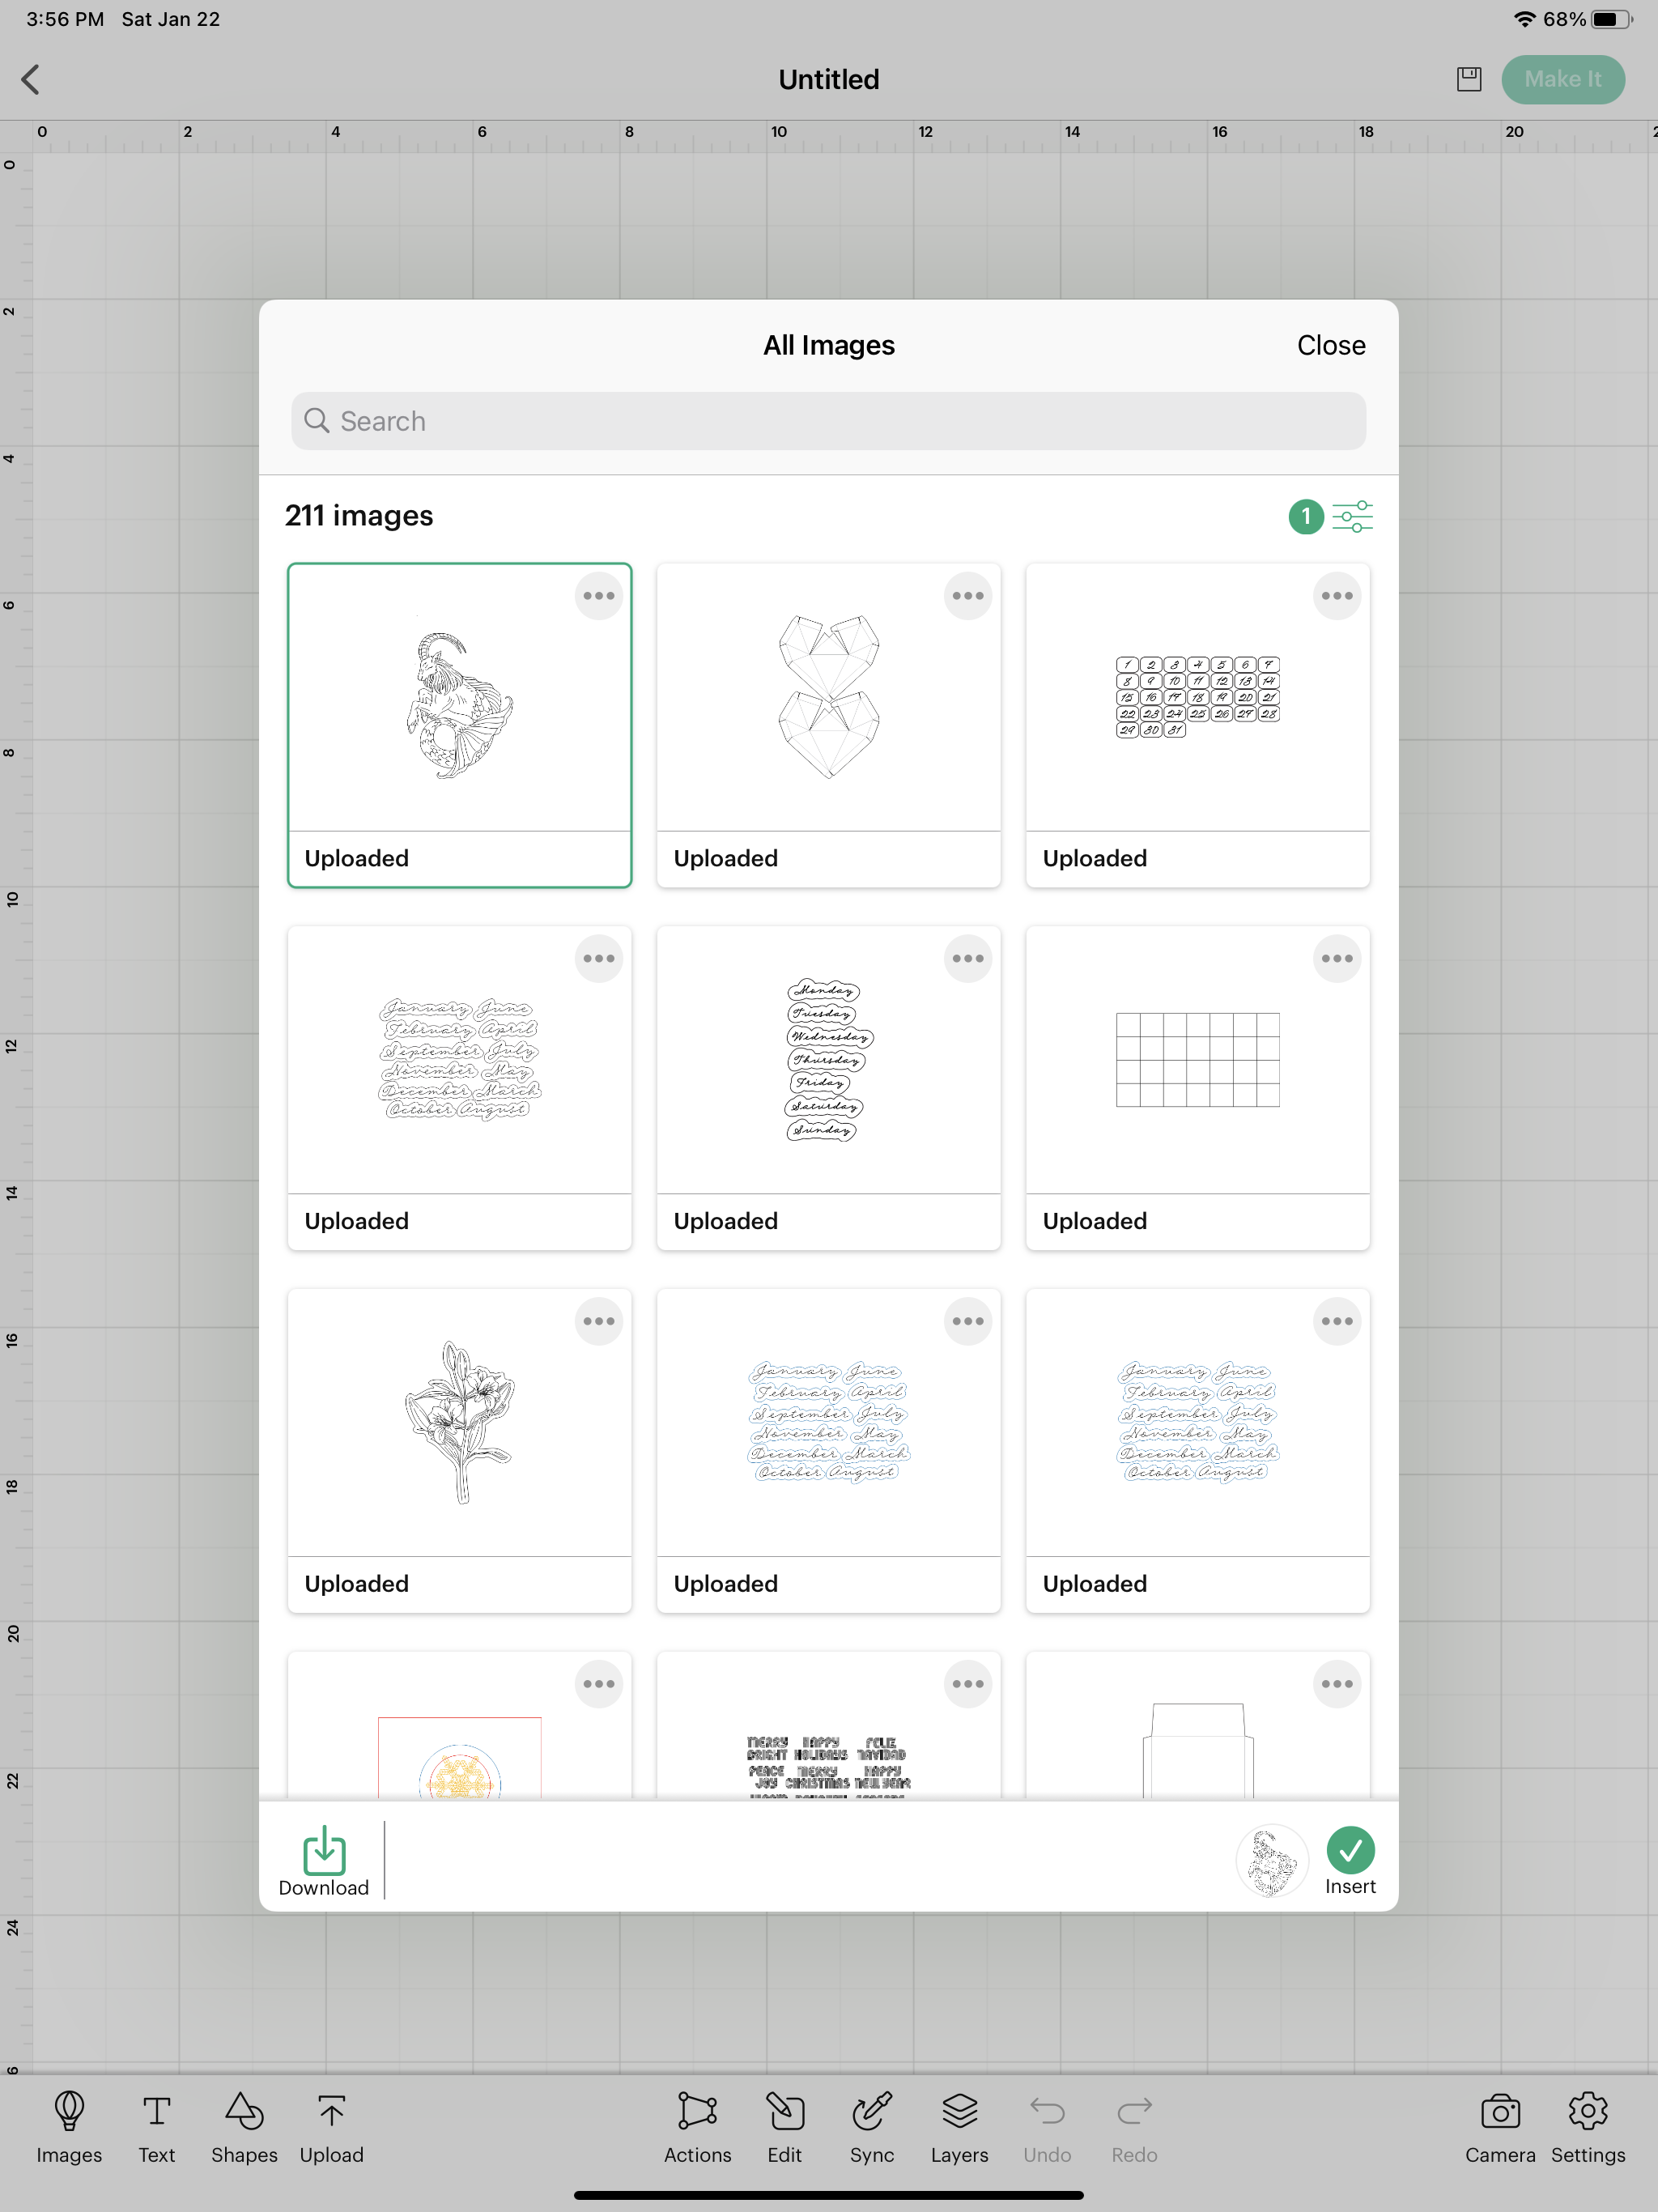
Cricut Design Space will show a preview of the file. It will default to a CUT image. I can’t change it to a DRAW file until it’s uploaded into Design Space. So now, I can name my file and click save in the upper right corner.

Testing Single Line SVG file in Cricut Design Space

After I click save, Design Space will bring up all my uploaded images. I select my Capricorn file and click INSERT down in the bottom right corner.

Testing Single Line SVG file in Cricut Design Space

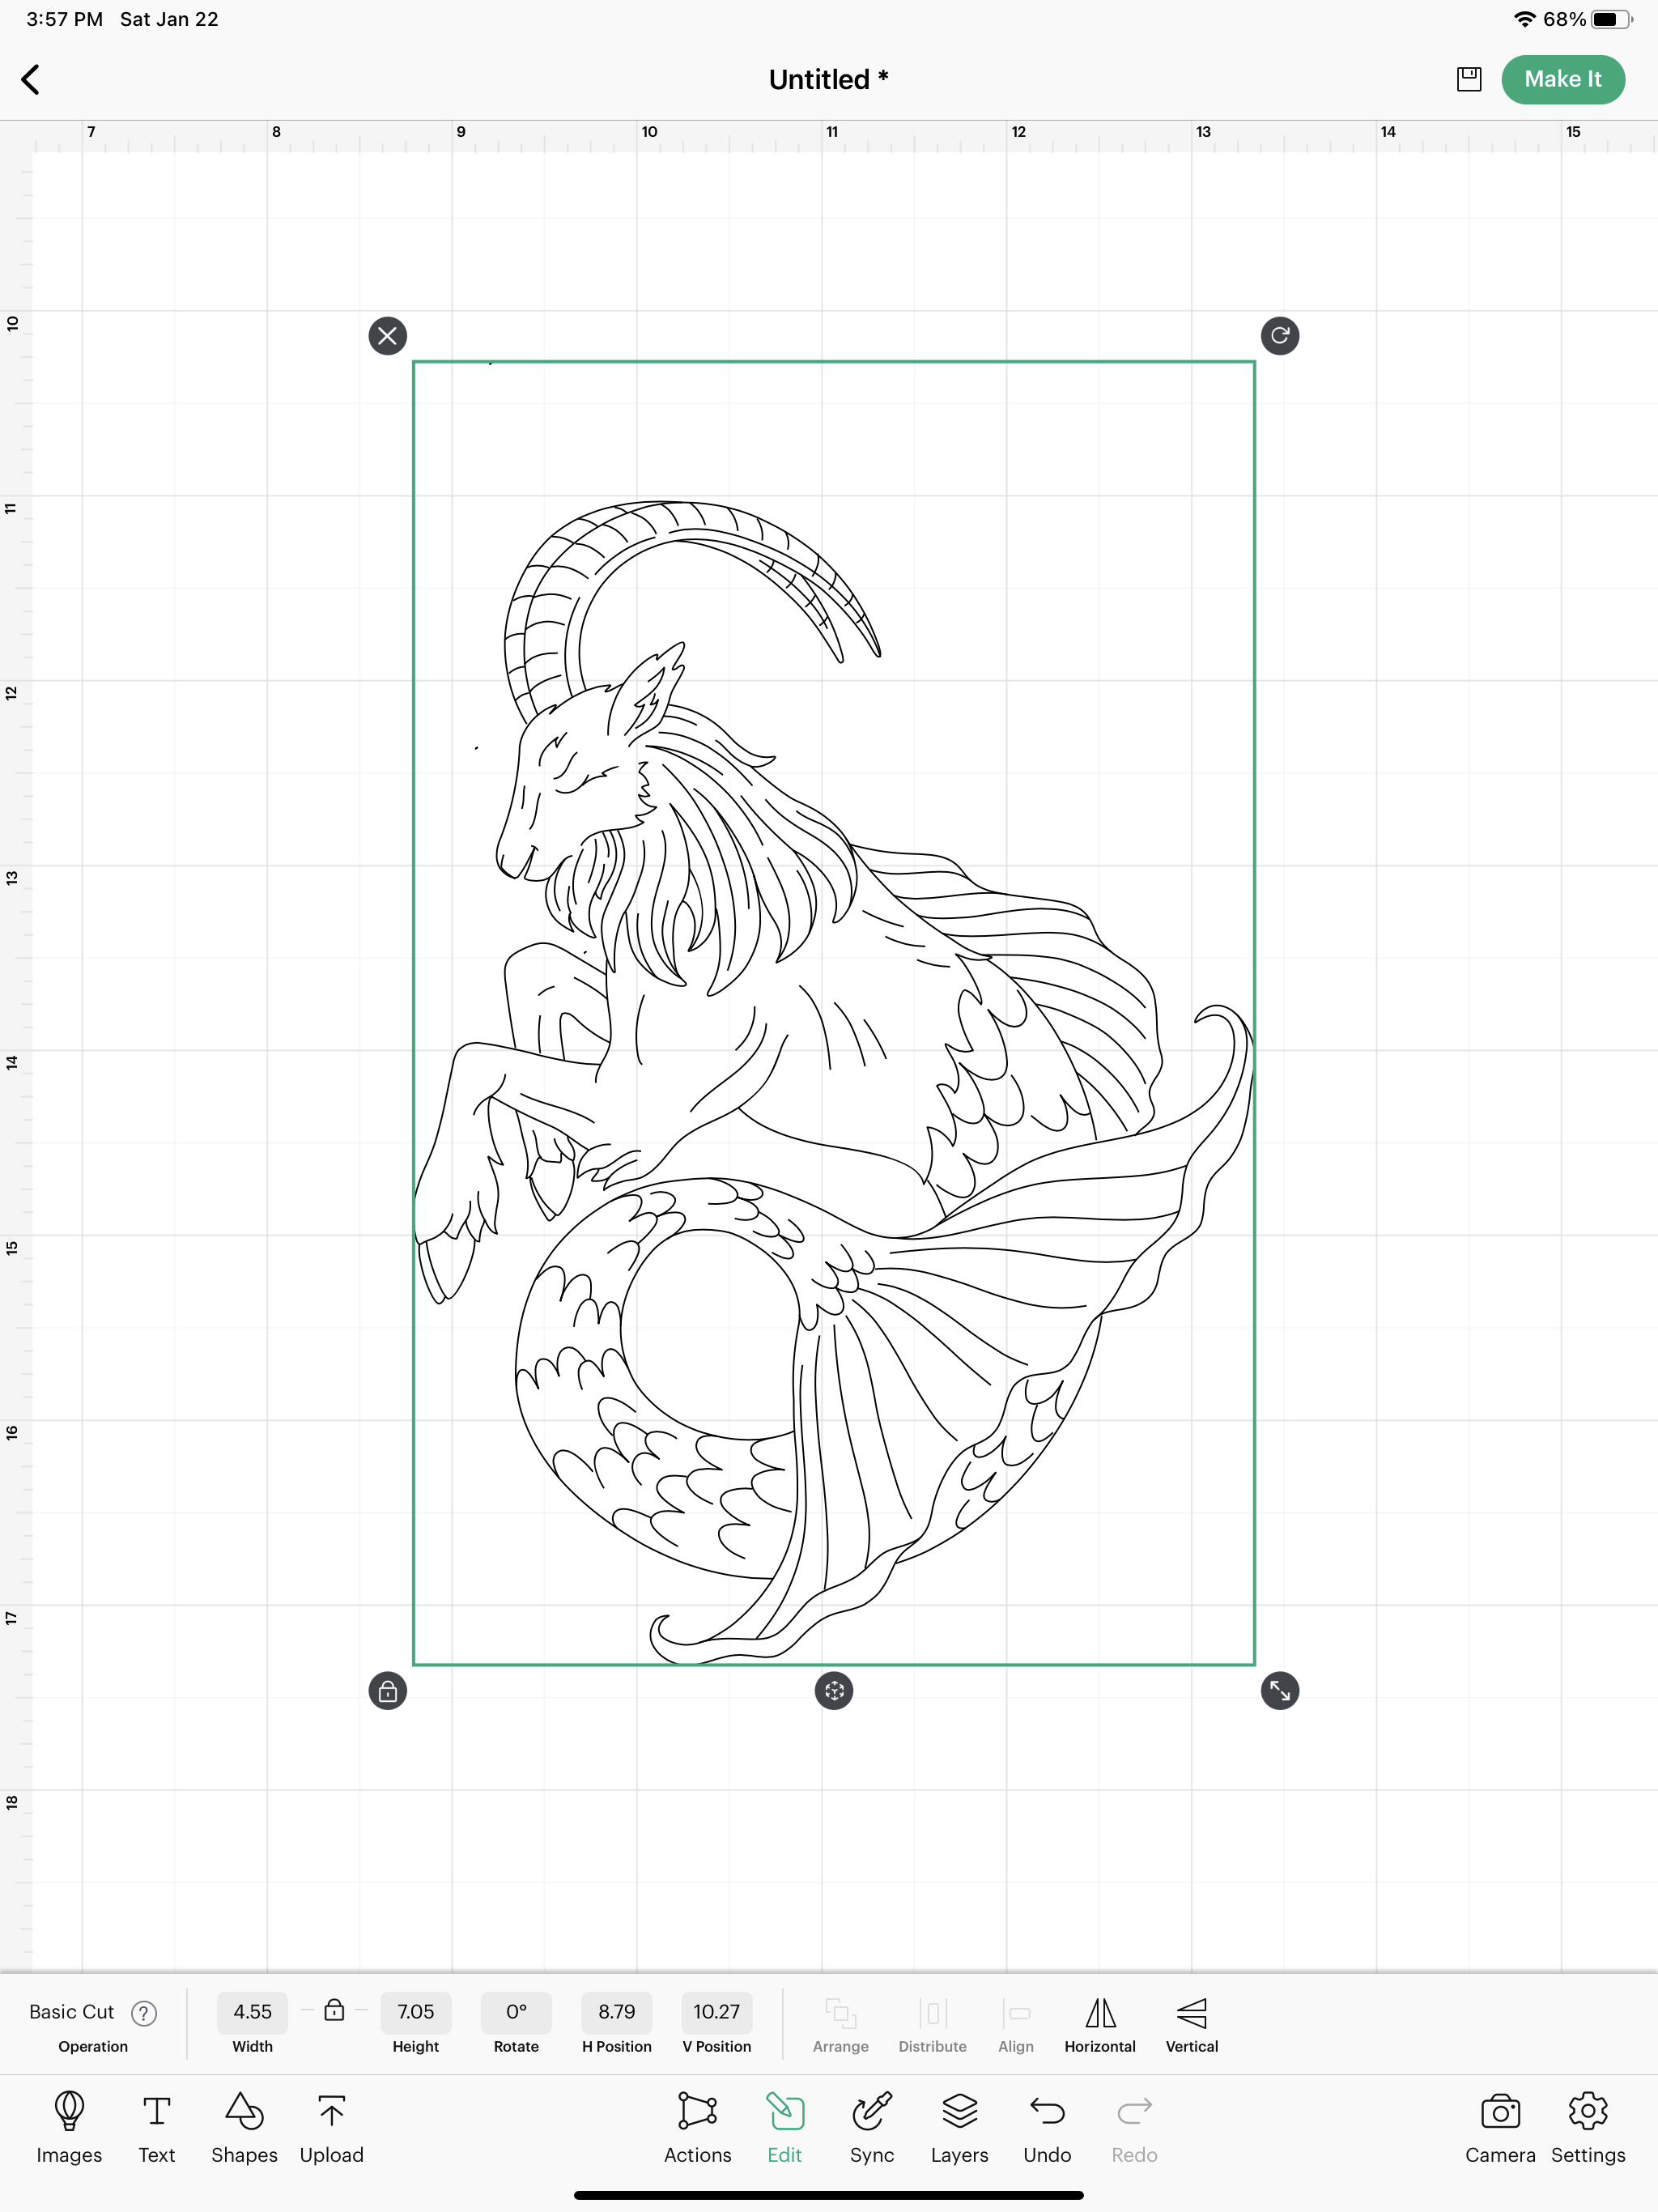
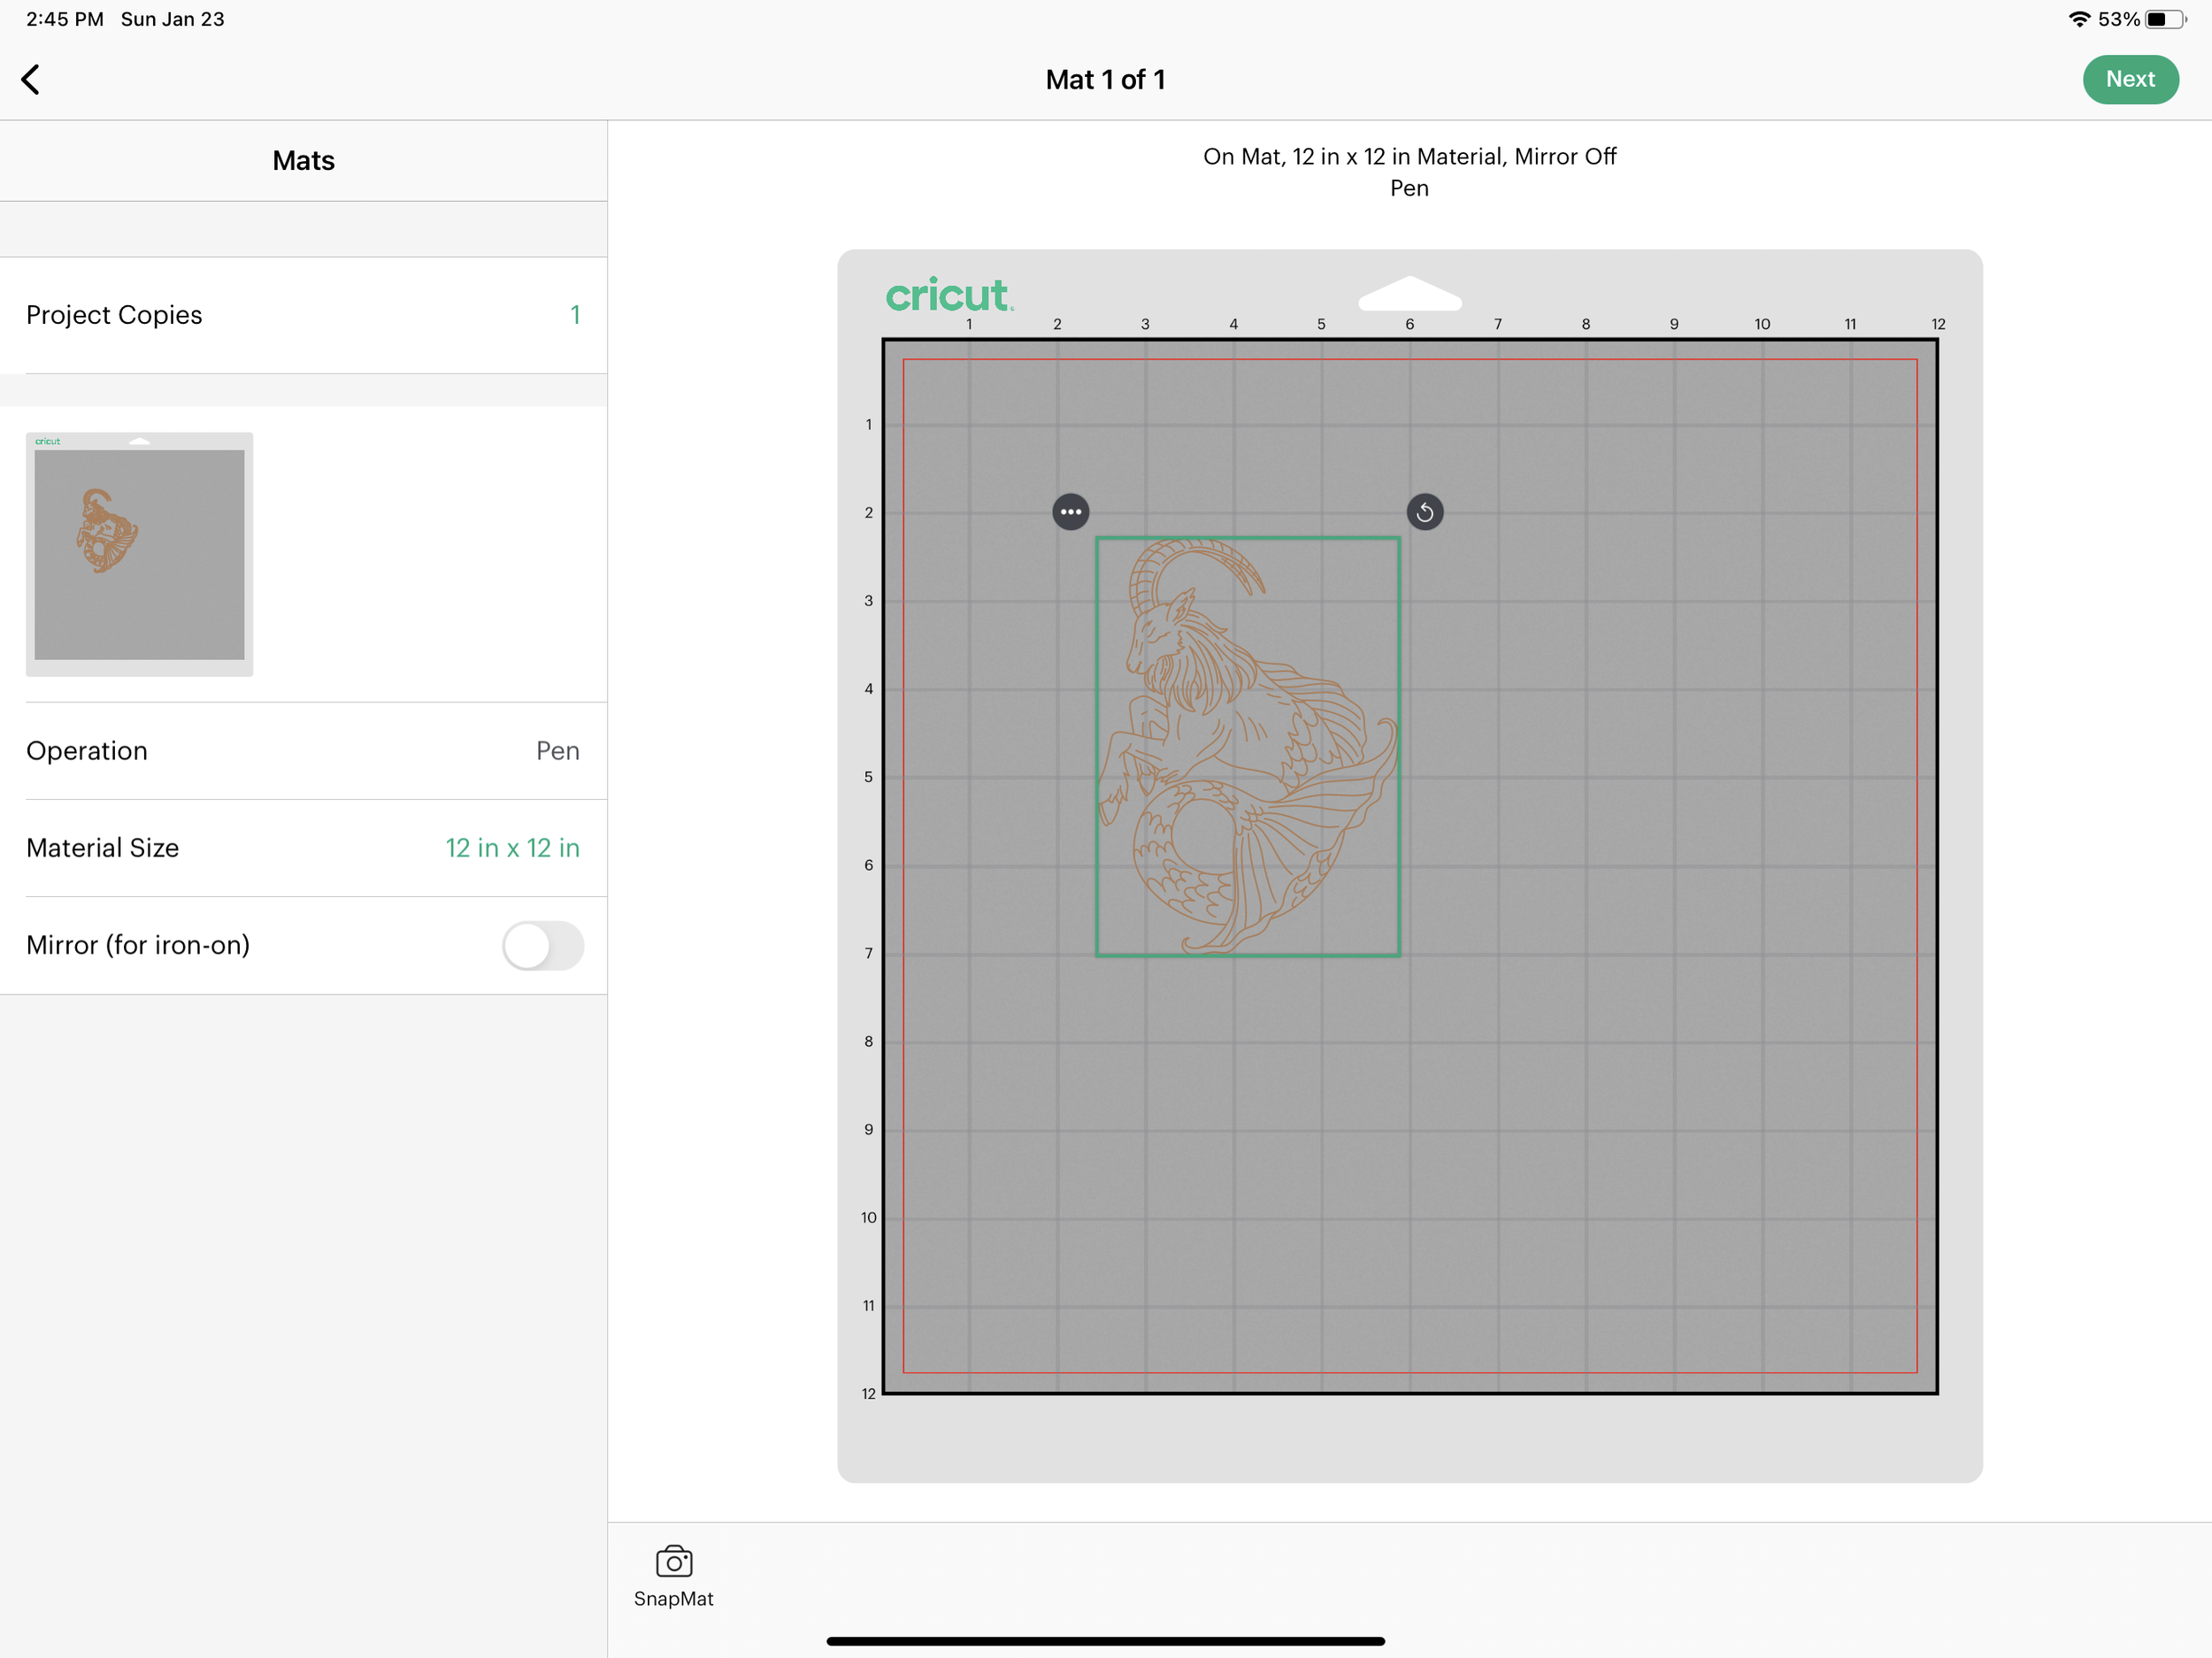
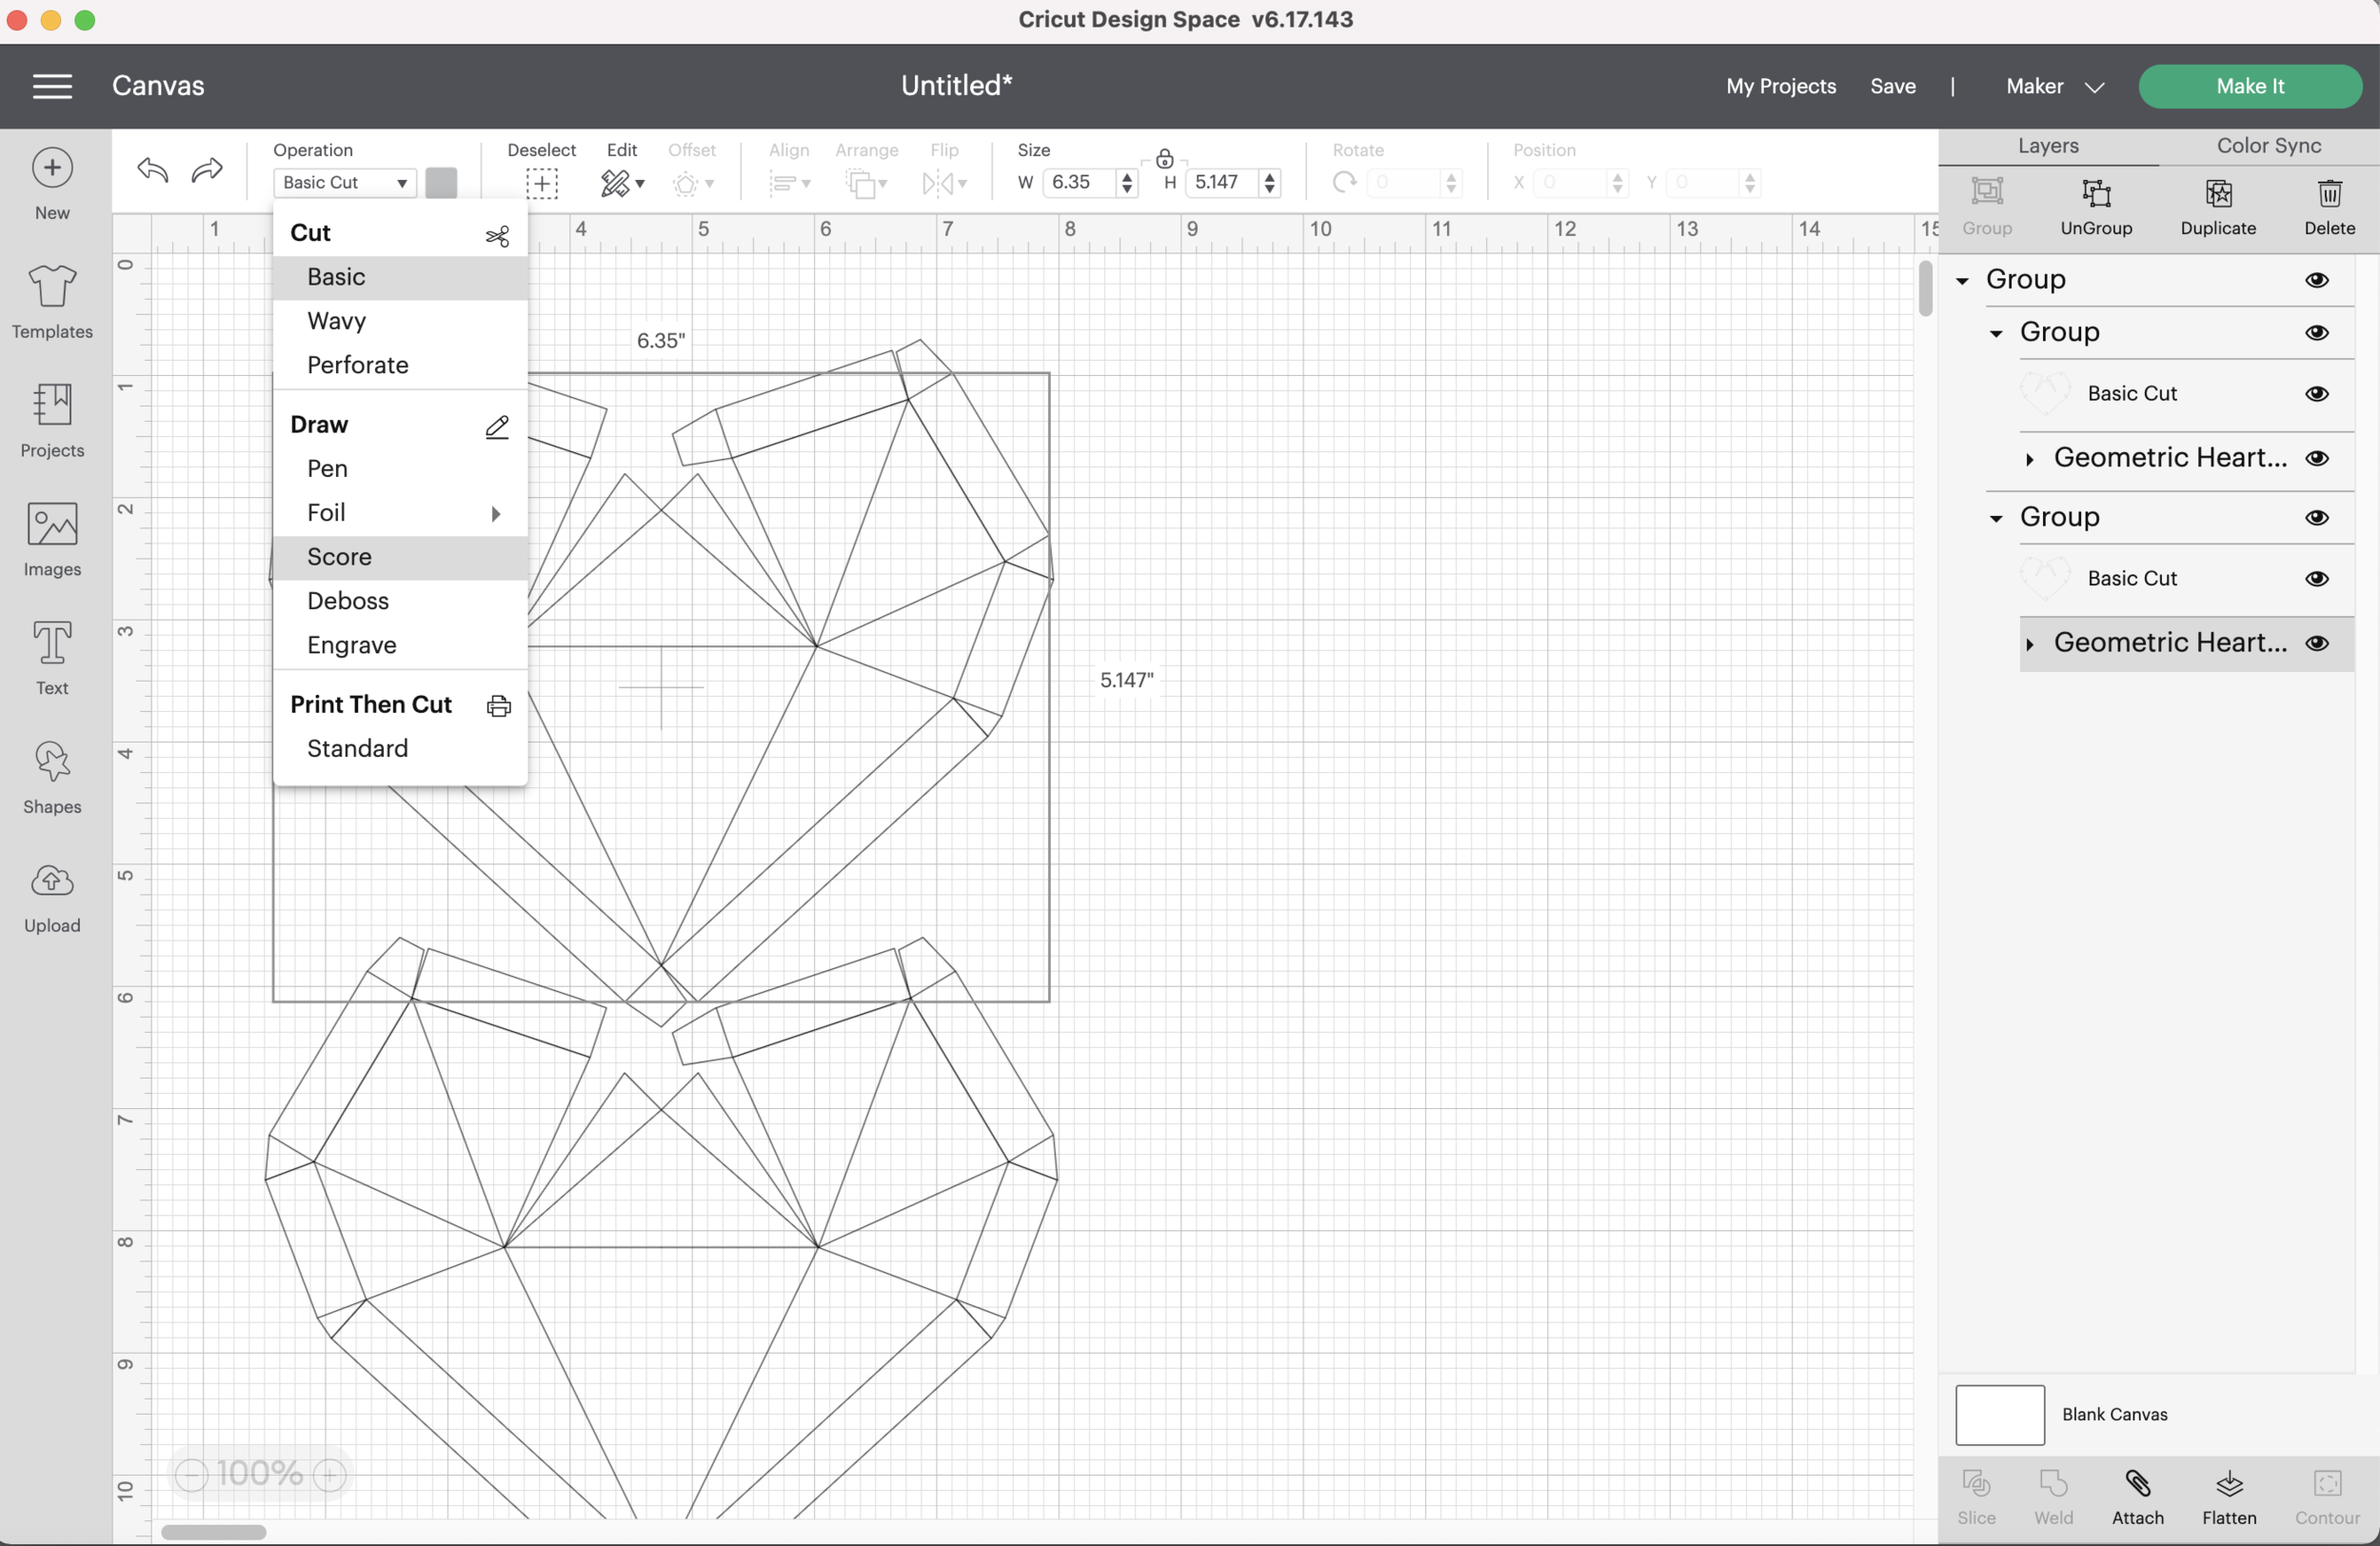
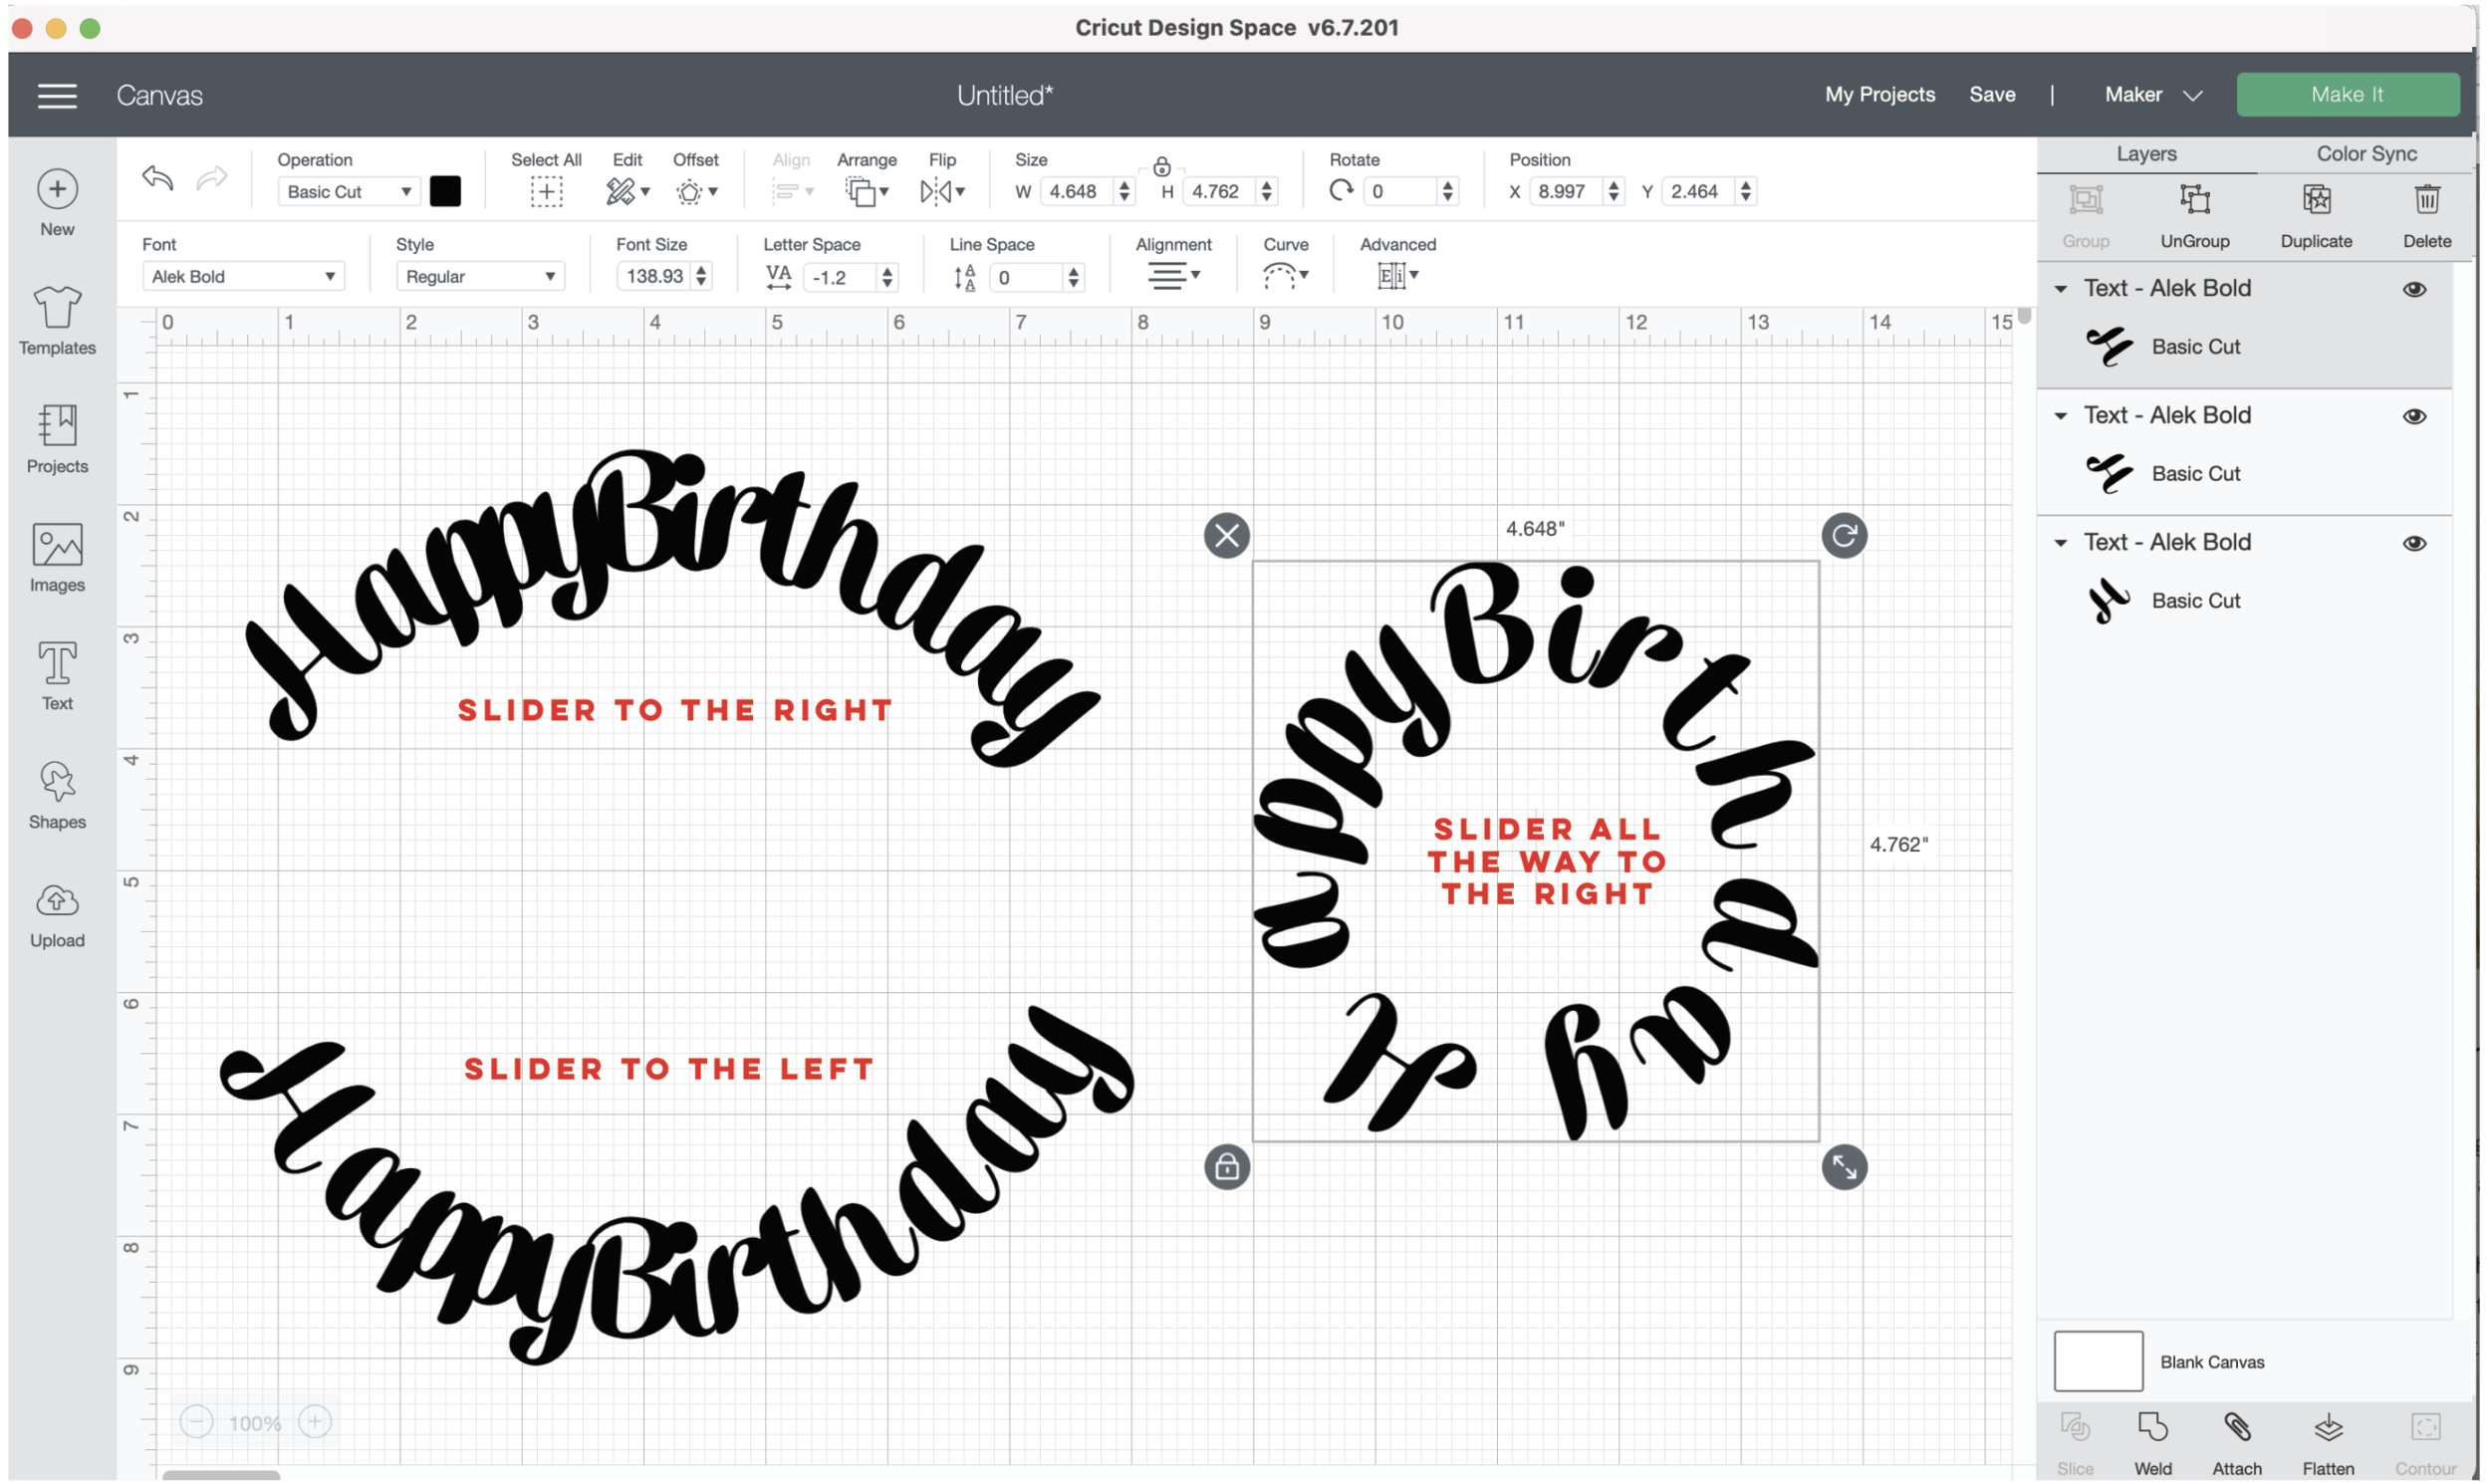
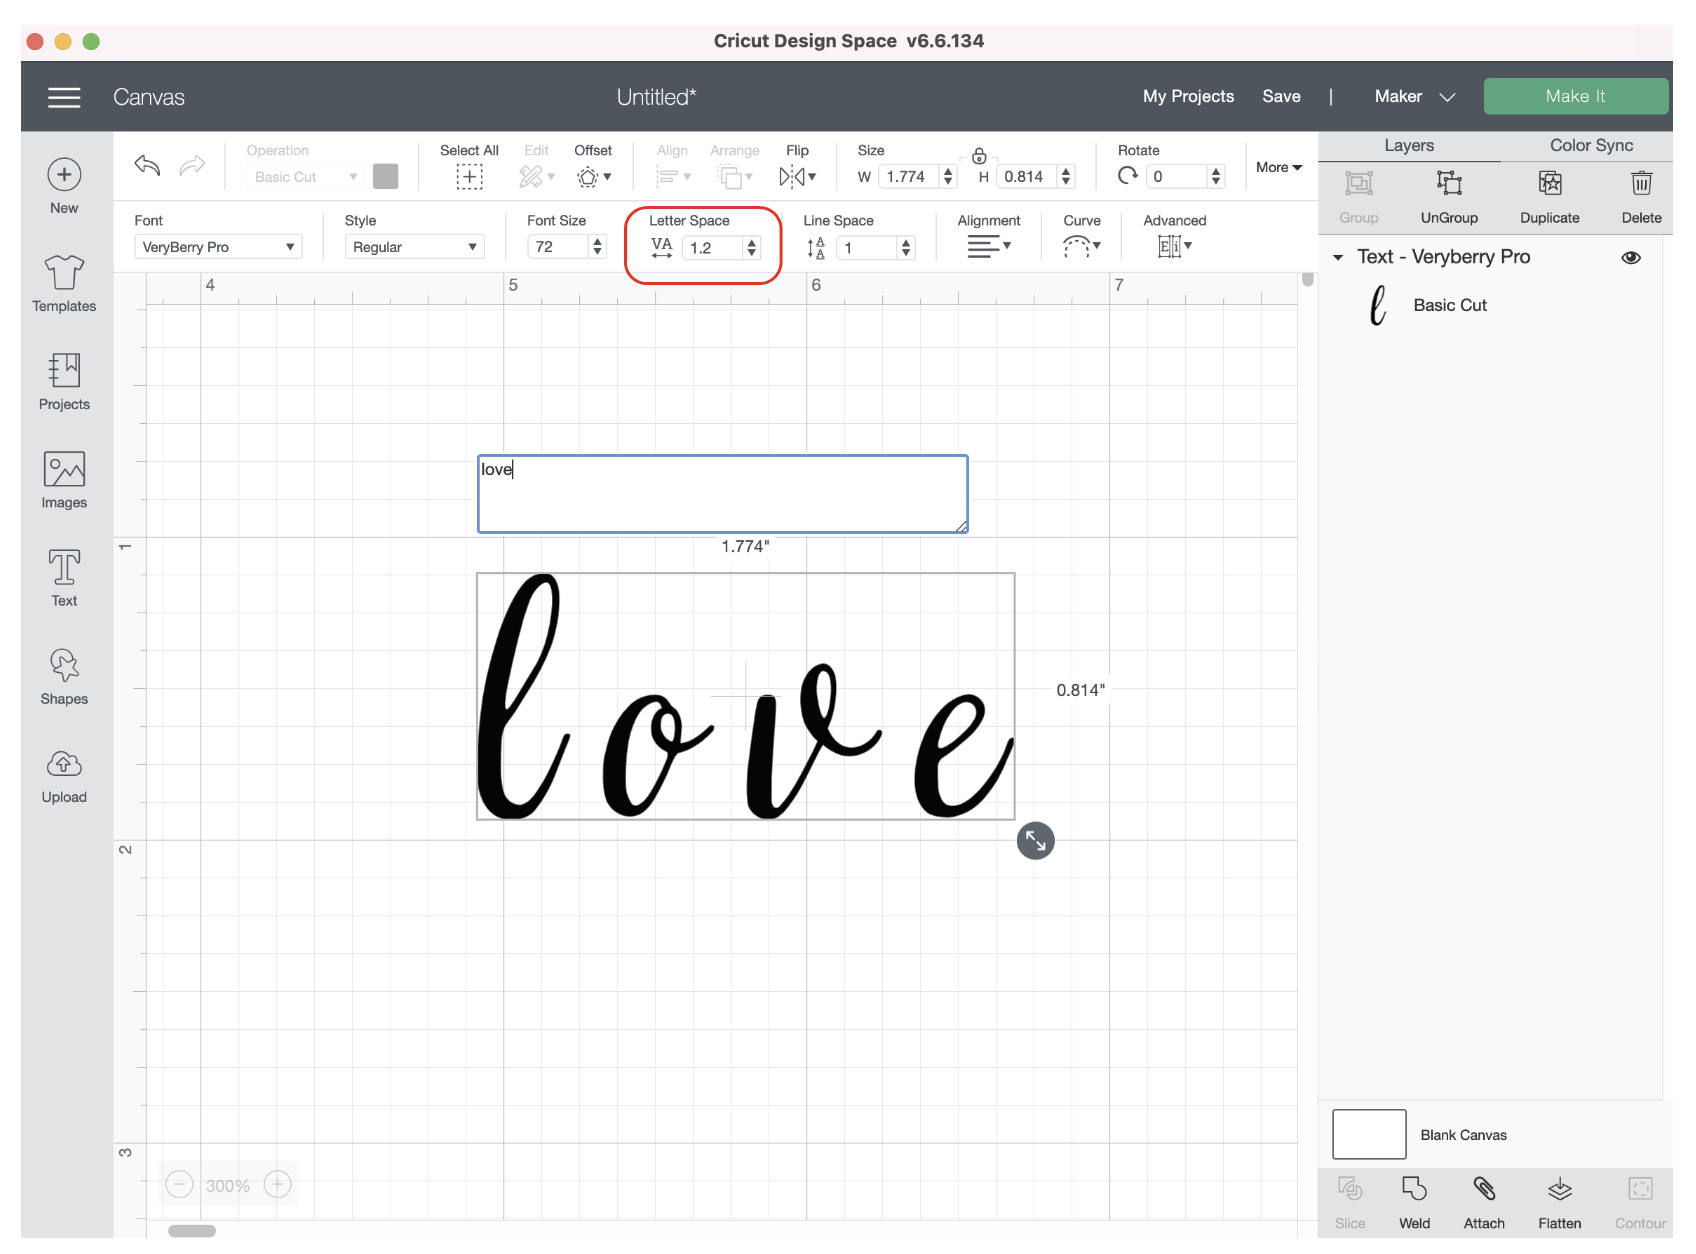
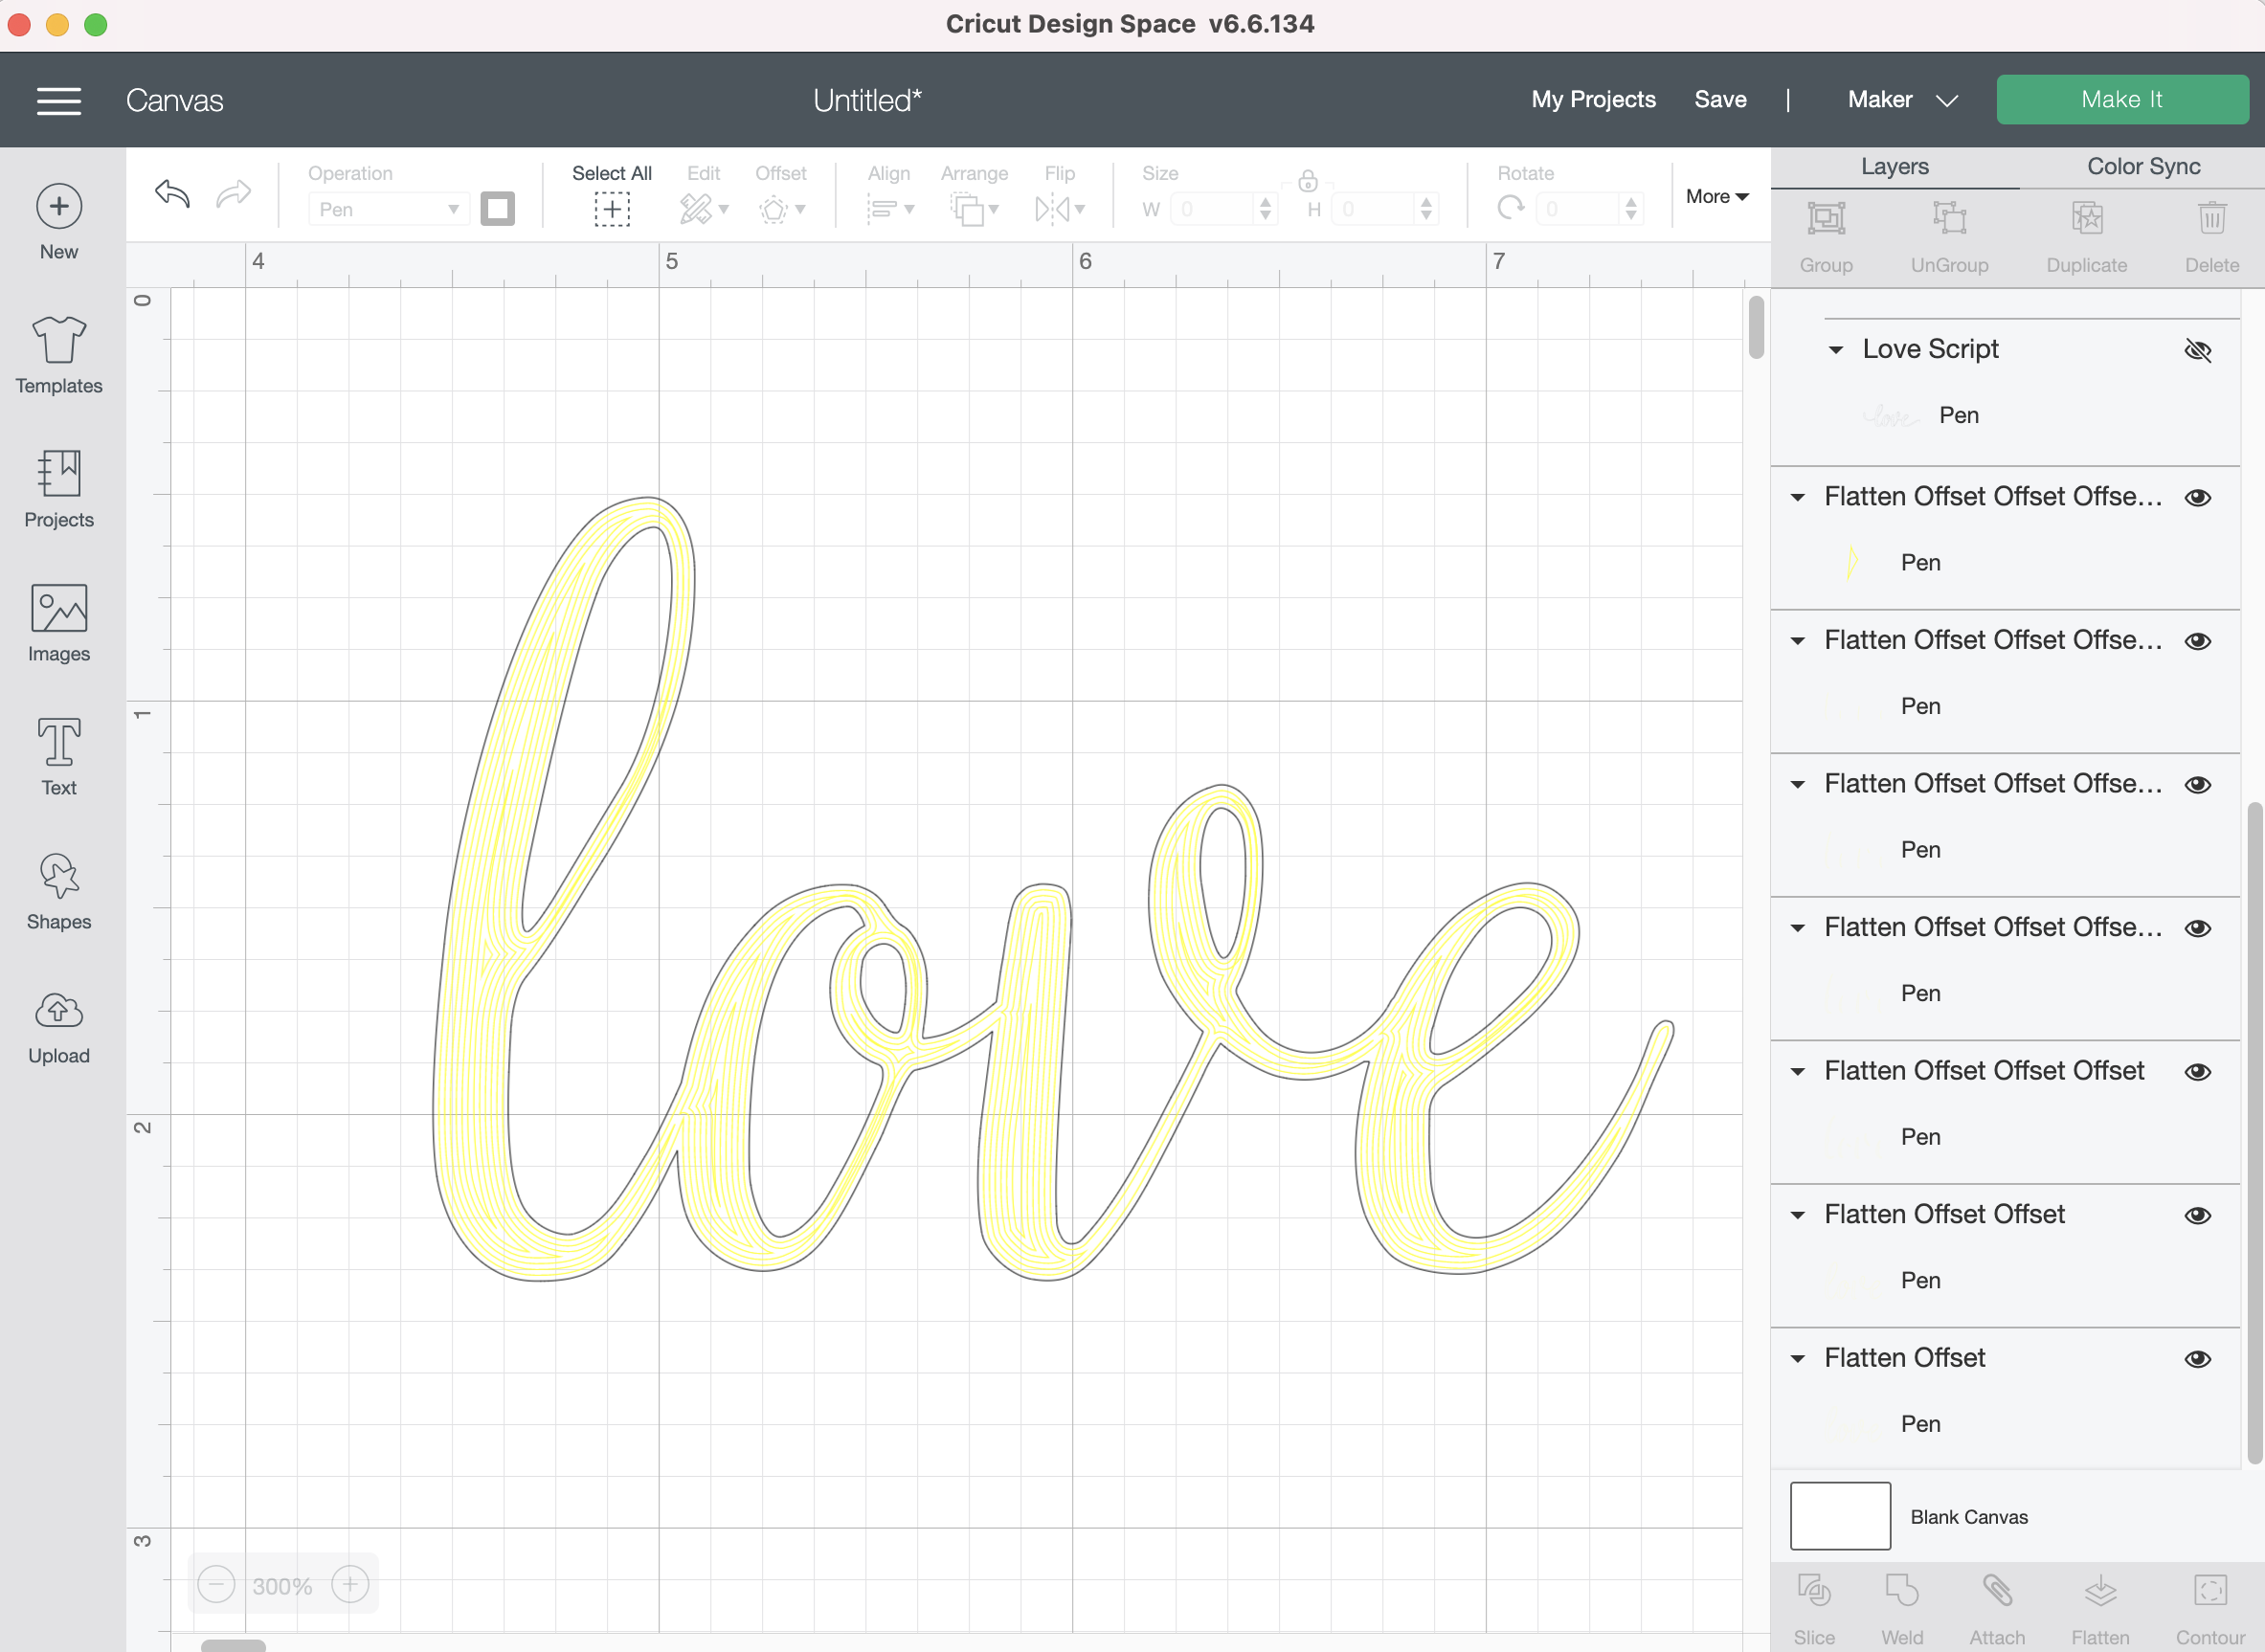
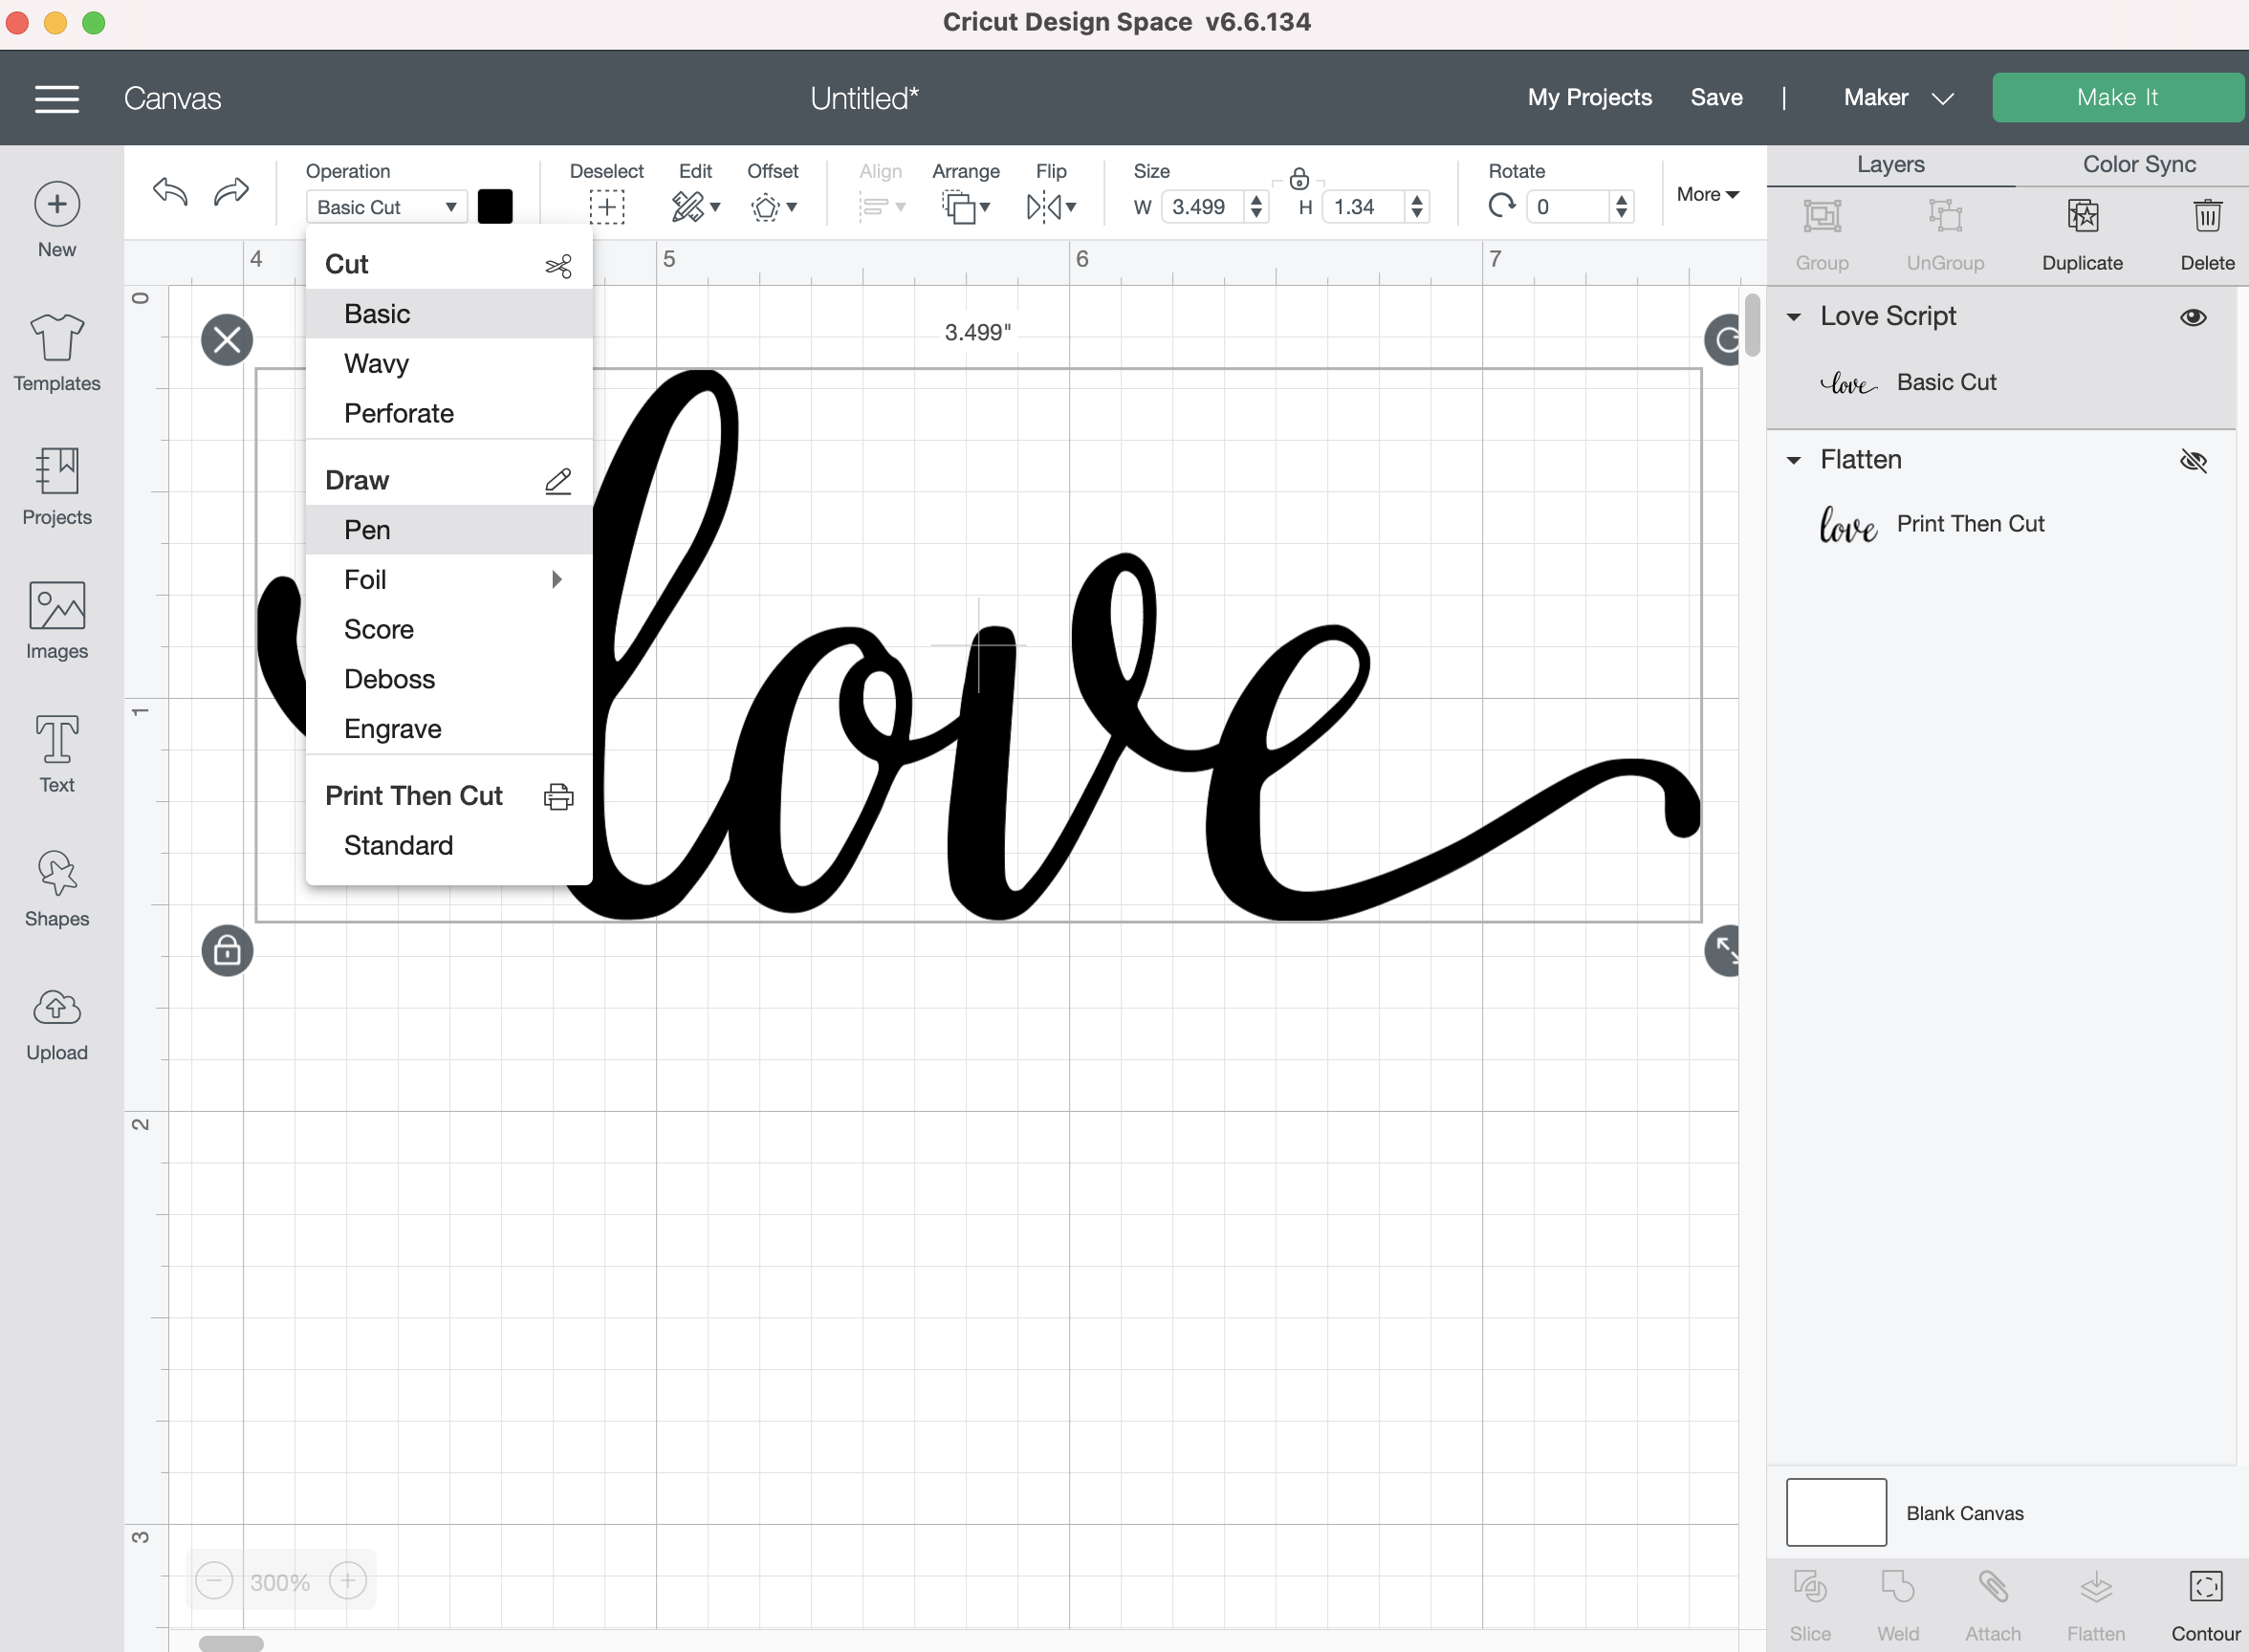
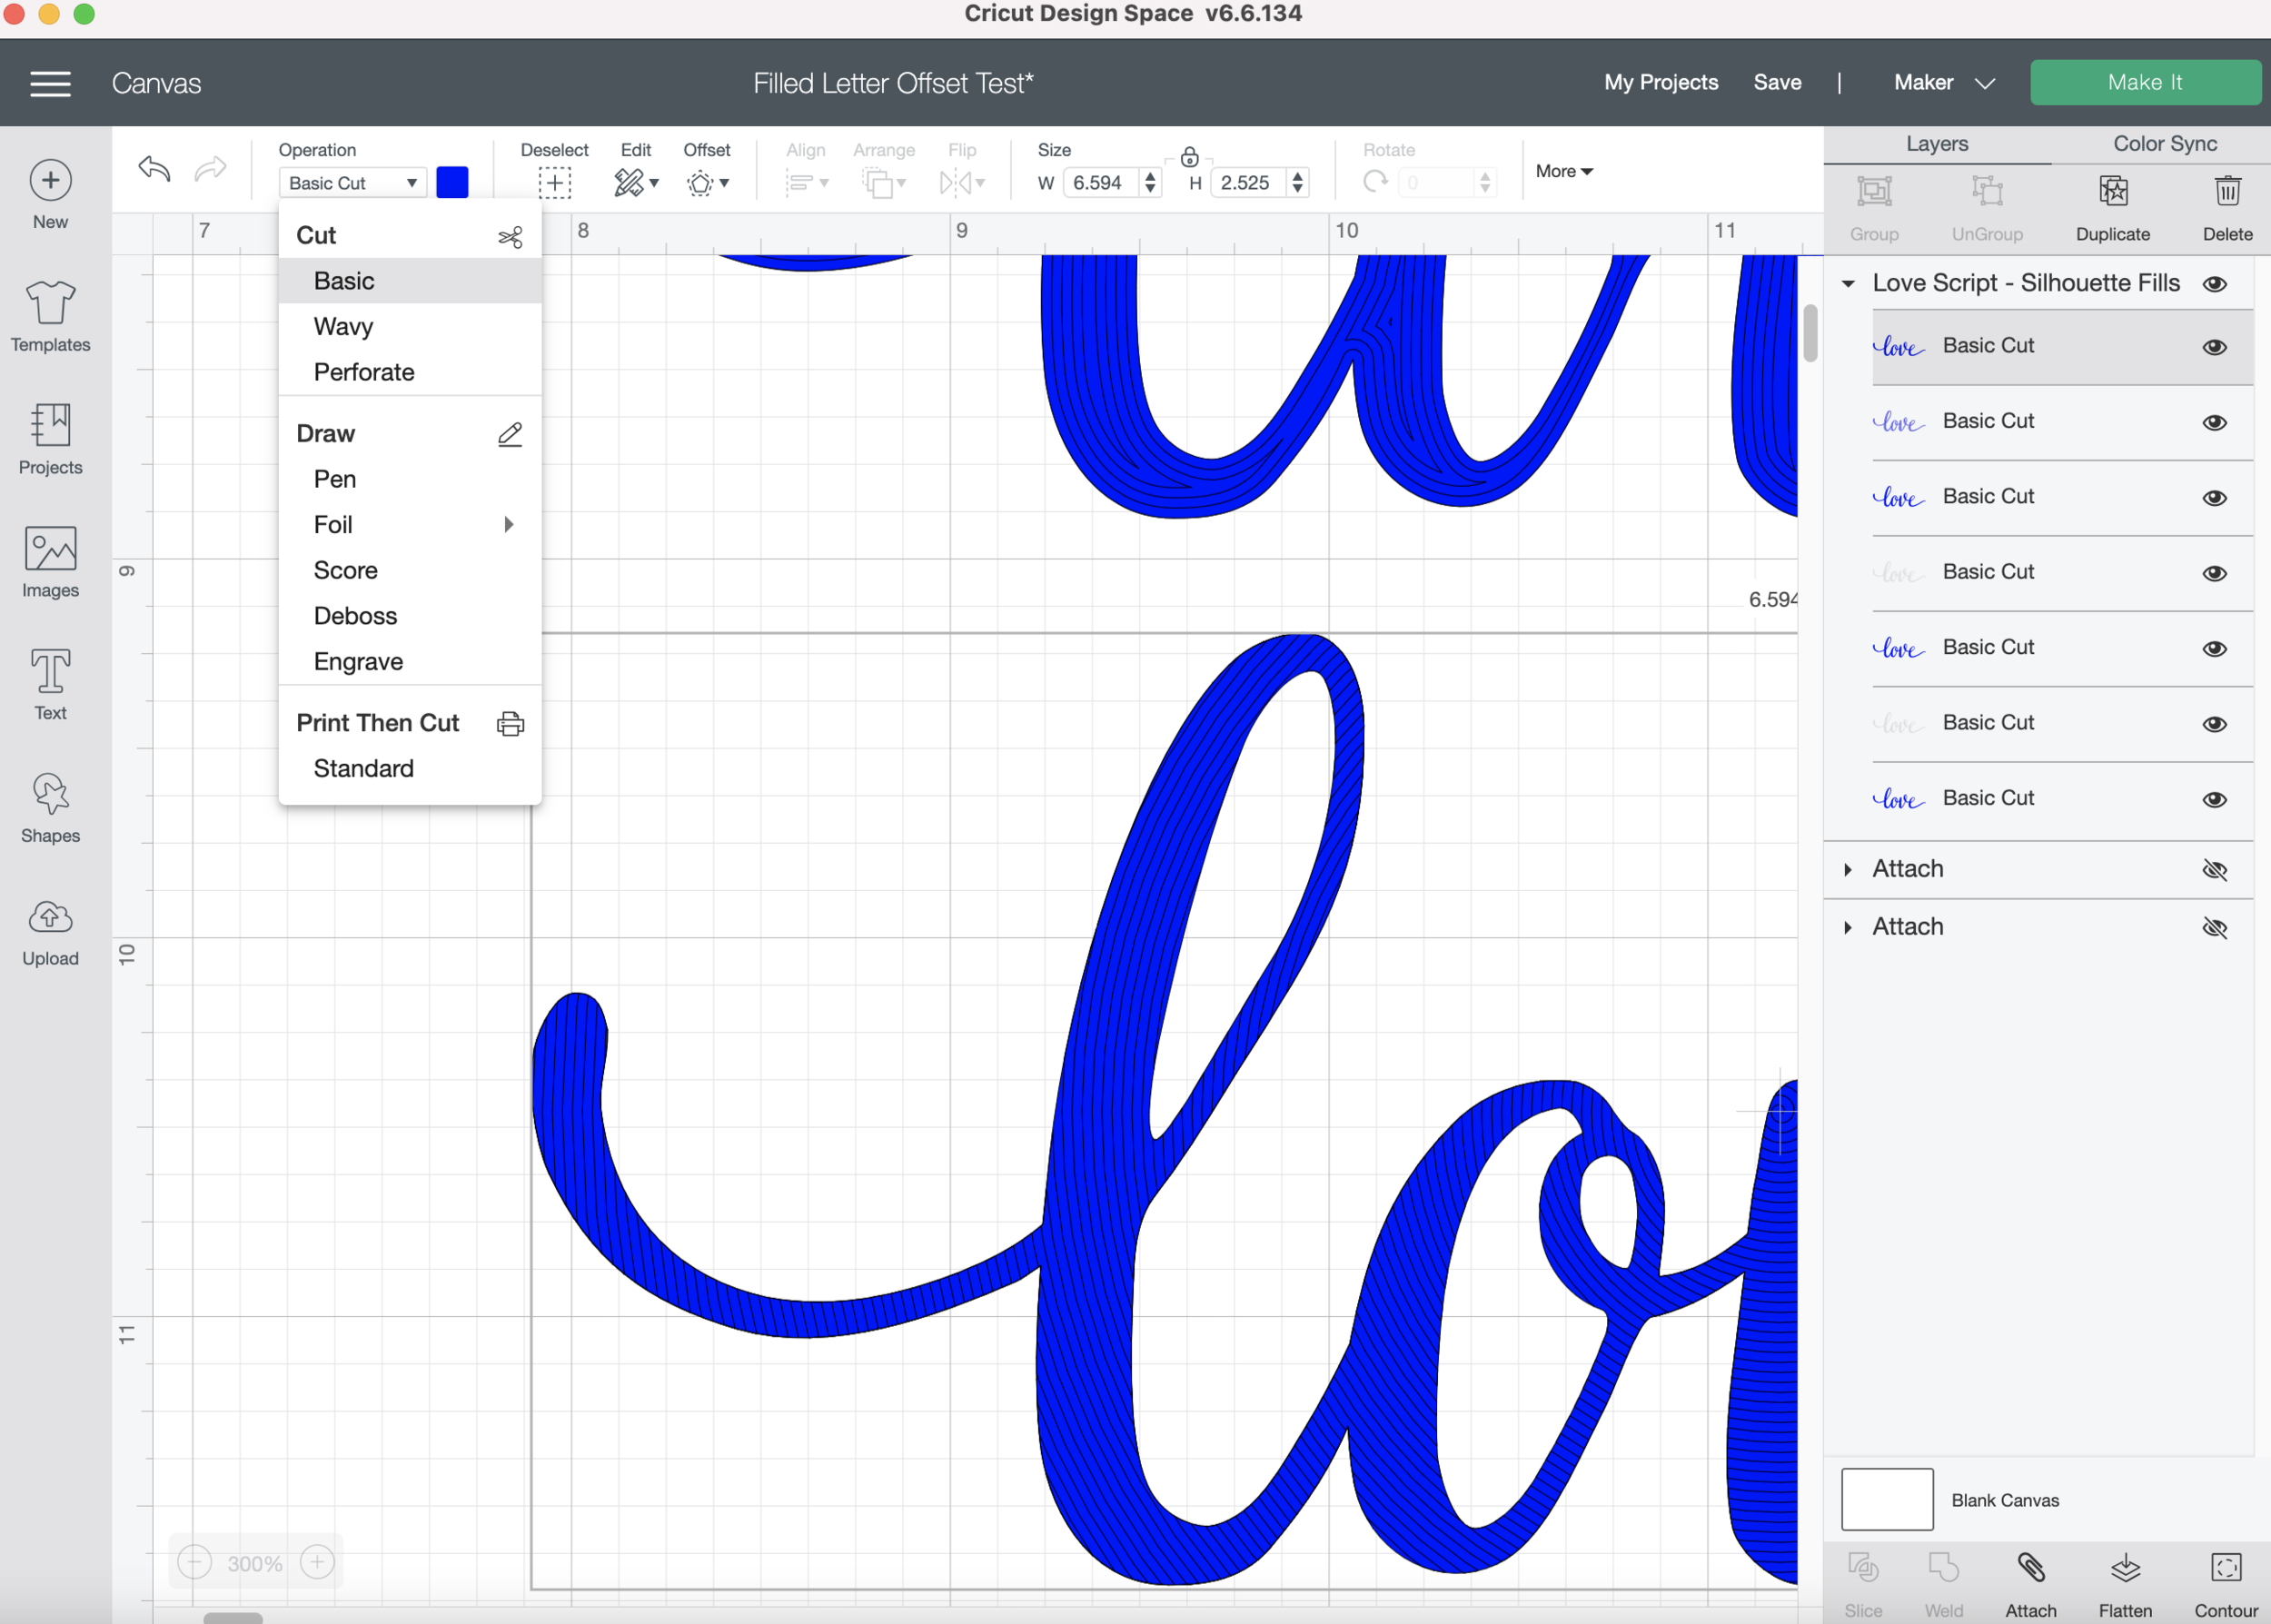
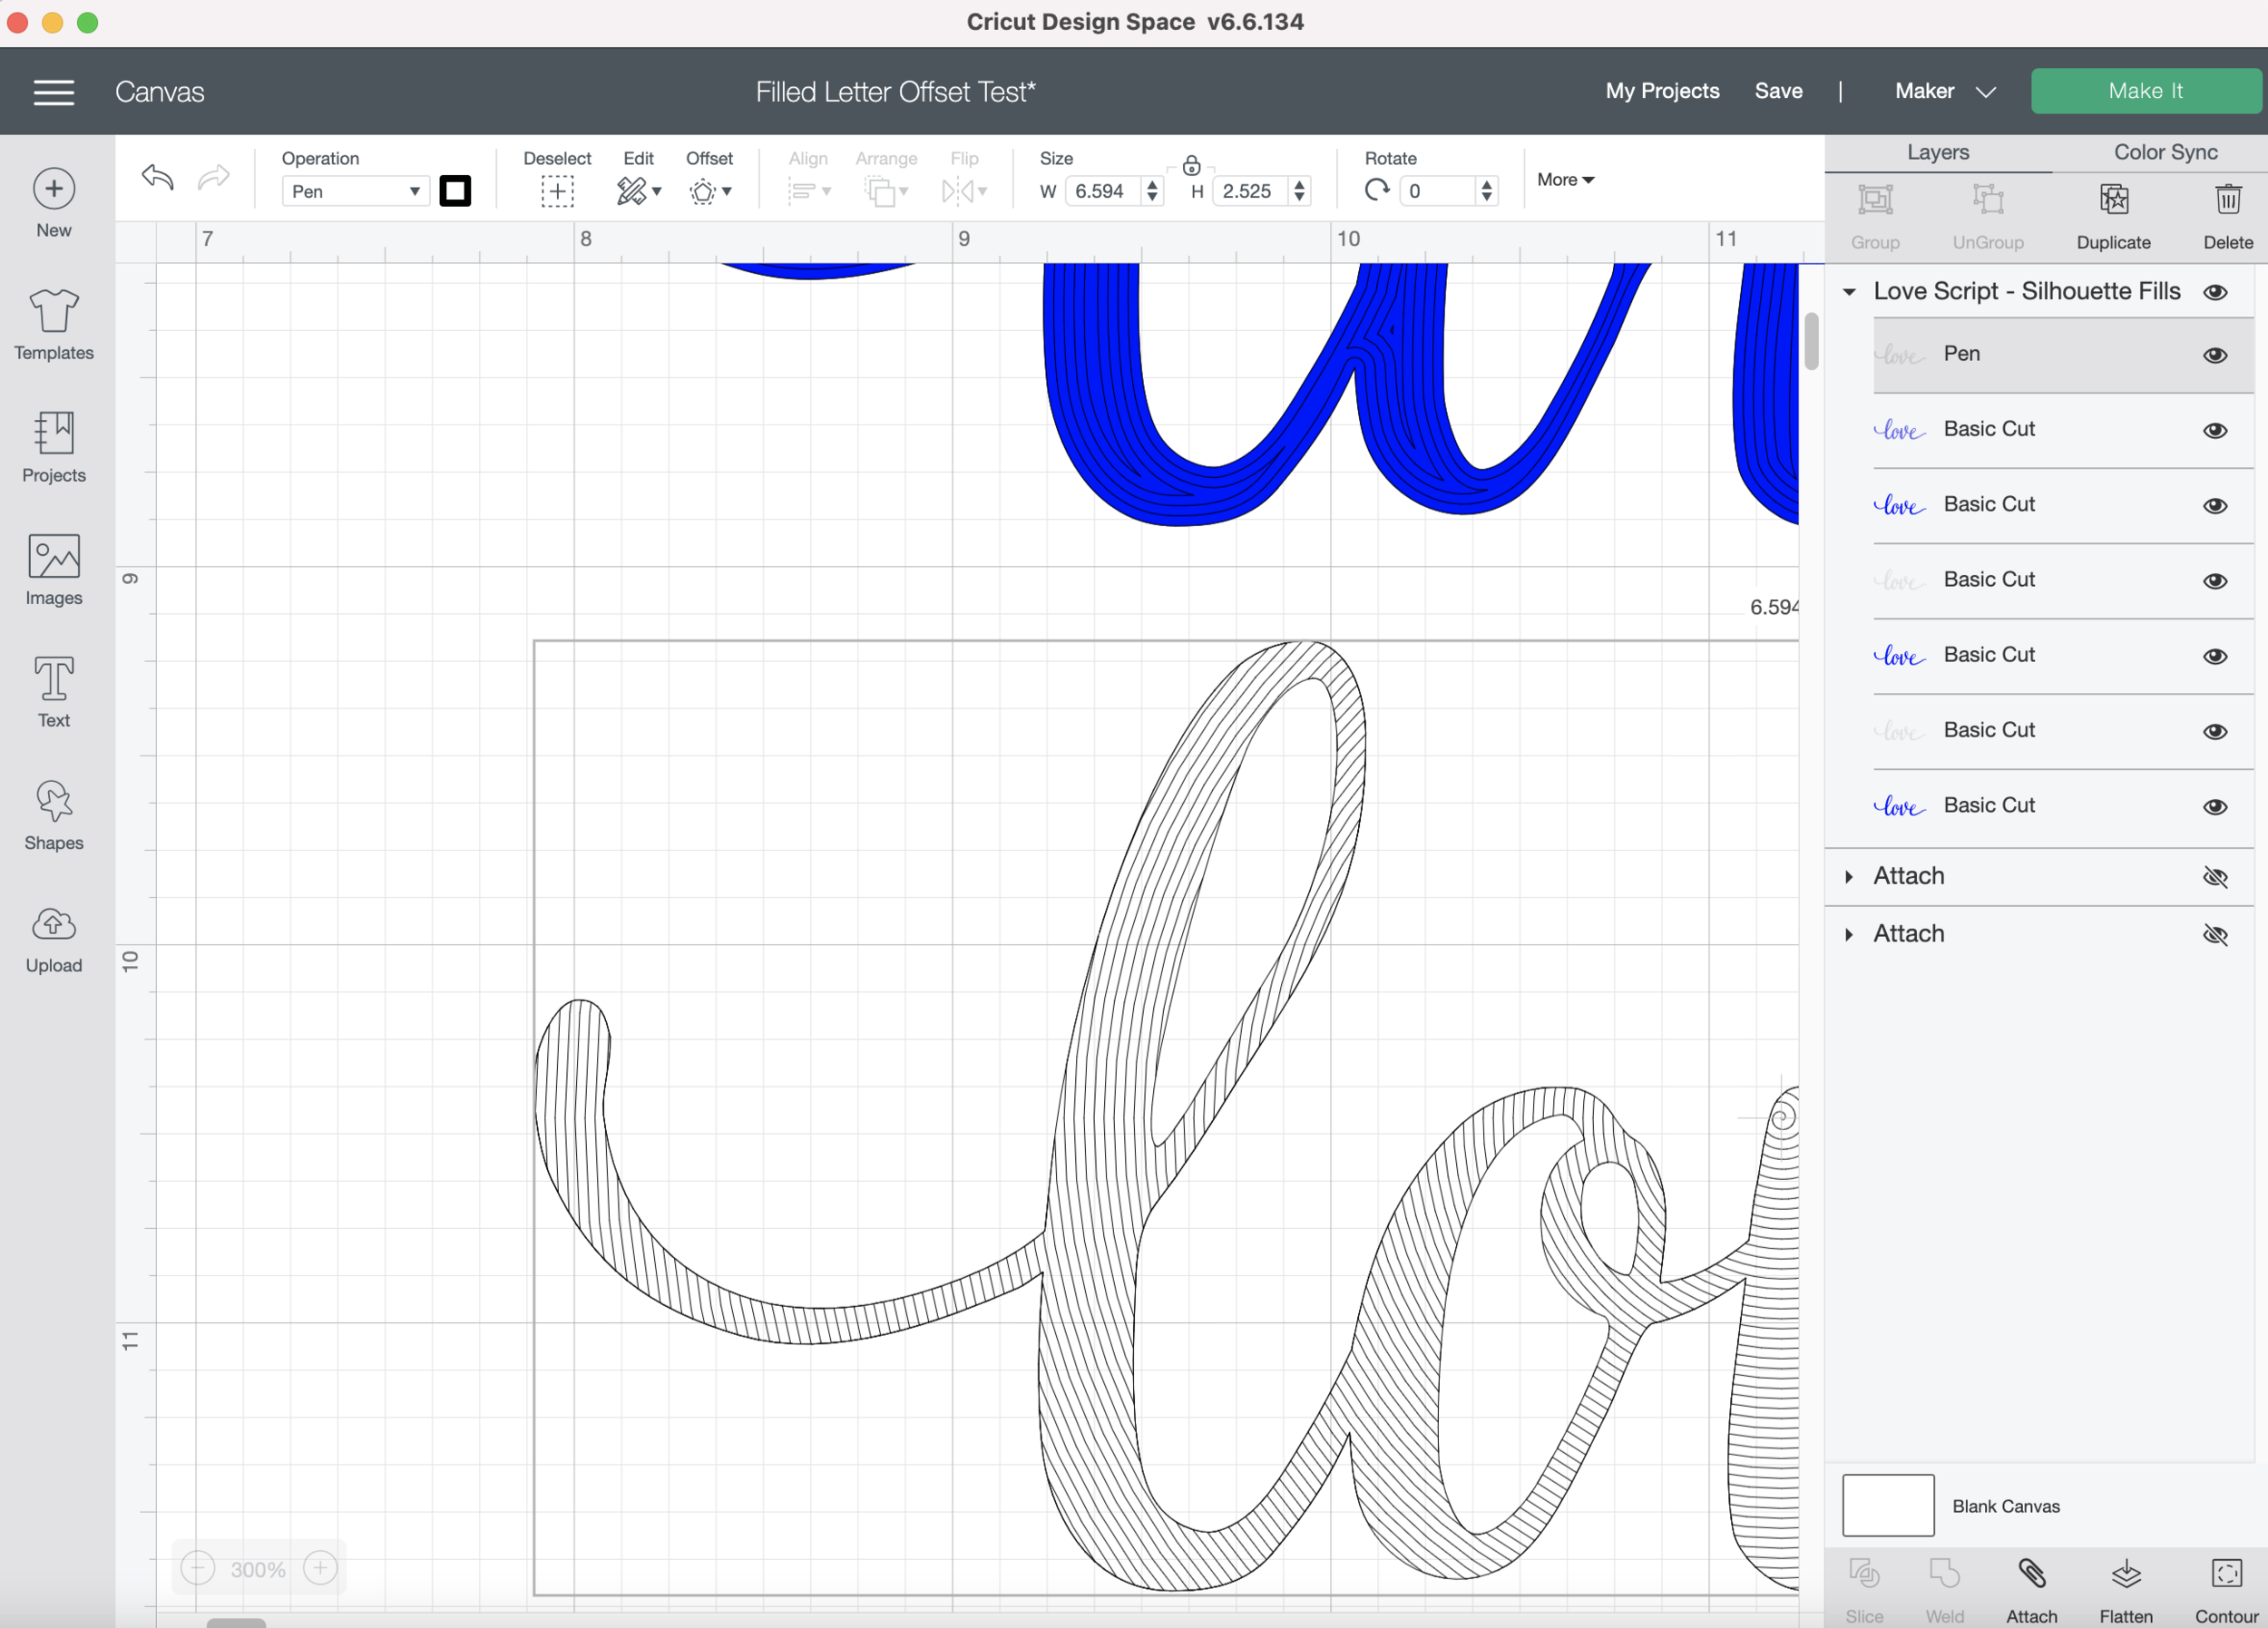
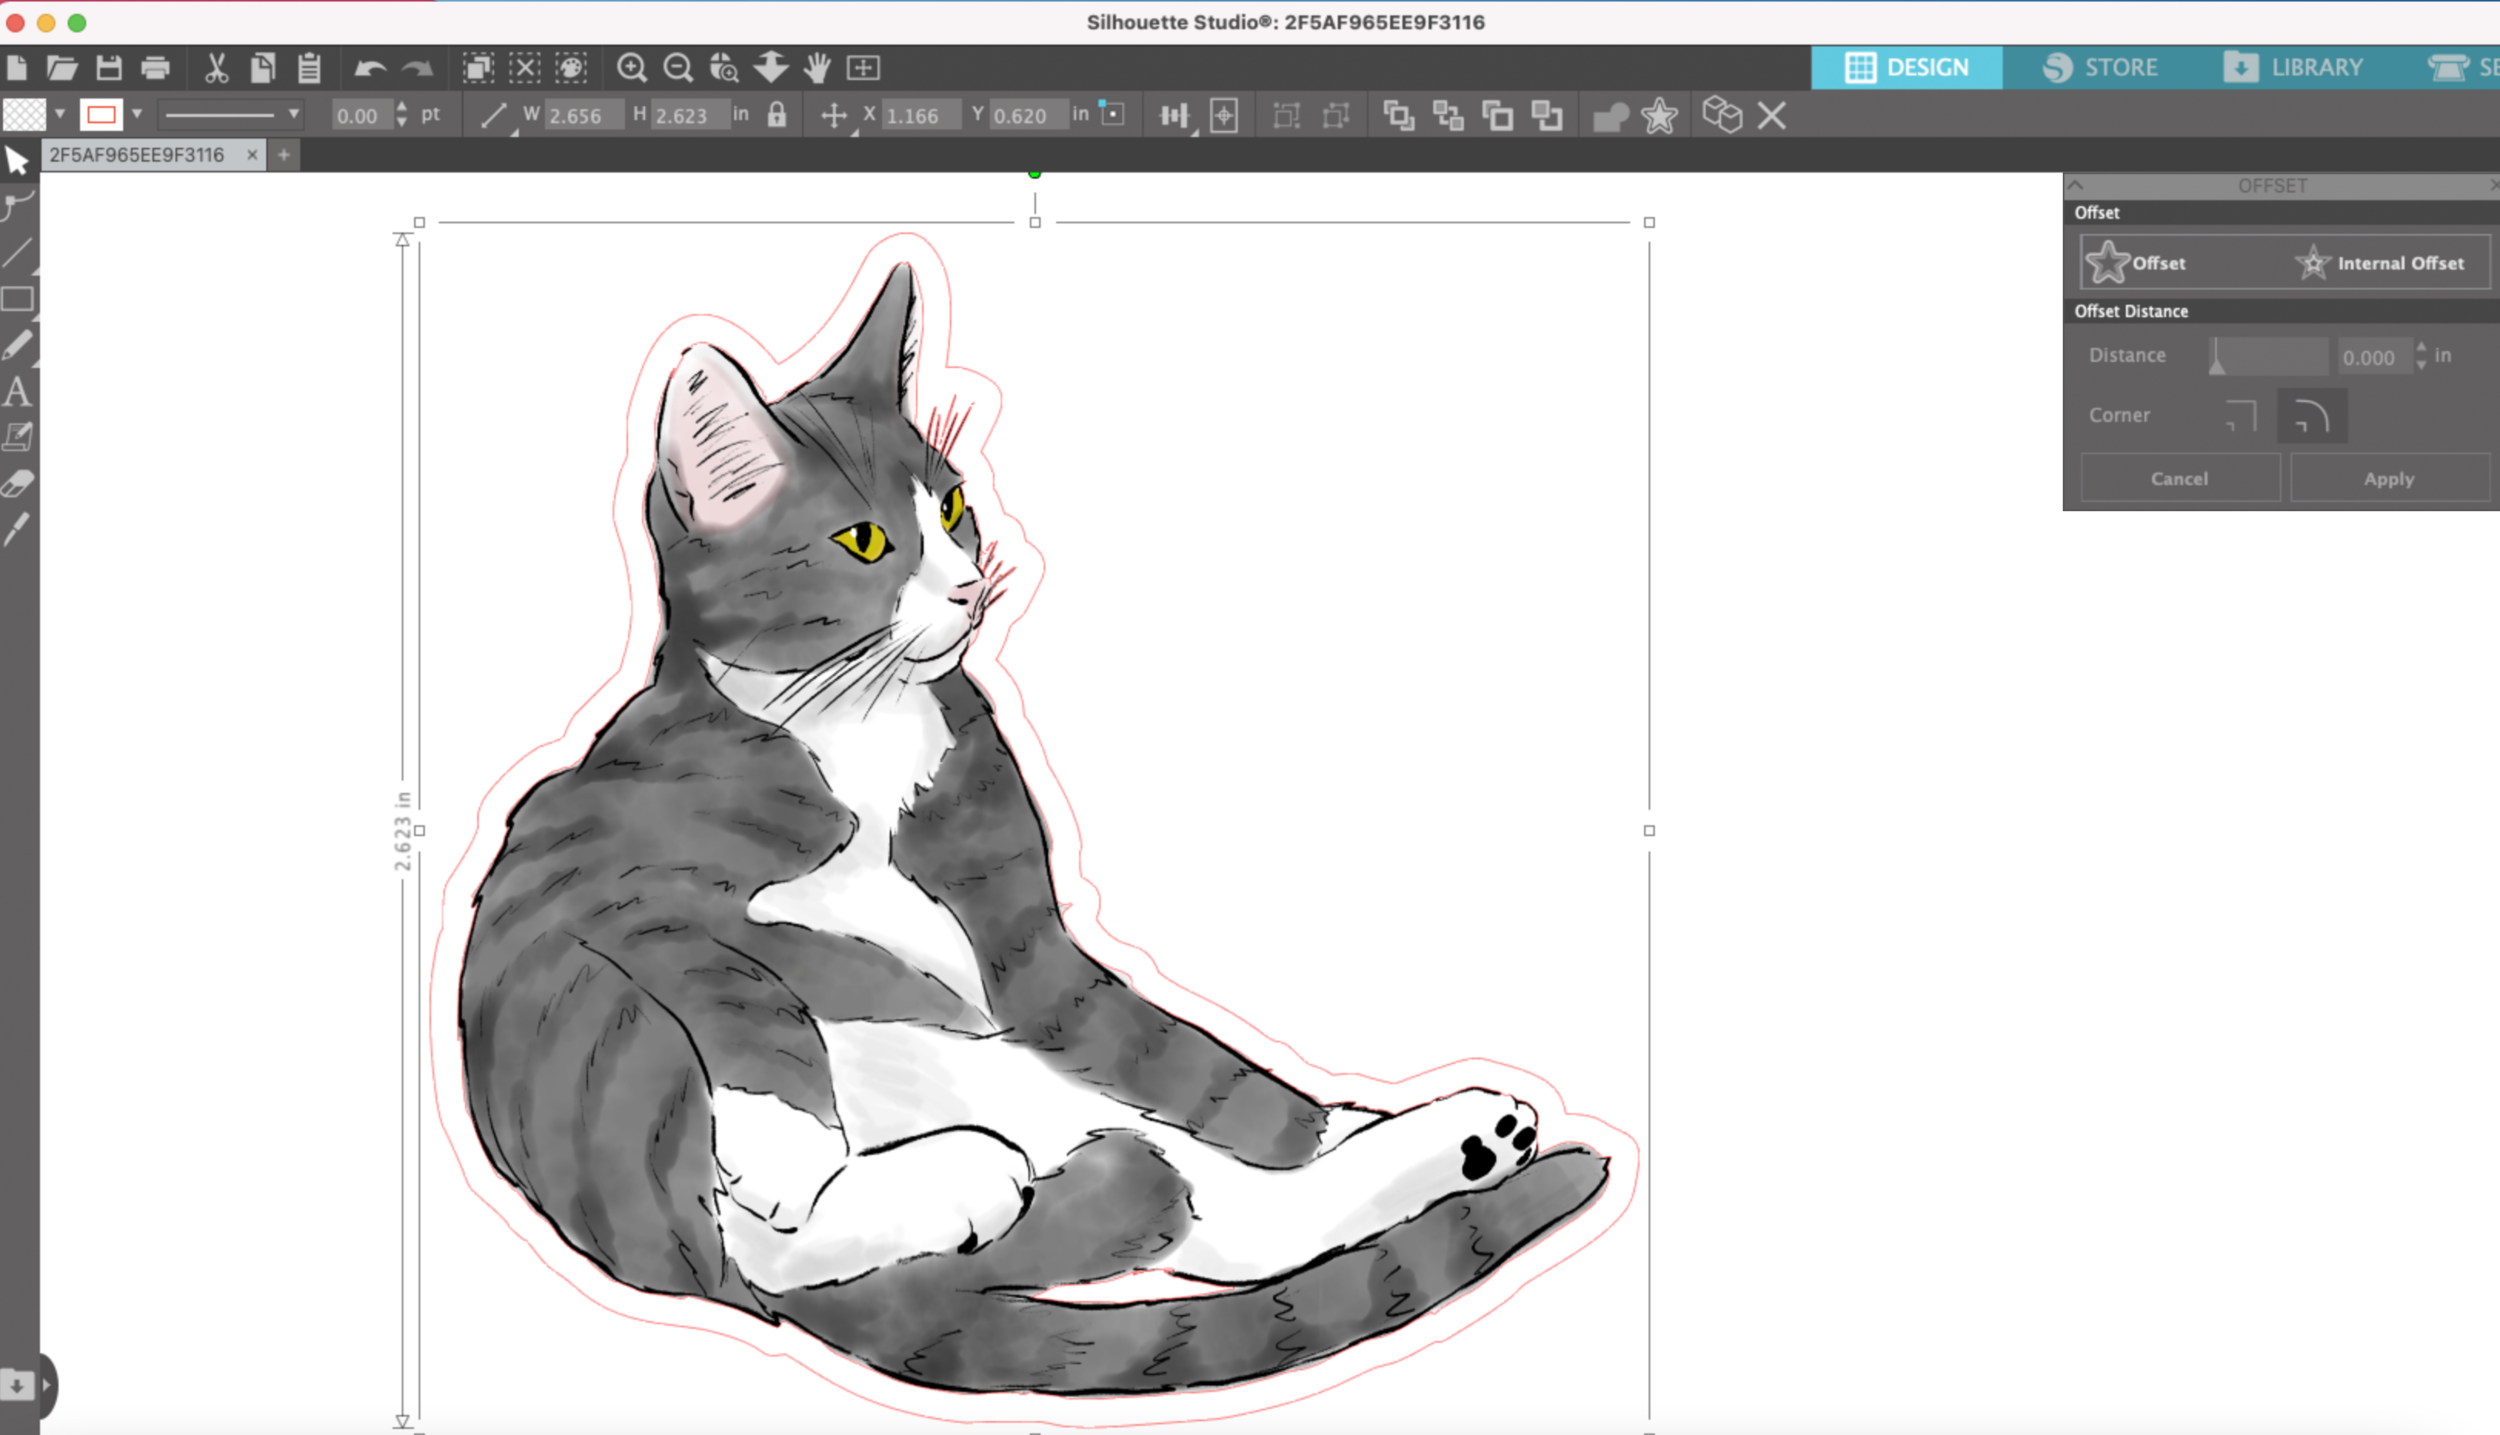
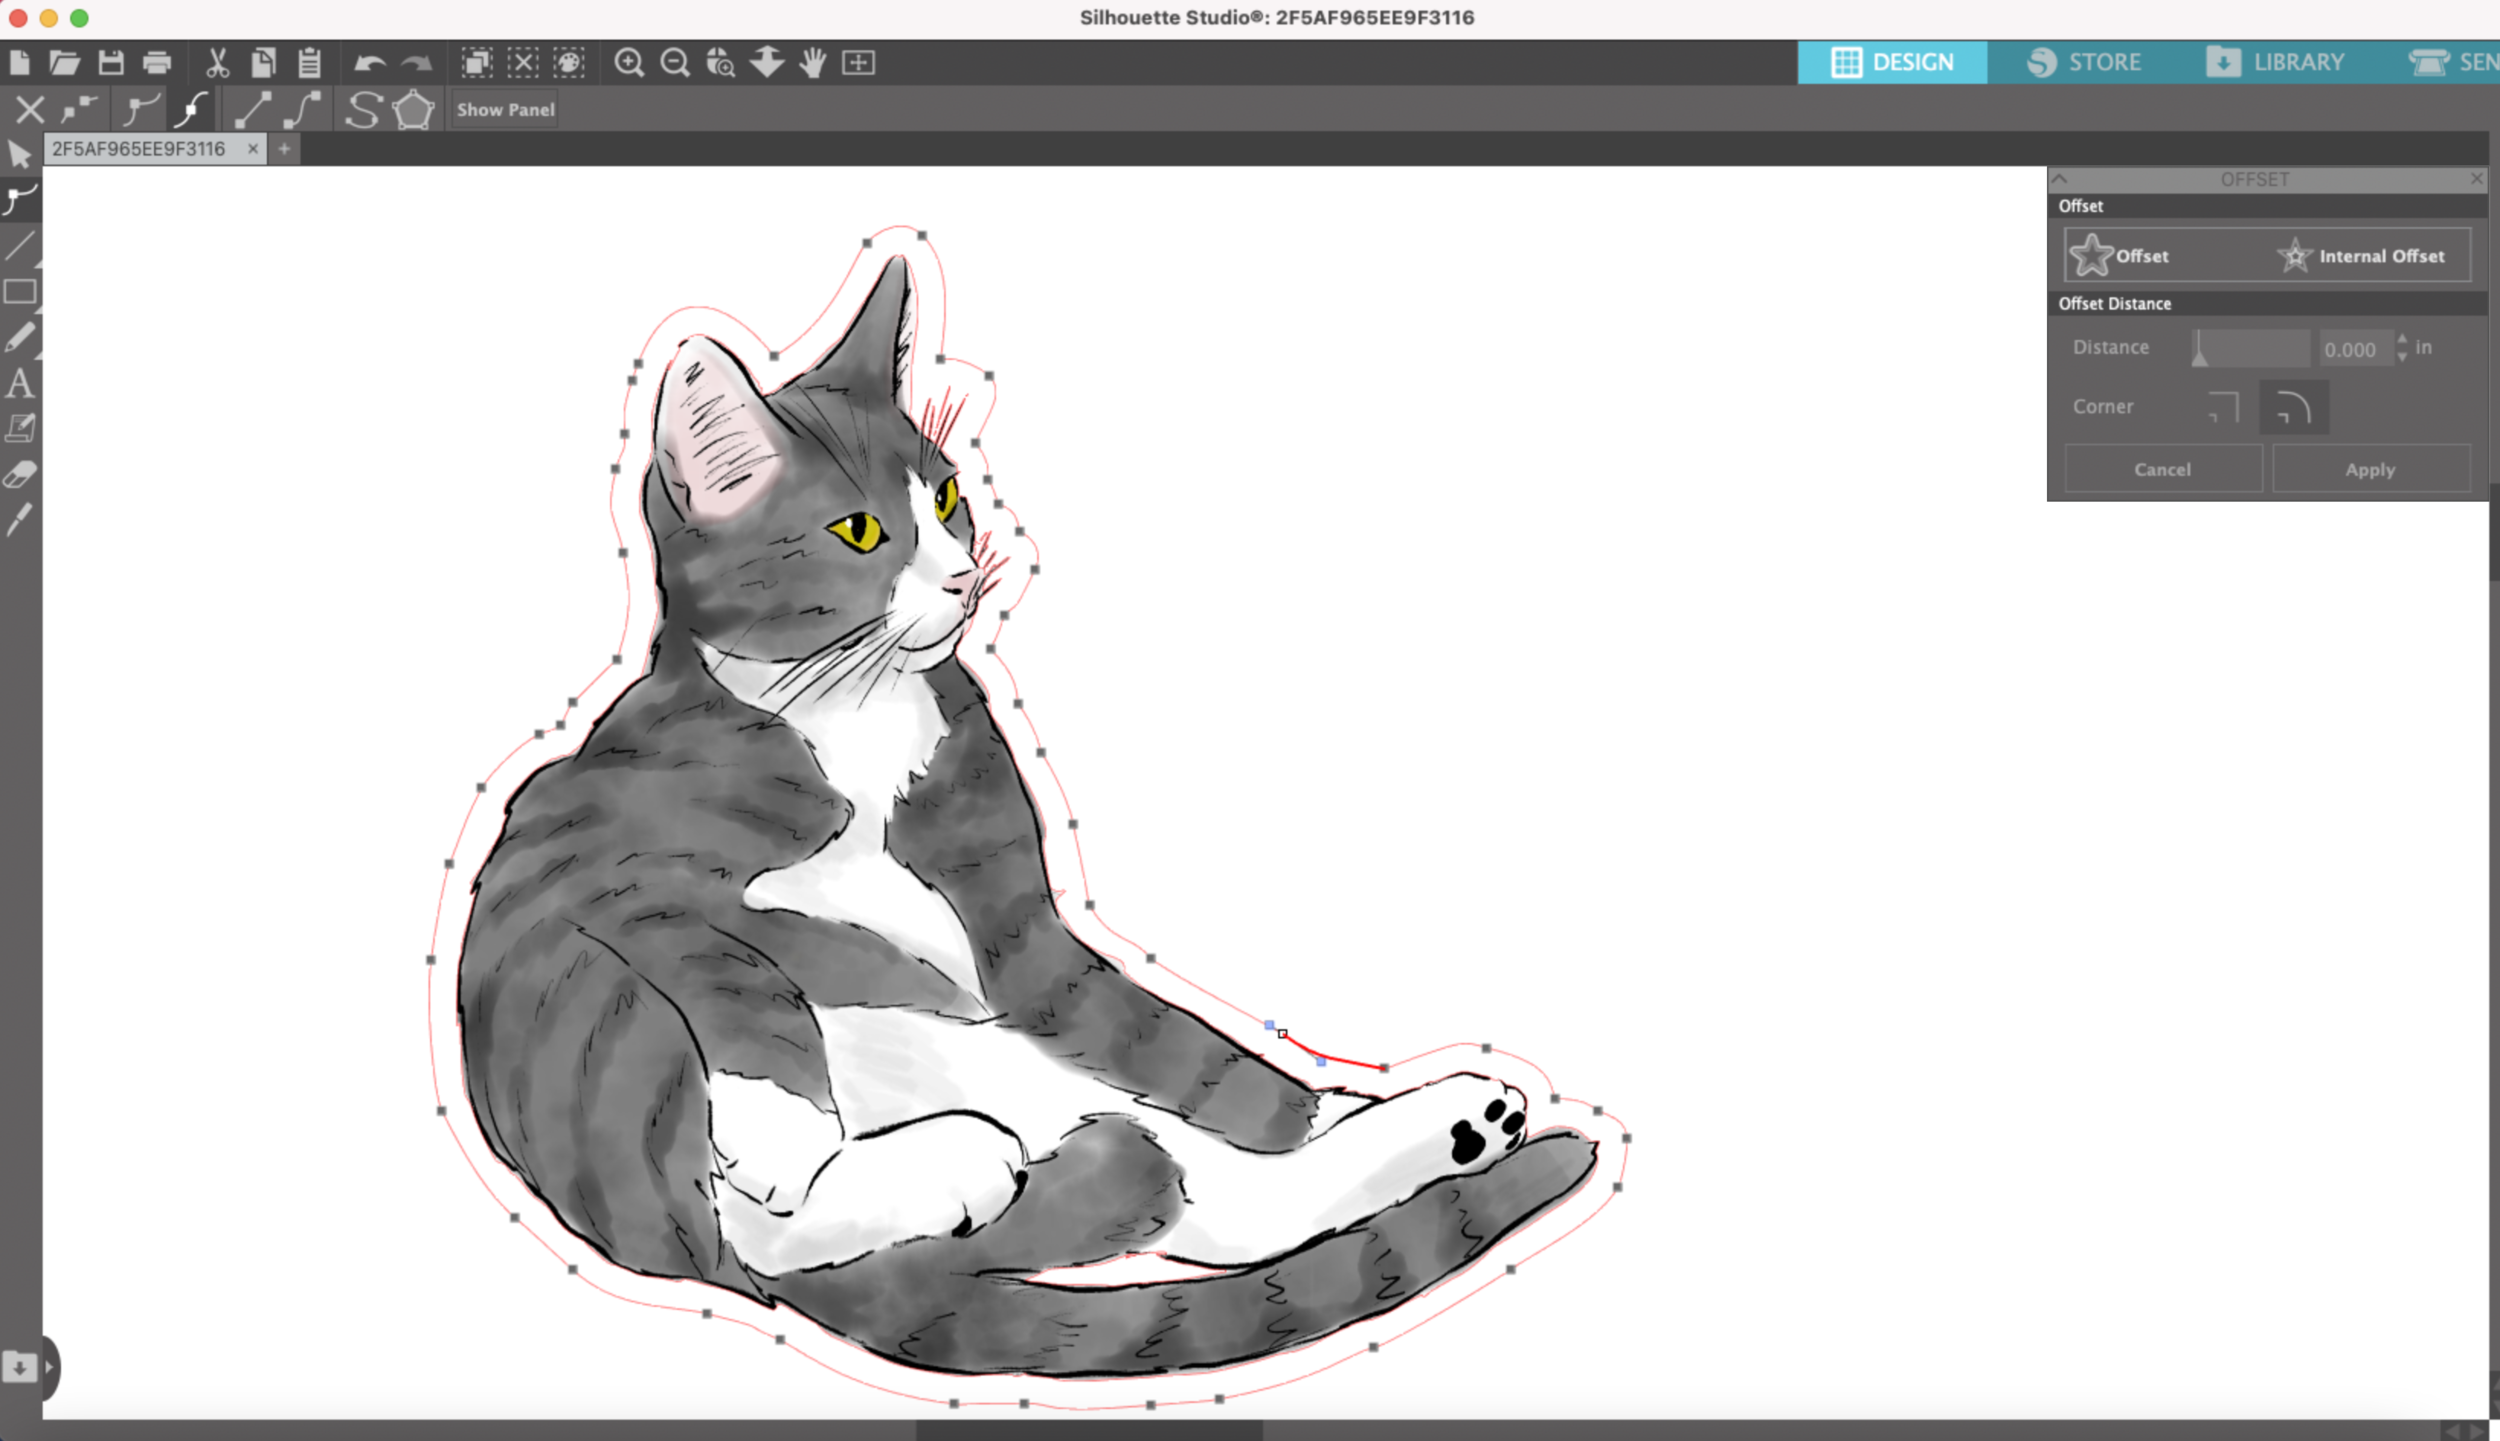
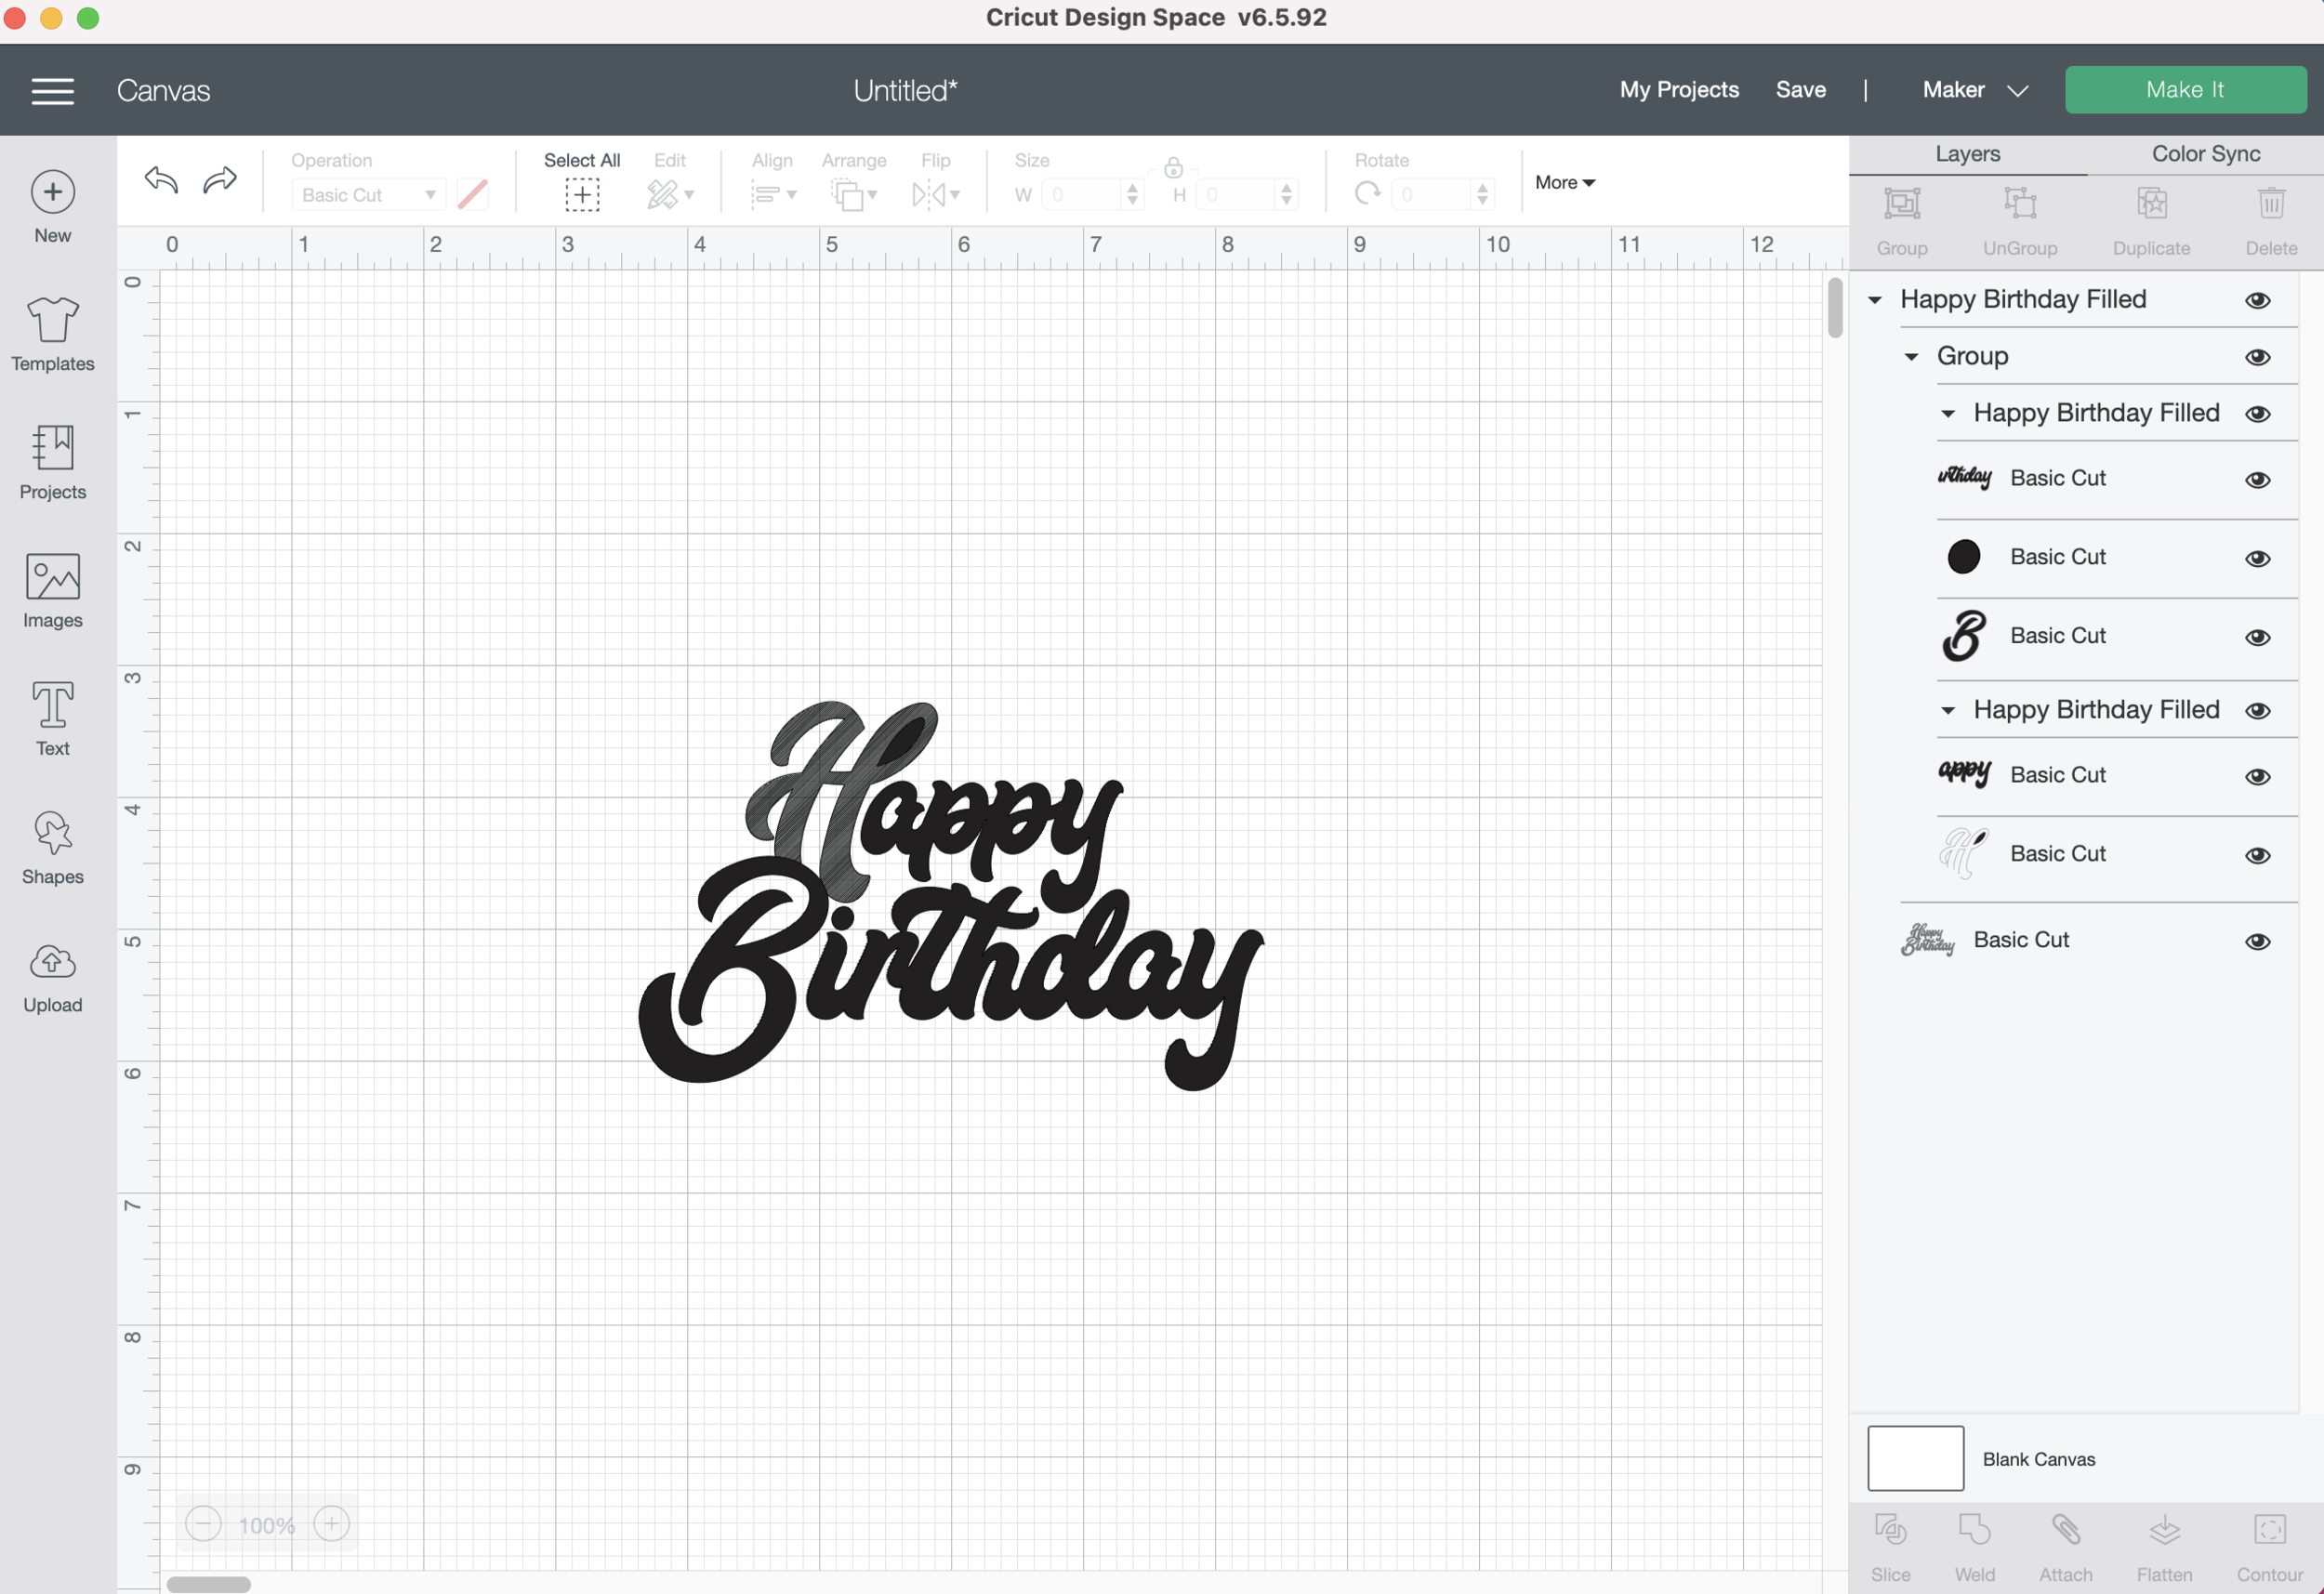
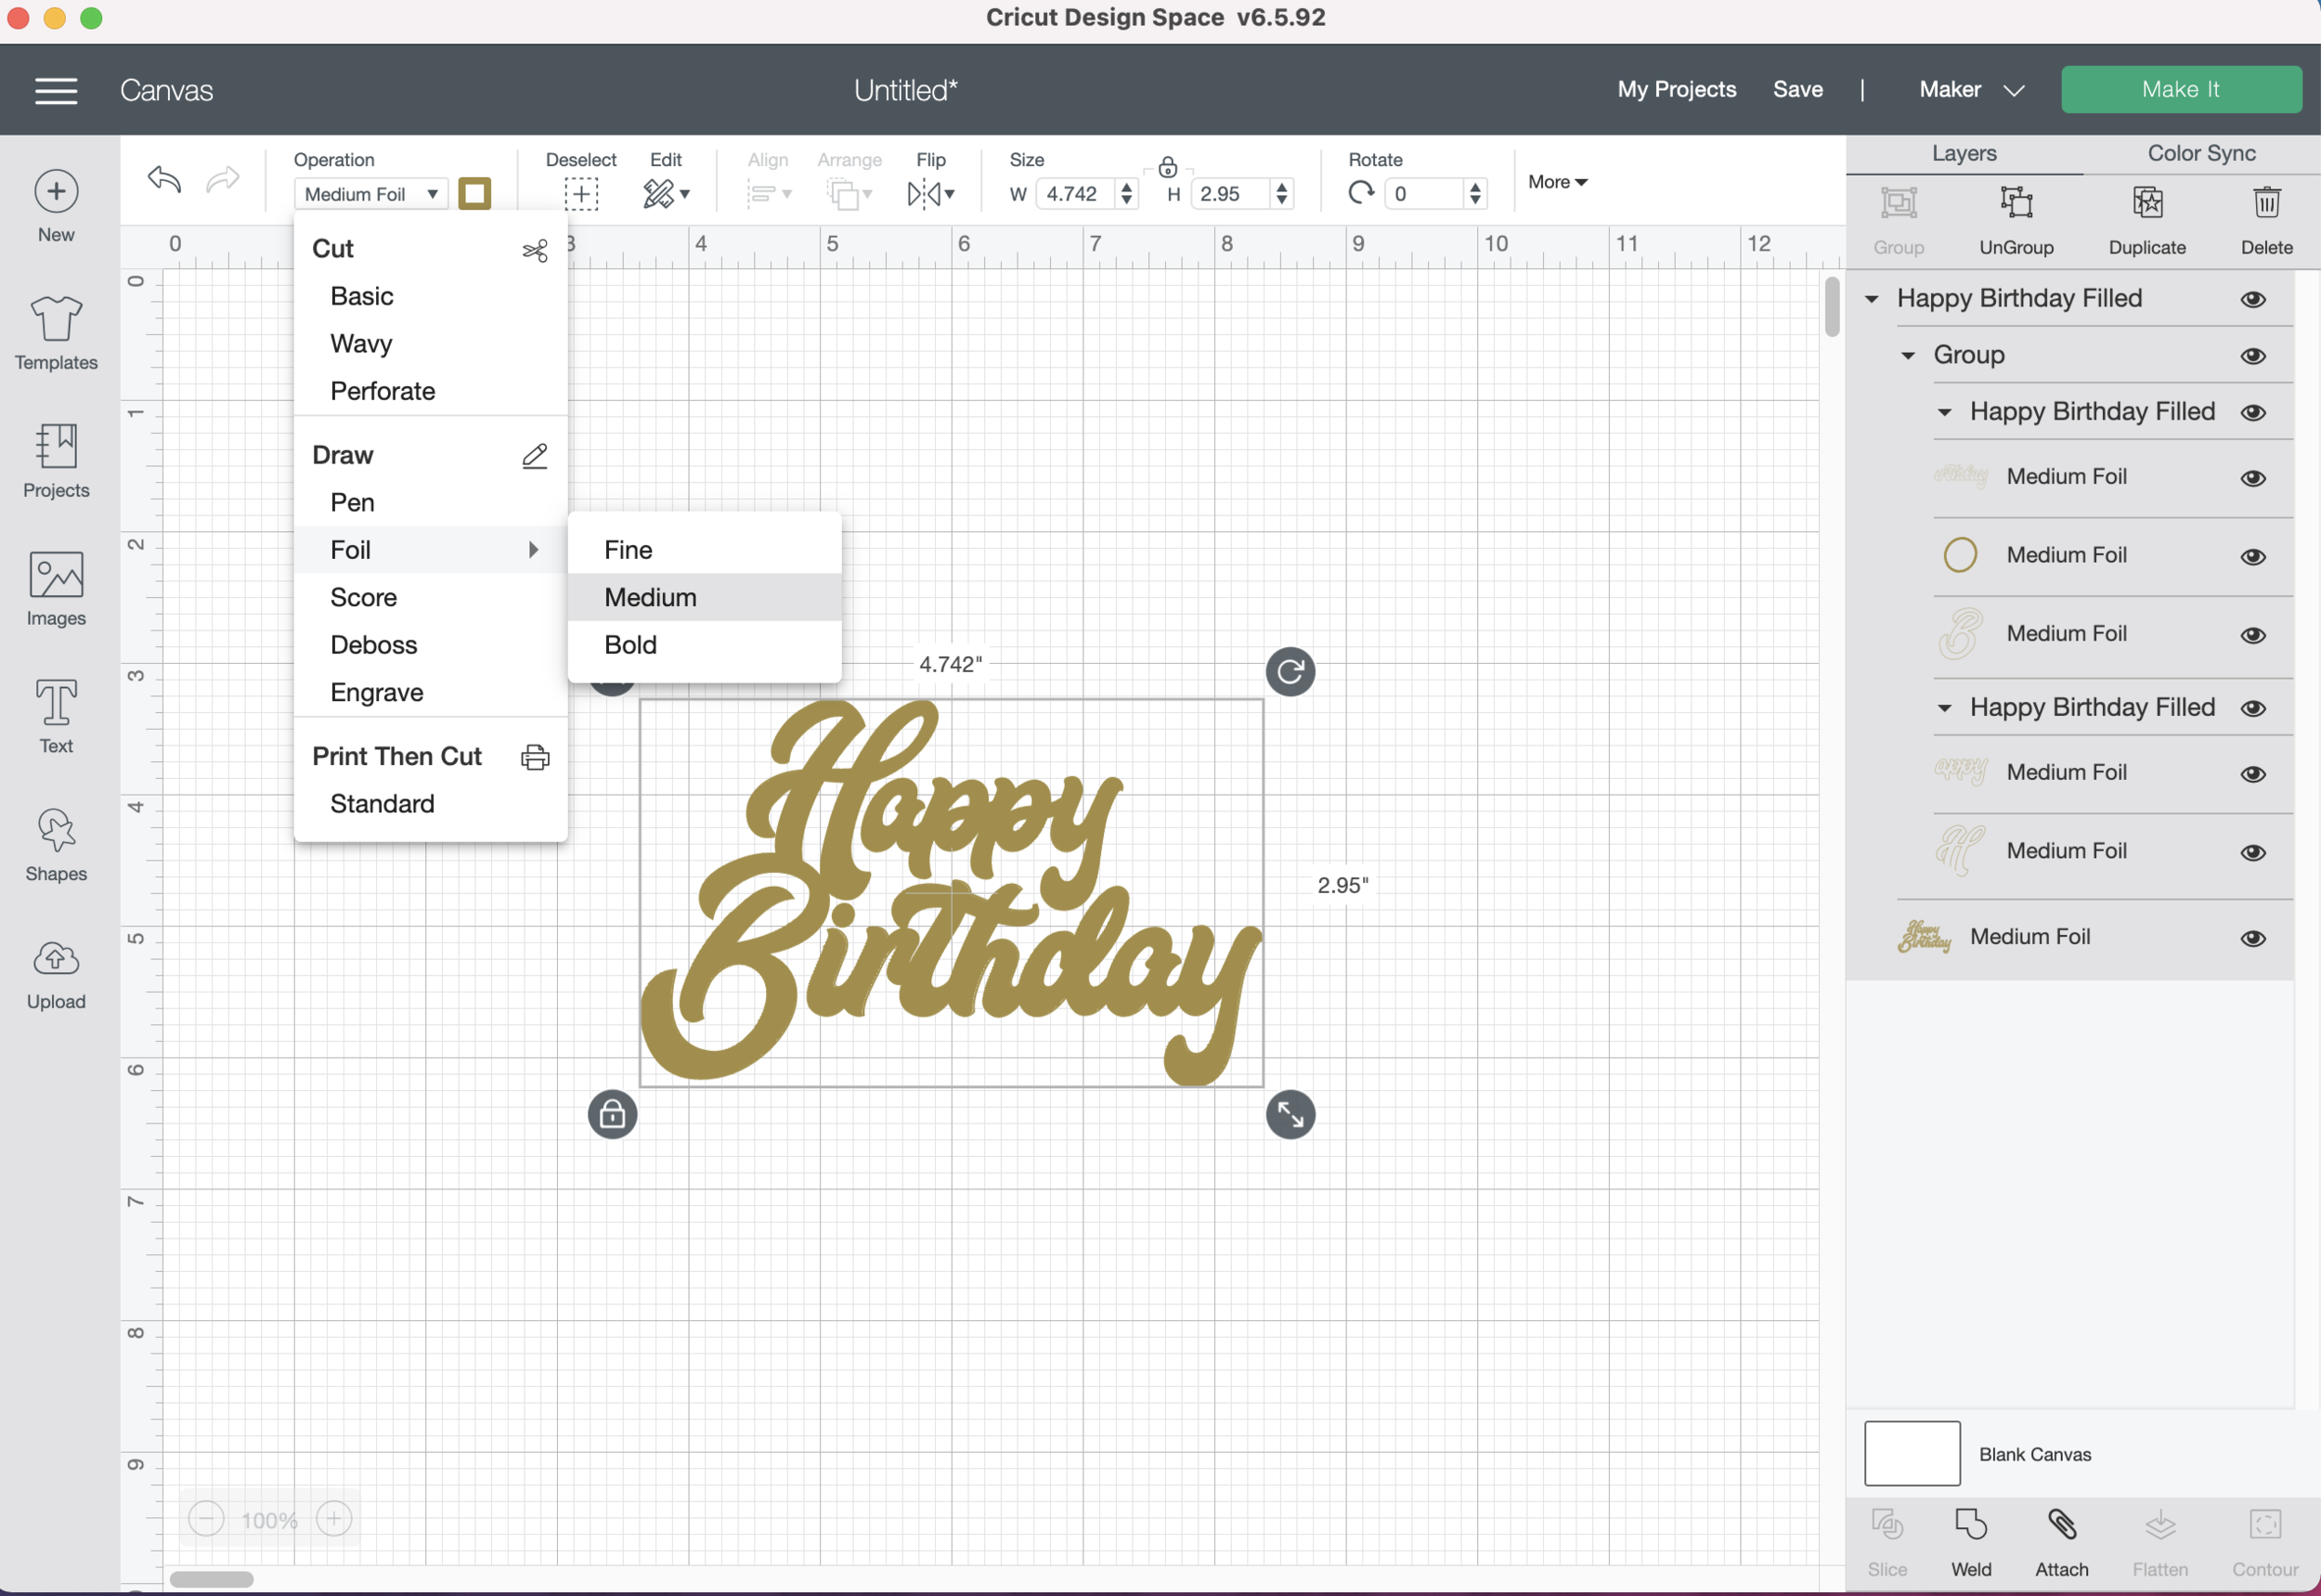
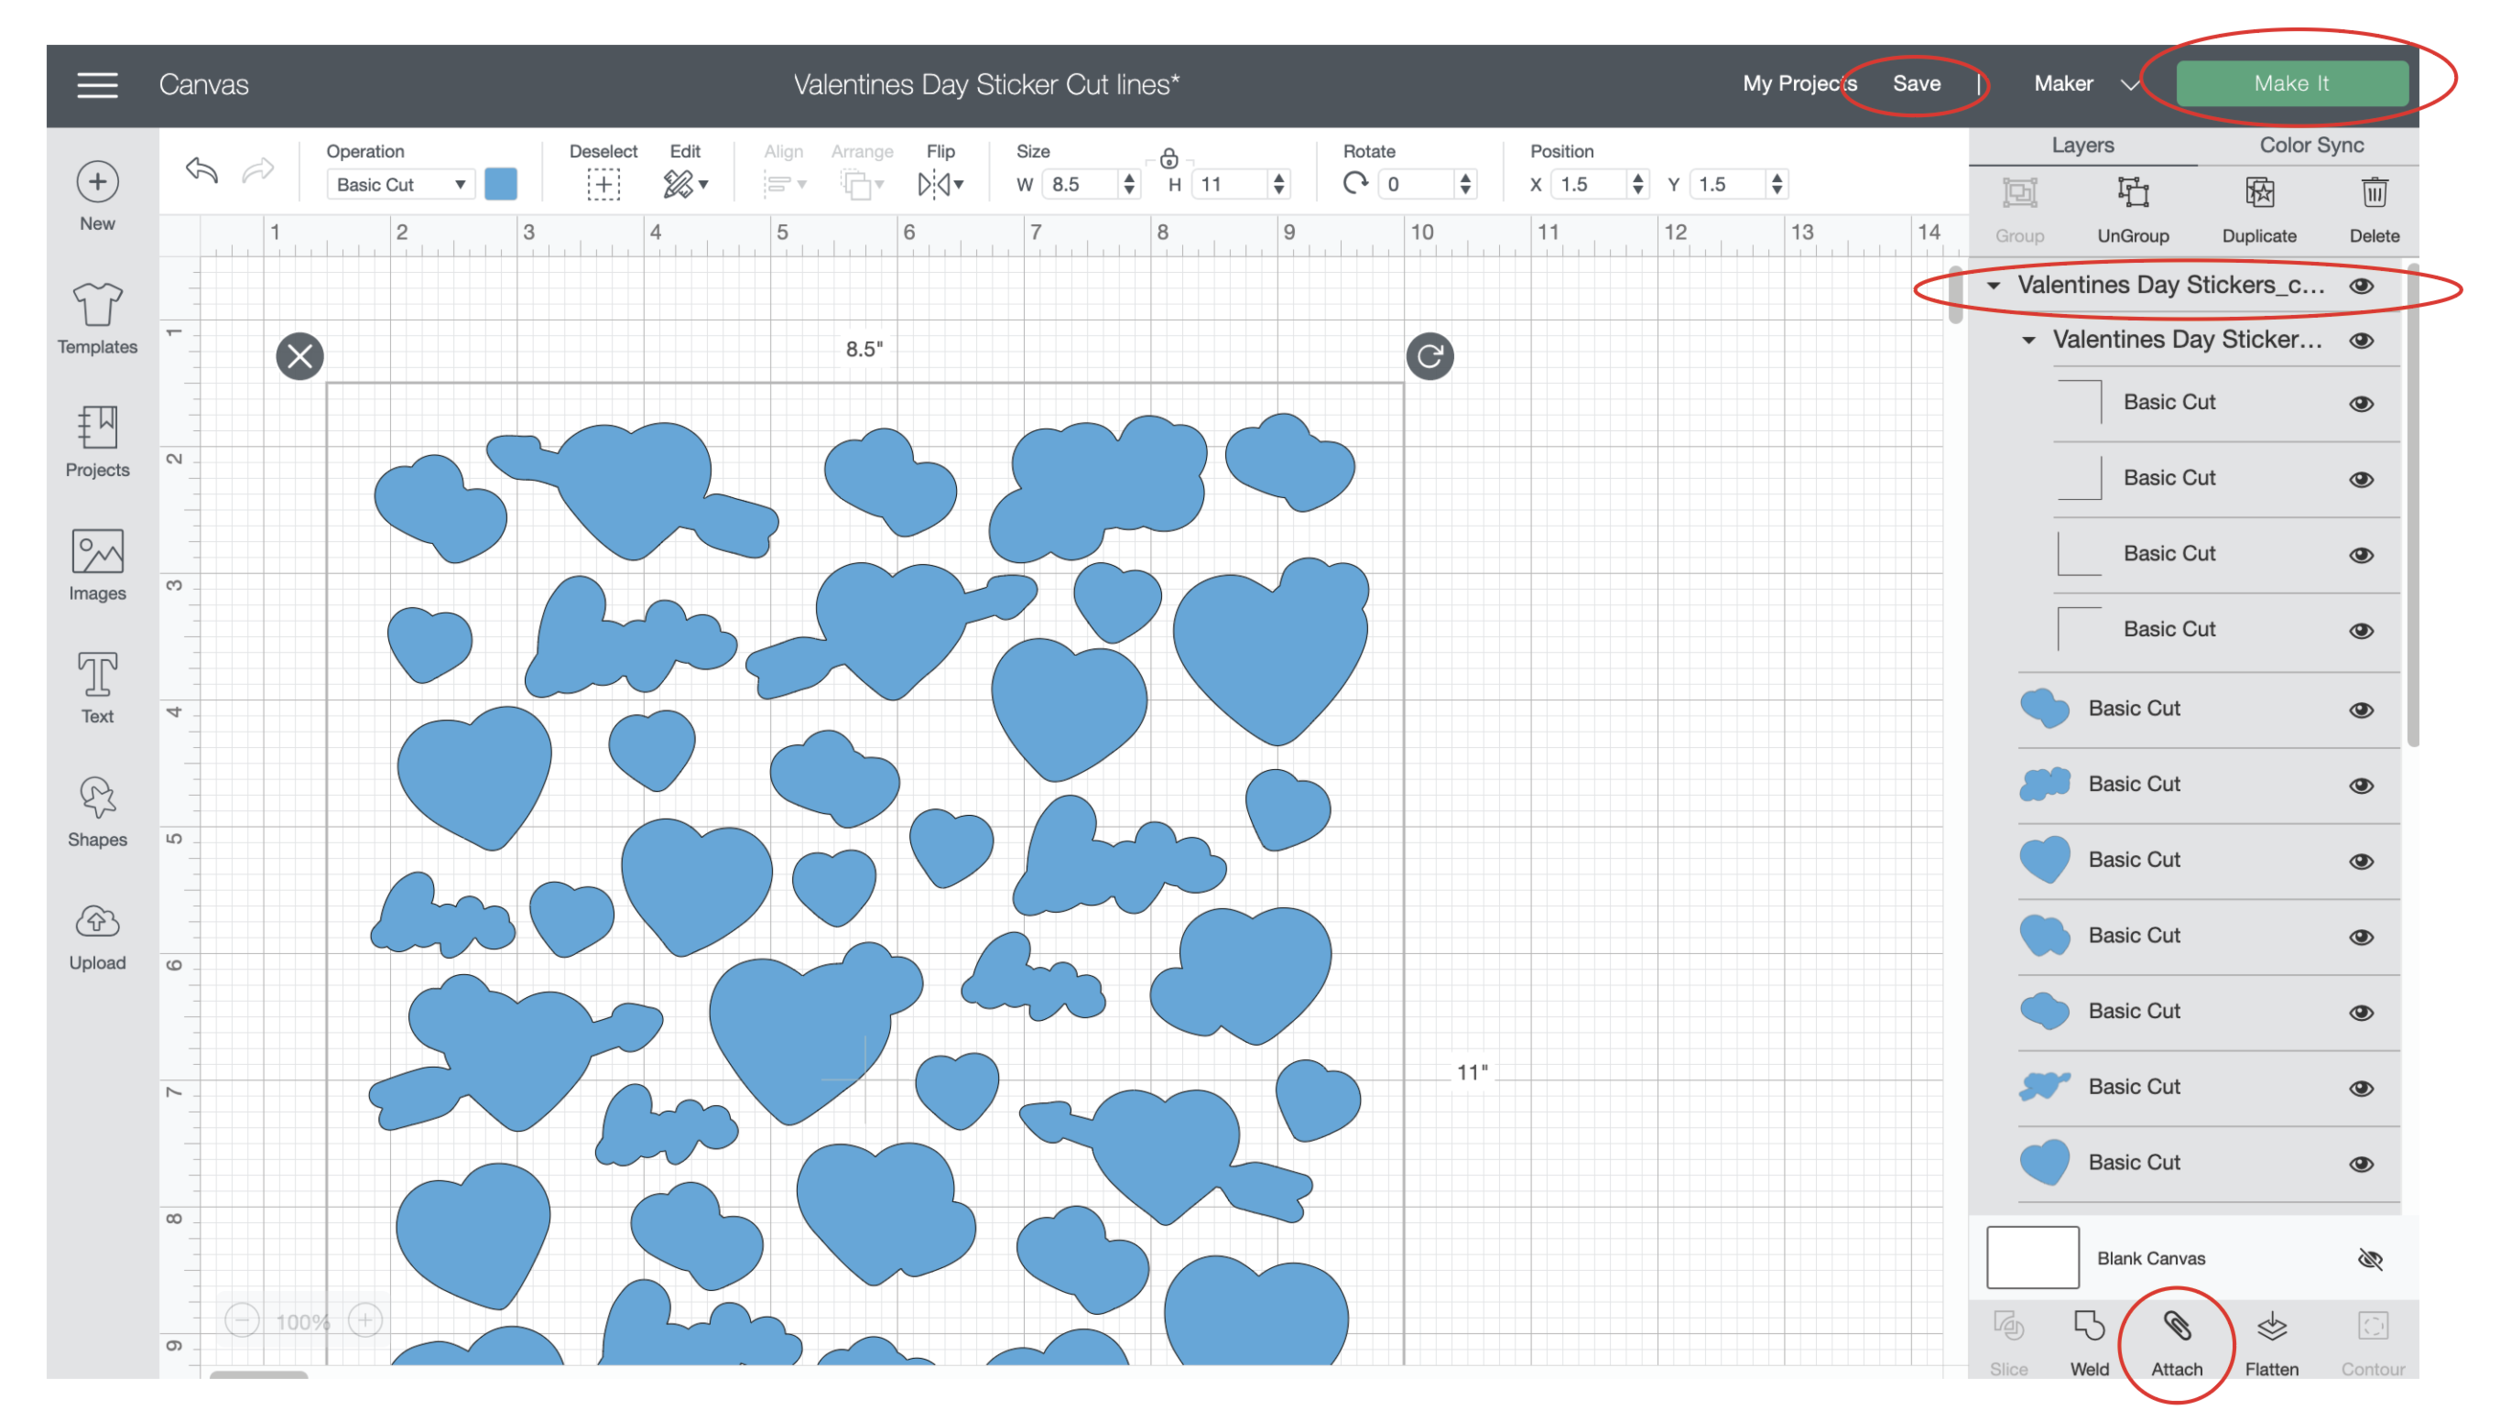
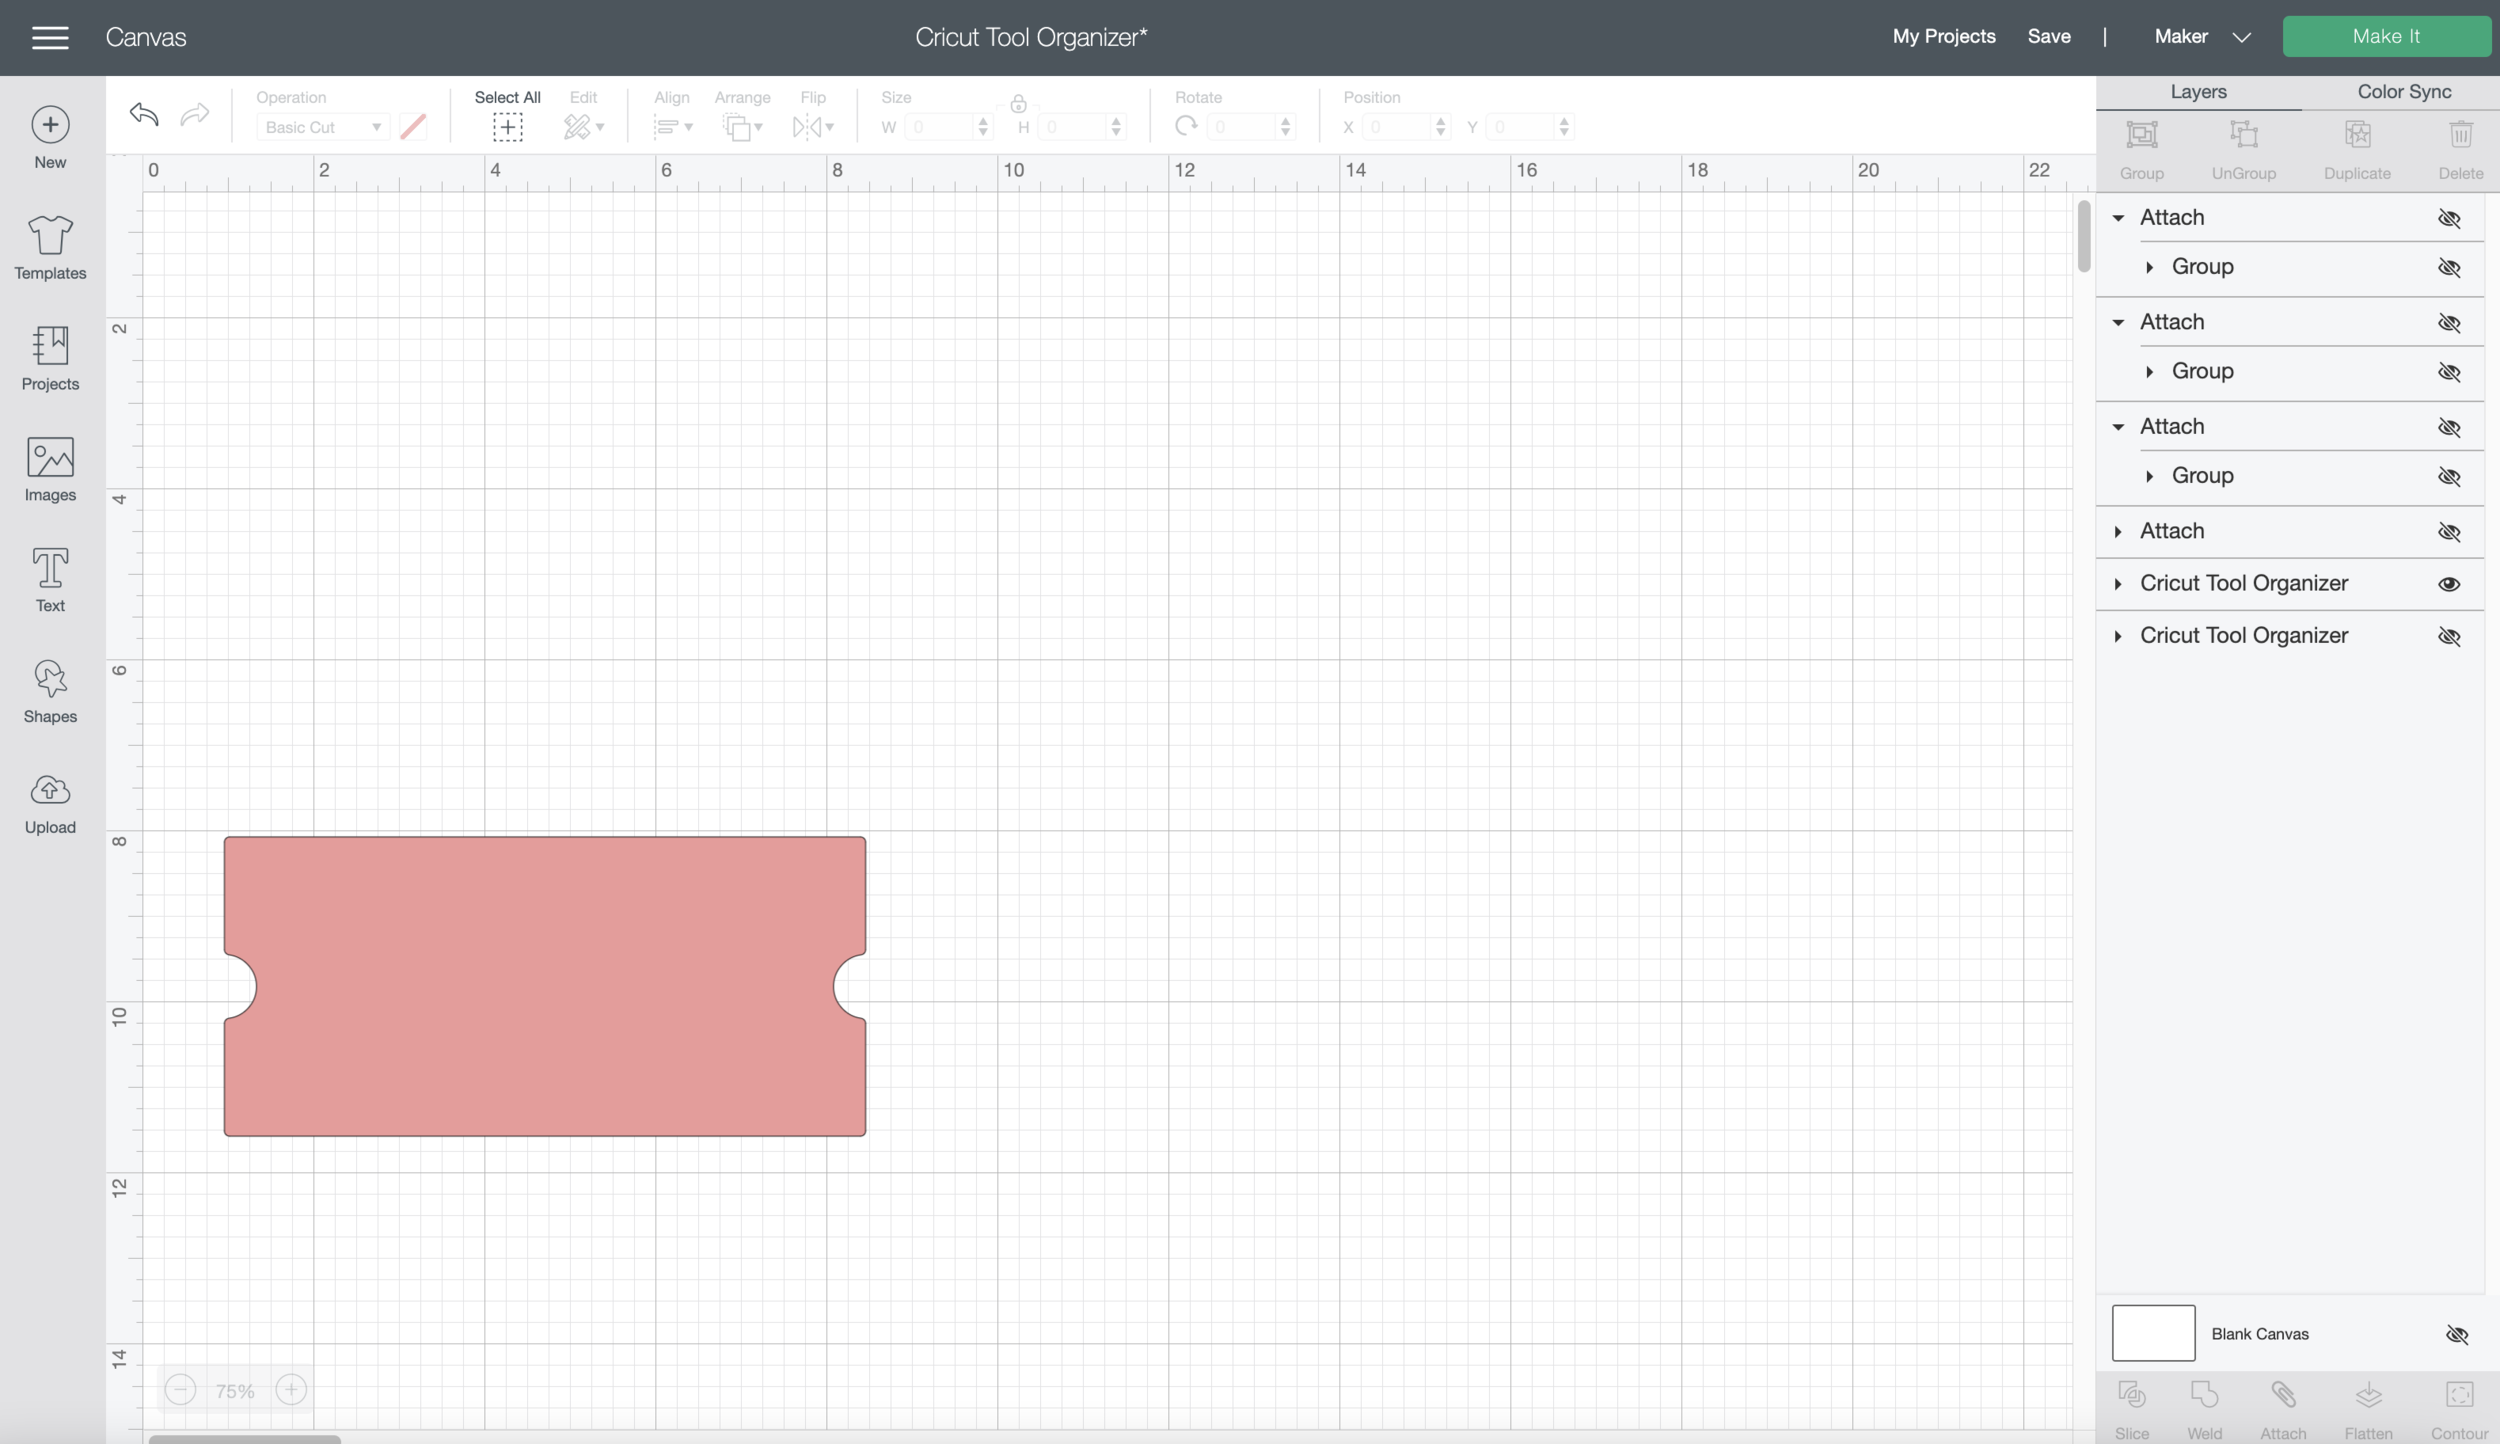
Now, my file is on my canvas. I’m going to scale it down a little bit, so it fits on the piece of cardstock I will be using to do my test drawing. I’m also going to change this to a DRAW file. Down in the bottom tool bar, select EDIT, then where it says BASIC CUT on the bottom left, select that and change it to DRAW/ Pen.

Testing Single Line SVG file in Cricut Design Space

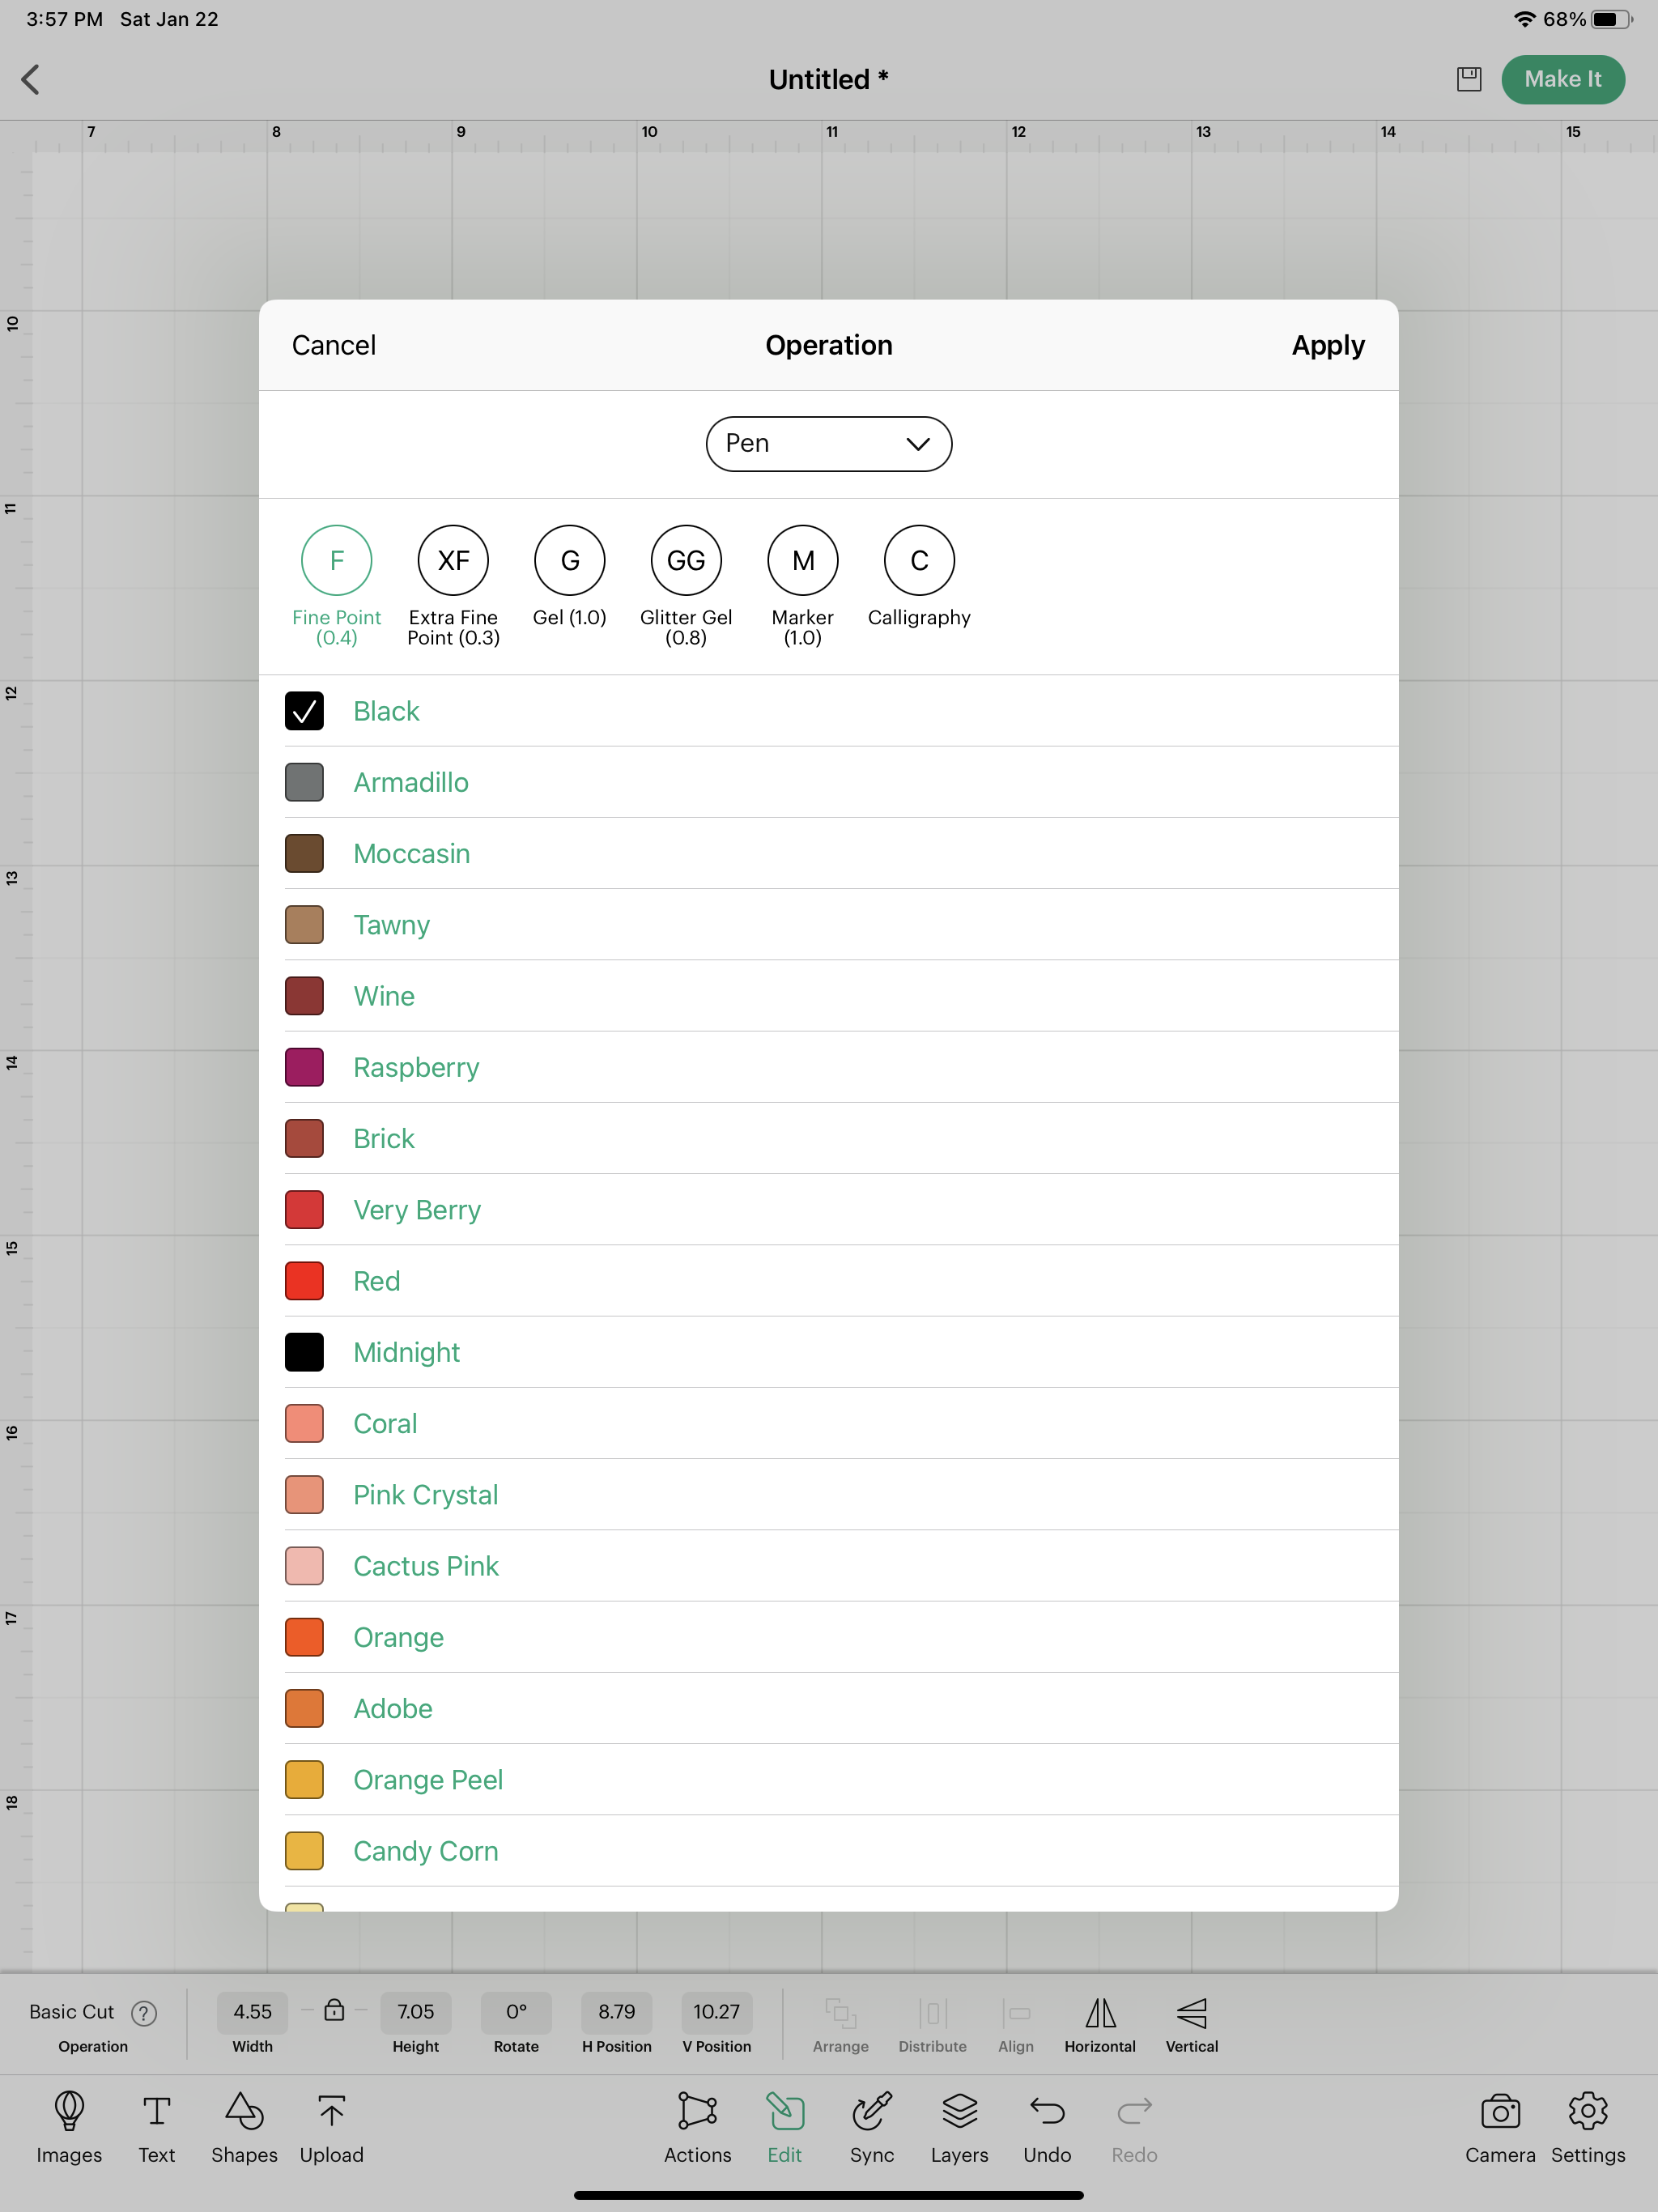
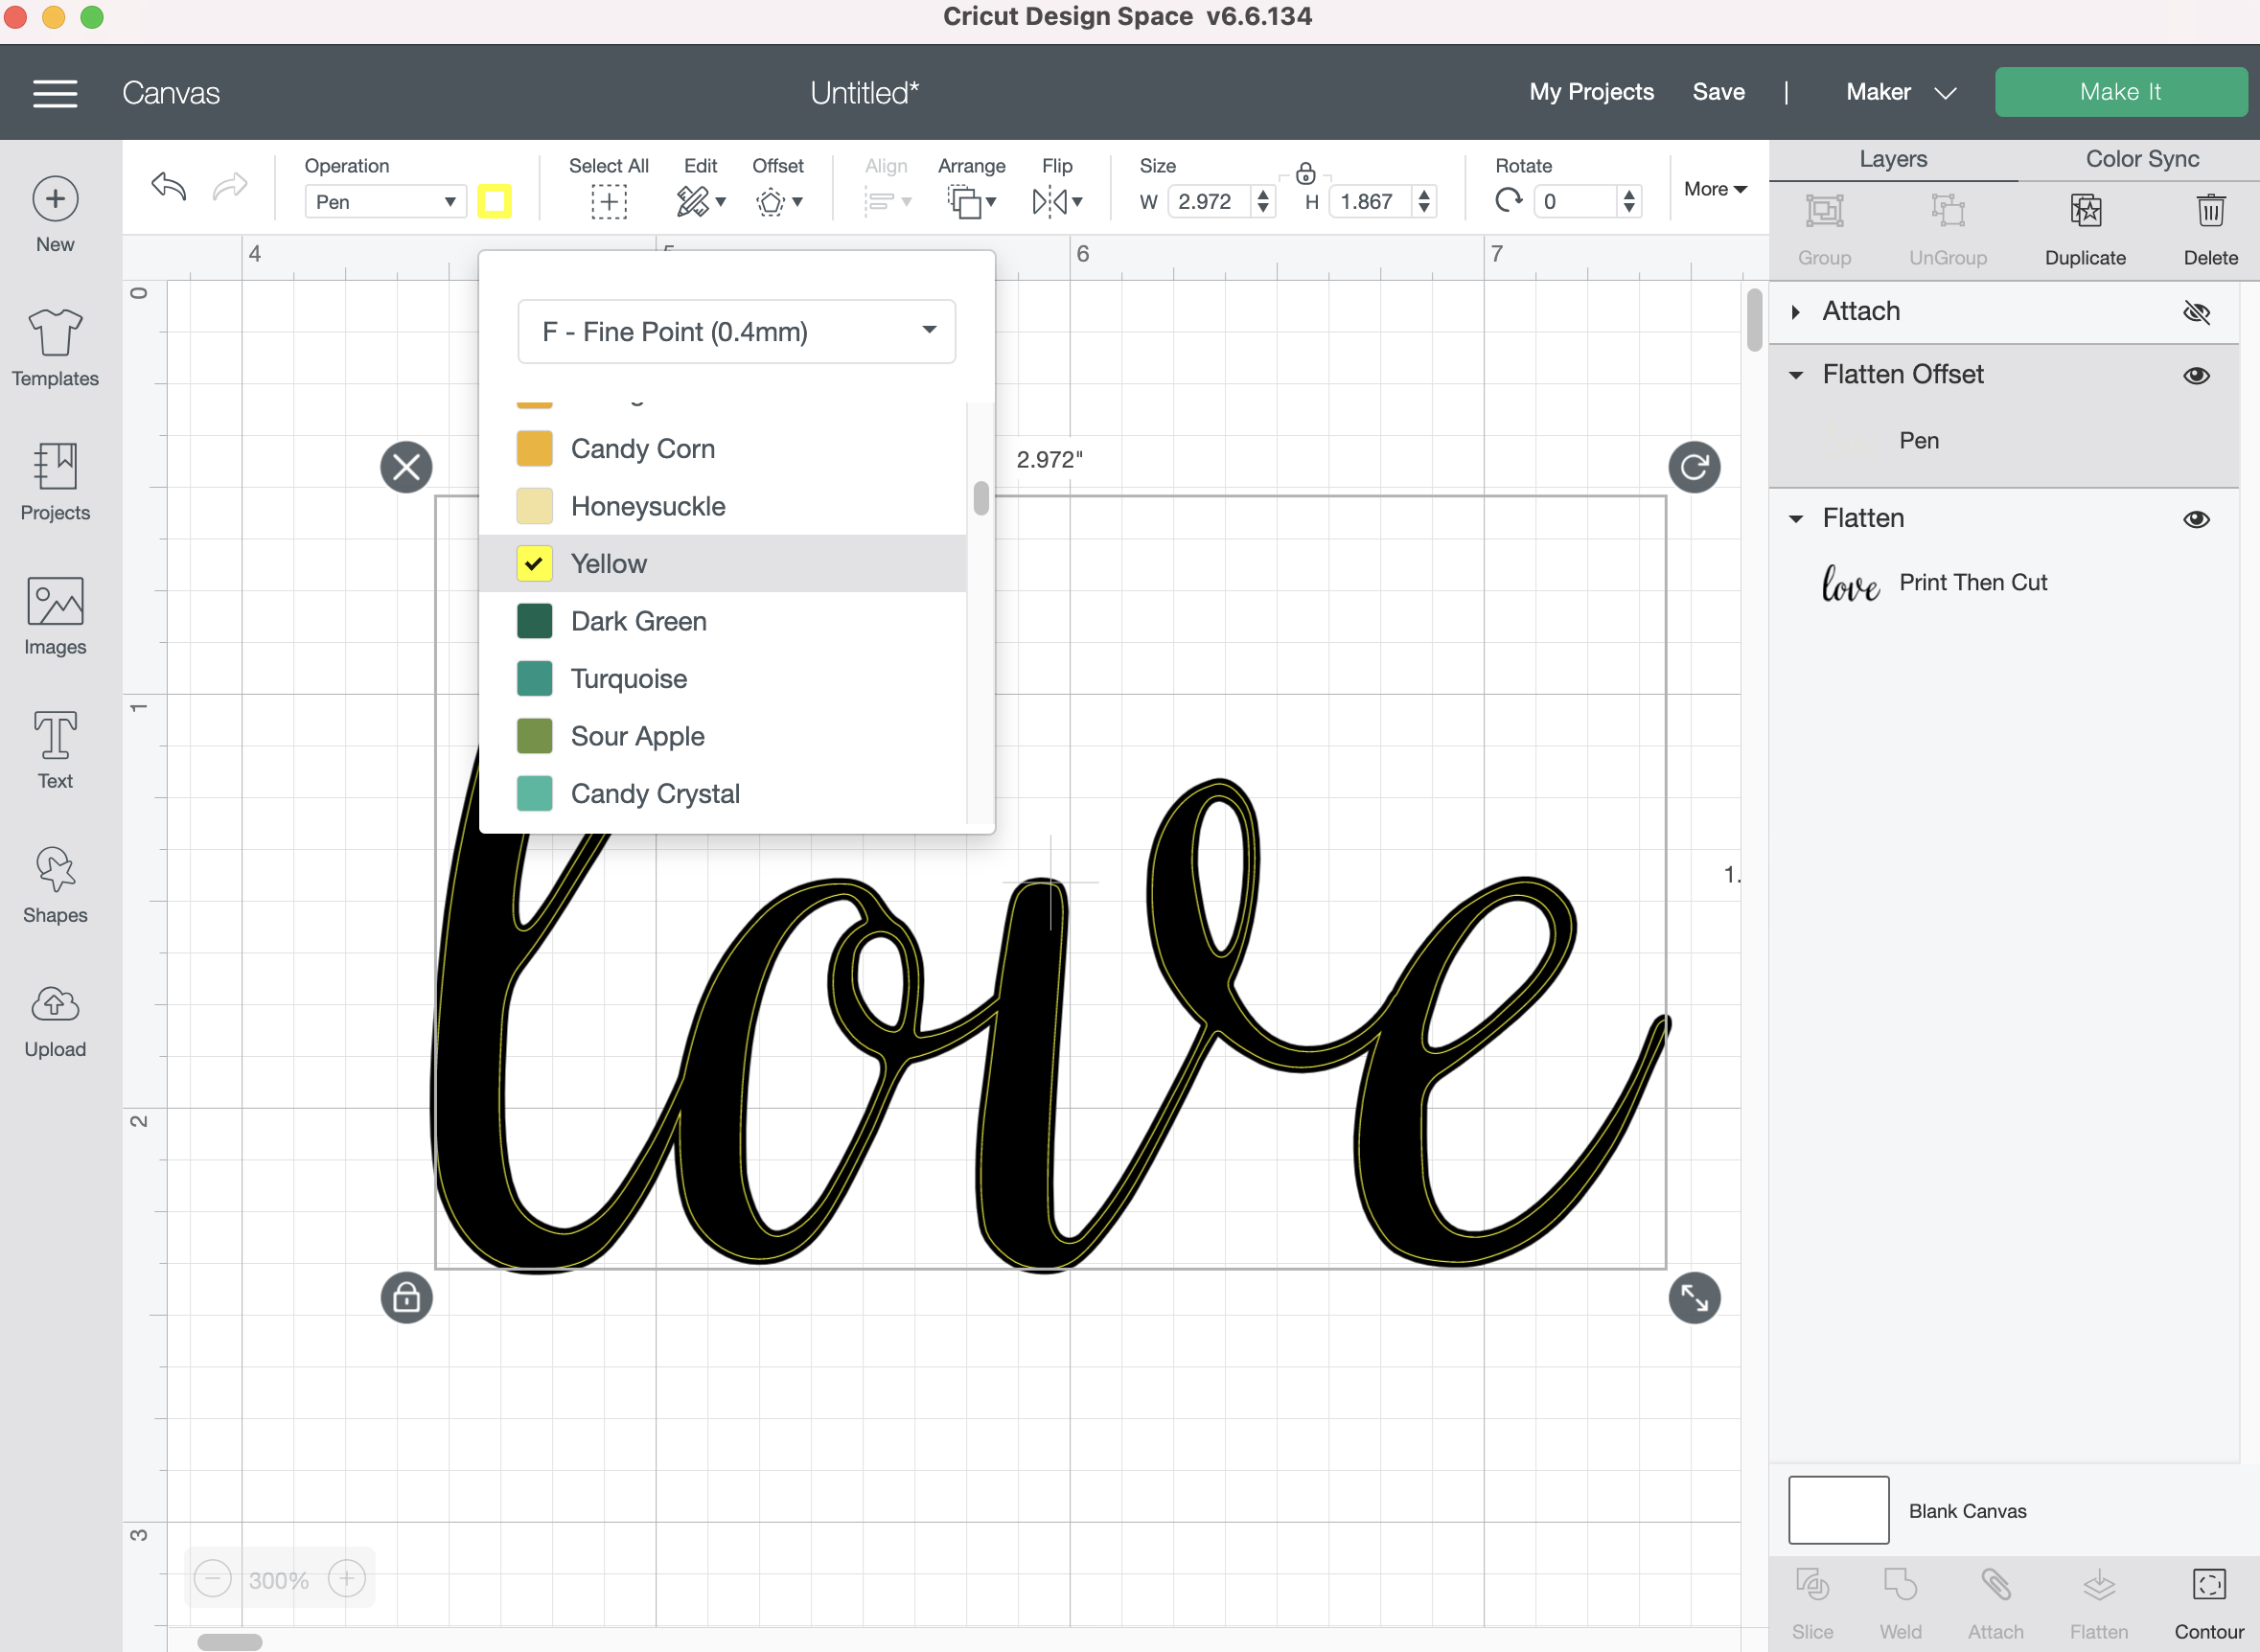
Here I can change the pen type and color. I’m using my Fine Point Black pen. I’m going to change the color just for visibility purposes in Design Space. My machine cannot determine the actual pen color I’m using, so I can select whatever color I want.

Testing Single Line SVG file in Cricut Design Space

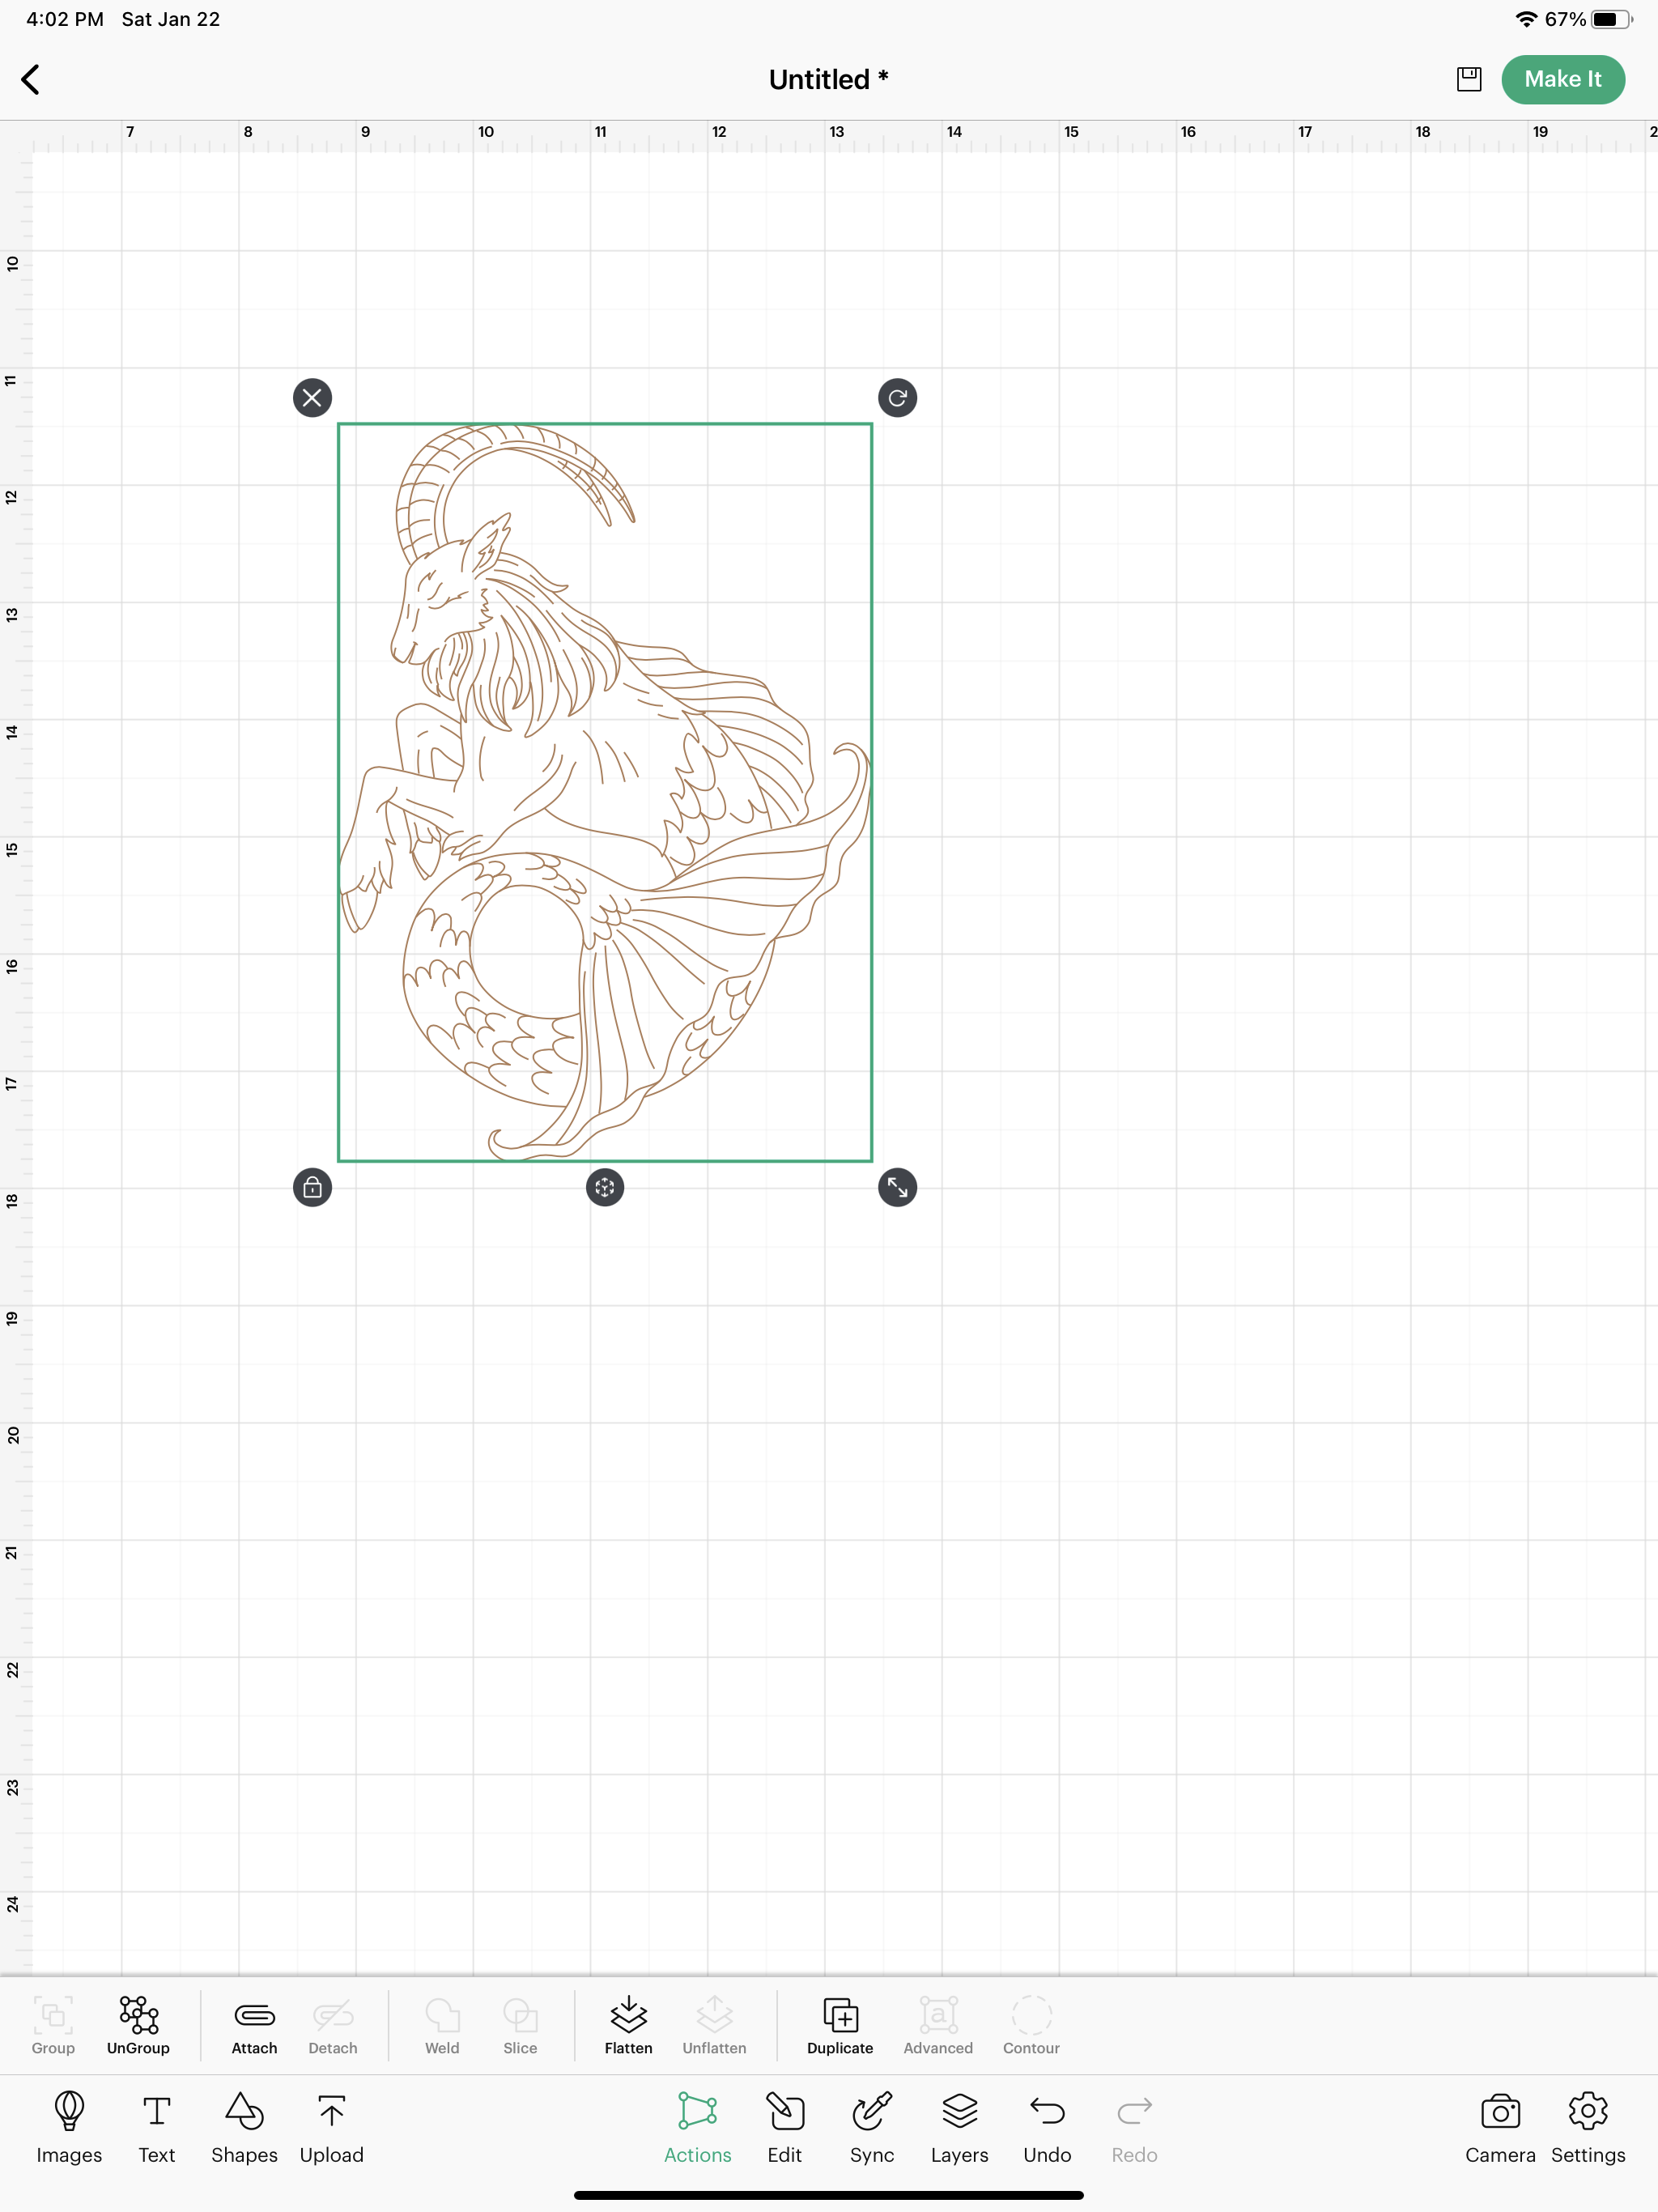
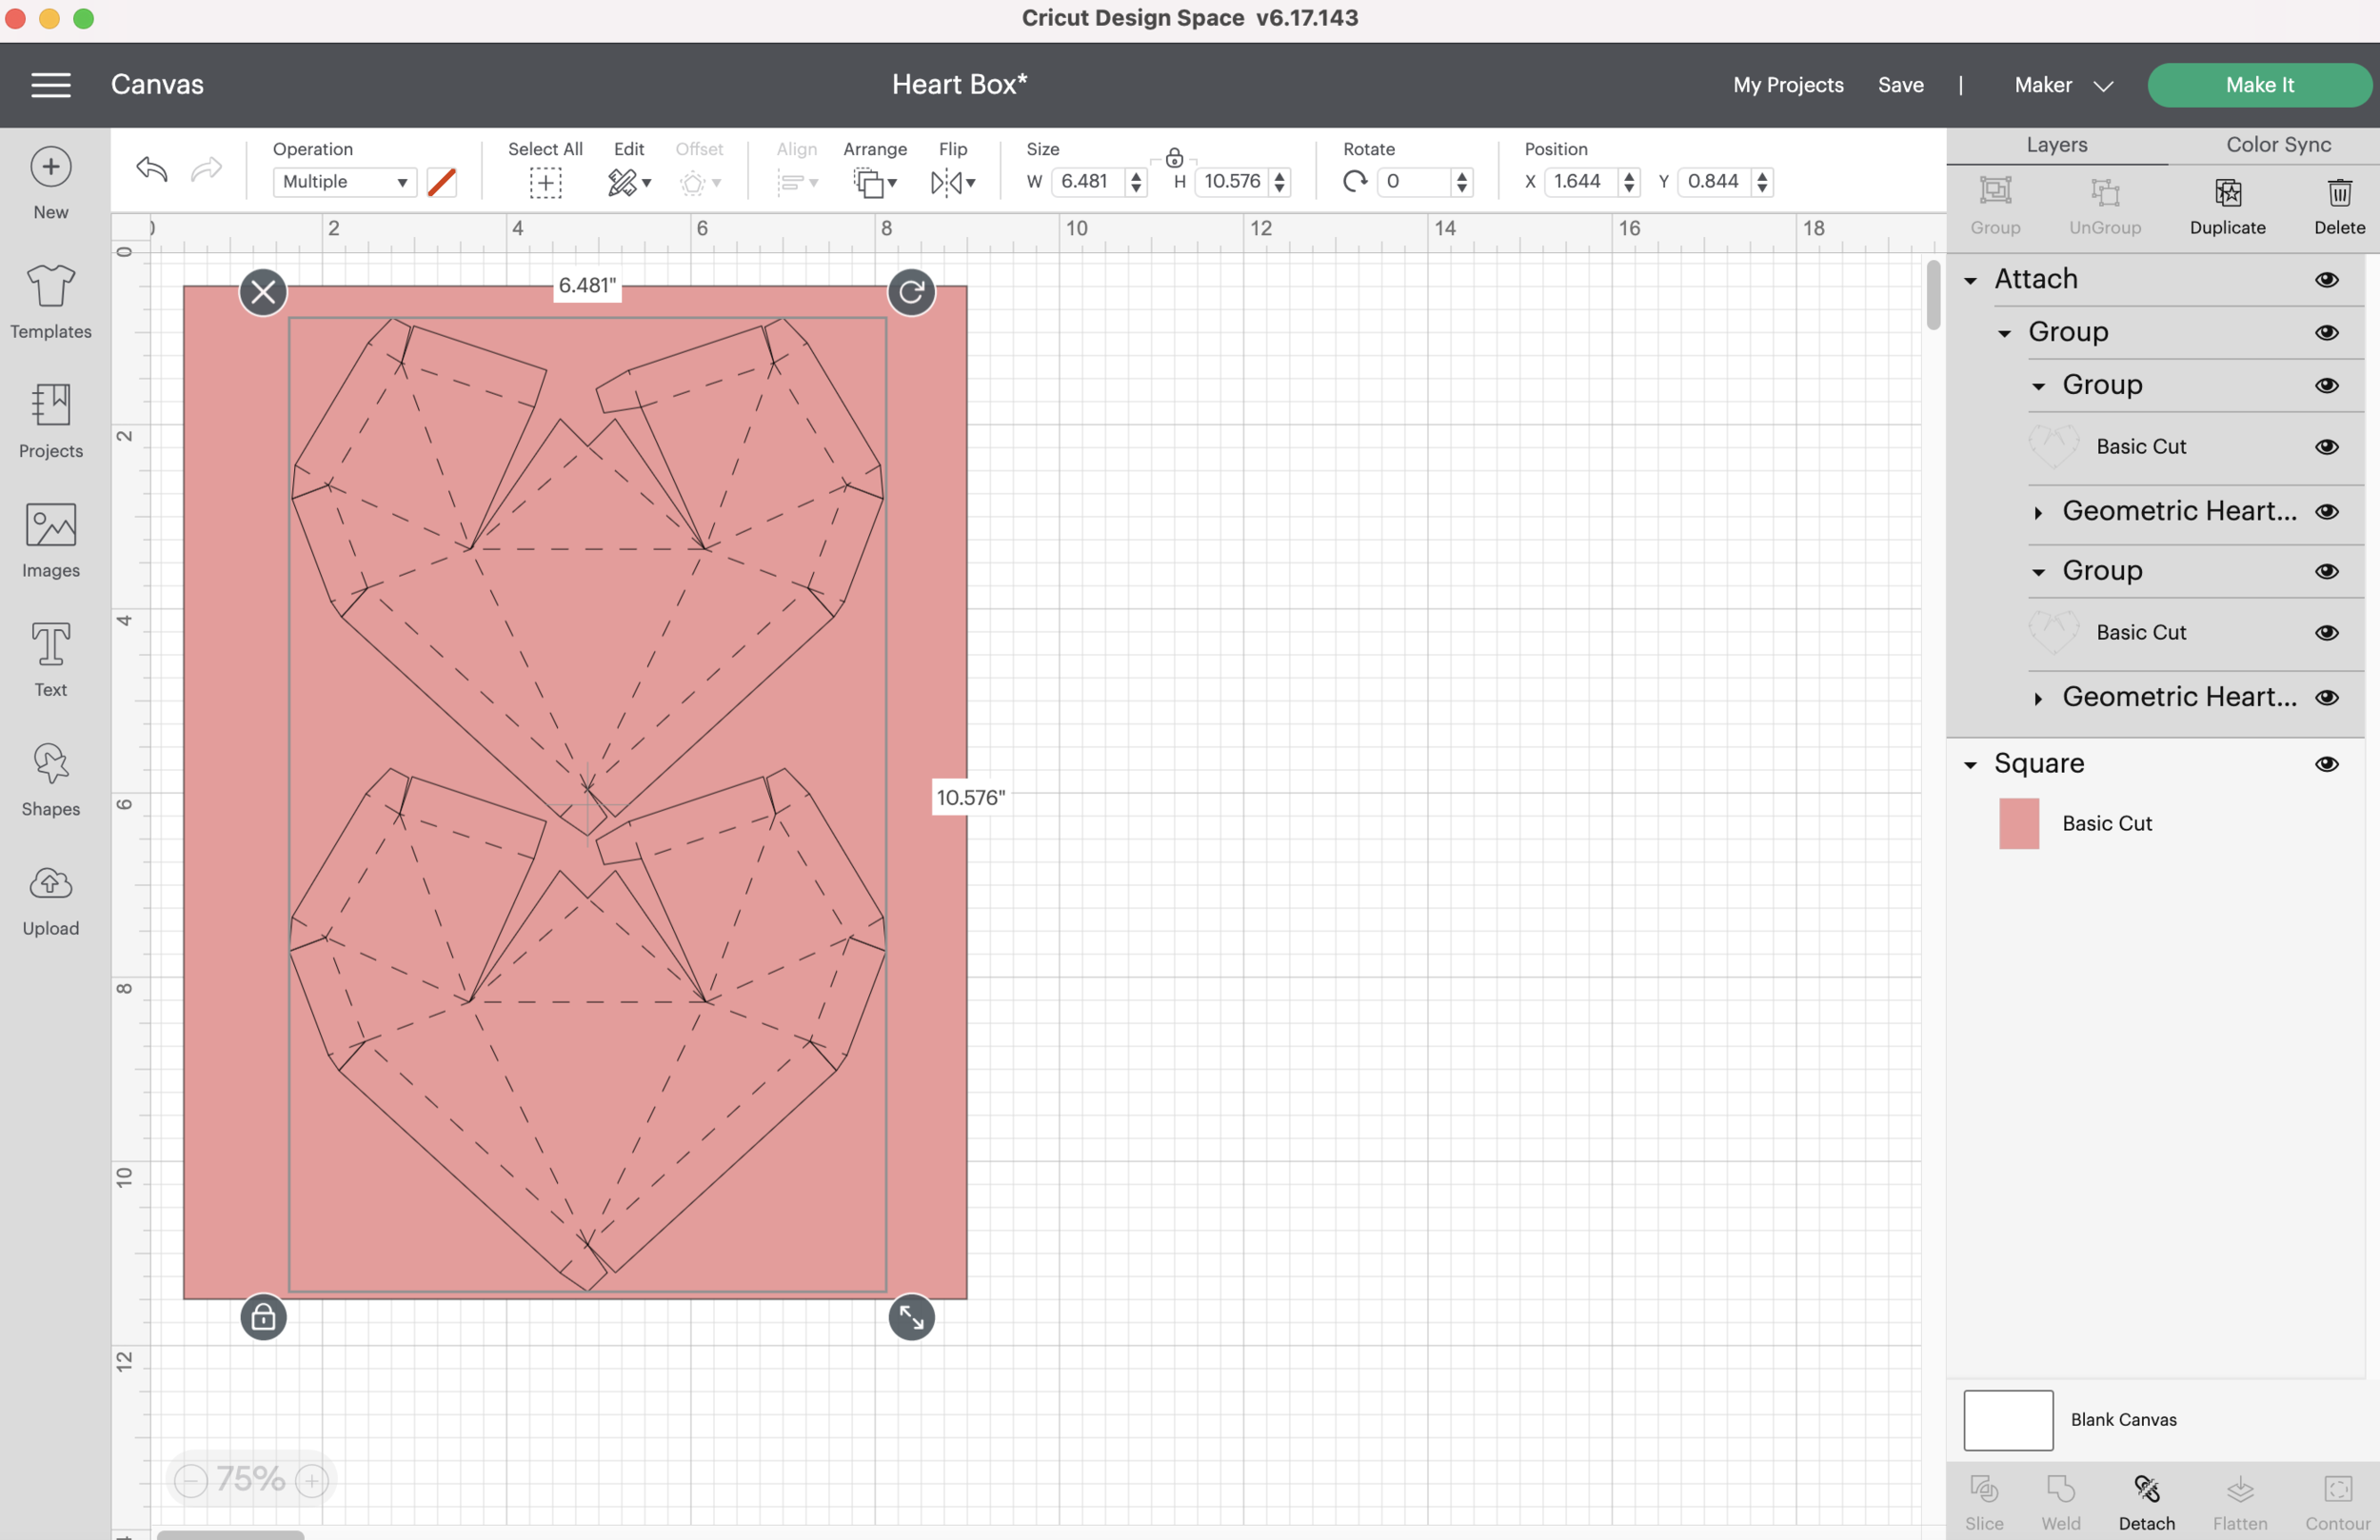
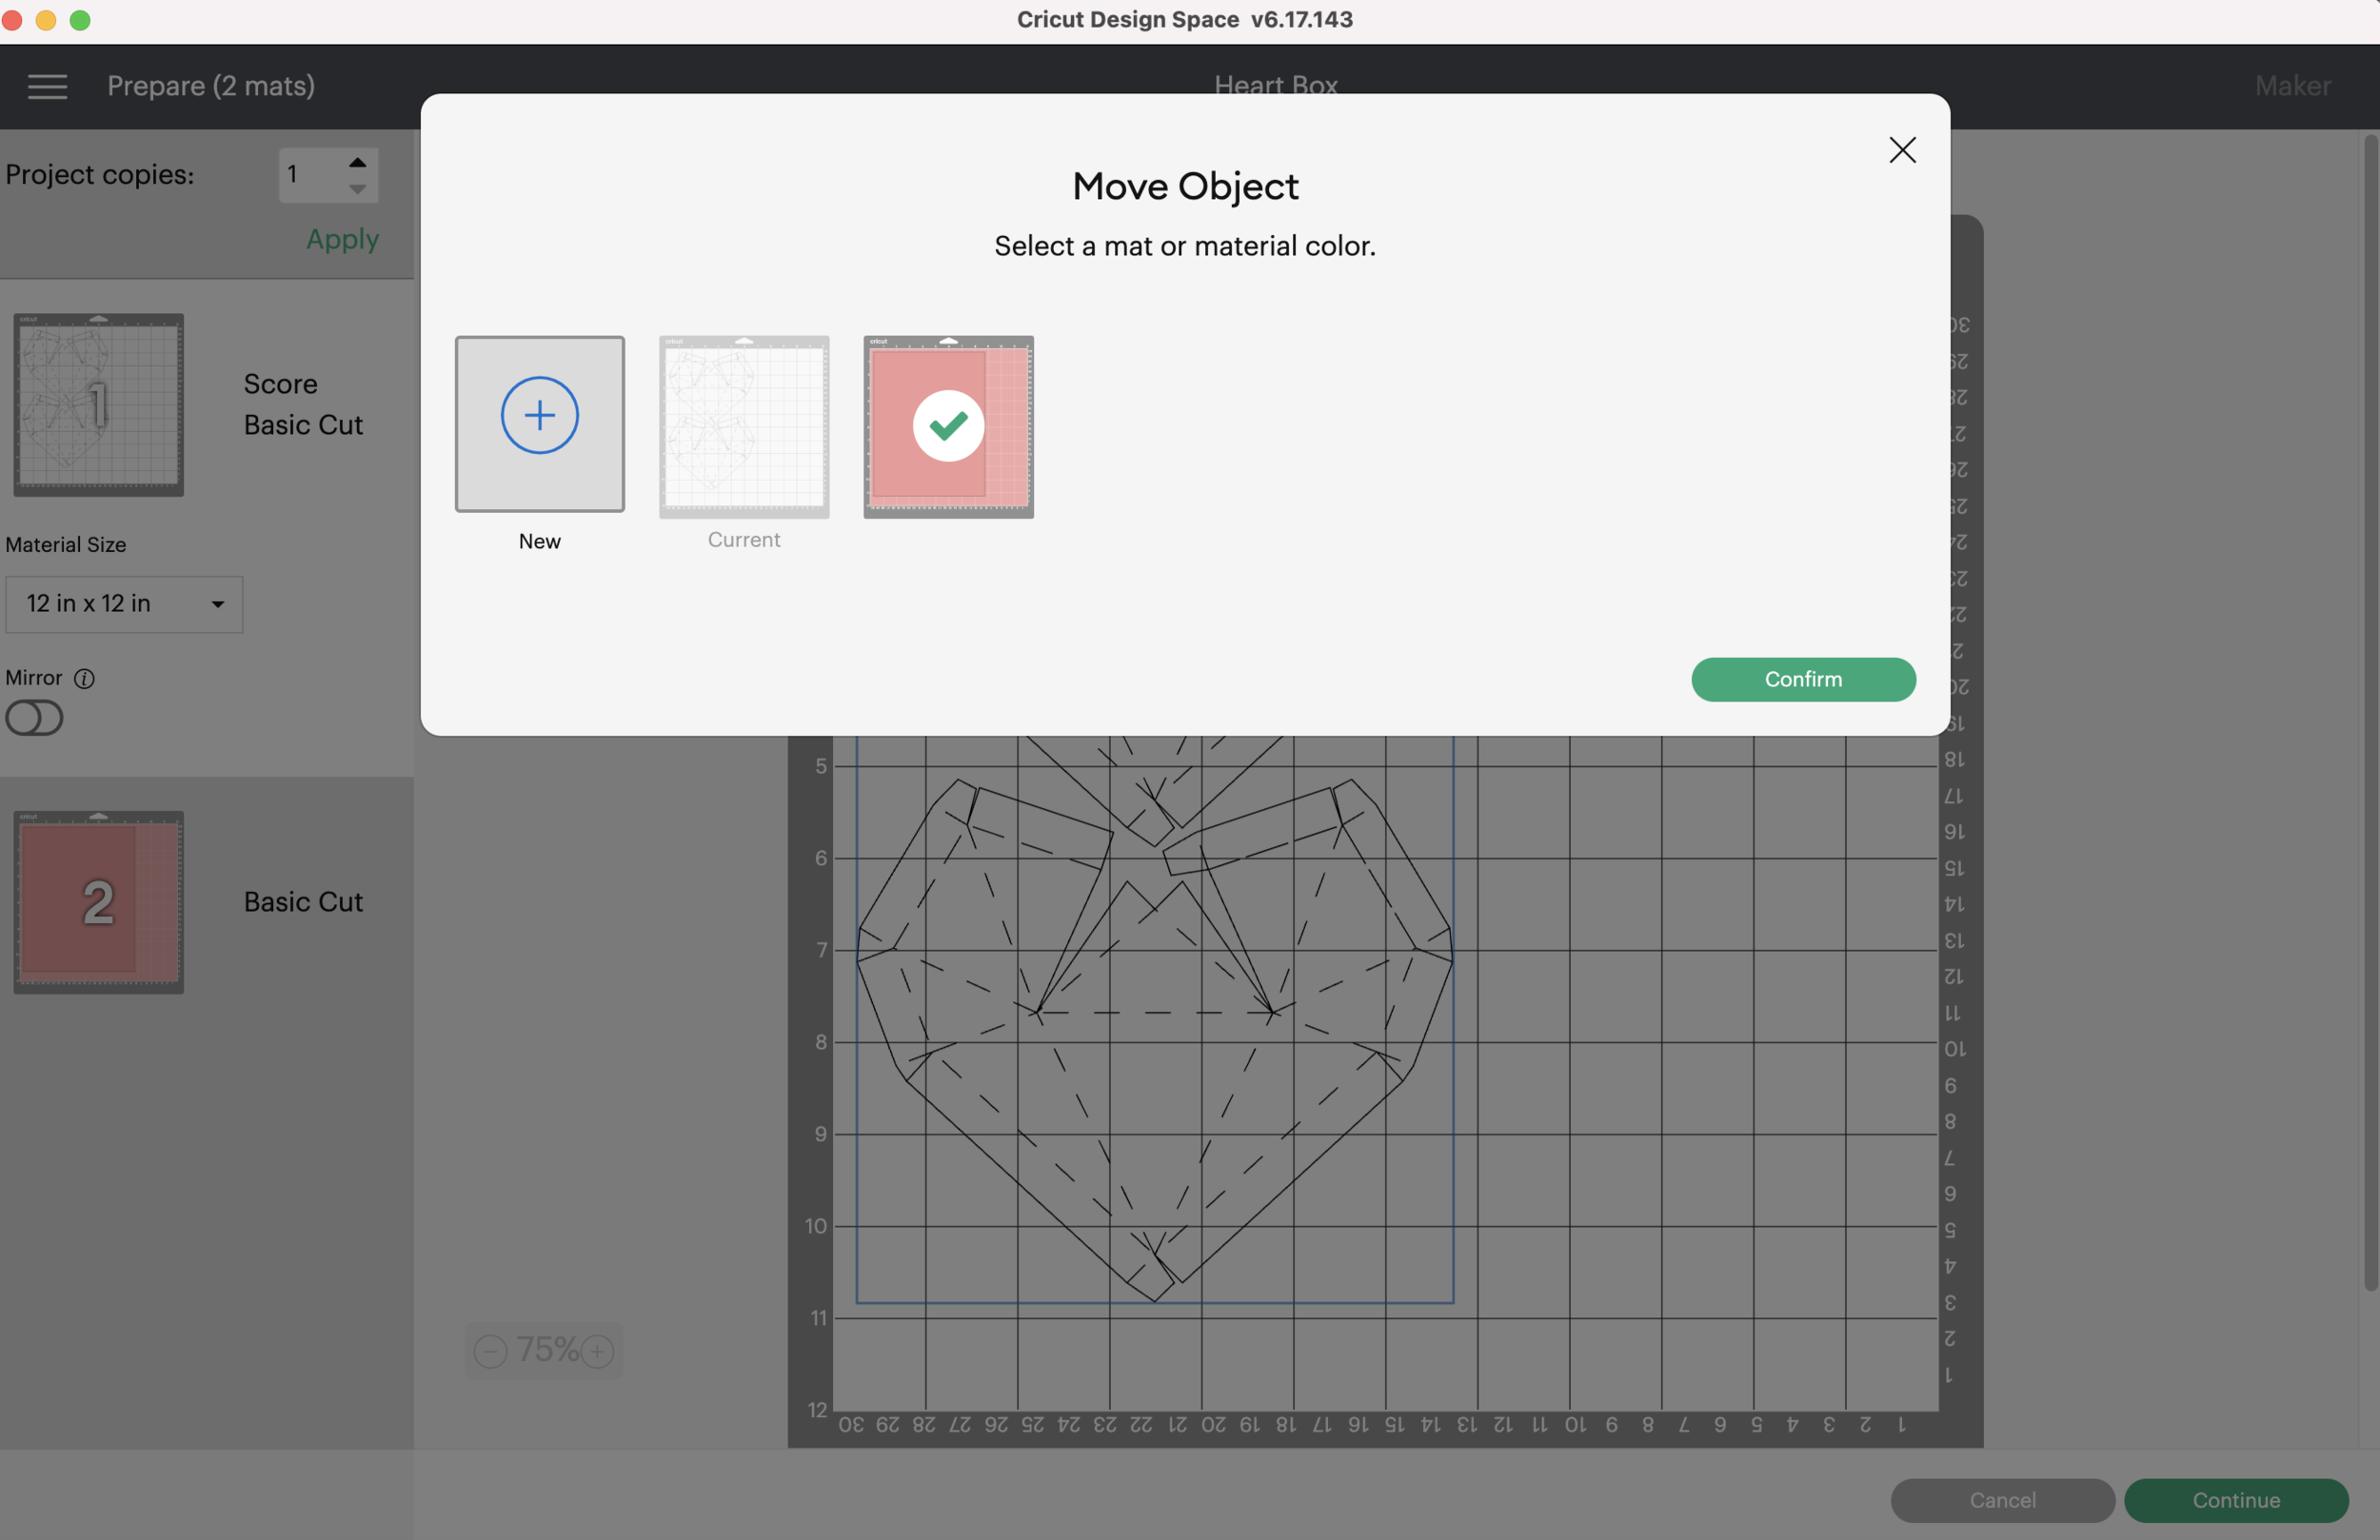
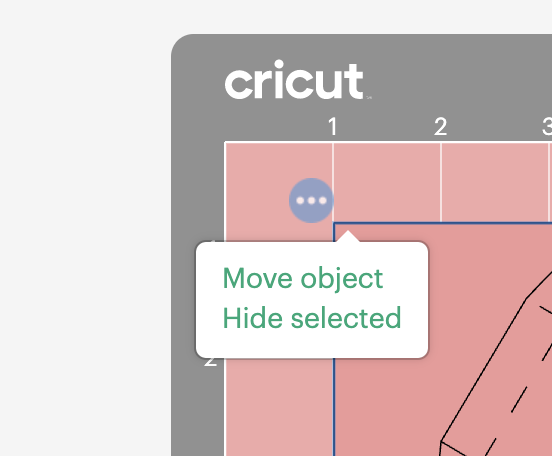
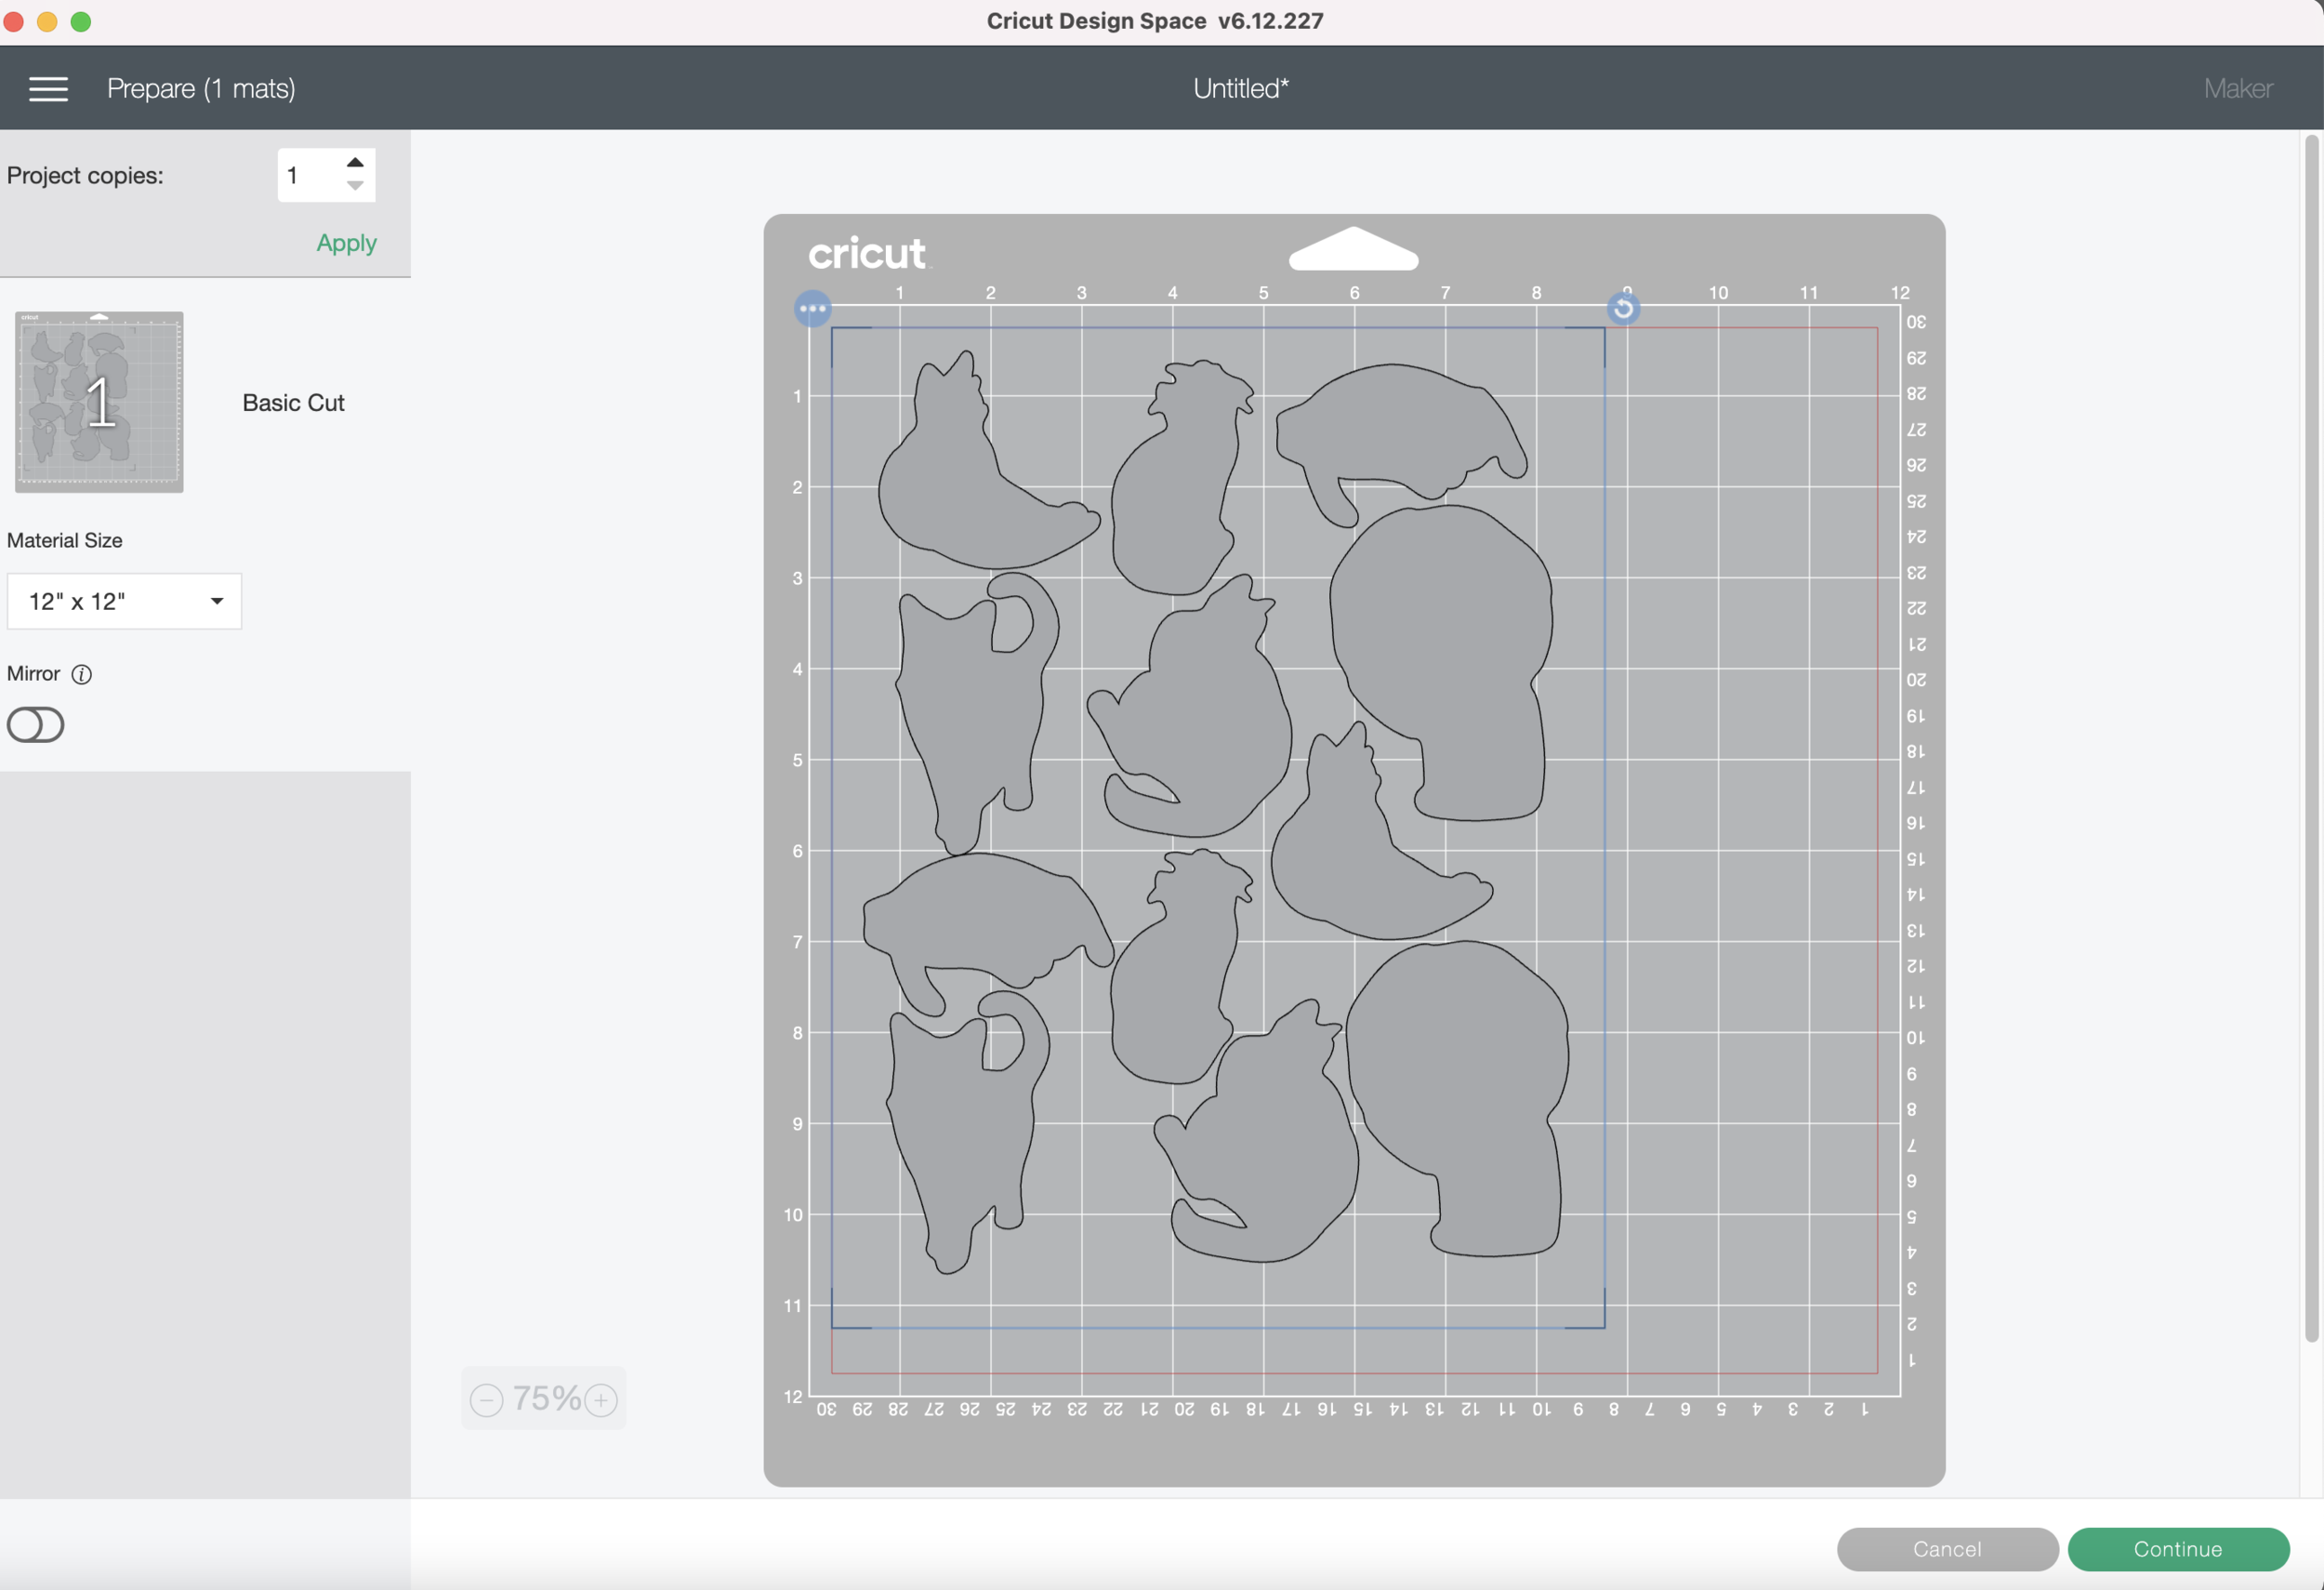
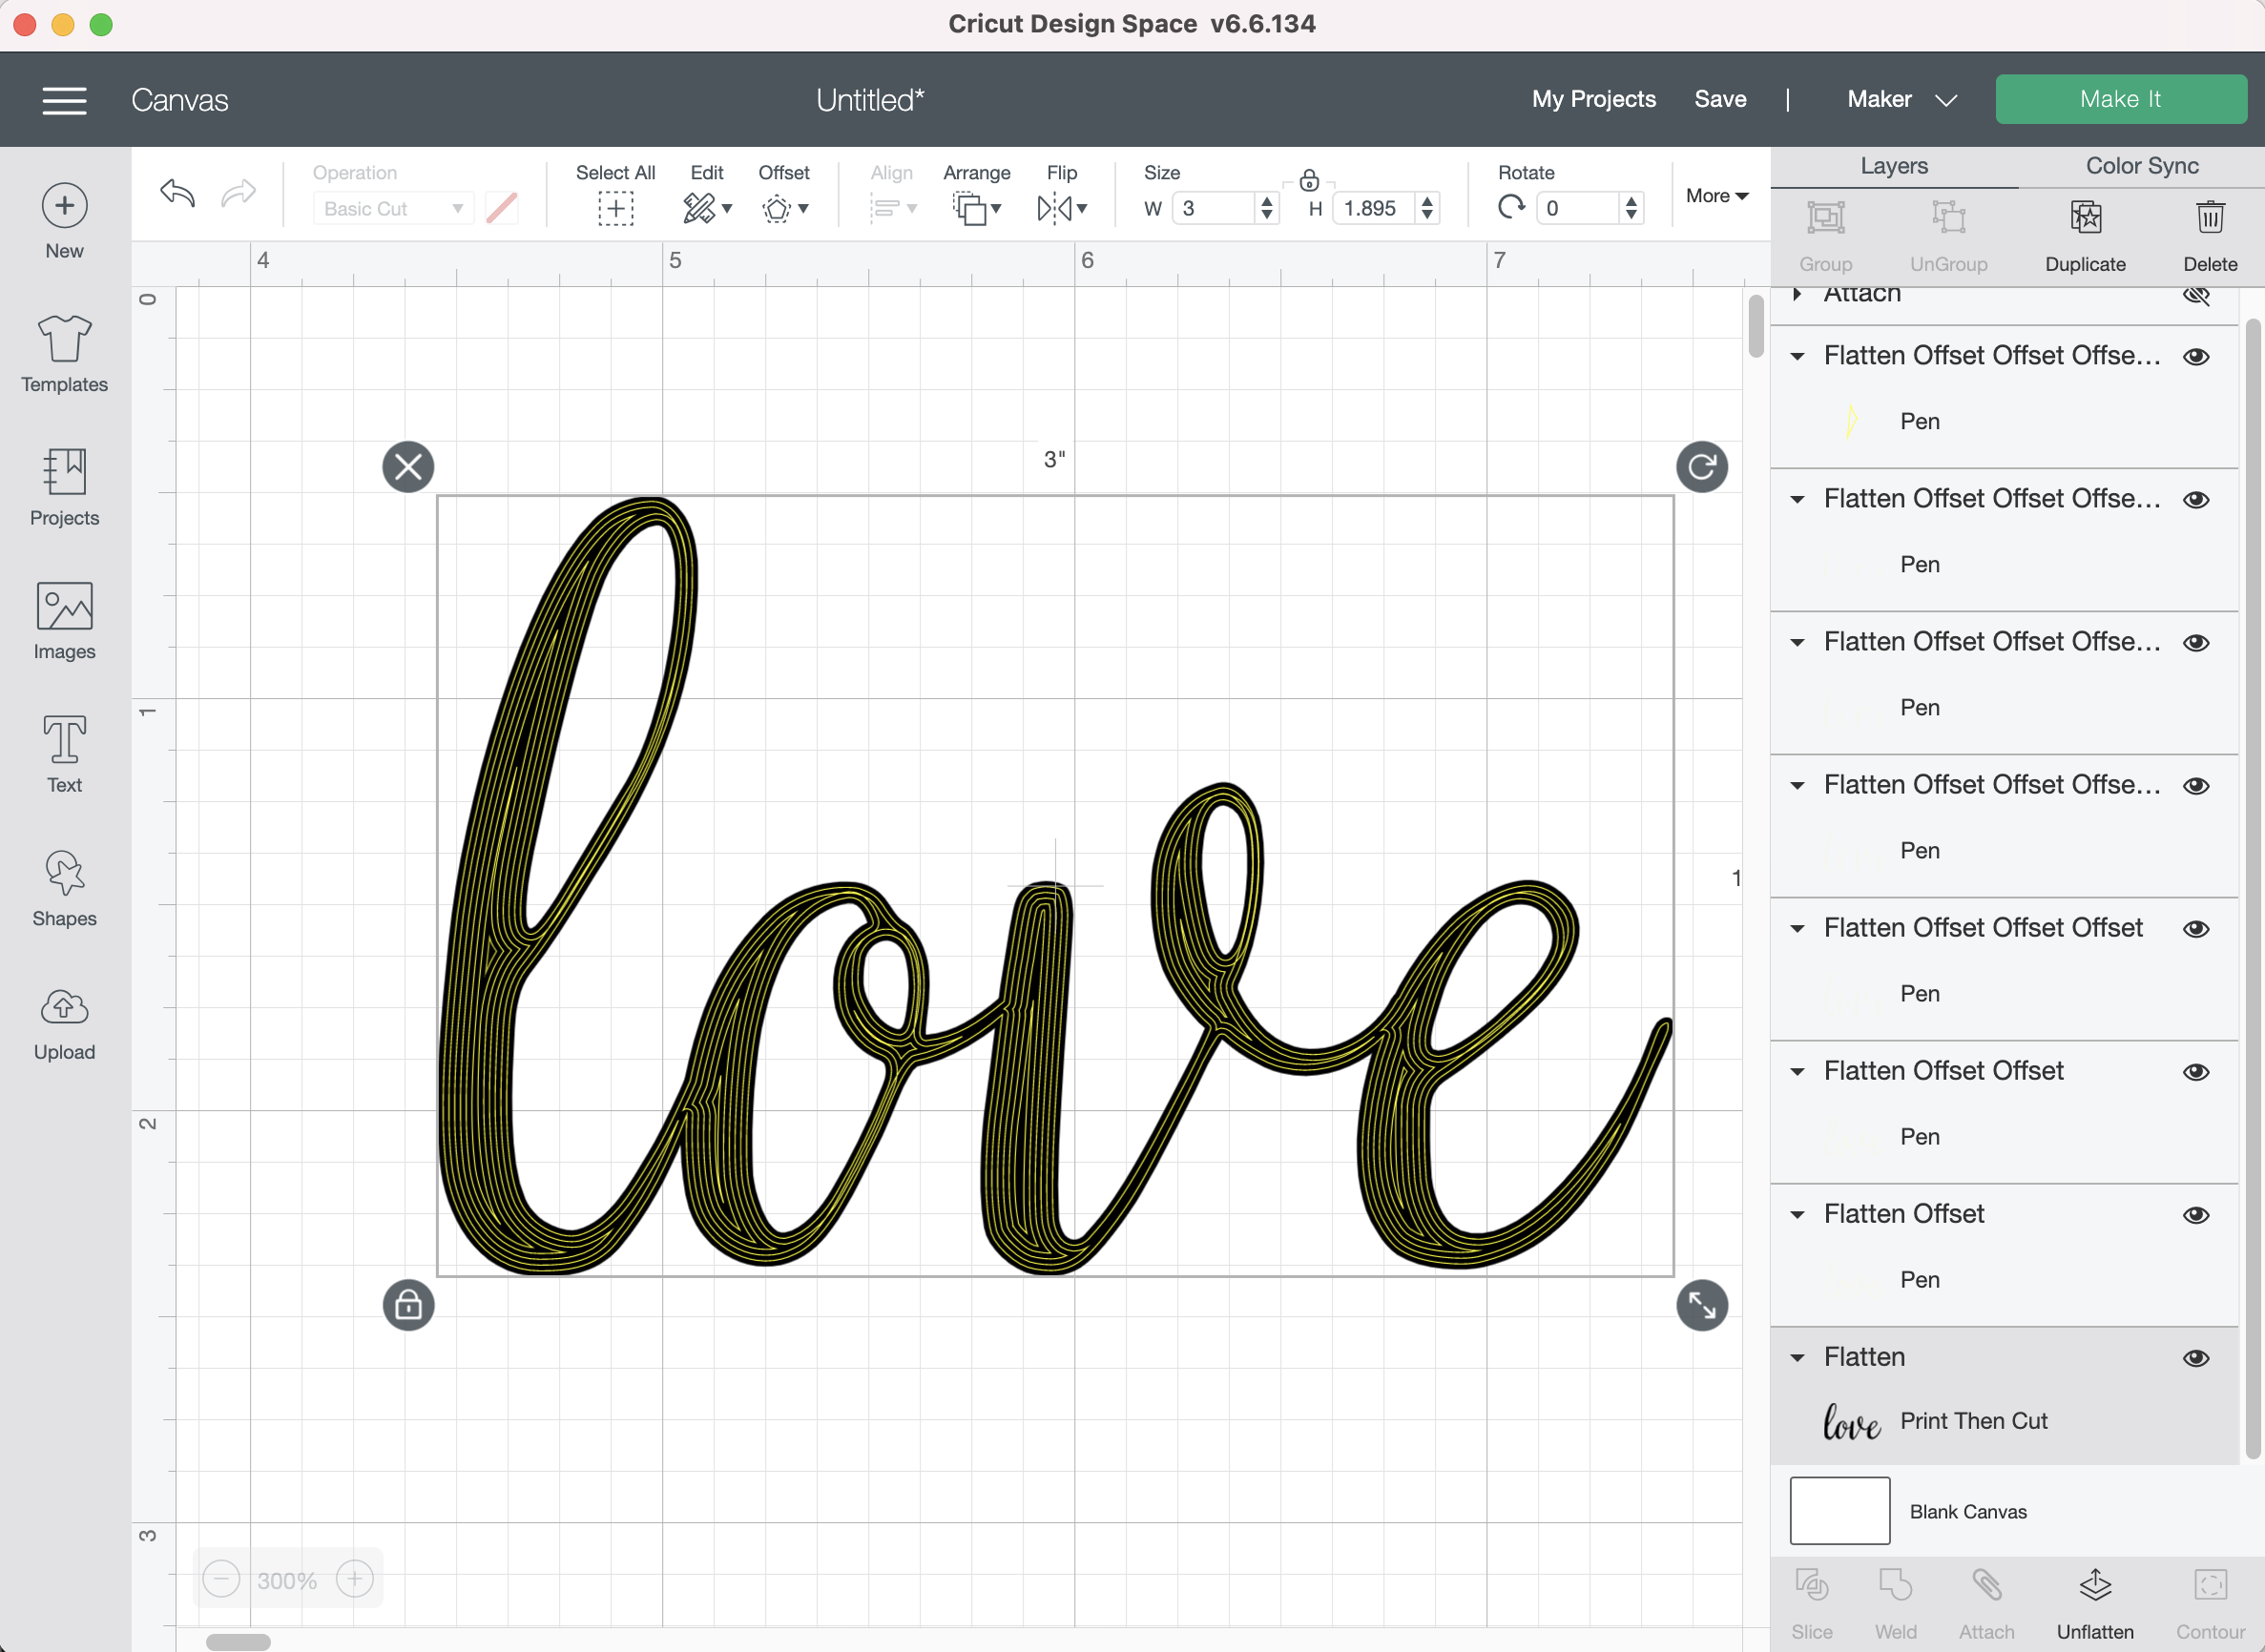
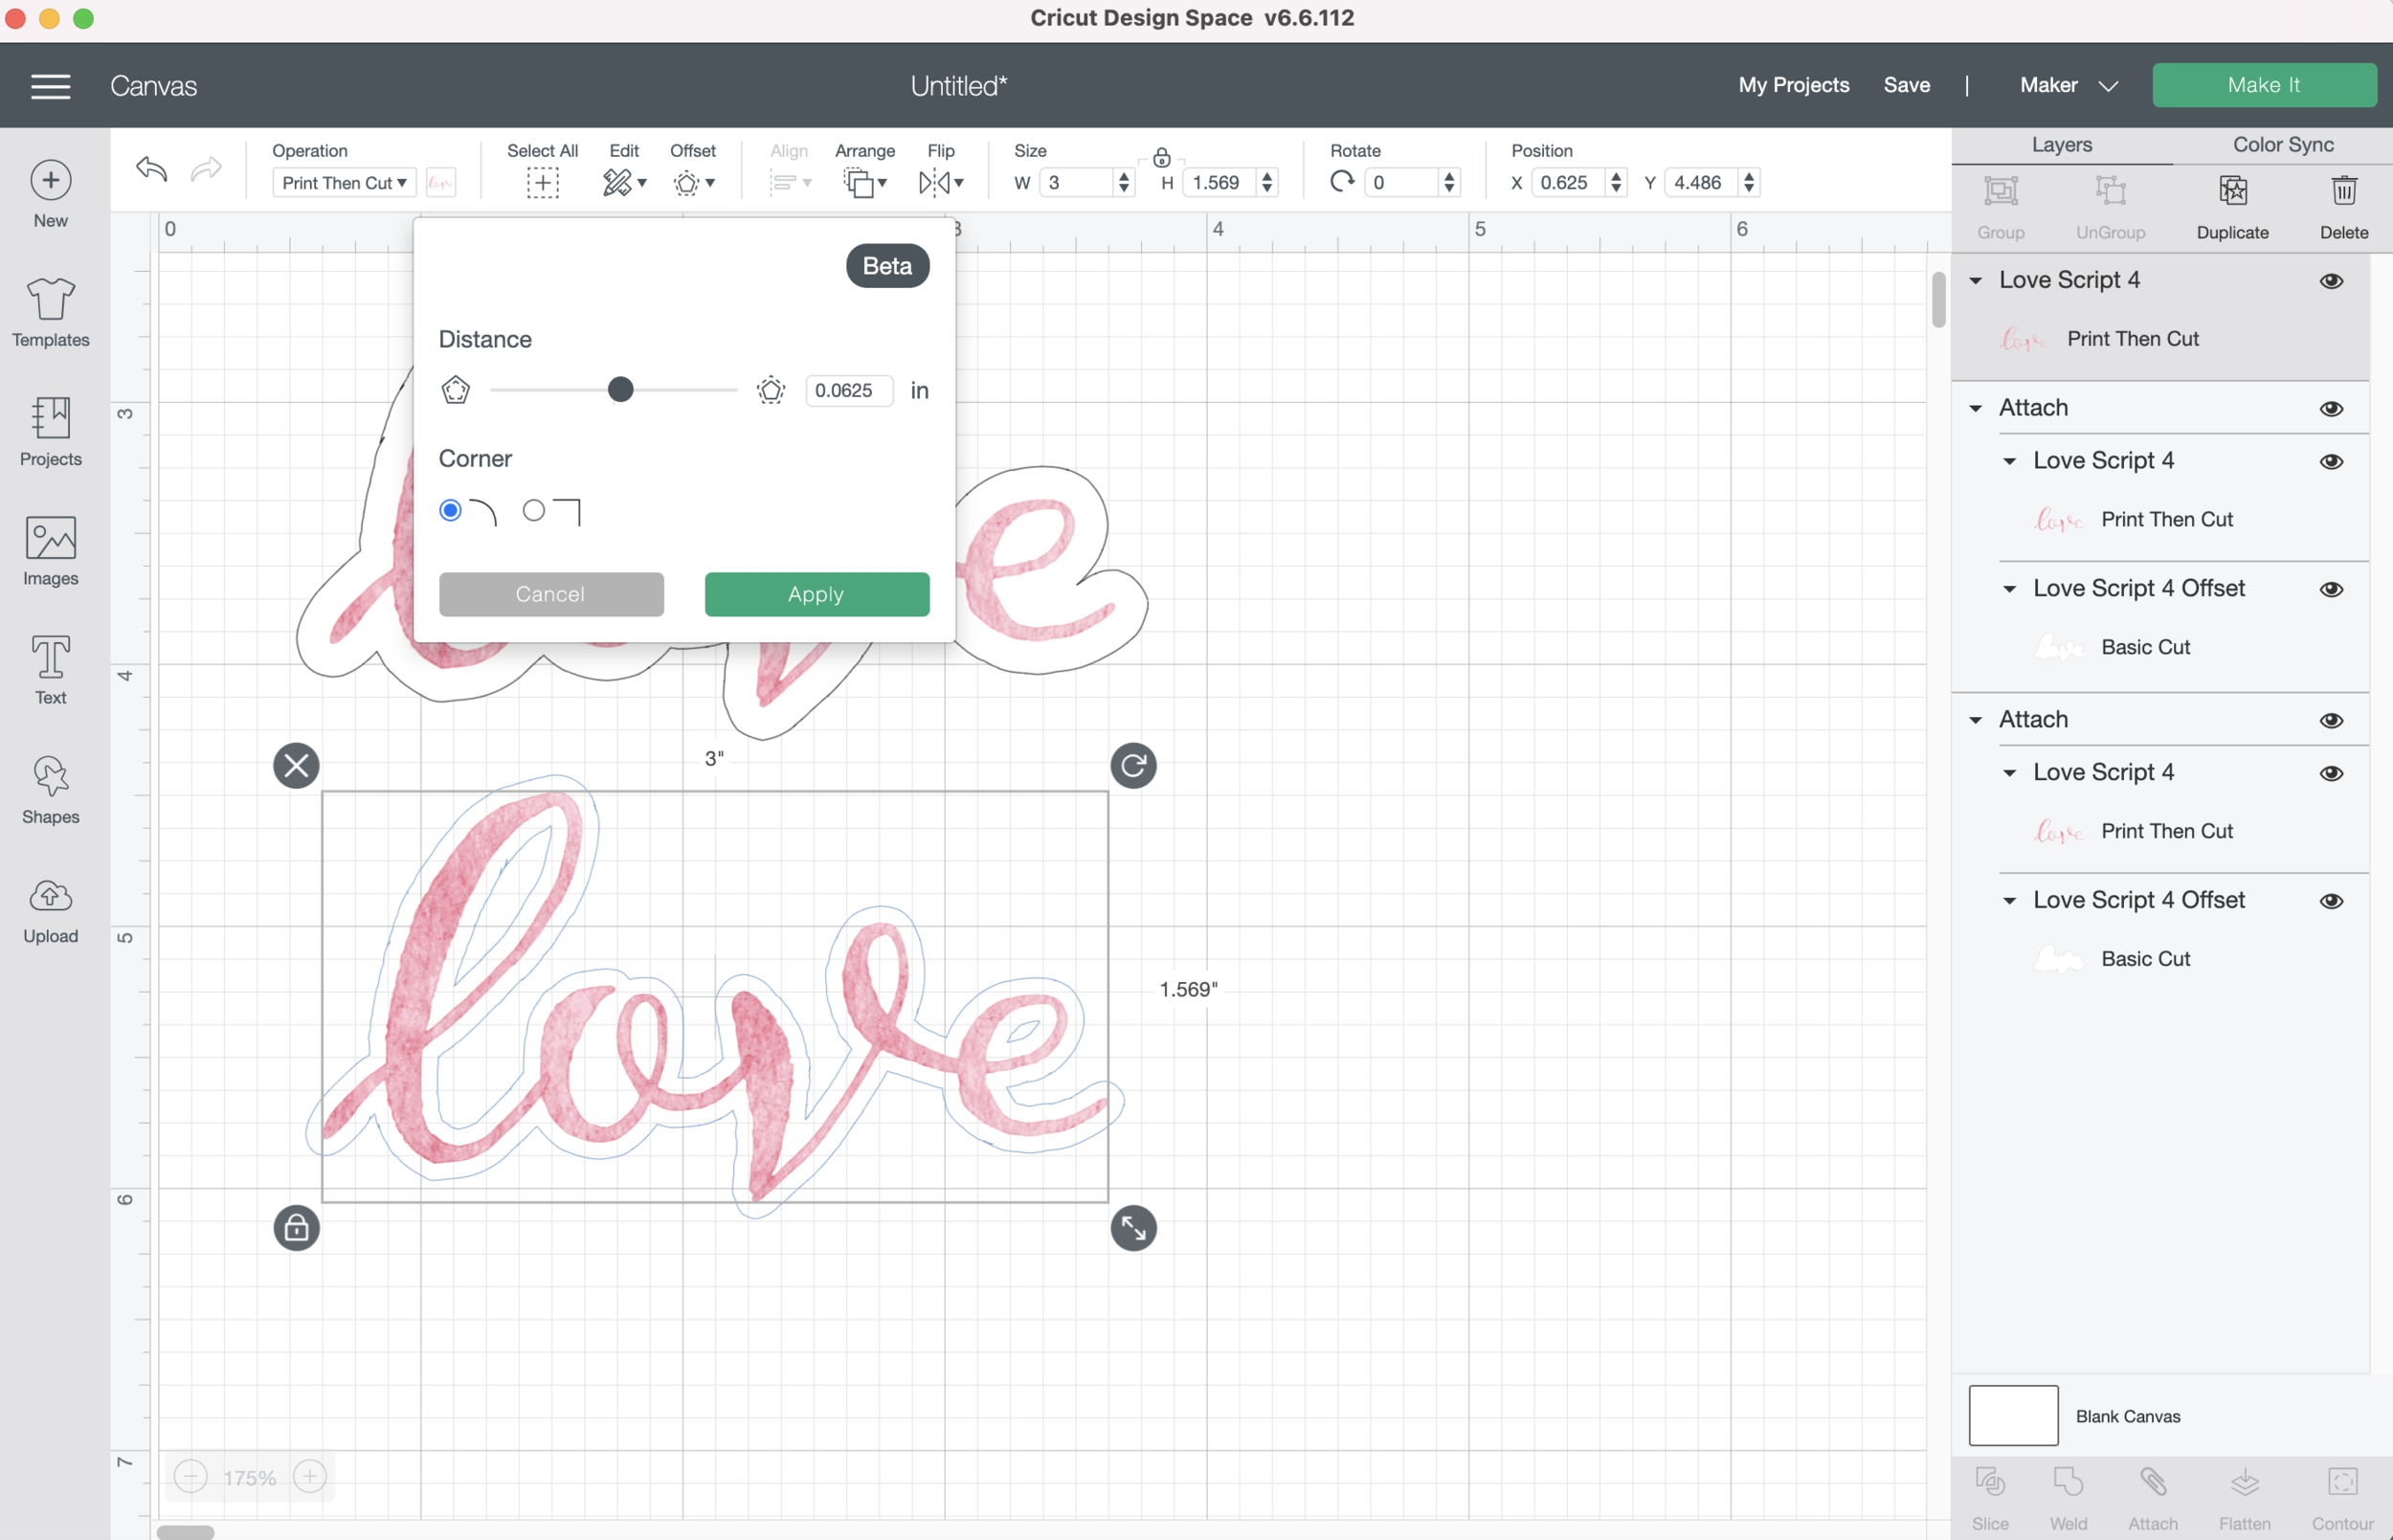
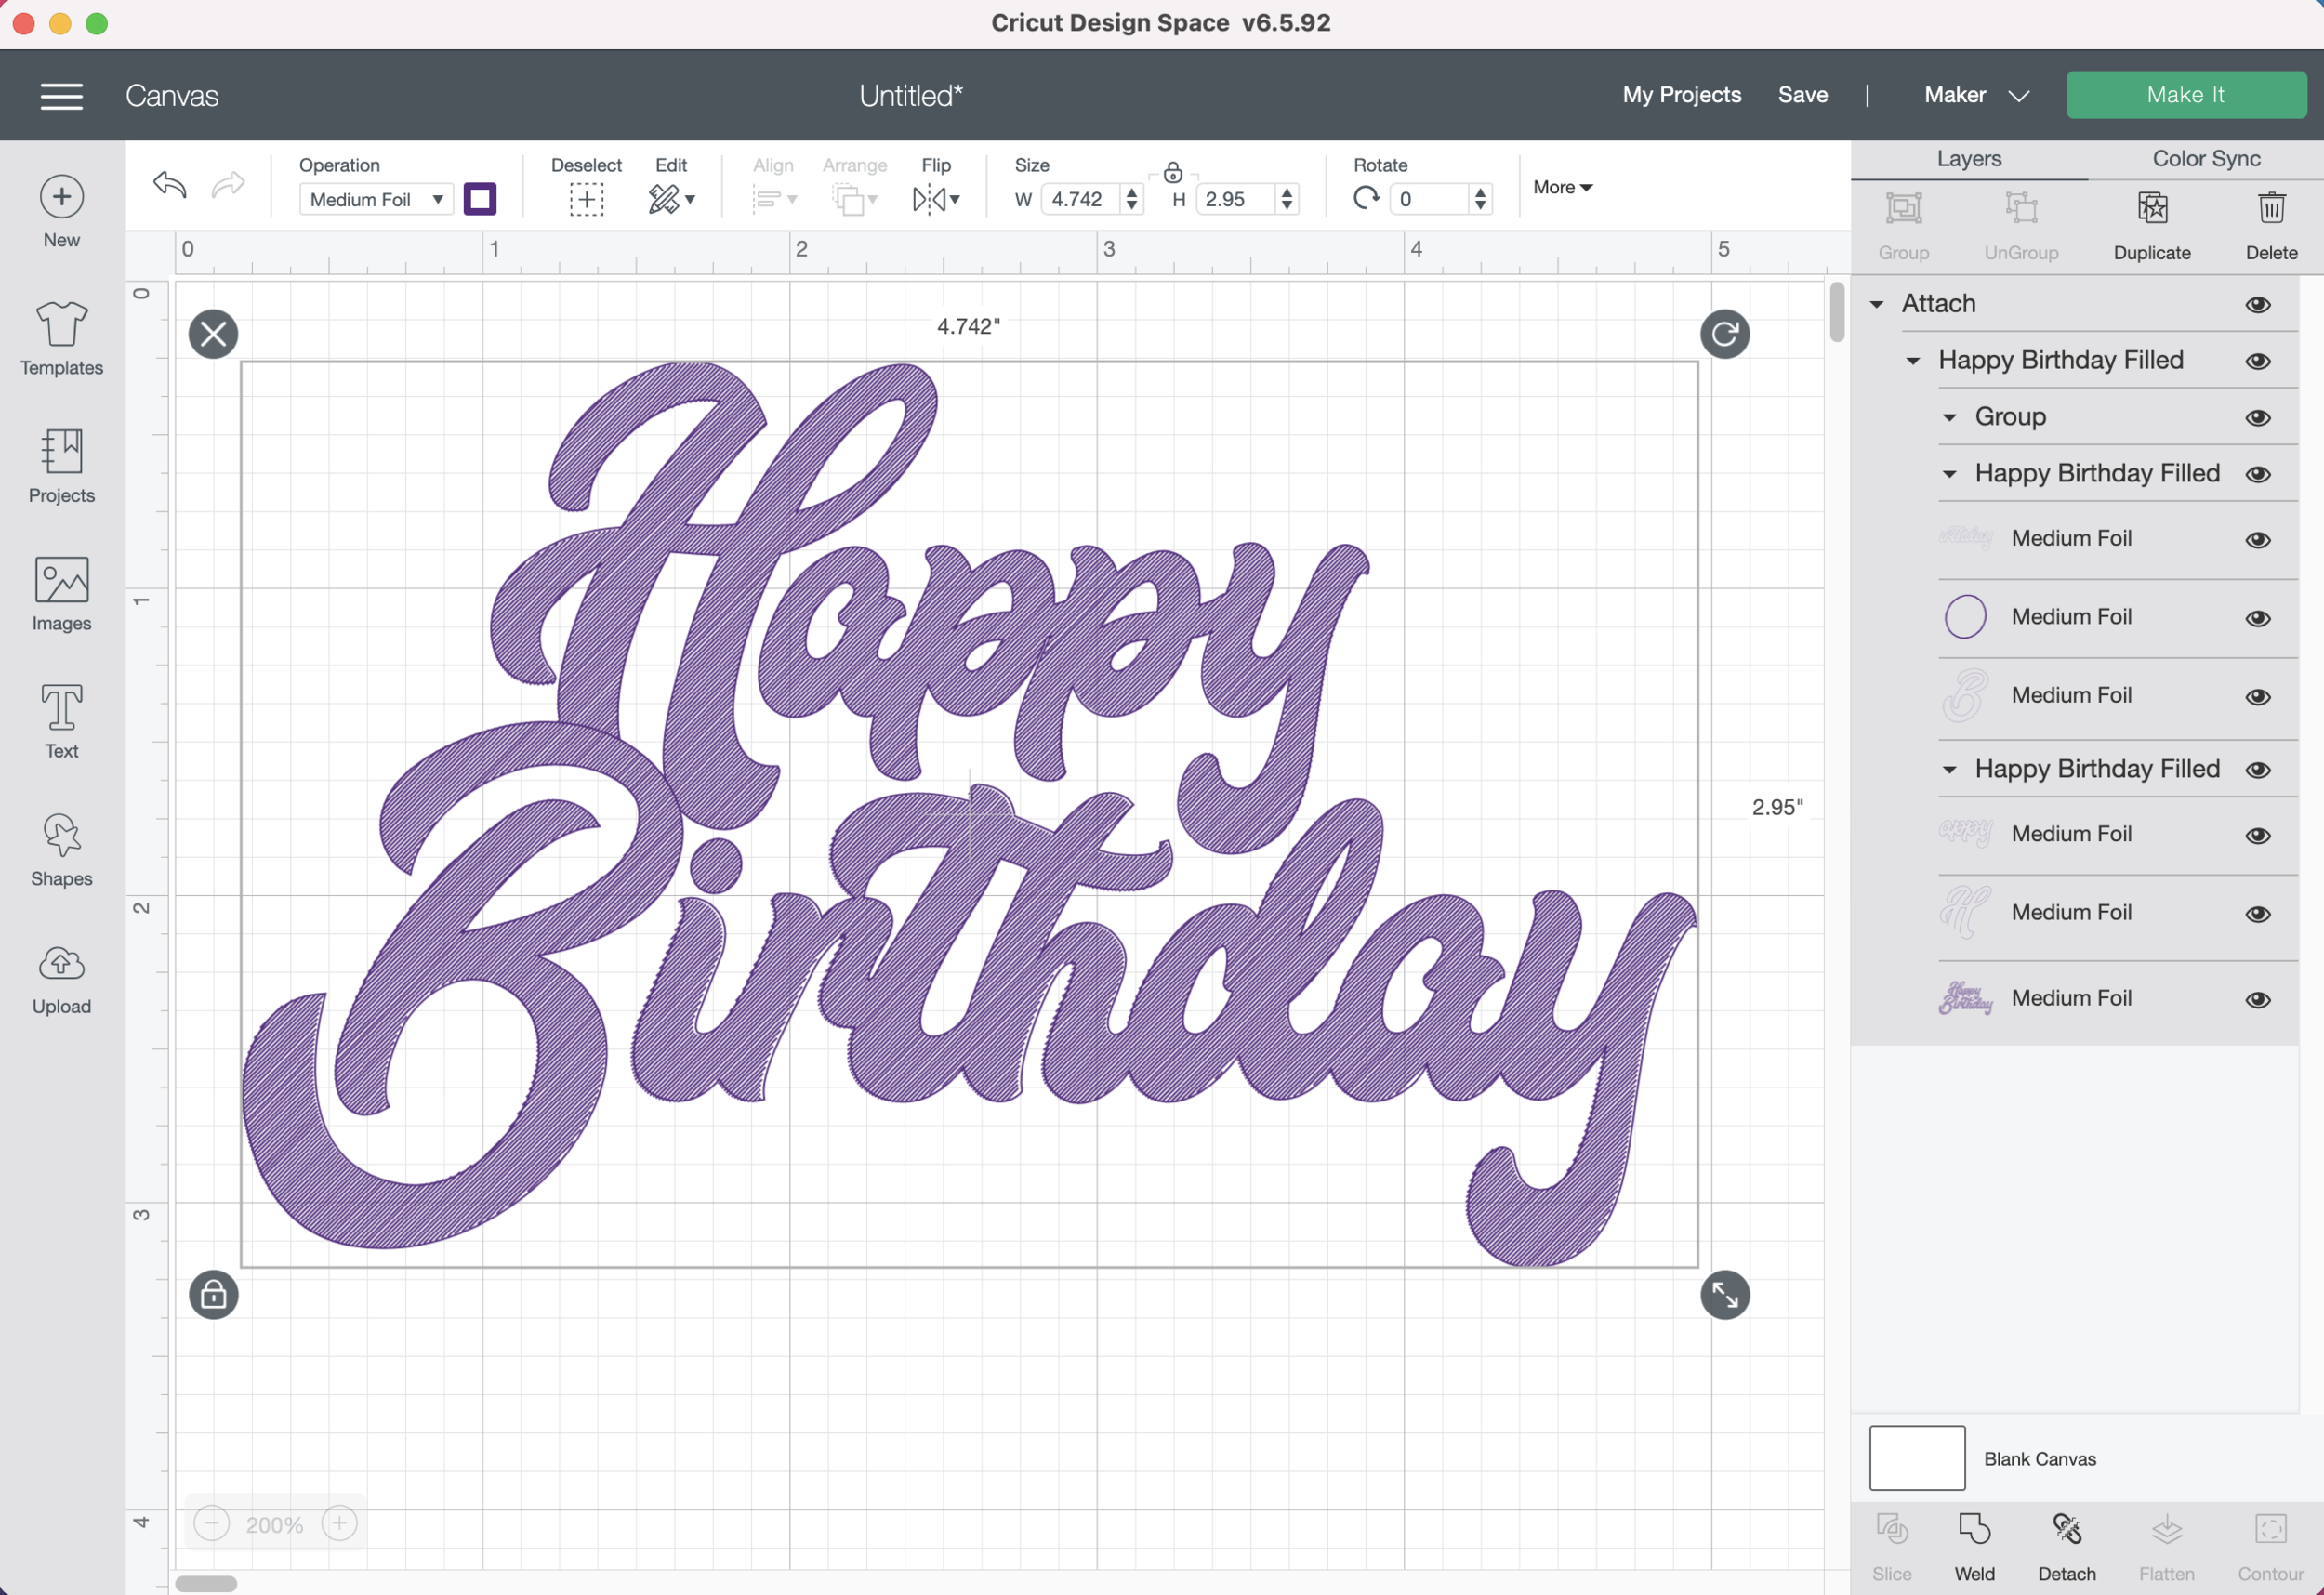
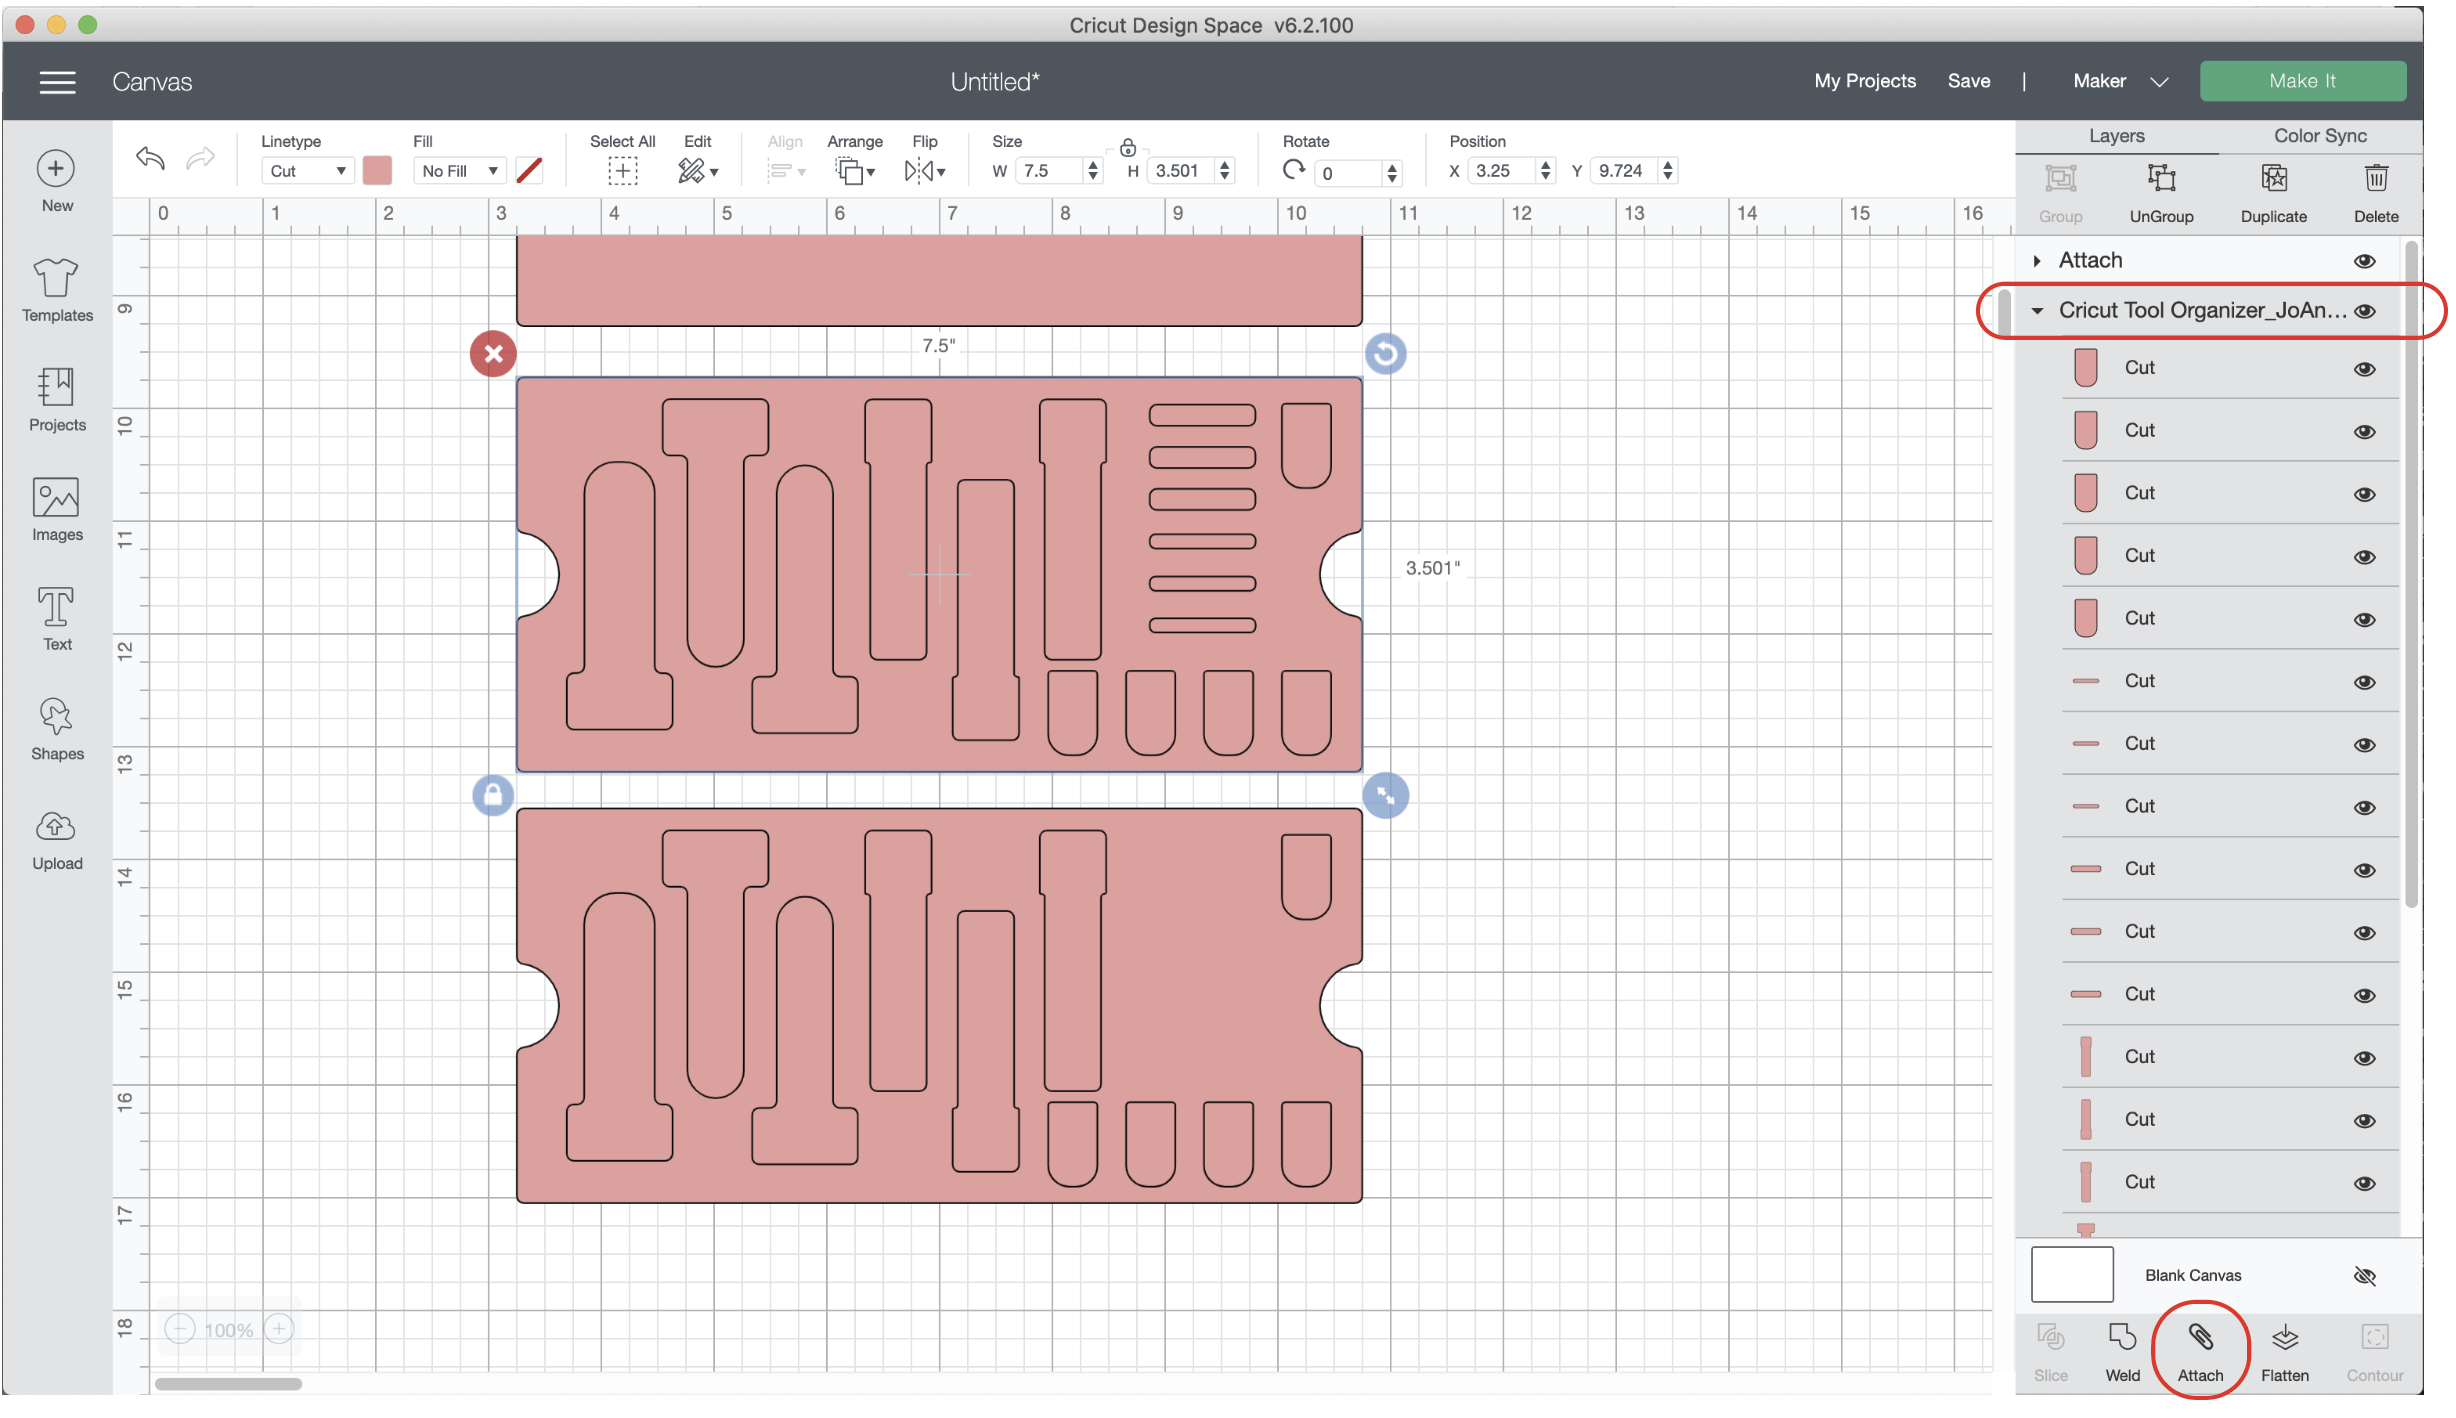
Even though all of my lines are already grouped together, I still need to ATTACH them. Otherwise Design Space will spread them out all weird on the mat when I select Make It. Down in the bottom tool bar I select ACTIONS then I select ATTACH. Now I’m ready to SAVE my file and then select Make It.

Testing Single Line SVG file in Cricut Design Space

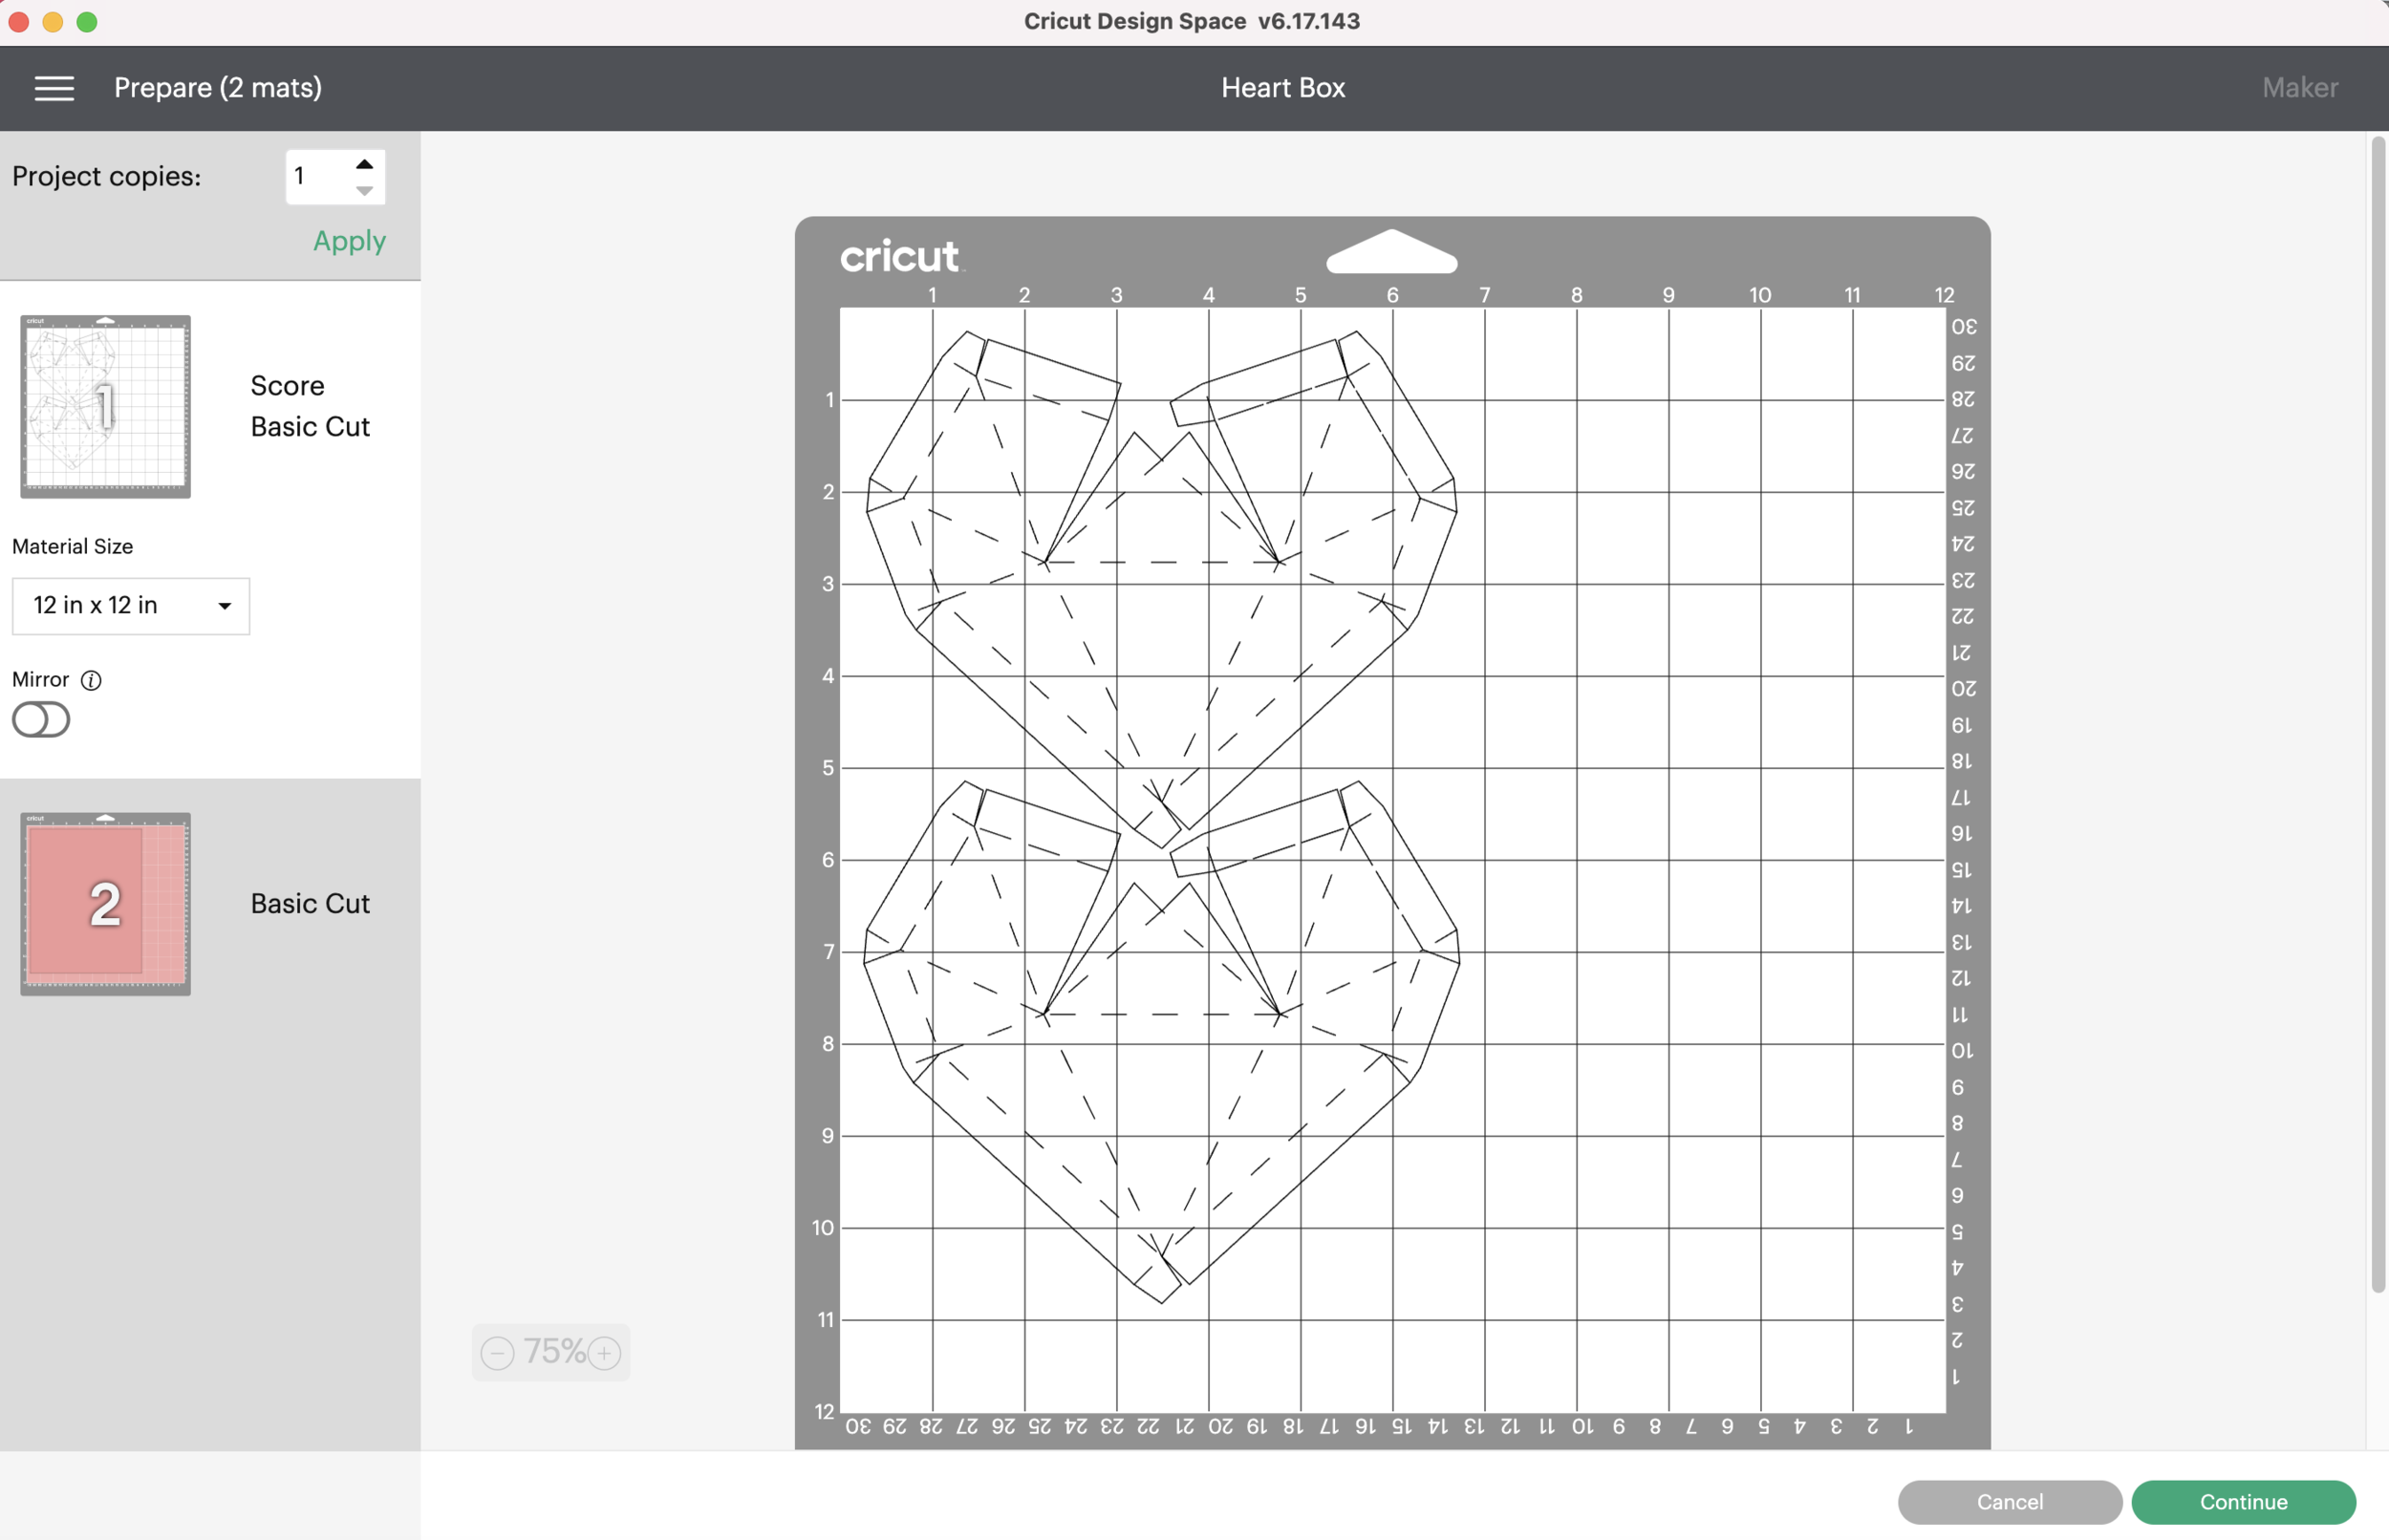
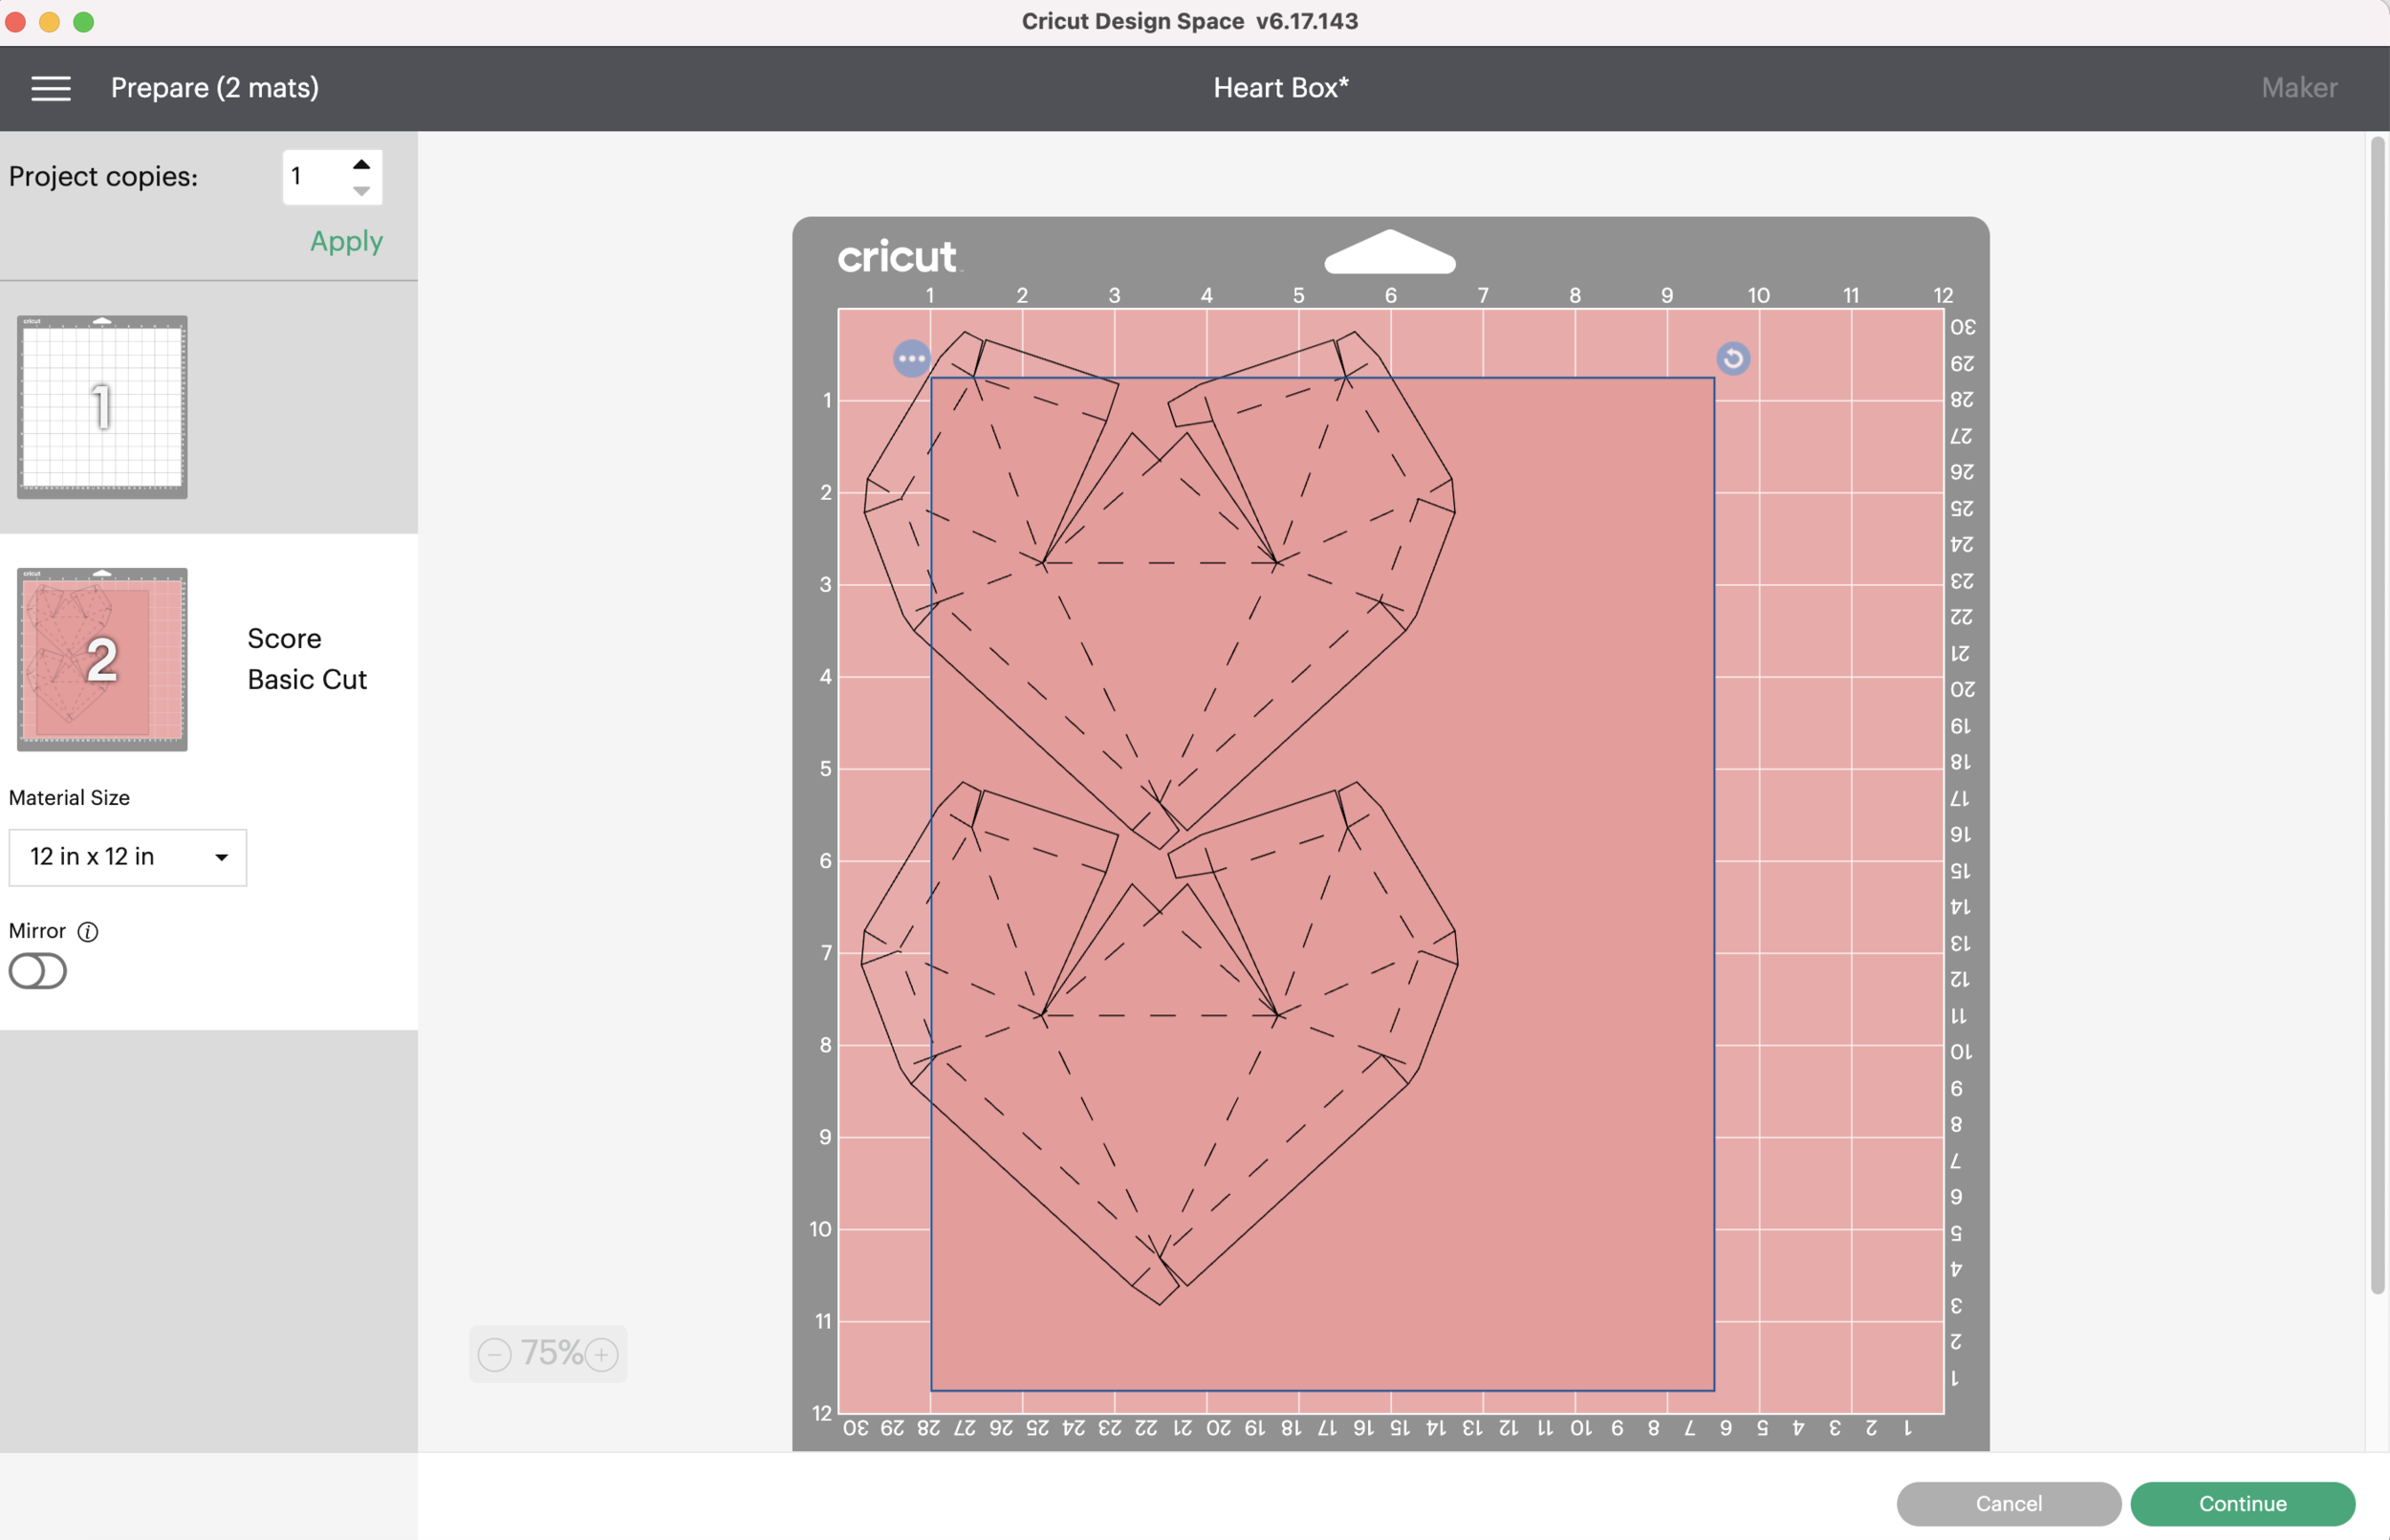
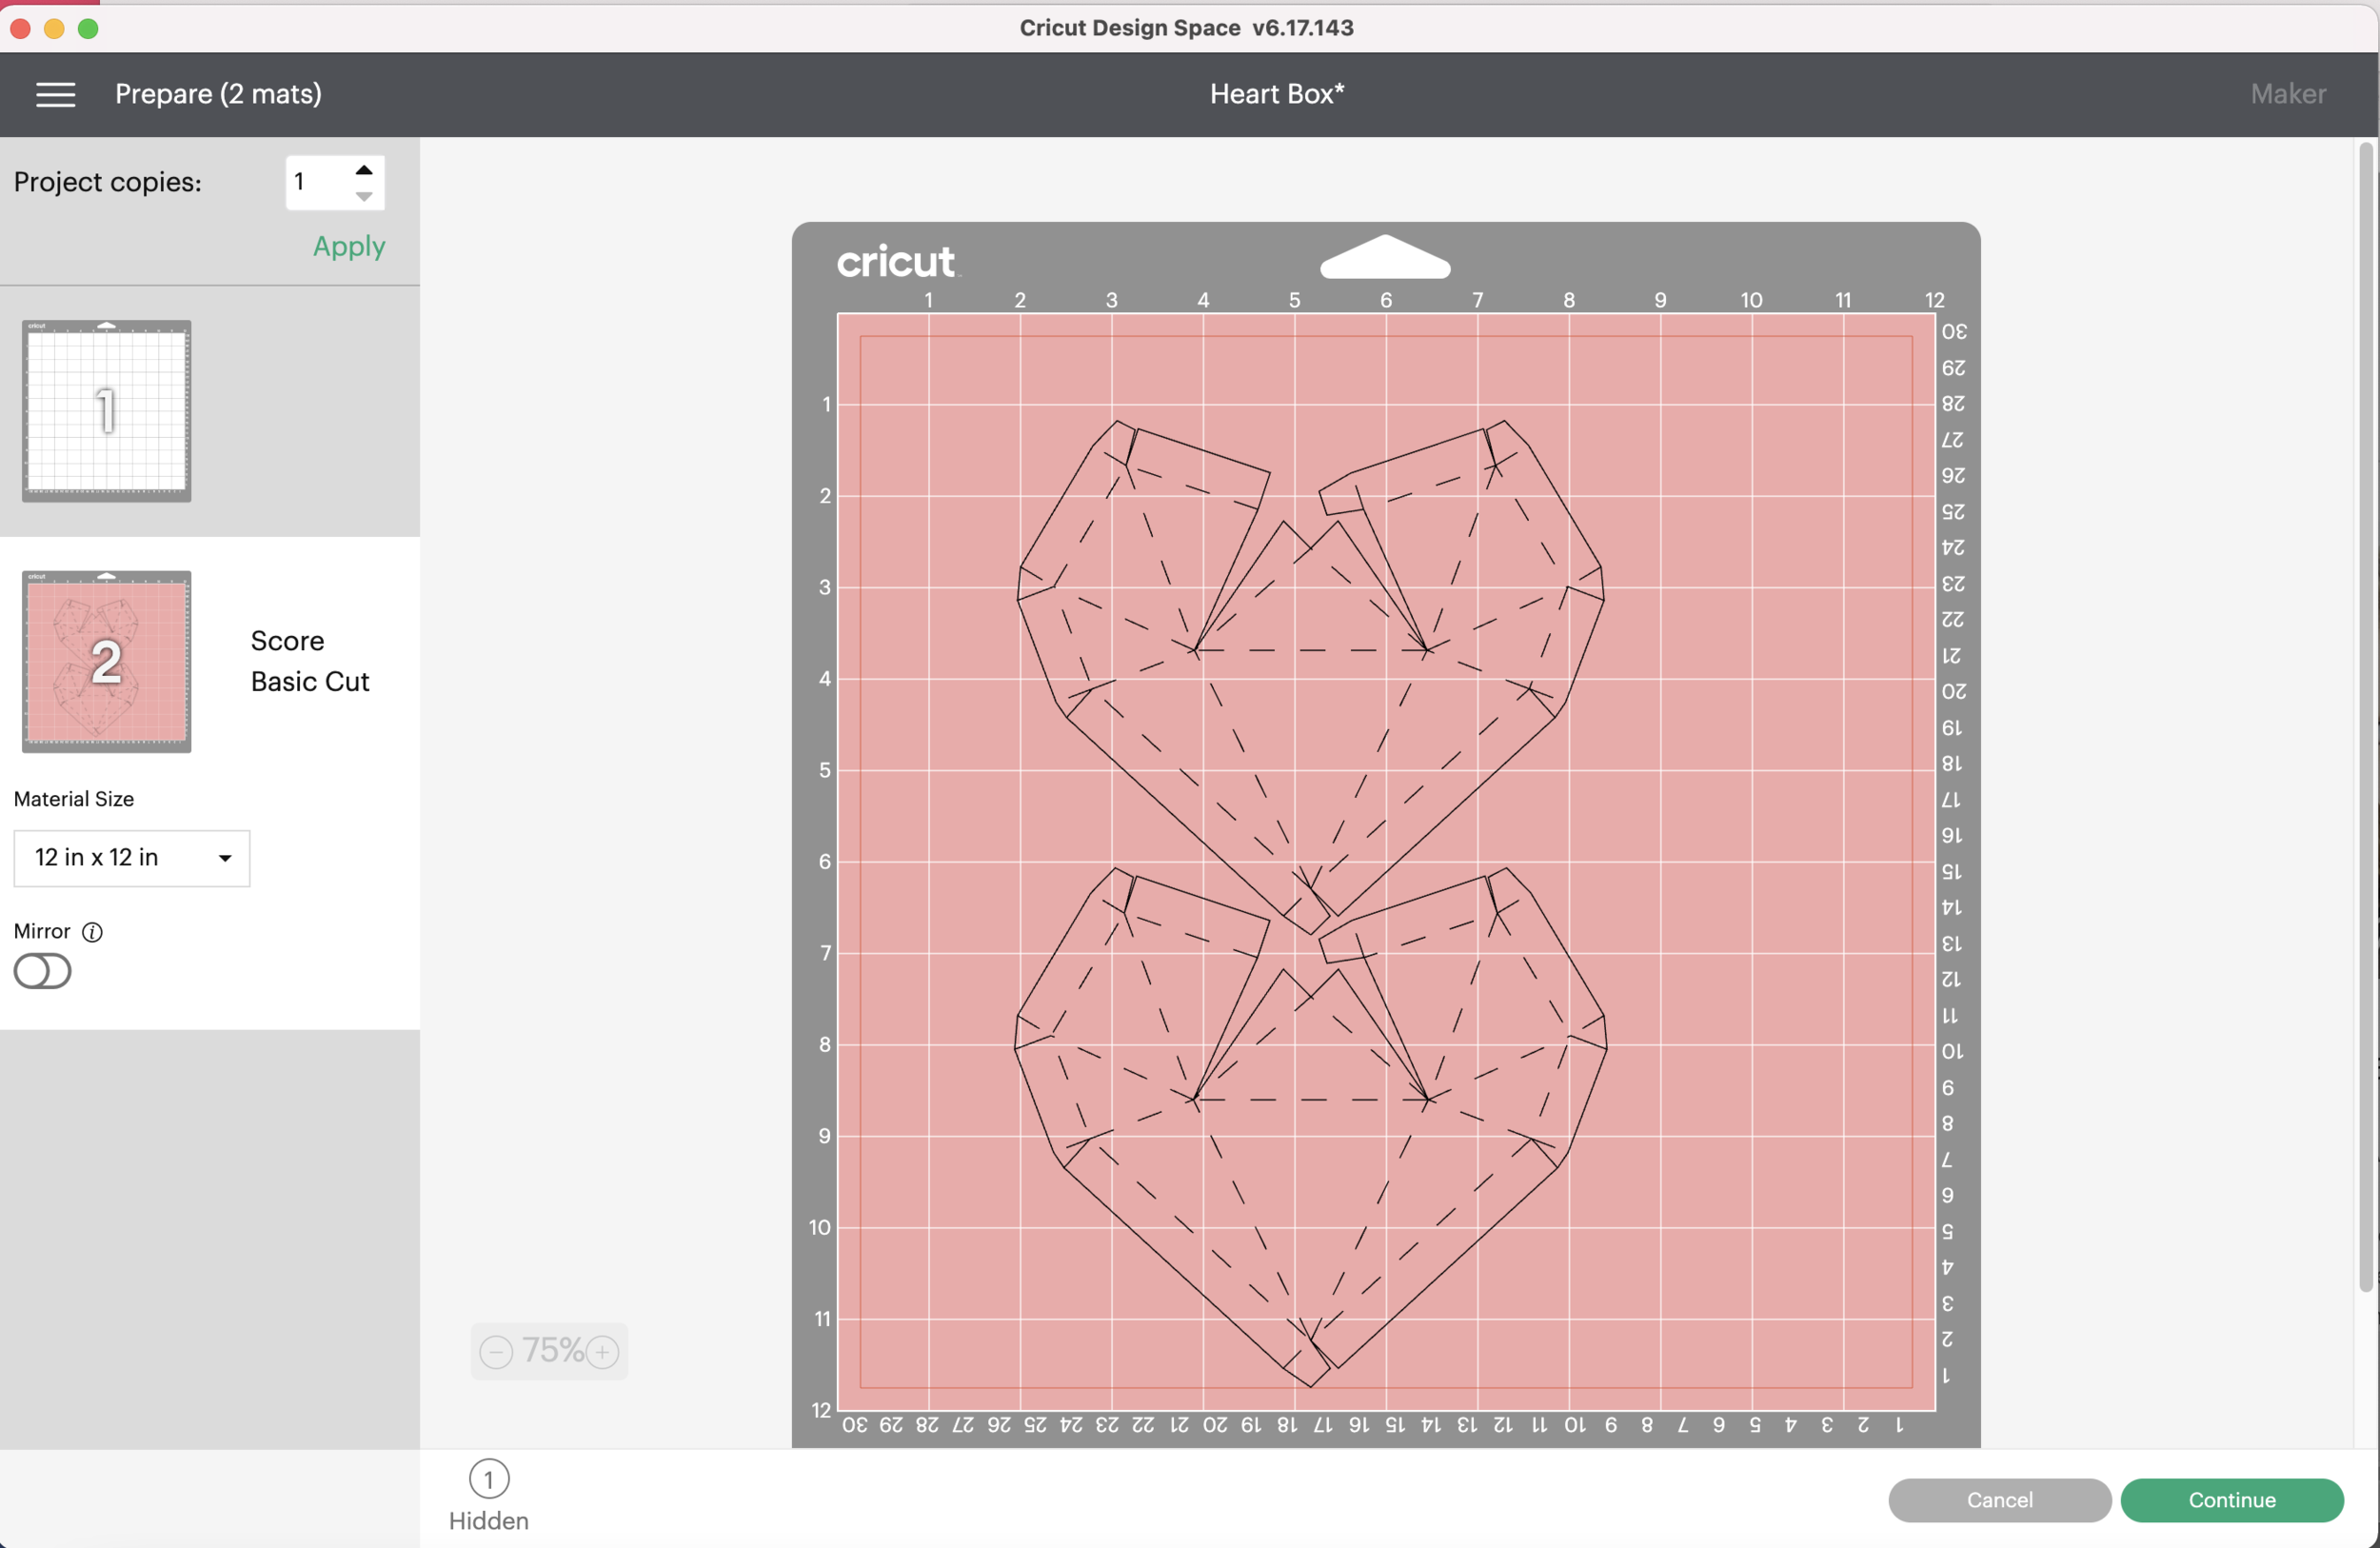
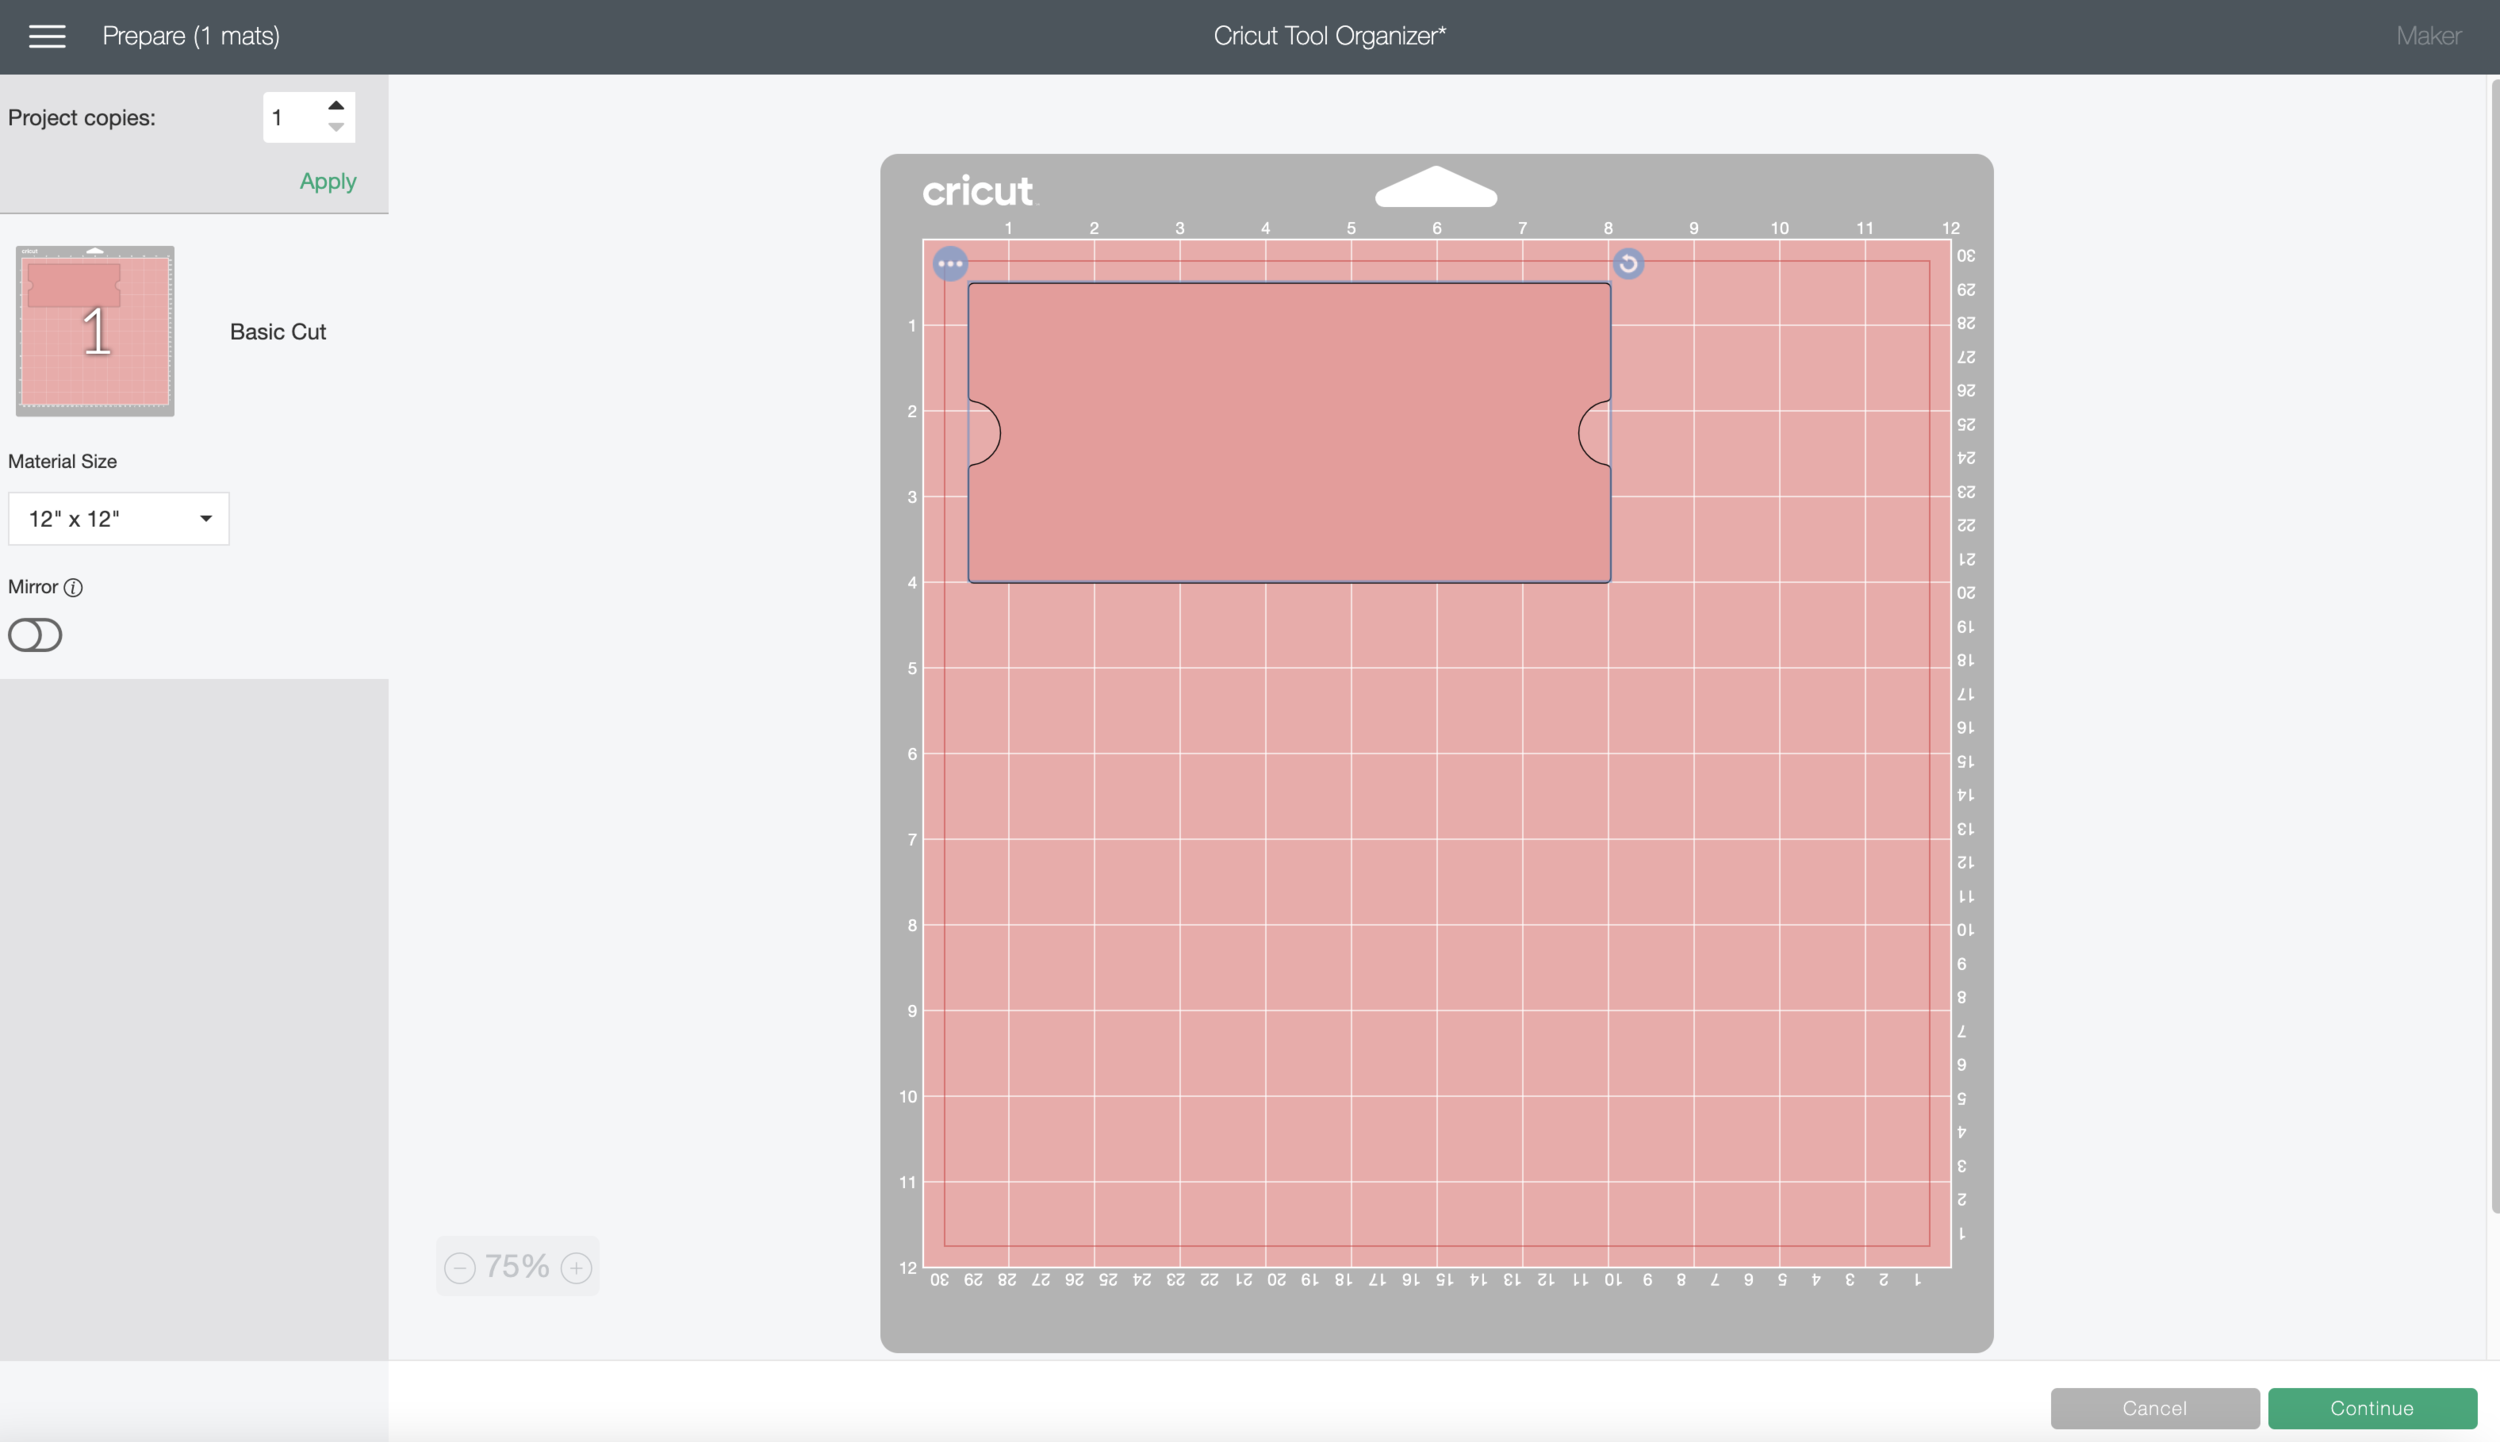
I’m going to position my design relative to where I have my piece of cardstock on my actual mat.

Testing Single Line SVG file in Cricut Design Space

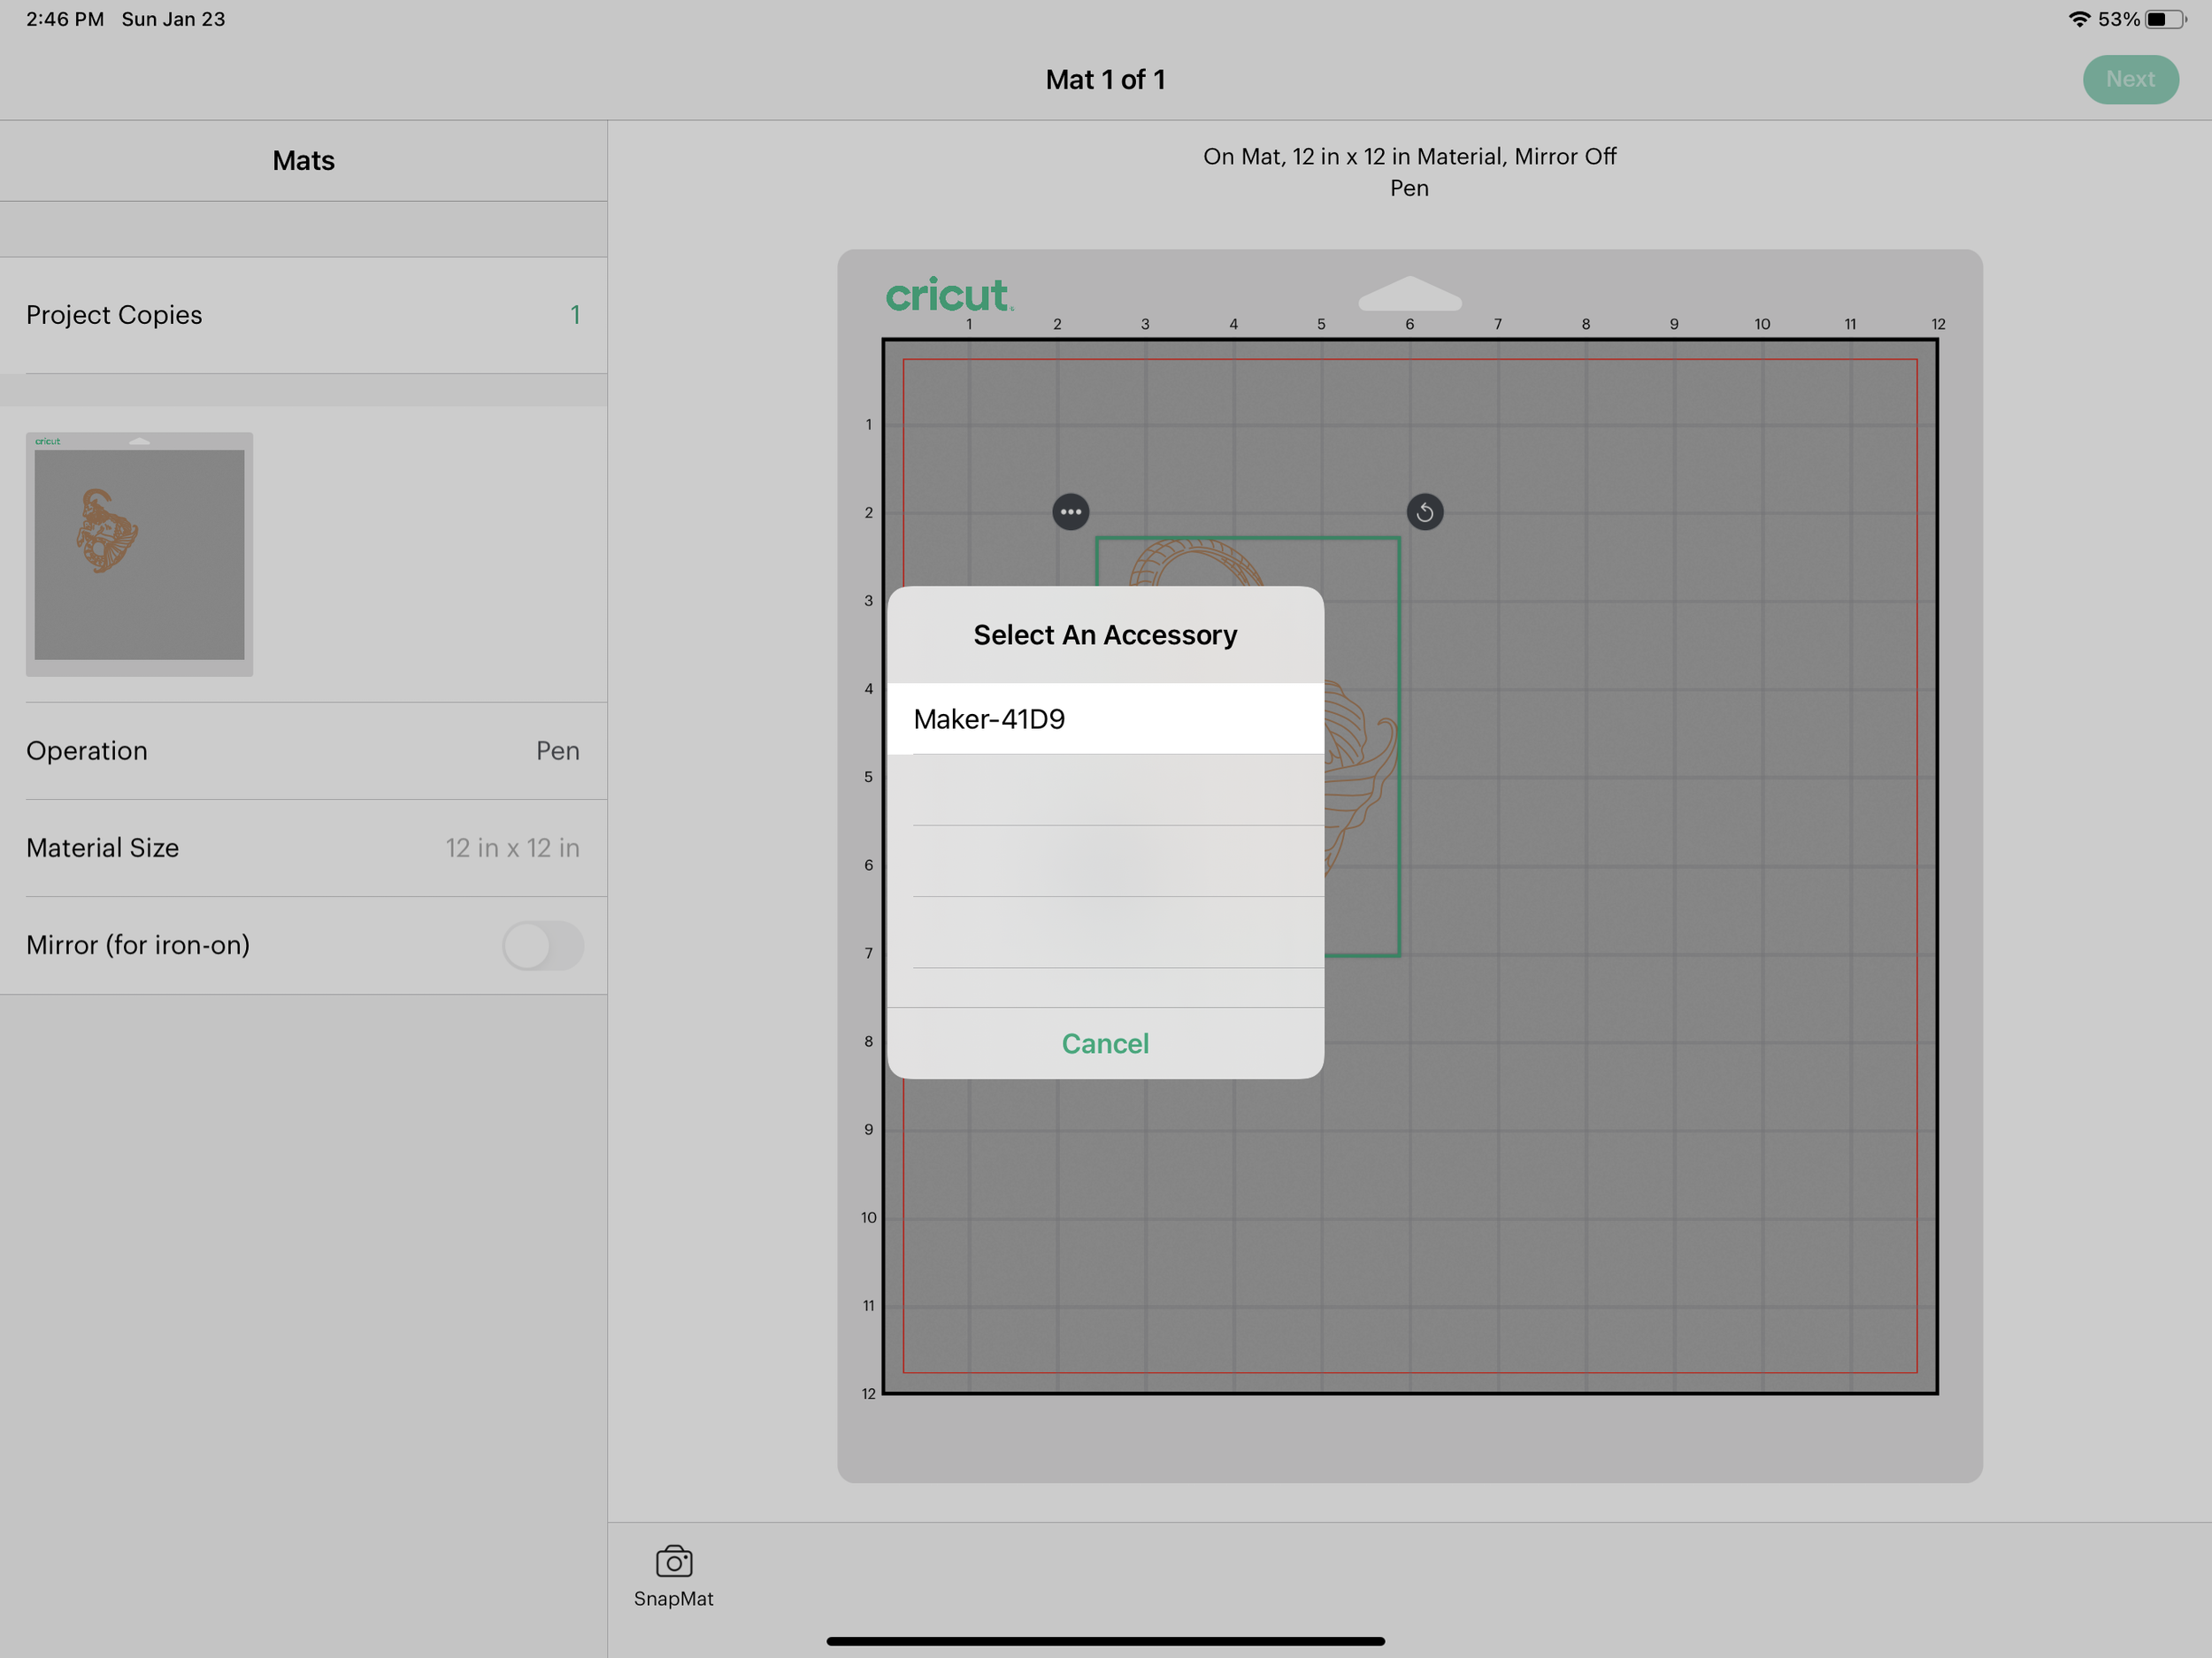
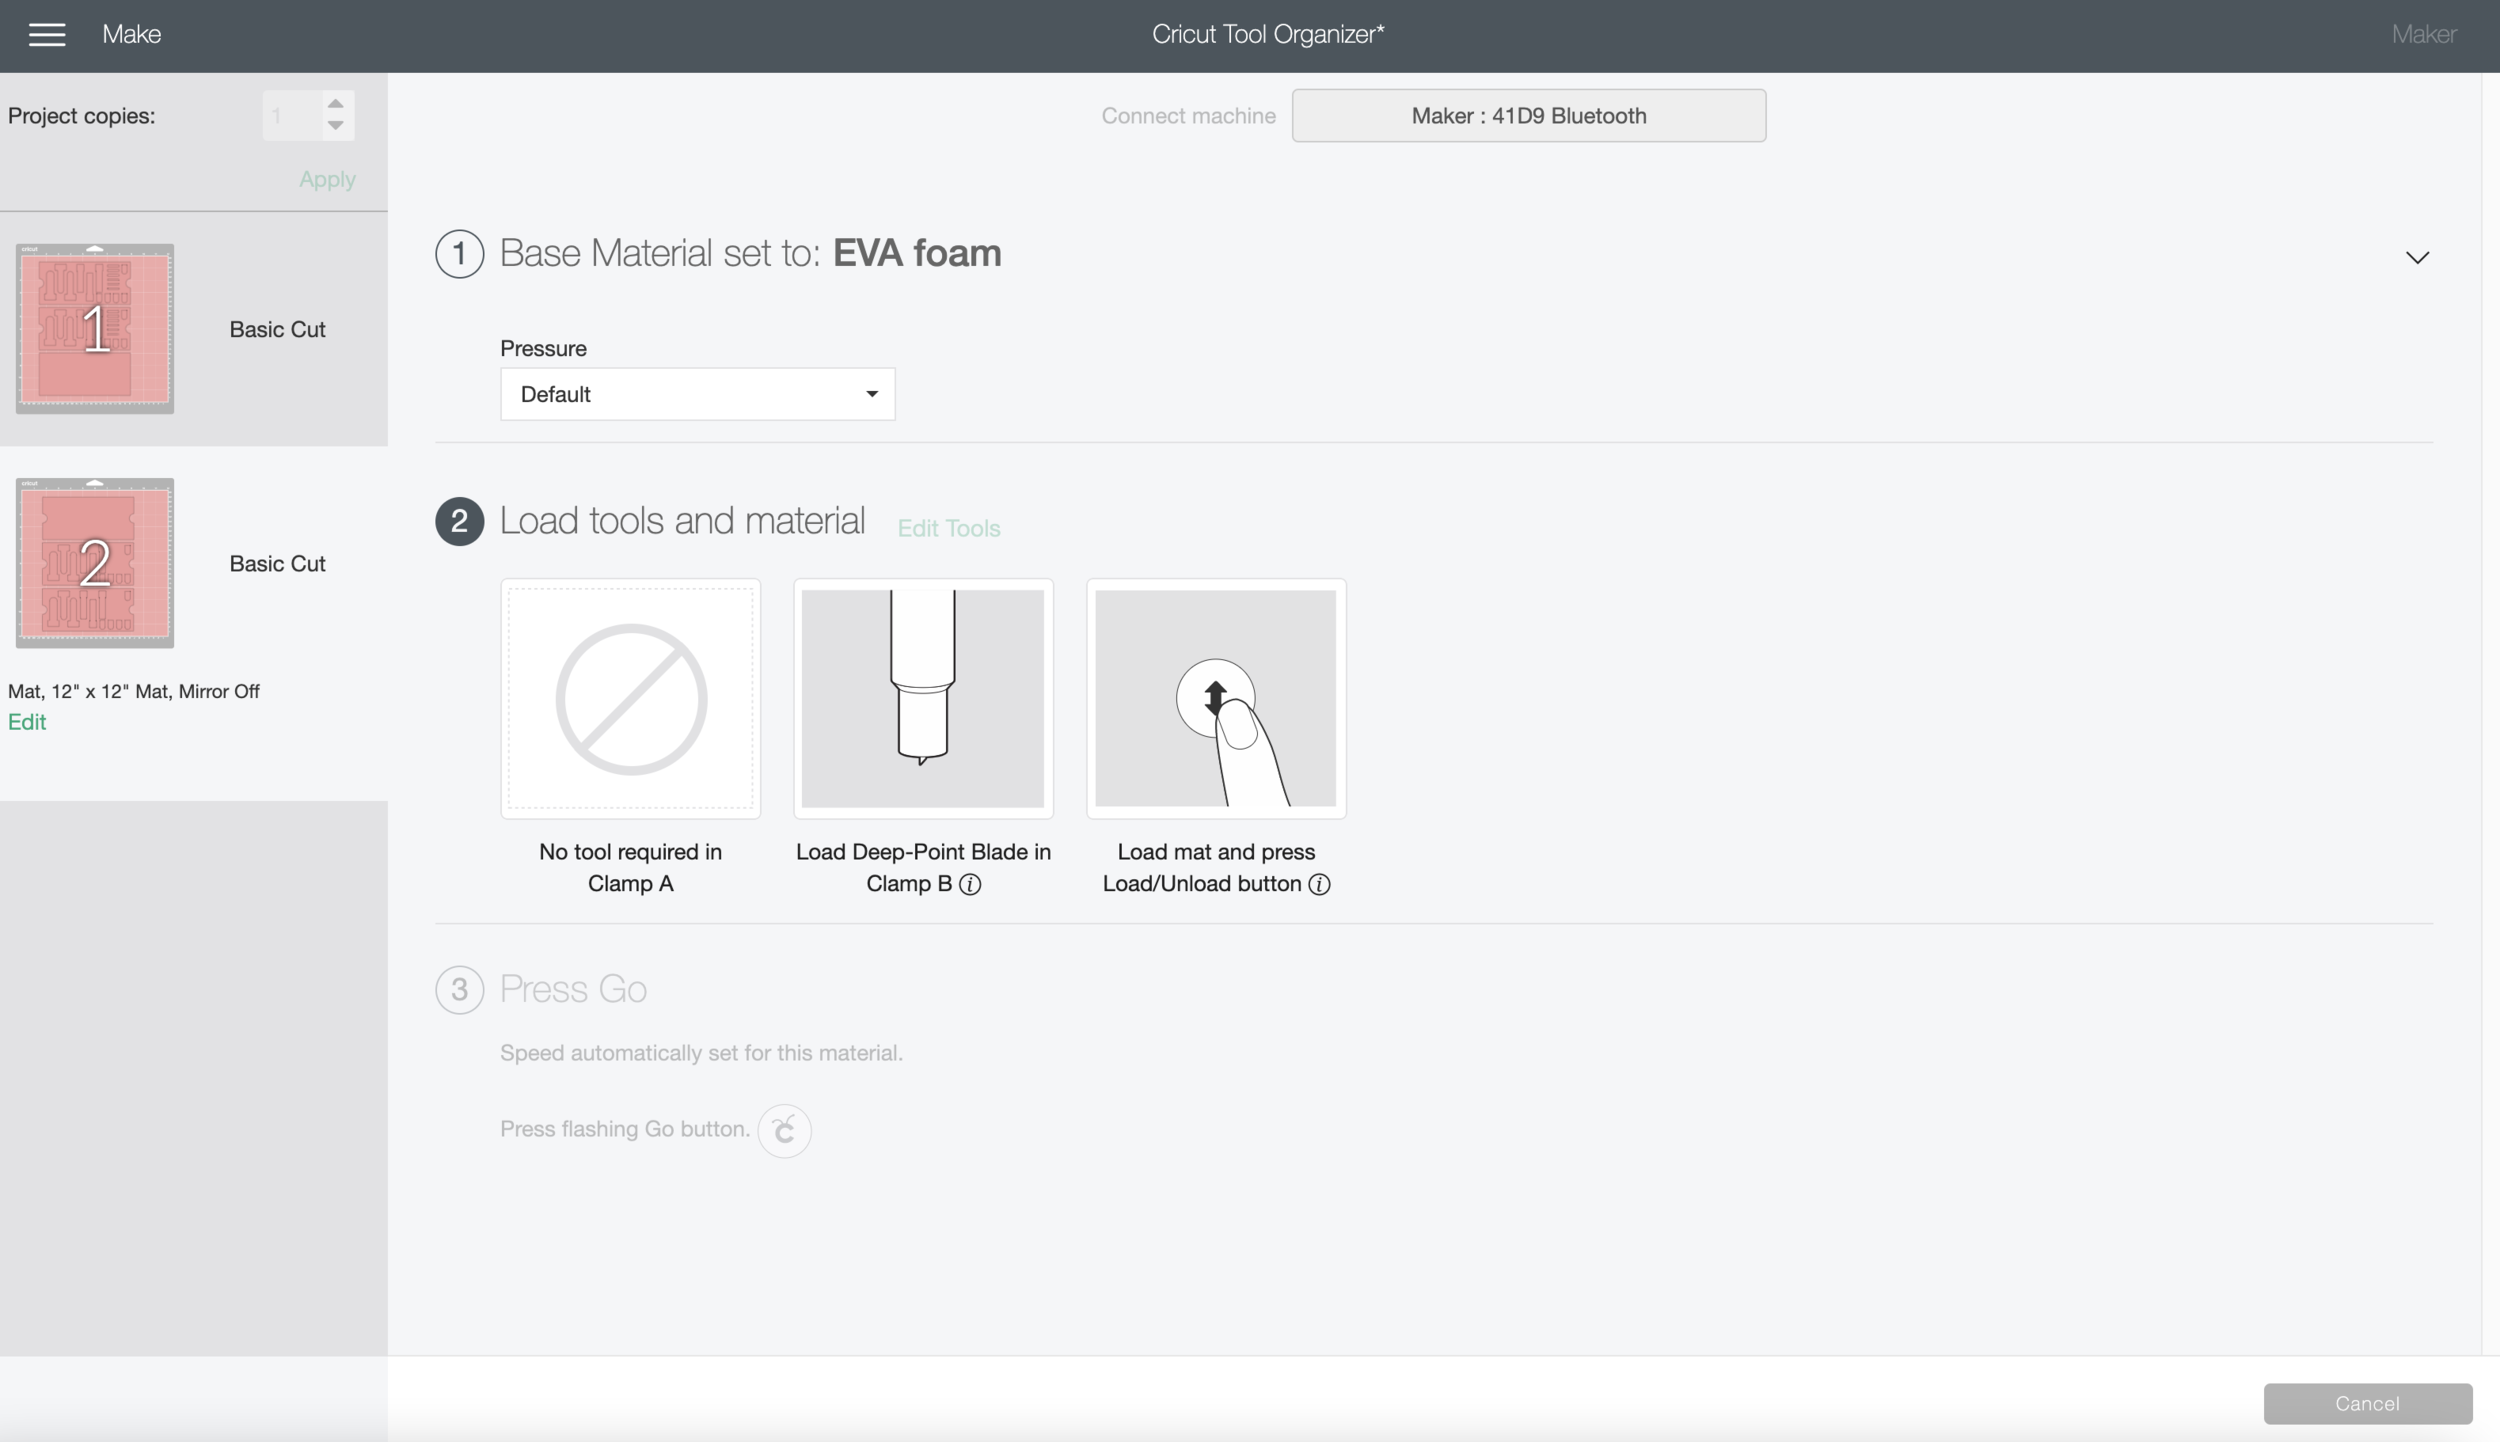
Click NEXT and then select my Maker machine.

Testing Single Line SVG file in Cricut Design Space

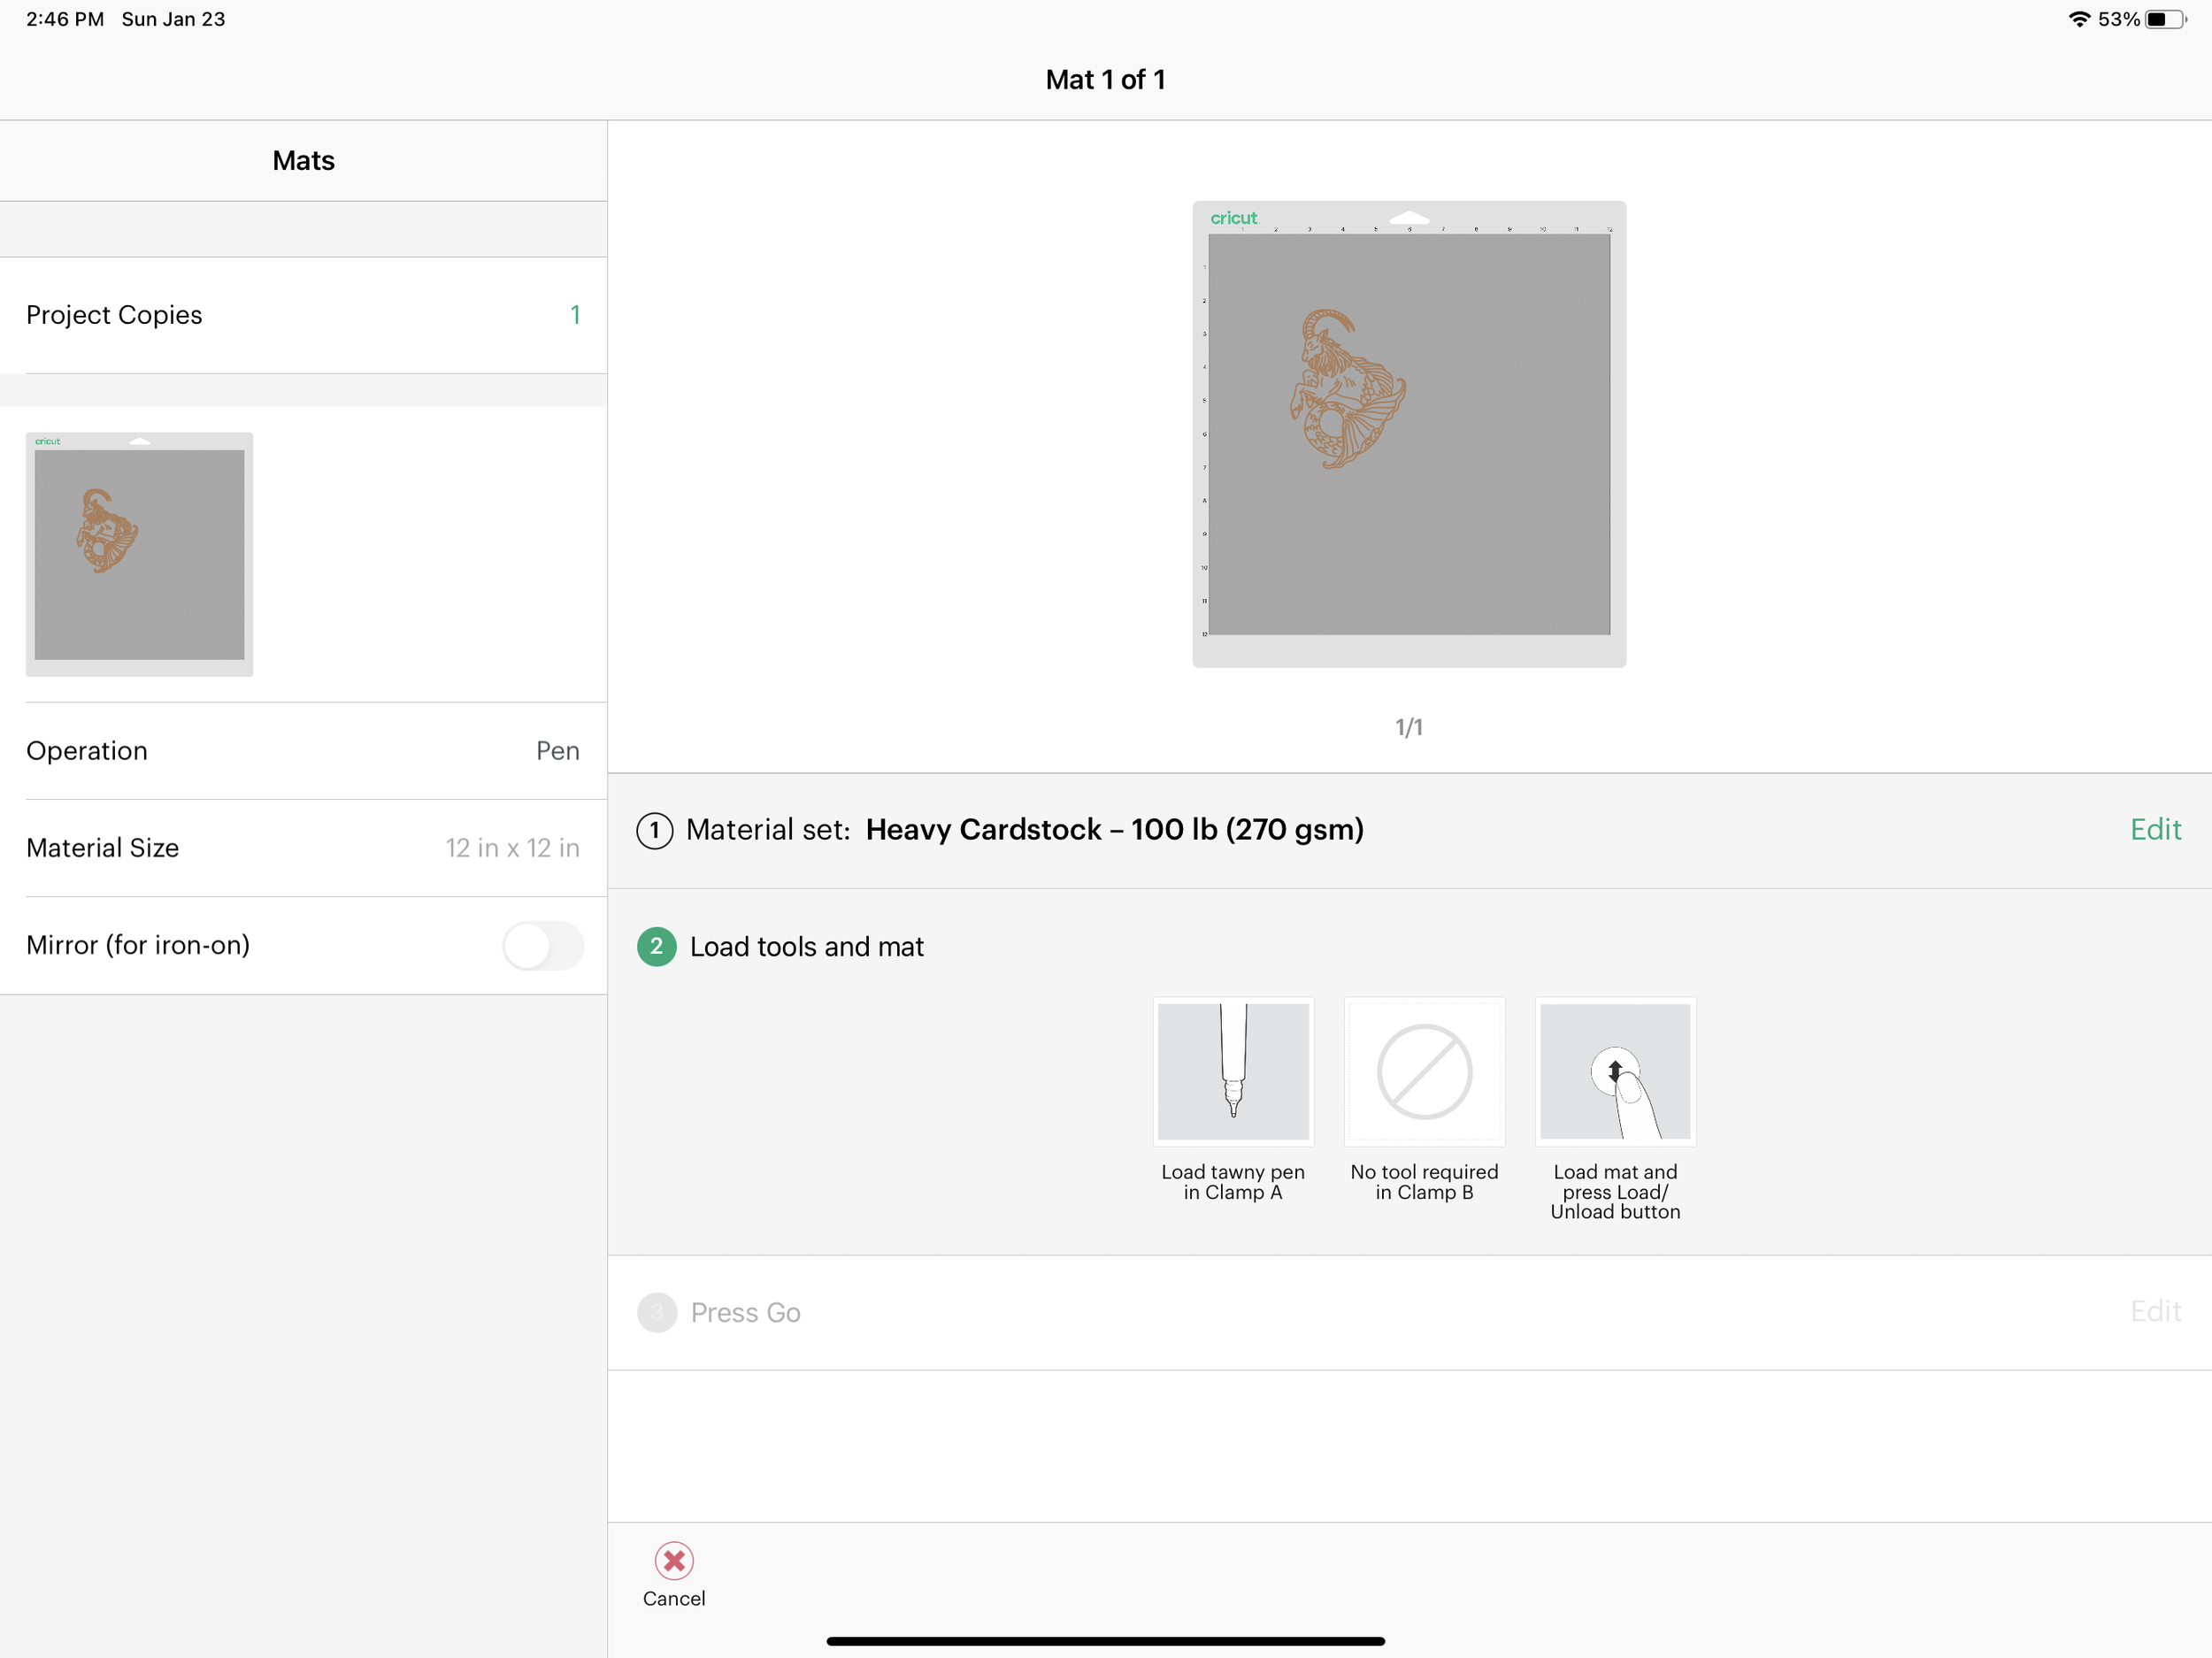
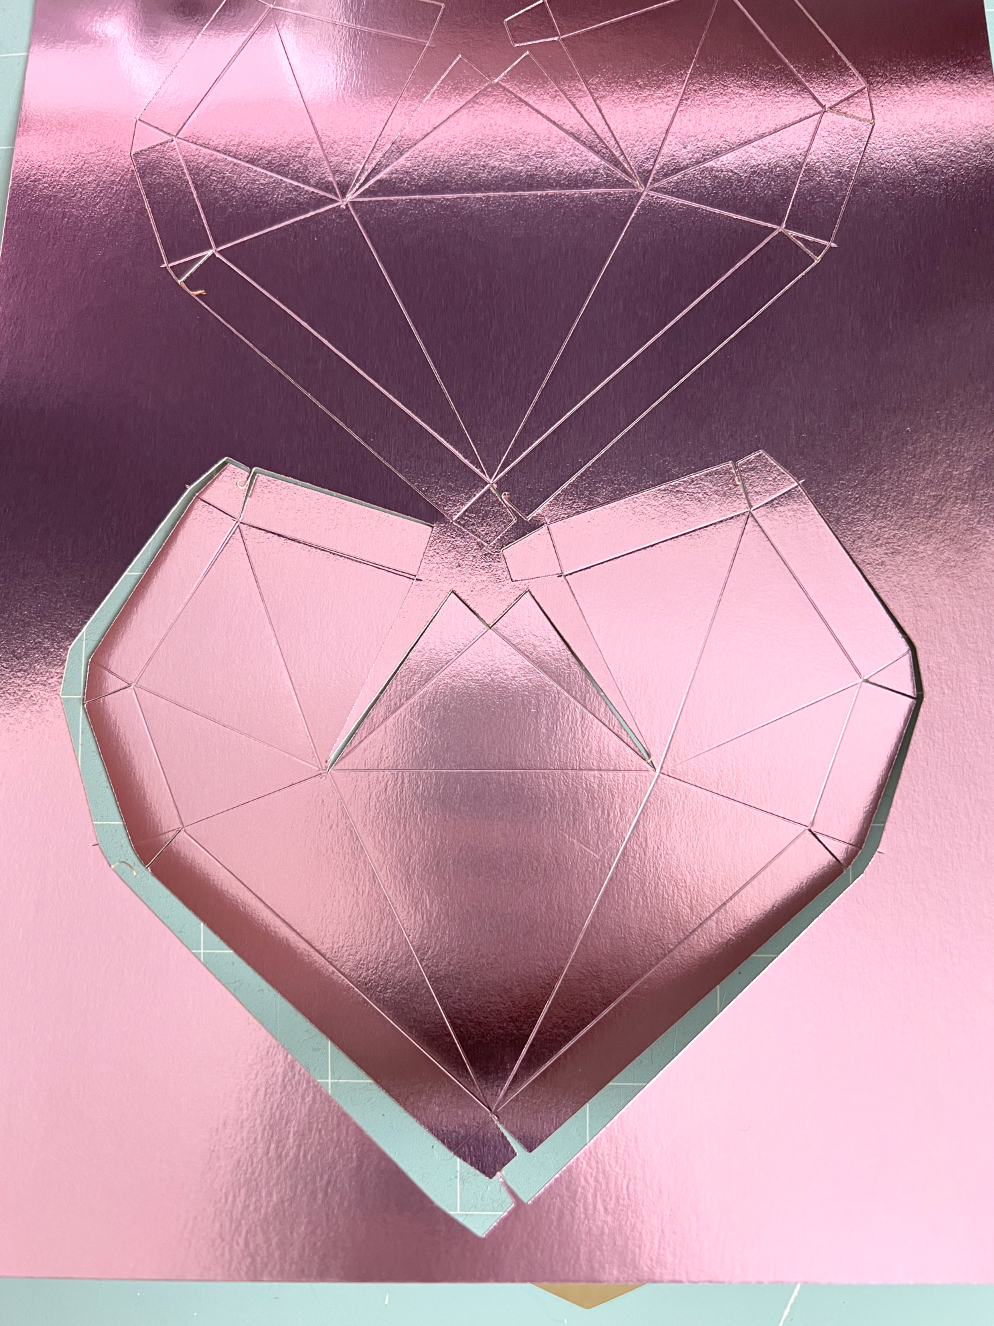
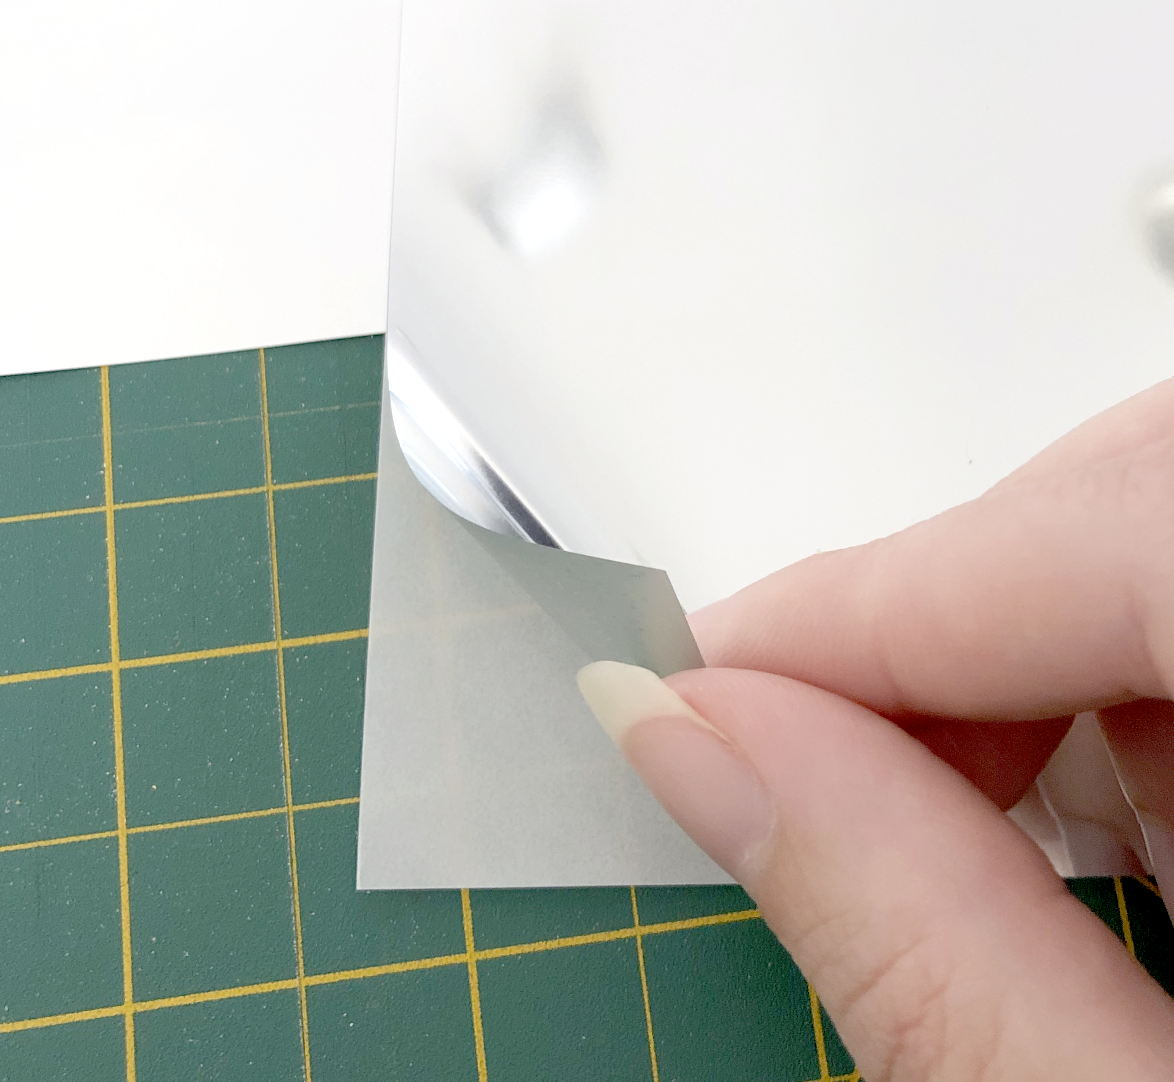
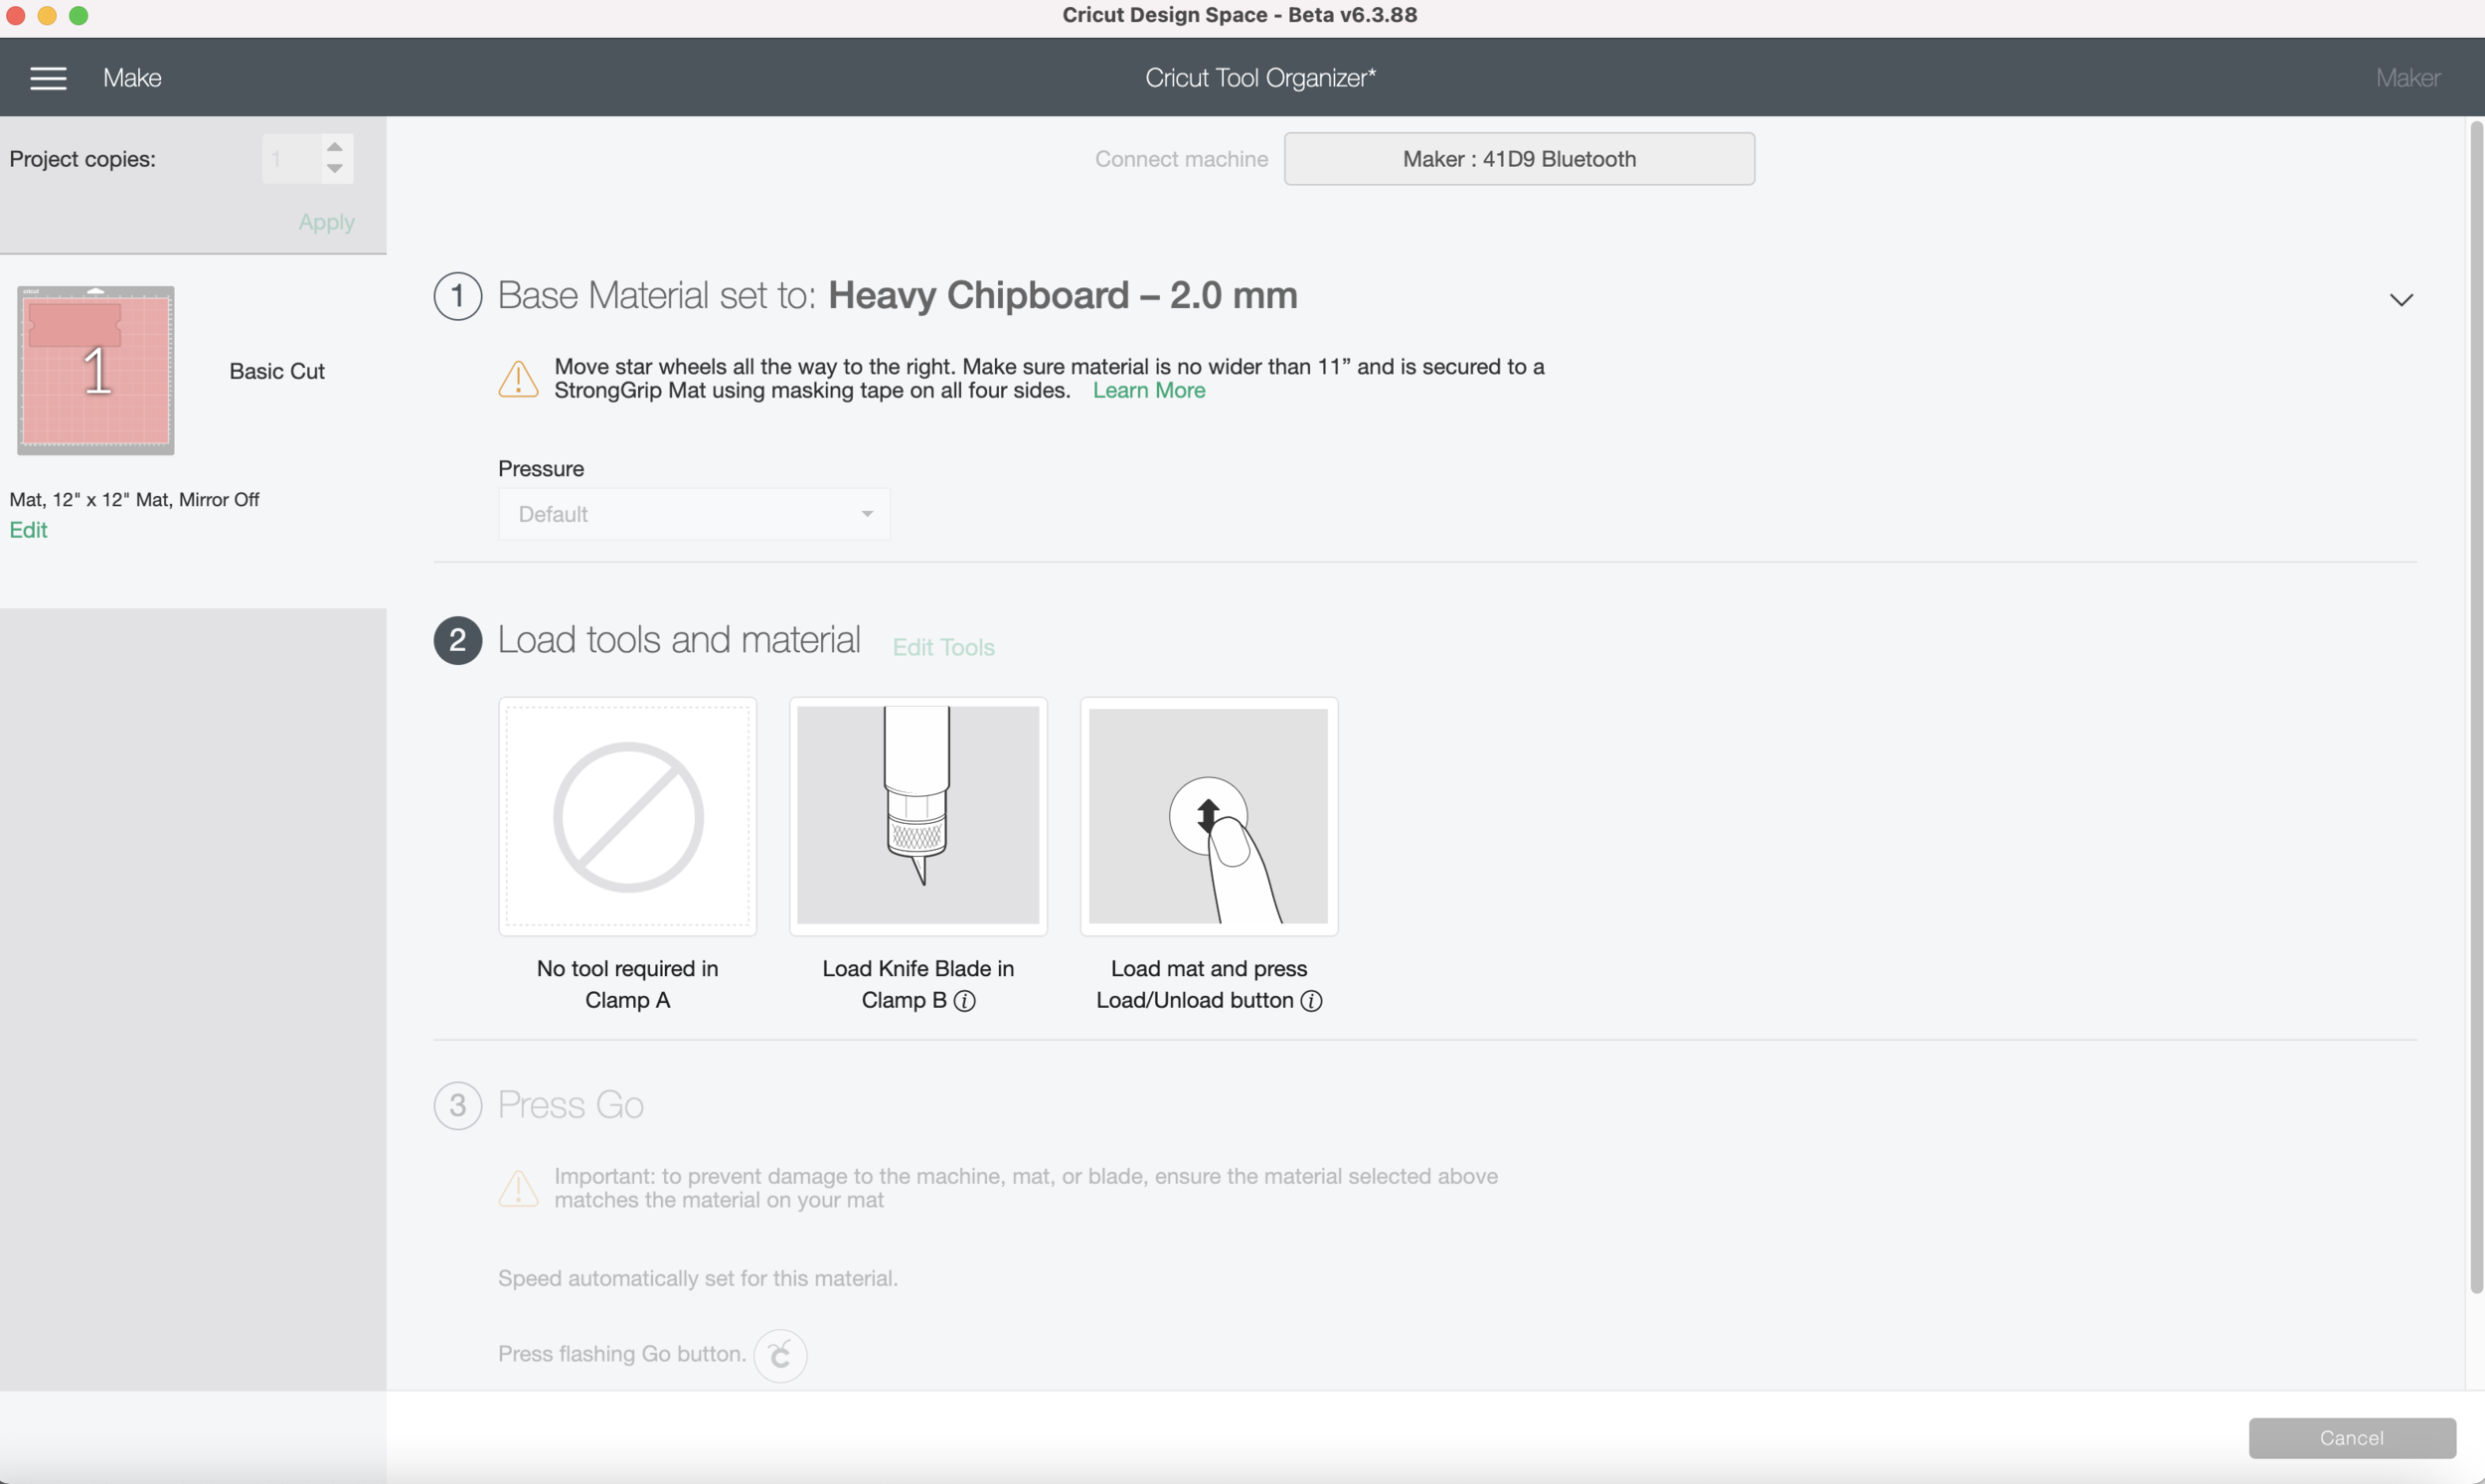
I’m using a scarp piece of cardstock, so I select Heavy Cardstock as my material. and I load my Black fine point pen and my mat into my machine, and Press GO!!

Testing Single Line SVG file in Cricut Design Space

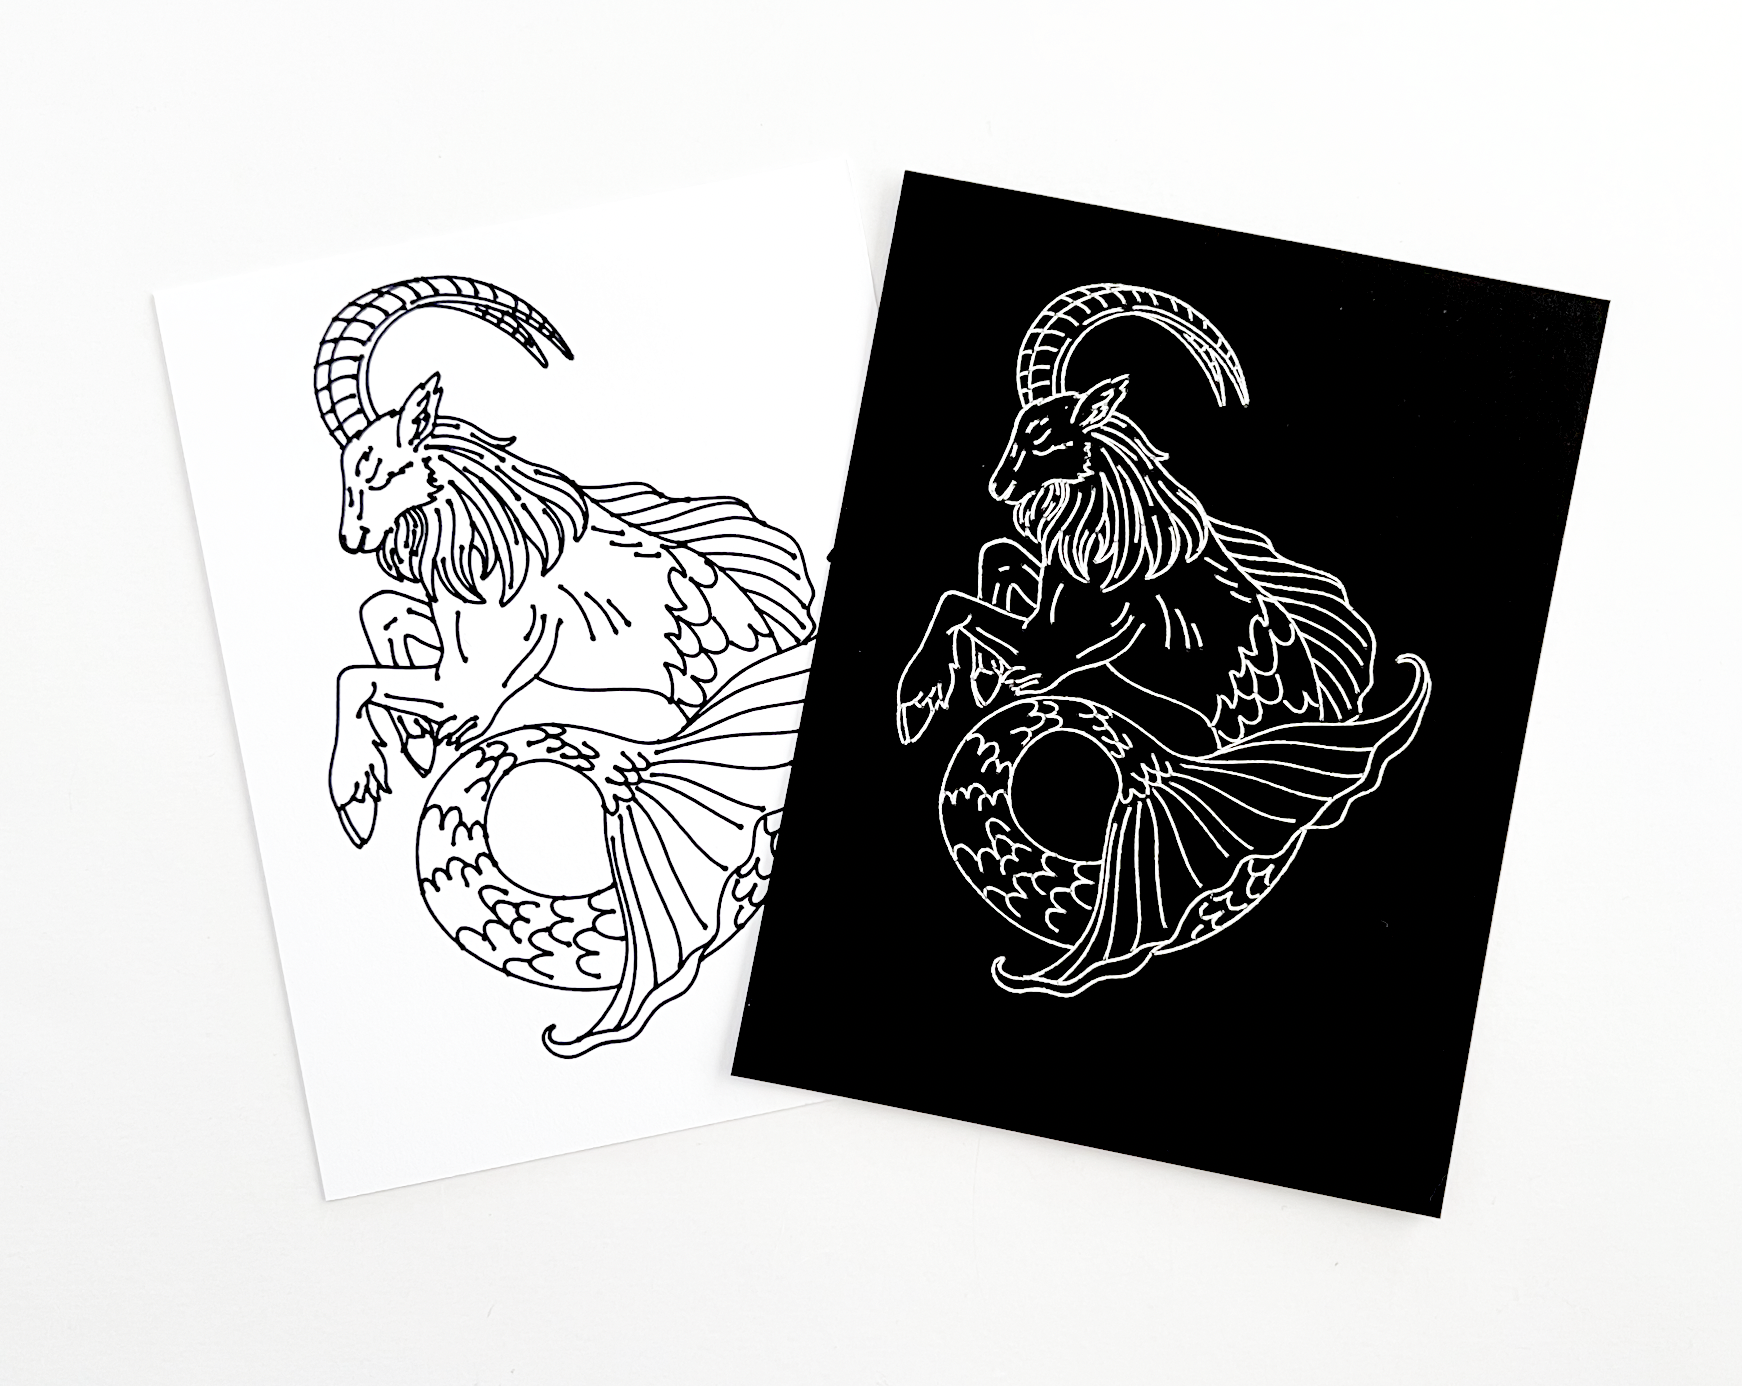
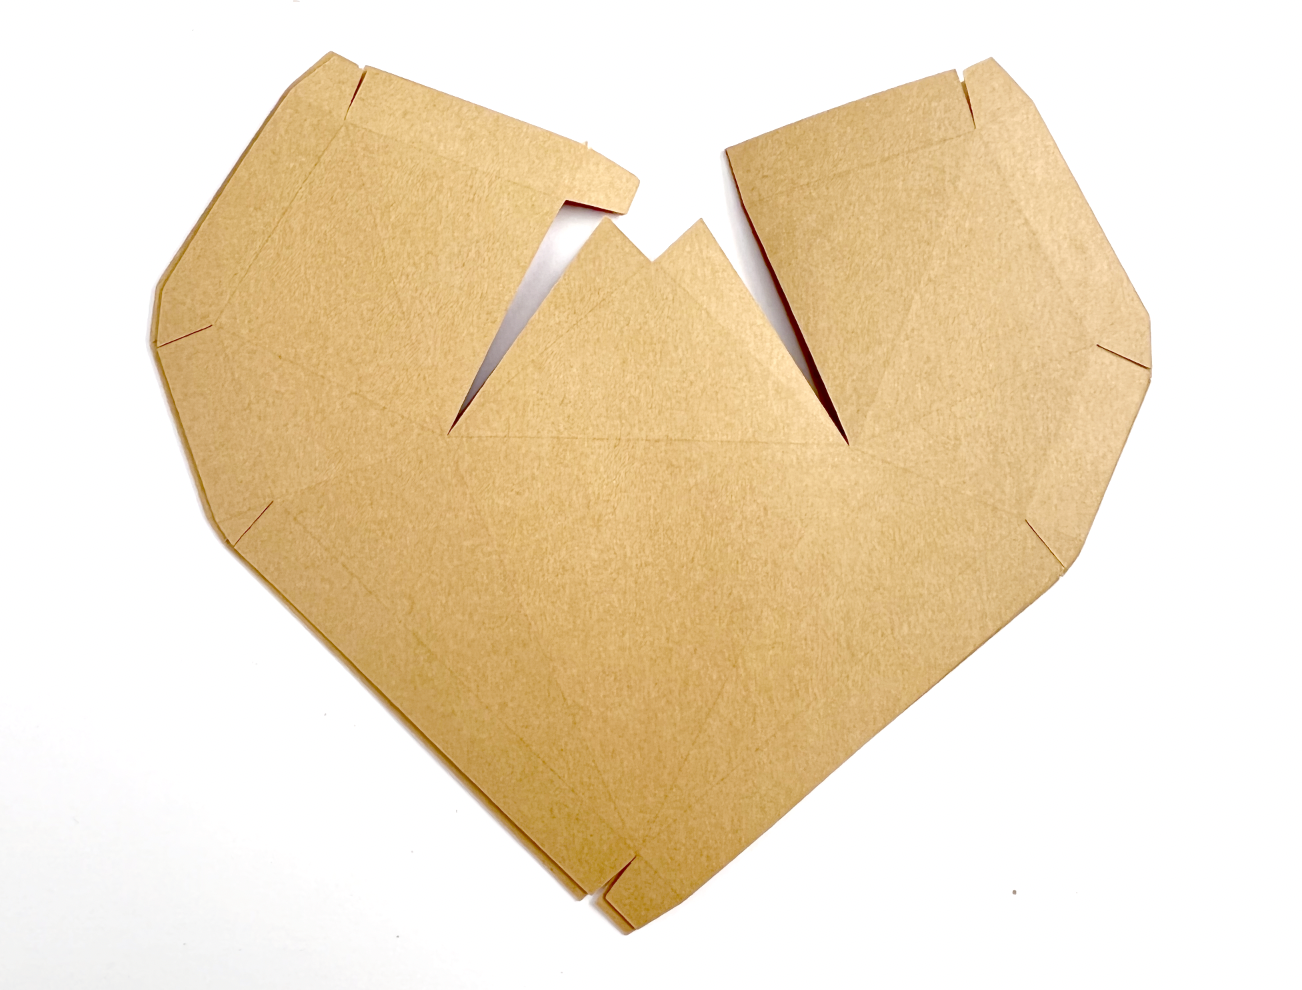
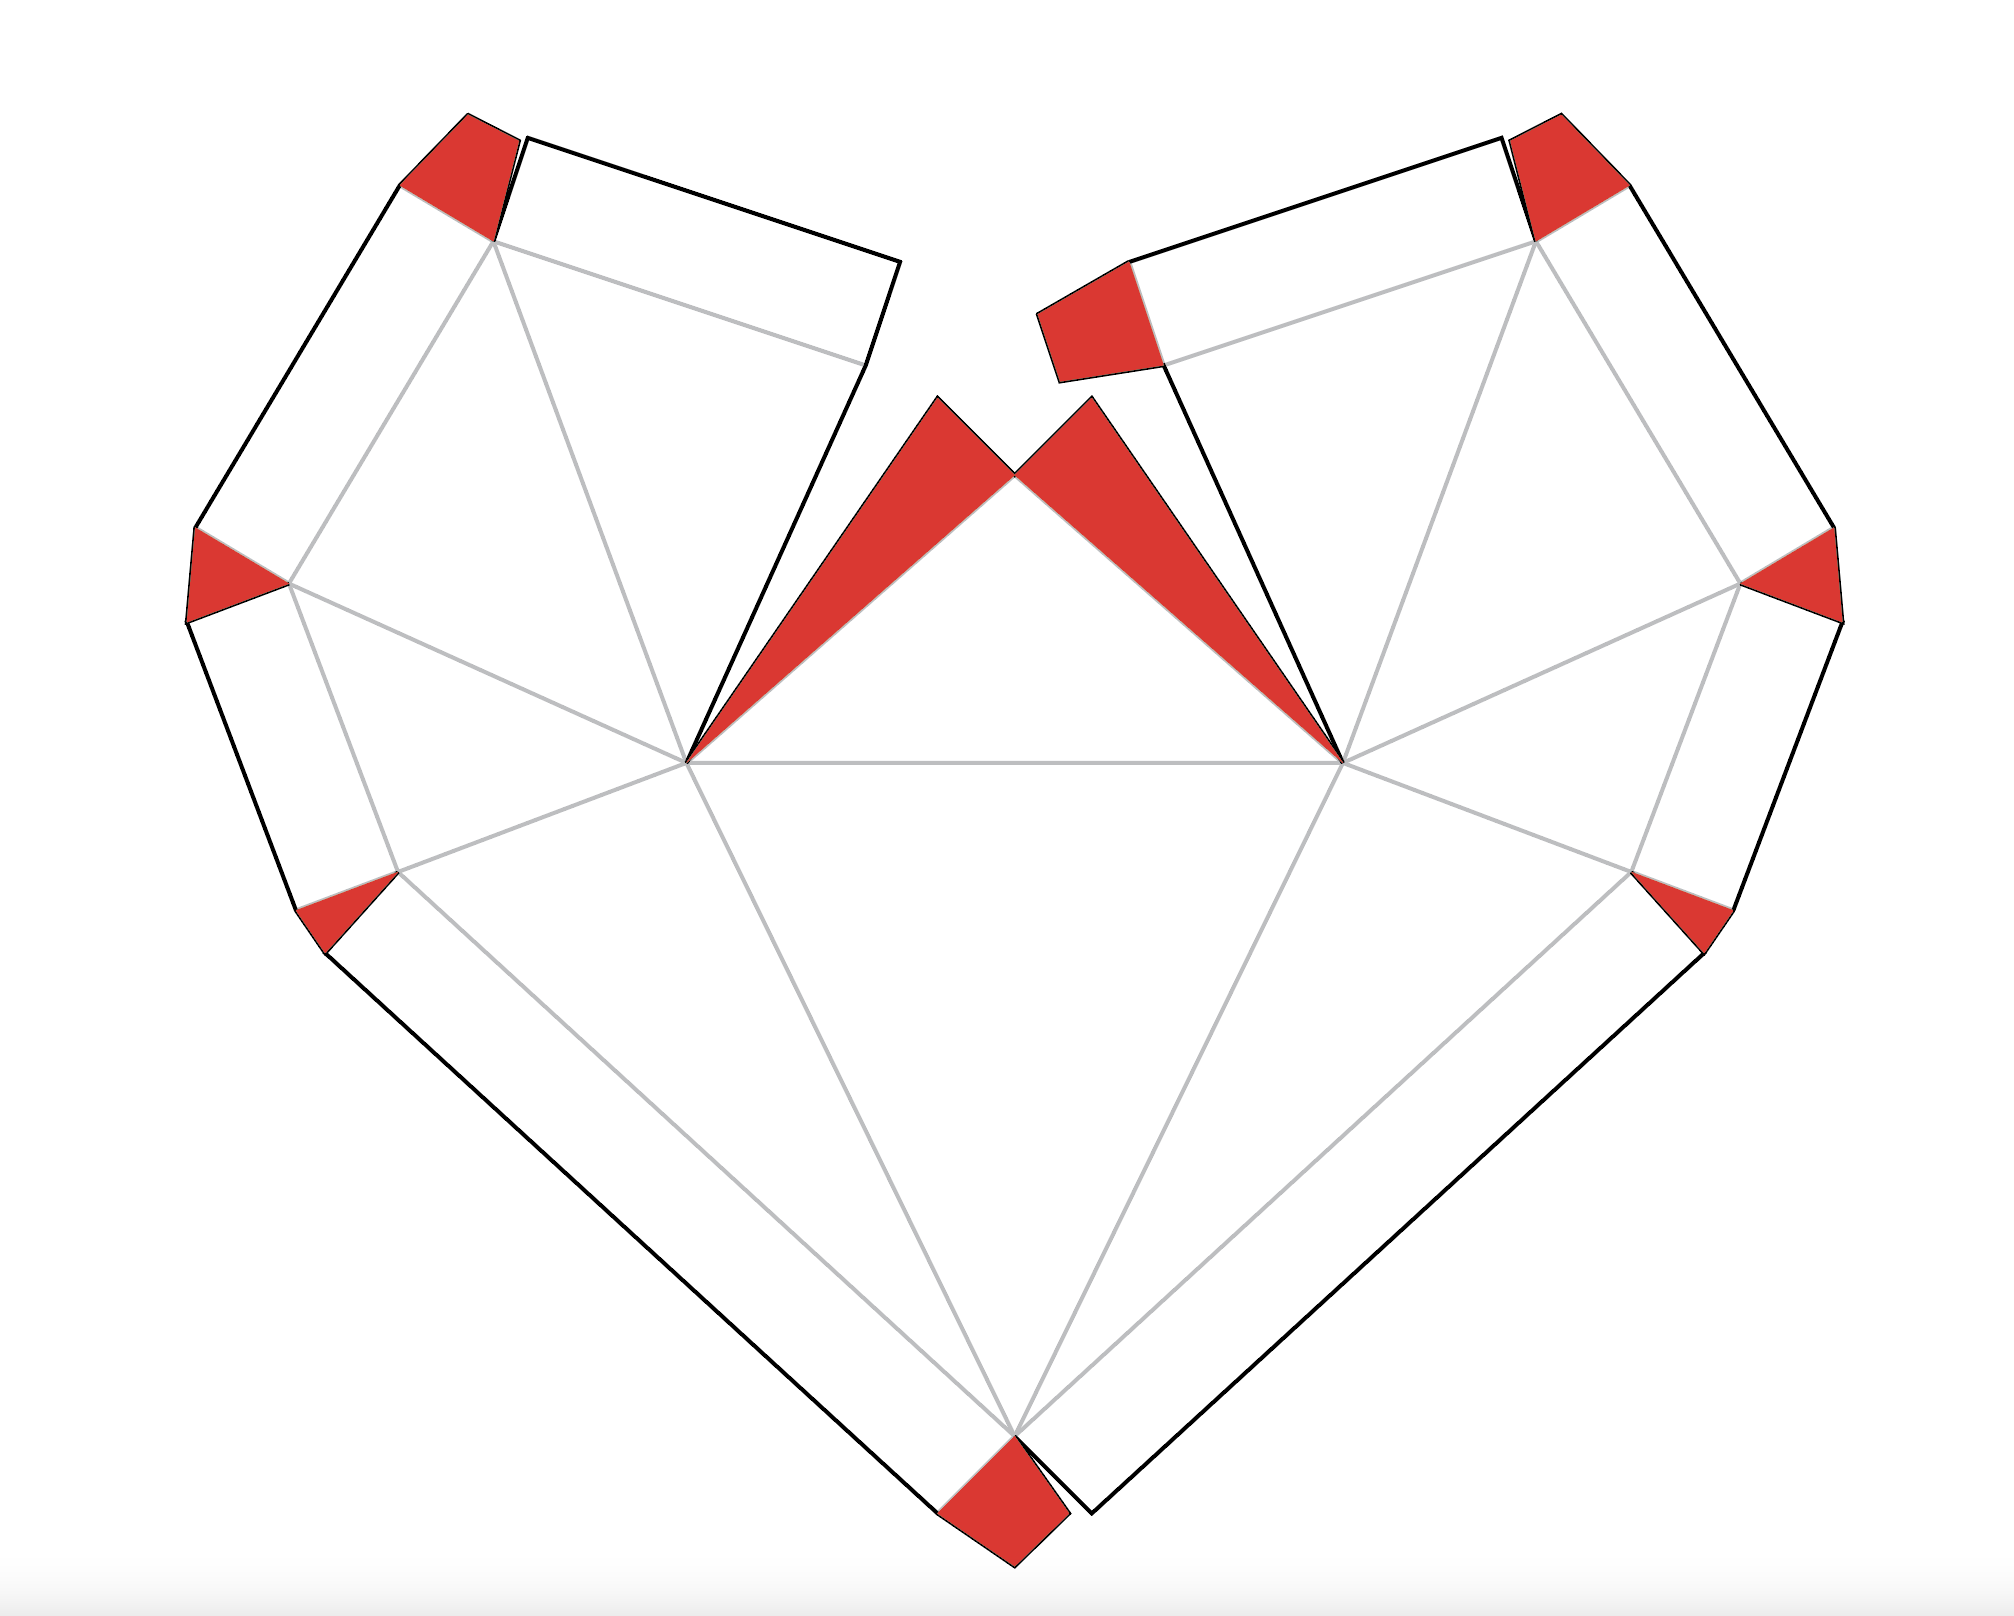
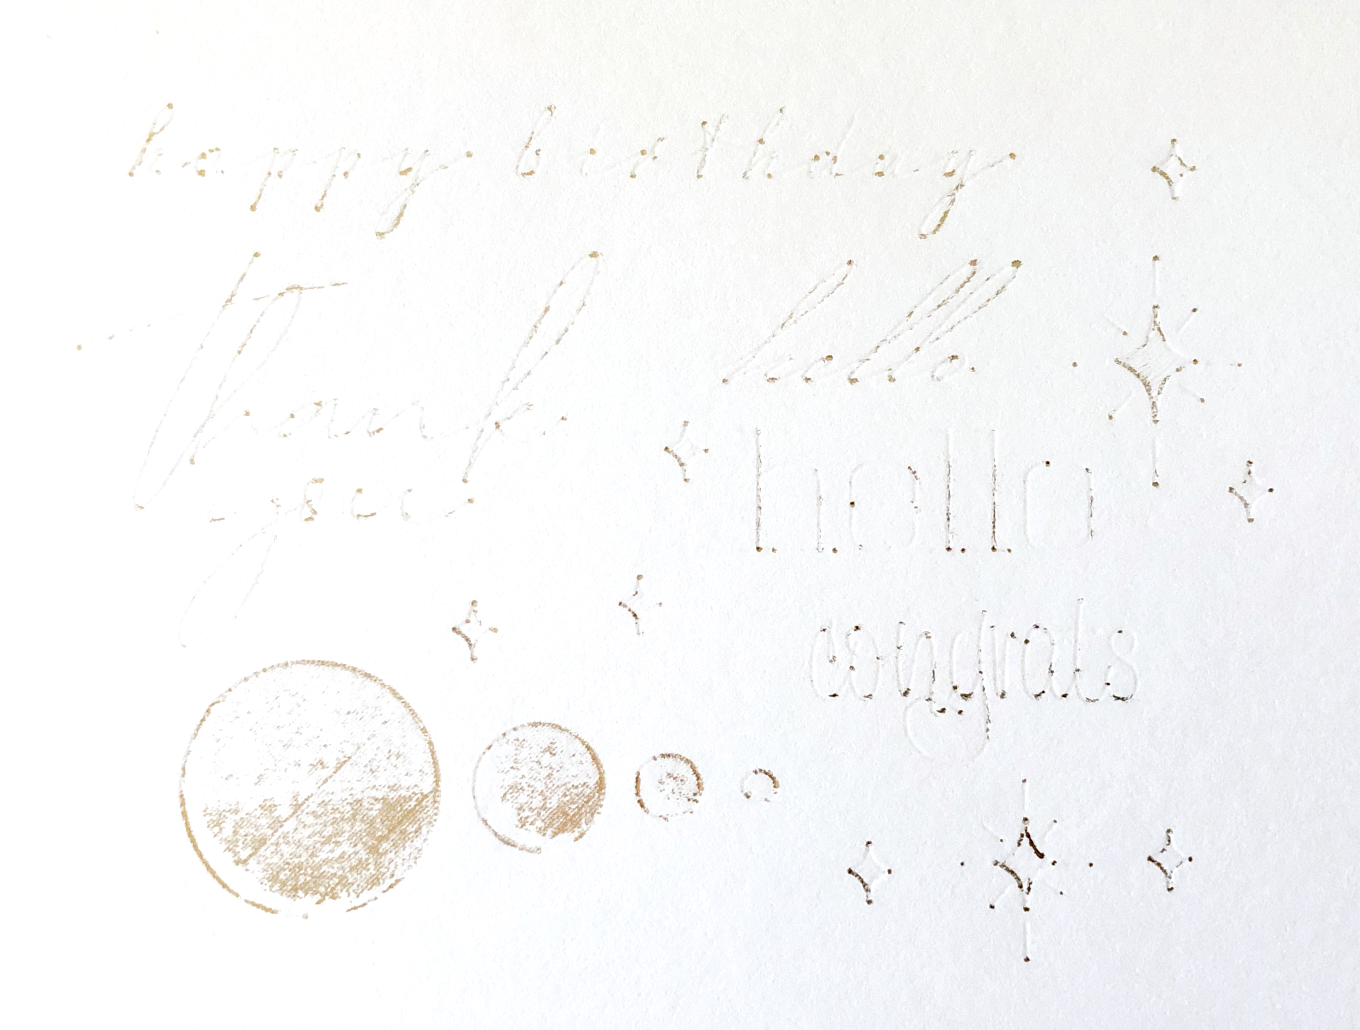
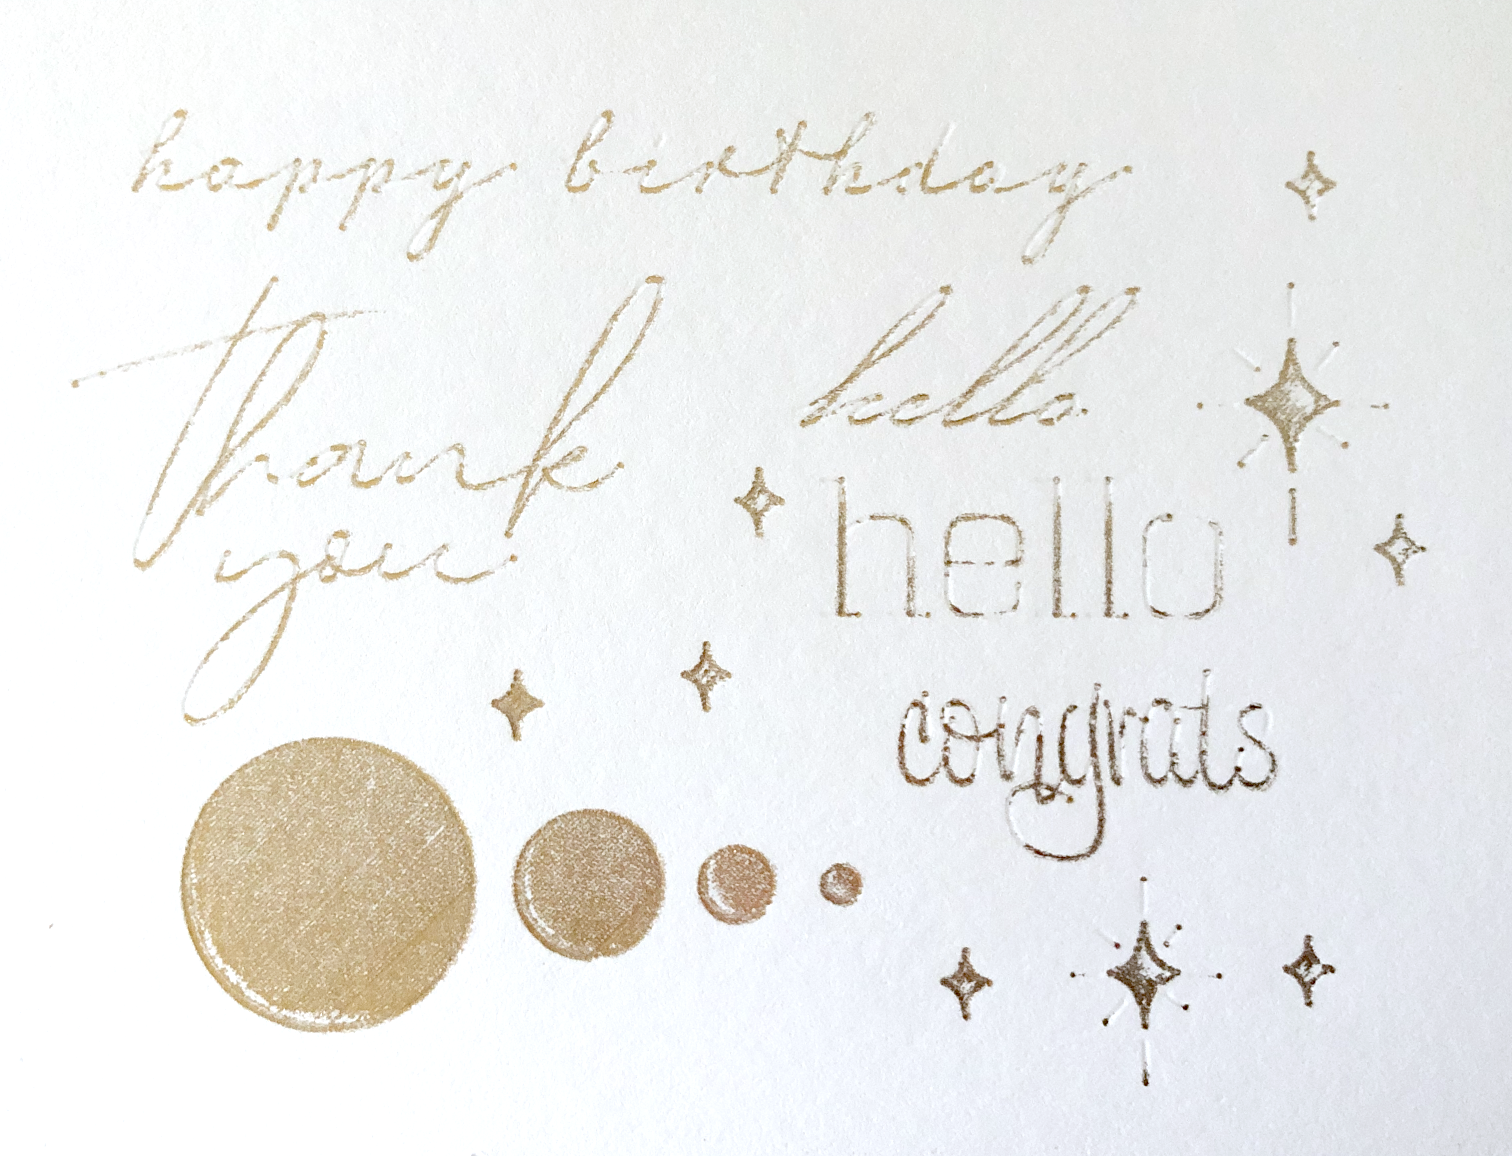
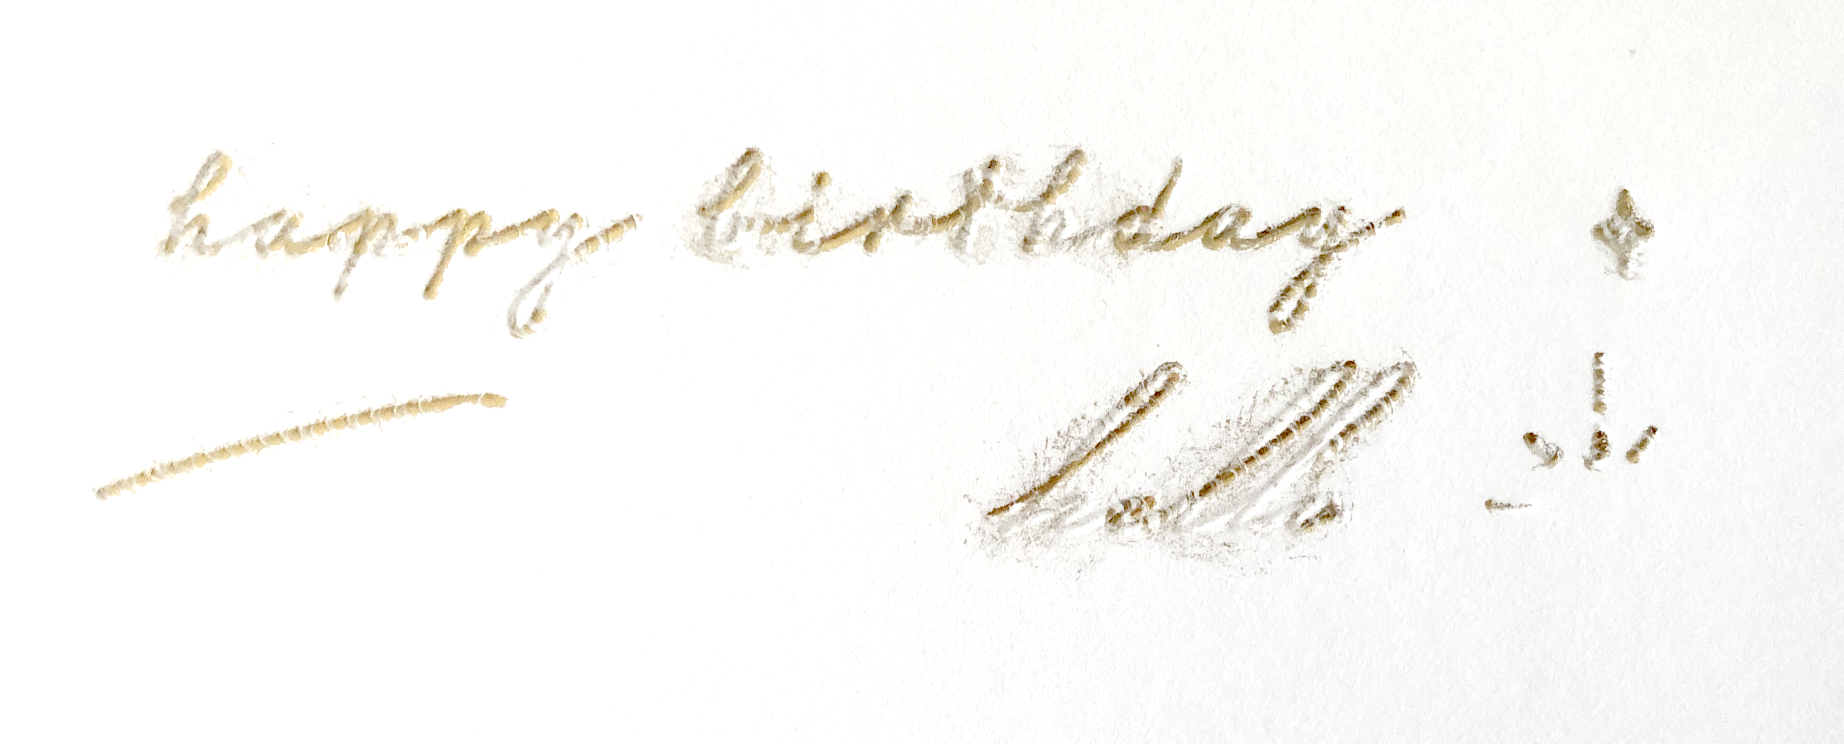
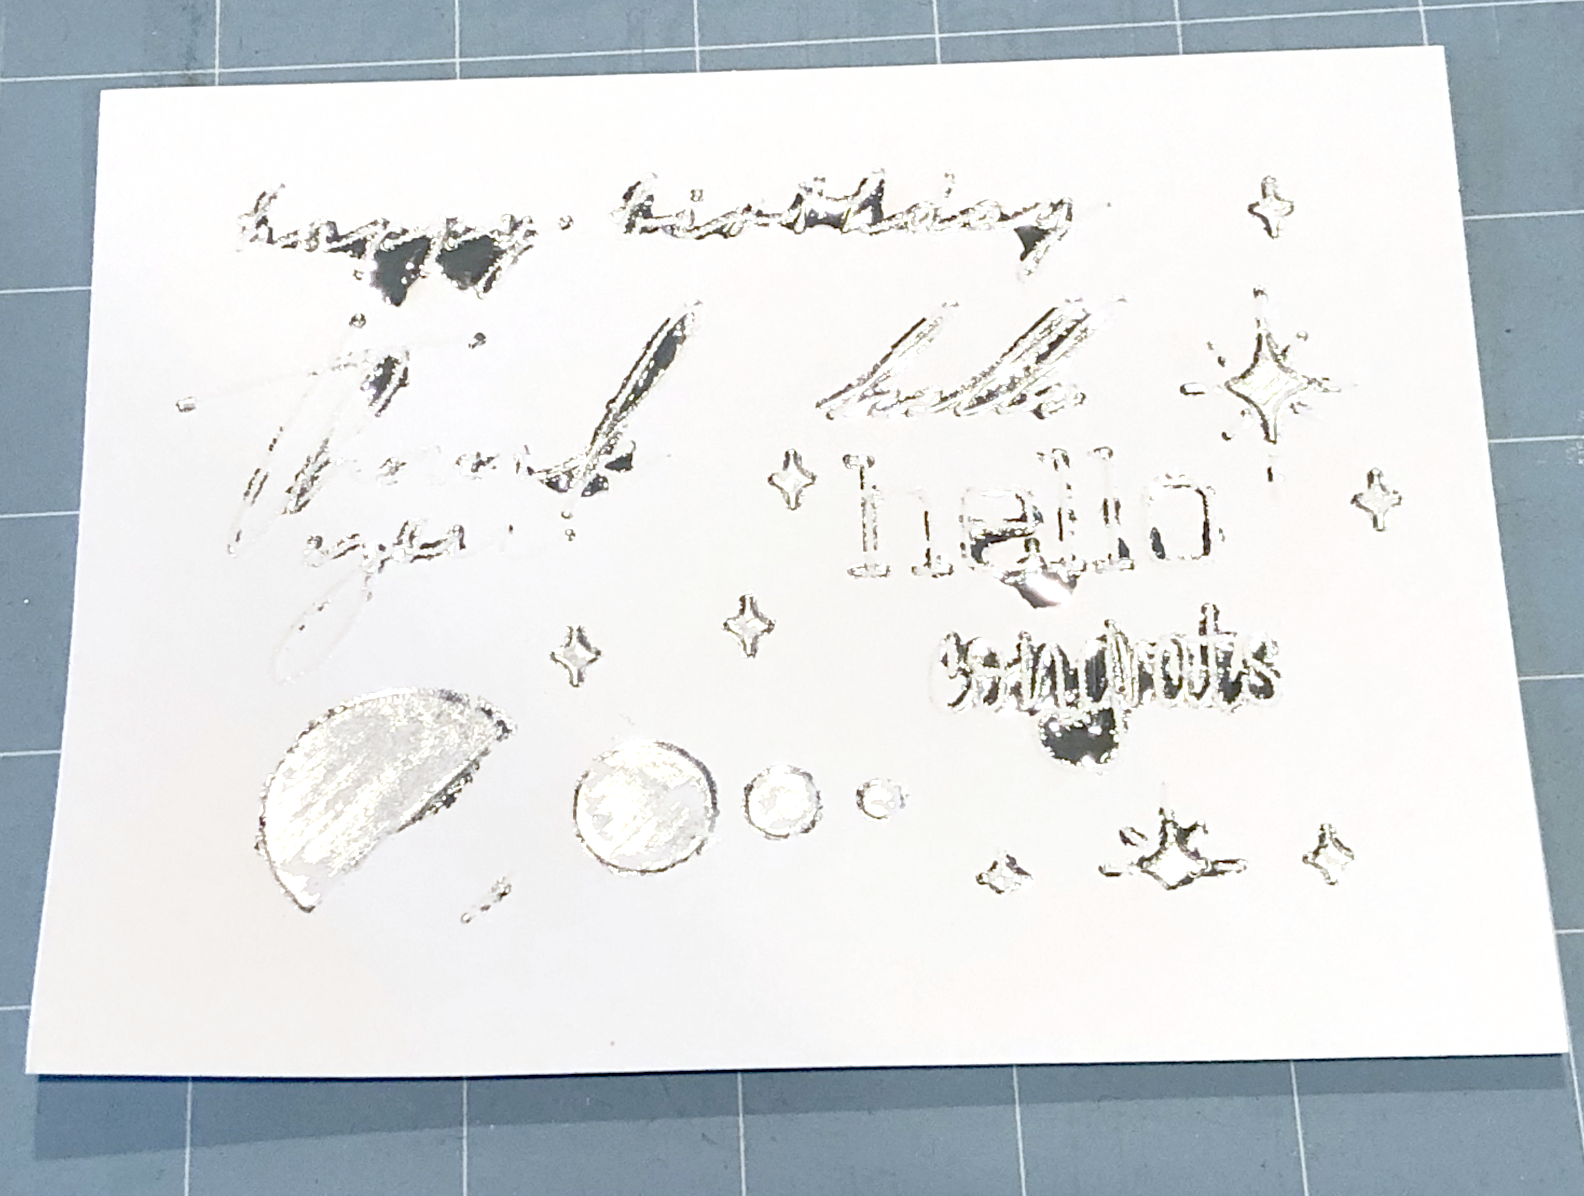
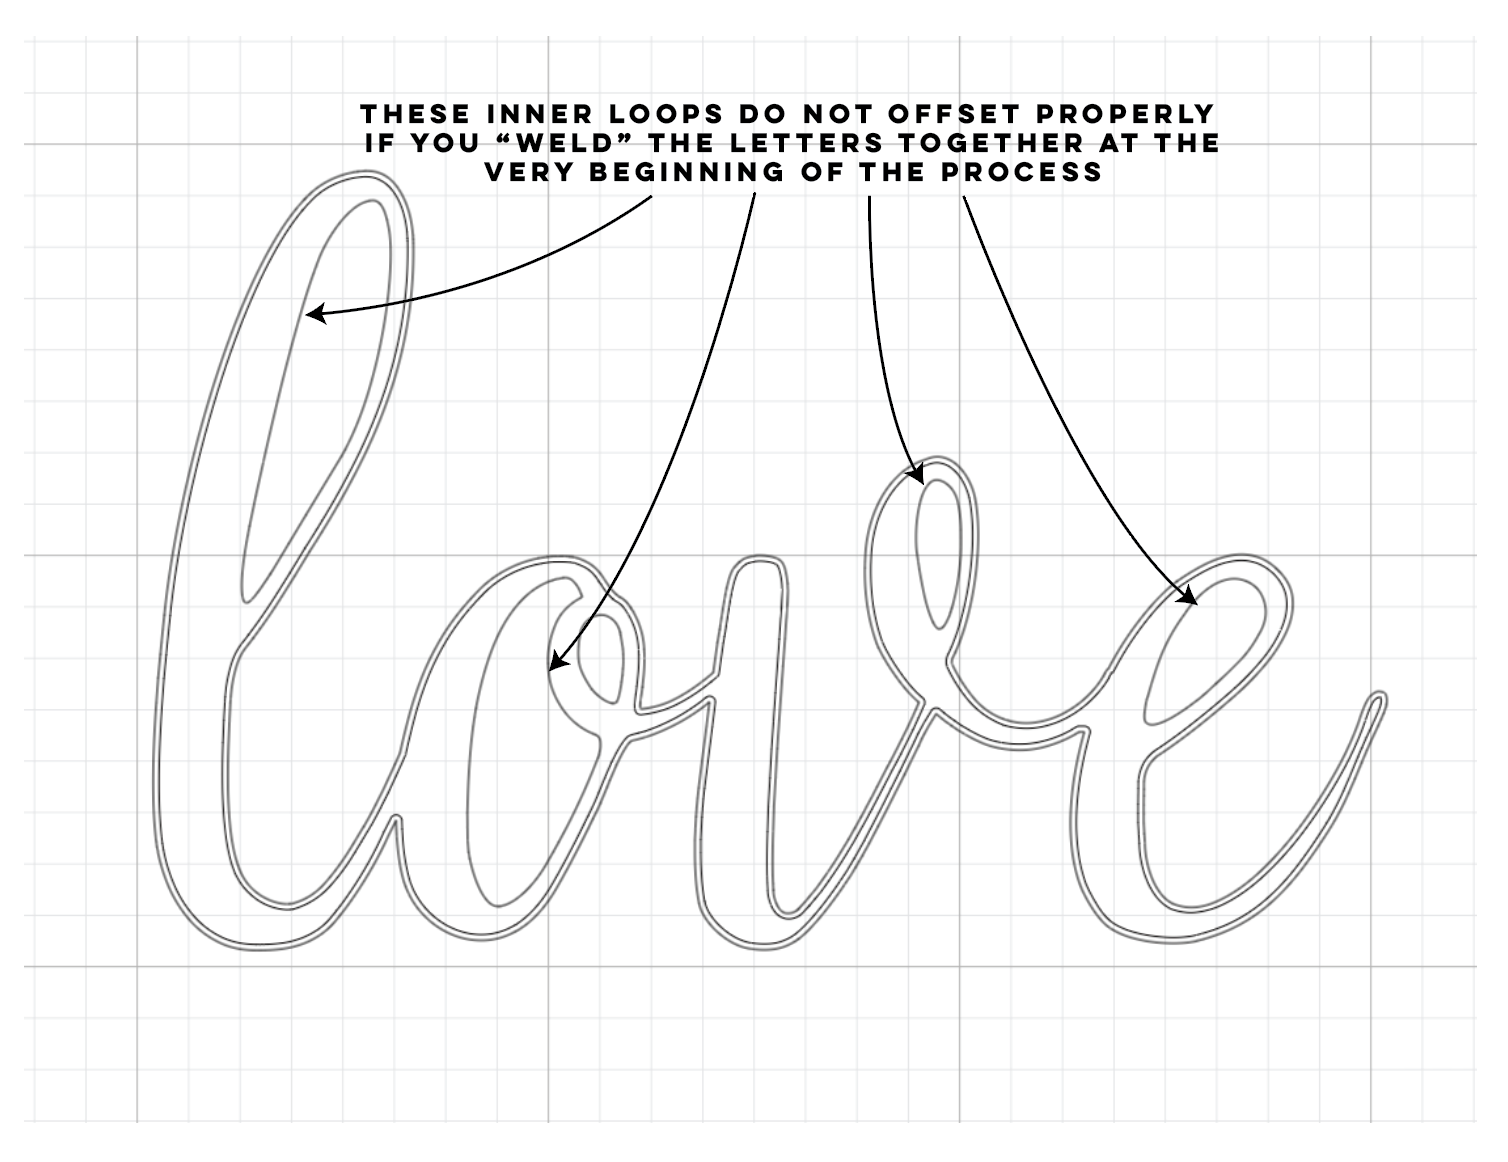
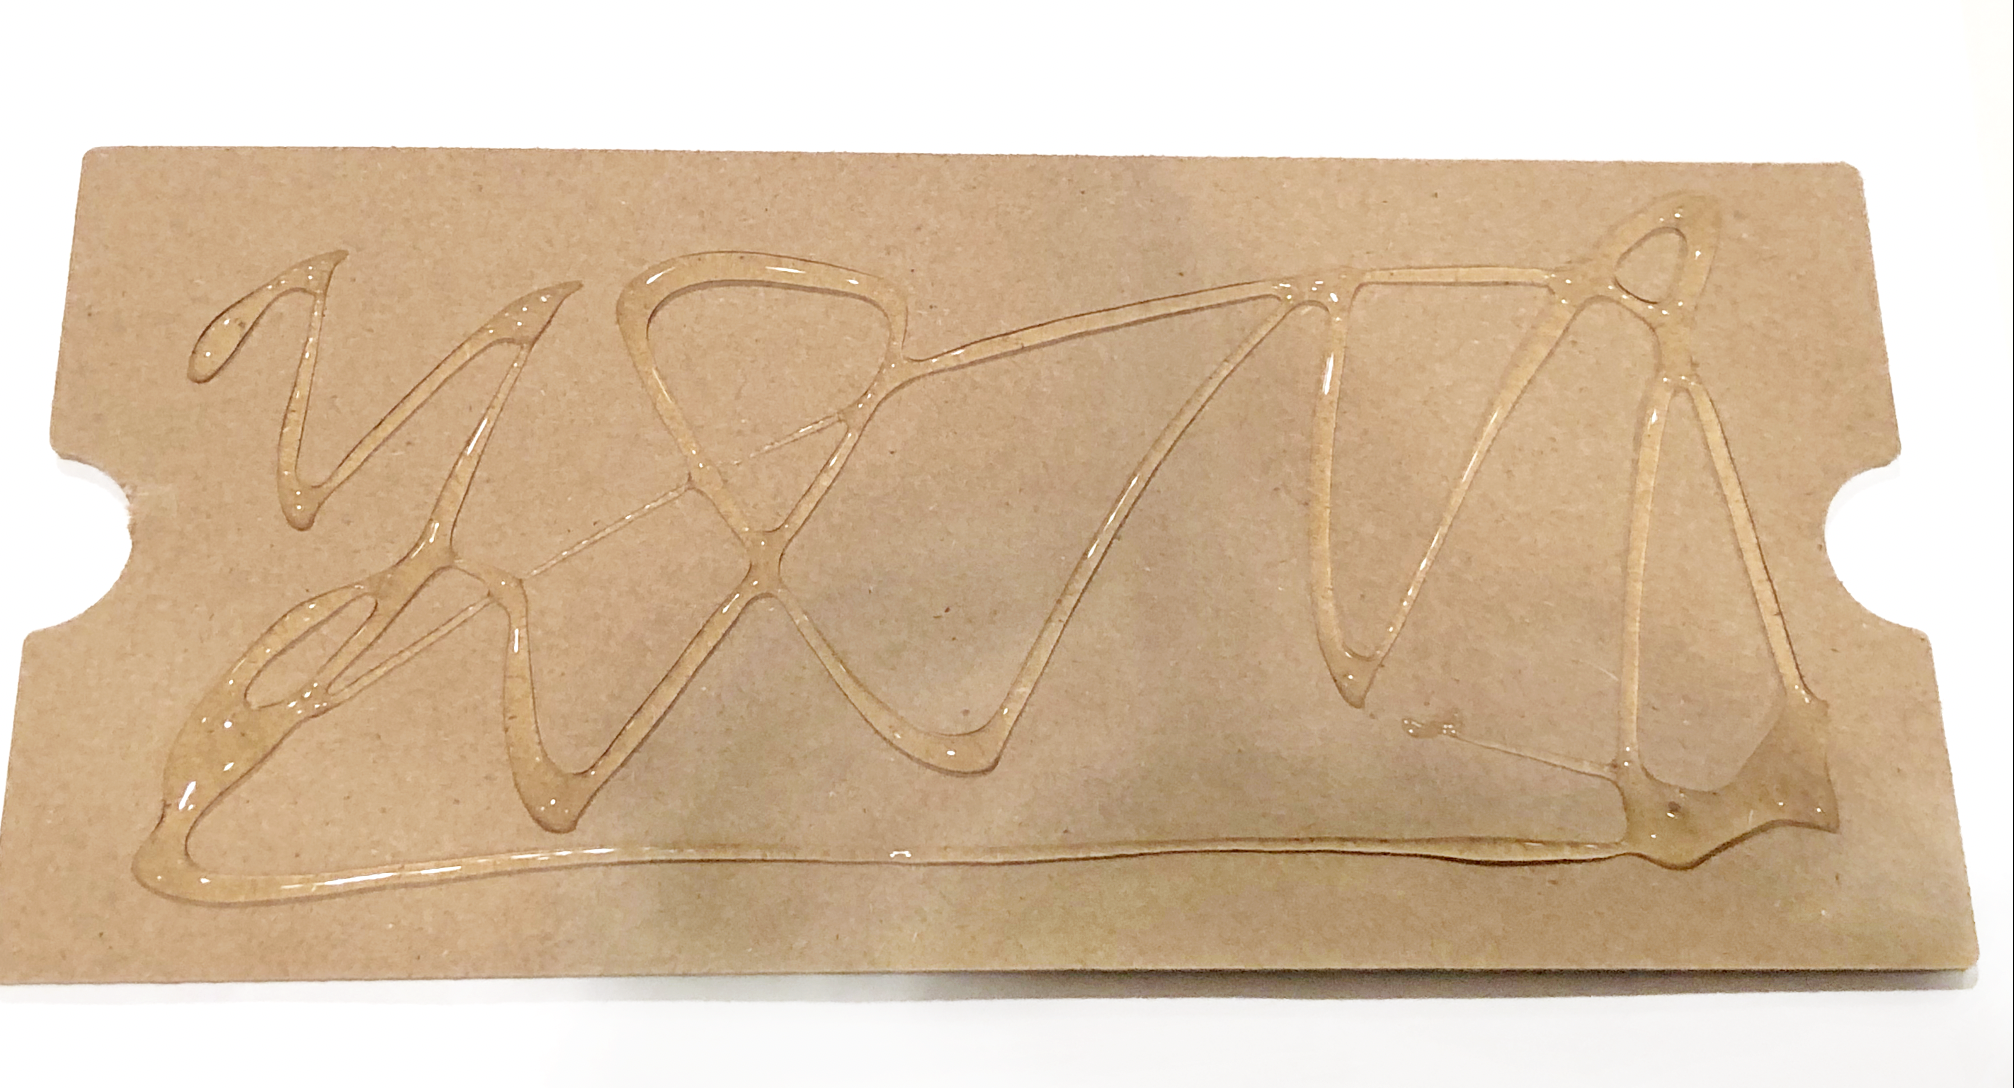
After my machine is done drawing, I check my design to see if skipped any of my lines. If any parts of your design are missing, try re-uploading your SVG file into Design Space.

Testing Single Line SVG file in Cricut Design Space

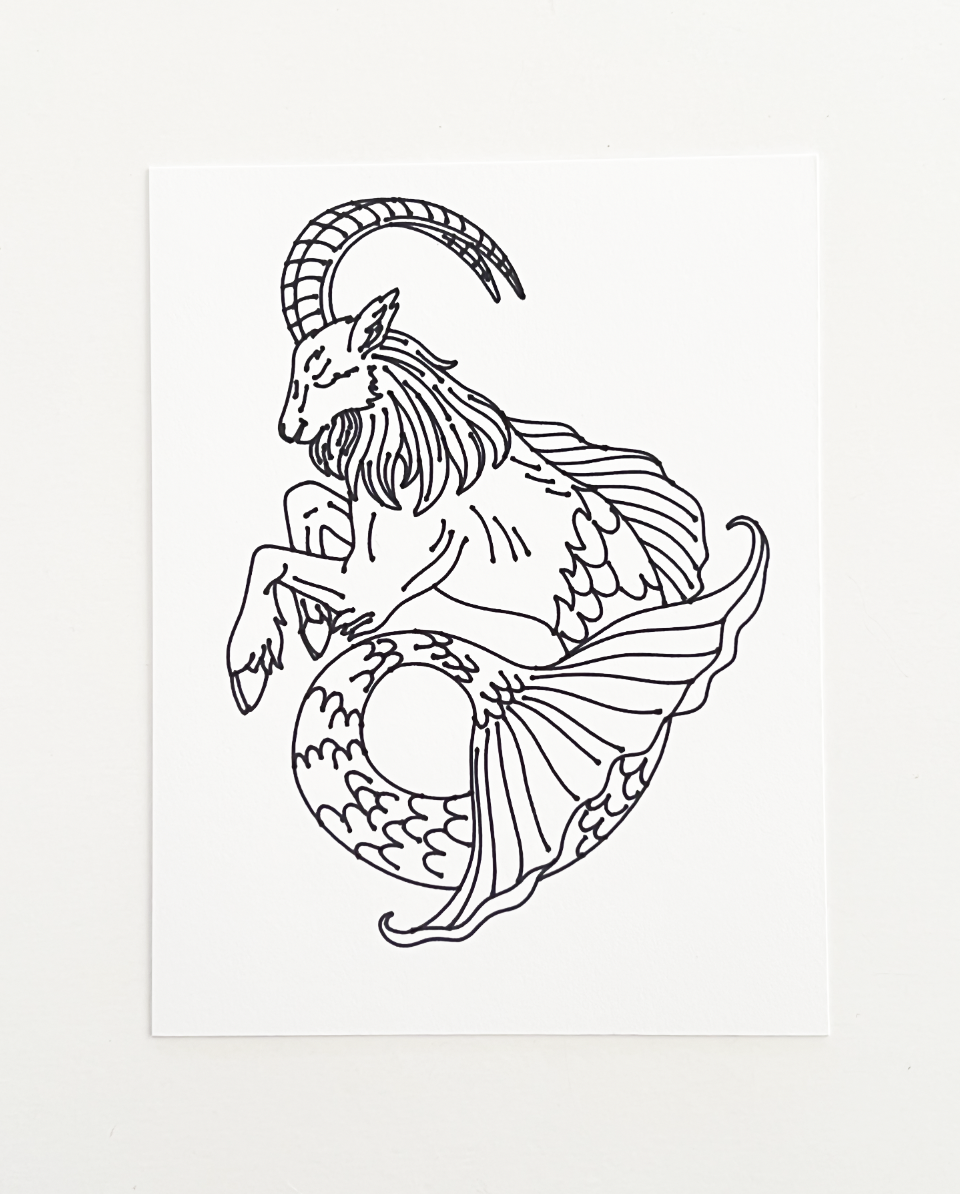
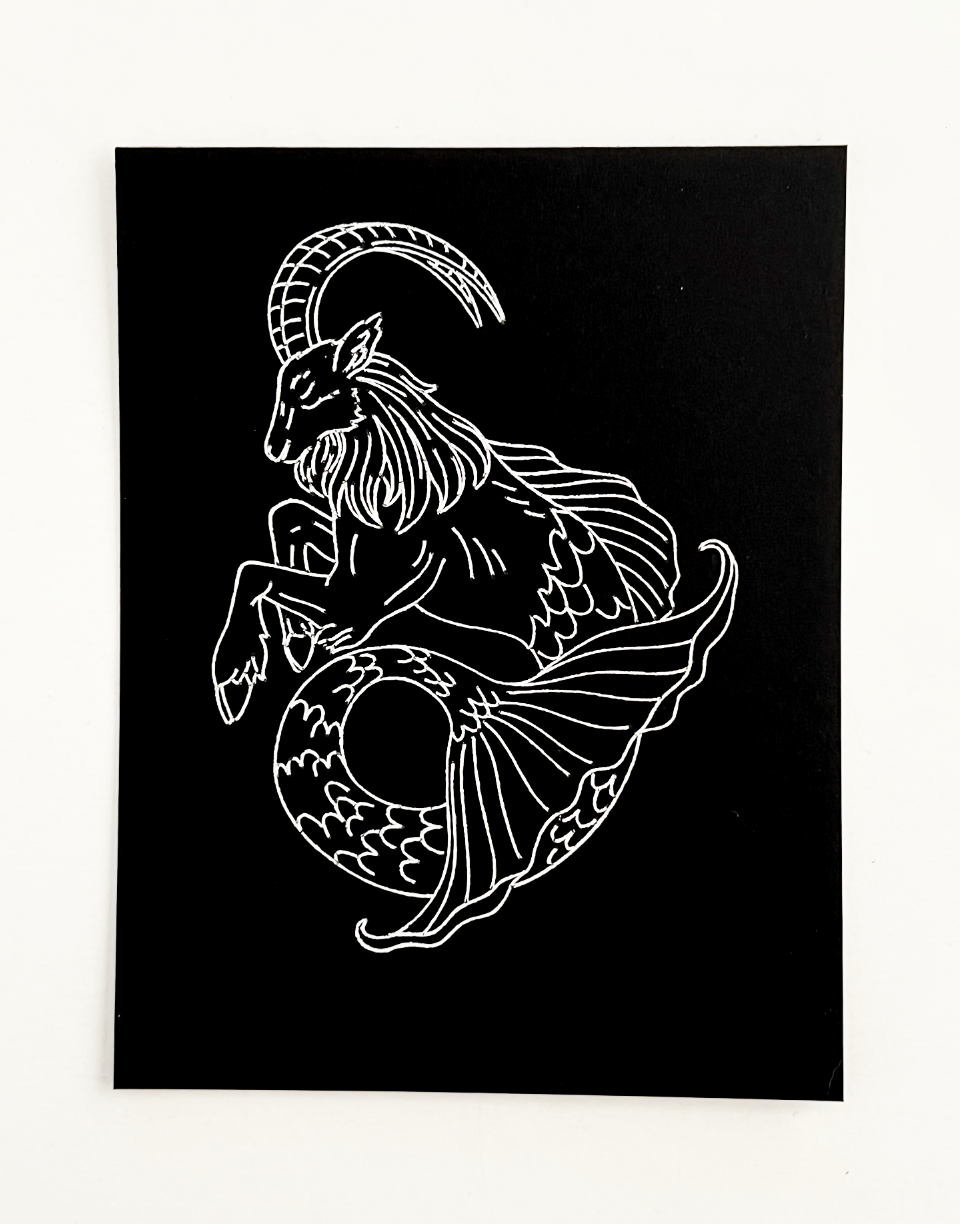
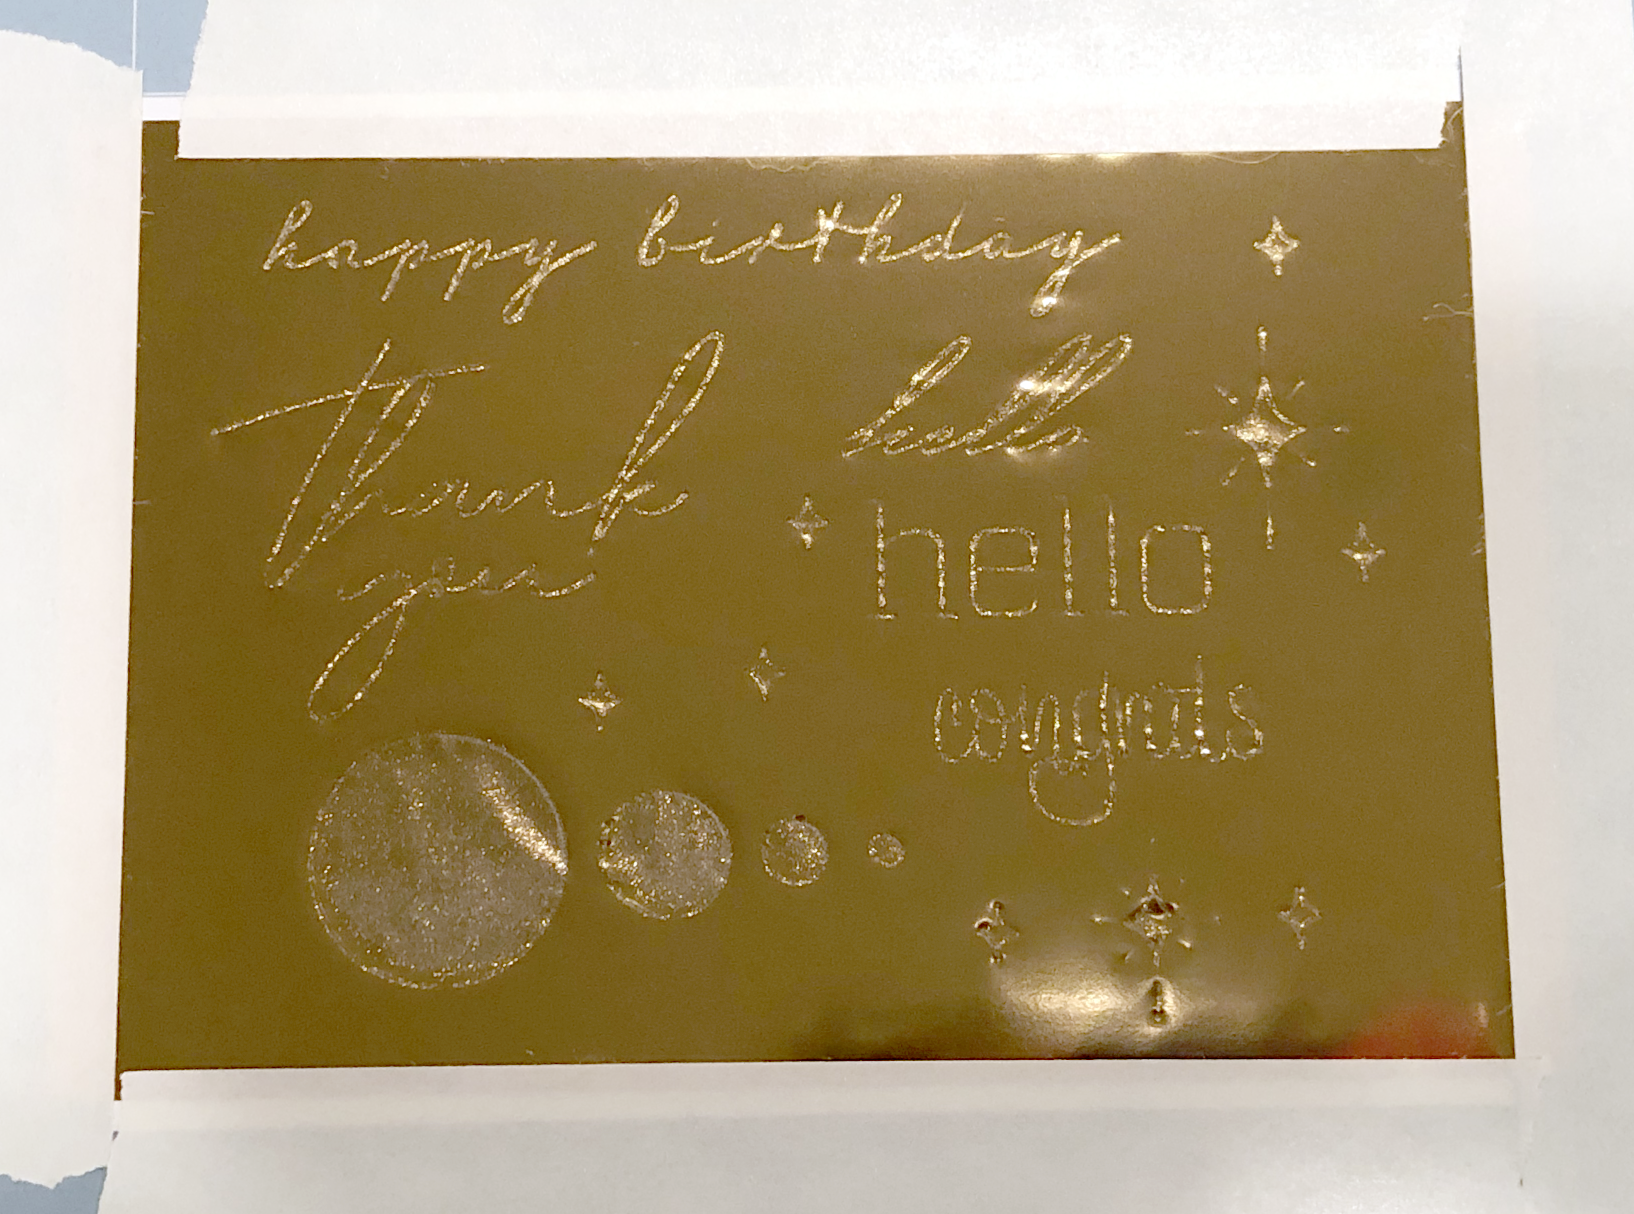
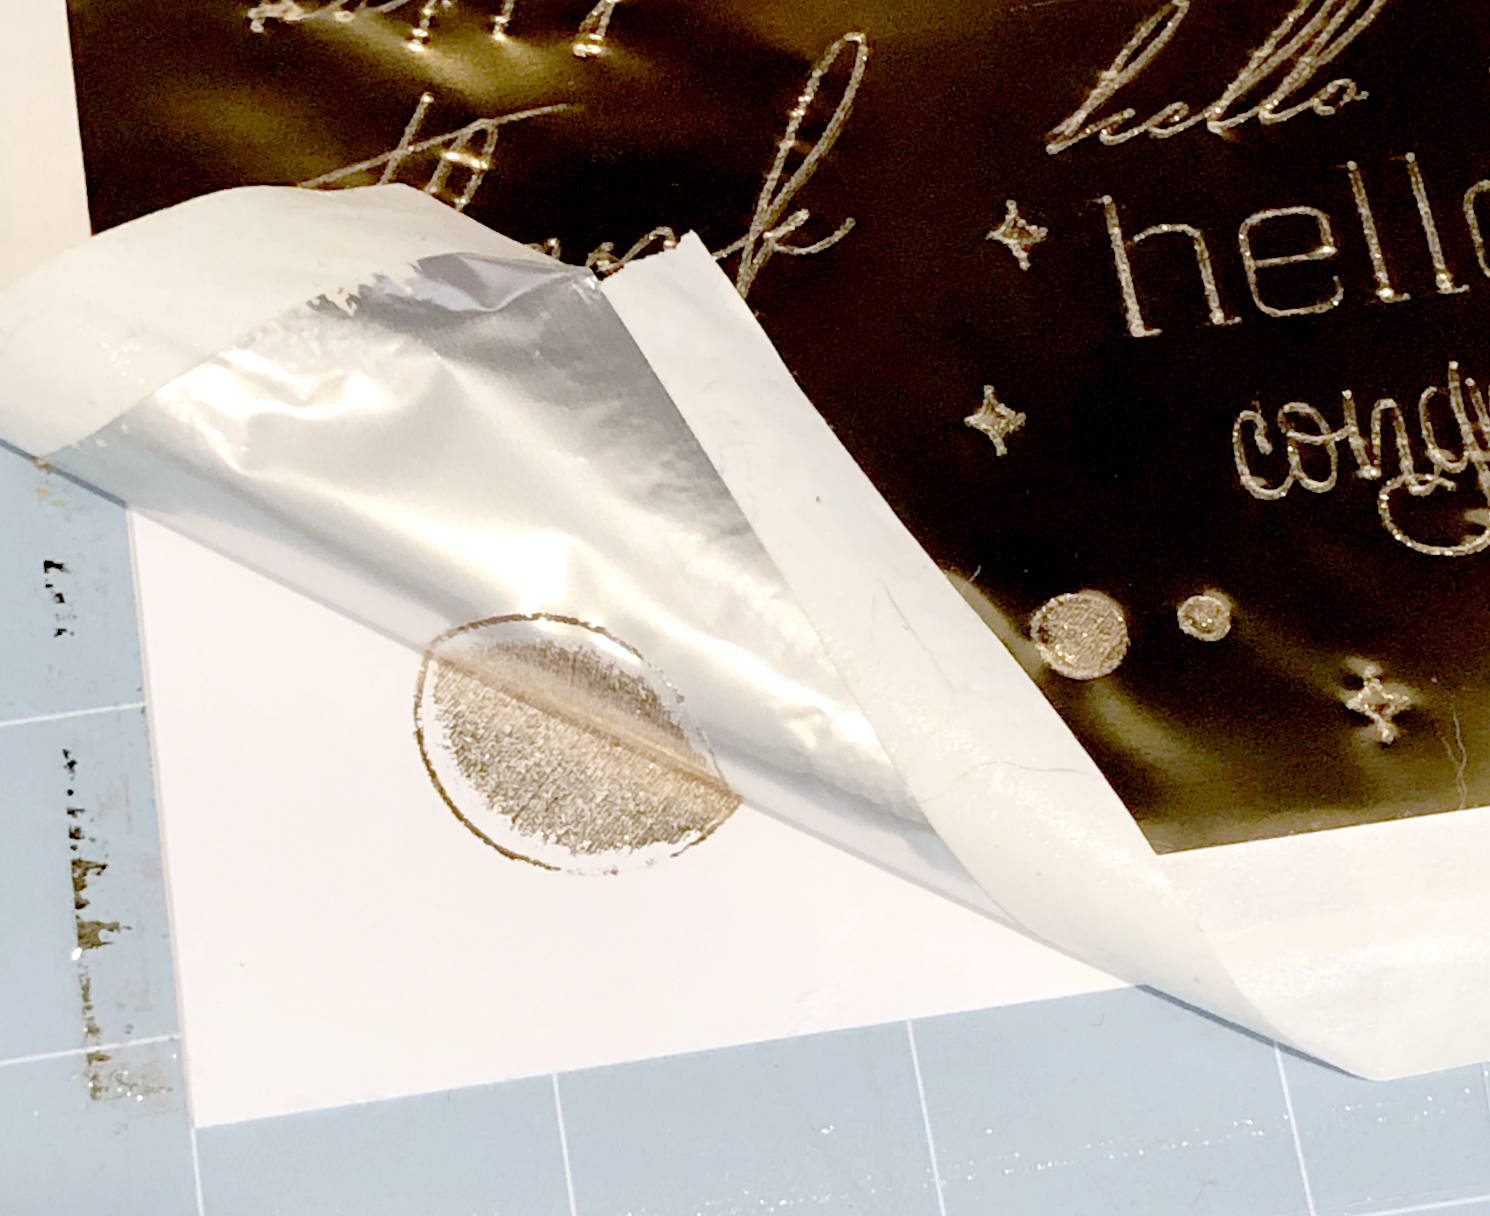
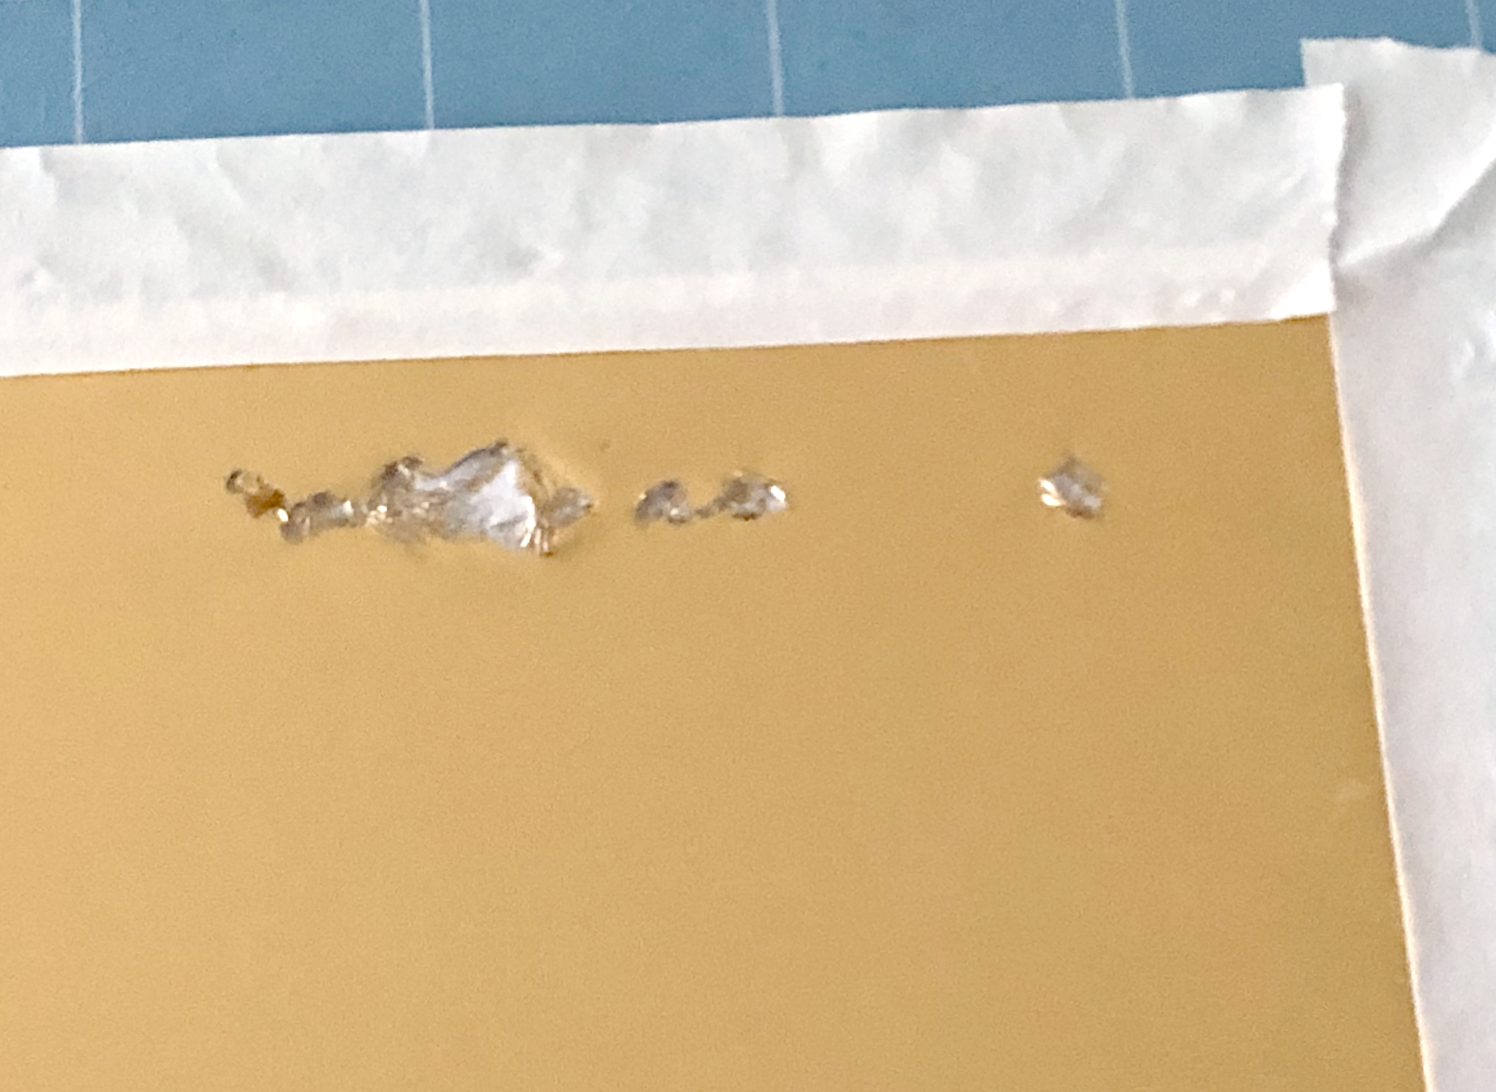
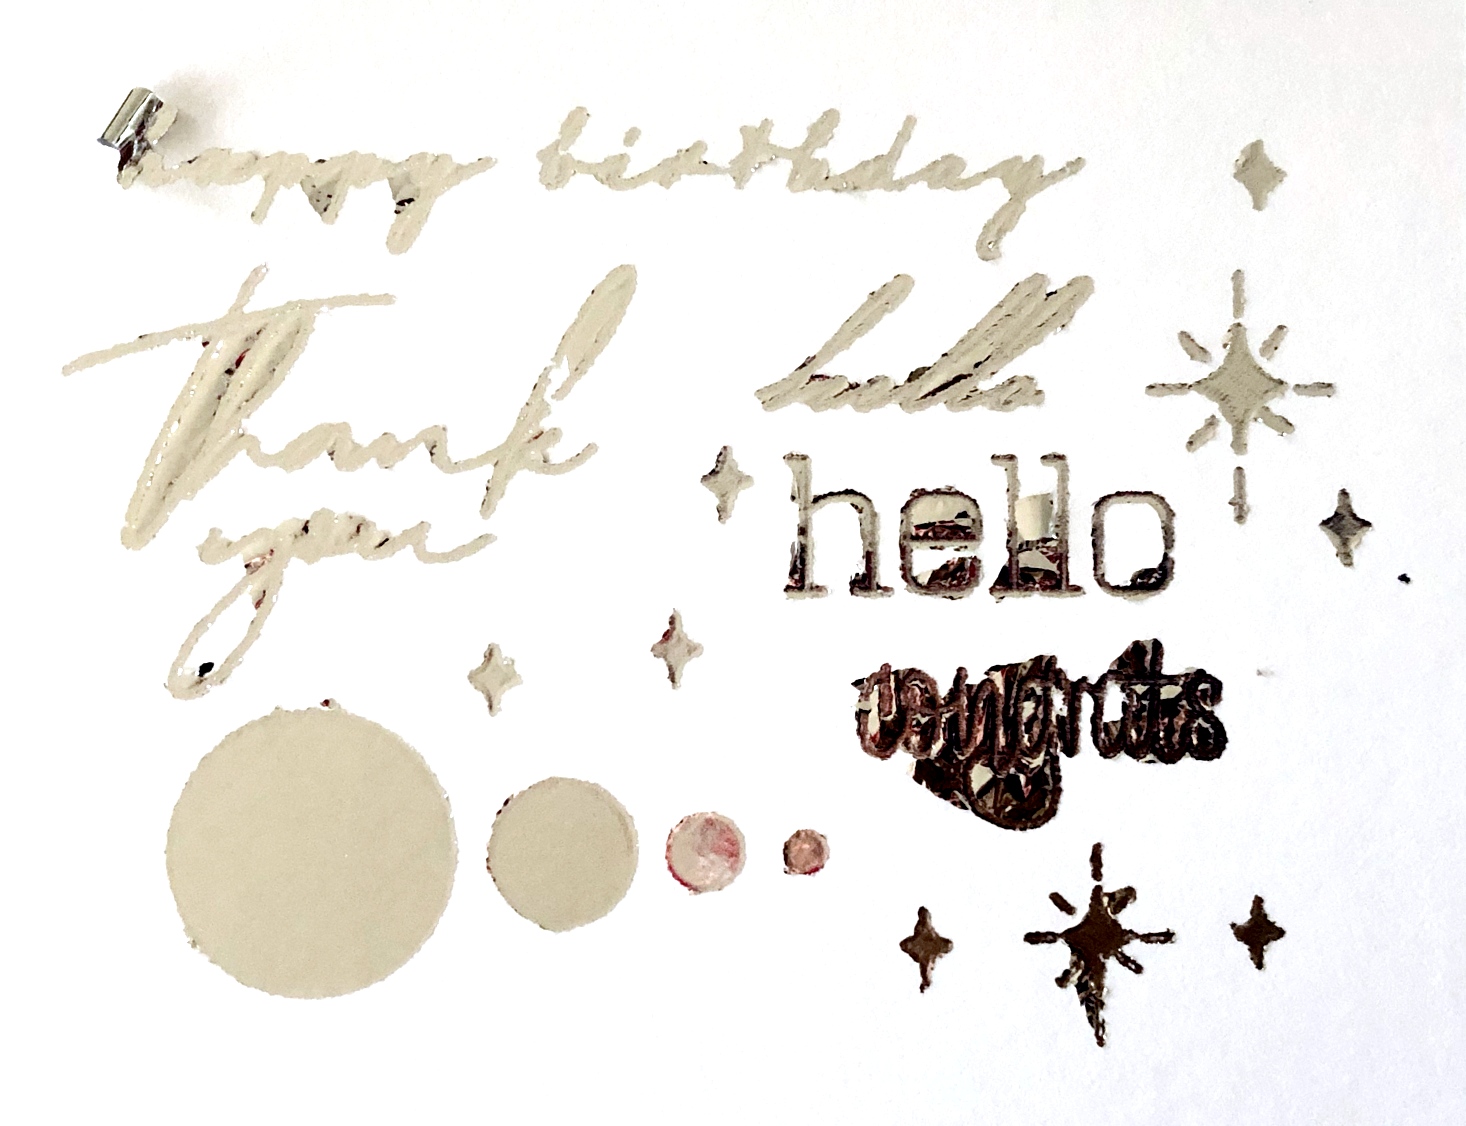
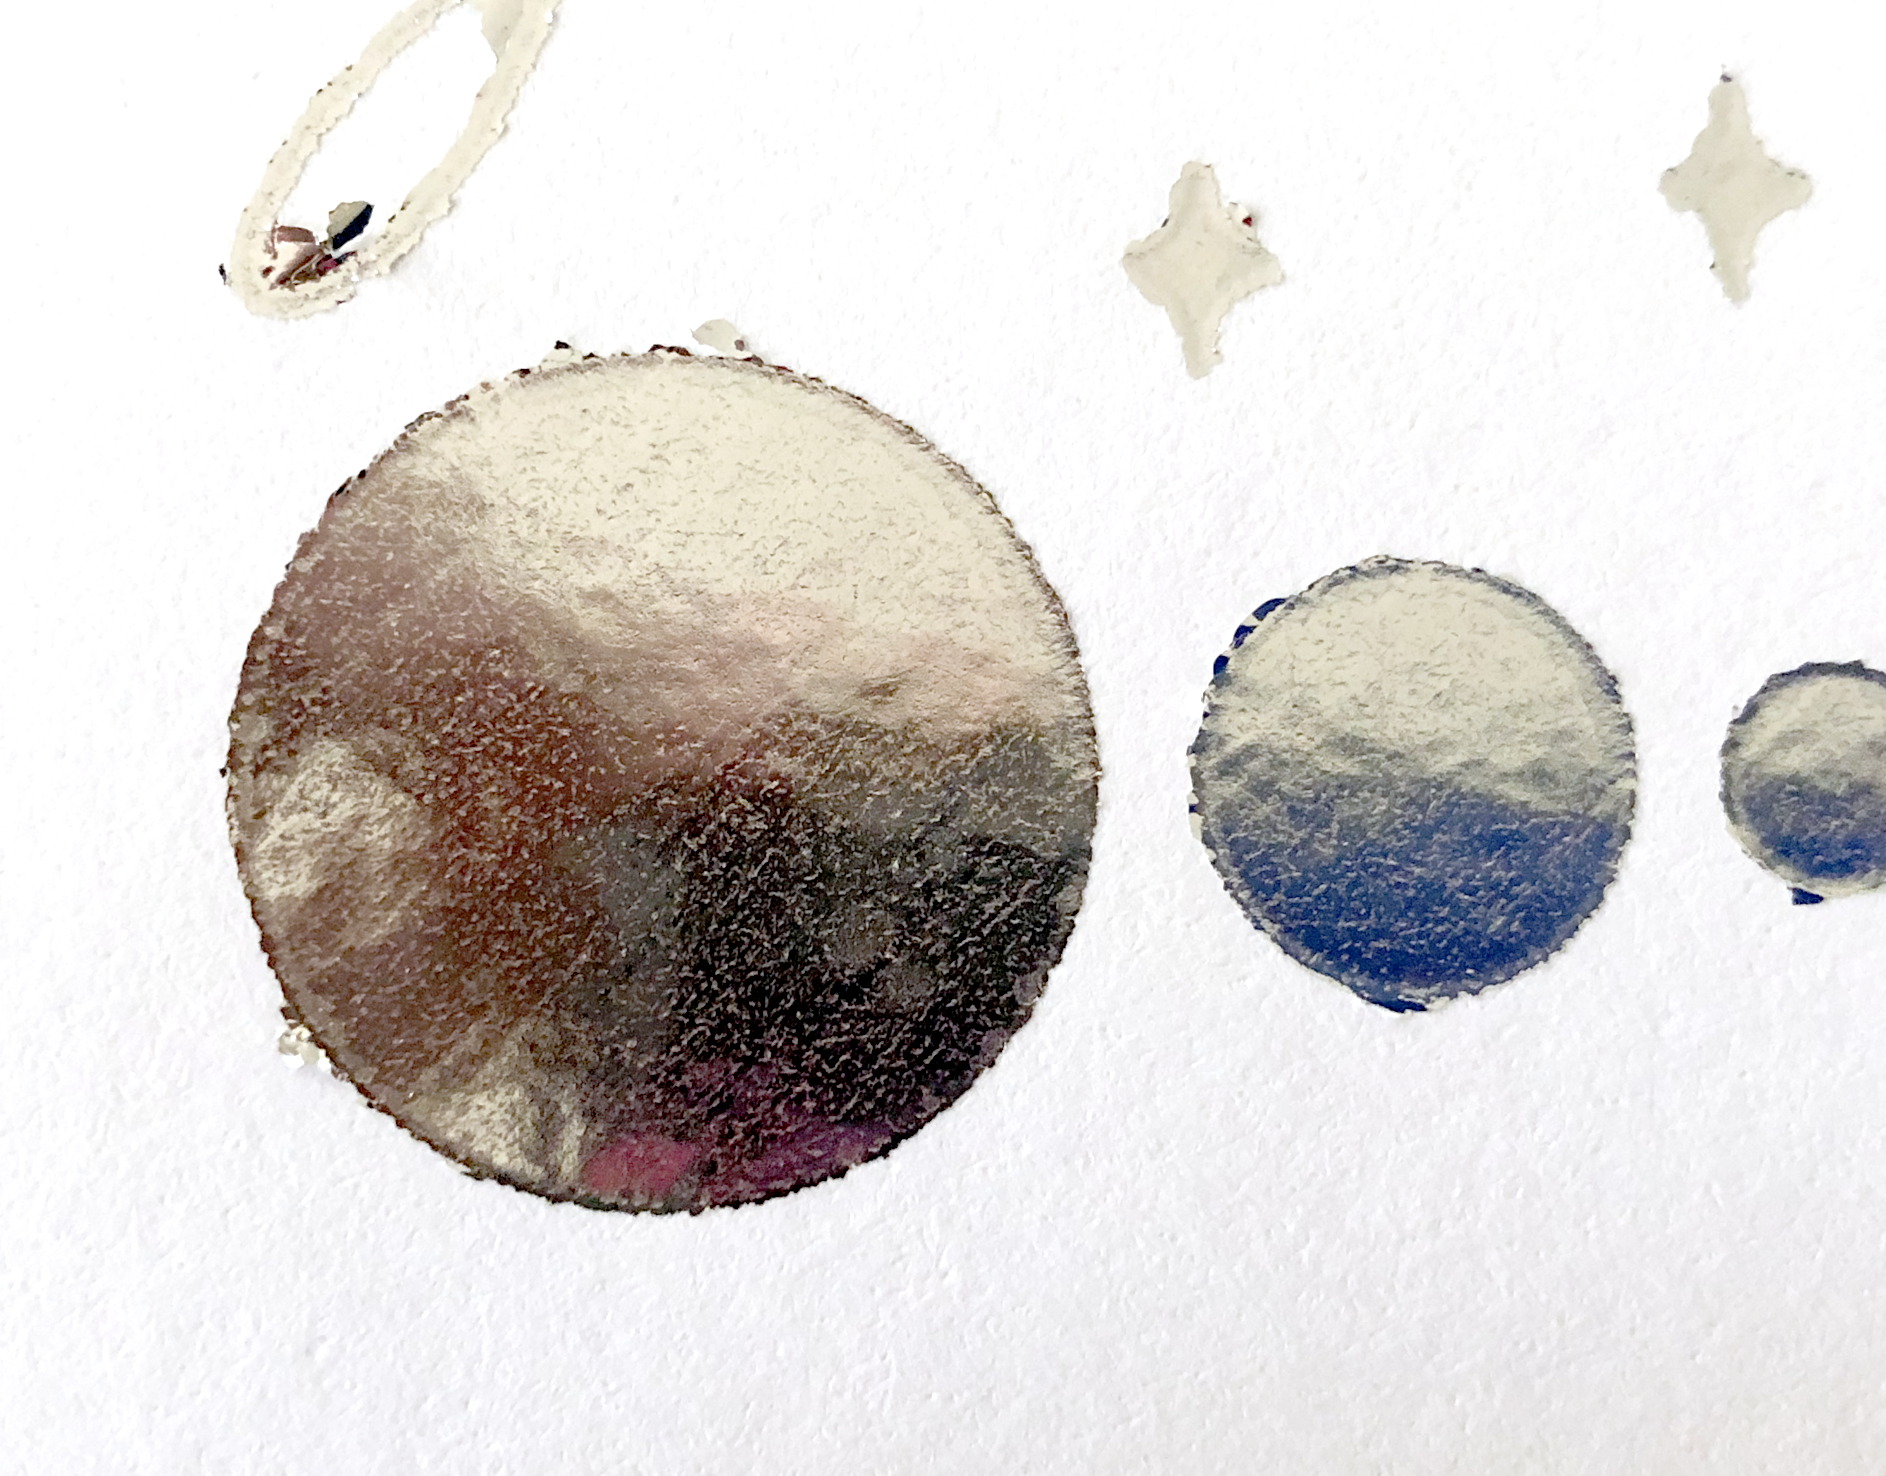
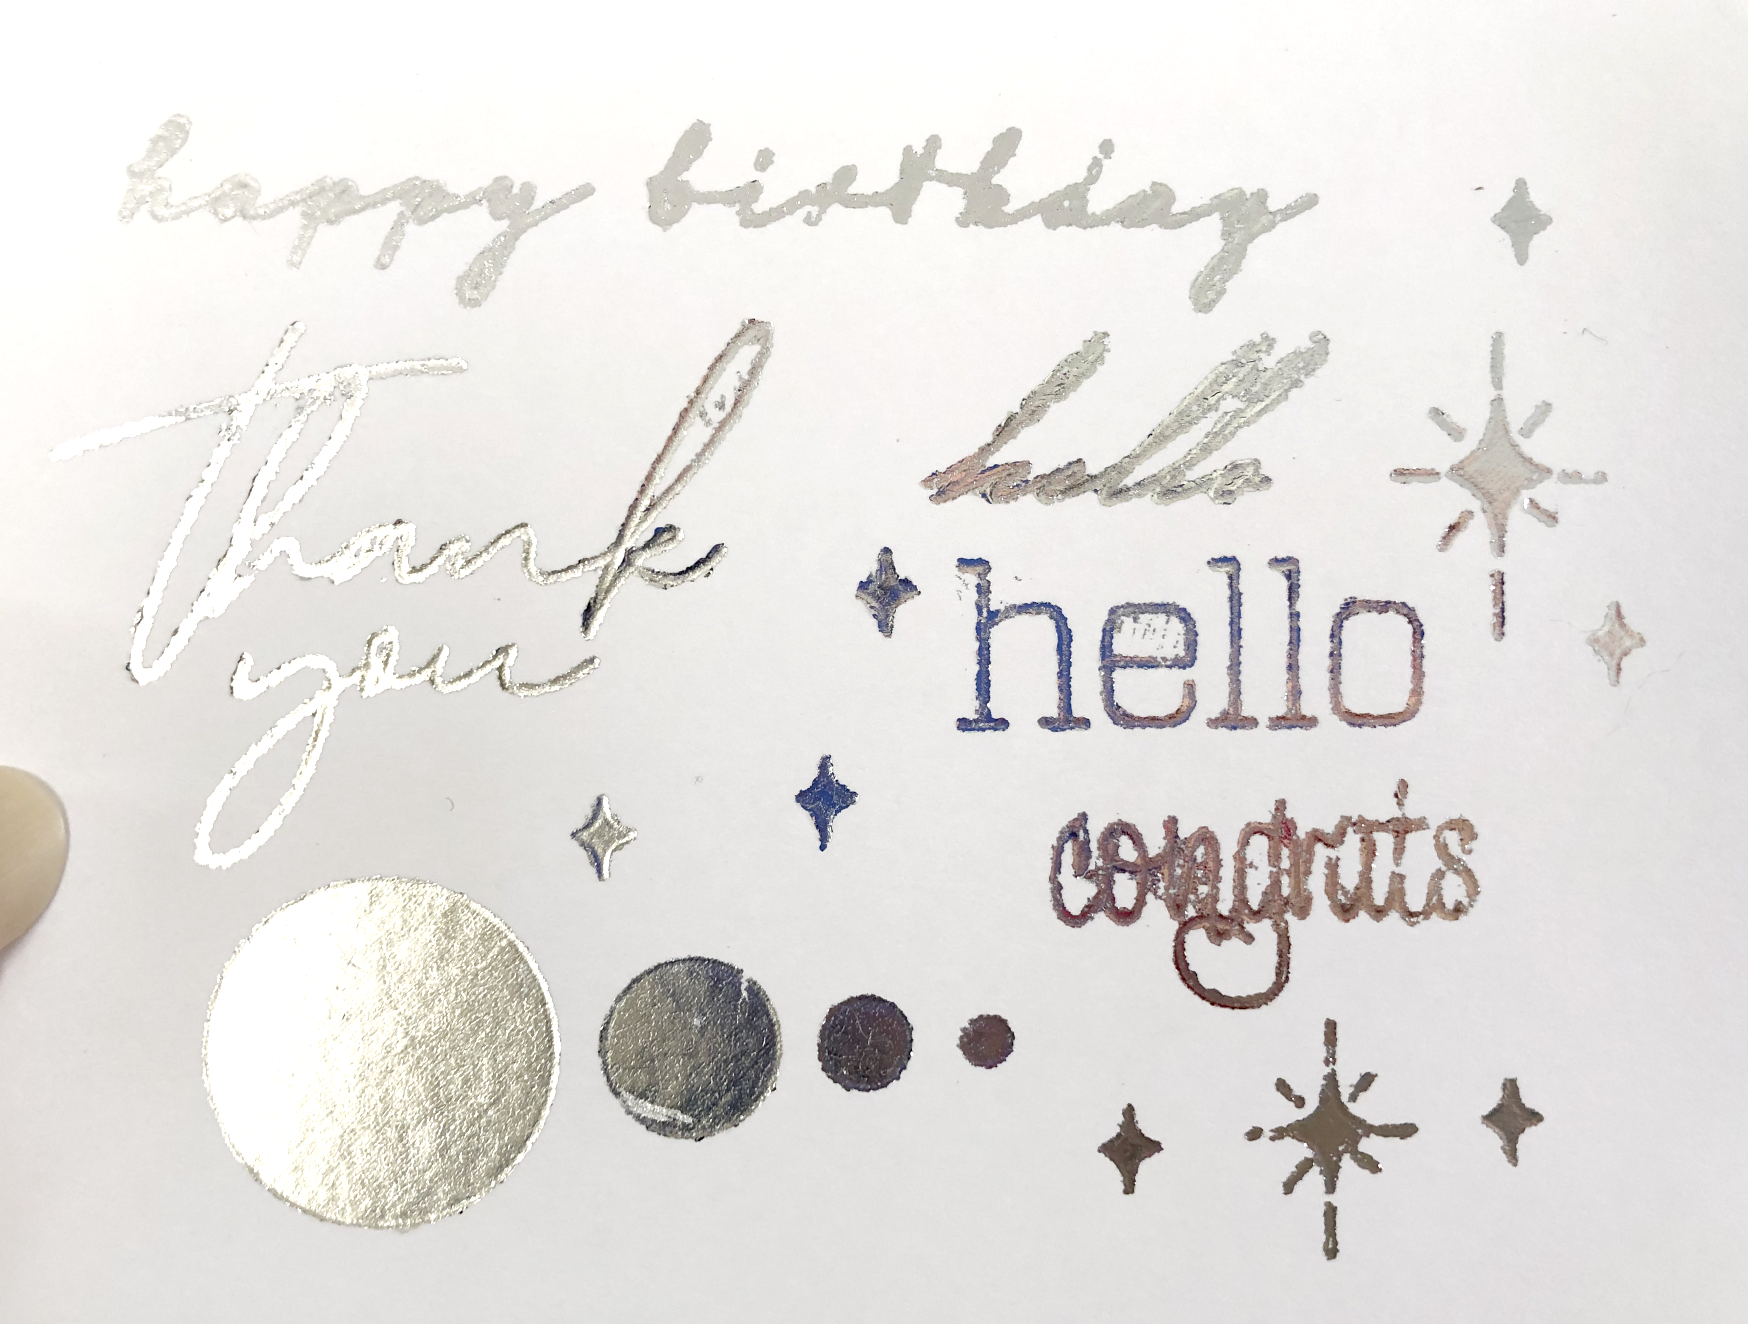
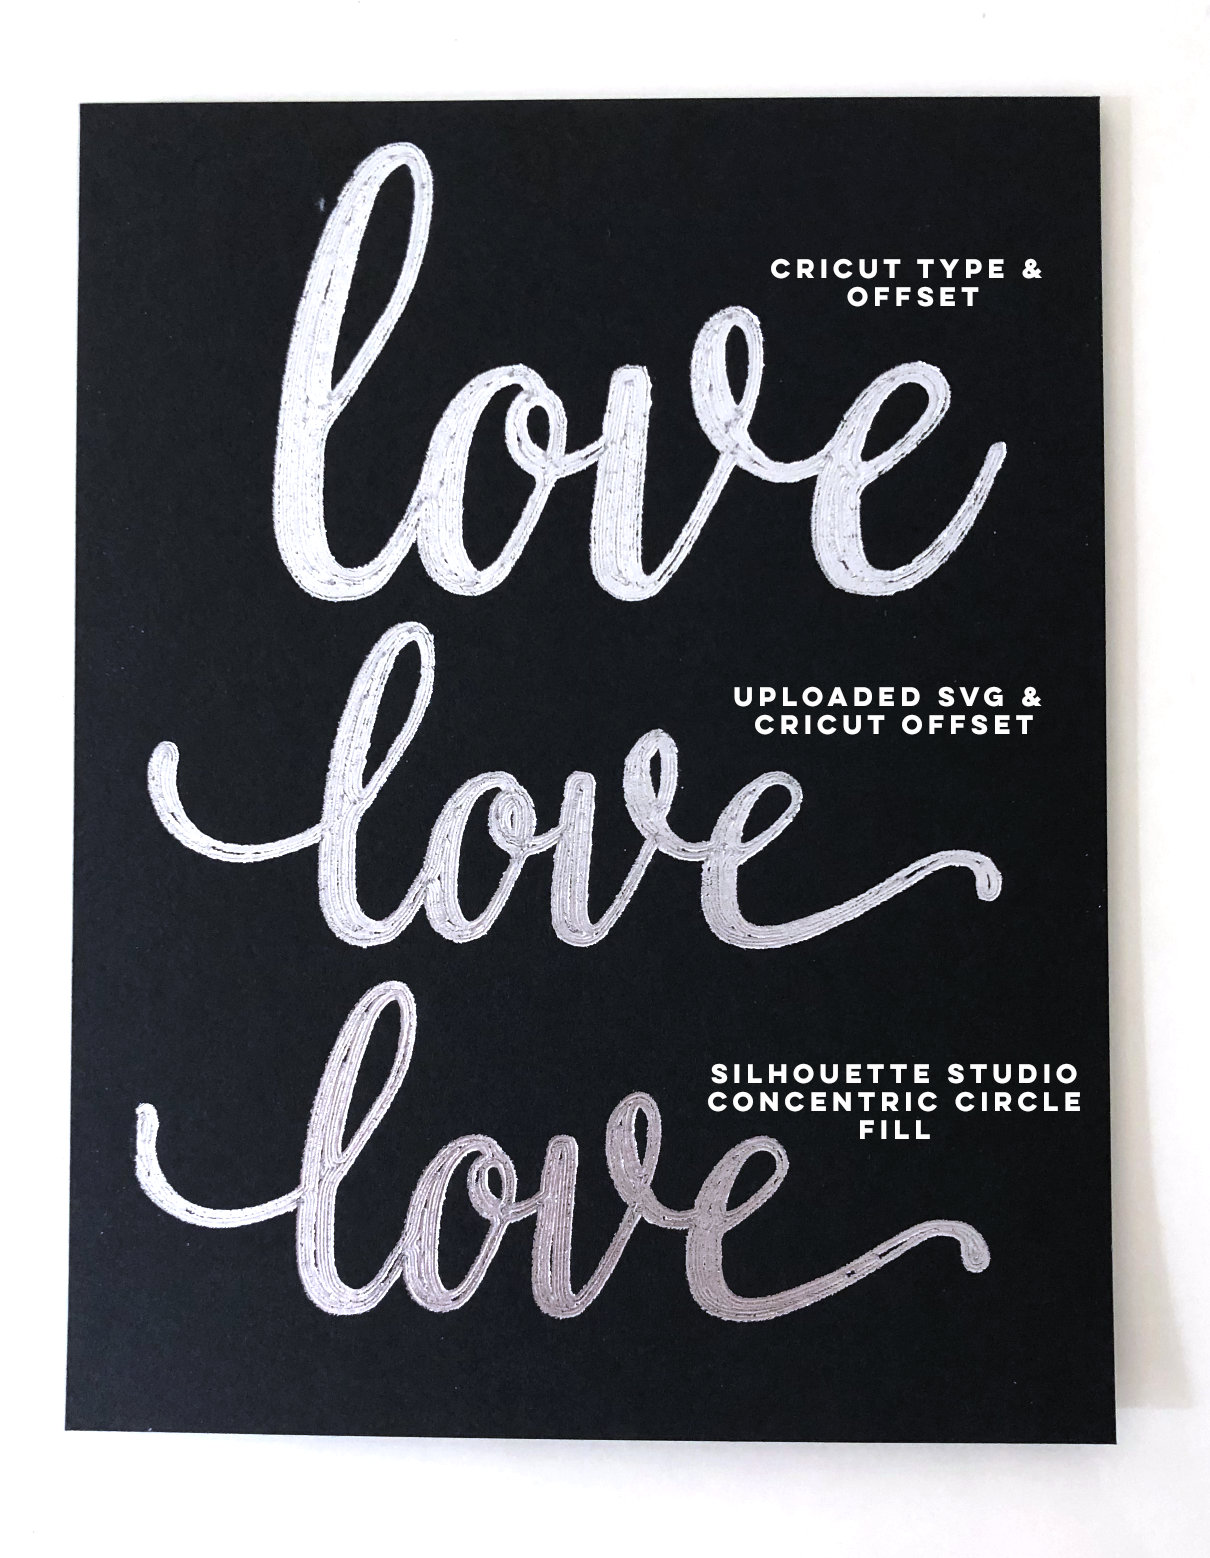
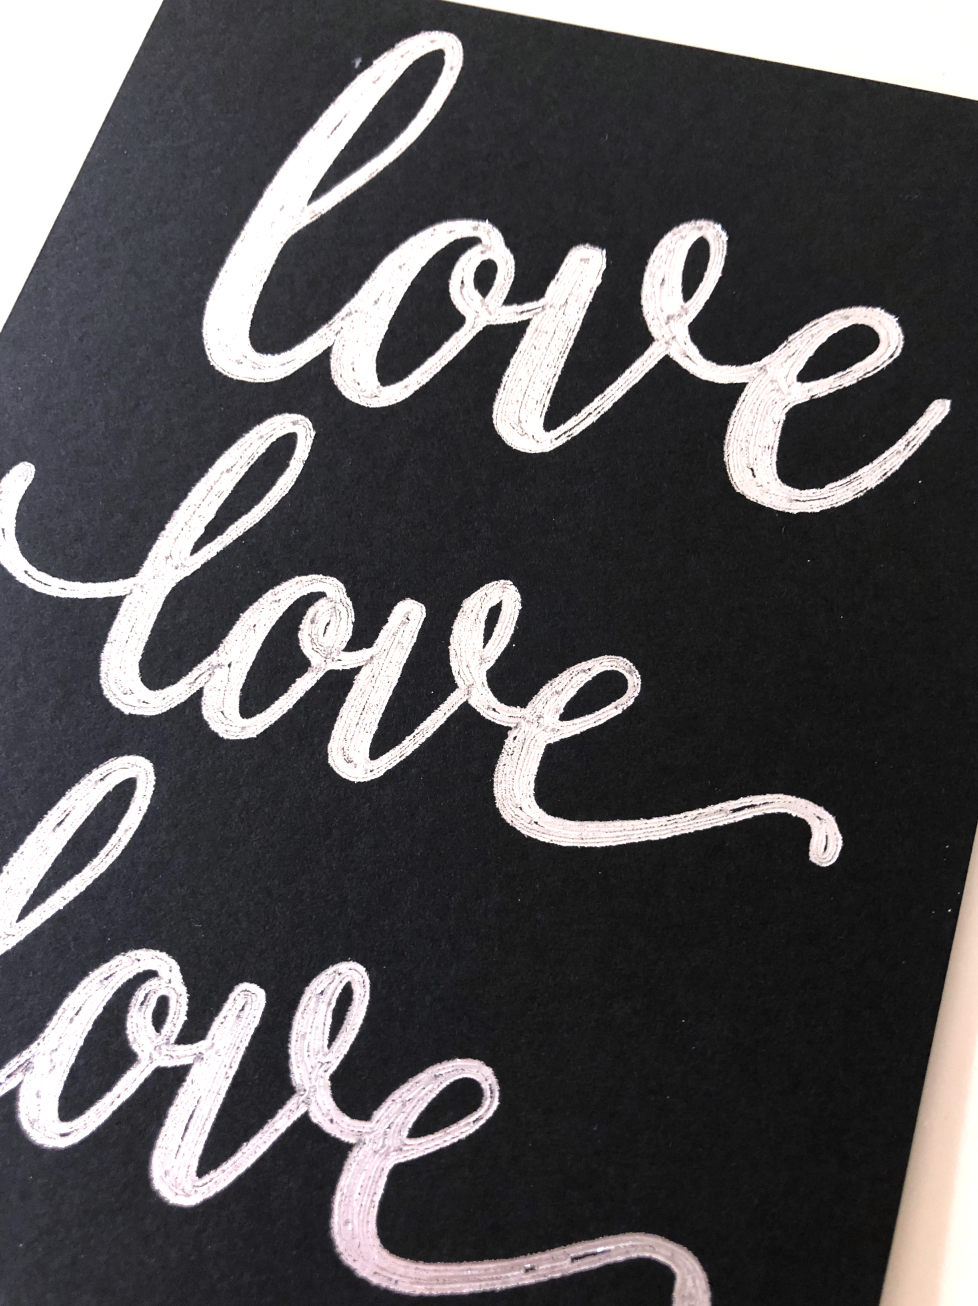
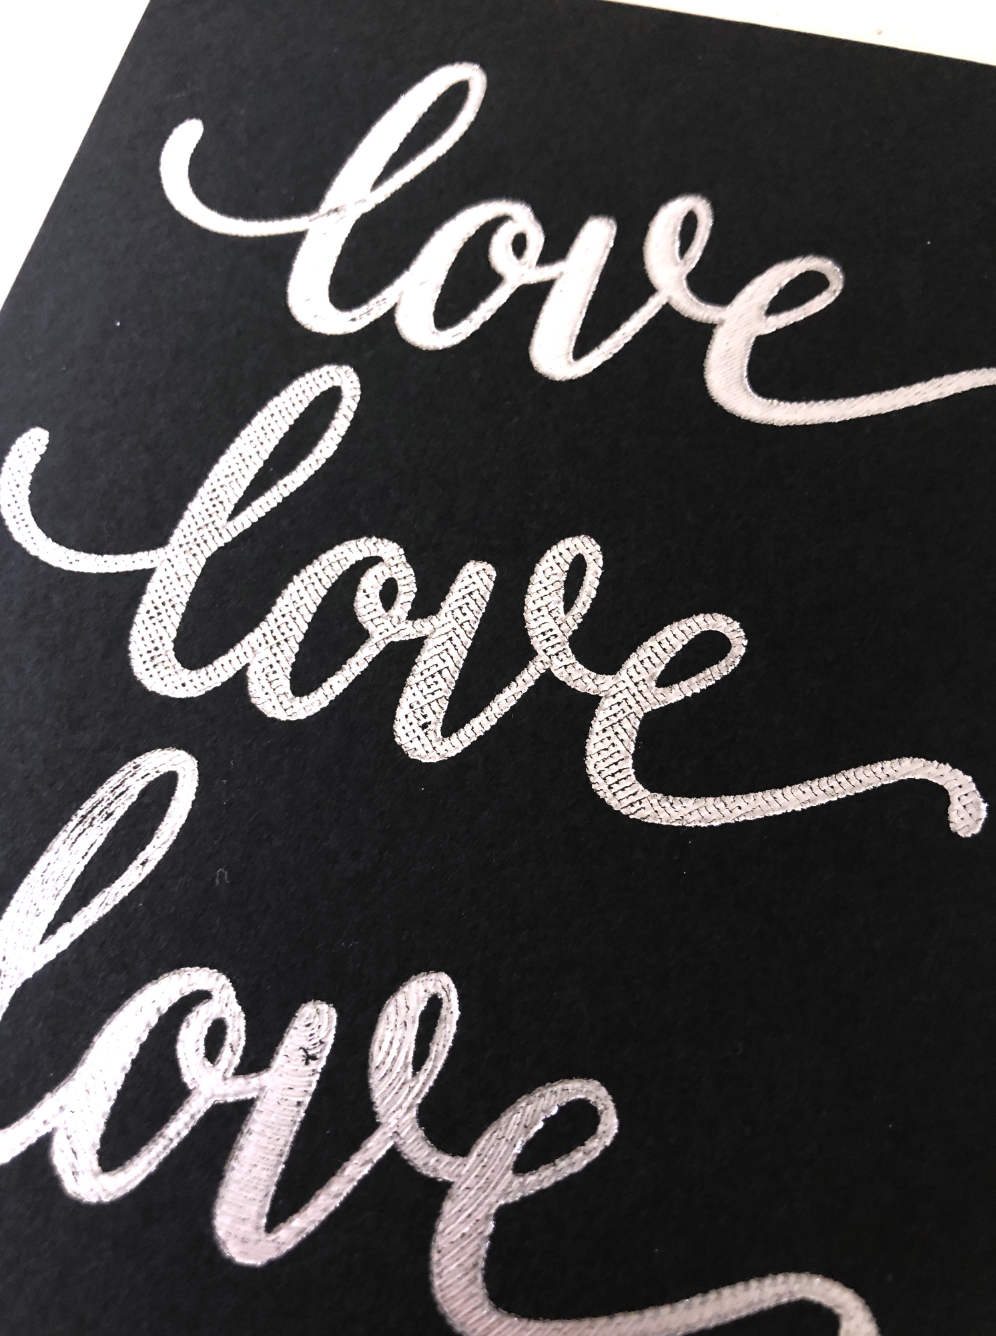
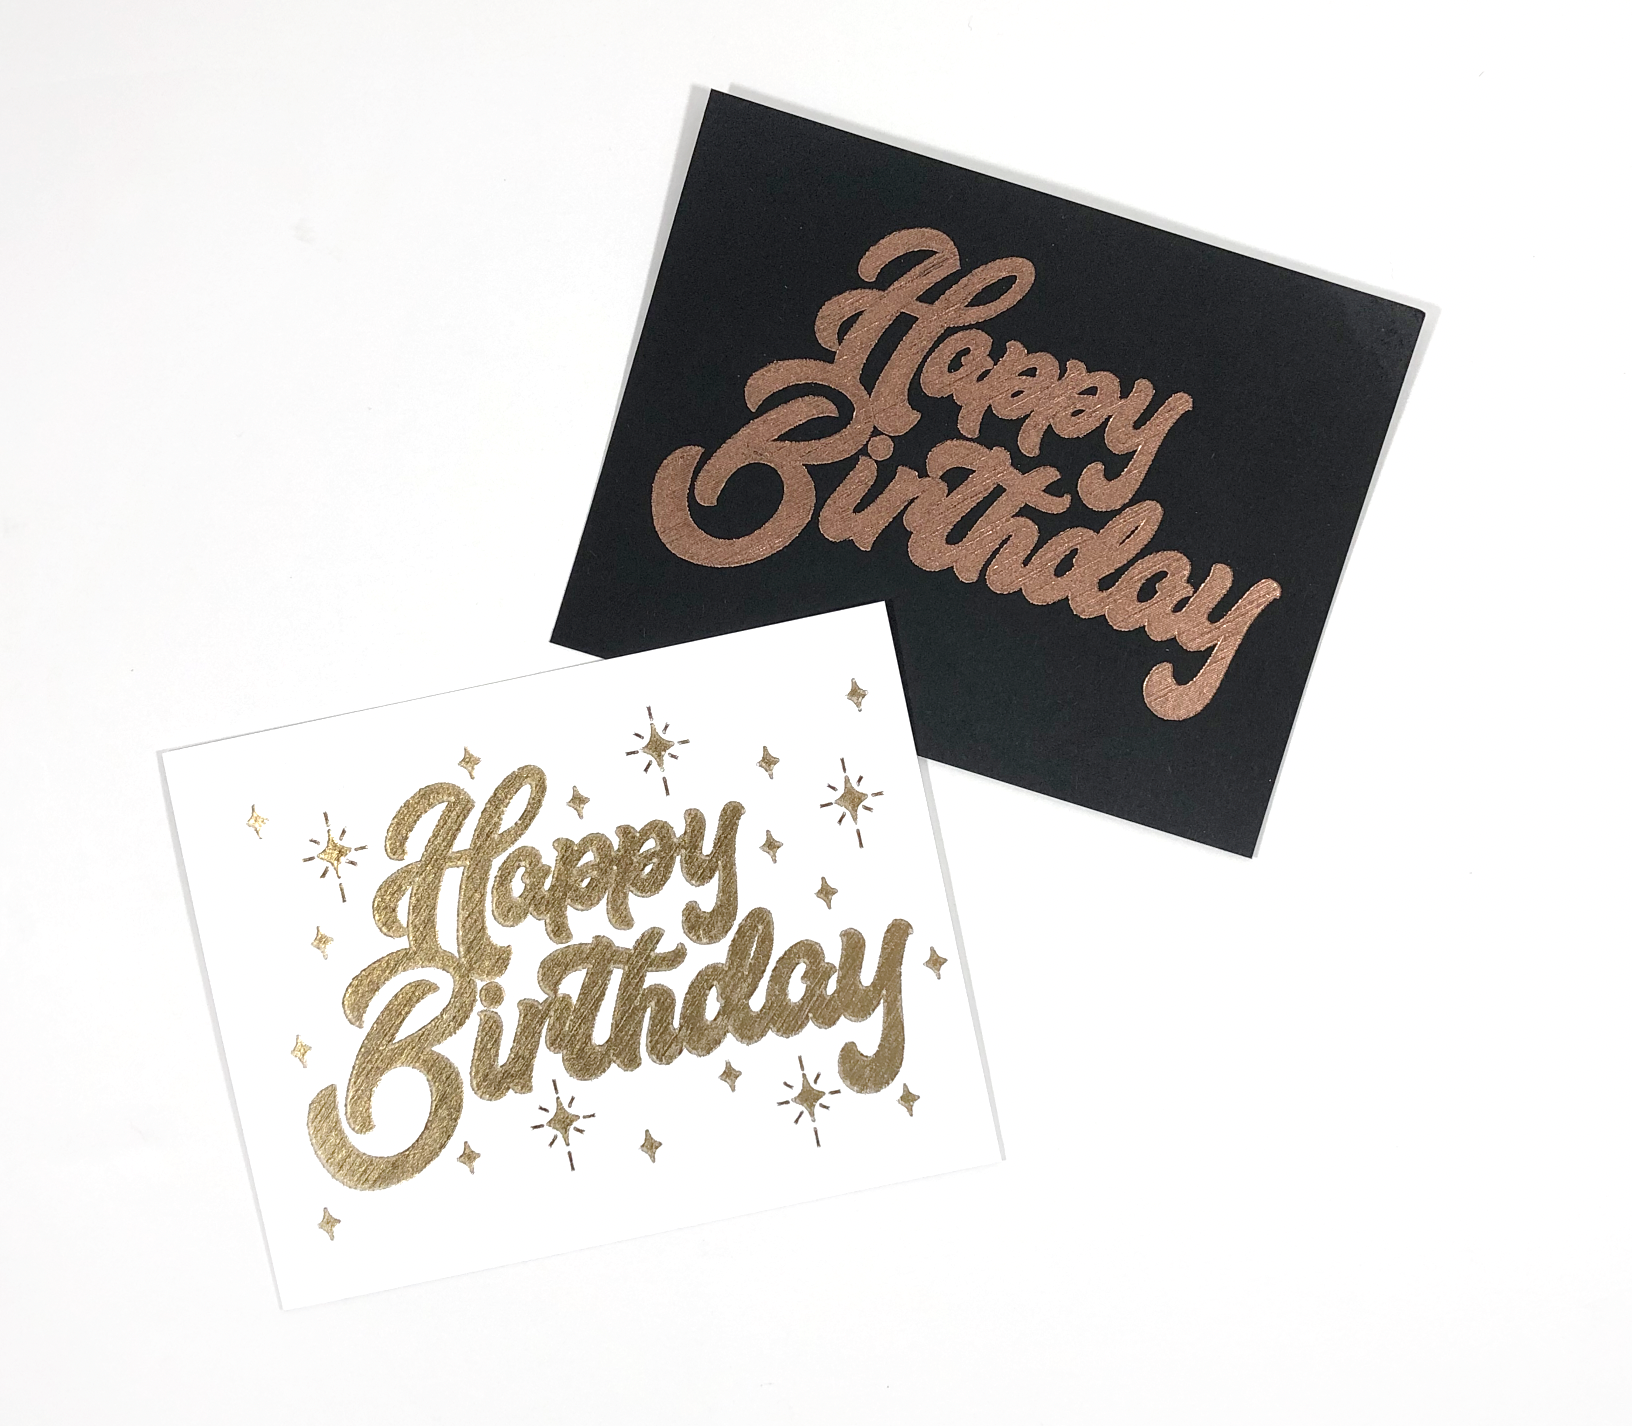
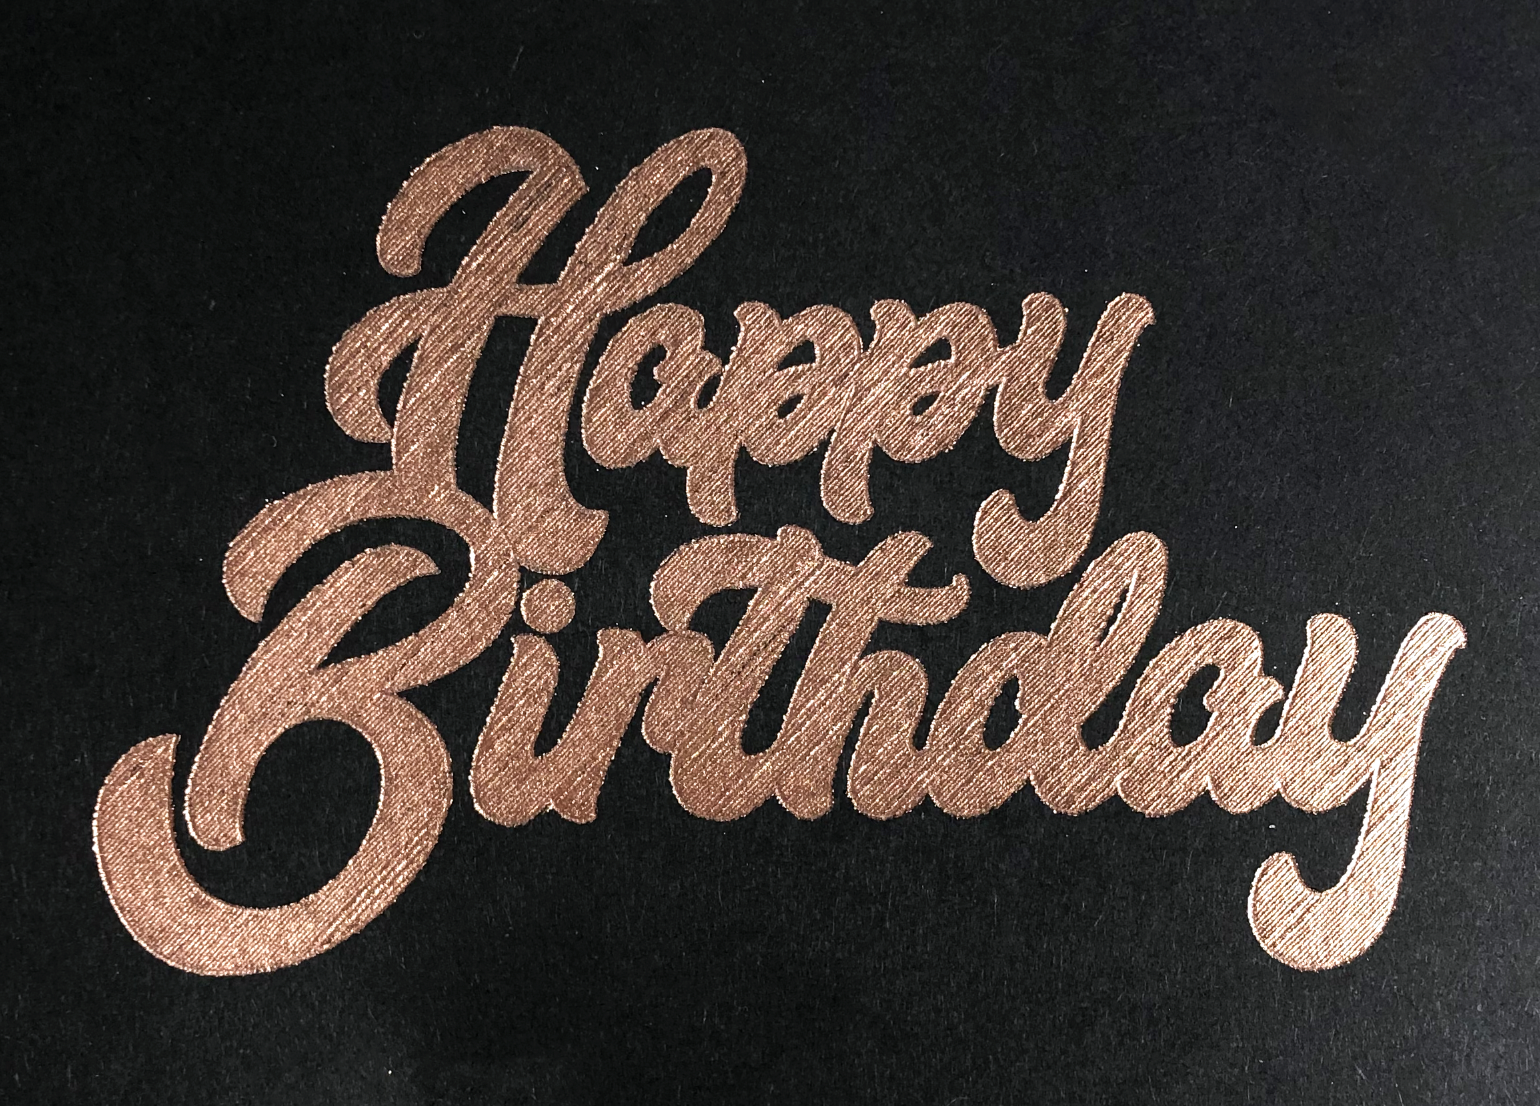
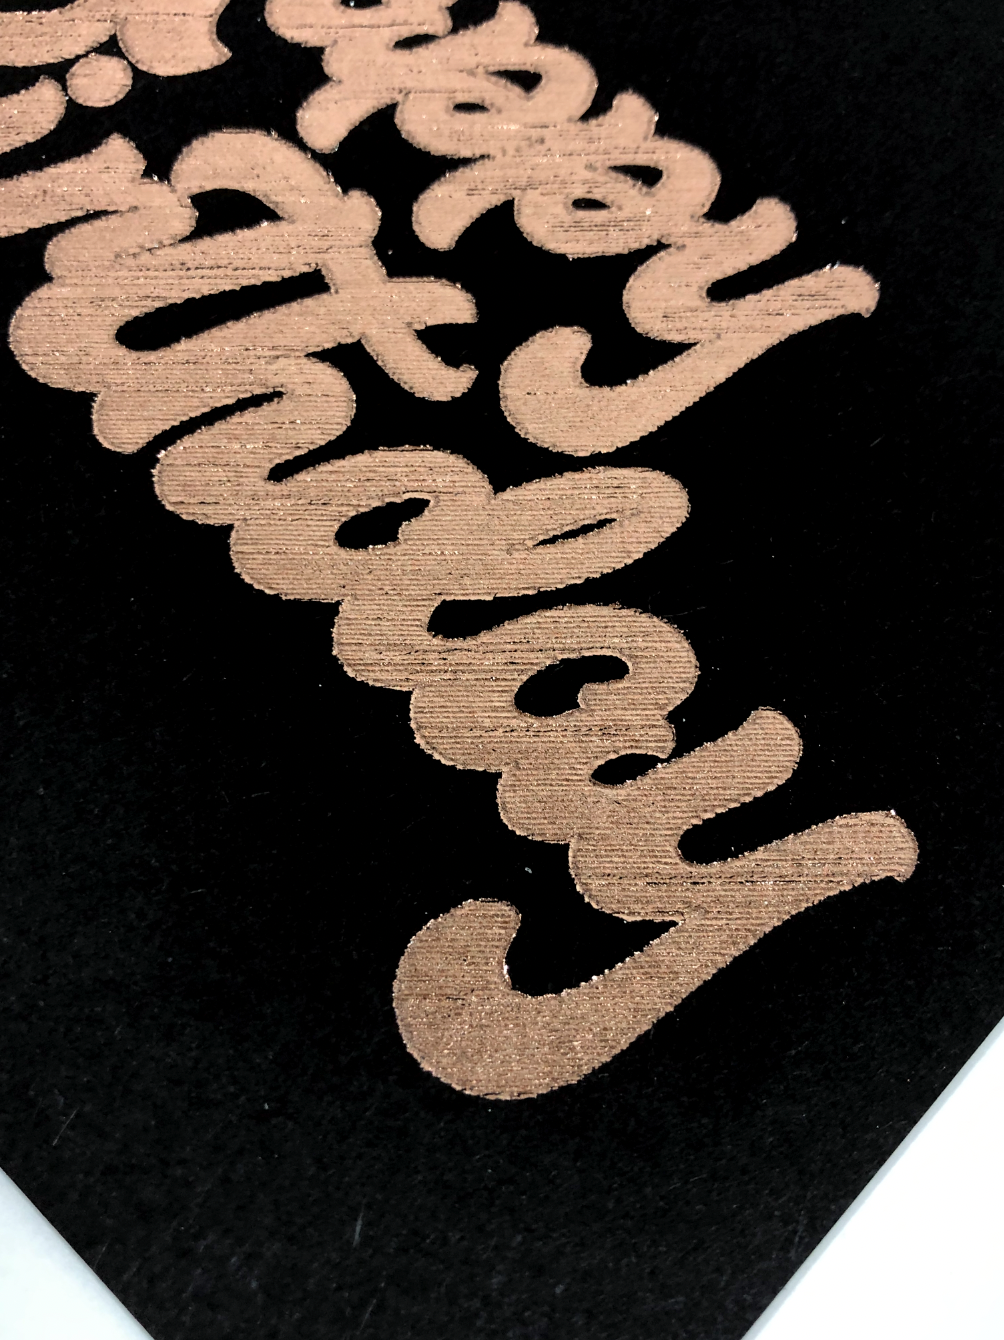
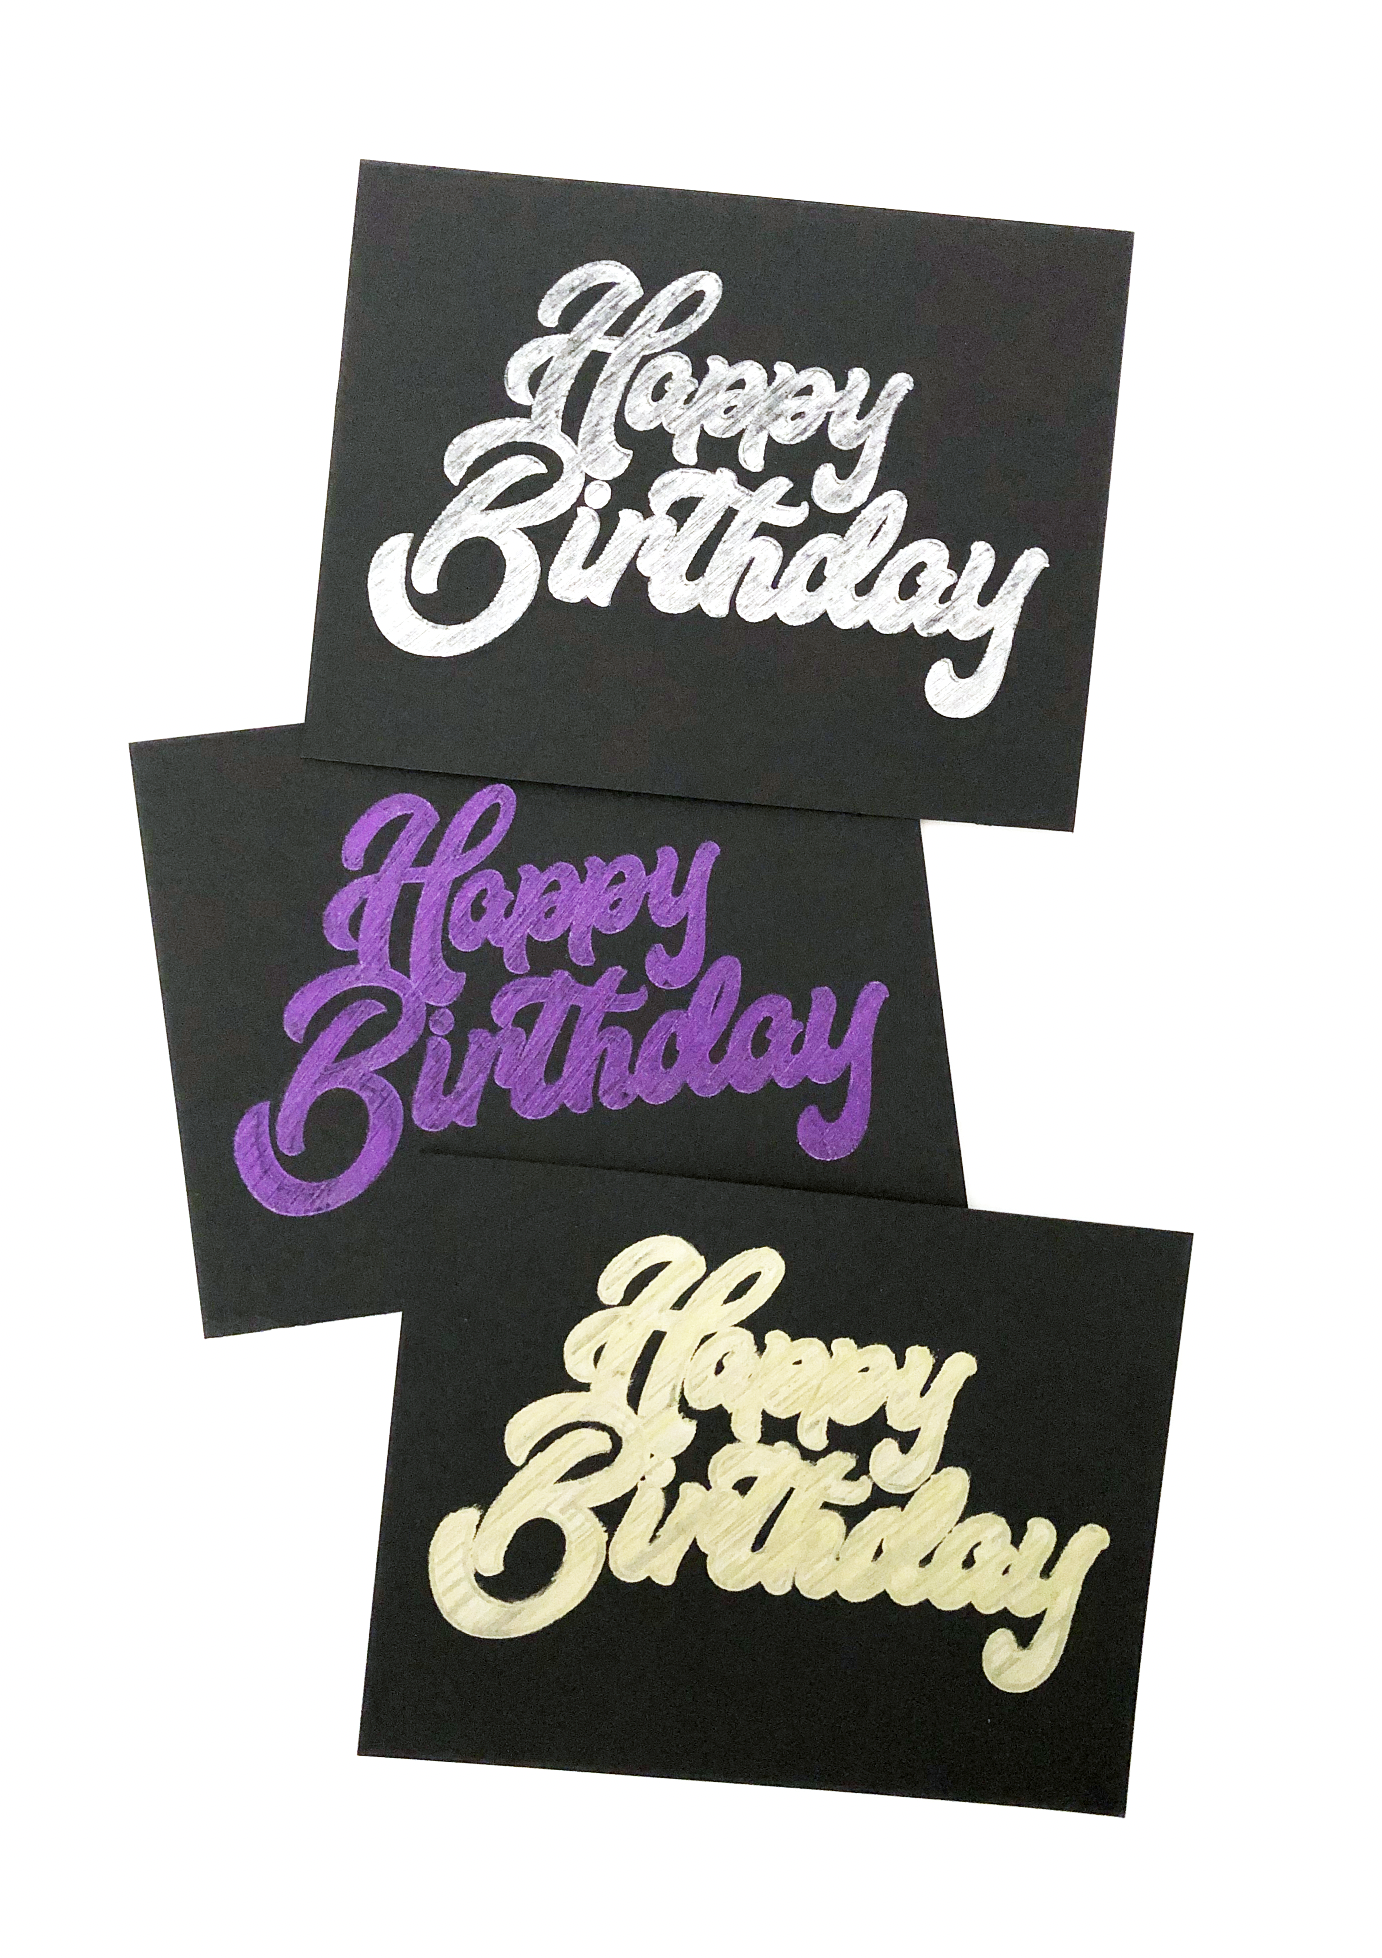
It looks like all of my lines are there, now I’m going to try out my design with my WRMK foil quill. I can use my Foil Quill with my iPad because my machine treats it like a pen. I cannot use my Cricut Foil Transfer tool with my iPad, I don’t know why Cricut hasn’t figured that one out yet.

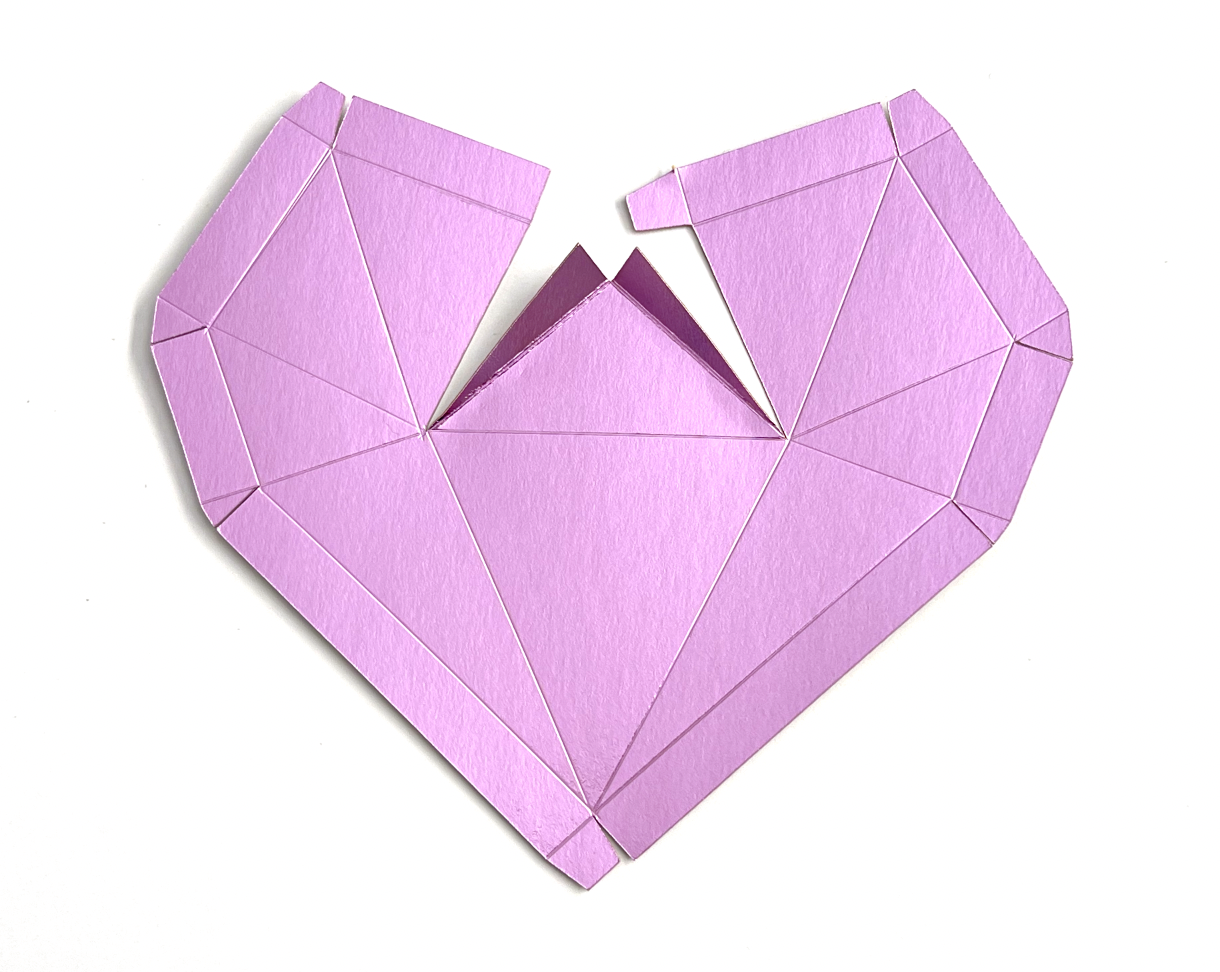
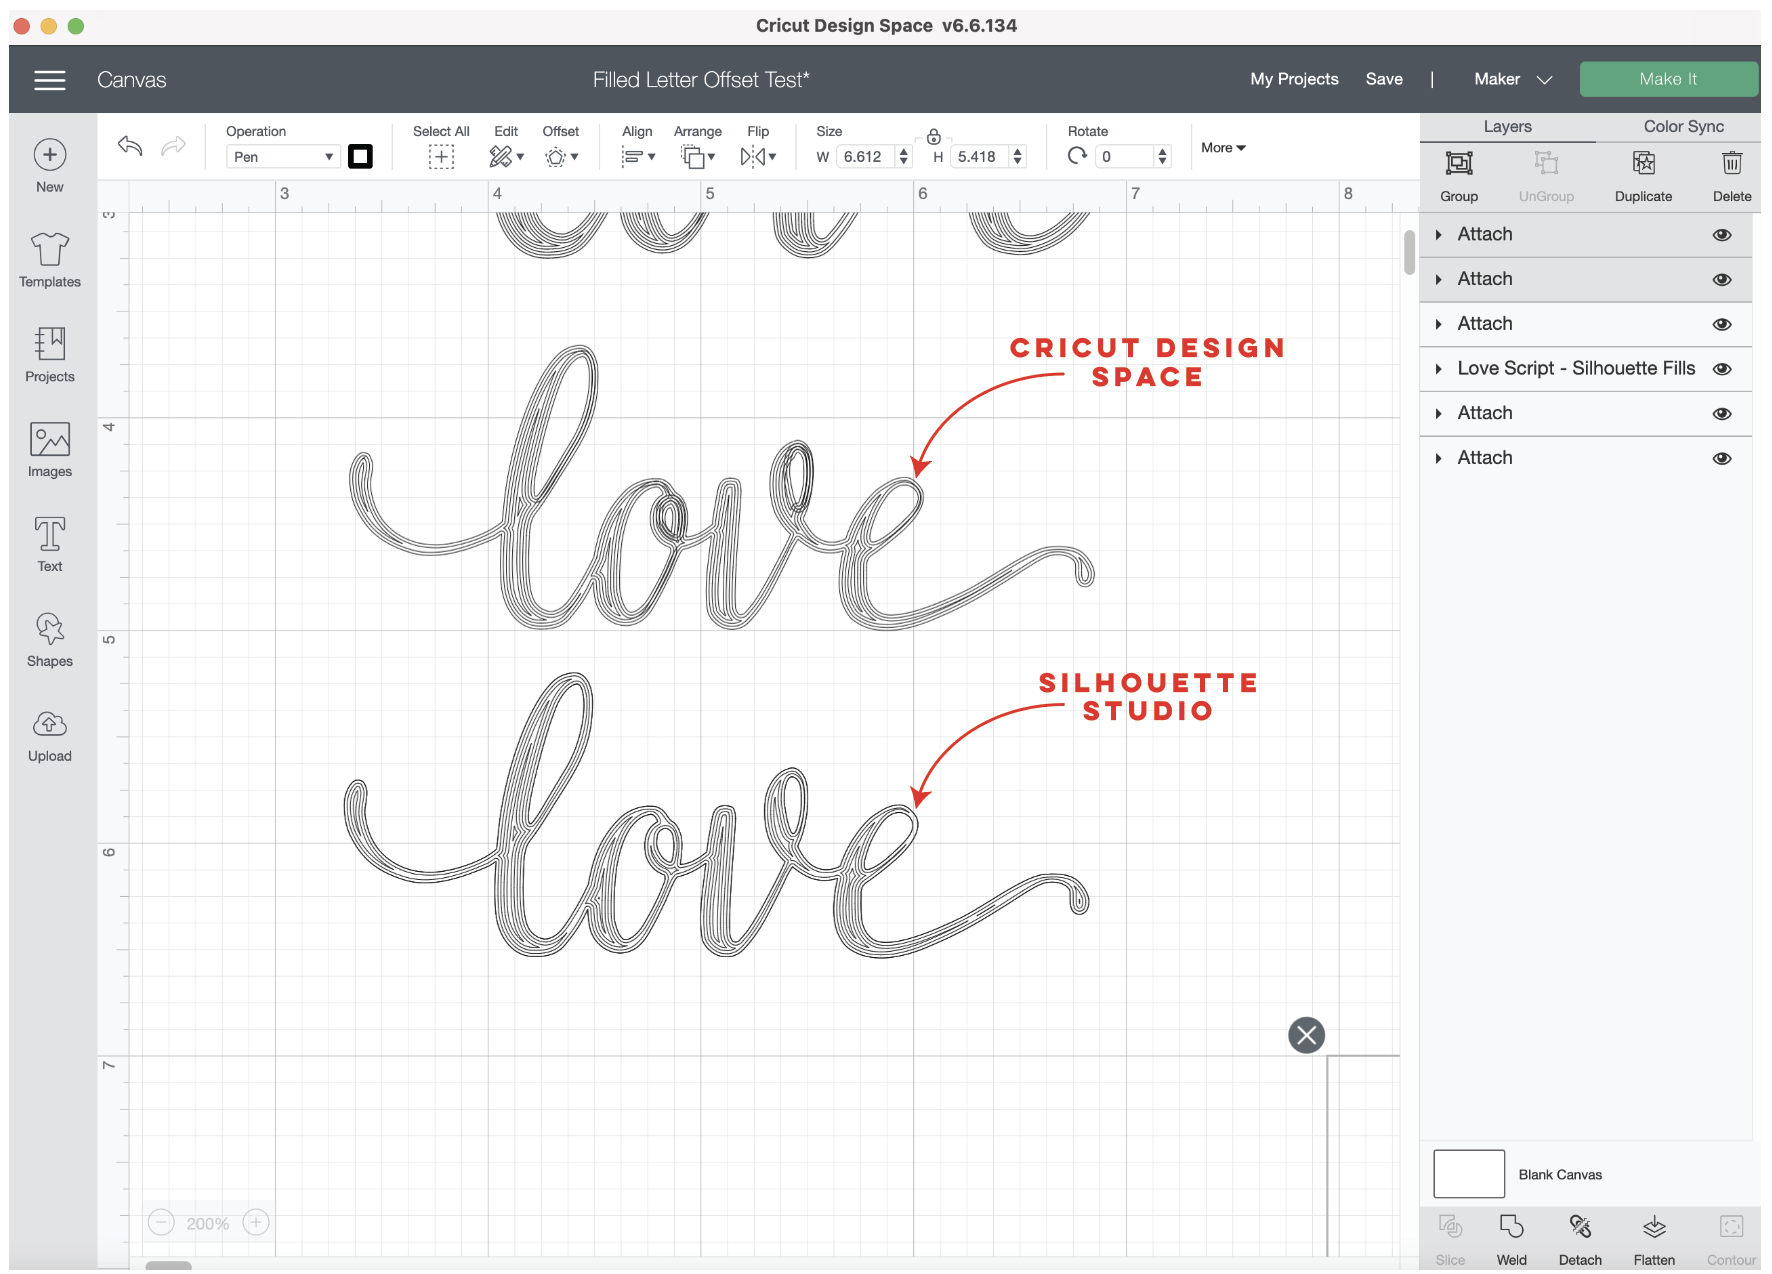
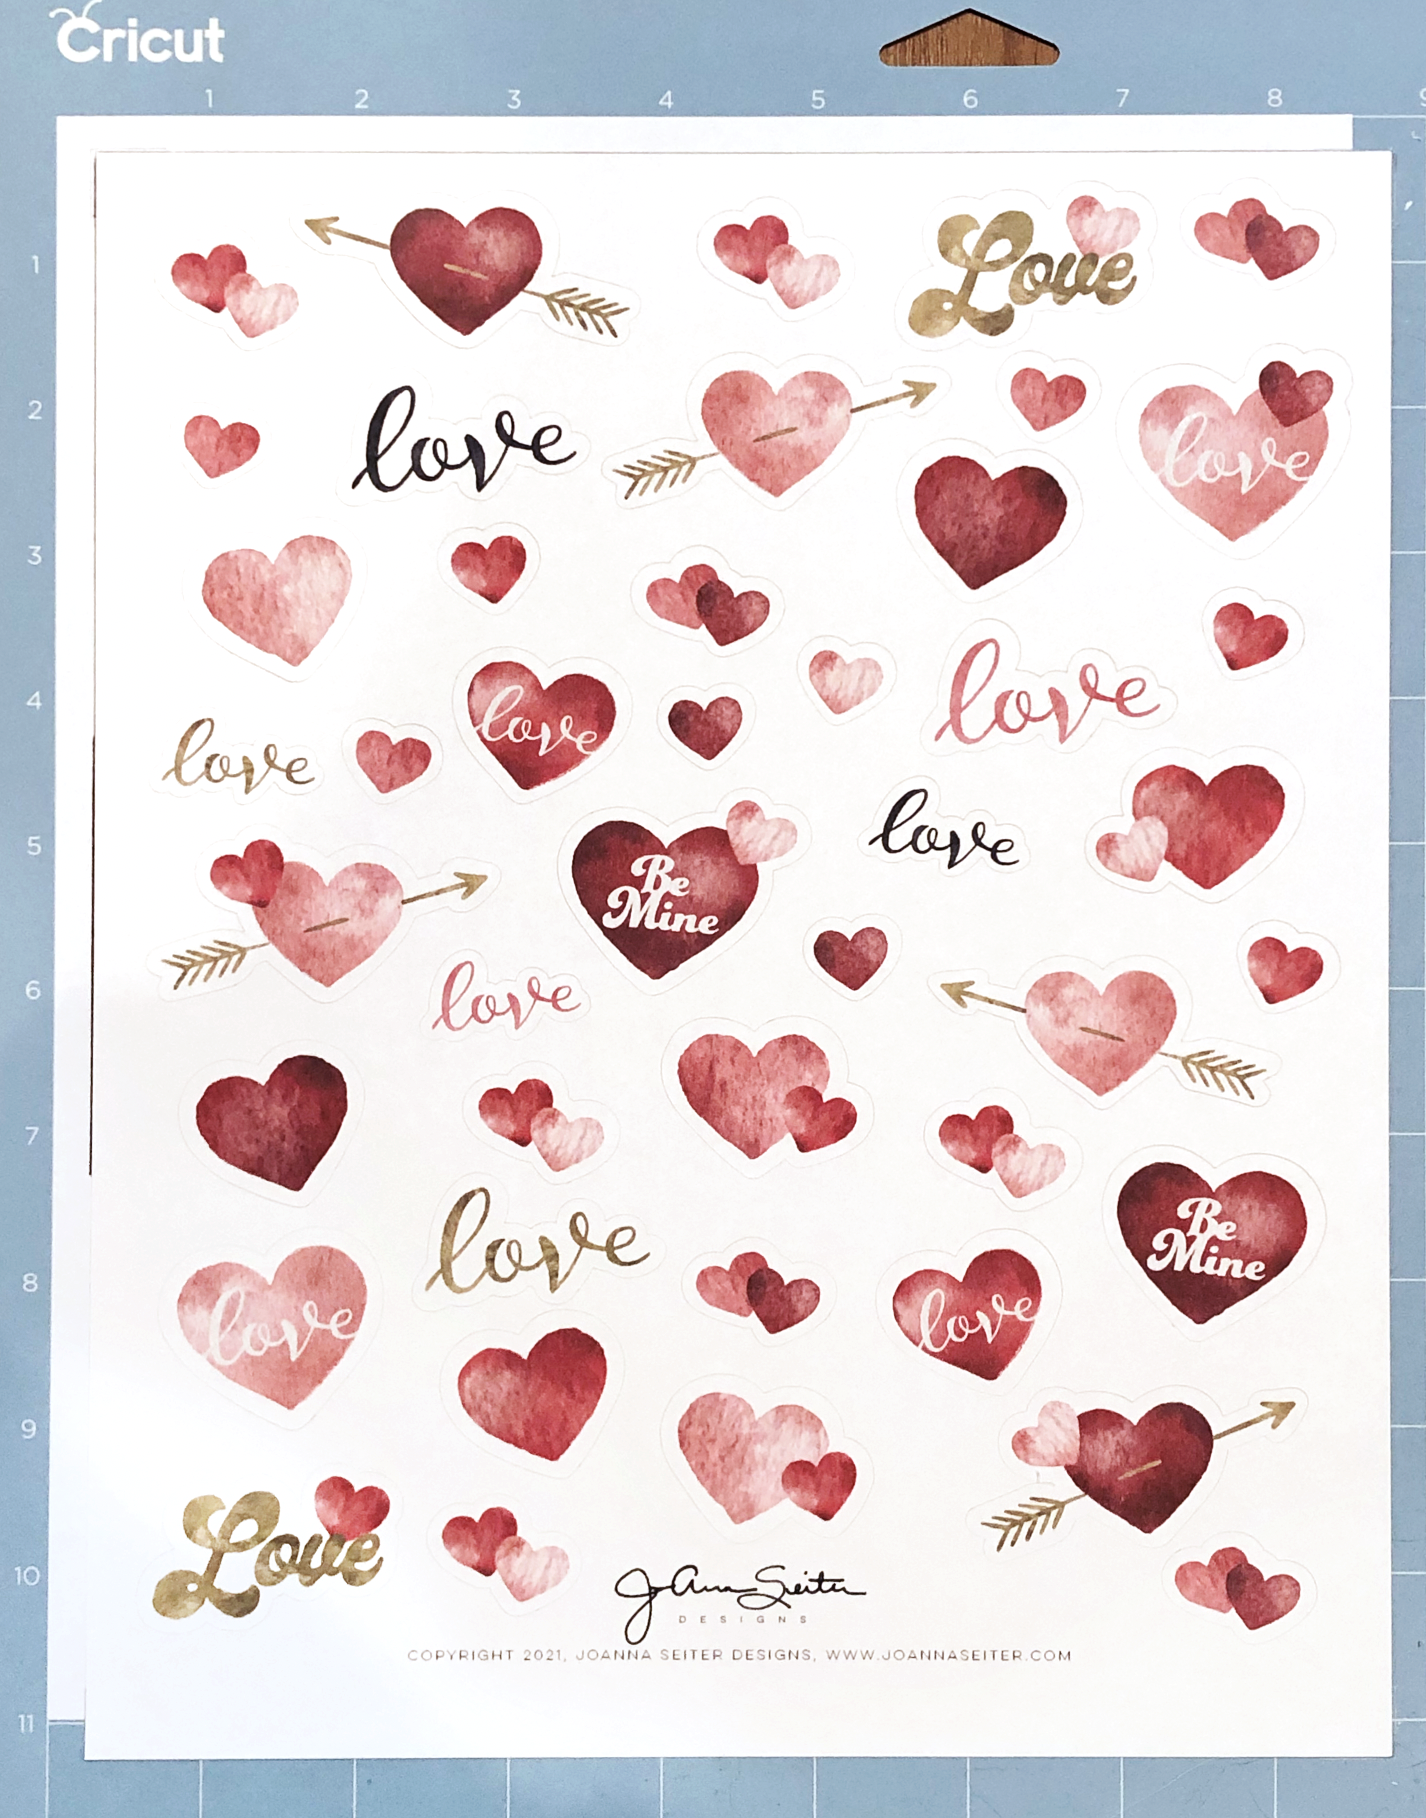
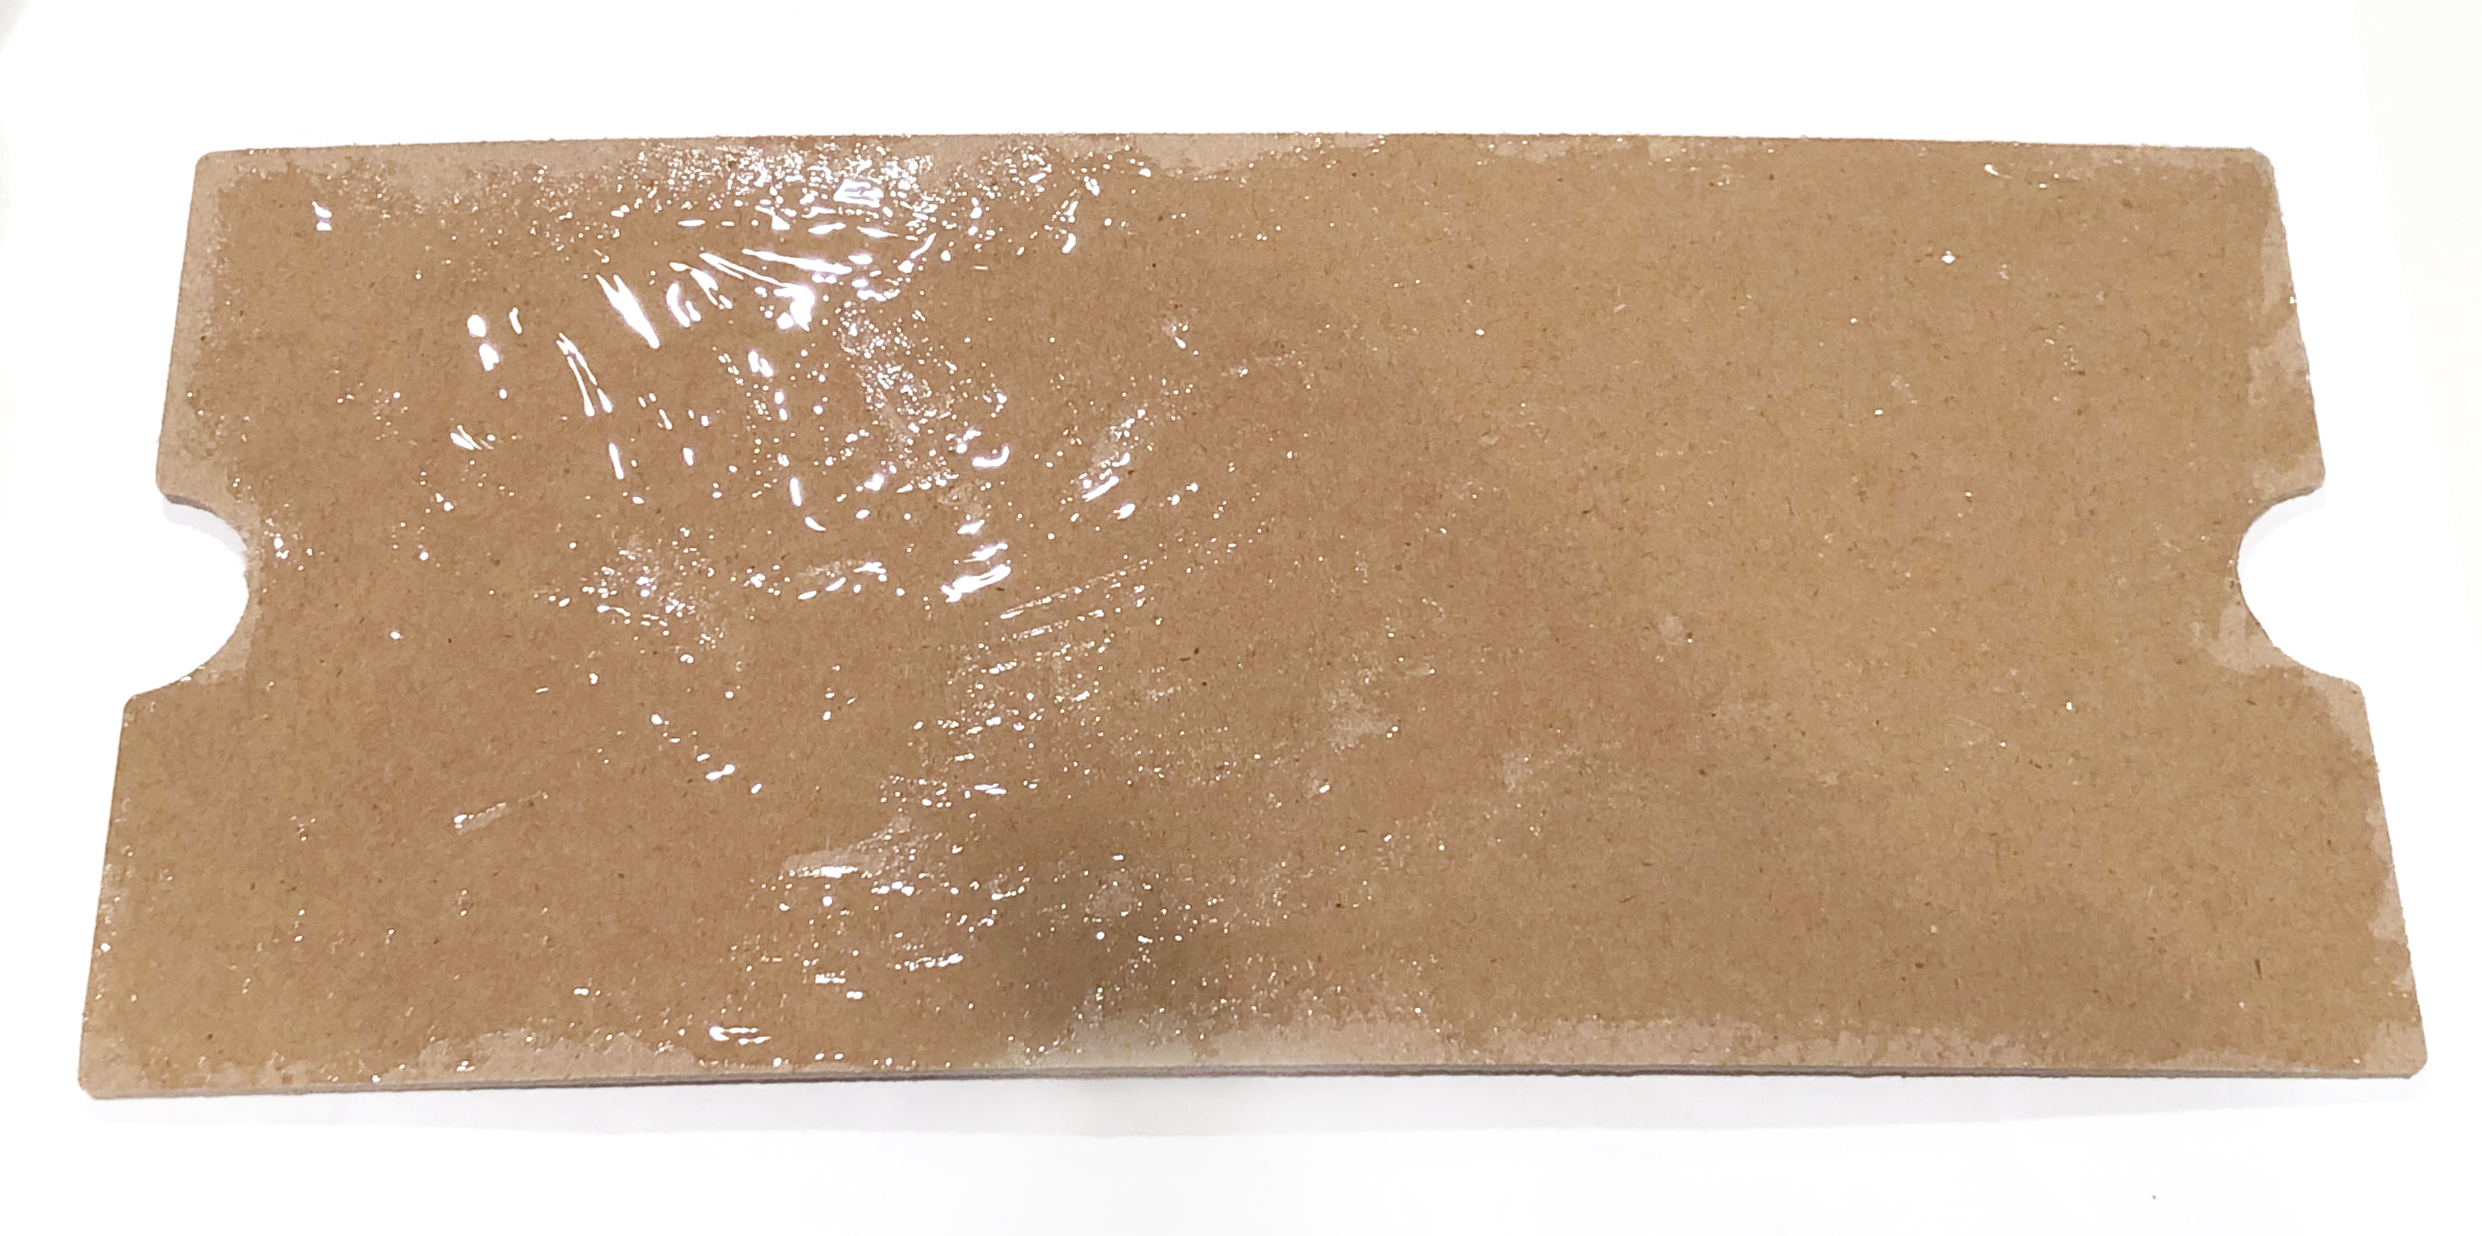
But here it is with silver foil on black cardstock! Now that I’ve tested my file and it works, I can use it for whatever projects I want.

Testing Single Line SVG file in Cricut Design Space

Low Poly Heart Box

Hi Everyone,

This week I’m working on some Valentine’s Day designs. I’ve been testing a pattern for a heart box on my Silhouette and Cricut machines so I can post here and in my Etsy shop. Here are the project details for making this on a Cricut Maker if you want to try it out for yourself!

Supplies:

(some links below may be affiliate links)

My Heart Box Pattern SVG

Cricut Machine (I will be using my Maker)

Light Grip mat (the blue one)

8.5” x 11” Foil Cardstock (or whatever cardstock you prefer)

Scoring Wheel or Scoring Stylus

Fine Point Blade

Tape runner or glue pen

Upload to SVG into Cricut Design Space and insert it onto a blank canvas.

Low Poly Heart Box

The top heart is the back of the box, to bottom heart is the front of the box. The back of the box is slightly smaller than the front.

Select the groups that contains the score lines and change them from Basic Cut to Score Lines. Now your score lines should look like dashed lines.

This part is optional, but since I’m using 8.5x11 cardstock I want to make sure my hearts are placed so they cut in the correct area.

Make an 8.5 x 11 rectangle and put it behind the hearts. Make sure the hearts fit within the rectangle. Attach just the hearts together, leave the rectangle on it’s own.

Low Poly Heart Box

Make the material color for the hearts White so we can see them in the next step.

Low Poly Heart Box

Press the Make It button, now we should have 2 mats - one with the hearts and one with the rectangle.

Low Poly Heart Box

Select the mat with the hearts and click the 3 small dots. Select Move Object in the pop up box.

Low Poly Heart Box

Select the mat with the rectangle in the pop up box and click Confirm. Now your hearts and rectangle will be on the same mat, but you can move them around separately.

Low Poly Heart Box

Select the rectangle and move it as close to the 1x1 position on the mat. The red border at the bottom will keep you from moving it all the way to the 1x1 position.

Low Poly Heart Box

Now select the hearts and move them so they are centered left to right on the rectangle and the bottom point of the heart is touching the bottom red border line and the bottom of the rectangle.

Low Poly Heart Box

Select the rectangle again, click the 3 dots in the corner and select Hide Object from the pop up.

Low Poly Heart Box

Now we are left with just the hearts on the cutting mat and the rectangle is hidden.

Low Poly Heart Box

Place your cardstock on your Light Grip mat, the Top left corner of the cardstock should be at the 1 x1 position.

Low Poly Heart Box

Since I’m using foil cardstock, I decided to use the Foil Posterboard material setting on my machine for this project.

After I select my material it shows me the tools I will need. It calls for the double scoring wheel, but if you prefer to use the single scoring wheel or scoring stylus, click where it says Edit Tools in green.

Low Poly Heart Box

I’m going to use the single scoring wheel, so I select it and click apply. Now it’s time to load my mat and press go!

Low Poly Heart Box

After it’s done scoring I need to switch to the fine point blade.

Low Poly Heart Box

Once the machine is done cutting, before removing the mat, check to see that the blade cut all the way though your material. Mine did, so I can unload the mat. If it didn’t, press the Cricut button again on machine and it will do another round of cutting.

Low Poly Heart Box

Now it’s time to assemble! It doesn’t matter if you start with the front or back heart. If you forget which piece is which, lay them on top of each other, the back heart piece is slightly smaller than the front heart heart piece.

Low Poly Heart Box

The areas in red will need tape or glue applied when assembling.

Low Poly Heart Box

I like to fold all of my score lines before I start taping/ glueing. I’m going to start at the center of the heart, these 2 pieces in the center need to be folded in the opposite direction of all the other lines.

Low Poly Heart Box

Then I fold all my other lines.

Low Poly Heart Box

I’m going to use double sided tape to assemble this, but you can also use glue. Again, I’m going to start at the center of the heart. I apply my tape to the flap and line up the edge with my score line.

Low Poly Heart Box

I do the same thing for the other side. Then the little tab needs to be on the inside of the heart, and taped.

Low Poly Heart Box

Then I move to the top of the heart, apply tape or glue to the little tab. Line up the score line to the cut edge and secure it.

Low Poly Heart Box

I work my way all around so all the little tabs are taped/ glued.

Low Poly Heart Box

Now one side is finished and I repeat the same process for the other heart piece.

Low Poly Heart Box

Now I put them together, the back nests inside the front. This is a view of the back.

Low Poly Heart Box

Now you have a cute little heart box! You can even cut some vinyl to add names or cute little messages to the front heart.

Low Poly Heart Box
Low Poly Heart Box

Cutting Full Sticker Sheets with Your Cricut - Part 2 - Test Printing

Hi Everyone!

This week is another important step when creating full sticker sheets to cut on your Cricut Machine.

I always print a few test sheets on plain paper before I cut the actual sticker paper. Once you learn all the little nuances of your machine, you will probably be able to skip this step. But when you are just beginning to using this method, it’s best to practice, practice, practice before jumping into using your expensive sticker paper.

I already set up my artwork in Adobe Illustrator with my offset cutlines. If you need some guidance on creating offsets in Illustrator, you can check out my previous posts here and here.

Kitty Sticker artwork in illustrator

When I set up my art files in Illustrator I have 2 separate layers. First, the ARTWORK layer that we will use to print our stickers directly from Illustrator. Second, the CUTLINE layer that we will export as an SVG and import into Cricut Design Space.

Layers in Illustrator

Very Important: My cut layer contains a bracket in each corner of the 8.5” x 11” artboard. This is going to help us line up the cut lines in Design Space. Make sure you include these brackets when you set up your file!

Kitty Sticker artwork in Illustrator

For my test print, I’m actually going to print the grey cutlines with the artwork so I can really see how far off my machine cuts and make the appropriate adjustments.

I’m using an Epson SureColor P600 printer, but you can use any inkjet printer for this method. I do not recommend using a laser printer for this method. Since laser printers use heat, you will run into shrinkage issues with your paper and your cuts will be off unless you calculate the proper shrinkage. The shrinkage is very minimal, but it is noticeable.

I’m going to print 3 copies of my artwork on plain paper so I have a couple of extra to practice.

Your print dialog box will probably look different , but make sure the image is NOT SCALED when printing.

Print settings

Check your printouts carefully to make sure they are straight and the artwork is is the same position on all 3 printouts. If the artwork is shifted, at all, in any of the printouts you will need to test and/ or adjust your printer to make sure you are getting the same print placement everytime.

Checking print placement

After checking your print outs, carefully place one of the printouts inside the rectangle on the mat that we prepped in last weeks post. Take your time when doing this to make sure your paper is properly aligned within the rectangle.

Test Print placed on mat

Now we’re going to open our cut lines only in Design Space. I exported that layer as a separate SVG from Illustrator and imported it into Design Space.

Check that the dimension of the imported artwork are 8.5” x 11” like our file in Illustrator. Those very important brackets that you put in the corners on the artboard in Illustrator help ensure that the dimensions remain 8.5” x 11.

Cut Lines in Design Space

ATTACH all of your elements, and the press MAKE IT.

Those very important corner brackets are also going to help keep your artwork in the proper place in the upper left corner of the mat, but not beyond those red border lines in Design Space.

Cut lines in Design Space

I select Copy Paper and Default pressure for my material settings.

Now I carefully load my mat into the machine like we practiced last week, and press GO!!

After the machine is done cutting, load your mat and let’s check the results!

So on my first attempt, my paper is placed just a hair too high up on the mat. So for my next try I’m going to try to do a better job aligning the bottom edge of my paper to the bottom line that’s drawn on the mat.

First Cut Attempt

My 2nd attempt is much better! Remember it’s never going to be absolutely perfect, there are so many variables that go into this process and there will always be some level of human error. But it’s up to you how much time and effort you want to spend trying to perfect your cuts. Also, the more you do it, the better you’re going to become.

2nd Cut Attempt

Since the offset on my actual stickers will be white, I’m ok with my second attempt. I’m really going to focus on lining up my paper along the bottom line on my mat for my future cuts.

2nd cut attempt

If you are doing a colored offset, make sure you add some bleed around the edges so if it cuts slightly off there won’t be any white showing. Also, a wider offset will make a slightly off cut less noticeable.

Next week we’ll print on the actual sticker paper and cut some stickers!

Foiling with the Cricut Fine Deboss Tip

Links in the article below may be affiliate links.

Foiling with Cricut Deboss tip

Hi Everyone! I’ve been doing some more experimenting with my Fine Deboss Tip for my Cricut Maker. You can even use this tip for foiling!

Please note: The Deboss Tip only works with the Maker machine, it is used with the quick swap housing.

I’m showing this method because I can use the Deboss tip with the Cricut App on my iPad. For some reason the actual Foil Transfer tool is not compatible with the Cricut App.

You need to use a pressure sensitive foil. So I tried out the foil that is used with the Cricut Foil Transfer tool and the Silhouette brand pressure sensitive foil.

Here are my results:

Cricut Brand Foil Transfer

I am testing some single line words and a few filled shapes with the Cricut brand foil and the fine deboss tip on 100lb cardstock. I select the 100lb cardstock from my materials, with default pressure.

Fine Deboss tip with Cricut Gold Foil, default pressure.

Fine Deboss tip with Cricut Gold Foil, default pressure.

The foil transferred in a few places, but far from a success.

Fine Deboss Tip, Cricut Gold Foil

Fine Deboss Tip, Cricut Gold Foil

Next I tried 100lb cardstock, more pressure.

I snuck a peek after 1 full pass. It did a little better than the default pressure, but still not great.

Fine Deboss tip, more pressure, one full pass.

Fine Deboss tip, more pressure, one full pass.

I didn’t unload my mat so I could try sending it through my machine one more time. Definitely better than the default pressure, but still not great.

Second pass, more pressure

Second pass, more pressure

I made one last attempt with the Cricut foil, this time I tried with the medium 80lb cardstock setting. What a disaster! It tore the foil paper on default and light pressure. I didn’t even attempt more pressure.

Medium 80lb cardstock, default pressure. Tearing the foil.

Medium 80lb cardstock, default pressure. Tearing the foil.

Medium 80lb cardstock, less pressure. Also tore the foil.

Medium 80lb cardstock, less pressure. Also tore the foil.

So the deboss tip doesn’t really work with the Cricut Foil.

Silhouette Brand Foil Transfer

I’ve seen a few you tube videos of people using the Silhouette foil transfer sheets, it’s intended to be used with the Curio machine, so I hope the foil doesn’t get discontinued like the Curio machine. But I thought I would give it a shot. They’re a little pricier than the Cricut foils and fewer color choices. I mainly use gold, silver and rose gold anyway, so it’s not a huge deal for me. Sometimes they go on sale, so keep an eye out for that.

It’s a lot thicker than the Cricut Foil and you need to remove the back carrier sheet before placing it over whatever you’re foiling.

Remove the backing sheet!!

Remove the backing sheet!!

I started out with the 100lb cardstock default pressure again. When I first remove the film after it’s done, it looks kind of scary, but you can clean up the excess pieces and edges with blue painters tape or Washi tape.

Silhouette Foil with Cricut Fine Deboss tip

After cleaning it up, the results are pretty good. It’s REALLY shiny compared to the Cricut Foil. The filled circles look spectacular! Pretty smooth and flat. It occasionally misses parts of some of the letters and the edges aren’t super crisp.

Filled Circles before cleaning up the edges

Filled Circles before cleaning up the edges

After cleaning up the edges with Washi tape.

After cleaning up the edges with Washi tape.

I tried the 100lb card stock setting with More pressure, that came out ok, the edges are not as clean as the default pressure.

Silhouette Foil, 100lb cardstock, More Pressure

Silhouette Foil, 100lb cardstock, More Pressure

I also tried the Medium cardstock setting, Default pressure, just to compare the results. The foil did not stick at all!!

80lb cardstock setting, Default pressure

80lb cardstock setting, Default pressure

Overall, I think I like the results with the 100lb cardstock, default pressure the best. The lettering is OK, but it would not be suitable for really small text. I don’t think this would be a great option for very detailed, intricate designs either. It worked really well with the filled circles, so this could be a good option for filled shapes or thicker solid stripes.

It’s another foiling technique you can use if you work primarily with the Cricut App, or you don’t want to purchase the Foil Transfer tool or the Foil Quill.

I just got my Silhouette Portrait 3 machine, so I’m excited to try the Silhouette foil with that in the future!

Silhouette Foil Cricut Fine deboss tip

FREE Template DIY Cricut Tool & Blade Organizer

Hi Everyone! This year one of my goals is to better organize all of my craft and art supplies. I have A LOT! I don’t have a pretty little workspace like you see all over Pinterest. They’re very cute, but just not practical for me. ( I’m guessing these people don’t have cats or dust in their house.)

I’ve been buying a lot of clear acrylic storage bins on Amazon to help organize my stuff. They MUST have a lid to help keep the dust out and they have to fit in one of the cubbies at them end of my work desk.

I found some smaller one’s intended for make up brushes, but I decided to use one for my Cricut tools and blades. Yes, I know Cricut has their own round organizer, I almost bought it. But then I realized, it won’t fit in my storage tote with my machine, it won’t fit in my desk cubbies with my other bins, and I don’t intend to leave it out on my desk. You can also store the blades in the front flap of the machine, but I know myself, and I will forget to take out all the blades/ tools I need for a particular project before I start my machine.

So today I wanted to share how I made my storage solution that works for me. I’m also sharing the template that I made for FREE!

If you have any questions, feel free to ask in the comments section. I’ll get back to you as quickly as I can!

Screen Shot 2021-02-01 at 12.12.37 PM.png

Supplies: (Links below may be affiliate links)

Optional:

Let’s get started!

Upload the FREE SVG file to Design Space and press SAVE.

Tip: If you are using Safari, right click on the button below and select “Download linked file” and it will save the SVG file to your Downloads folder. If you are using Chrome, right click on the button below and select “Save Linked file” and choose where you want to save the SVG file.

Screen Shot 2021-01-29 at 11.23.32 AM.png

Select the Image and press INSERT IMAGES.

Screen Shot 2021-01-29 at 11.26.24 AM.png

Change the color of your MATERIAL so you can actually see the cut lines. I’m using pink, but you can use any color other than black.

Screen Shot 2021-01-29 at 11.27.15 AM.png

Select the top most layer and click UNGROUP.

Screen Shot 2021-01-29 at 11.37.44 AM.png

Select the top most group and click ATTACH.

Screen Shot 2021-01-29 at 11.43.00 AM.png

Select the next group and click ATTACH.

Screen Shot 2021-01-29 at 11.57.44 AM.png

Now I’m going to pre-set up my mats. I only have one Strong Grip mat, so I’m going to do it one mat at a time.

Side note: I tried using my regular green mat, it’s a little old, I don’t think it was sticky enough, the foam kept getting pulled up and ripped by the blade, even with the masking tape around the edges. If you have a fresh new green mat, it might be sticky enough.

For the 1st group to cut, duplicate the group with the tool shape cut outs (you will now have 2 of these showing) place the solid rectangle with finger holds below.

For the 2nd group to cut, duplicate the group with the tool shape cut outs, then place the solid rectangle below.

These will be your 2 mats.

Screen Shot 2021-01-31 at 12.23.46 PM.png

Keep the material size at 12x12, so you can move your pieces toward the middle of the mat. I had better success cutting the foam if I placed toward the middle of my mat. Select the 2nd mat and move those pieces toward the middle of the mat also.

Screen Shot 2021-01-31 at 6.17.49 PM.png

Place one of the foam sheets centered on the mat. Make sure the foam is oriented so the cut lines fall within the masking taped edges.

Screen Shot 2021-01-31 at 5.45.29 PM.png

Press CONTINUE in Design Space.

Select EVA foam from your materials (I tried Craft Foam, but my pieces kept tearing).

Load the Deep Cut Blade or the Knife Blade into your machine.

Load the mat into your machine and press GO!

Screen Shot 2021-02-01 at 9.57.09 AM.png

Once the machine is done cutting, check your cut to make sure it went all the way through, if it’s good, unload your mat.

Carefully remove the cut pieces from the mat.

Attach the 2nd piece of foam to the mat, making sure your cut lines fall within the taped edges. Load the mat into the machine and press GO!

Once the machine is done cutting, check your cut to make sure it went all the way through, if it’s good, unload your mat.

Go back to the CANVAS screen and and hide all the layers except for the solid rectangle with finger holds, we’re going to cut just this piece out of 2mm Chipboard or whatever other stiff material you have selected.

Press MAKE IT.

Screen Shot 2021-02-01 at 10.00.12 AM.png

Move the piece slightly away from the edges of the mat. Use masking tape to attach the Chipboard to your mat.

Press CONTINUE.

Screen Shot 2021-02-01 at 10.01.35 AM.png

Select 2mm Chipboard from your materials (or whatever material you are using). Load the Knife Blade into your machine, load the mat and press GO!

Screen Shot 2021-02-01 at 10.06.57 AM.png

After a few passes, press the PAUSE button on your machine to check the progress of your cut. If it’s not cut all the way, press the GO button again and let it do a few more passes.

My machine was finished cutting after the 8th pass! No need for the 24 passes my machine wanted make, it would have cut clear through my mat! I hope Cricut will let us adjust the Knife Blade settings in the future.

When your cut is finished, eject your mat from the machine. Carefully remove the Chipboard from the mat.

Now we’re going to assemble all of our cut pieces. Let’s start from the bottom up.

I’m using the solid rectangular piece of foam for a little padding in the bottom layer. I just laid it in the bottom of the acrylic box, no glue or anything.

Screen Shot 2021-02-01 at 11.56.45 AM.png

For the 2nd layer that hold the blades, I applied glue to the chip board first, spread out the glue into a thin layer with the paintbrush.

Screen Shot 2021-02-01 at 3.29.29 PM.png
Screen Shot 2021-02-01 at 3.33.46 PM.png

Then I placed the solid foam rectangle with the finger holds on top of the glue. While the glue is still wet you can slide the pieces around a little to make sure they are aligned.

The next layer is the foam with the cut outs for the blade housings and quick swap tips, glue the back side of this layer, then apply it to the top of the chipboard with the foam.

Screen Shot 2021-02-01 at 3.41.57 PM.png

Next is the 2nd piece of foam with the cut outs for the blade housings and quick swap tips, glue the back side of this layer, then apply it to the top of the chipboard with the foam. Make sure to line up your edges while the glue is still wet.

Then apply glue to back of the one of the foam pieces with the cut outs for the blade housings, quick swap tips, and extra blades. Attach it to the chip board with the other foam layers, align your edges.

Finally, apply glue to the back of the remaining foam piece. Attach it to the chip board with the other foam layers, align your edges.

The wet glue makes the chipboard and foam warp a little bit. Place your foam and chipboard piece under a heavy book overnight to flatten it out.

Screen Shot 2021-02-01 at 3.45.09 PM.png

Once your foam and chip board piece is flattened out, you can add your tools and blades!

Screen Shot 2021-02-01 at 11.55.46 AM.png
Screen Shot 2021-02-01 at 11.53.04 AM.png
Screen Shot 2021-02-01 at 11.49.36 AM.png

For a finishing touch, you can make a label out of adhesive vinyl. You can download my FREE SVG Blades + Tools or create your own!

Screen Shot 2021-02-01 at 12.12.37 PM.png